Mount the deck rail on the front porch between the house wall and porch support post.
This project is continued from How to Build a 2×6 Porch Rail – Part 2.
Mount the Porch Top Rail
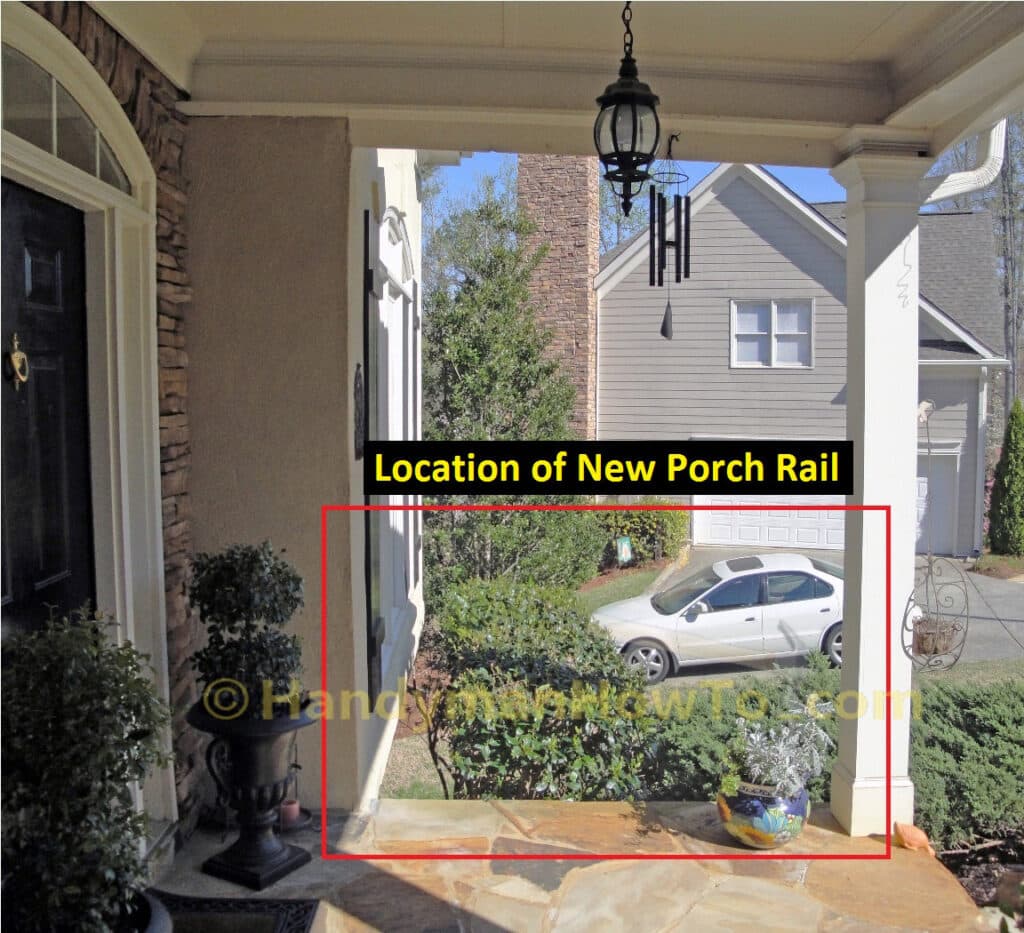
The 2×6 porch rail components were primed, painted and partially assembled in the workshop. It’s a fine Saturday morning for working outside. The porch rail will be installed between the wall and porch post as indicated by the red box:
Install the Porch Rail End Supports
The porch rail is supported by a 2×2 picket anchored to the house wall and a horizontal 2×4 support block fastened to the porch post. The two supports are highlighted in yellow in this drawing:
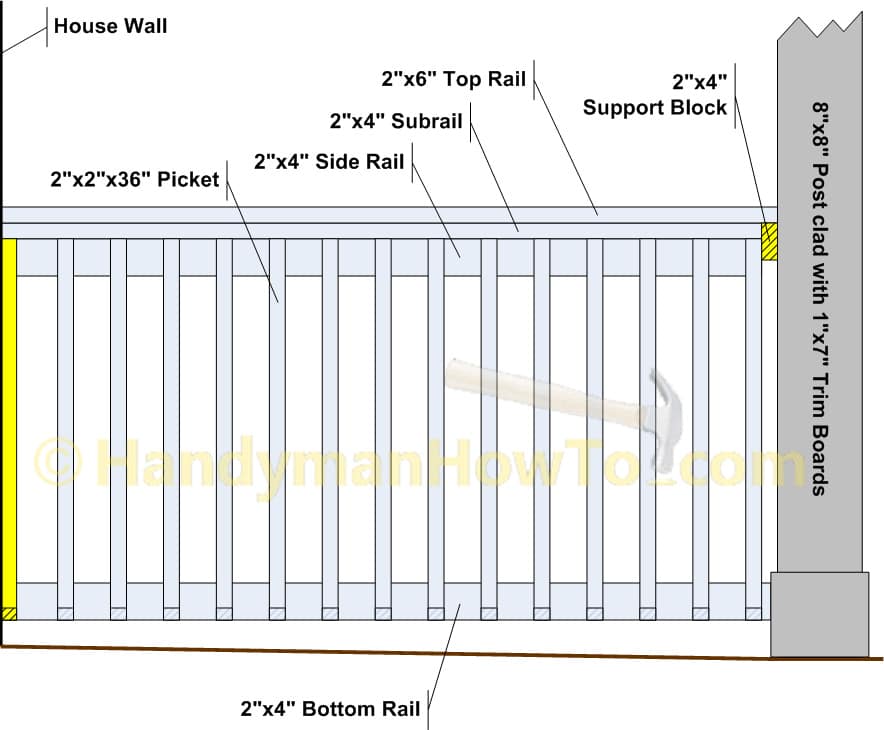
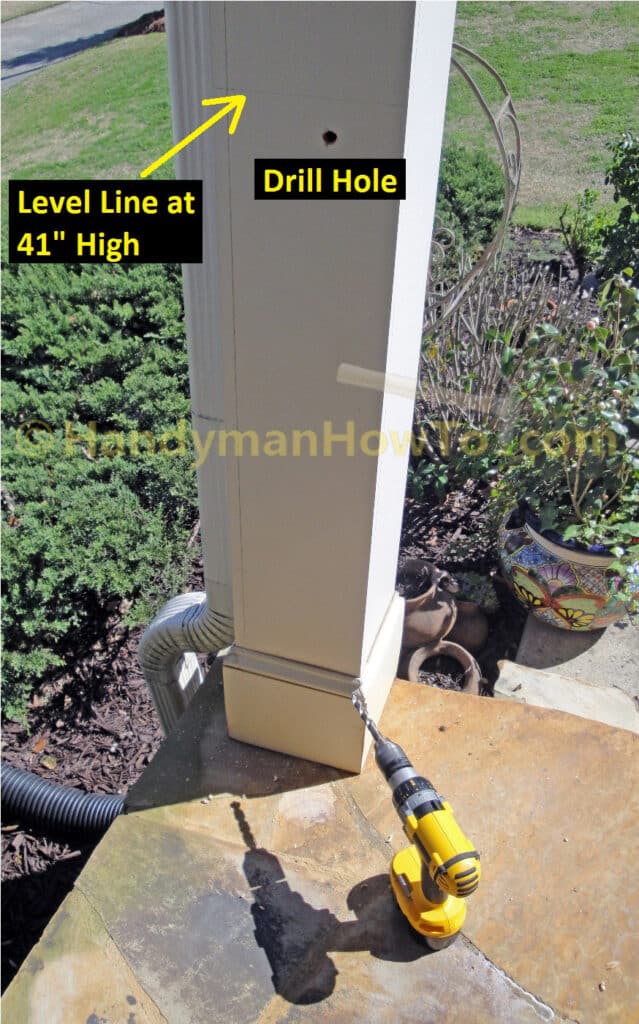
The porch rail installation begins by determining the location of the two rail supports. The total height of the assembled 2×6 porch rail is 39 inches per the design drawing. Another 3 inches is added for clearance between the bottom rail and porch floor for a total height of 41 inches. I decided on a 3 inch bottom clearance because it “looks right” and won’t catch leaves.
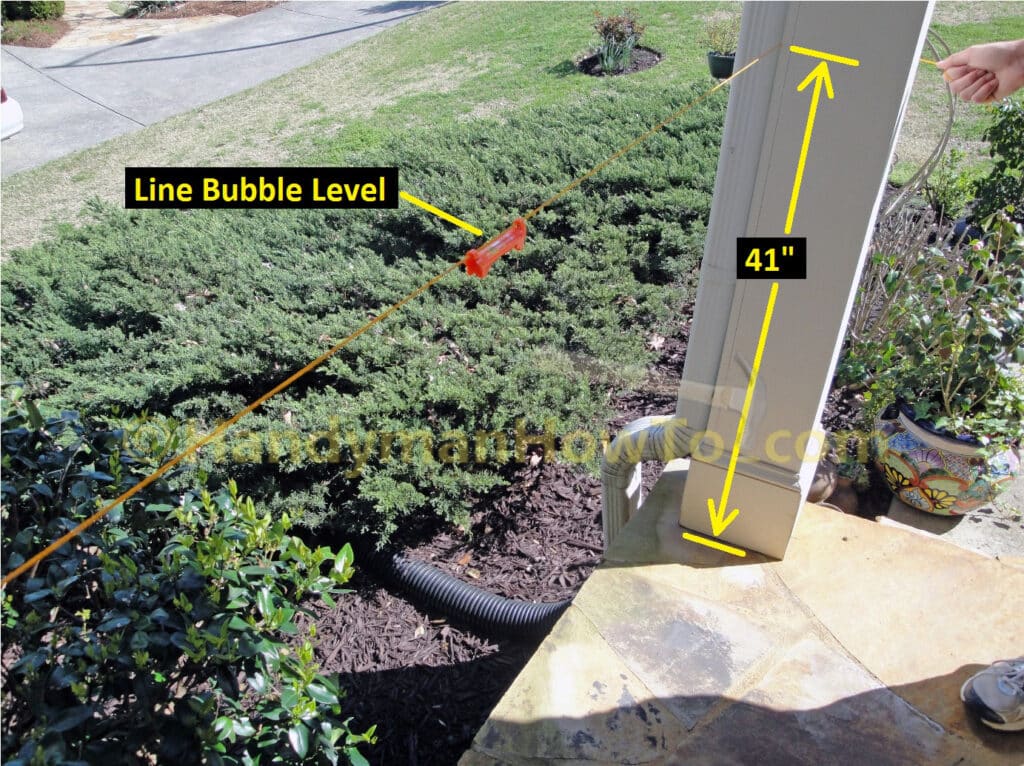
To locate the rail at 41 inches above the porch floor, do the following:
- Measure and make a tick mark in pencil at 41 inches high on the porch post.
- Stretch a heavy construction string with a line bubble level between the 41″ tick mark and the house wall.
- Adjust the string location against the house wall until the line level bubble is centered for a perfect horizontal line between the post and the wall.
After marking the level line against the house wall, I used the tape measure and found the porch floor slopes a bit more than 2″ from the house wall to the post, which would make the rail-to-floor gap on the house side a bit too narrow for my liking. To add a bit more bottom rail clearance, I decided to use the 41 inch position as the bottom of the 2×6 top rail – which is the same as the top face of the 2×4 subrail – and proceed from there. What you decide for the bottom clearance is mainly a matter of aesthetics and opinion, but it should be no greater than 4″ above the floor so a small child doesn’t get stuck underneath.
Install the Porch Rail Support Block
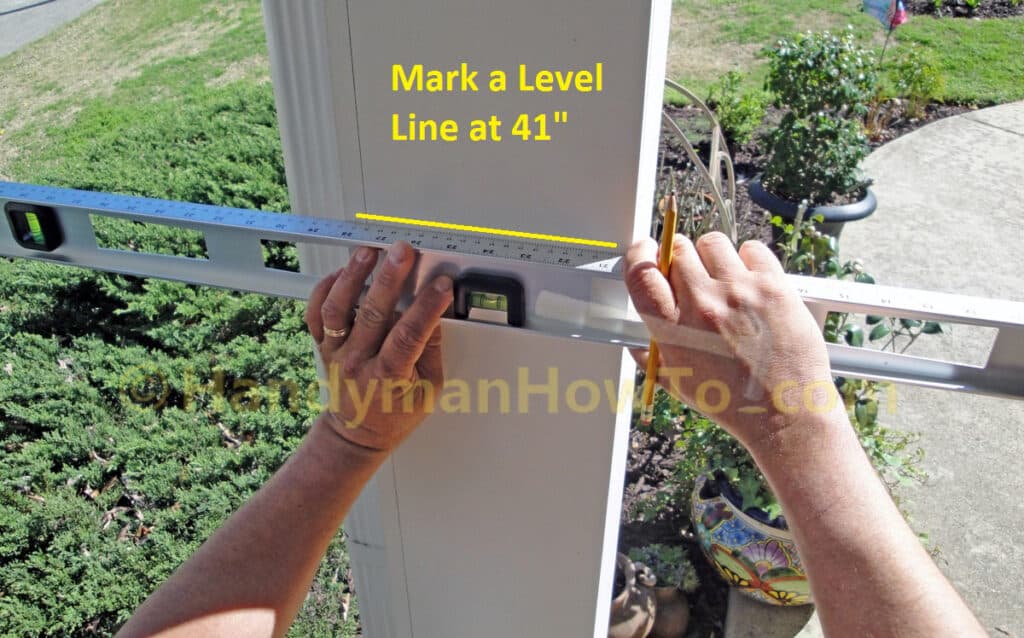
I marked a horizontal reference line at the 41″ mark on the porch support post with the carpenters level. This line marks the top position of the 2×4 horizontal support block.
I needed to know what’s inside the porch support post. Is it steel or wood, hollow or solid? This is critical so I can determine how to securely fasten the 2×4 horizontal support block. To determine the interior post construction, I drilled a 1/2″ hole where it will be hidden by the 2×4 block.
I was pleased to discover the porch post is made of an 8″x8″ wood post core clad with trim boards. An 8×8 nominal lumber size is actually 7.5″x7.5″. When I added the thickness of the finish trim boards, the width of the post measured exactly 8 inches square.
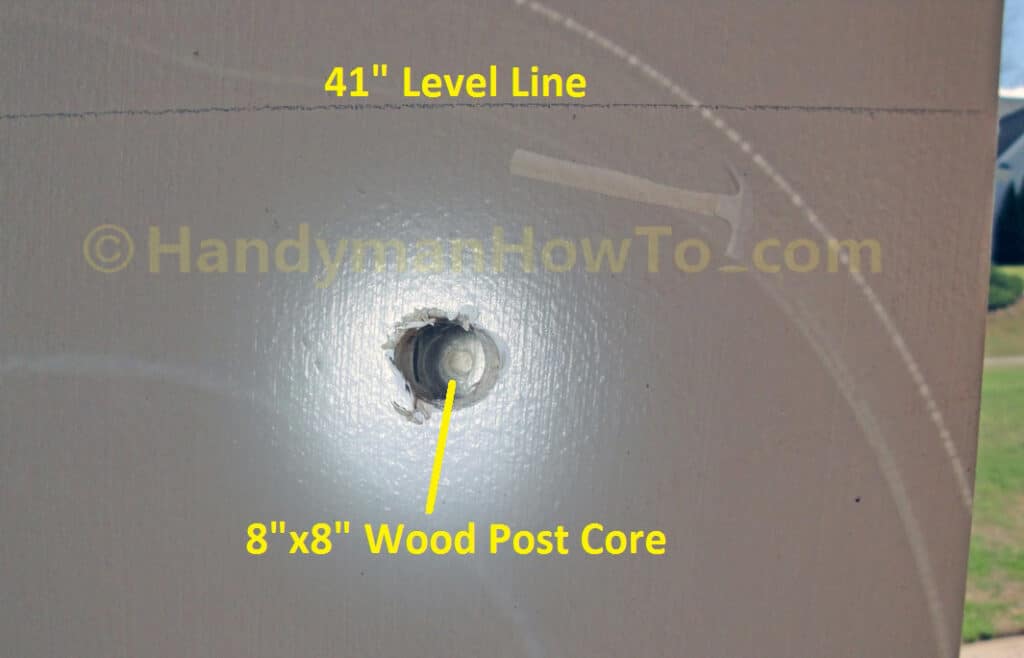
The conclusion is I can confidently install the 2×4 support block with 3 inch stainless steel screws.
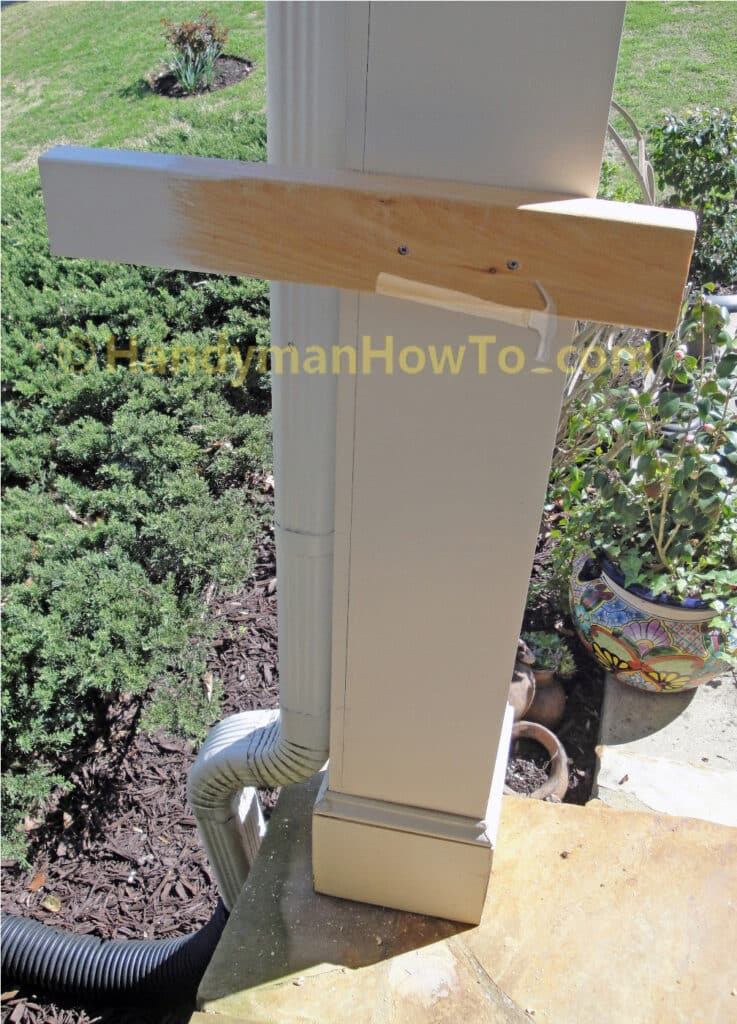
I have a minor installation challenge because the porch support post is not in alignment with the corner wall of the house. Instead of attempting a lot of error prone measurements, I took the simple and sure method of mocking up the deck rail and marking actual locations. The mock up starts with an extra long 2×4 temporary support block as shown with a piece of 2×4 scrap cedar:
Test Fit the 2×6 Porch Rail
The 2×6 porch rail is measured and fitted to span the distance between the house wall and the porch post by:
- Mark and saw a 1.5 inch notch in the 2×4 subrail and 2×5 side rail so the 2×6 top rail can rest on the temporary support block. The cuts were made with the Dewalt Miter Saw and finished with a handsaw so as not to mar the bottom of the 2×6 top rail.
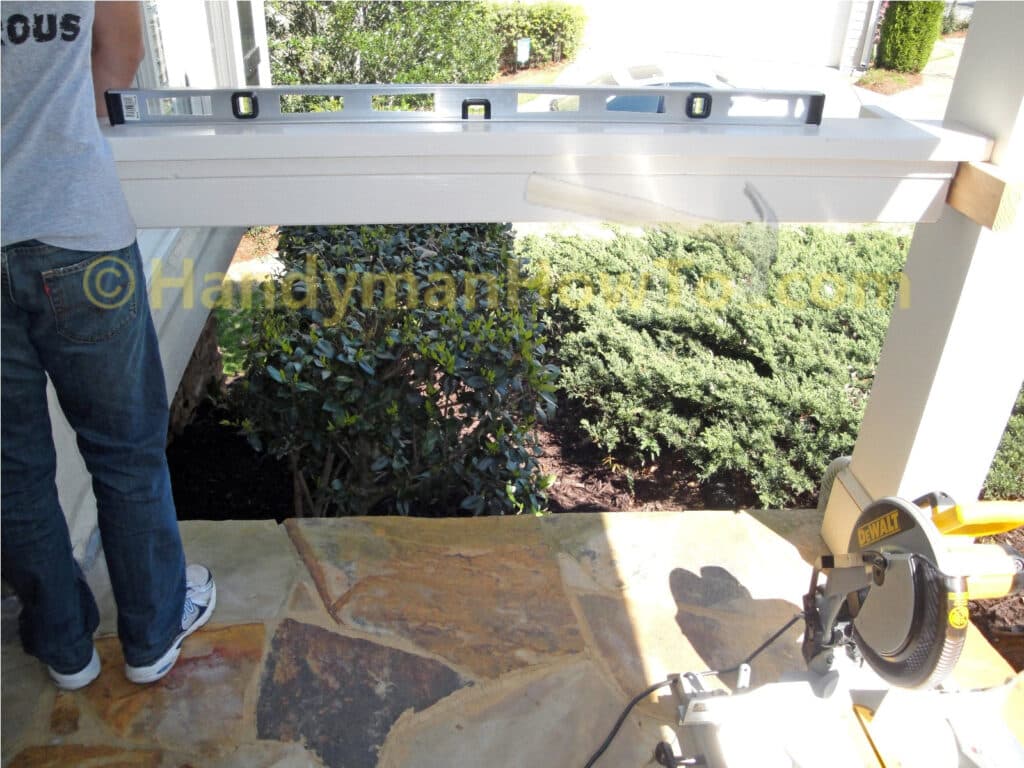
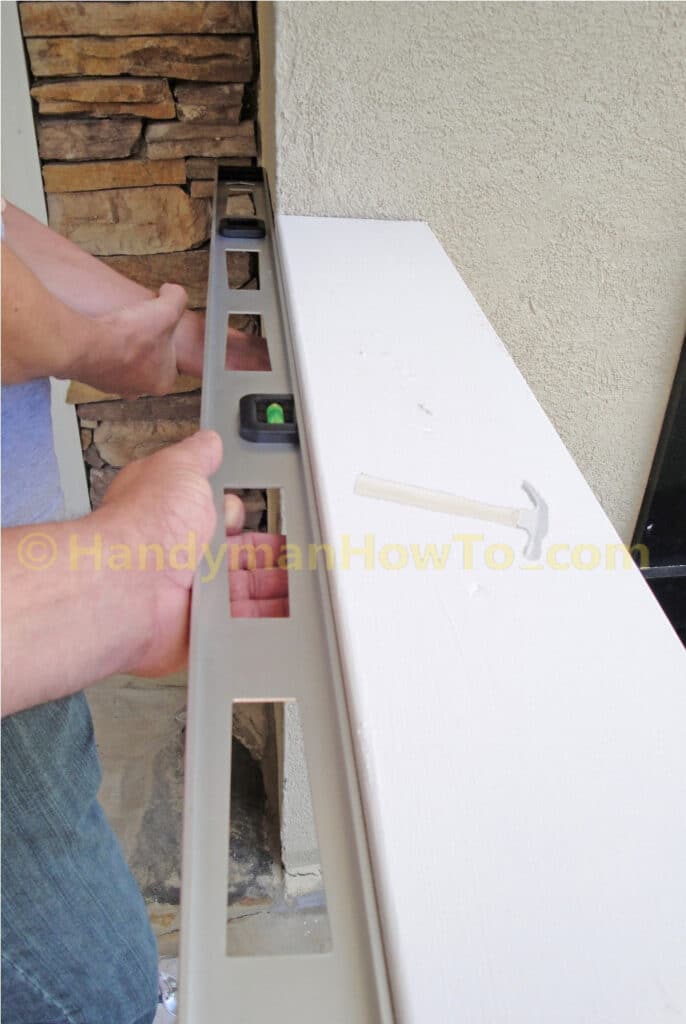
- Place a four foot long carpenter level on the top rail (as shown below) to mark the level position of the rail against the house wall.
- Mark the length of the top rail against the house wall to saw the rail to it’s exact length.
The left side of the rail is being supported by my son while I make measurements.
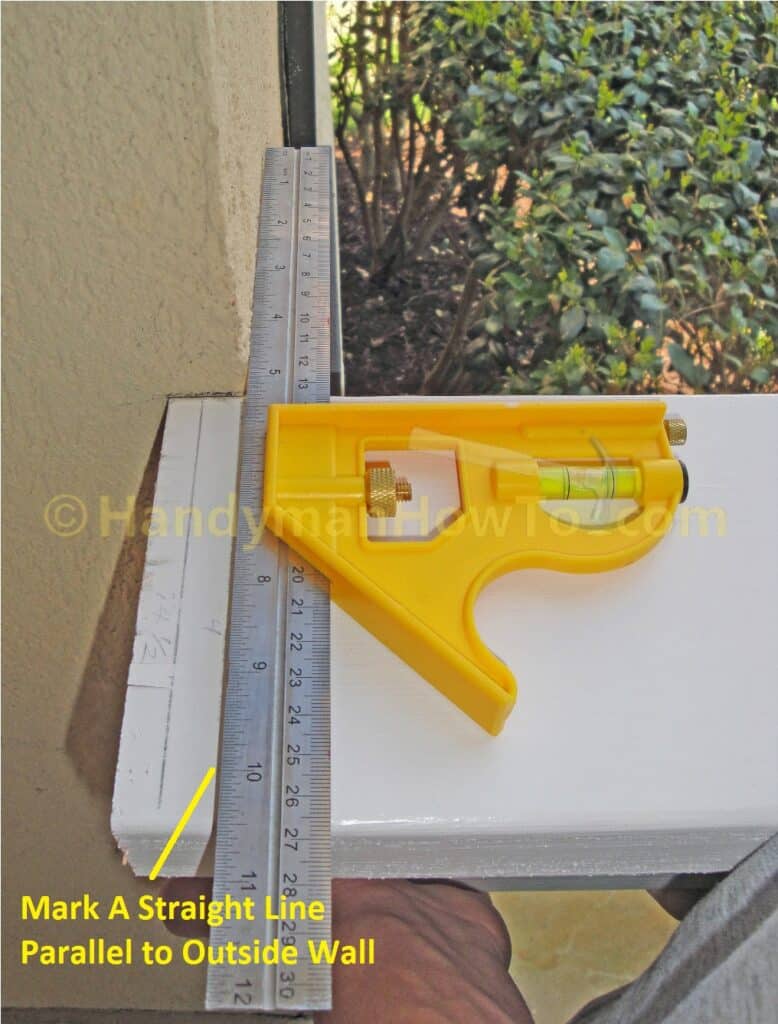
The next photo illustrates how I sawed the porch rail an inch on the long side in the workshop so it would be easier to carry and maneuver. Two marks are made:
- Horizontal level mark in pencil against the corner of the house for the top of the rail.
- A straight line parallel to the outside wall for the exact length of the porch rail between the wall and porch post.
The porch rail is sawed to fit the distance between the wall and porch post. The rail is positioned to set flush with the wall using the 4 foot carpenters level as a straight edge.
While still holding the top rail flush the wall, I marked the outside edge of the other end of the 2×6 rail as it sits on the temporary 2×4 support block fastened to the 8×8 porch post.
This project is continued in How to Build a 2×6 Porch Rail – Part 4.
Thank for reading,
Bob Jackson