This project series explains how to build a basement closet with 2×4 framing as part of a basement bedroom remodeling job. Also see the previous project for finishing the concrete floor.
Please see How to Finish a Basement Bedroom for a summary of the Building Code, real estate appraisal and habitable space requirements for a basement bedroom.
Basement Bedroom Closet Dimensions
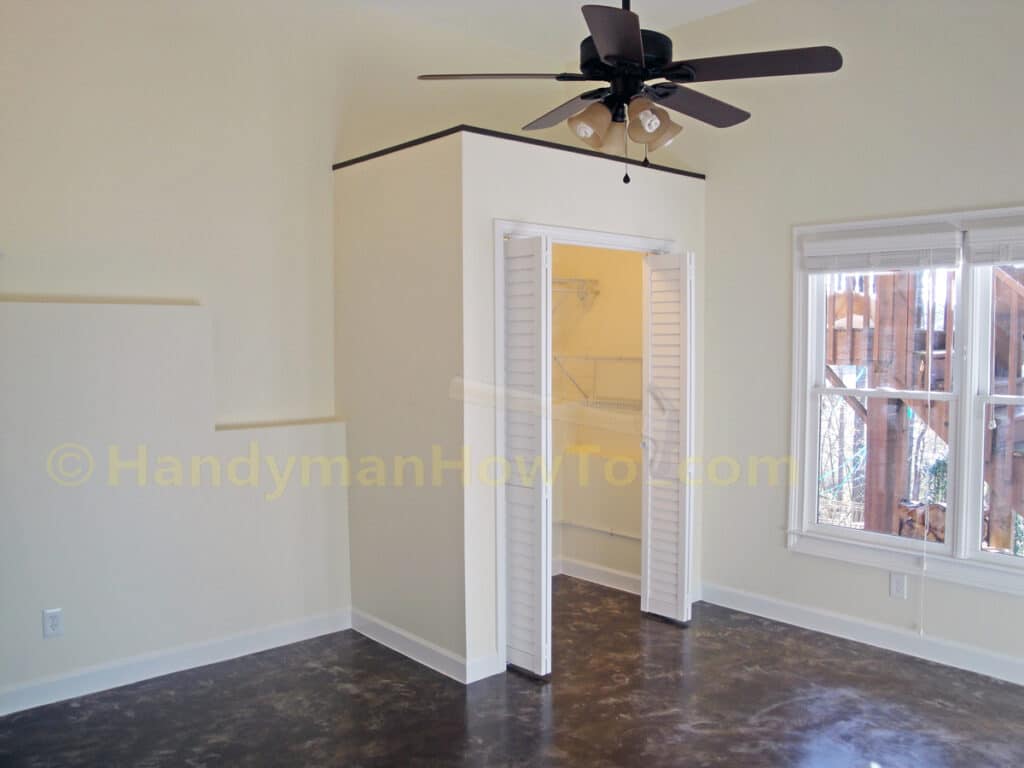
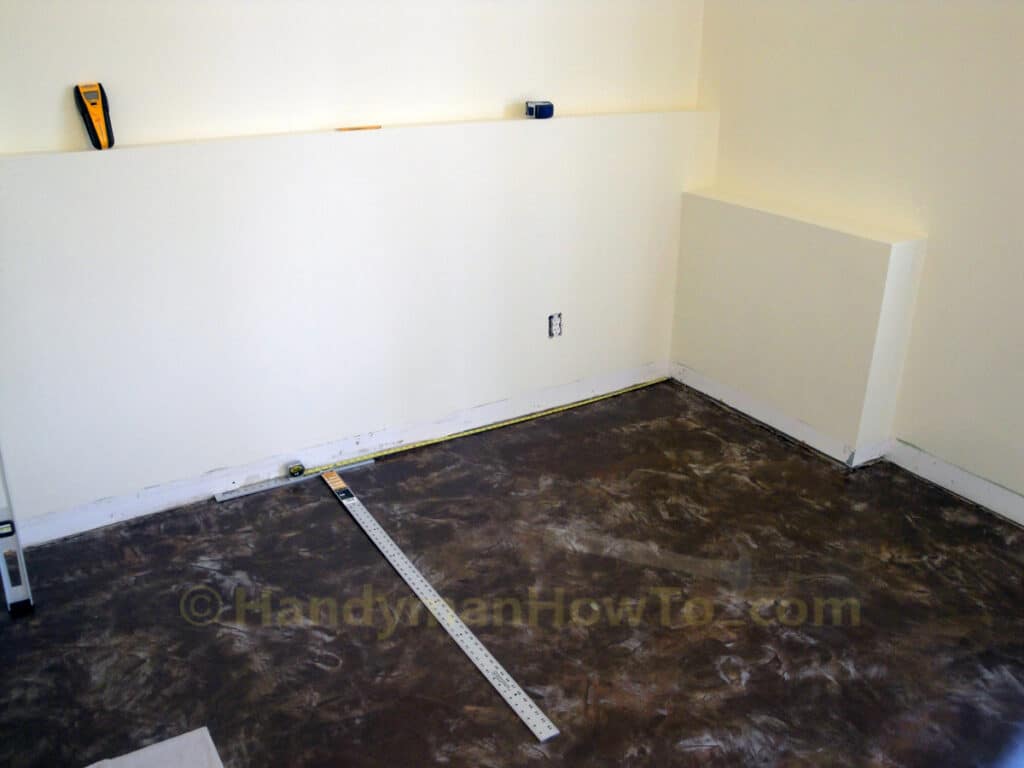
My home sits on a hillside with a walk-out daylight basement and 11 feet 5 inch ceilings. The basement room that’s being converted to bedroom is 13 feet 6 inches wide. The foundation walls are poured concrete that steps down with the grade of the land. The foundation wall results in a ledge or setback inside the room that is furred with wood strips and finished with drywall. A minor challenge was framing over the concrete foundation walls and fastening the closet walls to the concrete floor.
Closet Height
Due to the high ceilings, I chose to build a semi-free standing closet with 8 foot long 2×4 lumber because a floor to ceiling closet would result in a lot of wasted space and higher materials cost.
Closet Depth
To coincide with the final step downs in the poured concrete foundation wall, I chose to the make closet 45 inches deep from the finished room wall to the outside finished face of the closet. This translates into an interior closet floor dimension of 34 inches deep, which is well beyond the minimum acceptable closet depth of about 25 inches.
Closet Width
The width of the closet was chosen to fit several requirements:
- The closet must have a 4 feet wide finished door opening for two 24 inch bi-fold doors.
- The closet must leave room for a 60 inch wide queen bed and a night stand.
The initial closet floor plan was adjusted slightly to line up with the 2×4 studs in exterior load bearing wall.
Final Closet Dimensions
The final closet dimensions are:
- 99-1/2 inches tall from the floor to the outside finished top.
99-1/2 inches is the sum of the 1.5 inch 2×4 sole plate + 96 inch (or 8 foot) 2×4 wall studs + 1.5 inch 2×4 top plate + 1/2 inch plywood cap.- Since the closet walls are 3 inches taller than 8 feet (not including the 1/2 inch plywood cap because it will overlap the drywall edges), I will have to purchase 10 foot long drywall sheets for the closet exterior walls (the finished interior walls are shorter and I will use 8 foot drywall sheets inside the closet).
- Should you prefer to use only 8 foot drywall sheets, cut your 2×4 studs to 93.5 inches in length to make an 8ft 1/2 in high framed wall as measured from the concrete floor to the top of the top plate. The extra 1/2 inch framed wall height provides clearance between the bottom of the 8 foot drywall sheet and the concrete floor. The 1/2 inch floor gap will be covered by the baseboards.
- 45 inches from the upper part of the 2×4 finished load bearing to the finished outside corner of the closet.
- 71 inches wide from the finished wall to the finished outside corner of the closet.
- 34 inches by 58 inches floor space inside the closet.
- This equates to 13.7 square feet (or 1.3 square meters) of interior closet floor space. I wouldn’t call it a walk-in closet, but maybe a step-in closet because the clothes rack is too far back to reach-in from the doorway.
- Several inches of closet floor space are lost due to the concrete foundation walls being thicker than the upper 2×4 house walls.
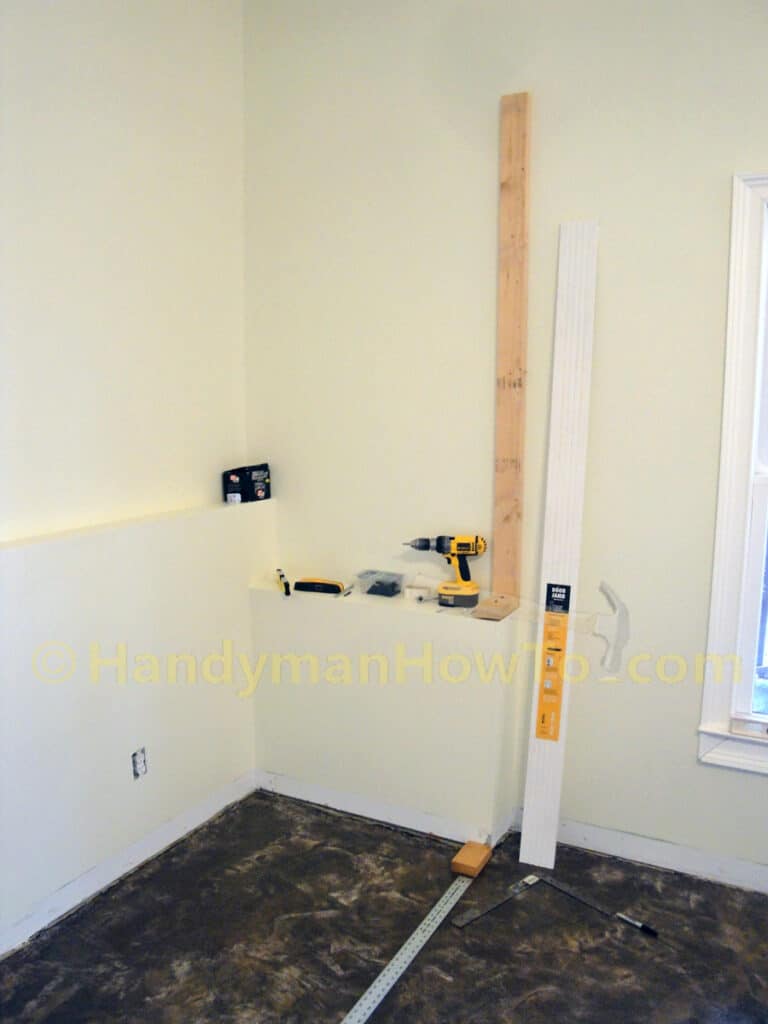
Basement Closet Wall Layout
To put the following steps into perspective, here’s a look ahead at the basement closet 2×4 framing for the sole plate, starter studs and ledger boards:
If you haven’t already done so, remove the baseboards from the walls where the closet will be built.
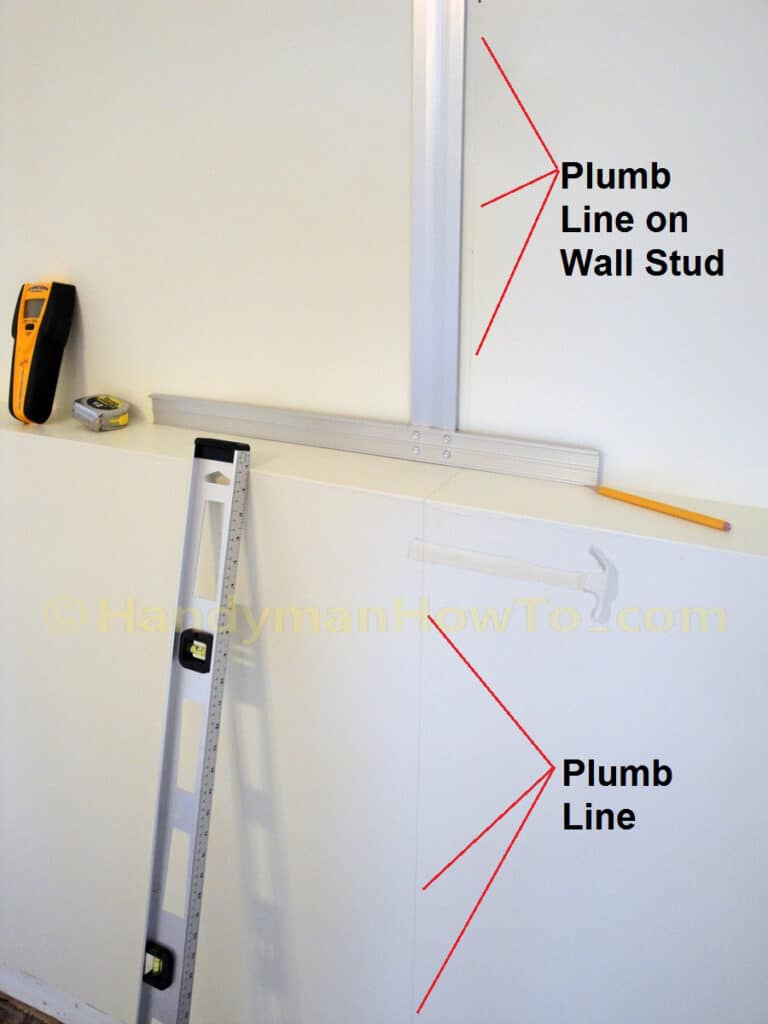
Using the stud finder, I began the closet construction by locating the 2×4 stud in the house wall (upper section in the photo) that was closest to my proposed location for the closet wall. I then marked a vertical plumb line in pencil with a level and square down the wall to the floor.
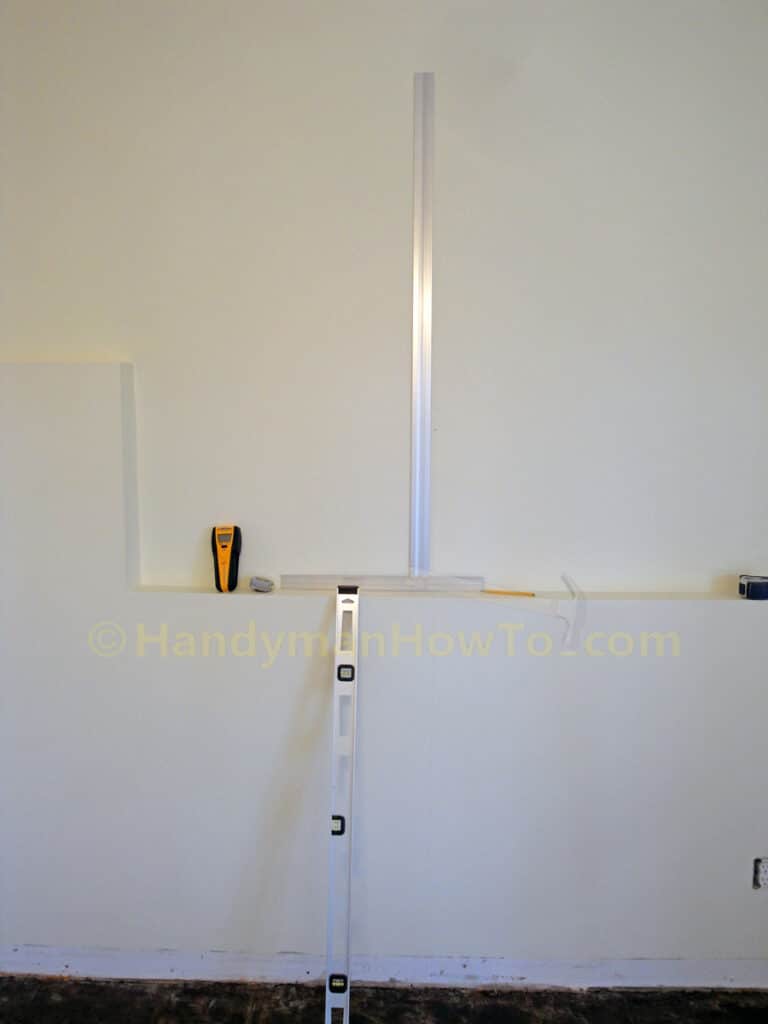
Close-up of the plumb lines marked in pencil:
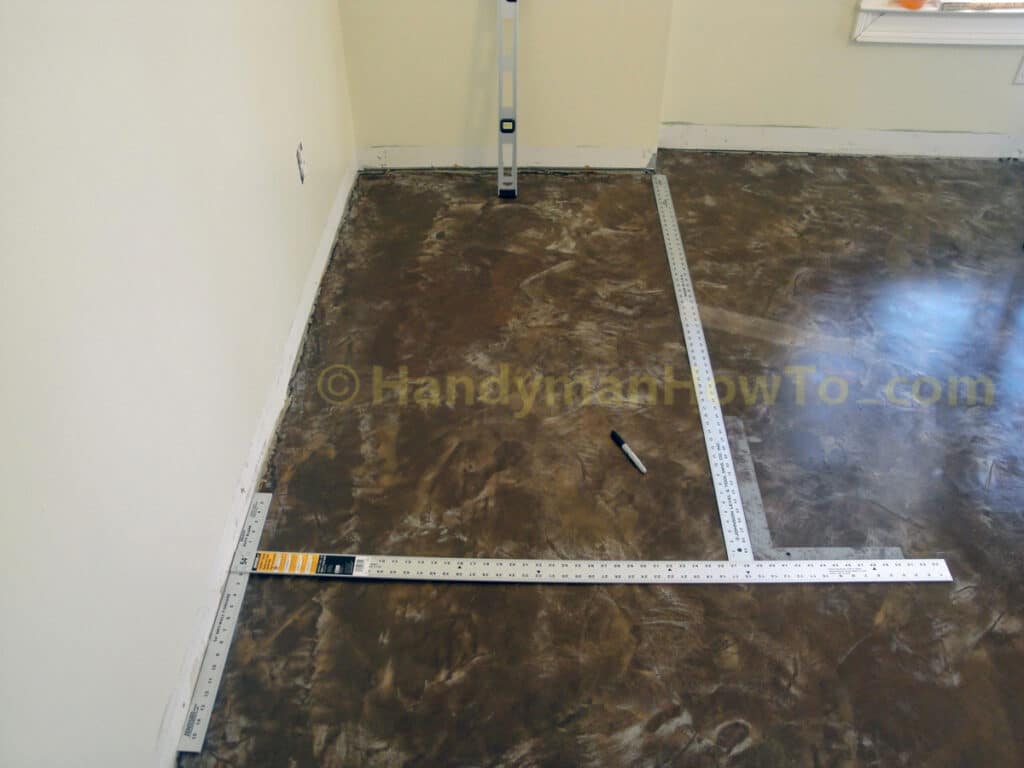
The 54 inch drywall T-square was very useful for extending a straight line across the concrete floor to mark the inside face of the 2×4 closet wall sole plate.
The depth of the closet finished exterior was chosen to cover that final step in concrete foundation wall. Notice the carpenter’s square between the 54 inch T-square and tape measure for accurate layouts.
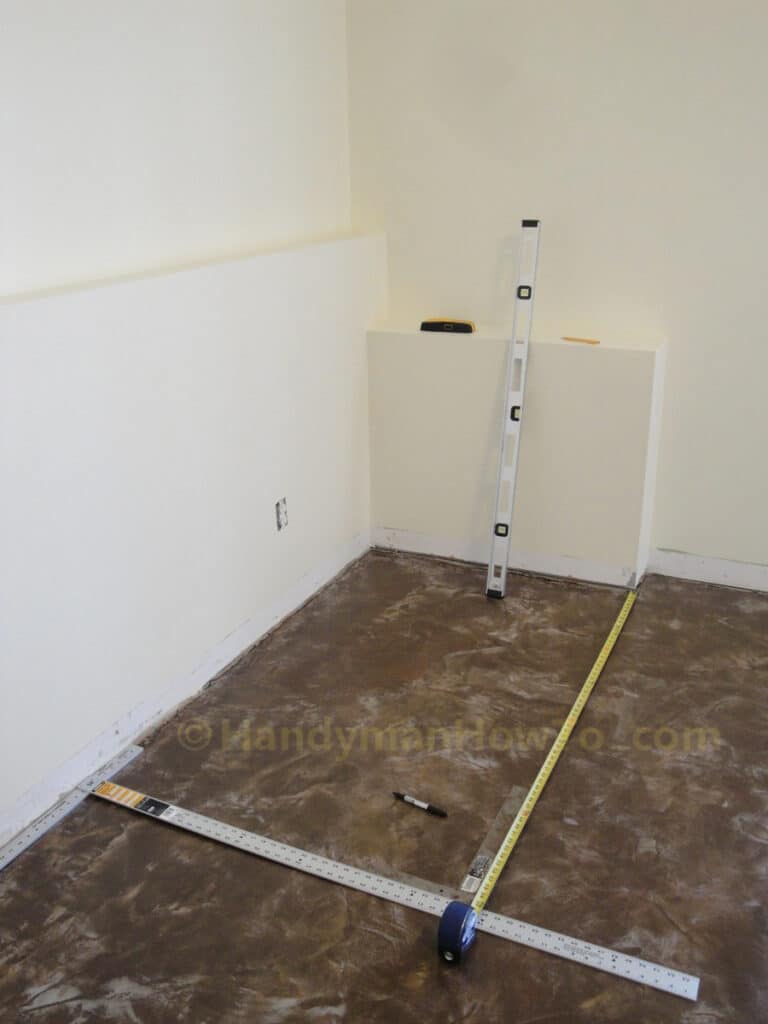
The tape measure was replaced with a 5 foot aluminum ruler for marking the wall positions on the floor. The angles were trued-up with the carpenter’s square.
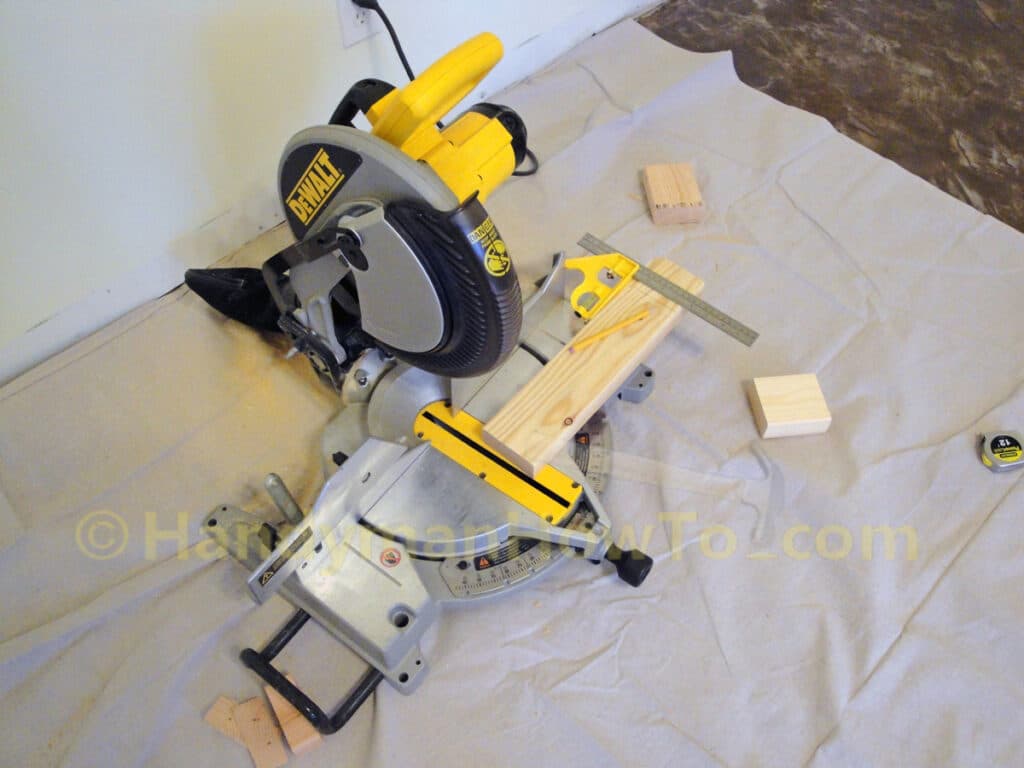
The 2×4 framing was cut using my DEWALT compound miter saw for speed and precision. I placed the saw on a canvas painters drop cloth to protect the SkimStone concrete floor finish.
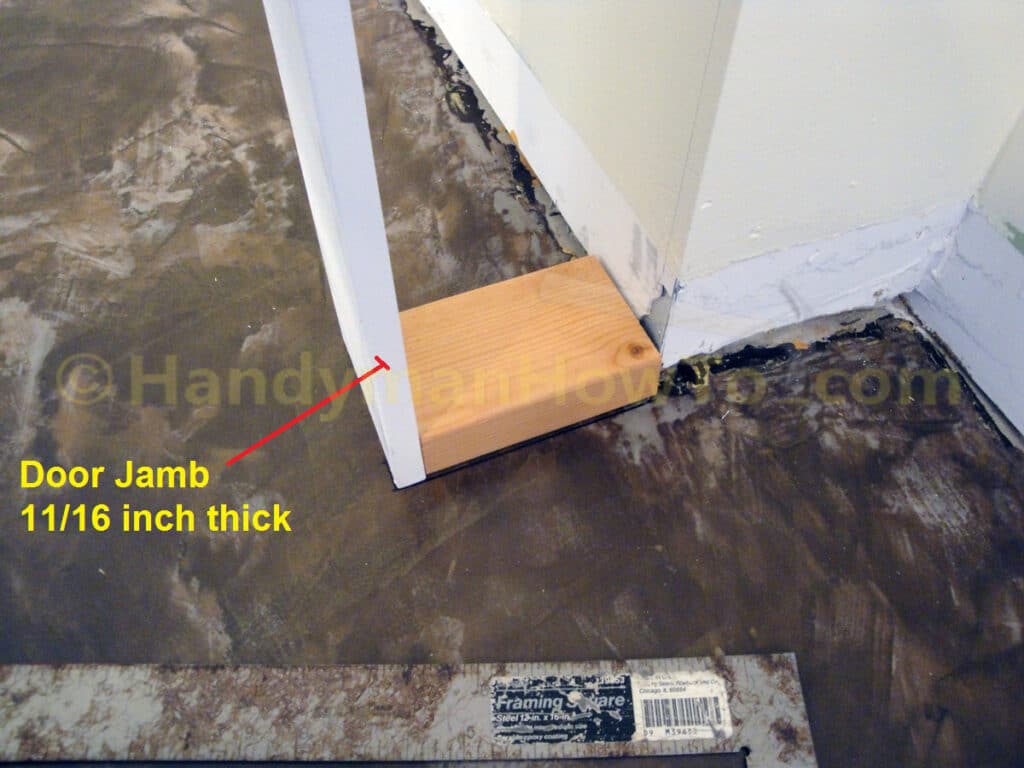
I centered the position of the 4 foot wide finished door, then cut a 2×4 sole plate that was wide enough for a 2×4 jack stud, king stud and wall plate with an extra inch of space to run electrical wiring for the light switch. The 11/16 inch thick by 4-9/16 wide door jamb is held in place to mark the finished door dimension on the concrete floor. The far side of the finished door will be marked on the floor 4 feet from the face of door jamb.
In the following photo:
- I located the 2×4 stud in the exterior wall with the stud finder.
- Marked a plumb line down the wall to the floor.
- A short horizontal 2×4 block is fastened on the setback of the concrete foundation wall with 4 inch Tapcon® blue masonry hex-head screws.
- The starter wall stud, or wall plate, is measured and cut such that the final height is 8 feet above the 2×4 sole plate on the floor. (Total height from the top of the stud to the concrete floor is 97.5 inches.) This is such that top of the starter stud fastened to the wall will be the same as the full length 8 foot wall studs fastened to the 1.5 inch thick sole plate. The 2×4 wall plate is fastened to the exterior wall stud with 3 inch stainless steel bugle-head wood screws.
Fastening the 2×4 Sole Plate with Tapcon Concrete Anchors
The 2×4 sole plate for the closet wall will be positioned at the right line indicated by the yellow arrow. (I had to adjust the front wall position slightly to align with the 2×4 studs in the house wall.)
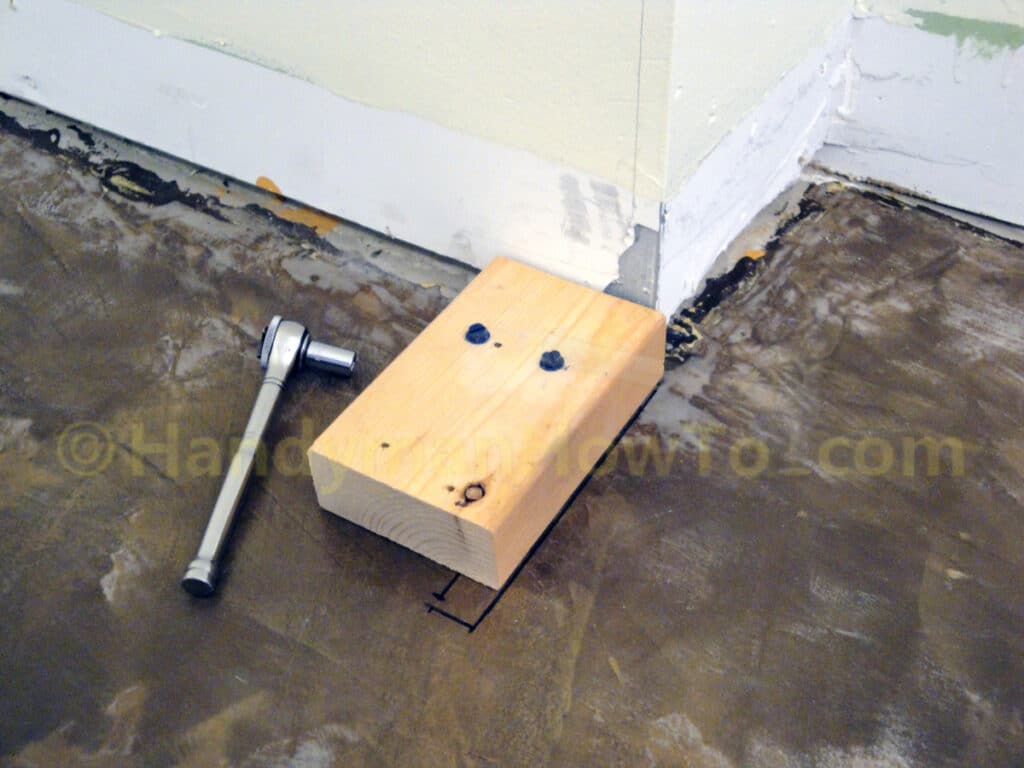
- After marking the positions of the jack stud, king stud and wall plate stud on the sole plate as shown by the lines on the block, I drilled pilot holes through the block for the 4 inch Tapcon masonry anchors in the open space between the studs that will be installed later.
- While firmly holding the sole plate block on the floor against the wall and even with the right line (yellow arrow), I used my hammer drill with a masonry drill bit to drill a hole in the concrete floor using the pilot hole in the 2×4 block as drill guide.
- After drilling the first hole in the floor with for the Tapcon, I screwed the Tapcon into the sole plate block with a socket wrench until the Tapcon projected slightly through the block.
- The Tapcon will now center itself in the concrete floor while I drill the hole for the 2nd Tapcon.
It’s necessary to remove the sole plate block when the drill bit contacts the wood in order to drill the floor hole to the full depth for the 4 inch Tapcon masonry anchor. - I held the block on the floor letting the point of first Tapcon center itself in the previously drilled hole, then drilled the hole for the 2nd Tapcon. Both holes are now in perfect alignment.
This photo shows the second hole (left side) that was drilled for the Tapcon anchor screw:
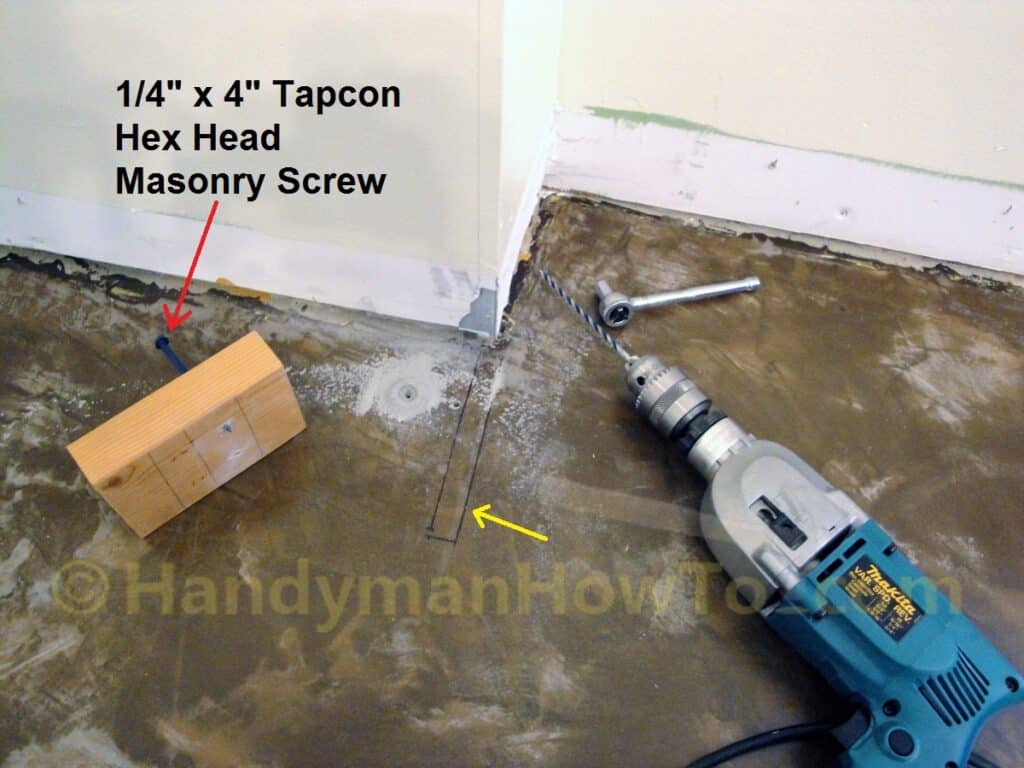
After vacuuming up the concrete dust, the Tapcon masonry anchors are screwed into the concrete floor with a socket wrench. Notice the line extending 11/16 inch beyond the sole plate to mark the finished face of the door jamb:
This project in continued in How to Build a Basement Closet – Part 2.
Thanks for reading,
Bob Jackson