The basement closet door cripple studs, wall studs, light switch electrical box and ceiling box are built in this installment of How To Build a Basement Closet. This project is continued from How to Build a Basement Closet – Part 3.
Basement Closet 2×4 Wall Studs
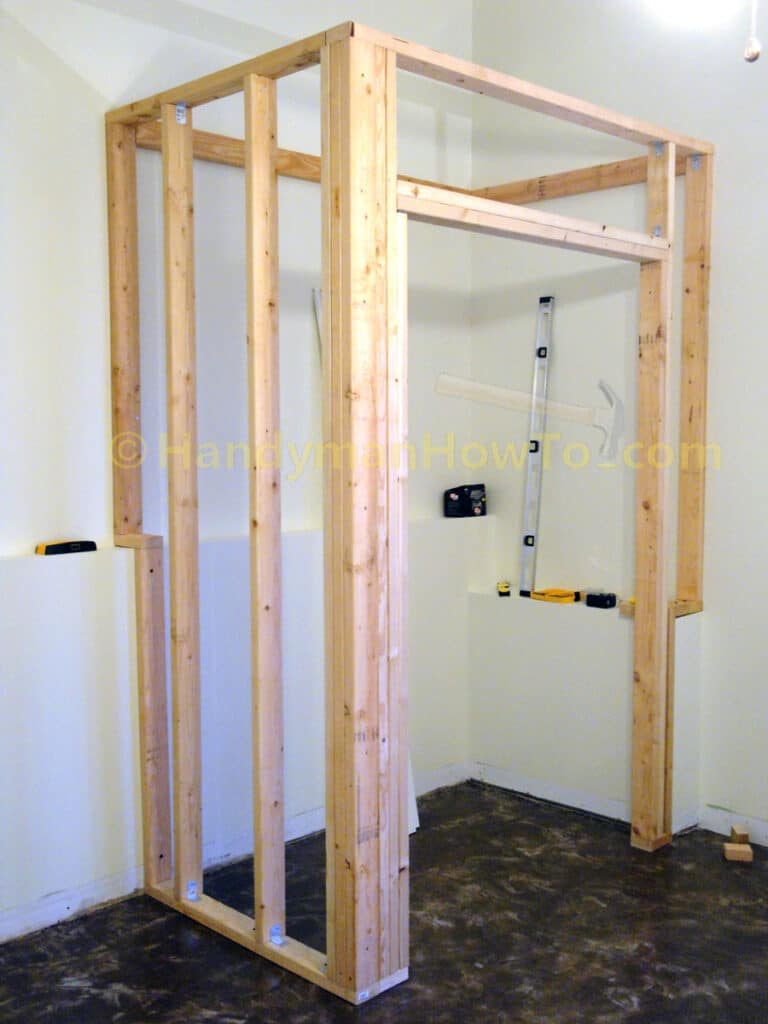
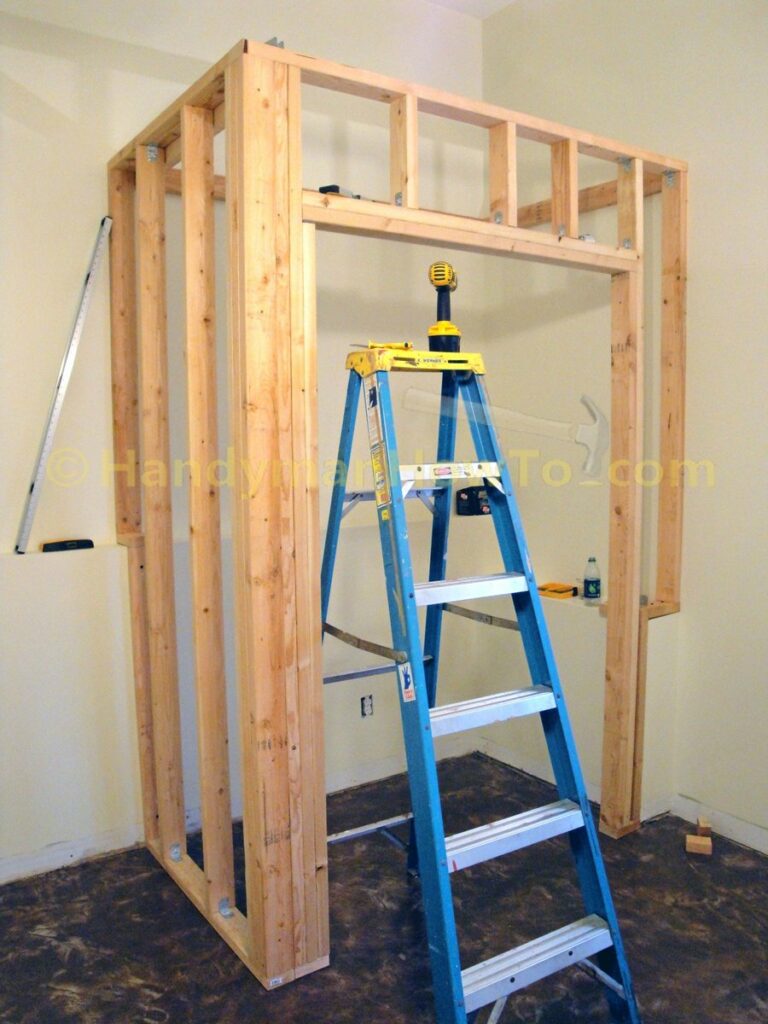
Only two 2″ x 4″ x 8′ studs were needed to complete the right side closet wall. The 2×4 studs are a full 8 feet (96 inches) long and fastened to the sole plate and top plate with Simpson Strong-Tie® Z-Max A21Z metal angle structural connectors and Simpson Strong-Drive SD8X1.25 wood screws. The studs are set on 16 inch centers as measured from the corner post. Each stud is checked with the carpenter’s level for plumb (vertical) before fastening.
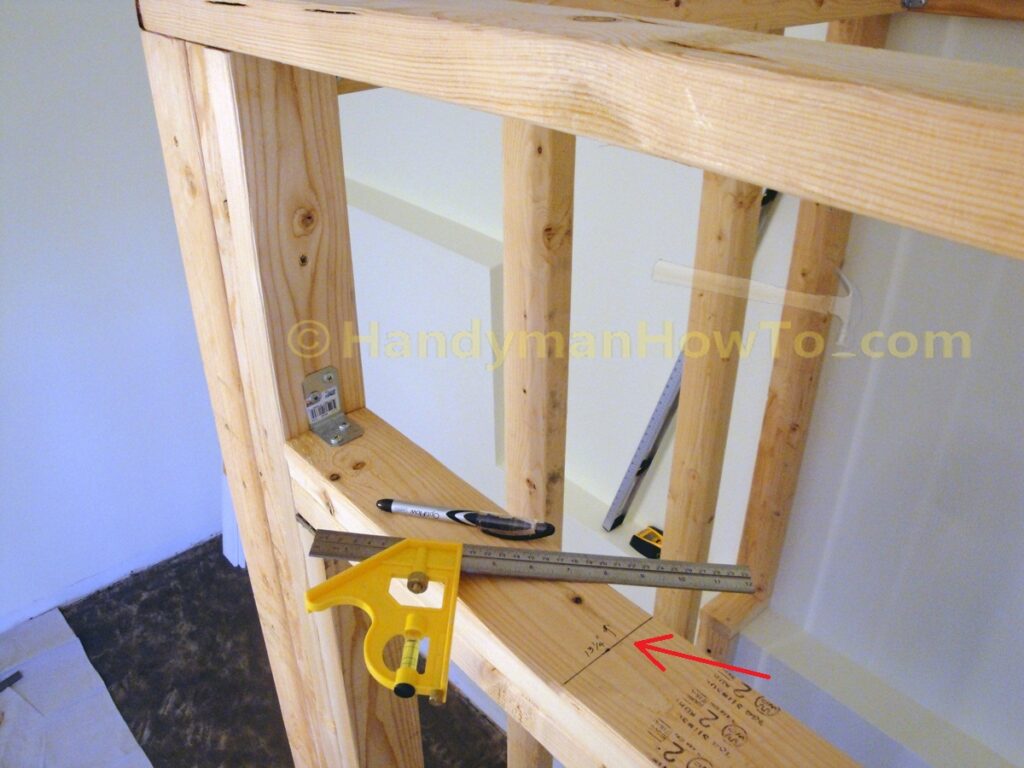
Door Rough Opening: 2×4 Cripple Stud Framing
The door header is measured and marked-off for three equally spaced cripple studs:
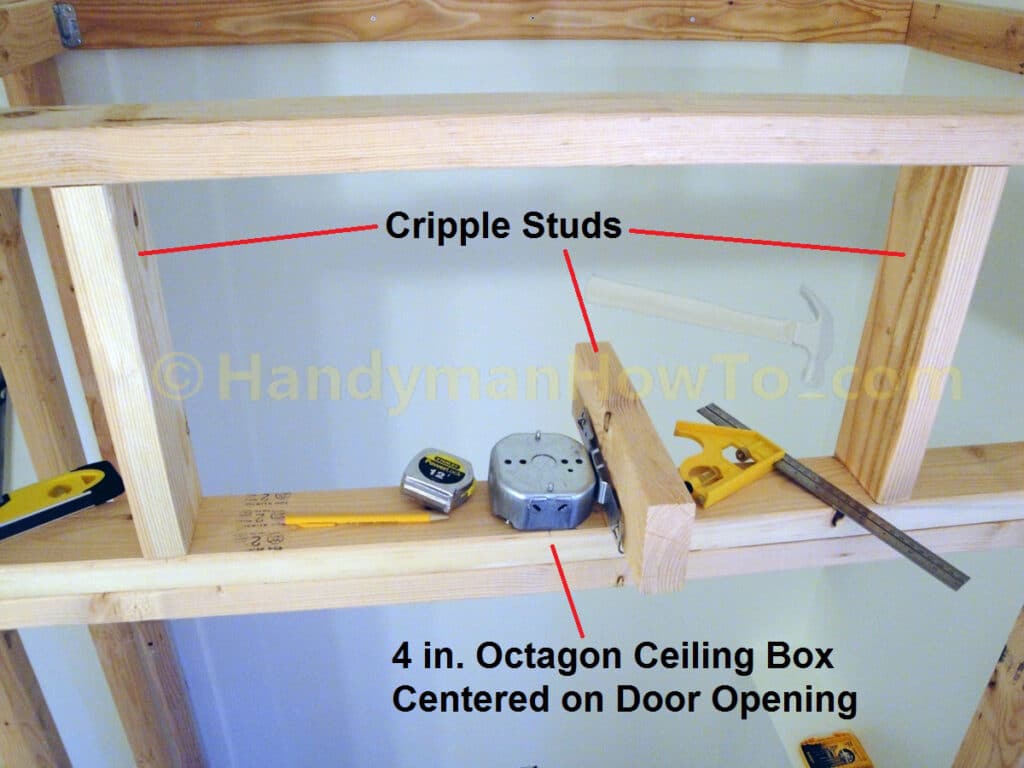
I measured and sawed the three cripple studs, stood them in place (no screws, just free-standing) and thought about where I wanted to install the ceiling closet light. The closet door rough opening is offset to the left due to the concrete foundation wall and I decided it would be best if the ceiling light were centered over the closet door. To align the cripple stud with the closet ceiling joist, I set the 4 inch octagon electrical box for the ceiling light on the center of the door header and marked the 2 inch offset for the center of the cripple stud. The closet ceiling joists will be aligned with the cripple studs later. Although the cripple studs and ceiling joists don’t have to be aligned, doing so makes for nicer looking framing and is convenient reference point when installing the ceiling drywall.
The cripple stud will be placed 2 inch to the right of the door center, which makes sense for a 4 inch electrical box, but I wanted to check that the electrical box mounting bracket didn’t affect the box center measurement (as if anyone but myself would notice).
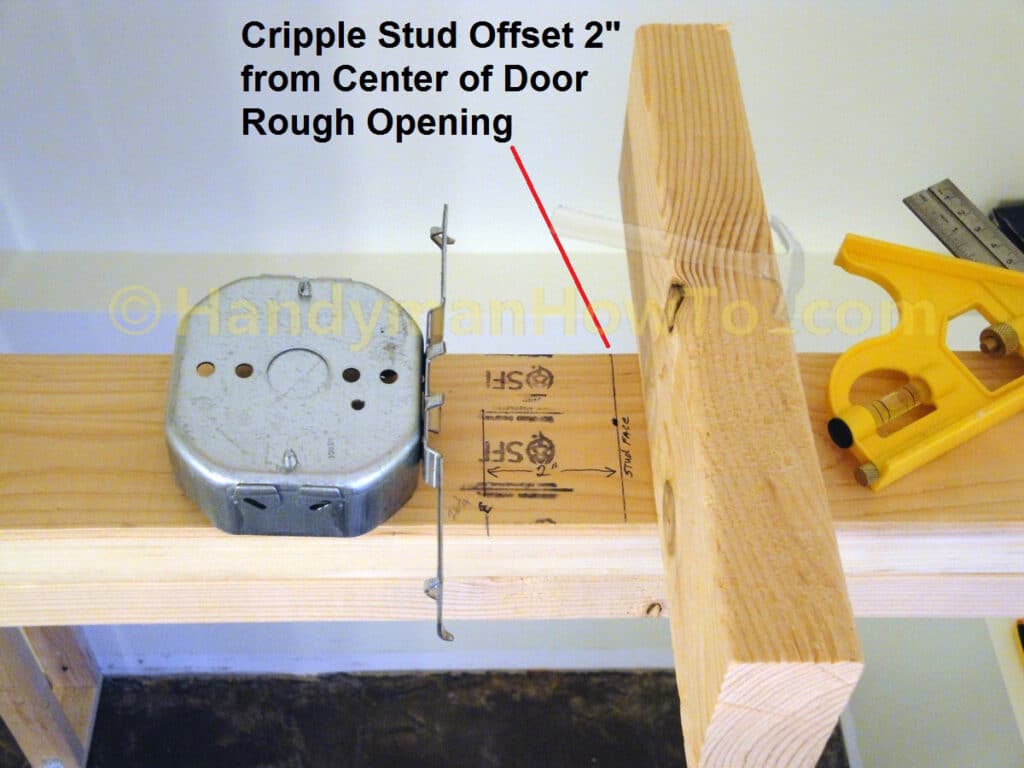
The cripple studs are fastened to the closet door double header with Simpson Strong-Tie Z-Max A21Z metal angles and by driving a 3 inch wood screw down through the top plate. Notice the right offset of the middle cripple stud to align with the ceiling joist (to be installed next) to center the ceiling light.
Basement Closet Ceiling Joist Framing
Since the basement closet is a semi free-standing closet design, a closet ceiling must be framed. 2×4 ceiling joists will be more than strong enough for the short span of the ceiling joists.
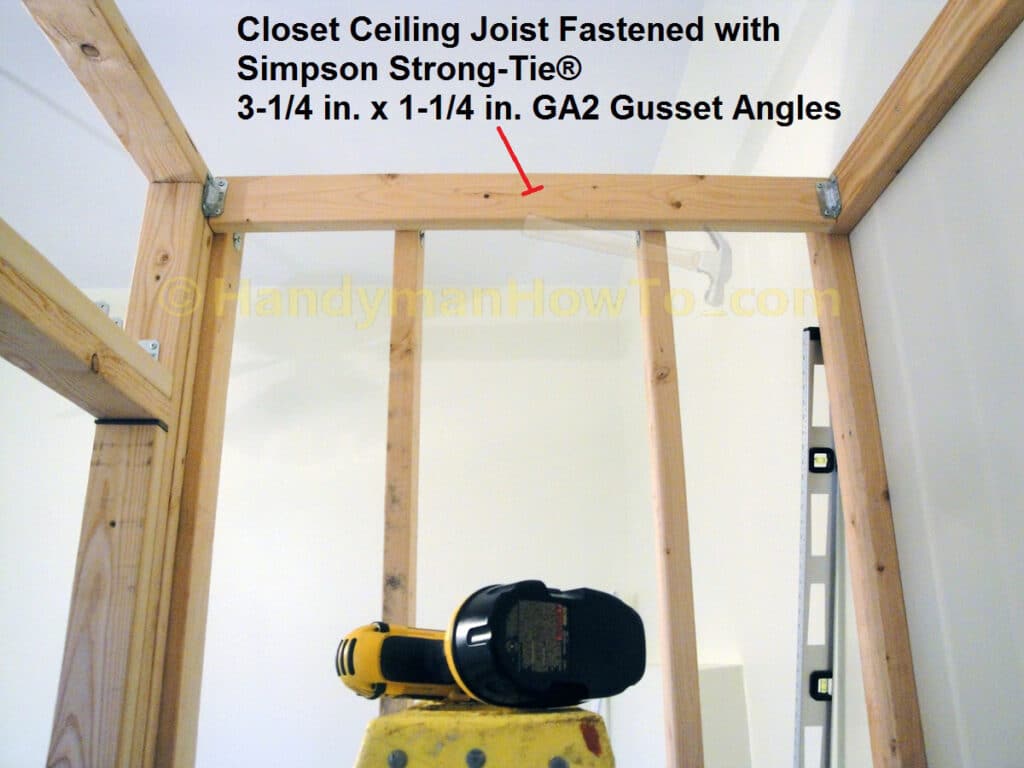
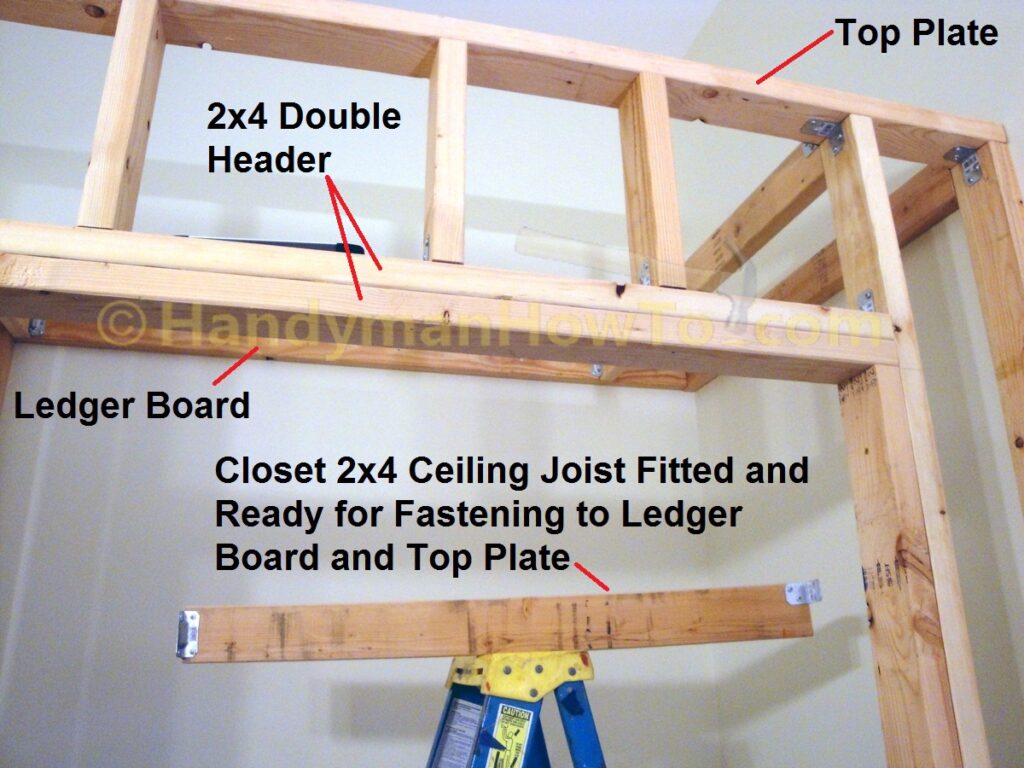
The first ceiling joist will be installed against the stud wall and wall top plate to provide an interior surface to mount the ceiling drywall. The ceiling joist length is measured, sawn and fastened in place with Simpson Strong-Tie GA2 Gusset Angles (product drawing) to the ledger board (right side) and top plate/king stud (left side) and with Simpson Strong-Drive wood screws.
Working at the opposite side of the closet, the ceiling joists are installed on center with the door king studs and cripple studs. The spacing between the ceiling joists is less than 16 inches on center given the closet design. I measured and sawed each 2×4 ceiling joist so it fit snug between the ledger board and top plate, i.e. the joist would just hold in place without falling, but not push the front wall out of alignment. Such precision is easy with my DEWALT compound miter saw for clean square cuts.
The 2×4 ceiling joist is centered with the wall stud and squared for a perfect fit before fastening with Simpson Strong Ties.
After measuring and fitting the ceiling joist, I found it simpler to attach the Simpson Strong-Tie GA2 Gusset and Z-Max A21Z angle to the ceiling joist before fastening it to the closet framing. The GA2 gusset is fastened to the ledger board and the slim A21Z angle is attached to the top plate with Simpson Strong-Drive wood screws.
Basement Closet Ceiling Light Electrical Box
I installed ceiling light electrical box so it was 10 inches from the front wall so the ceiling light would be forward of the clothes rack for a better lighting angle. The Raco 4 in. Octagon Box is 1-1/2 in. deep and has gauging tabs on the mounting bracket for the correct setback in the 1/2 inch drywall. The ceiling electrical box is attached to the joist with two Simpson Strong-Drive wood screws.
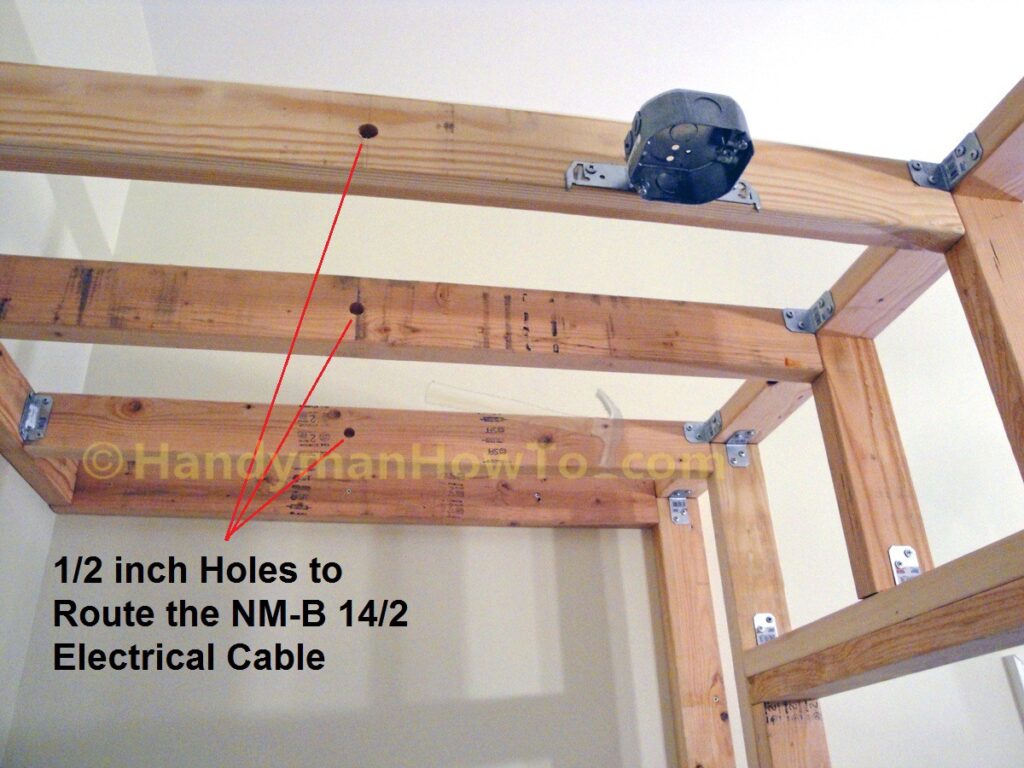
1/2 inch holes are drilled through the middle of the 2×4 ceiling joists about 12 inches away from the ceiling electrical box to route the NM-B 14/2 electrical cable. 12 inches provides for a more gentle bend in the electrical cable and space to staple the cable with in 12 inches of the metal box [NEC 334.30] (or within 8 inches [NEC 314.17(C)] for plastic boxes) as required by the National Electric Code© (NEC). The NEC is the basis for your local Building Codes.
The wiring joist holes must not be larger than 1/2 inch such the edge of the hole is not less than 1-1/4 inches from the top or bottom of the joist:
- NEC 300.4 (A) (1) Bored Holes
“Holes shall be bored so that the edge of the hole is not less than 1 ¼ inches from the nearest edge of the wood member. Protection (steel nail plate 1/16 inch thick and of appropriate length) shall be used to protect cable where the distance cannot be maintained.”
A 1/2 inch diameter bored hole centered in a 3-1/2″ wide 2×4 ceiling joist results in a 1-1/2 inch distance between the edge of the hole and the joist edge. This is so the 1-1/4 inch drywall screws (or nails) will not accidentally pierce the electric cable. If you’re concerned about piecing the wires, install nail plates (stud guards) on the joists to protect the wiring.
Basement Closet Light Switch Electrical Box
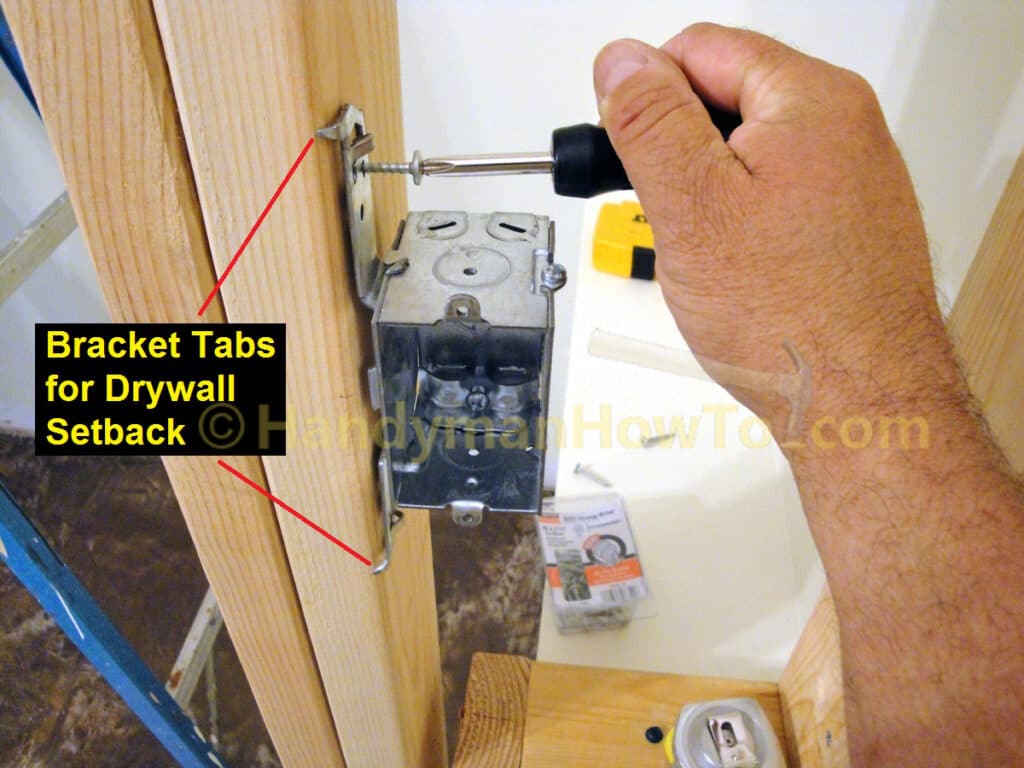
The closet light switch box is a Raco 3 in.x 2 in. Switch Box, 2-1/2 in. Deep, Gangable with TS Wood/Metal Stud Bracket featuring a gauging tabs and recessed nailing spurs. The gauging tabs fit on the corner of the 2×4 stud to set the proper setback for the drywall. I prefer to mount the switch box to the stud with two Simpson Strong-Drive SD8X1.25 wood screws instead of the bracket nailing spurs.
A new electrical circuit using NM-B 14/2 cable will be extended from the wall outlet, run along the surface of the exterior wall using Wiremold receptacle boxes and cable raceways, into the closet wall and through the ceiling joists to the ceiling light as indicated in the following image:
The closet light electrical circuit wiring steps are explained in the How to Wire a Close Light with Wiremold.
Take care,
Bob Jackson
Very helpful instructions with illustrations on how to construct a basement closet in 4 parts. Thank you Aim to do this project for a friend soon with a drop ceiling to address in the area too. This will incorporate two handing doors that bypass each other on the track. Appreciate any other tips you can offer.
Also plan to install a pocket door after closing in an opening.
Thank you,
John
Thanks for the feedback, John. Sounds like an excellent project, good luck and enjoy the process.