Mount the new Schlage keypad deadbolt in the exterior door, install the battery and program the keyless entry code.
This project is continued from How to Install a Schlage Keypad Deadbolt – Part 1.
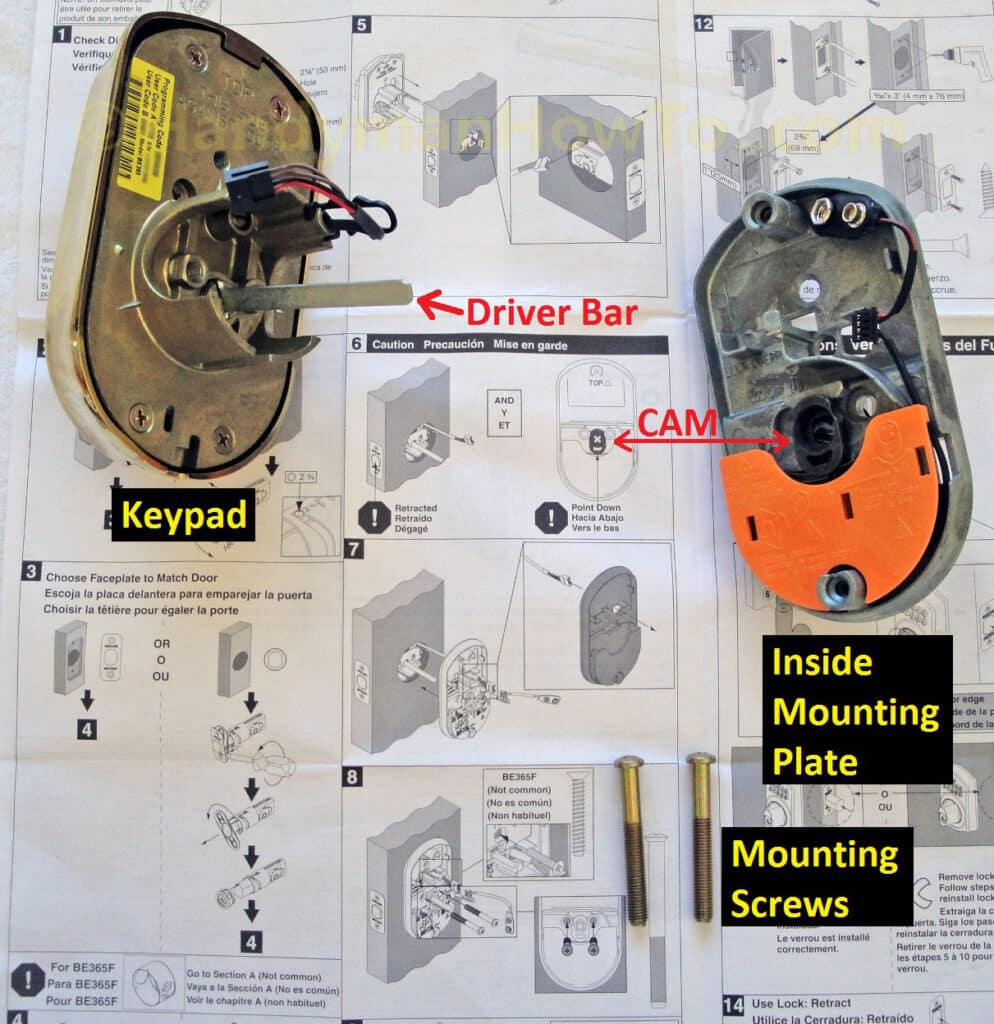
Install the Schlage Keypad and Inside Mounting Plate
It helps to layout the parts on the installation instructions to familiarize yourself and orient the parts for Steps 5 through 8. The black cam in the inside mounting plate must be in the “down” position as shown, if it isn’t turn it with your fingers to the “down” position:
To install the keypad:
- Check that the deadbolt is retracted. If not, insert a flat screwdriver into the latch and turn it to retract the bolt.
- Orient the keypad driver bar as shown to pass through the center of the latch. Turn the driver bar with your fingers if needed to fit into latch.
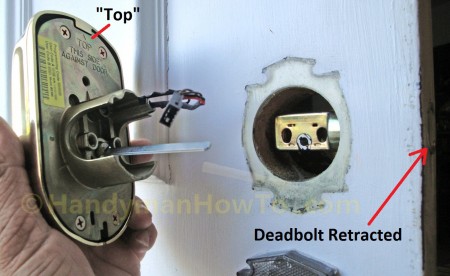
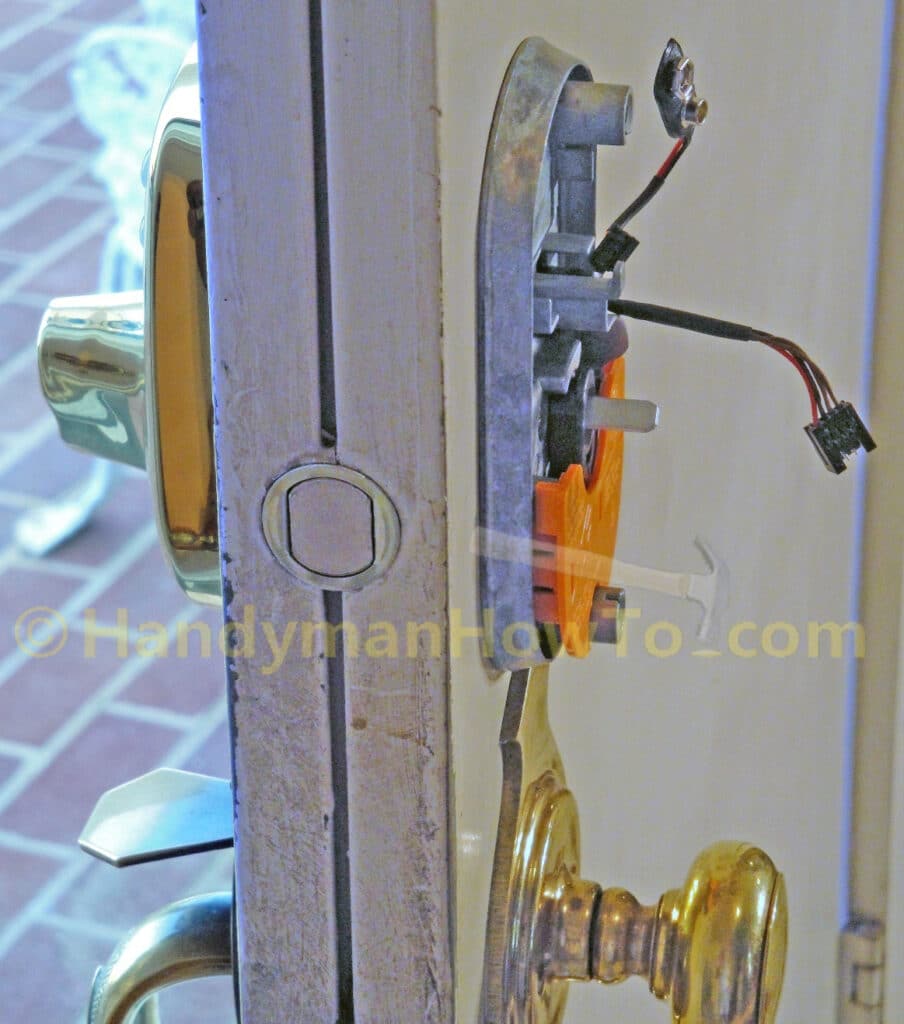
Guide the connector wire over the top of the latch and through the door while inserting the keypad driver bar into the latch. The driver bar must be in this left slanted orientation:
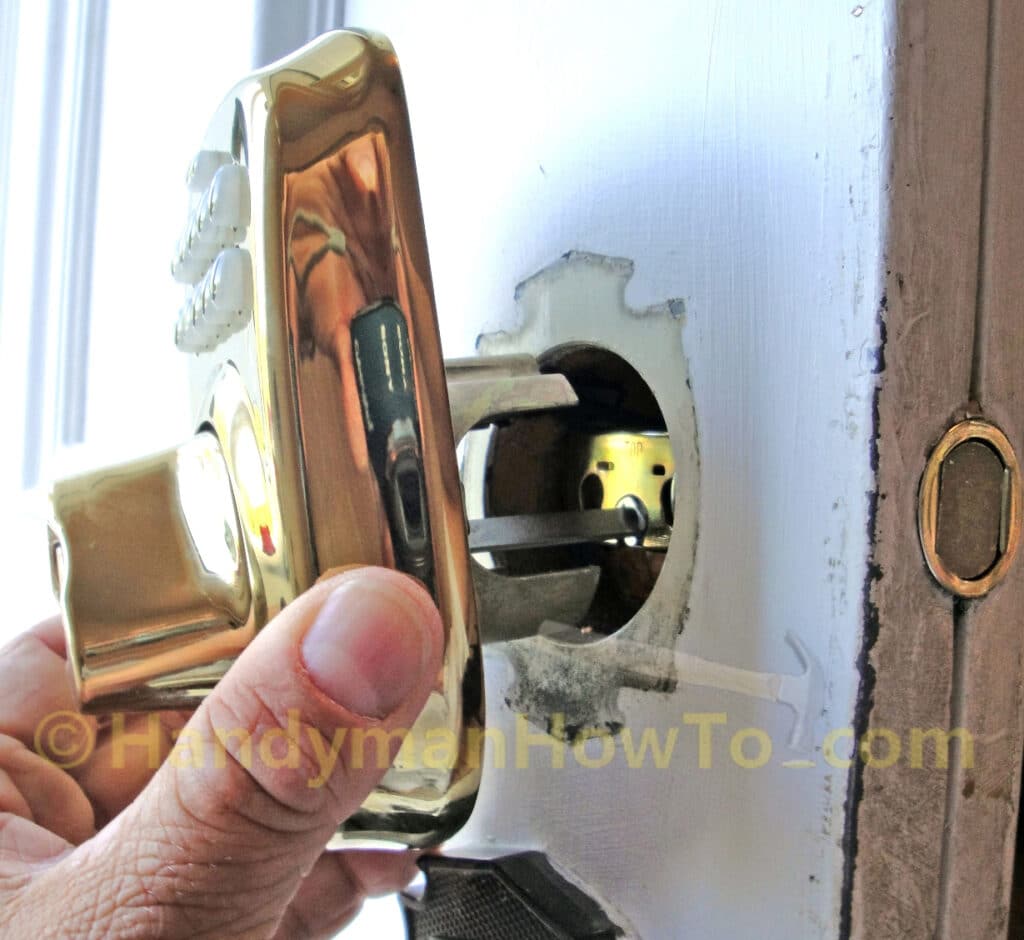
The plastic grabber bar will automatically snap into the place against the door hole to keep the keypad from falling out – my compliments to the Schlage engineers for this installation feature!
View of the keypad from the interior side of the door:
Orient the inside mounting plate – note the word “Top” and “This side against door” stamped on the plate – and guide the keypad connection wire and driver bar through the plate as you set it against the door. The driver bar must pass through the mounting plate cam in the position illustrated in the following photo. Fasten the mounting plate to the keypad with the two 2 inch mounting screws:
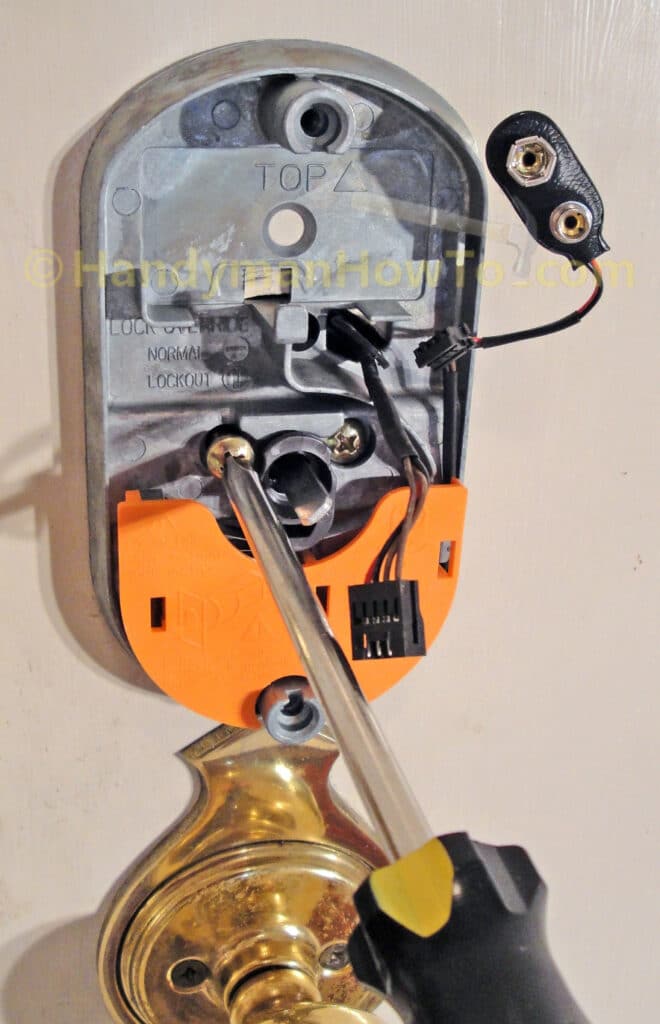
Check that the keypad is straight and tighten the mounting screws until snug, then add another 3/4 turn or so. Metal skinned doors such as this one will tend to compress under the clamping force of the screws, causing the other screw to become slightly loose. Alternate between the screws, tightening each screw a bit at a time until both are equally tight.
Here’s the keypad and mounting plate after attaching with the mounting screws:
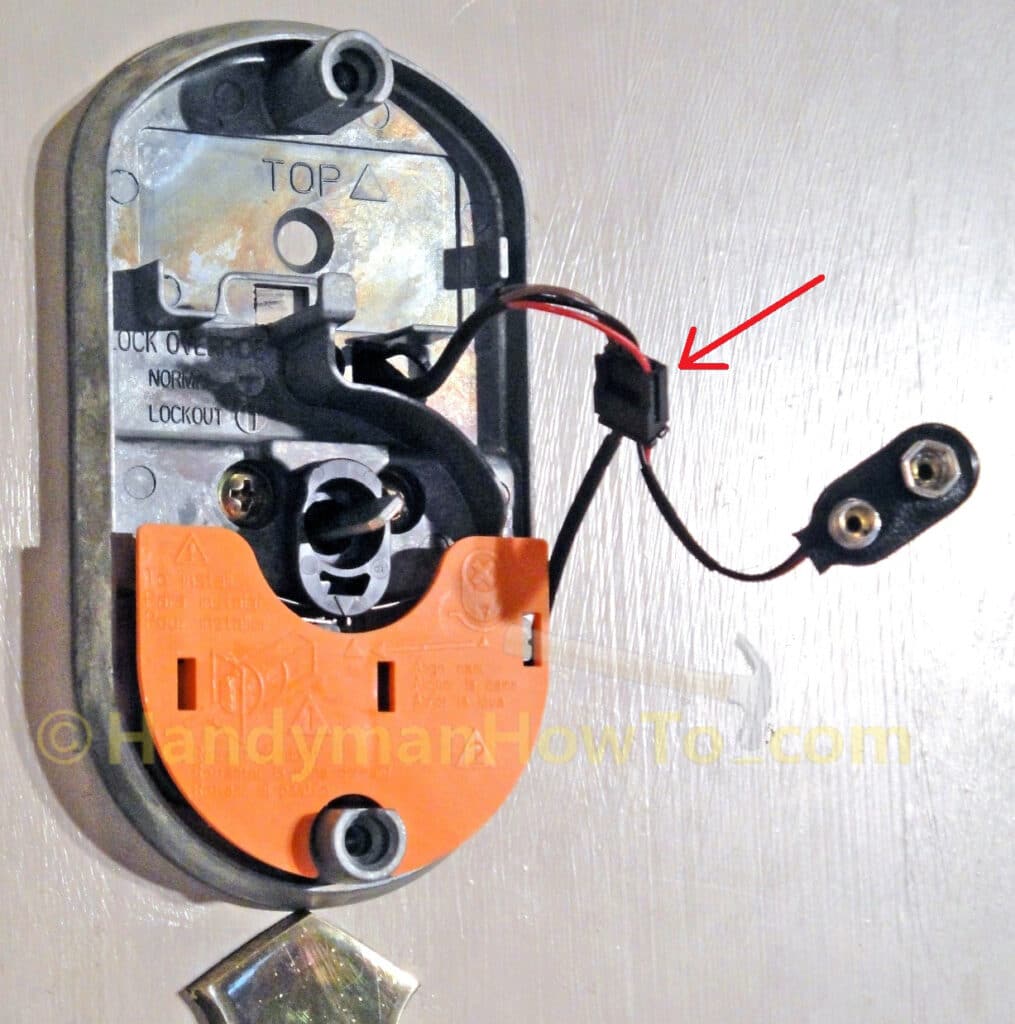
Battery Wire Harness Connection
Plug the keypad cable into the battery wire harness as indicated by the red arrow:
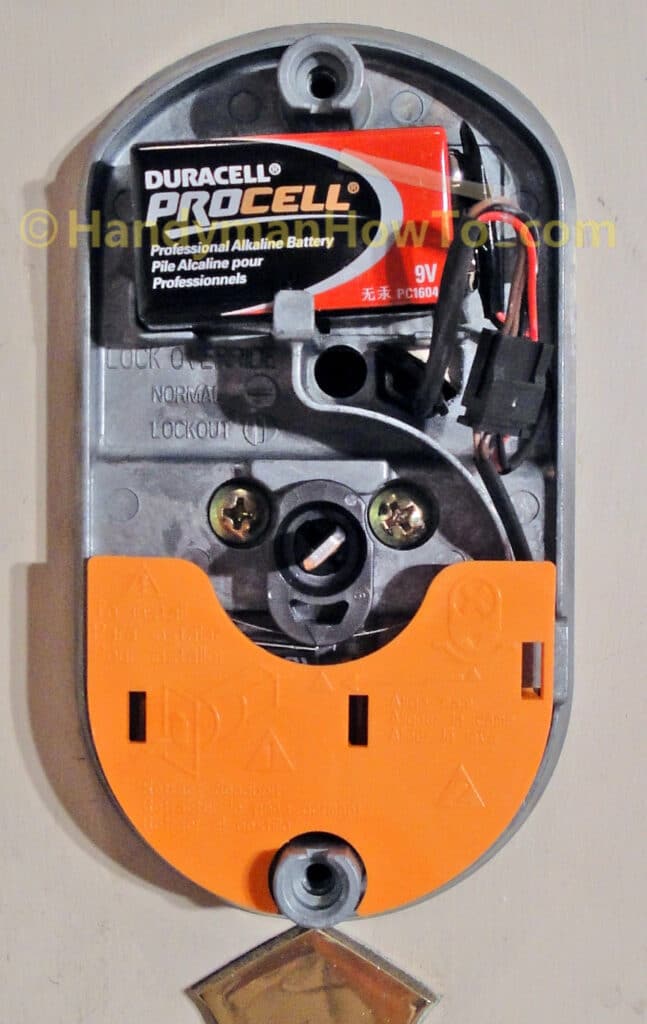
Install the Deadbolt Lock Battery
Plug in the battery and set it in the battery compartment. Tuck the wire harness in as shown so it doesn’t get pinched by the lock cover.
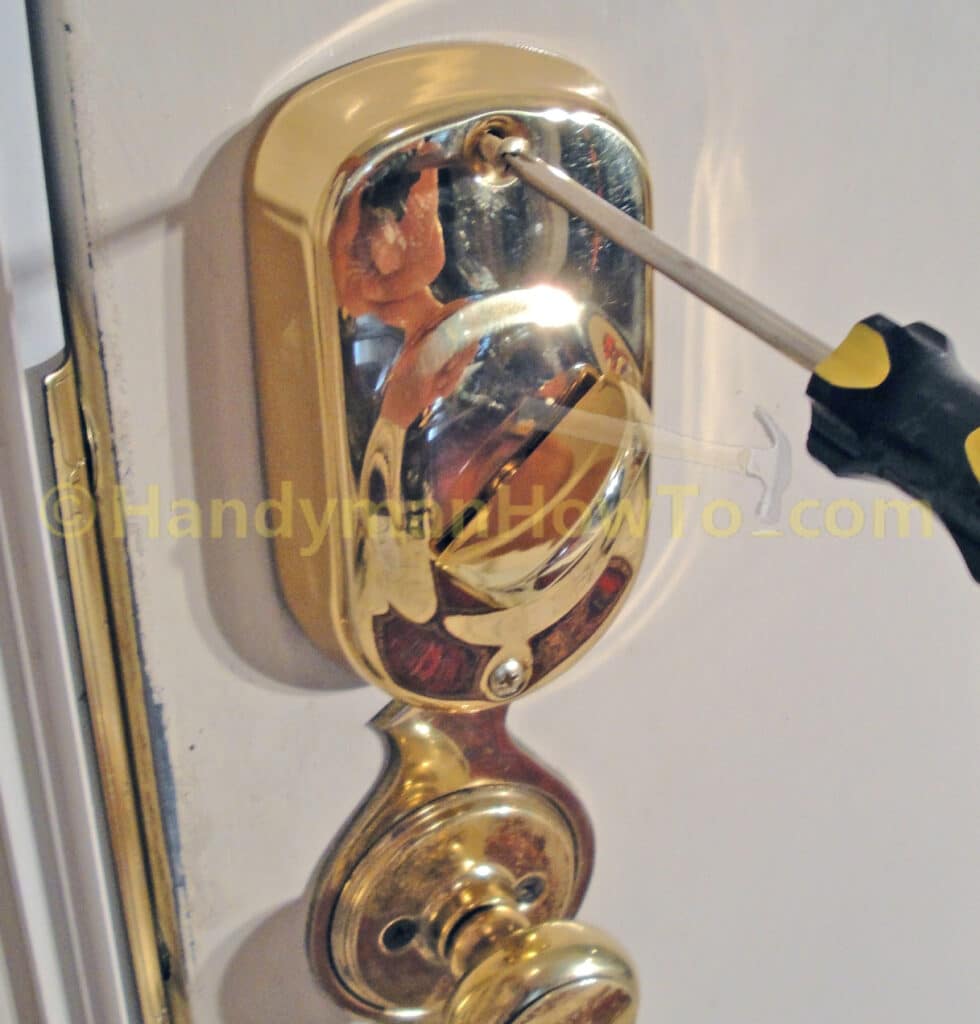
Install the Interior Deadbolt Cover
Turn the thumb knob to the right so it will fit over the driver bar and carefully slide the lock cover in plate over the mounting plate, taking care not to pinch the wires. Attach the lock cover with the two 3/4 inch mounting screws.
Test the Lock Operation
Turn the interior thumb knob back and forth to verify the deadbolt operates correctly.
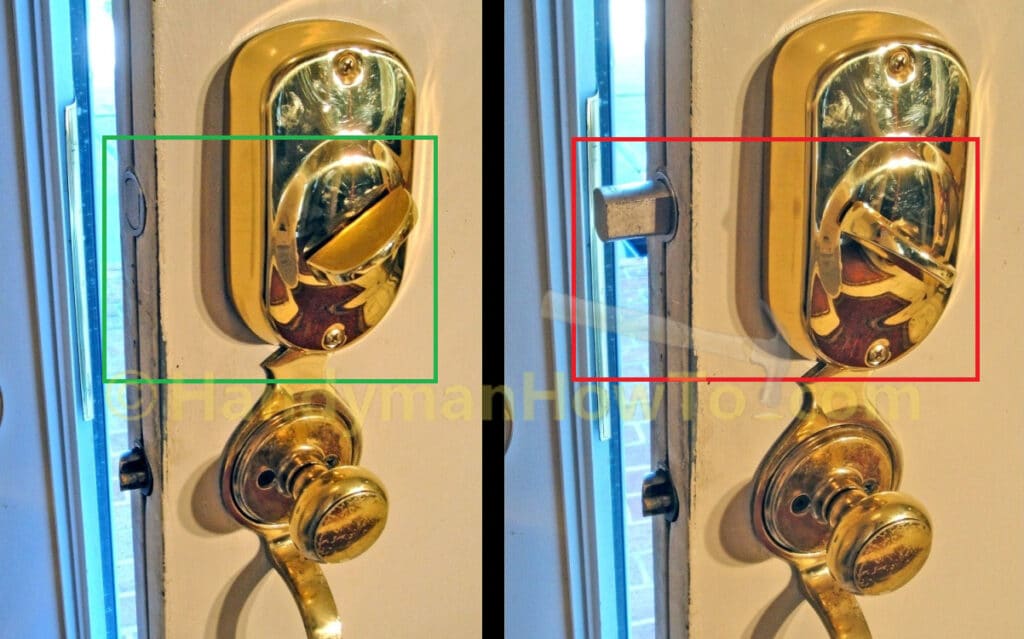
Close the door and lock the deadbolt to confirm it throws completely with a satisfying click into the locked position.
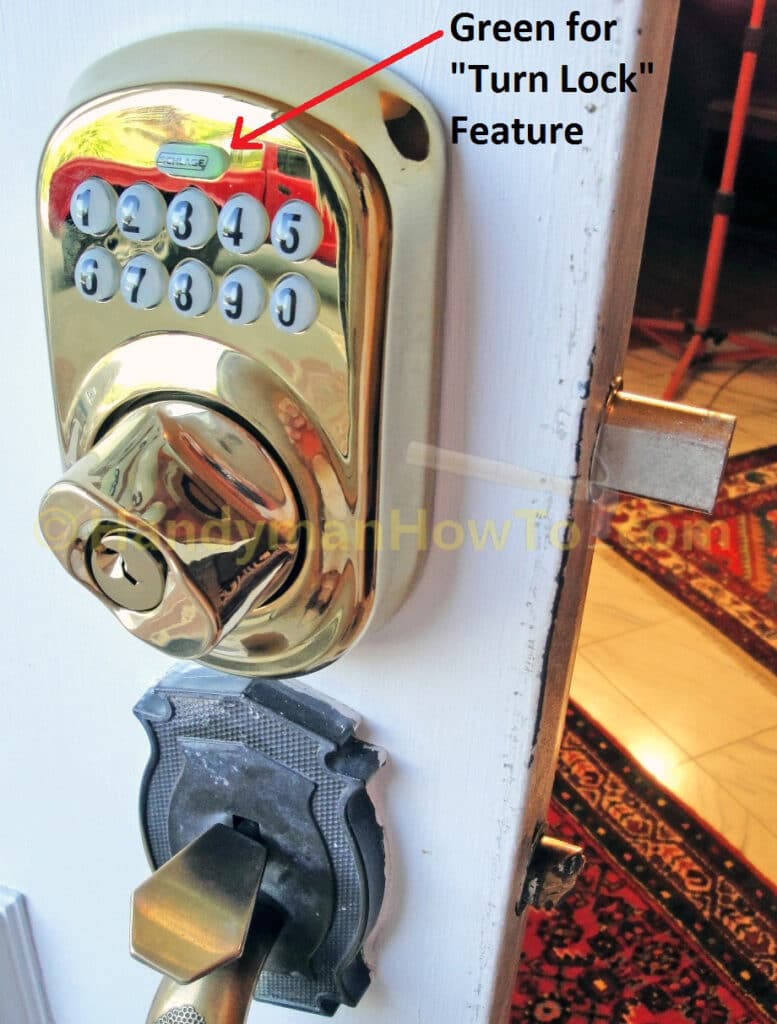
The Schlage deadbolt can be locked from the outside without keys by pressing the “Schlage” keypad button – which will illuminate green – and turning the thumb knob. You don’t need to enter a code to lock the door. Press the Schlage button and verify the thumb knob will lock the door. The “turn lock” feature times out after 2 or 3 seconds to prevent someone from opening the door after it’s locked.
Your lock is now ready to use! See the Operating Your BE365 Keypad Deadbolt Video for a guided tour.
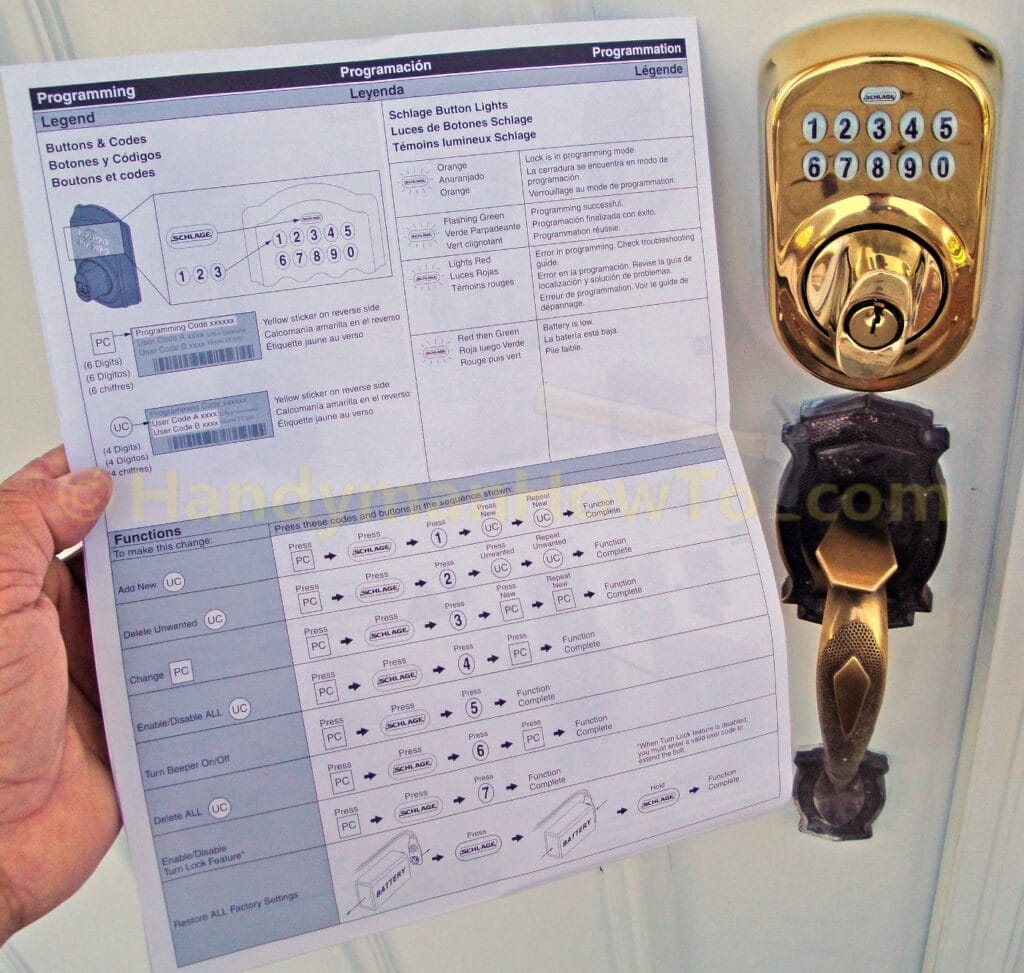
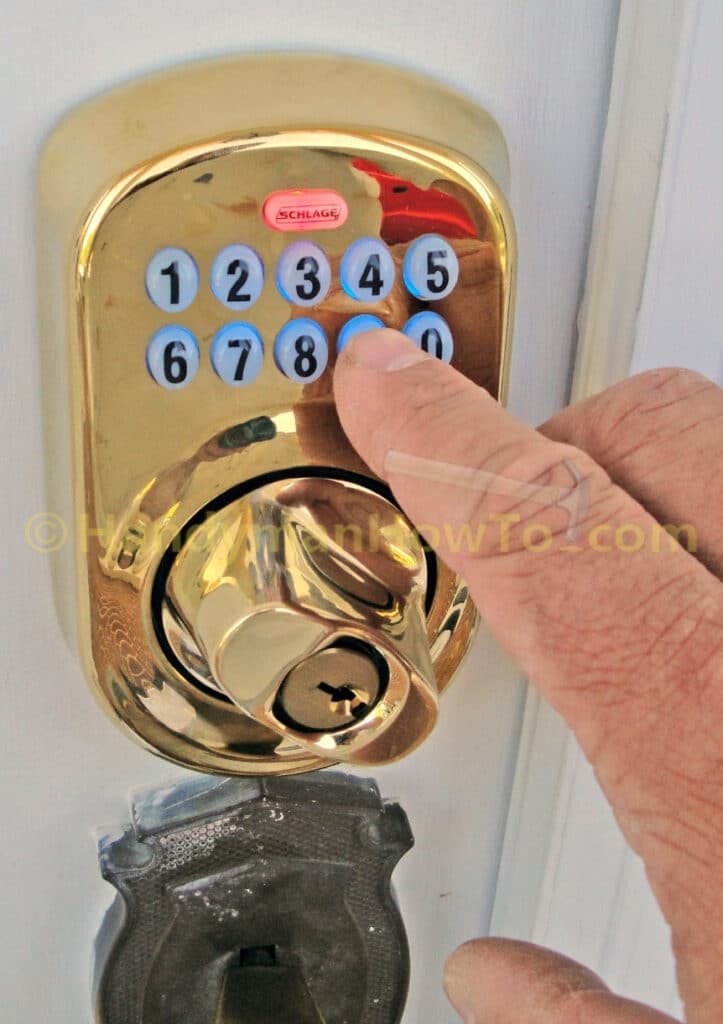
Program the Schlage Keypad Deadbolt Lock
The Schlage keypad deadbolt is ready to use and it’s not necessary to program the lock. The lock is factory pre-programmed with two 4-digit User Codes that you can use immediately. The default user codes are printed on the yellow label on the installation instructions.
If you want to create a new user code that meaningful to you, or a create a user code to be given to others (e.g. house sitter, babysitter, renters, visitors), then it’s easy to program the lock following the programming instructions in the installation guide. For example, when you visitors are done with their stay, you can delete their user code and be confident they won’t be popping in while you’re not home.
See the Programming Your BE365 Keypad Deadbolt Video for a programming walk through.
I found the programming instructions easy to follow and it takes only a minute to program a new user code. The keypad is user friendly and illuminates to indicate the function mode while programming:
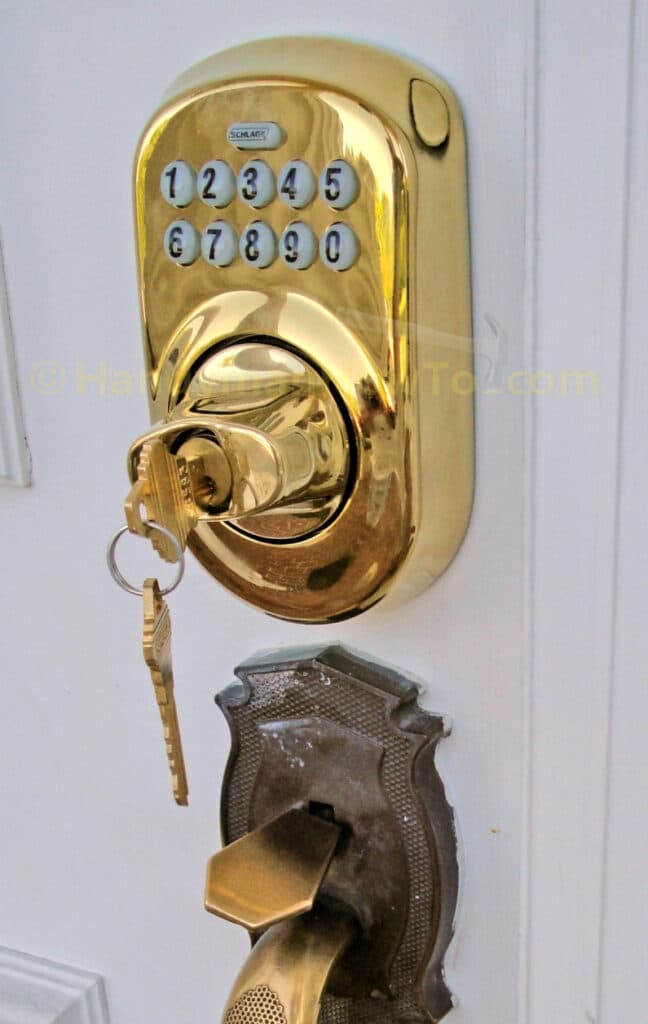
Manual Key Override
The deadbolt includes two keys that can be used for manual operation even if the battery is dead.
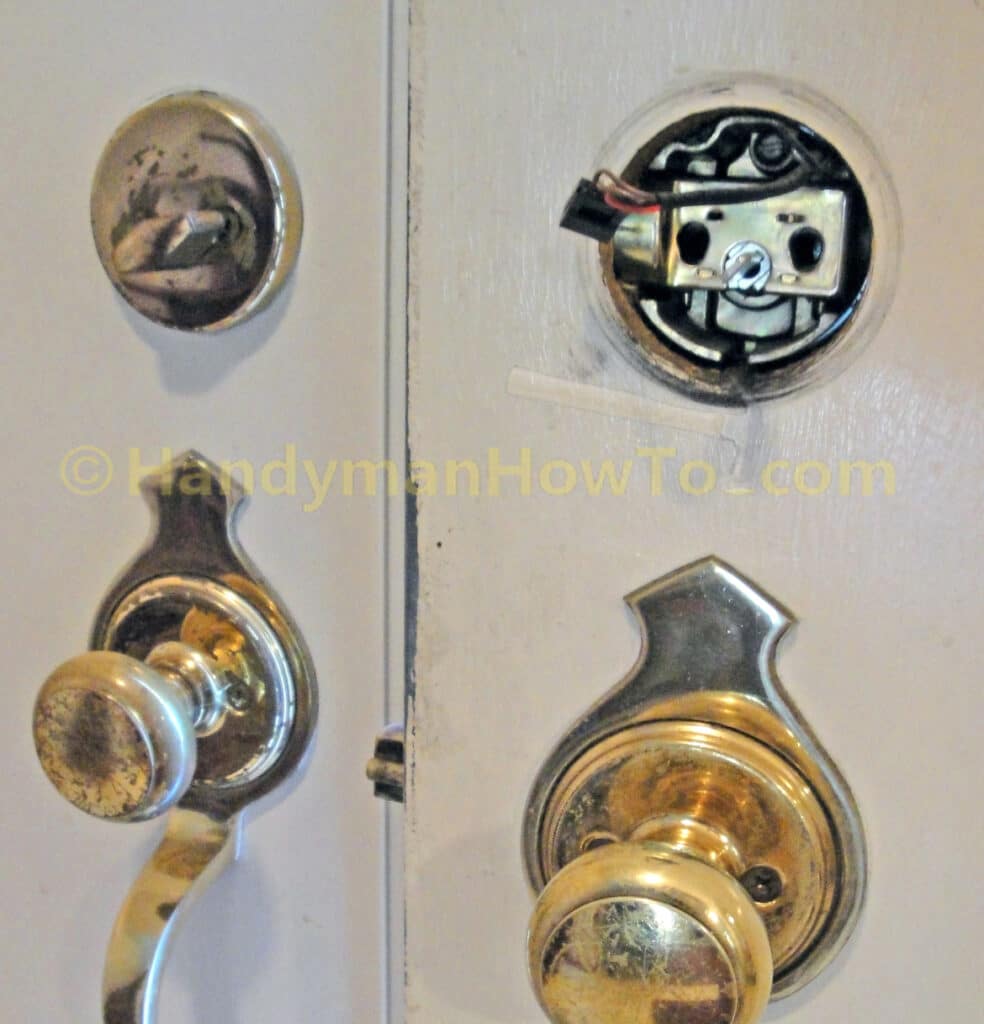
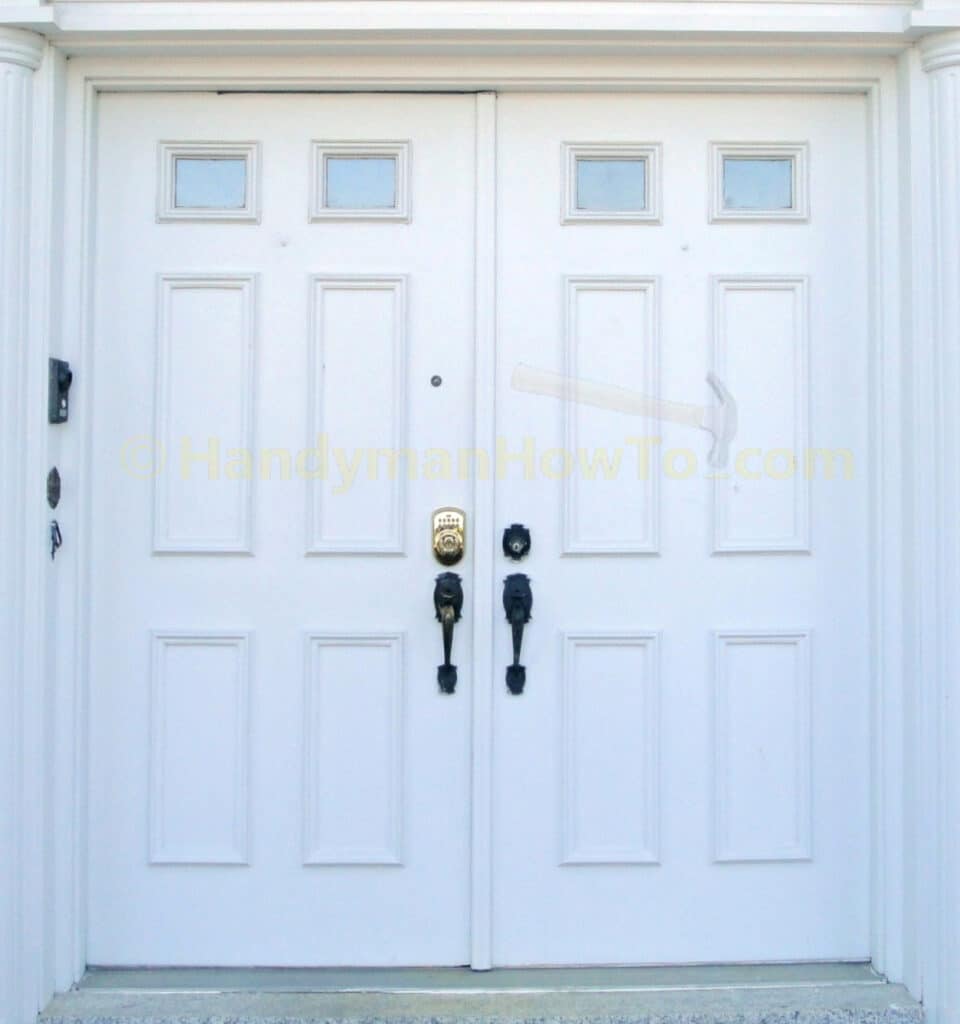
Schlage Keypad Deadbolt – Finished Install
The new Schlage keypad deadbolt looks nice. Now I’m off to buy brass polish to clean 30 years of tarnish off the original brass lockset.
My relatives say they are very pleased with the new deadbolt and the convenience of not carrying a key.
Take care,
Bob Jackson