How to Install a Kitchen Instant Hot Water Dispenser, Faucet and Water Filter: Replace the old hot and cold water supply valves with new 1/4 turn stop valves and mount the hot water faucet to the kitchen sink. This project is continued from How to Install an Instant Hot Water Dispenser, Faucet and Water Filter – Part 1.
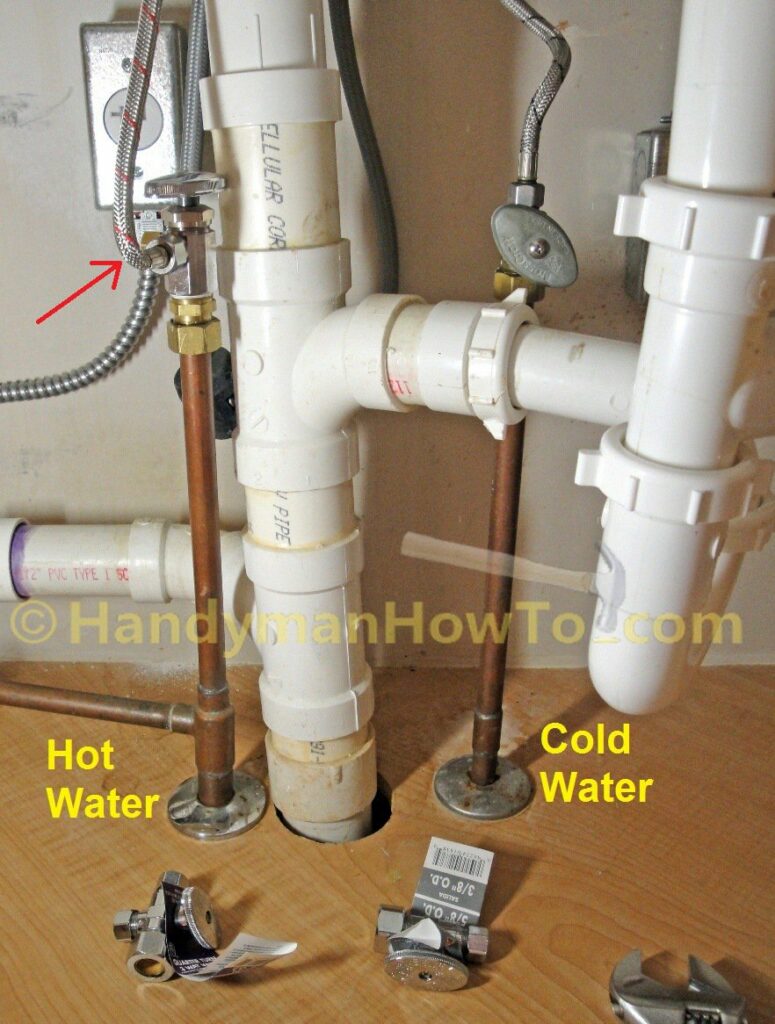
My next task is to replace the old hot and cold water supply stop valves with new 1/4 turn units. Notice how the kitchen hot water faucet hookup hose is somewhat pinched at a 90 degree angle at the red arrow. There’s a better way to do this with straight 3-way valve.
Replace the Kitchen Sink Water Stop Valves
Before proceeding, it is critical to turn off the water for the entire house. This can be done either at the water meter or at the service entrance water valve in the basement or crawlspace. Open the faucets in the upstairs sinks and at a location lower in elevation than the kitchen sink – perhaps at an outdoor water hose bib or basement bathroom – to relieve the pressure and drain the water from the pipes. Otherwise, you’ll have gallons of water gushing out when the stop valves are removed!
The stop valve is removed in the usual way and the 1/2 inch copper pipe cleaned with a pipe brush in preparation for installing the new 1/4 turn stops. Notice the 1/4 inch cap nut that I installed on the old 3-way stop valve when I disconnected the old hot water dispenser (yellow arrow).
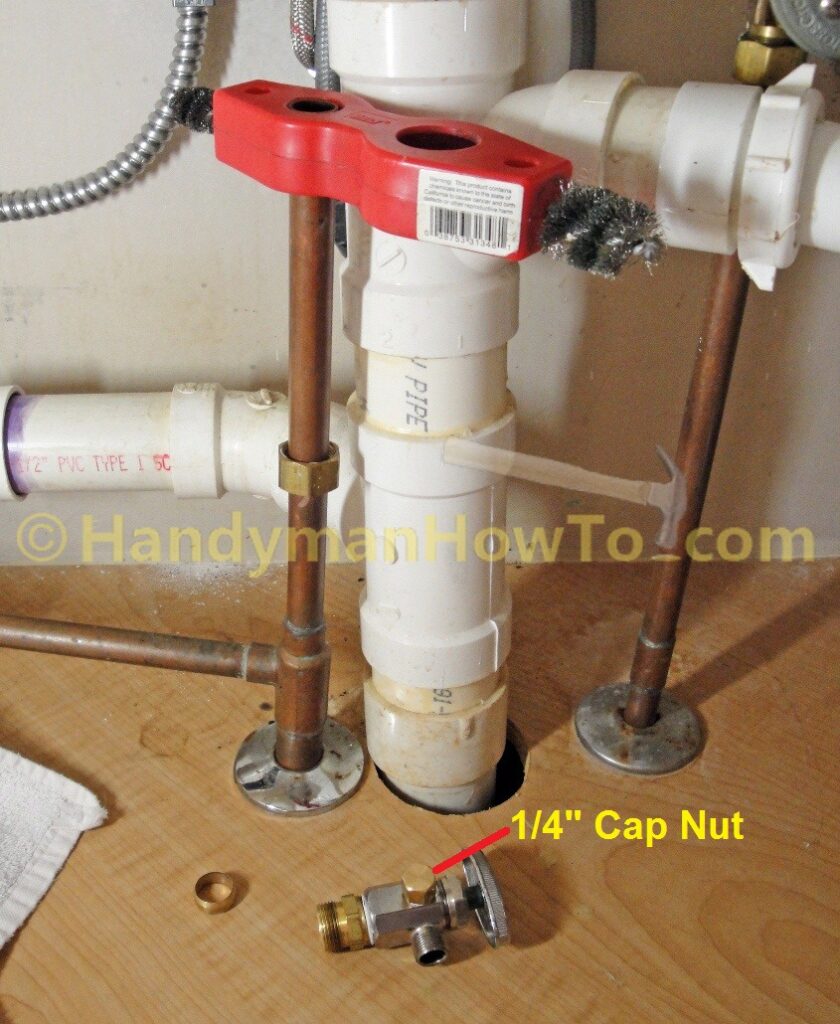
The old 3-way multi-turn stop valve has been removed and the pipe is ready to install the new 3-way 1/4 turn stop valve:
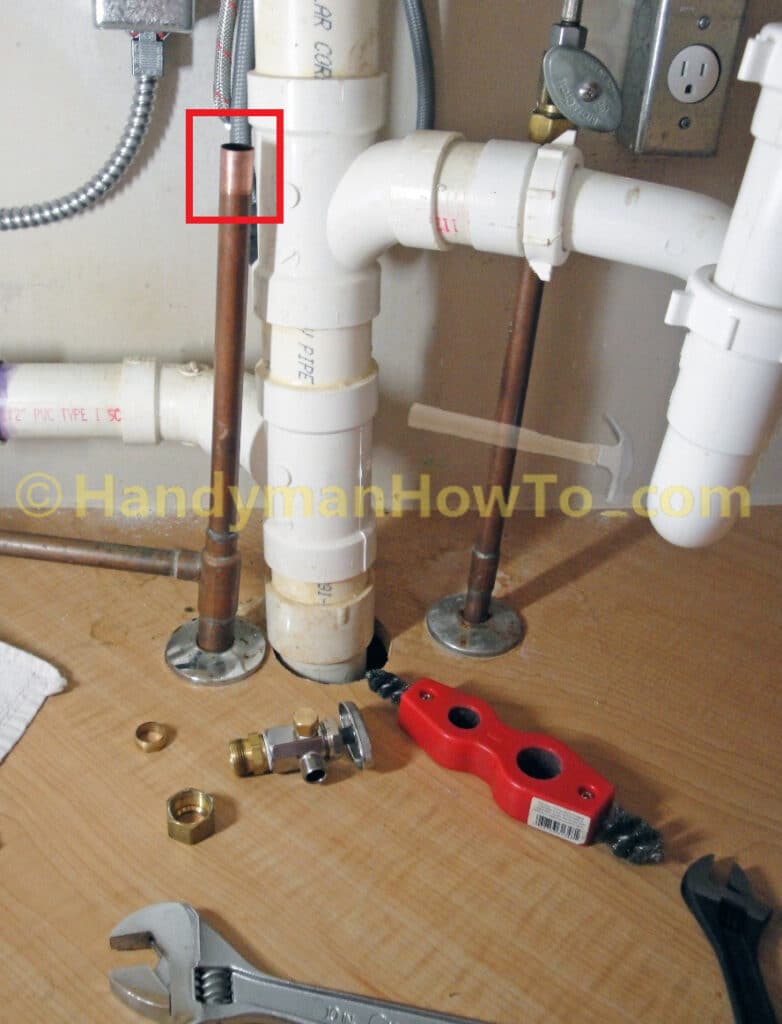
Uh oh! It hit me! The previous homeowner had incorrectly connected old instant hot water dispenser to the house hot water supply and I was about to make the same mistake! The new Keeney Mfg. Co. Quarter Turn 3-Way Stop Valve must be mounted to the house cold water supply. I quickly remedied this by swapping the two stop valves. Please see the plumbing diagram for the Keeney Mfg. Co. stop valve sizes and part numbers. Remember – the water to entire house is still off.
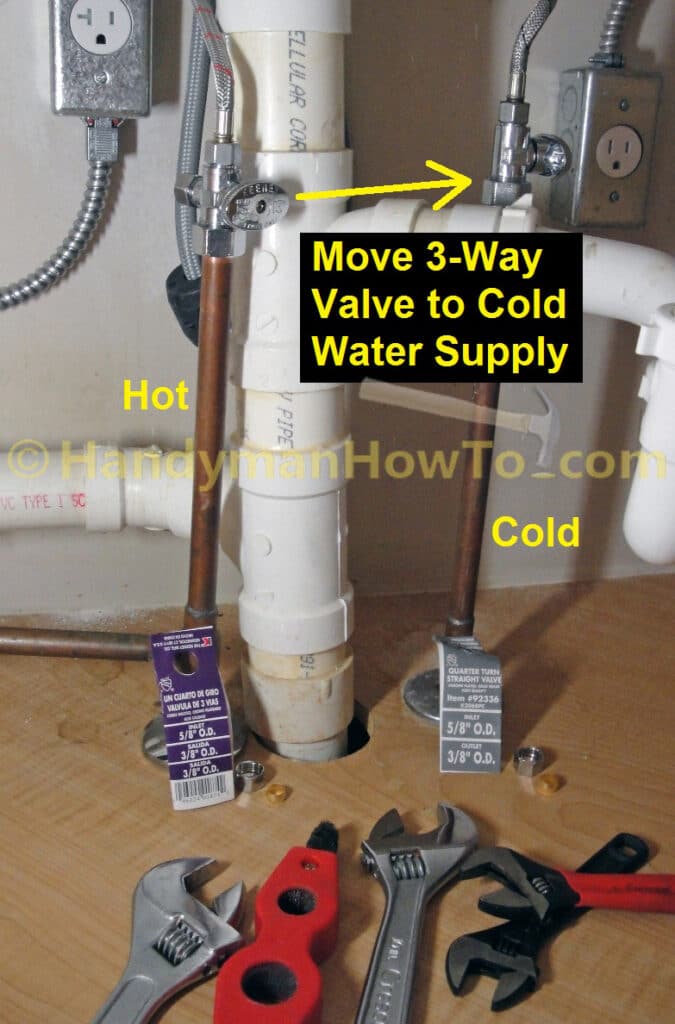
In the above photo, notice how the hot and cold water faucet hookup hoses are now connected to the top of the shutoff valves – with no kinks or tight turns.
Westbrass Velosah D271 Hot Water Faucet Installation
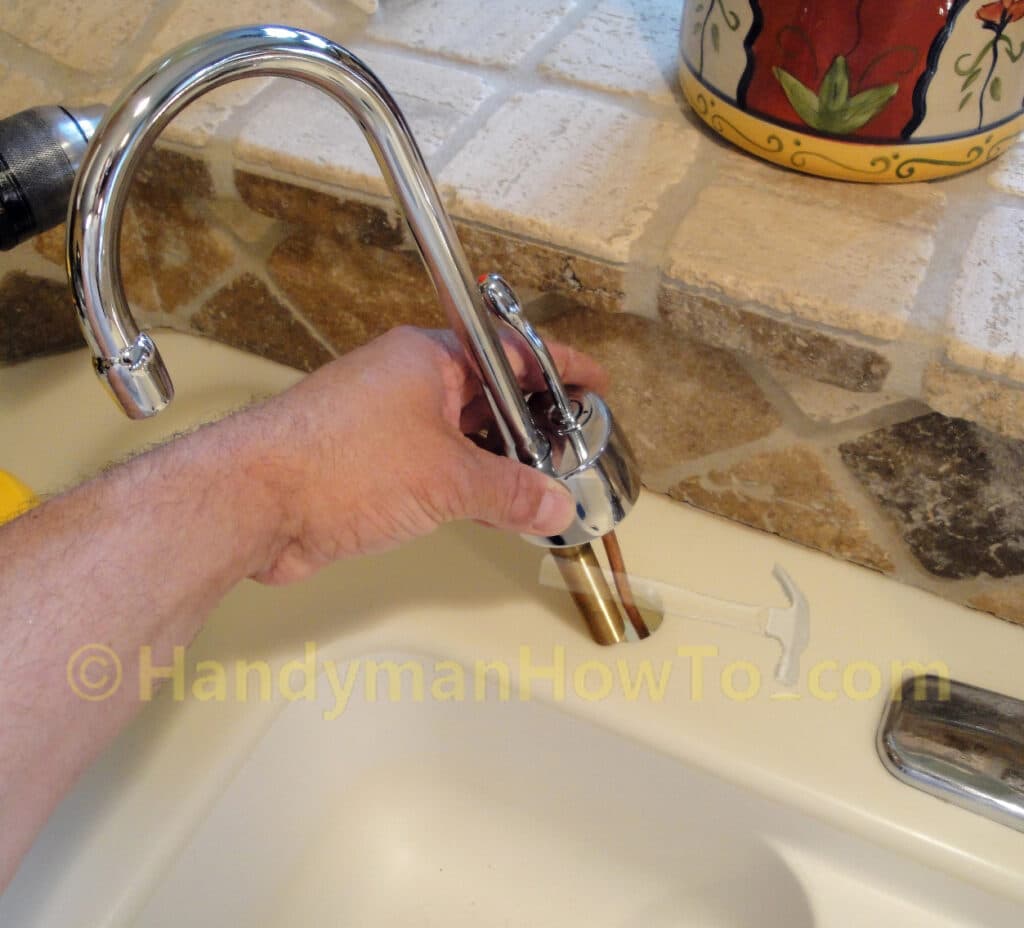
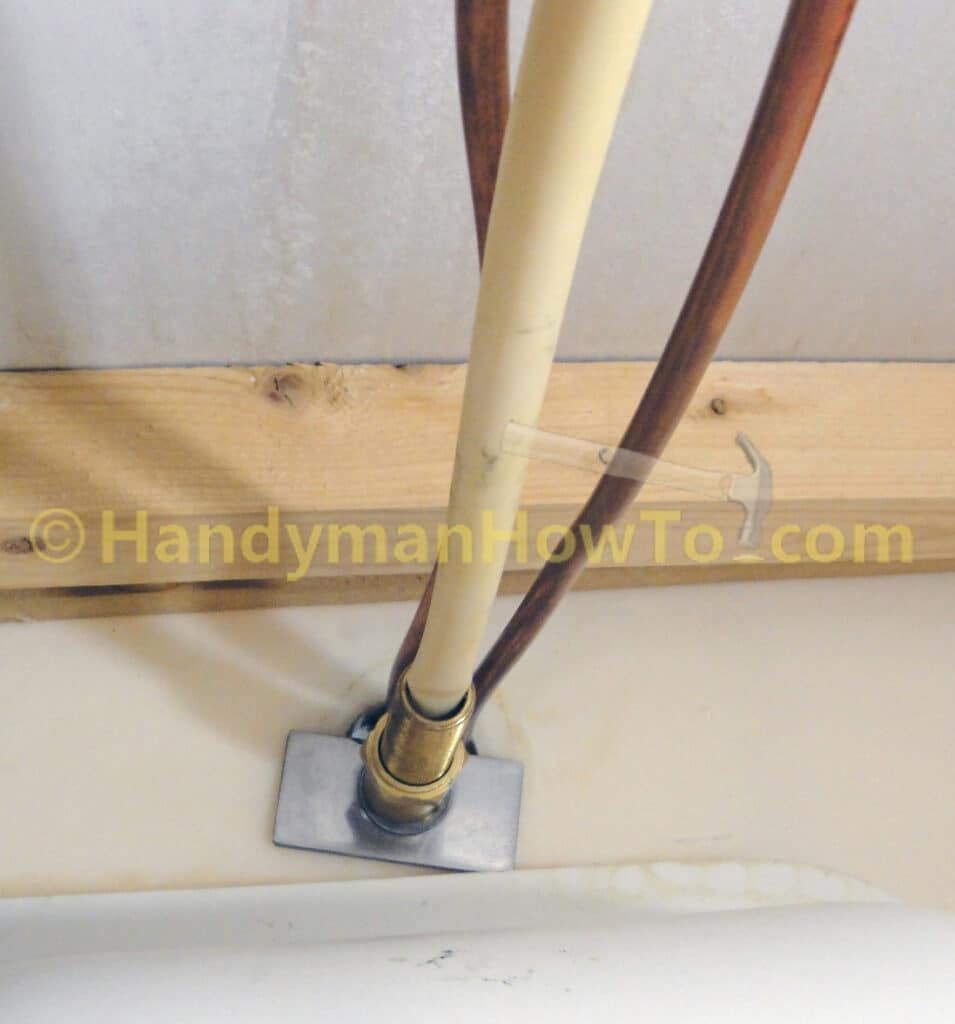
The Westbrass Velosah model D271 instant hot water faucet is installed on the sink next. The two 1/4 inch copper tubes are gently straightened to fit in the sink mounting hole.
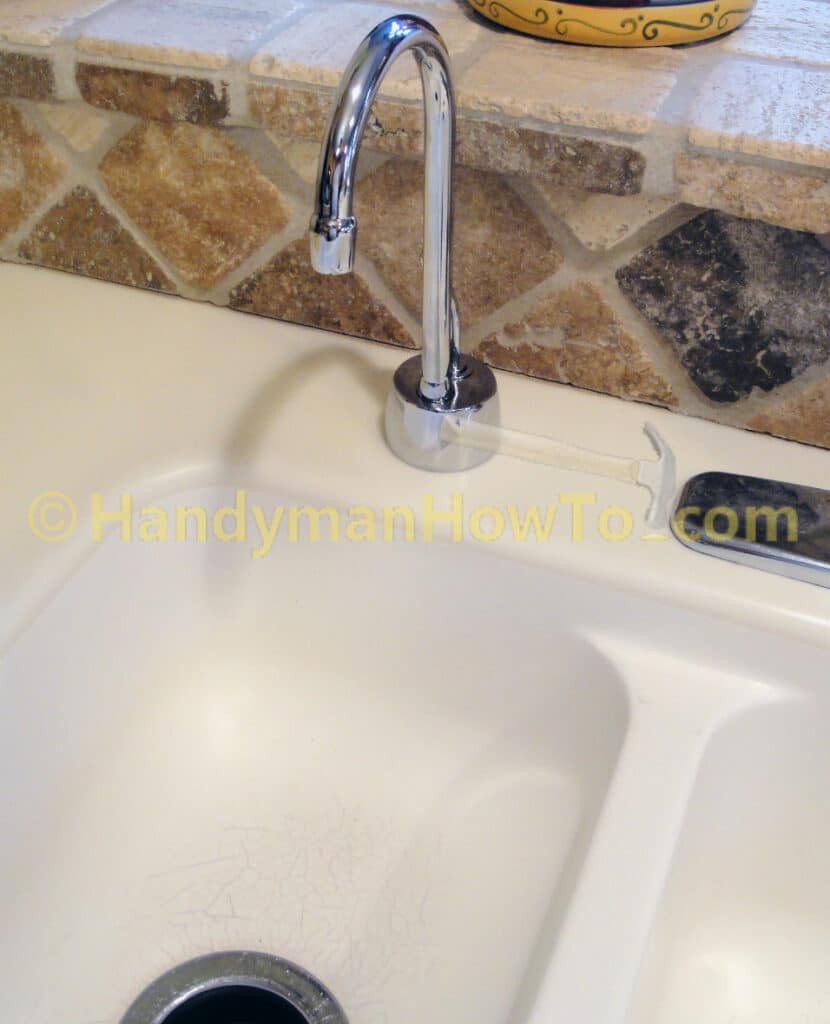
Insert the instant hot water faucet into the kitchen sink mounting hole:
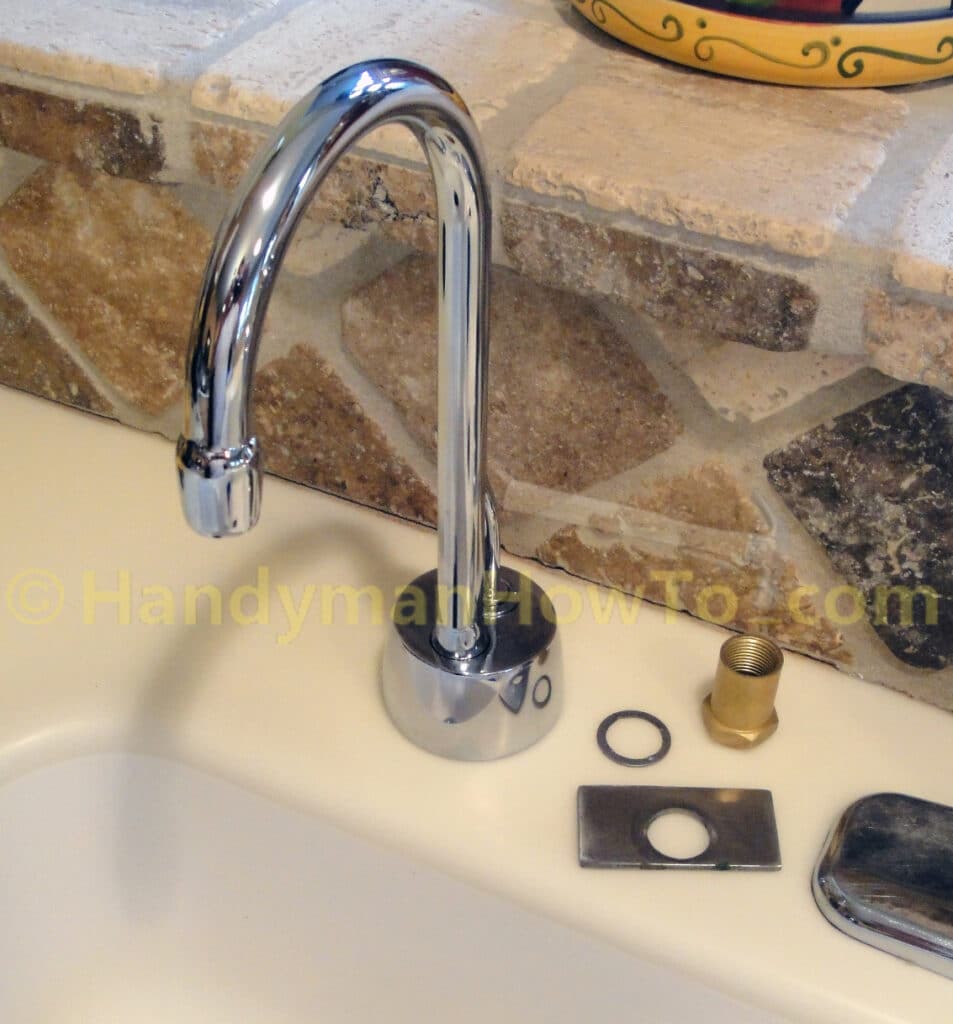
The Velosah hot water faucet mounting hardware consists of a rectangular mounting plate, washer and brass nut.
Check the faucet for alignment with the sink and have a helper hold the faucet while the brass nut is tightened. Notice how the white Santoprene hot water tube is routed through the brass mounting nut.
Note that the faucet goose neck is fixed in place and does not swivel side-to-side.
This project is continued in How to Install an Instant Hot Water Dispenser, Faucet and Water Filter – Part 3.
Take care,
Bob Jackson