This project shows how to make a drywall access panel out of plywood large enough to step through to gain access to the narrow cavity behind the wall to run electrical wiring and insulate the closet.
The drywall access panel is one of several home improvements I’ve made to this bedroom over the garage. You can read about those projects here and here.
Drywall Access Panel Options
There are many pre-fabricated access panels on the market in a variety of styles and sizes. I’ve used these on occasion and they work well. A simple grill can work too. The type of access panel depends on the application requirements:
- Size – small enough to get a hand inside? Or large enough to crawl or walk through?
- Appearance – flush mount or surface mount?
- Frequency of access – one time for a repair or installation; or routinely such as a storage closet
- Ventilation – is air circulation needed? Or must it be sealed to prevent drafts?
- Sound Proofing – can be important to minimize noises from other rooms or plumbing.
Commercial Access Panels and Kits are readily available, including:
Bauco Access Panels – by Access Panel Solutions, Inc. (APS). High quality, low-visibility and easy to install access panels for residential and commercial applications. The preferred choice when appearances, fire resistance, air seal to prevent drafts and noise reduction are important. APS sells direct to home-owners and will custom manufacture panels in any size.
MagnaPanel – Hardware-only mounting system which requires fabrication of the access panel frame and door. These are popular for tiled walls and bath access panels. The MagnaPanel system is really nice for creating a flush-mounted hidden access panel in just about any size that’s held in place with magnets. You can see a demo of the MagnaPanel system at most tile supply stores.
PlumBest – Inexpensive plastic snap-in access panels sold by Home Depot in the plumbing supply section. Available in sizes from 6×9 inches to 14×27 inches. Best used for infrequent access and where appearances and air seal against drafts aren’t as important.
Plywood – a humble option that suited my project needs because: appearance isn’t important at the back of the closet hidden by clothes; surface mount is OK; this is intended for one-time access; plywood is stronger than the surrounding drywall; low cost and it was readily available.
How to Make a Drywall Access Panel
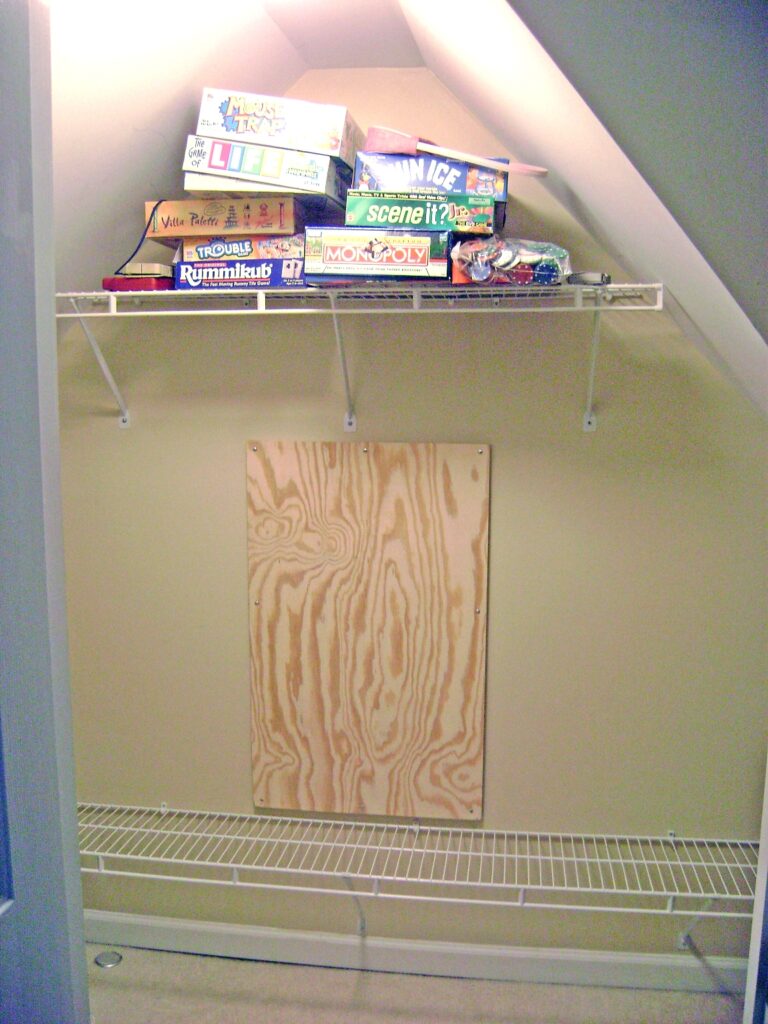
The bedroom closet is at the gable end of the house over the garage. The triangular shape is due to the slope of the roof. I needed to get behind the wall the at the back of the closet to install a electrical wiring for a floodlight. The access panel will be located in the center of the back wall.

Attic Crawl Space
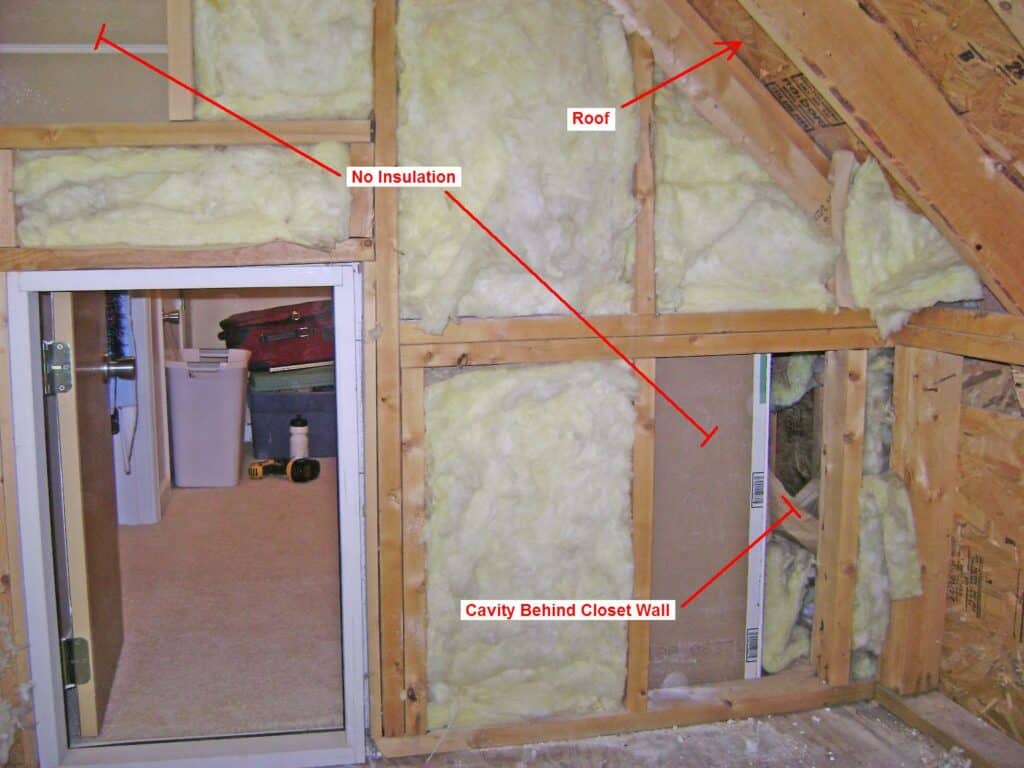
This is a view of the bedroom closet from the adjacent attic crawl space. The attic is accessed by the small door on the left. I noticed a couple things here:
- Insulation was missing (or more correctly never installed) in two places.
- There is a ~15 inch wide cavity between the closet and exterior walls.
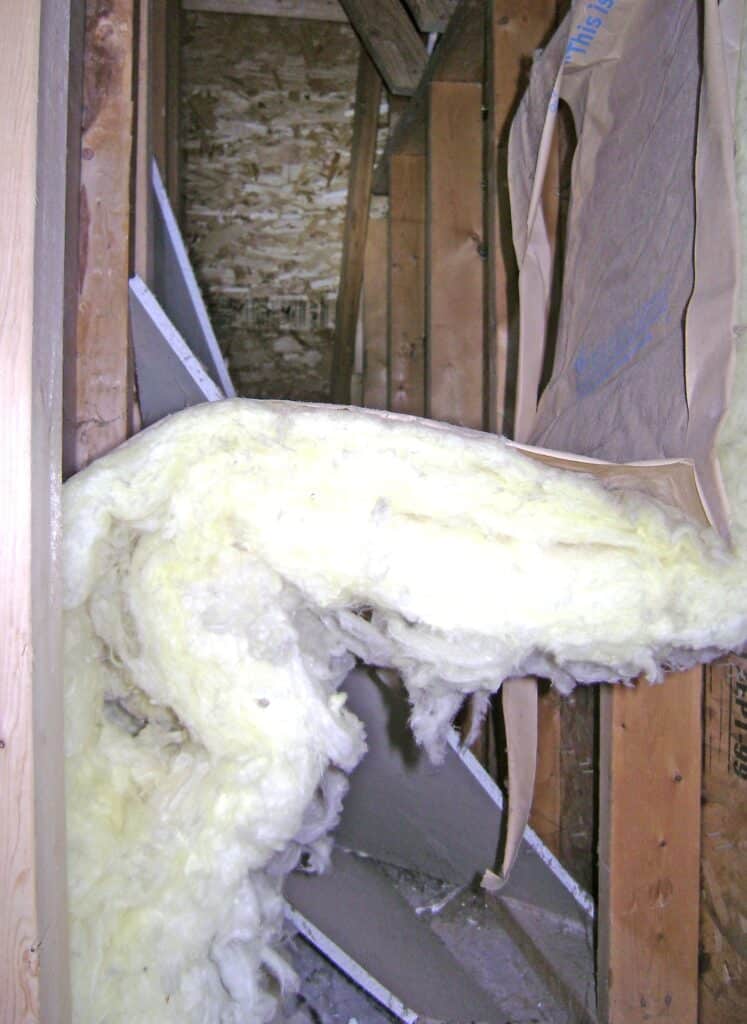
Peering into the cavity (see photo below) between the closet wall (left side) and exterior wall (right side) with a flashlight, I saw the back of the closet wasn’t insulated! Another shortcut by the contractor who built the house. No wonder the closet is hot in the summer and cold in the winter!
A single bat of fiberglass insulation has fallen, however the remainder of the left wall is uninsulated – an error by the lazy contractor. The single bat of insulation was probably put there so the building inspector would think the area was insulated when viewed from the attic crawl space.
Sections of drywall from when the closet was built are left where they fell when the larger sheets were cut to size; again a lazy job by the contractor.
The reason for the wall cavity is to provide ventilation from the gable vent (not visible in this photo) through to the main attic.
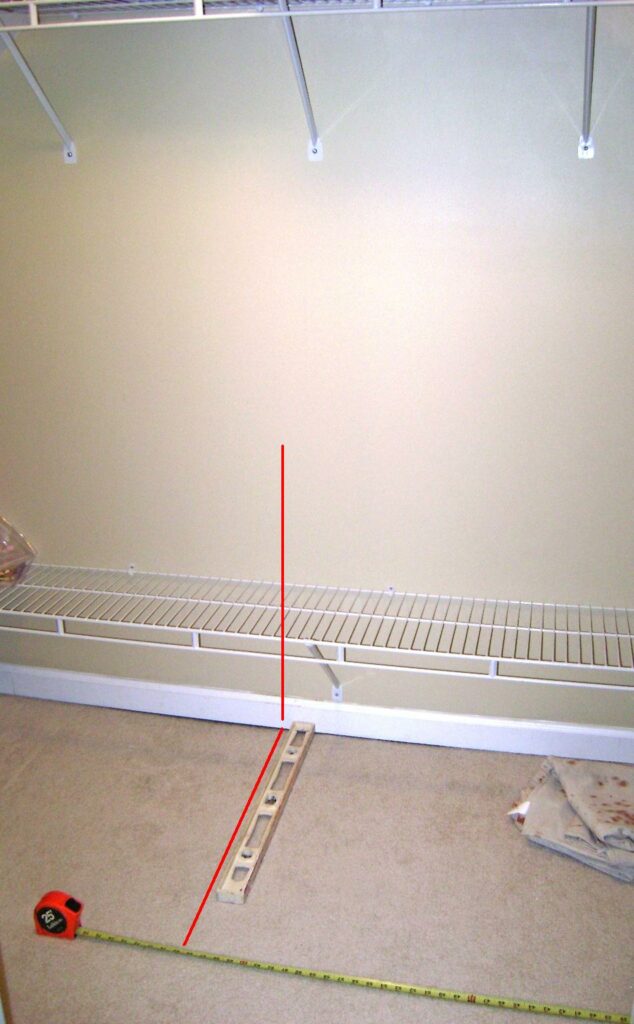
Measure for the Drywall Access Panel
To locate where the hole will be cut for the access panel, I snaked a tape measure into the wall cavity to locate the distance between two wall studs near the center of the closet.
I measured the same distance inside the closet from the side wall.
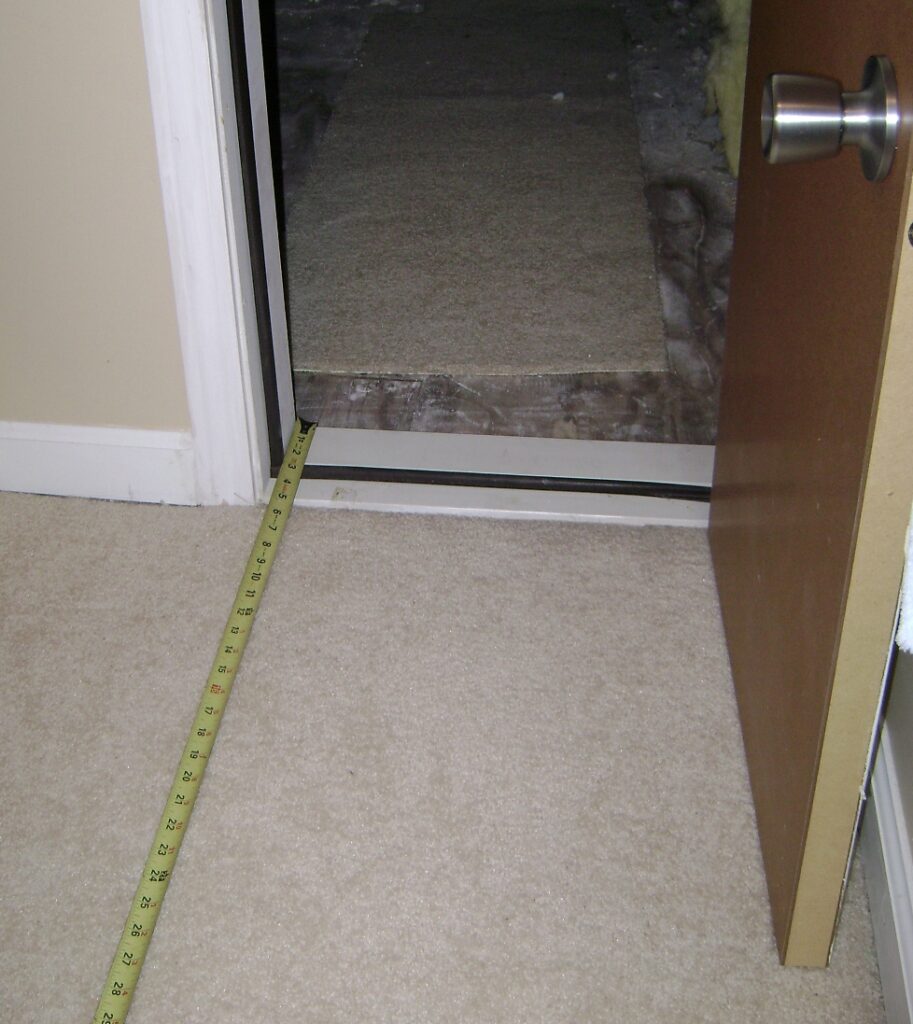
The measurement was transferred from the tape measure at roughly a right angle using a level. The red lines indicate the process of marking to the baseboard and vertically up the wall. I didn’t need a lot of precision here.
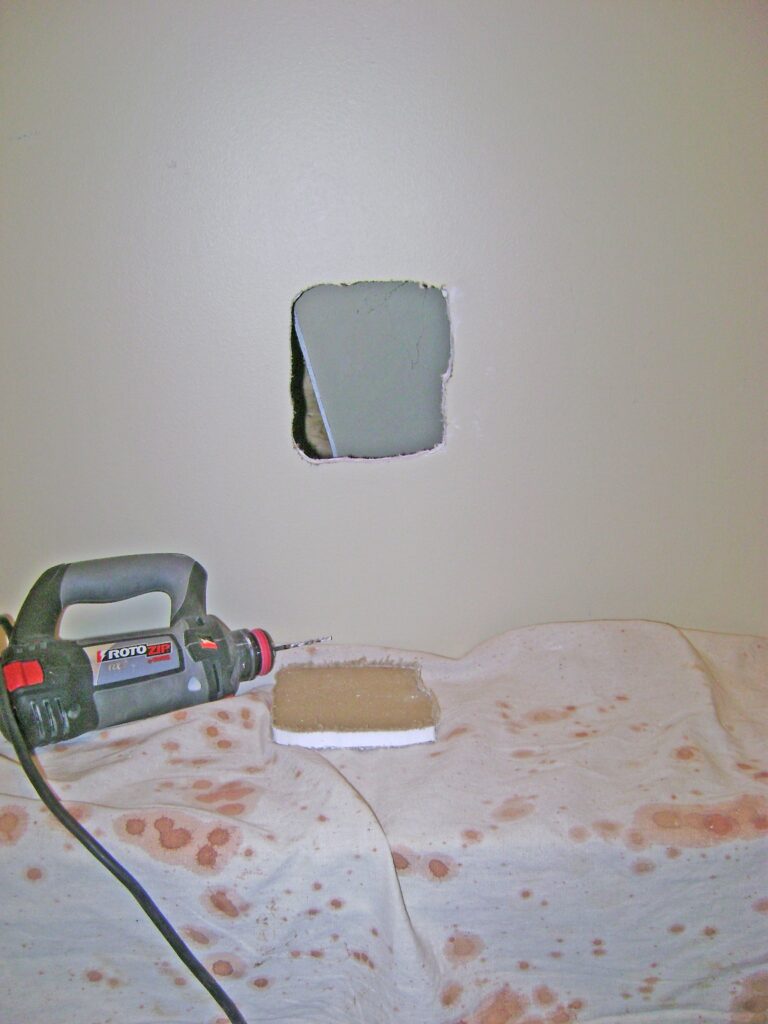
A small inspection hole was cut using a Rotozip Spiral Saw. I reached my hand inside to check for electrical wires and confirm the locations of the 2×4 wall studs. The wall studs were approximately 20 inches apart here. I decided a 33 inch high opening would be enough to step through. I marked rough dimensions for the full size width and height of the access panel opening on the closet wall. The purpose of the well stained painter’s drop cloth is protect the carpet from dust and dirt.
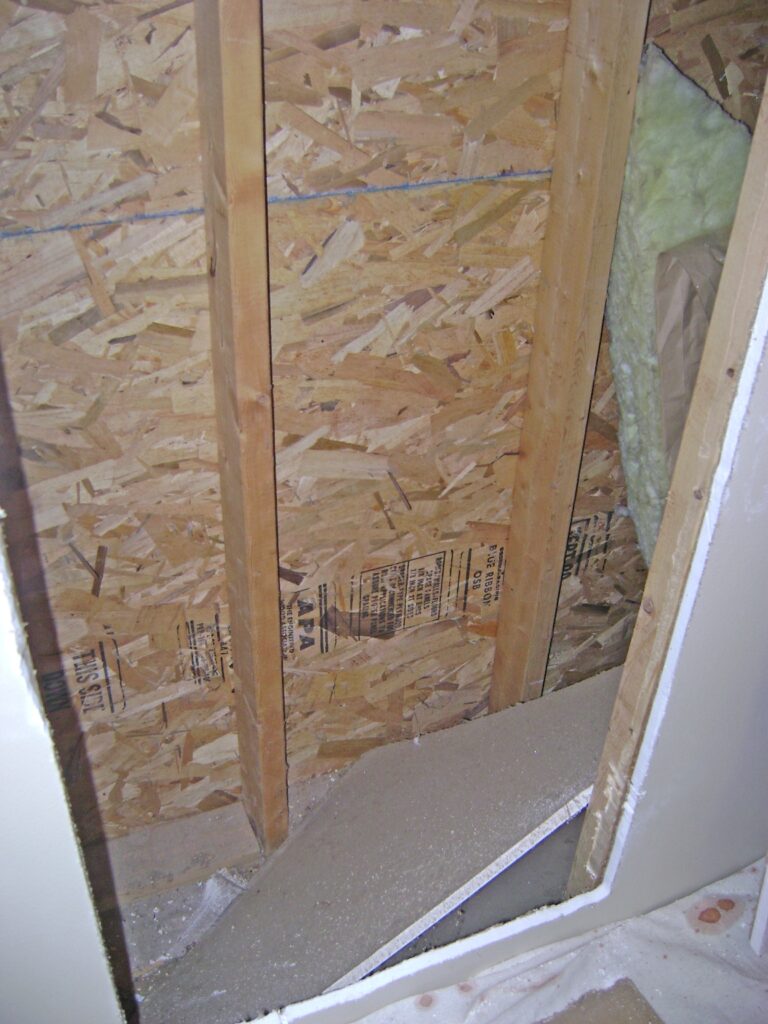
The drywall was cut to the full size opening for the access panel. The triangular section of drywall on the right is a piece taken from cavity behind the wall that was left by the builder.

View through the cut for the access panel into the cavity behind the closet. The Oriented Strand Board (OSB) sheathing is seen on here on the exterior wall.
Workspace Clean Up
The wall cavity space behind the closet was cleaned up by hauling out the left over pieces of drywall, old batts of fiberglass insulation and a good session with the shop vacuum.
This project is continued in How to Make a Drywall Access Panel – Part 2.
Take care,
Bob Jackson