This article explains how to remove an old dishwasher and install a new Frigidaire Gallery dishwasher. The old dishwasher drain PVC P-Trap was also replaced with a “P-Trap with Union & Plastic Nut” for easy plumbing disassembly and clean out should I ever need it.
This project is continued from Part 1: The dishwasher won’t drain completely.
Dishwasher Replacement Project Table of Contents
This article is part of a project series on replacing a dishwasher. The project phases are:
- Part 1 – Troubleshooting why the dishwasher won’t drain
- Check for clogs in the drain hose, sump and check valve.
- Discovered the old dishwasher is leaking on the floor.
- Decide the old dishwasher isn’t worth fixing.
- Part 2 – Disconnect and remove the old dishwasher (this article).
- Disconnect the drain hose, water supply and electrical connections.
- Water was leaking on to the solenoid drain valve, causing it to go bad.
- Part 3 – Buy a Frigidaire Gallery Dishwasher.
- New Dishwasher overview.
- Consumer Reports, SquareTrade extended warranty, Mfg Installation Instructions
- Part 4 – Install a new Water Supply Line and Dishwasher Elbow
- Part 5 – How to install a Dishwasher under the counter (main guide).
Removing the Old Dishwasher
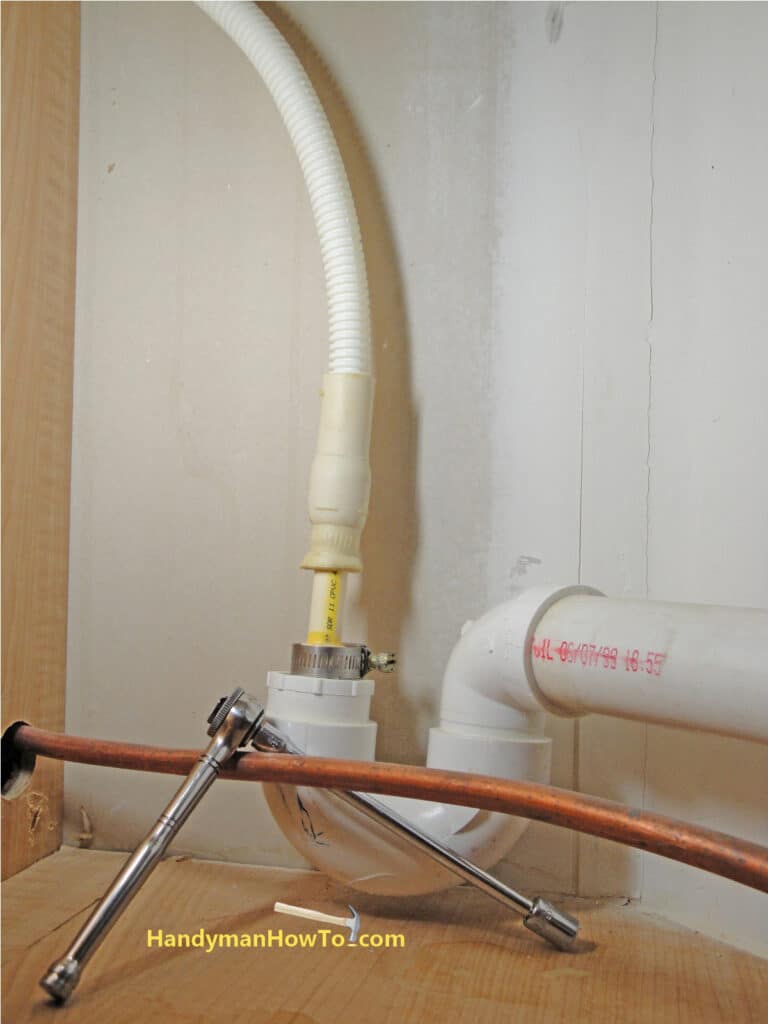
Dishwasher Plumbing Connections
Now that I’ve made the decision to replace the dishwasher, I set about the task of removing the old dishwasher. Before I begin, it’s necessary to familiarize oneself with the various plumbing connections under the kitchen sink:

The under sink plumbing connections and parts are:
- A – Flexible copper tube water supply line. Yours may be a plastic or braided steel flexible line.
- B – Water supply shutoff valve.
- C – Dishwasher drain hose.
- D – PVC P-trap.
- E – Garbage disposal.
- F – Dishwasher drain connection on garbage disposal. This has a knockout plug.
- G – Studor Mini Vent Air Admittance Valve. Required one-way plumbing vent to prevent siphoning the P-traps dry. The vent also keeps the sewer gases from entering the house.
- H – PVC drain pipe that eventually connects to the main sewer line.
- I – Kitchen sink drain (right side). The garbage disposal is under the left sink basin.
It’s common for the dishwasher drain hose (C) to be attached to the garbage disposal (F). My dishwasher sits a little too far away to reach the garbage disposal so a PVC drain pipe and P-trap was installed (D) for this purpose.
Shut off the Dishwasher Water Supply Valve
The dishwasher water supply valve is usually under the sink. Follow the dishwasher water supply line to locate the valve.
See item B in the photo above.
Shut off the Dishwasher Circuit Breaker
Very important! Unlike the refrigerator or clothes washer, dishwashers do not have an electrical cord that can be unplugged. Dishwashers are wired directly into the house electrical wiring. You must shut off the dishwasher power at the main electrical panel. The dishwasher should be on a dedicated 15 or 20 Amp circuit breaker. My circuit breaker is labeled “Dishwasher”. Move the circuit breaker switch to the Off position.
Verify the power is off by closing the dishwasher door and pressing the appropriate Start button to activate the dishwasher. All indicator lights and motors should be off.
Disconnect the Dishwasher Drain Hose
I begin the old dishwasher removal process by loosening the metal band clamp with a screw driver or socket wrench and sliding the clamp off the drain hose.
Wiggle the drain hose off the PVC drain pipe. Have a towel ready in case the hose or P-trap is clogged to catch any spills.

Dishwasher Water Supply Disconnect
If you haven’t already done so, remove the toekick access panel underneath the dishwasher door. The panel is fastened with two or four machine screws. The water and electrical connections are shown in this photo:
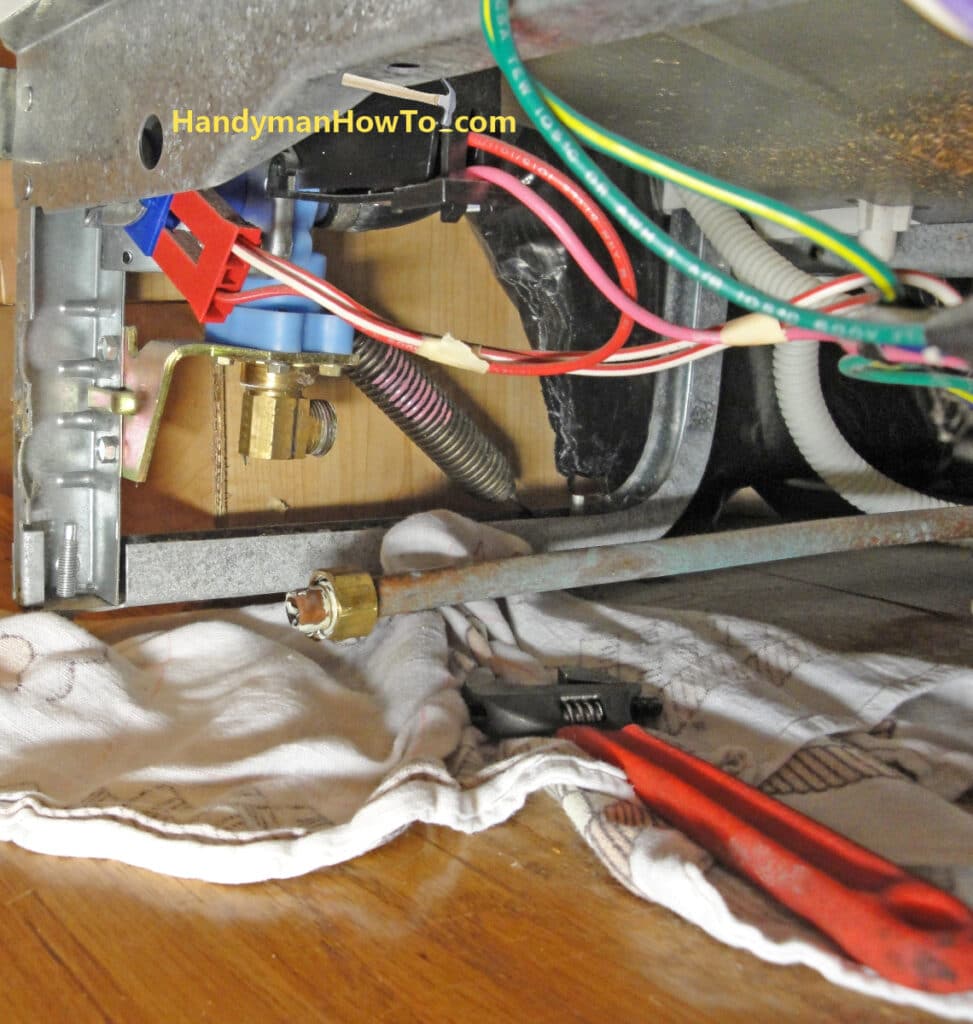
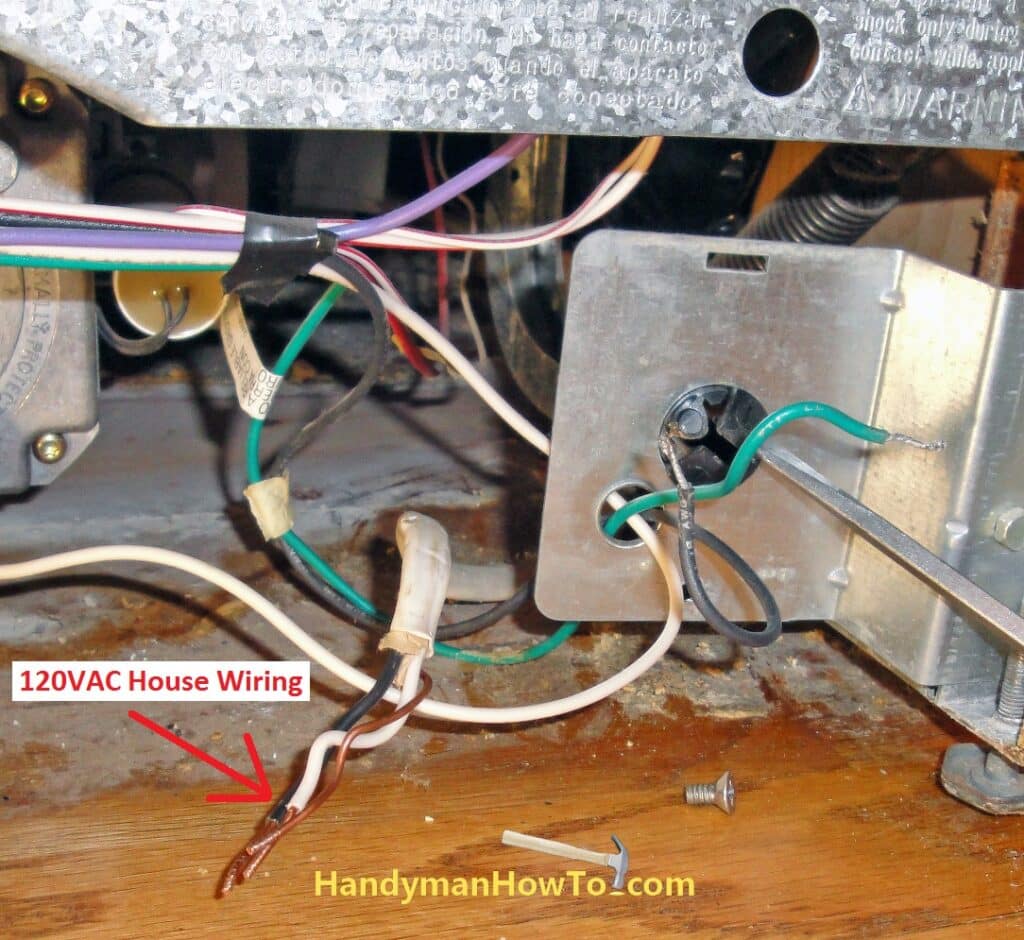
The flexible copper water supply tube is attached to the brass dishwasher elbow with a hex nut. Unscrew the nut with a small wrench. Place a towel or pan under the elbow because some water will flow out of the copper tube.
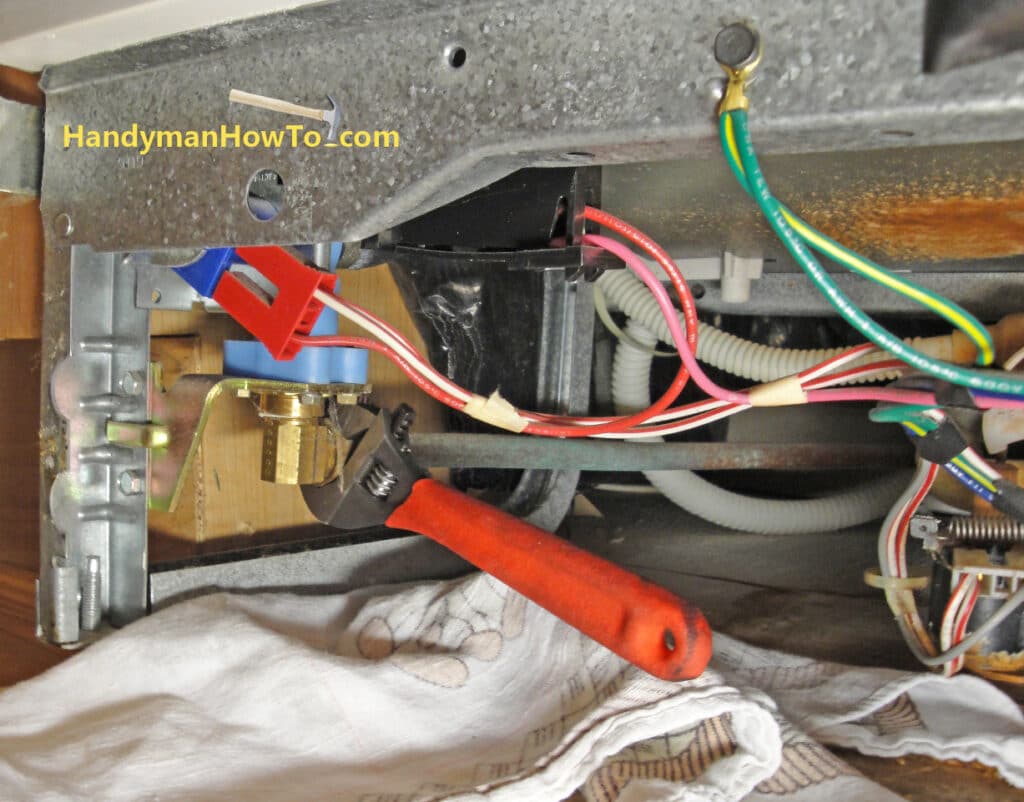
Let the water supply tube (or hose depending on your situation) lay on the floor clear of the dishwasher.
Dishwasher Electrical Disconnect
The dishwasher is wiring to the house electrical wiring at the box on the right front side as indicated by the yellow square. Remove the screw from the box cover.
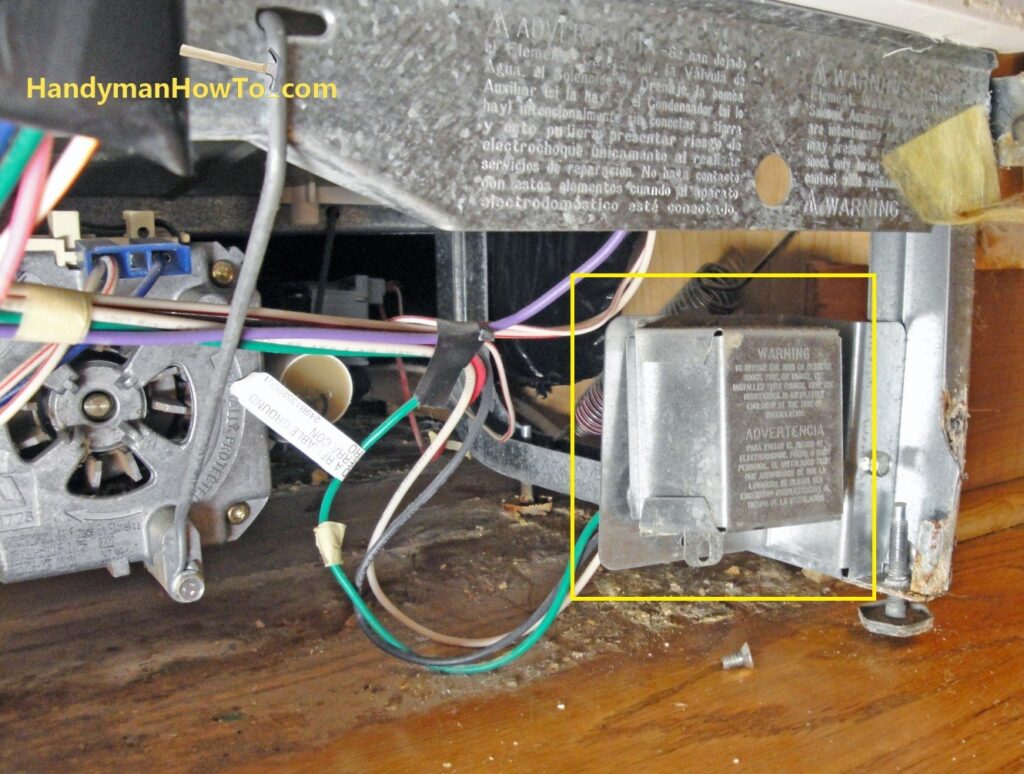
The dishwasher electrical connections are made with wire nuts. The three wiring connections are:
- Ground – green / bare copper wires.
- Neutral -white / white wires.
- Hot – black / black wires.
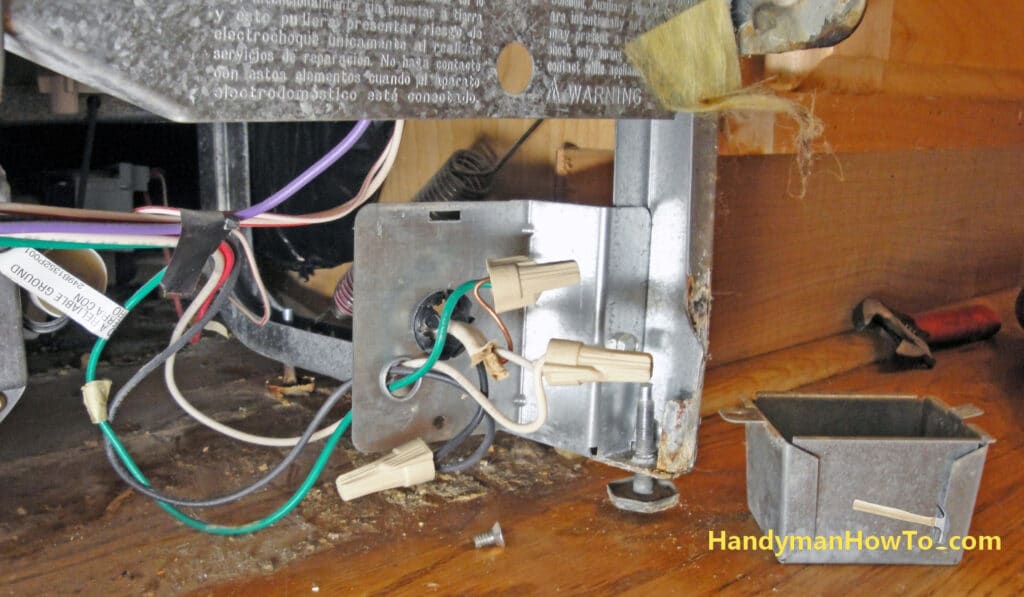
Unscrew the wire nuts to release the wires. Use an electrical tester to verify the power is truly off. As a final check before touching any bare wires with my hands, I always touch the NM 14/2 black house wire to the bare copper ground wire. Keep your face well away from the wires when you do this in case there’s a spark/flash to protect your eyes. Safety glasses are always a good idea, too.
Separate the NM 14/2 house wiring from the dishwasher wires and pull the house wires free from the box.
Dishwasher Drain Hose
Push the dishwasher drain hose back through the hole in the side of the cabinet (top left) to create a couple of feet of slack.
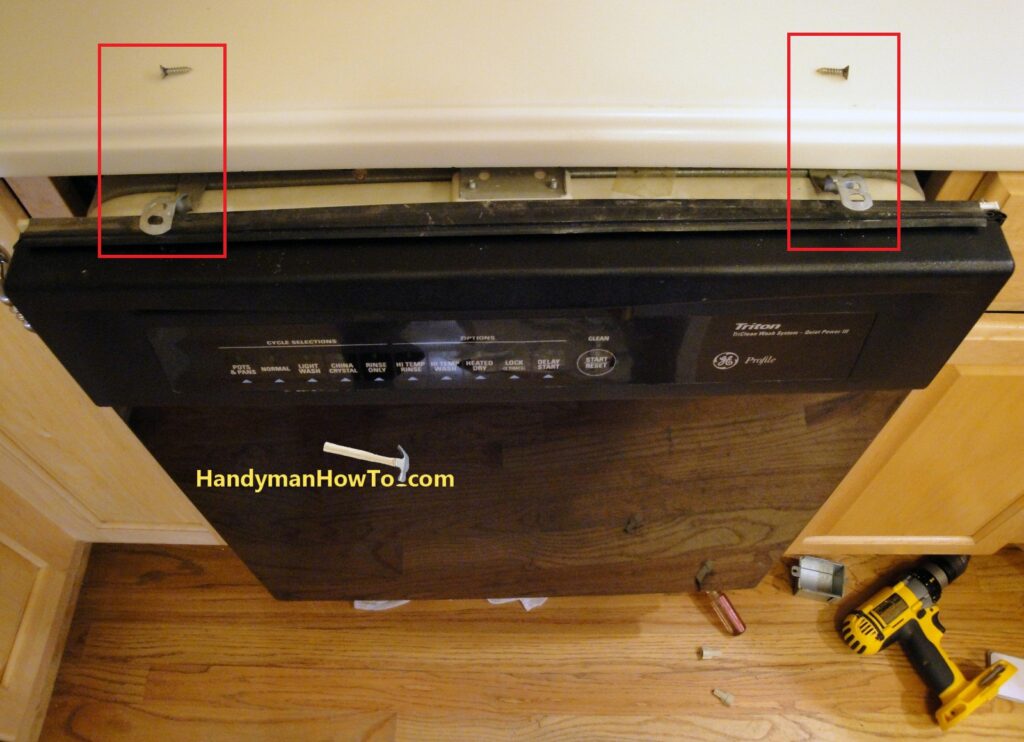
Countertop Mount Bracket
Open the dishwasher door and look underneath the counter. You’ll see two mounting brackets fastened with screws. Remove the two screws. Careful! The dishwasher will tip forward with the door open after the brackets are unfastened. It’s not heavy but it can surprise you. Close the dishwasher door.
Remove the Old Dishwasher
Place furniture pads or cardboard under the front feet of the dishwasher to protect the floor from scratches. Slowly pull the old dishwasher out from the cabinets. If you feel resistance, check that the water supply line, house electrical wire and drain tube aren’t catching on something.
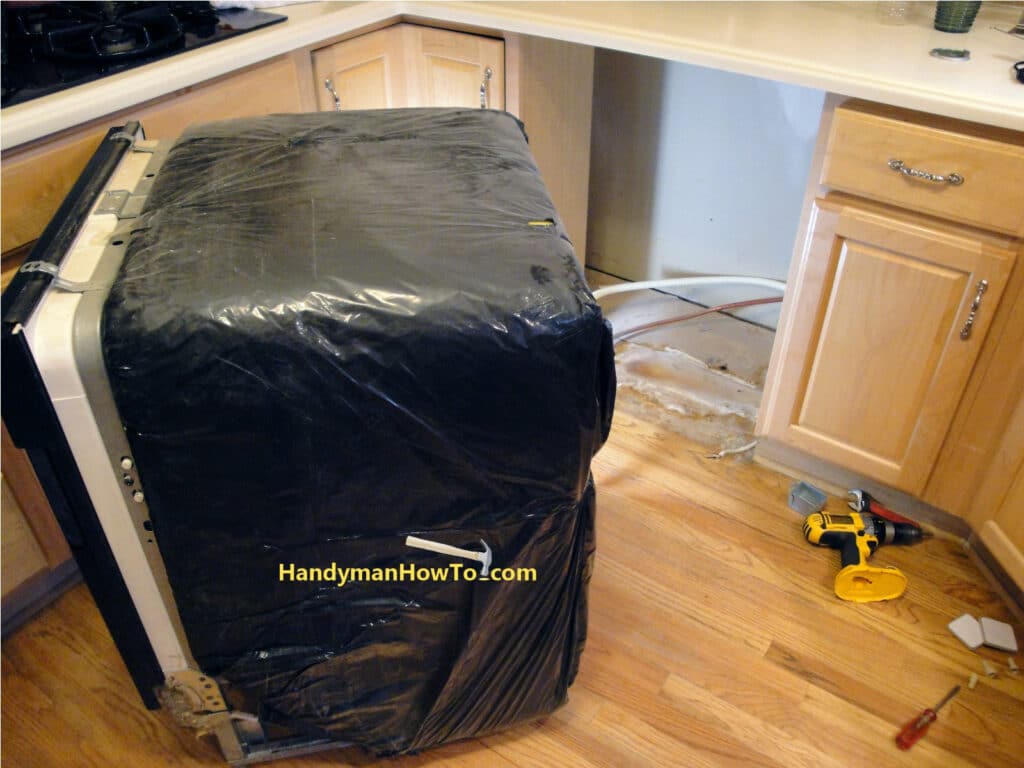
What a mess from the leaking dishwasher and dust bunnies!
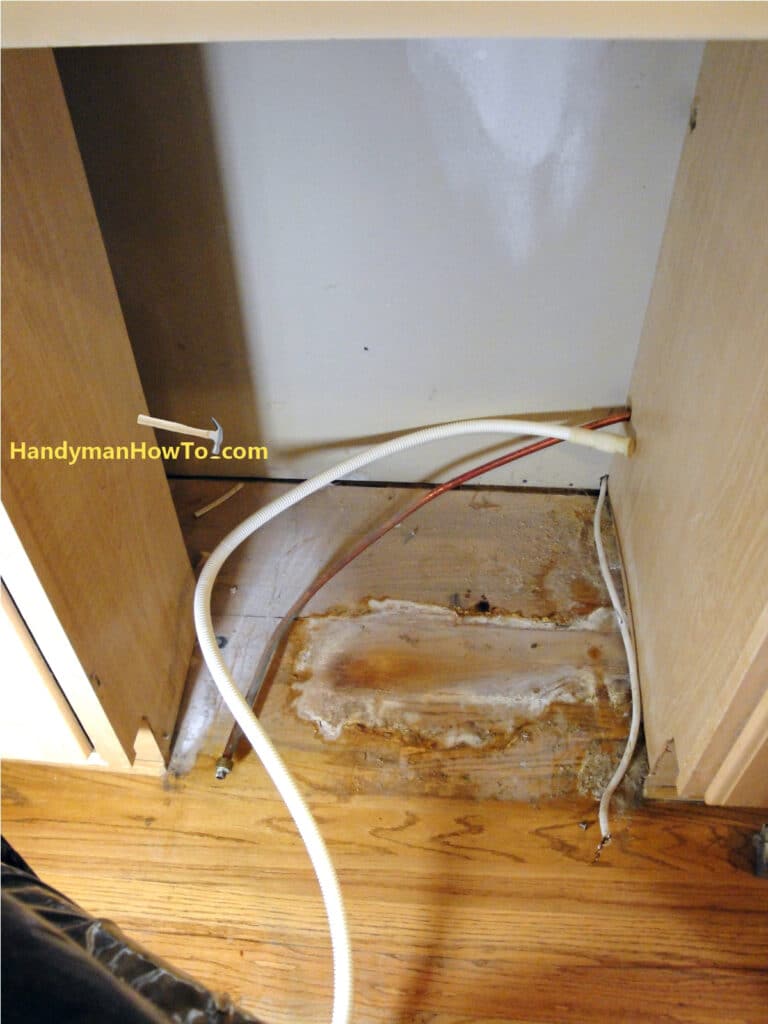
The floor cleaned up pretty well with only minor water damage to the solid oak floor planks.
GE Profile Triton Dishwasher Failure
The GE Dishwasher Drainology by Samurai Appliance Repair Man was very helpful to identify the dishwasher parts and probable causes of drain problems.
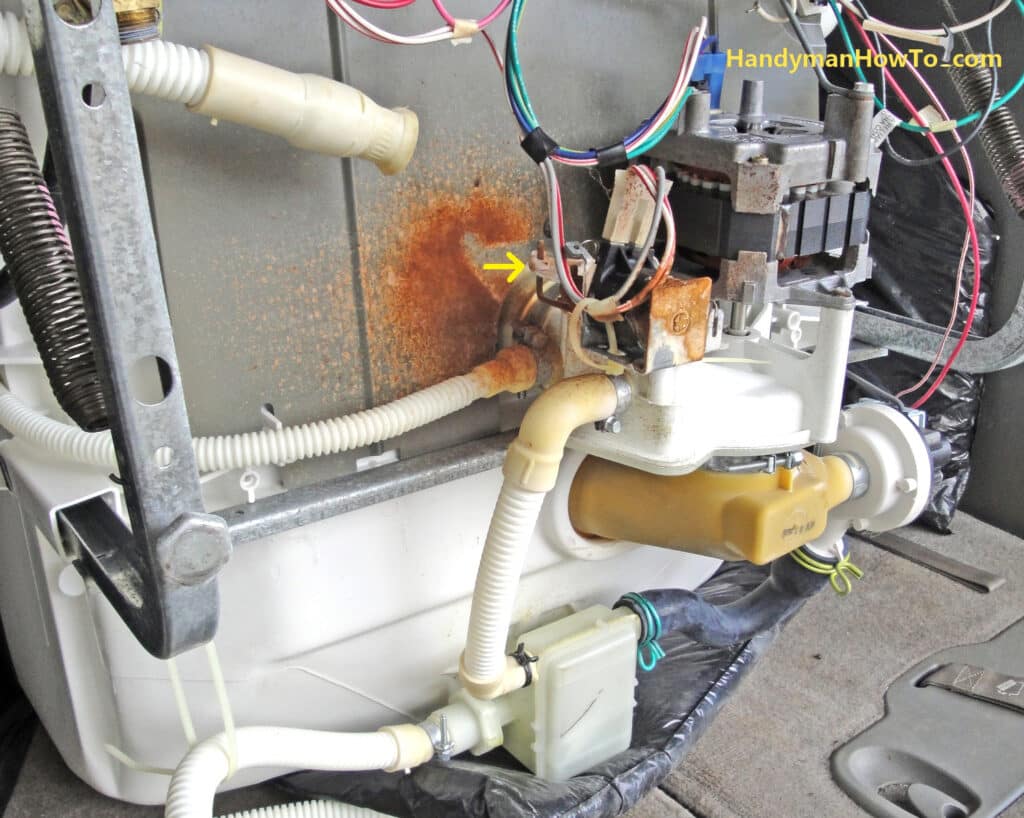
Here’s the dishwasher sitting in the back of the minivan for its trip to the recycling center. The dishwasher leaked onto the drain solenoid valve which was rusted. (A solenoid valve is an electrically operated valve.) I believe a malfunctioning drain solenoid valve was the cause of the dishwasher not draining.
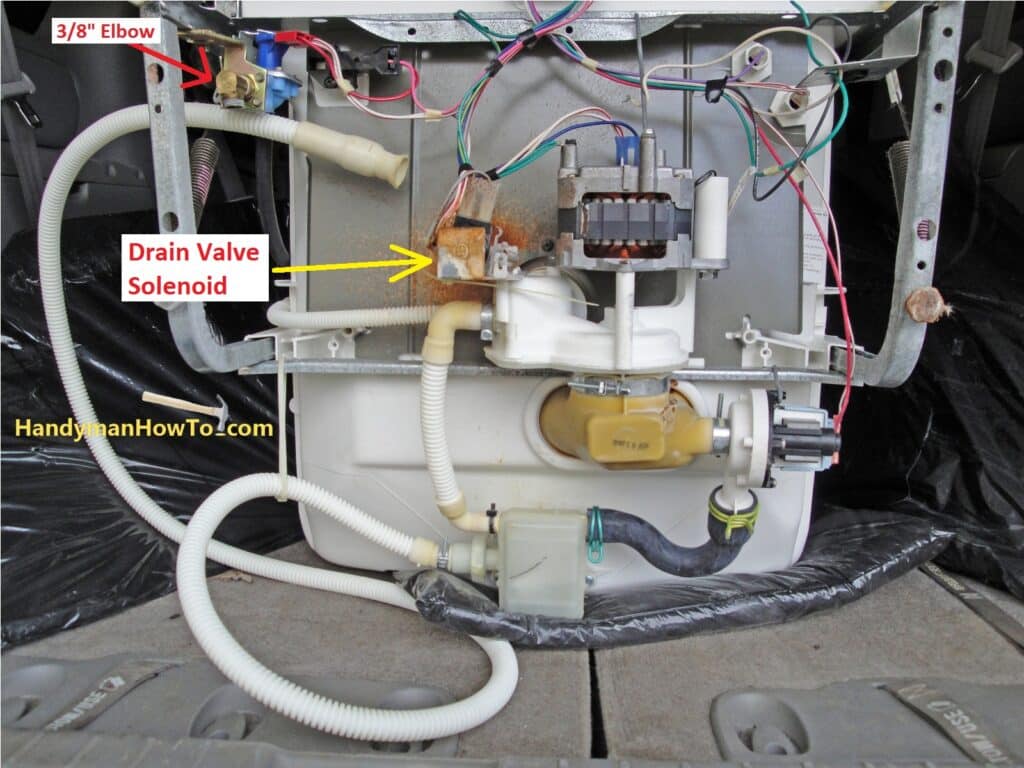
I checked the various hoses and drain flapper valve for clogs. Everything appeared to be whistle-clean.
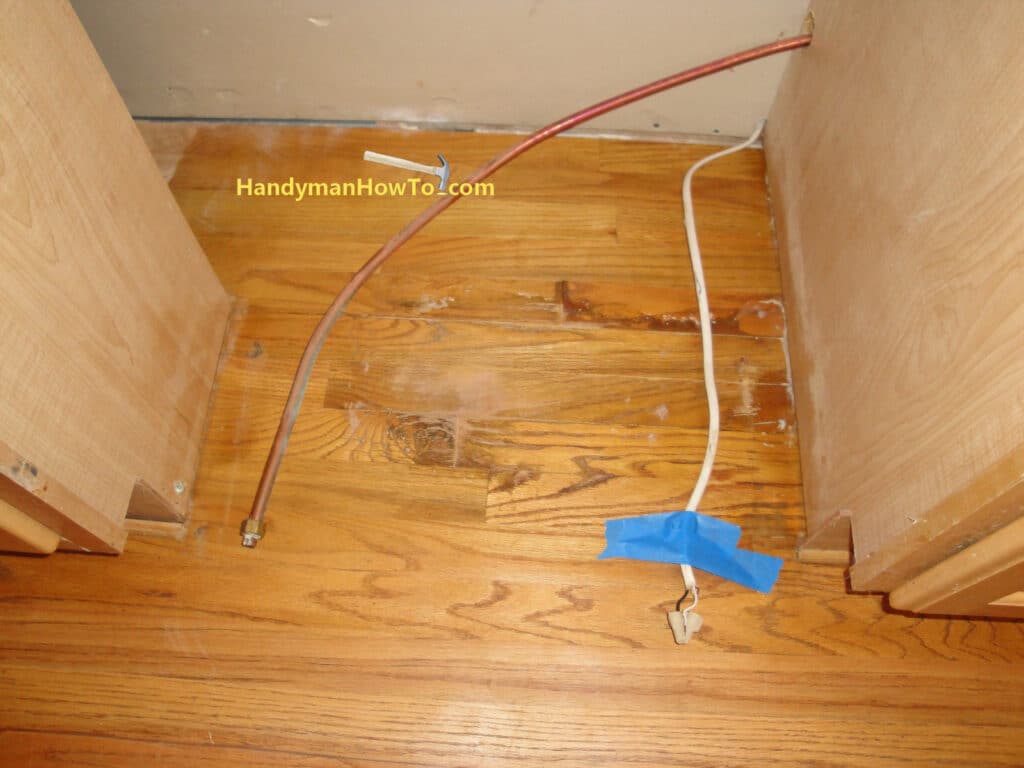
Brass Drain Elbow: You might want to remove the brass dishwasher elbow (see above) because Home Depot doesn’t sell this item separately and you may need it for your new dishwasher; especially if you plan to reuse the water supply line. New dishwashers do not come with the drain elbow.
Here’s a side view of the solenoid drain valve. The valve arm (yellow arrow) has been splashing water onto the bottom of the tub. Everything here has been getting wet and electrical parts don’t like water.
I wasn’t sure exactly where the dishwasher leak originated, but it didn’t matter since I’d written this dishwasher off and was heading out to buy the new dishwasher.
This project is continued in Part 3: Unbox and ready the new dishwasher for installing under the kitchen counter.
Hope this helps,
Bob Jackson