This article discusses how to connect the “flood safe” water supply hose and dishwasher elbow fitting. It is a continuation of the series on How to Replace a Dishwasher.
Dishwasher Replacement Project Table of Contents
This article is part of a project series on replacing a dishwasher. The project phases are:
- Part 1 – Troubleshooting why the dishwasher won’t drain
- Check for clogs in the drain hose, sump and check valve.
- Discovered the old dishwasher is leaking on the floor.
- Decide the old dishwasher isn’t worth fixing.
- Part 2 – Disconnect and remove the old dishwasher
- Disconnect the drain hose, water supply and electrical connections.
- Water was leaking on to the solenoid drain valve, causing it to go bad.
- Part 3 – Buy a Frigidaire Gallery Dishwasher.
- New Dishwasher overview.
- Consumer Reports, SquareTrade extended warranty, Mfg Installation Instructions
- Part 4 – Install a new Water Supply Line and Dishwasher Elbow (this article)
- Part 5 – How to install a Dishwasher under the counter (main guide).
Dishwasher Water Supply Hose
I elected to replace the flexible copper pipe water supply line with a Watts® FloodSafe™ Braided Stainless Steel Water Supply hose for dishwashers. I bought the 72″ (6 foot length) hose kit that includes the 3/8″-to-1/2″ brass dishwasher elbow and universal connection kit. The FloodSafe™ hose senses excessive water volume (indicating a burst connection) and closes an internal valve.
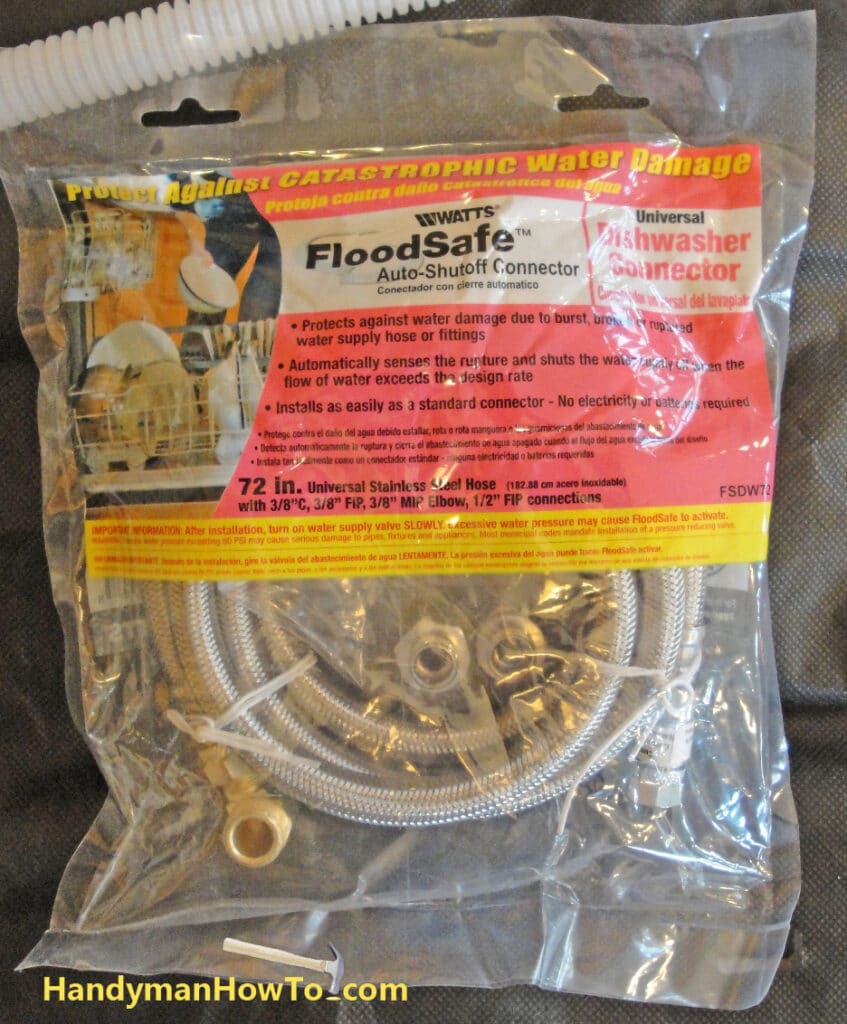
The hose cost about $25 at Home Depot.
Dishwasher Water Supply Line Replacement
Skip these water line replacement steps if you are reusing your existing water supply line and resume reading at the Dishwasher Elbow Installation.
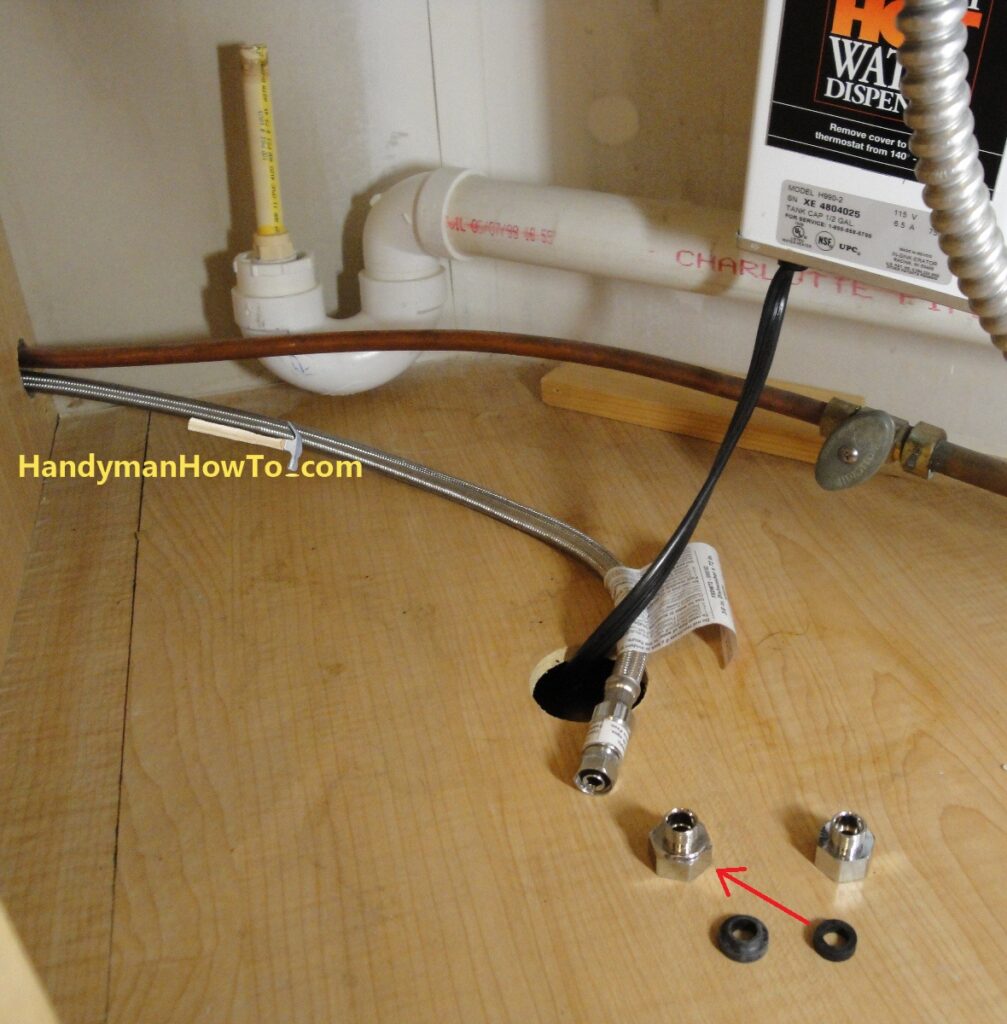
I began by snaking the Watts Floodsafe dishwasher connector hose behind the cabinets and under the sink. The Floodsafe universal connector kit included two fittings and washers. The flat rubber washer fits the larger of the two hex nuts as indicated by the red arrow.
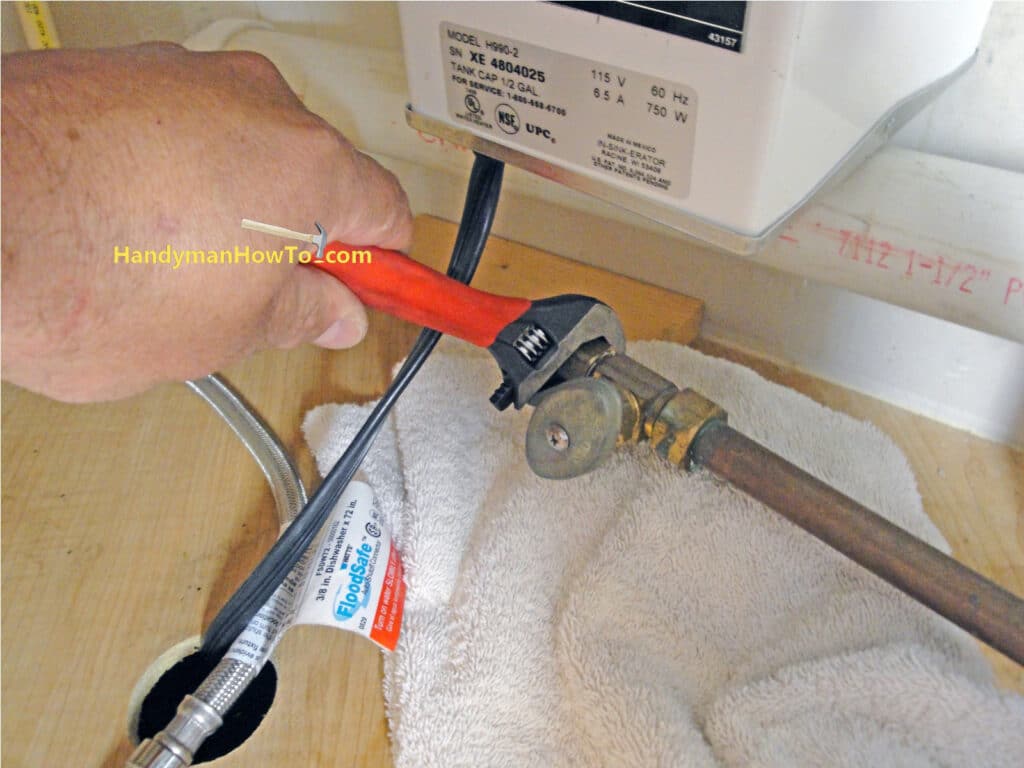
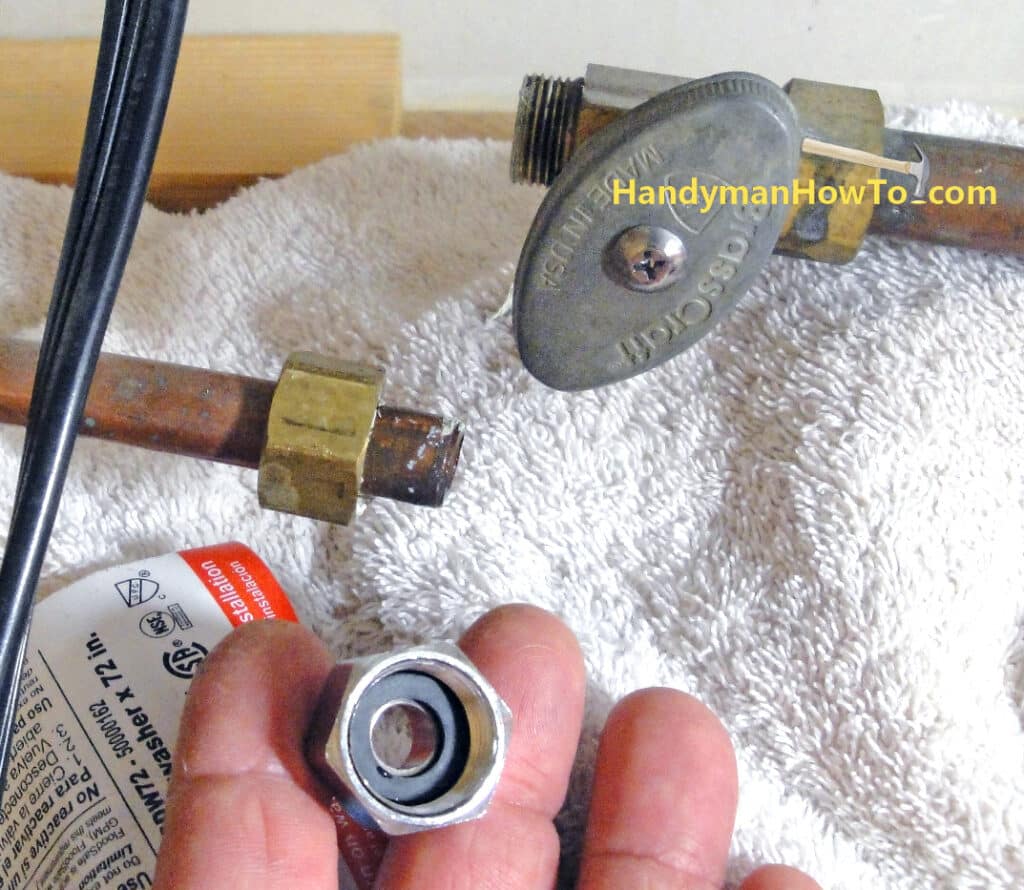
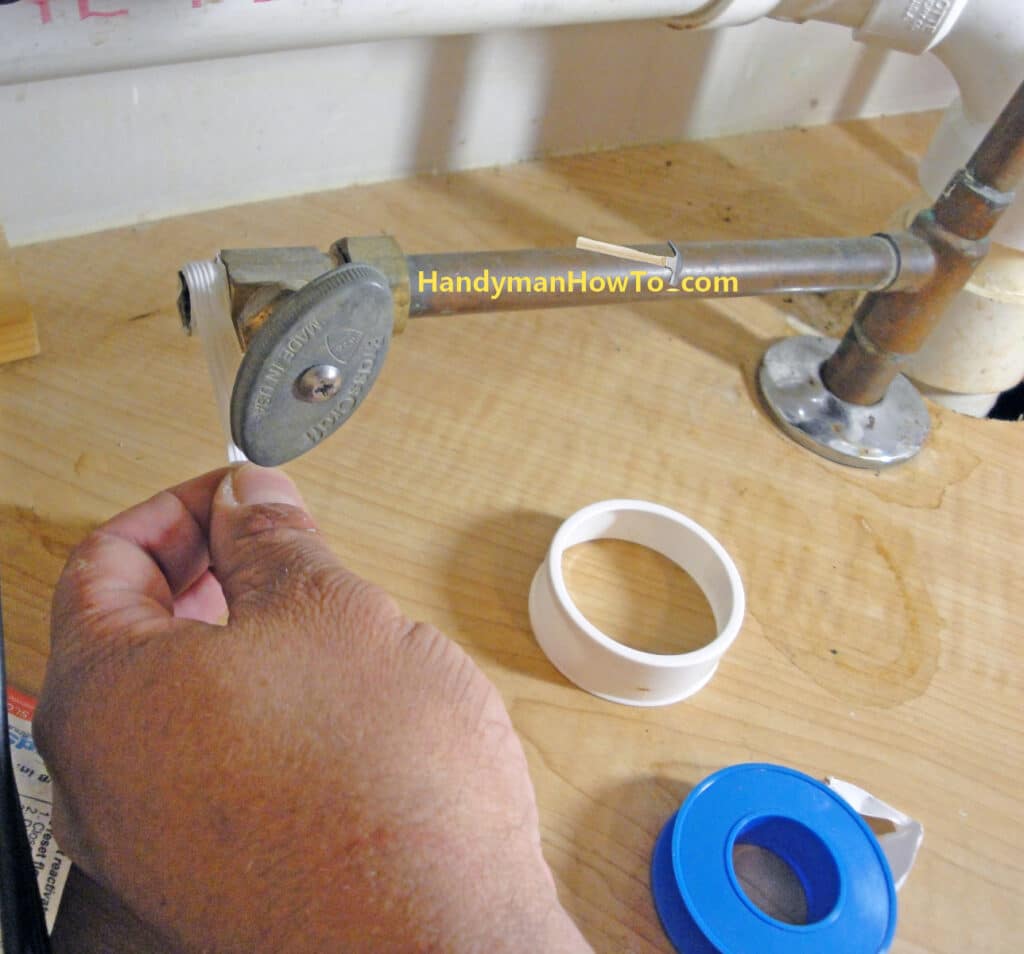
The water valve was shutoff before removing the old dishwasher. Loosen the nut on the existing copper water supply line with a wrench. If the nut is very stiff or frozen, use a second wrench to brace the valve body to prevent torquing the main copper pipe (right side in the photo).
The larger of the two adapter fittings provided with the Floodsafe hose fit my water valve.

Insert the flat rubber washer into the fitting.
Clean the threads on the water valve with a wire brush to remove any old plumbers tape, plumbers putty or pipe thread compound. Wrap the pipe threads with 3 or 4 turns of Teflon plumber’s tape. Wrap the tape in a right-hand direction as shown such that it “lays” in the direction that the fitting will be screwed on to prevent the tape from unraveling.
Next:
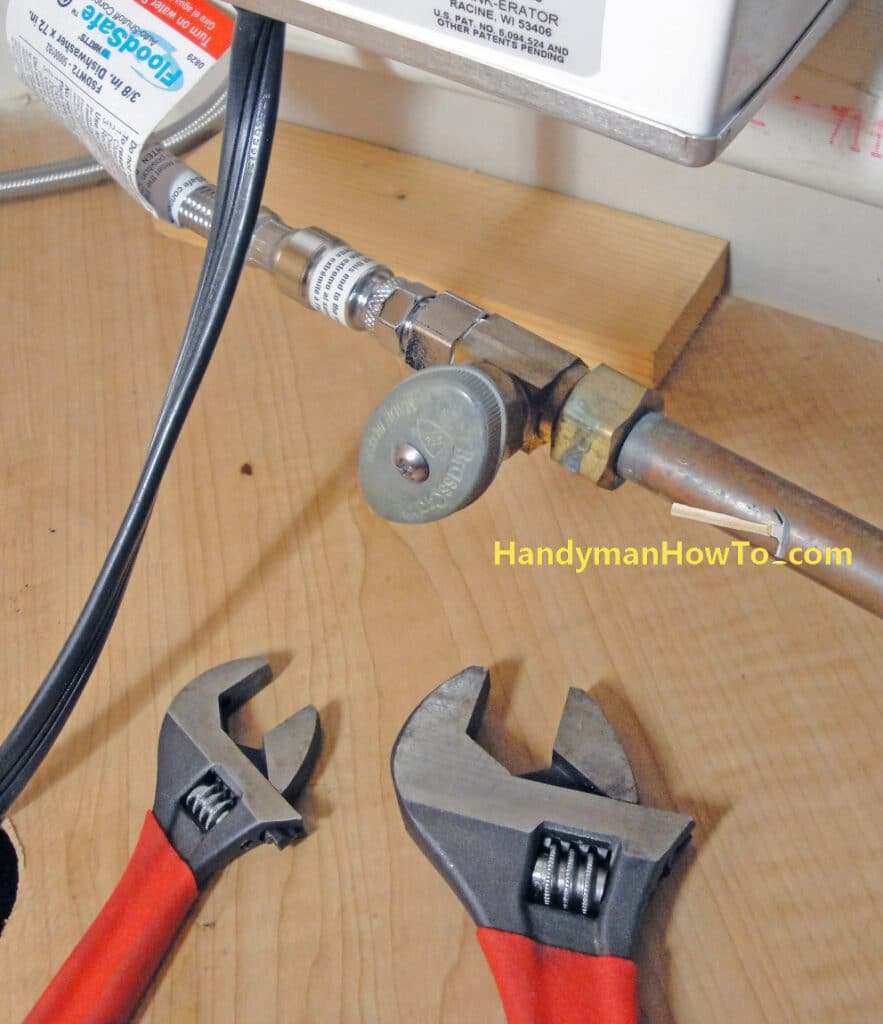
- Screw the large adapter fitting onto the water valve. Hand tighten and use the wrench to tighten 1/4 turn.
- Attach the Watts Floodsafe hose to the adapter fitting. Again, Hand tighten and use the wrench to tighten 1/4 turn. Two wrenches are required – one to hold the adapter fitting to prevent it from turning and the second wrench to tighten the hose.
Hand tighten each nut and use the wrench to tighten each nut 1/4 turn. You only need to compress the rubber washers and over tightening can crush the washers.
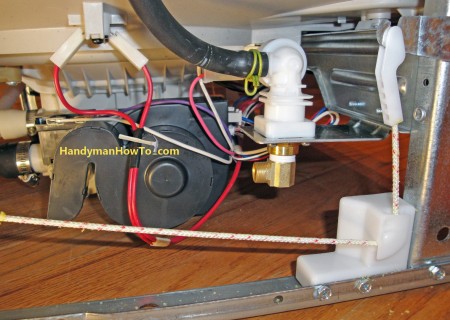
Dishwasher Elbow Installation
The dishwasher elbow attaches water inlet valve at the front-left-bottom of the dishwasher. A new dishwasher elbow is provided with the Watts Floodsafe dishwasher connector kit.
Tip: New dishwashers do not include the brass elbow. You must either buy the elbow of keep the old elbow from your old dishwasher.
Tip: The dishwasher is sitting in the middle of the kitchen floor for easy access.
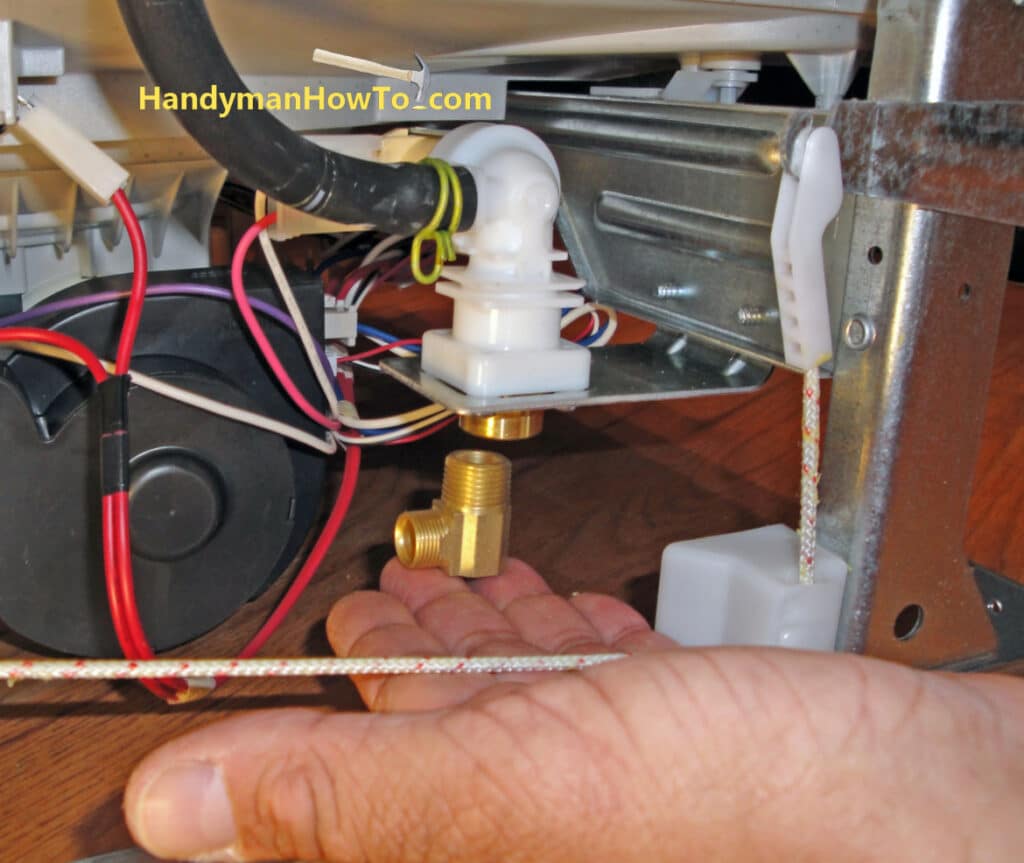
Wrap only the larger end (1/2″ threads) of the brass elbow with Teflon plumber’s tape. Do not apply plumber’s tape to the smaller 3/8″ threads because this end takes a compression fitting.
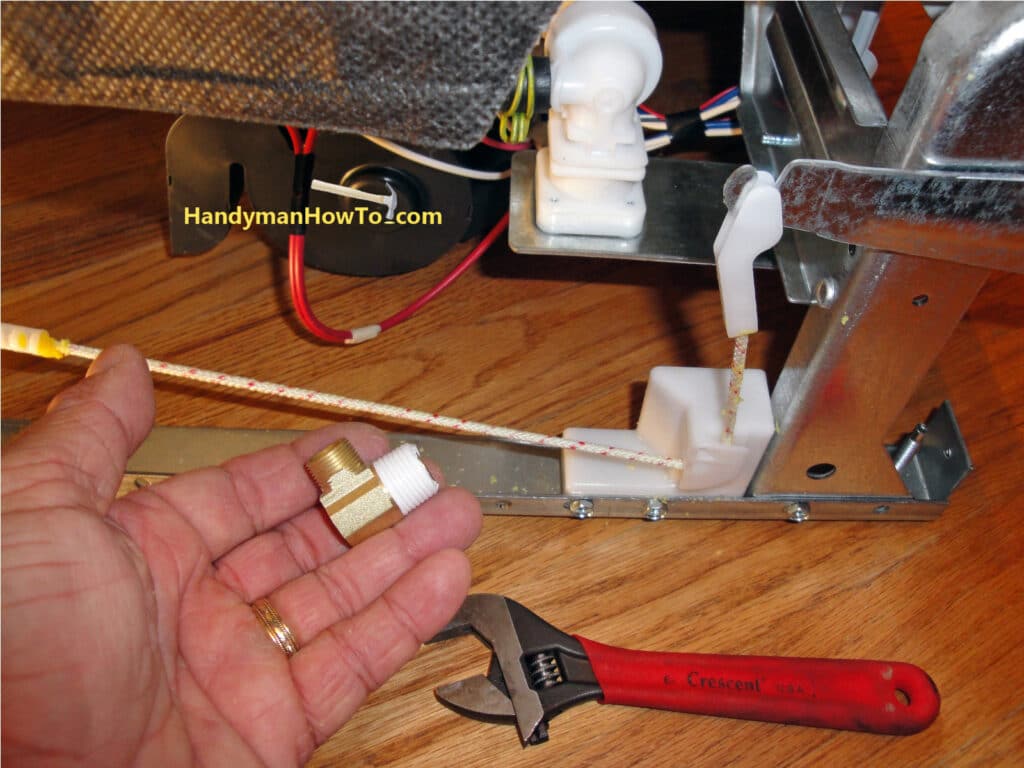
Screw the brass elbow into the water inlet until hand tight. Tighten with a wrench about 2 extra turns such that the 3/8″ inlet is pointed to the rear of the dishwasher to accept the water supply line.
This article is continued in Part 5: Installing the Dishwasher Under the Kitchen Cabinet
Take care,
Bob Jackson