How to Replace a Sewage Pump Check Valve – install the new silent sewage basin check valve and test for leaks.
This project is continued from Part 5.
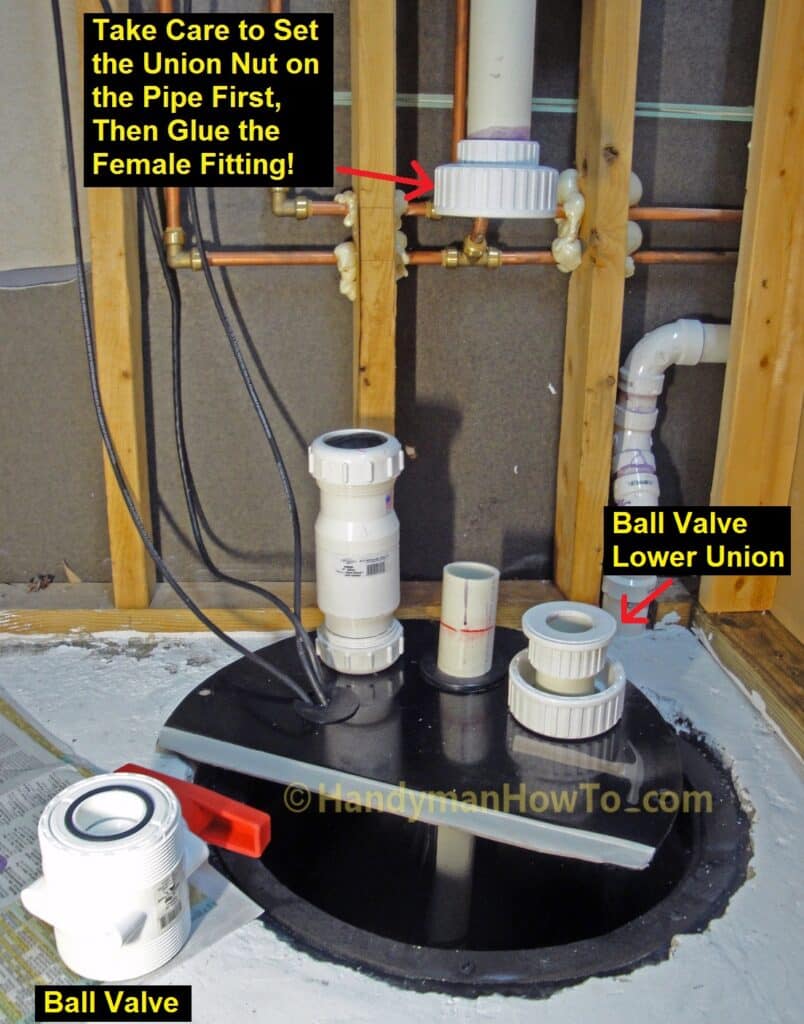
It’s very important to assemble and glue the solvent weld union fittings in the correct order because you only get one chance to do it right!
- The large white union nut must be slipped onto the upper section of PVC pipe and held in place so it doesn’t drop off.
- While holding the union nut on the pipe, glue the solvent weld fitting to the pipe end.
A helper is a plus as you’ll need three hands, or use a piece of duct tape to keep the union nut from sliding off the pipe.
The white union nut now becomes a captive nut as it seats over the solvent weld pipe fitting. See the red arrow in the photo below. - Glue the lower union fitting to the short section of PVC pipe that will mate the ball valve to the check valve.
This fitting is shown in the lower right corner of the photo below.
Install the A.Y. McDonald Silent Check Valve
The rest of the sewage check and ball valve installation is a breeze:
- Loosen the compression nuts on the A.Y. McDonald 2068S (2067S) silent check valve.
- Slide the silent check valve on the lower sewage ejection pipe.
Be careful to orient the check valve such that the flow direction arrow embossed on the side of the valve body points up. - Insert the short section of PVC pipe that’s glued to the lower ball valve union into the top of the silent check valve.
- Attach the ball valve body by tightening the two union nuts.
Double check the black O-rings are still set in the ends of the ball valve, otherwise you’ll have leak. - Raise or lower the silent check valve as needed to center it on the two pipe ends, ensuring the pipe ends extend past the rubber compression gaskets.
The clearances were verified during the “dry fitting” in Part 5. The A.Y. McDonald check valve has generous depth allowances for the pipe ends, so I cut the span of PVC pipe an inch longer than strictly necessary to join the check and ball valves.
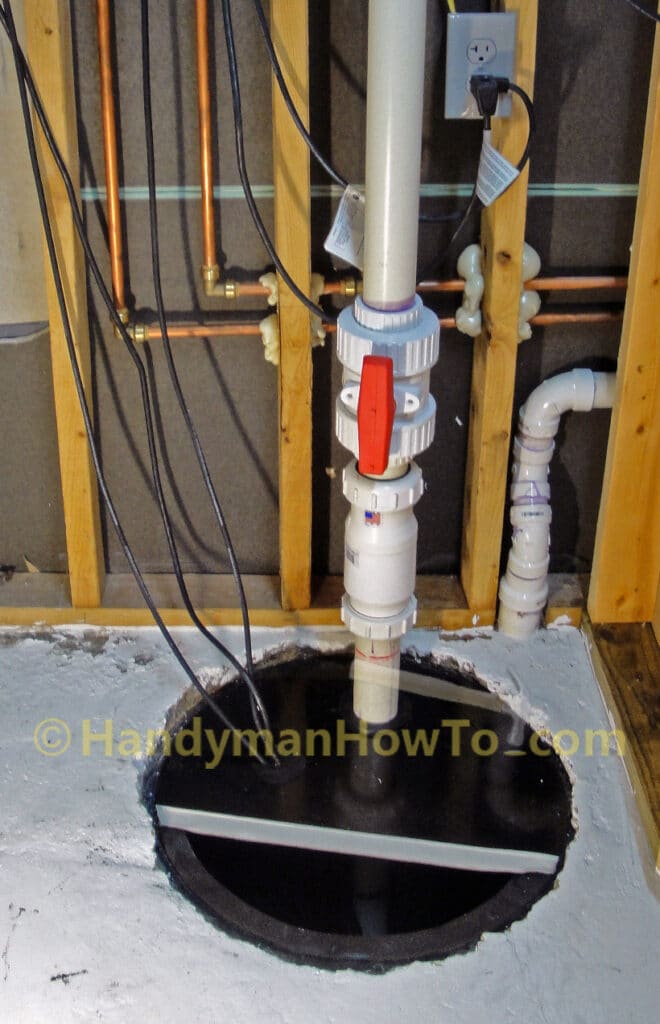
You will need to scoot the sewage pump a little to align the lower discharge pipe with the upper PVC pipe so the check and ball valve are straight. I used a scrap 6 length of 2 inch PVC Schedule 40 pipe to push against the base of the sewage pump to line up the two pipes.

The assembled silent check valve and ball valve after tightening the union and compression nuts, opening the ball valve and restoring power to the sewage ejection pump:
Sewage Check Valve Leak Testing
Before closing up the sewage basin, the sewage pump, new silent check and ball valve are tested to see that everything is working correct and there are no leaks. The basement shower is running in this next video to trigger the float switch and operate the pump. I watched the pump cycle several times while looking for leaks. Everything worked fine and was leak free!
Sewage Check Valve Water Hammer Fixed!
The new A.Y. McDonald Silent Check Valve solved the water hammer problem! Only a faint bump is heard and there is very little vibration with 12 feet of static water head. In this next video, the sewage pump shuts off at the 1 second mark – notice the just minor vibration in the white wire. The sound of running water is because the sewage basin is open with the shower running.
Compare the above to the severe water hammer and pipe rattle with the old sewage check valve:
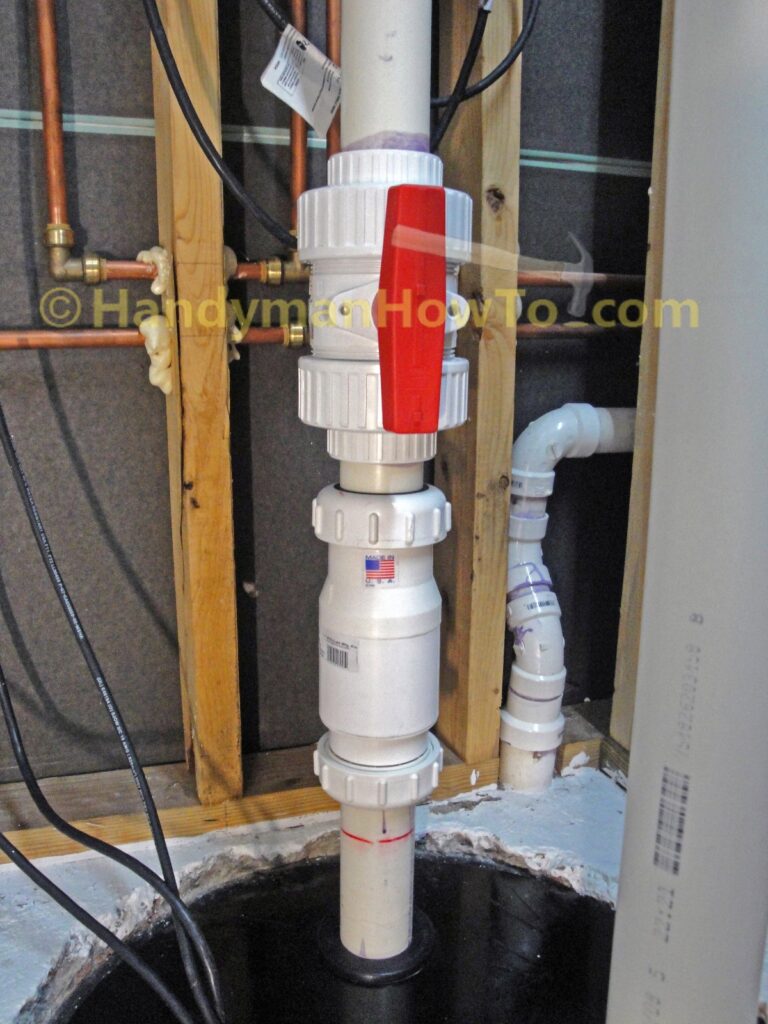
Silent Check Valve Final Installation
A closeup of the final installation – A.Y. McDonald Silent Check Valve and American Valve True Union Ball Valve:
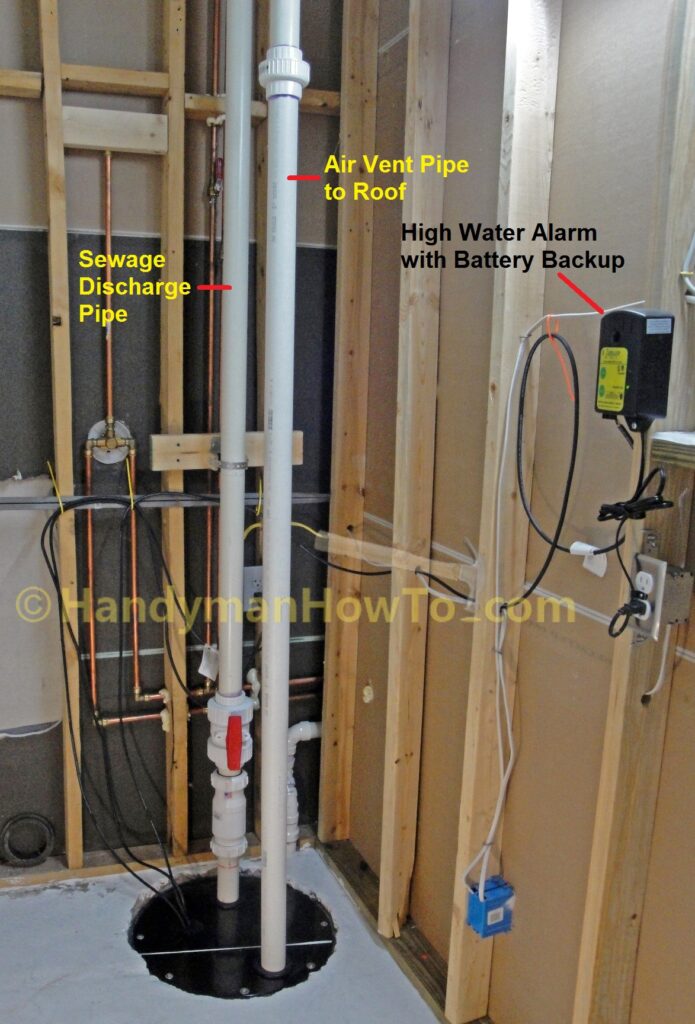
The final installation steps were to bolt down the sewage basin cover and set the air vent pipe back in place.
Here’s the basement bathroom sewage basin plumbing ready for service:
I’ve been checking the sewage check and ball valve fittings for leaks on a weekly basis. Everything is water tight.
Clean and Sanitize
I used almost a full bottle of rubbing alcohol and roll of paper towels to clean and sanitize my tools and wipe down the cement floor. I wore disposal latex gloves and everything went into a plastic garbage bag.
Future Sewage Pump Maintenance
If I ever have to pull the sewage pump or replace a check valve again, the task will be easy with the compression and union fittings. All I’ll have to do is:
- Close the ball stop valve by turn the red handle to the OFF position.
- Unbolt the sewage basin cover.
- Loosen the bottom compression fitting on the check valve.
This will allow the water to drain out of the lower discharge pipe into the basin as air enters the pipe. - Unscrew the bottom union nut from the ball valve.
This separates the check valve from the ball valve. - Scoot, rotate or tilt the pump and lower discharge pipe about 6 inches to the side so the lower discharge pipe and check valve clears the ball valve.
- Slide the check valve off the lower discharge pipe.
- Slide the sewage basin cover off the lower discharge pipe.
- Lift the pump out of the sewage basin.
No more sawing off PVC solvent joints!
Thanks for reading,
Bob Jackson