This project explains how to wire a closet light in this phase of How To Build a Basement Closet. See the previous project which illustrates the drywall installation and ceiling electrical box wiring rough-in.
Closet Ceiling Light
I purchased a Hampton Bay Textured White 2-Light Flushmount Model # FL226-S (Editor’s Note: this item is no longer available and a modern LED version is linked here), ceiling light from Home Depot for about $20. The light is rated for two (2) 60 watt medium base bulbs. I liked the clean low profile look of the unit and wanted two bulbs for good illumination. The 60 watt power limit per bulb is not a problem with compact fluorescent lamp (CFL) bulbs that draw just 23 watts each with an equivalent light output of 100 watts.
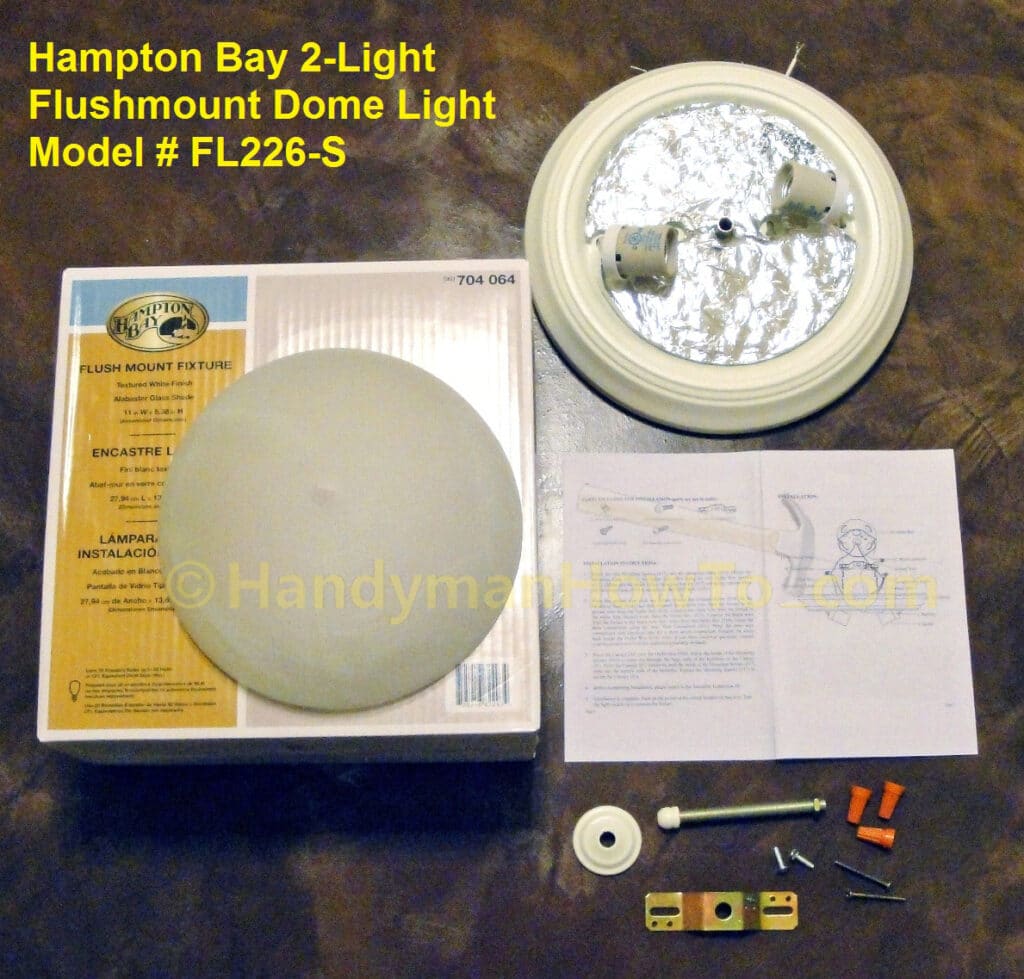
Please refer to the Hampton Bay 2-Light Model # FL226-S installation guide for the details.
How to Wire a Closet Light
Caution: The basement closet wiring is roughed-in, but is not yet connected to the main circuit, therefore the closet light NM-B 14/2 wires are not energized (no electricity).
If you are replacing an existing ceiling light fixture, be absolutely certain to shutoff the power at the circuit breaker and confirm the electricity is Off in the ceiling light circuit with a voltage tester. Failure to do so can result in electric shock, injury and death. If you are not familiar with electrical wiring, please hire a licensed electrician.
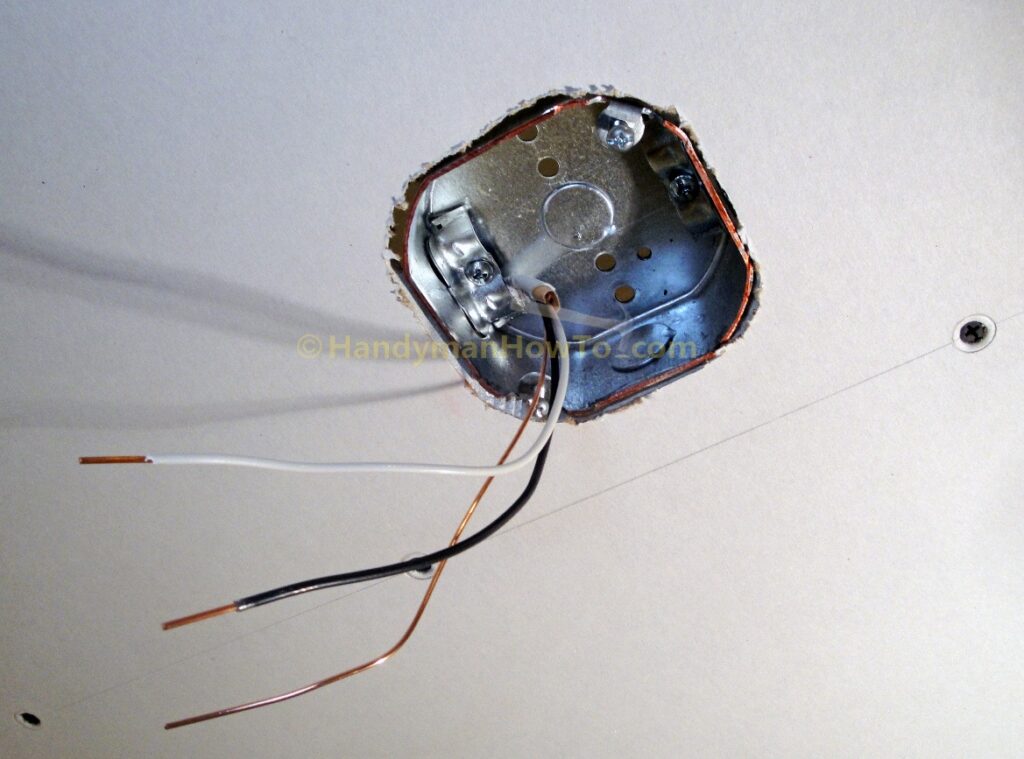
The ceiling electrical box roughed-in wiring is prepared as follows:
- The outer jacket of the NM-B 14/2 cable is carefully removed so as not to damage the insulation on the individual wires.
Make a short, shallow lengthwise cut in the outer jacket at the end of the cable, then peel it back like a banana. - Leave 1 inch of of the outer insulation jacket poking inside the ceiling octagon electrical box as shown.
- Tighten the cable clamp screw in the box to secure the NM-B 14/2 cable.
- Trim the wires if needed to have at least 6 inches of wire extending beyond the ceiling box.
- Strip 5/8 inch of insulation from the ends of the black (hot) and white (neutral) wires using wire strippers.
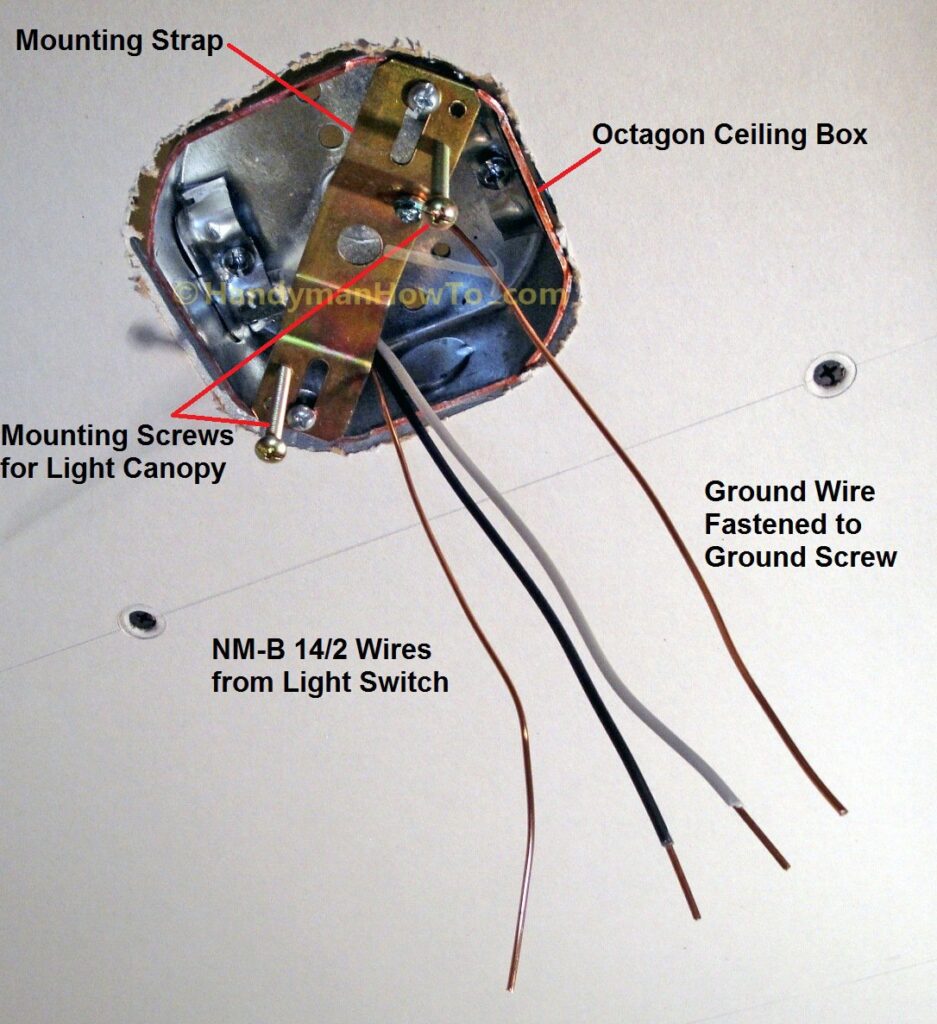
- Attach the light fixture mounting strap using the two screws that came with the ceiling electrical box.
- Cut a new 8 inch length of NM-B 14/2 cable from the roll, then pull the ground wire conductor from the cable jacket.
- Install the green ground screw on the mounting strap.
The ground screw is included with the light kit. - Make a small loop in the ground wire using needle nose pliers so it fits around the ground screw.
- Place the ground wire loop around the ground screw such that the end of the loop is “with the right hand twist” of the screw, then pinch the loop closed around the ground screw with the needle nose pliers.
The right-hand (clockwise) orientation of the ground wire loop is needed so the loop tends get tighter as the screw is turned.
In contrast, a “lefty” loop orientation will want to open up as the ground screw is tightened. - Securely tighten the ground screw on the ground wire.
- Trim the new ground wire to the same length of the other wires.
- Thread the two light canopy mounting screws about 3/8 inches into the mounting strap.
The steel electrical box must be grounded as required by the electrical building code via the mounting strap ground screw and ground wire.
The closet ceiling light wiring connections are straightforward:
Connect the Ground Wires:
A best practice is to connect the ground wires of a circuit first so there’s ground path that’s better than your body… just in case. Connect the light fixture ground wires by:
- Using a pair linesman pliers (available here), right twist (clockwise) the two 14 gauge solid bare copper wire ends together from the NM-B 14/2 cable.
Linesman pliers have flat wide jaw ends that are perfect for gripping and twisting electrical wires. - Hold the end of the braided copper ground wire from the light fixture even with the 14 gauge wires.
- Twist on an orange wire nut (provided with the light fixture) to fasten the three ground wires together.
Connect the Black (Hot) and White (Neutral) Wires:
- Right-hand twist together the ends of the two light socket black (hot) wires.
These are stranded flexible wires, twist together using your fingers. - Hold the light socket black wires even with the end of NM-B 14/2 black wire.
- Twist an orange wire nut on all three black wires.
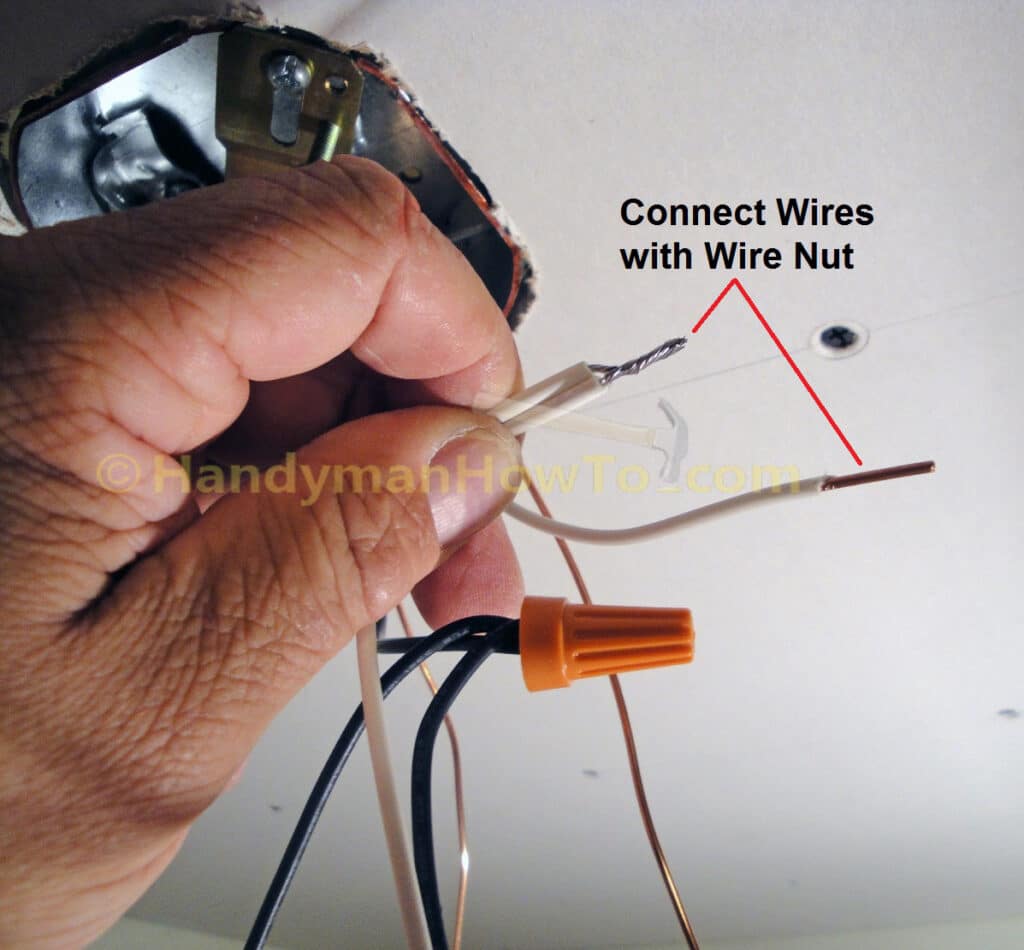
- Do the same to connect the white (neutral) wires.
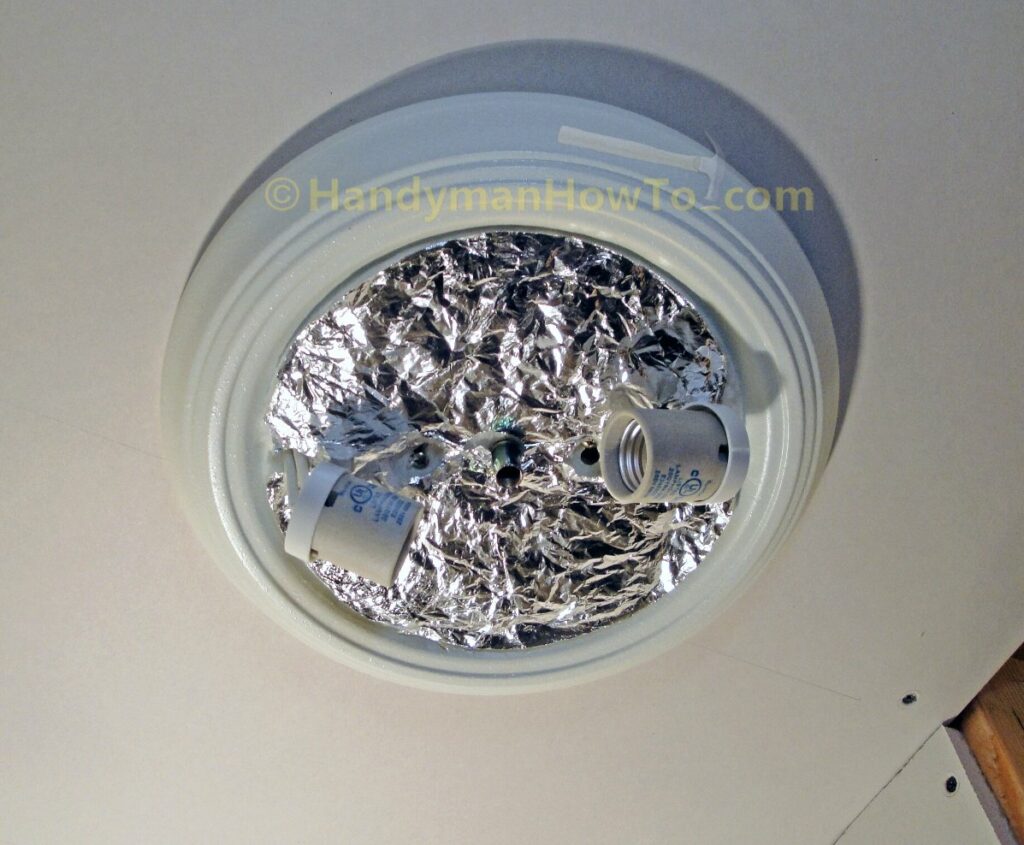
In the next photo, I’ve nutted the three black (hot) wires and twisted together the two light socket white (neutral) wires prior to nutting the wires with the NM-B 14/2 white (neutral) wire.
The completed ceiling light wiring connections for the hot, neutral and ground wires. Check that all wires are held securely by the wire nuts.

- Carefully fold and tuck the wires into the ceiling octagon electrical box.
- Align the canopy keyholes with the heads of the canopy mounting screws, then press the canopy over the mounting screws until it’s flush with the ceiling drywall.
- Twist the canopy clockwise to lock it place around the mounting screws, then tighten the canopy mounting screws.
- The light fixture insulation tends to hide the keyholes so this took some trial and error.
You may be thinking: “Isn’t wiring the light before the drywall is installed, finished and painted a bit premature?”
My reply is “No, because I need a light in the closet to see better while hanging and finishing the drywall. When it’s time to paint the ceiling, I’ll shutoff the circuit breaker, drop the light canopy, paint and set it back in place.”
Jumping ahead several steps in the closet light circuit wiring process, the next photo is what the closet light looks like during the basement closet construction. Power from the existing electrical outlet inside the closet is extended with Wiremold metal raceways and junction boxes to the wiring inside the 2×4 walls to reach the light switch and ceiling light.
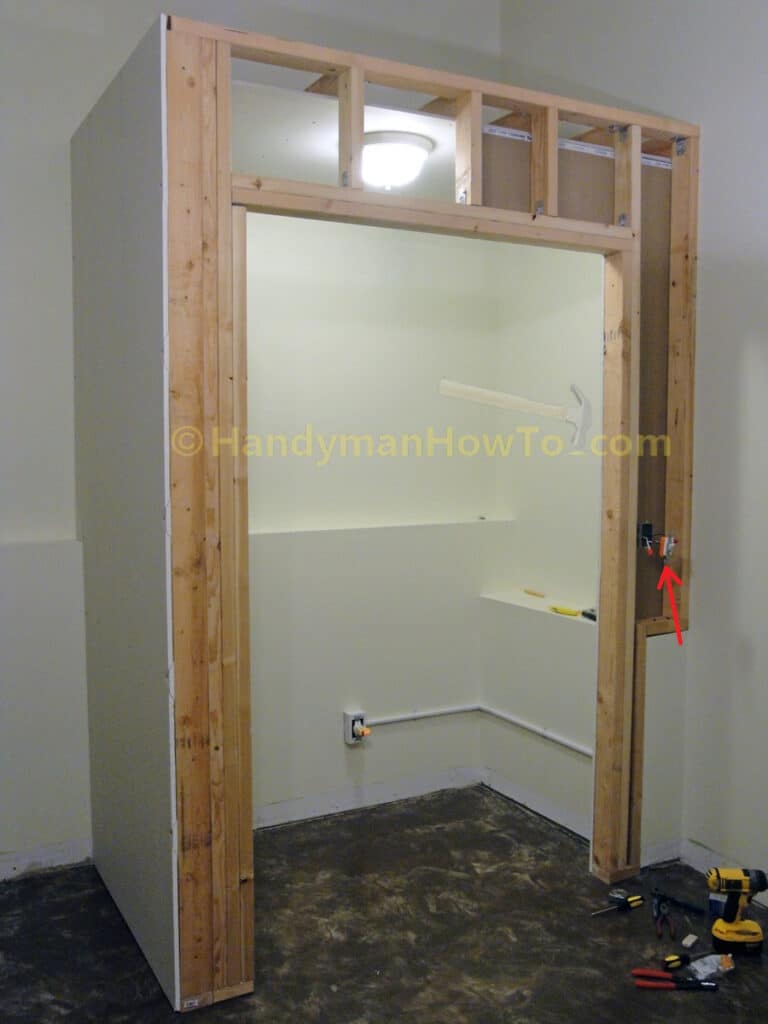
Next up, wiring the closet light switch.
Take care,
Bob Jackson