The black iron pipe fittings and natural gas hose quick connect coupling is installed to complete the gas grill hookup. This project is continued from How to Install a Natural Gas Shutoff Valve for a Grill – Part 1.
Install the Natural Gas Quick Connect Coupling
Fast forward several weekends. I’ve almost completed the deck rebuild and stained the deck boards. It’s been a while since we’ve grilled burgers and I’m hungry.
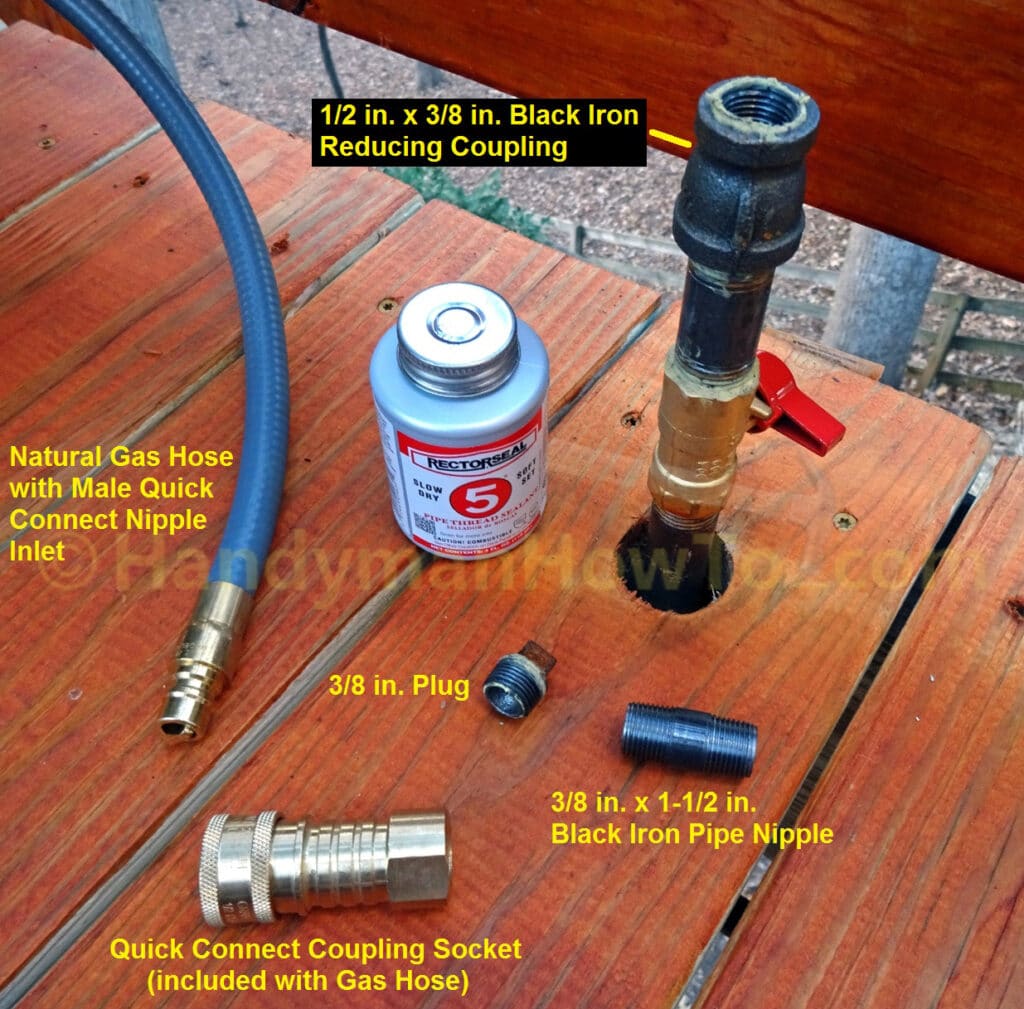
My gas BBQ grill requires a 3/8 inch female flare fitting and hose, hence the 1/2 in x 3/8 in black iron reducing coupling. I purchased a 3/8 inch female flare to 3/8 inch male quick connect gas hose from Amazon.com. The hose kit includes the quick connect coupling socket.
The steps to install the gas grill quick connect coupling are:
- Verify the gas shutoff valve is in the Off position (see the following photo).
- Remove the 3/8 inch pipe plug.
Wipe the old sealant off the reducing coupling (I’ve yet to do this in the photo). - Install a 3/8 in x 1-1/2 in black iron pipe nipple.
- Screw on the quick connect coupling.
- Connect the gas hose.
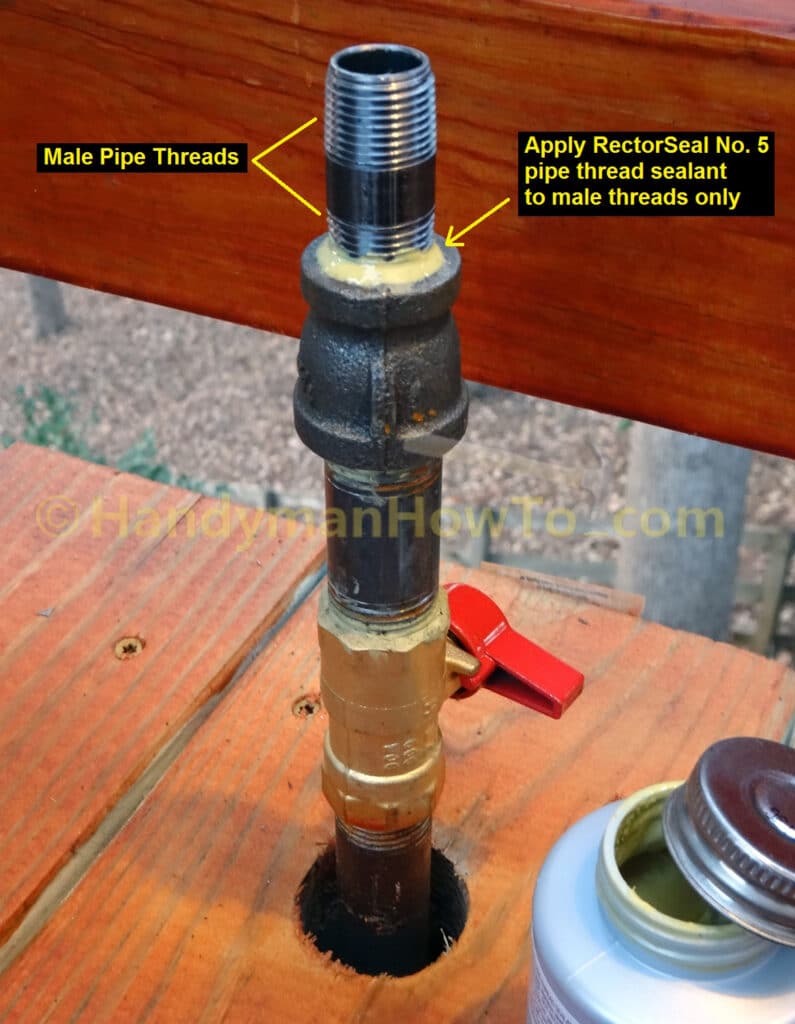
The 3/8 inch pipe nipple threads are coated with RectorSeal No. 5 sealant and the nipple threaded into the reducing coupling. No need to tighten it with the wrench at this point:
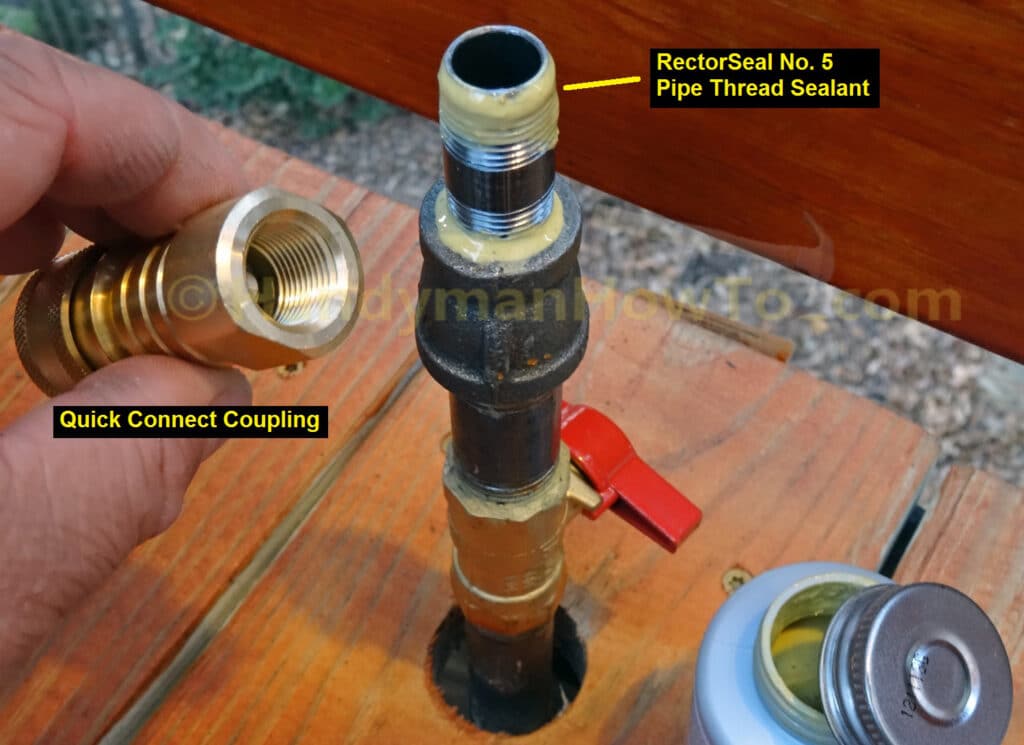
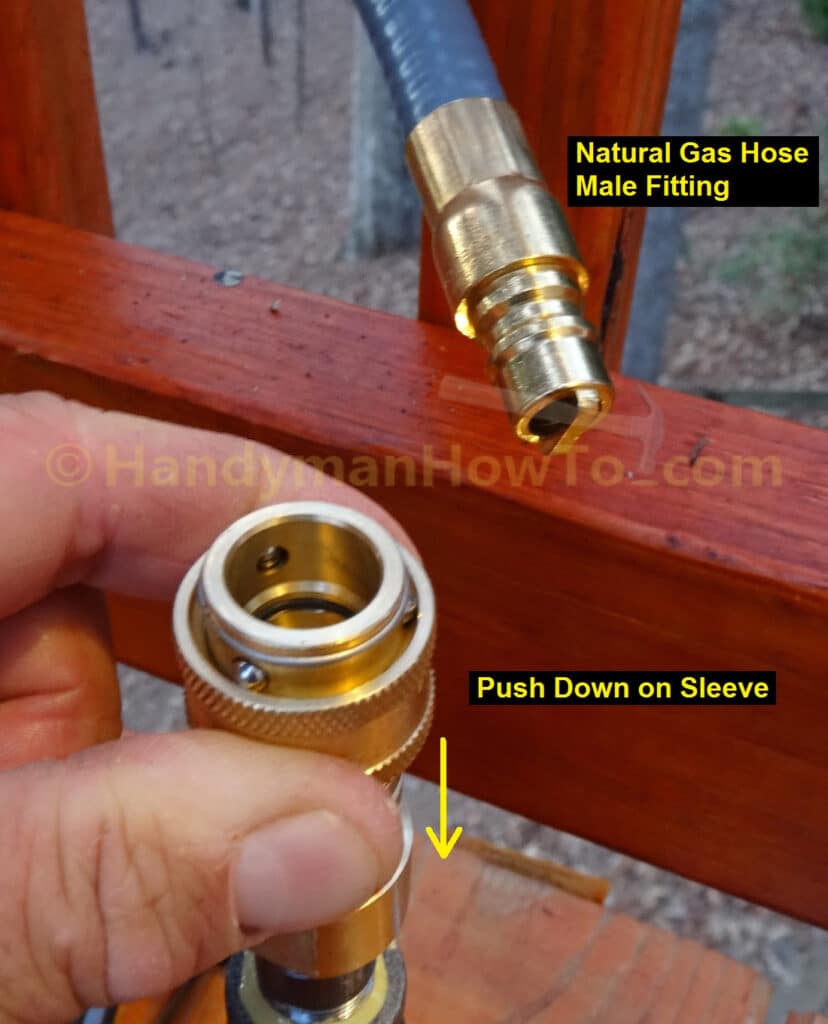
The upper threads are sealed. The 3/8 inch quick disconnect coupling socket is ready to install:
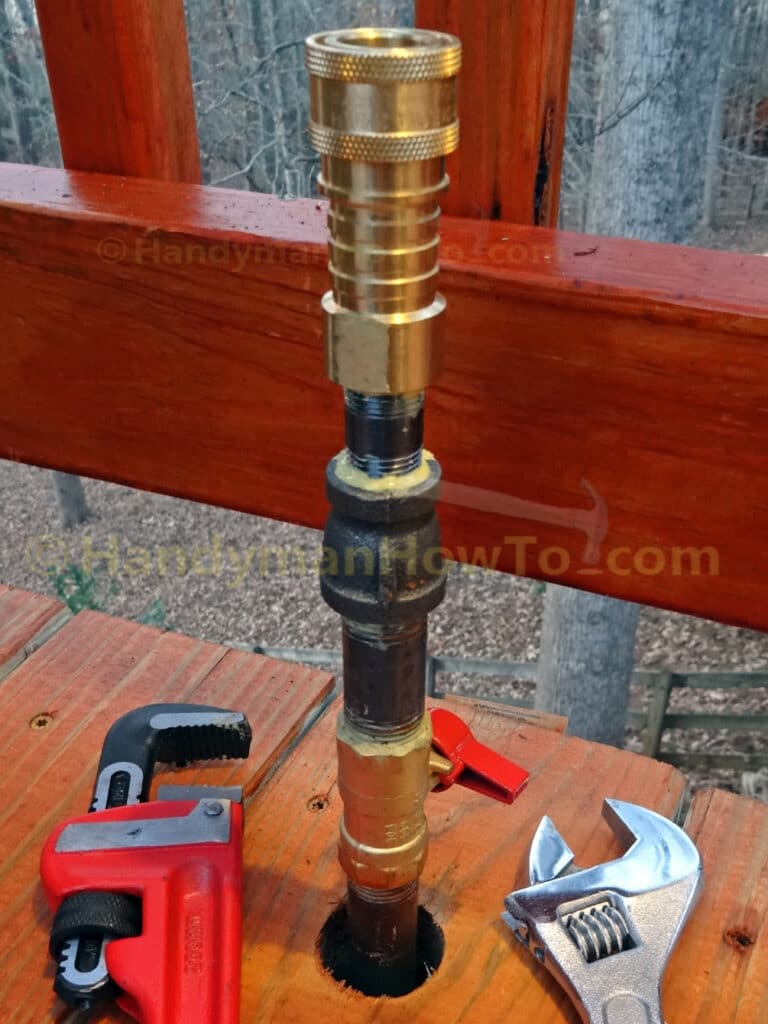
Hold the reducing coupling with the pipe wrench to prevent it from turning, then tighten the quick connect with the adjustable wrench. This will also tighten the pipe nipple:

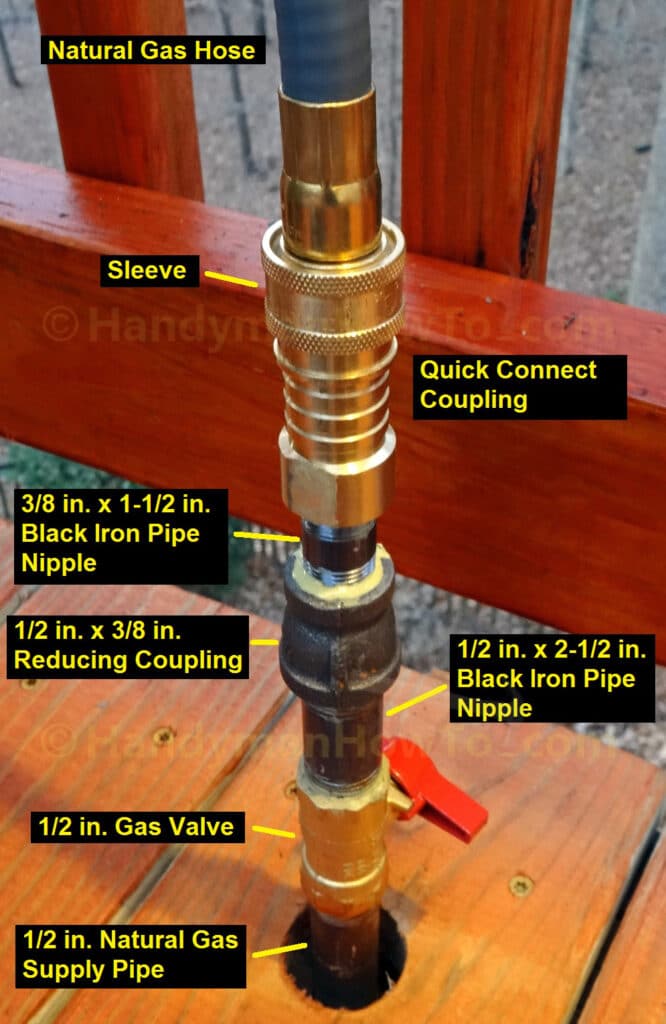
The installed gas grill quick connect coupling:
Connect the natural gas grill hose by pushing down on the spring-loaded quick connect sleeve and insert the hose. Release the sleeve and check the hose is held firmly in place:
The finished natural gas grill shutoff valve and quick connect installation:
The gas grill won’t start immediately after opening the shutoff valve because the air in the lines must be purged. My grill fired up after 10 or 15 seconds.
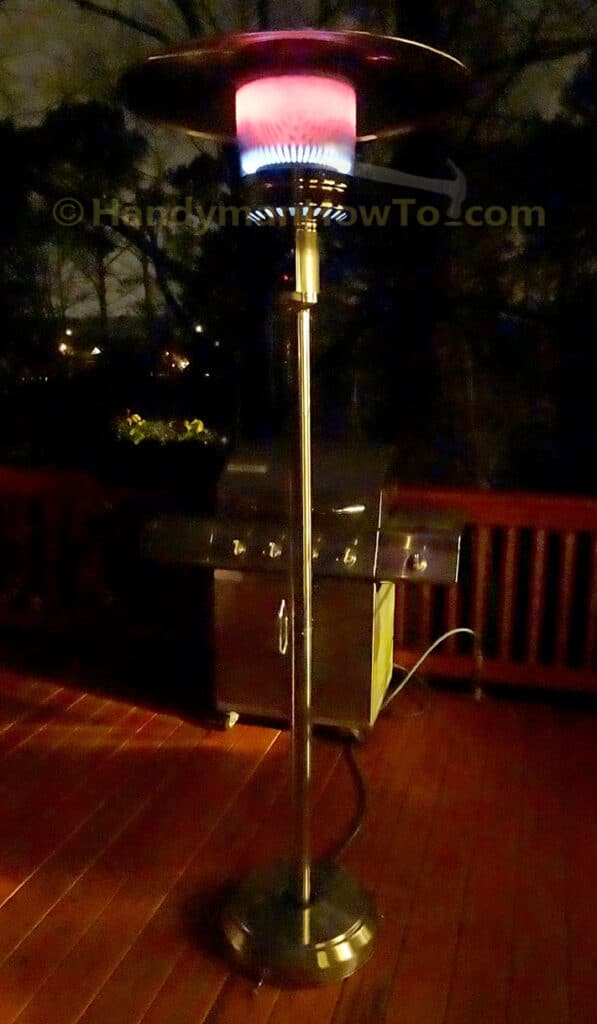
Natural Gas Patio Heater
The benefit of a natural gas quick connect coupling is easily switching between hookup hoses for other natural gas appliances, like a patio heater to stay warm on cool nights:
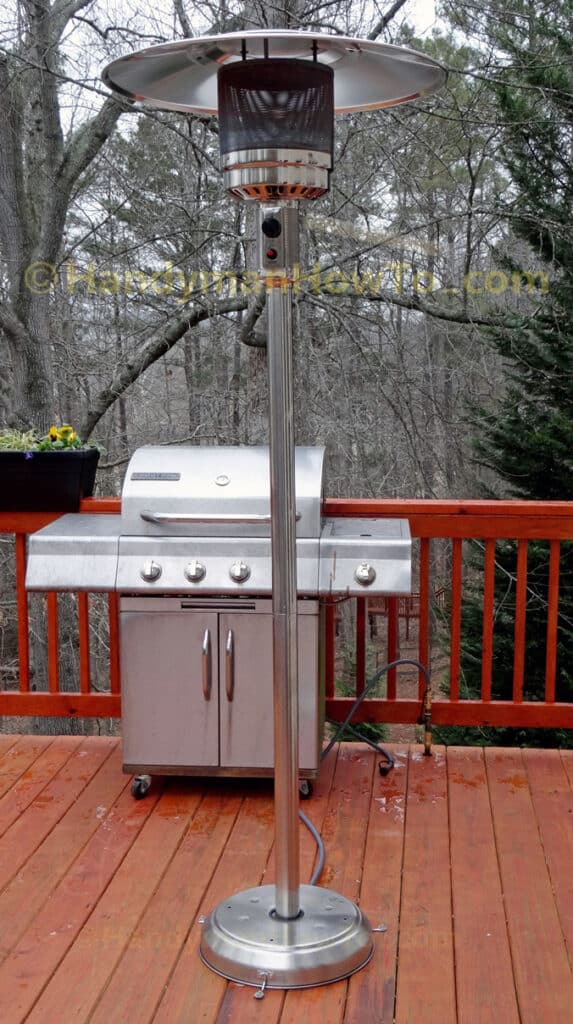
I bought the natural gas patio heater from Amazon because it was reasonably priced and free shipping.
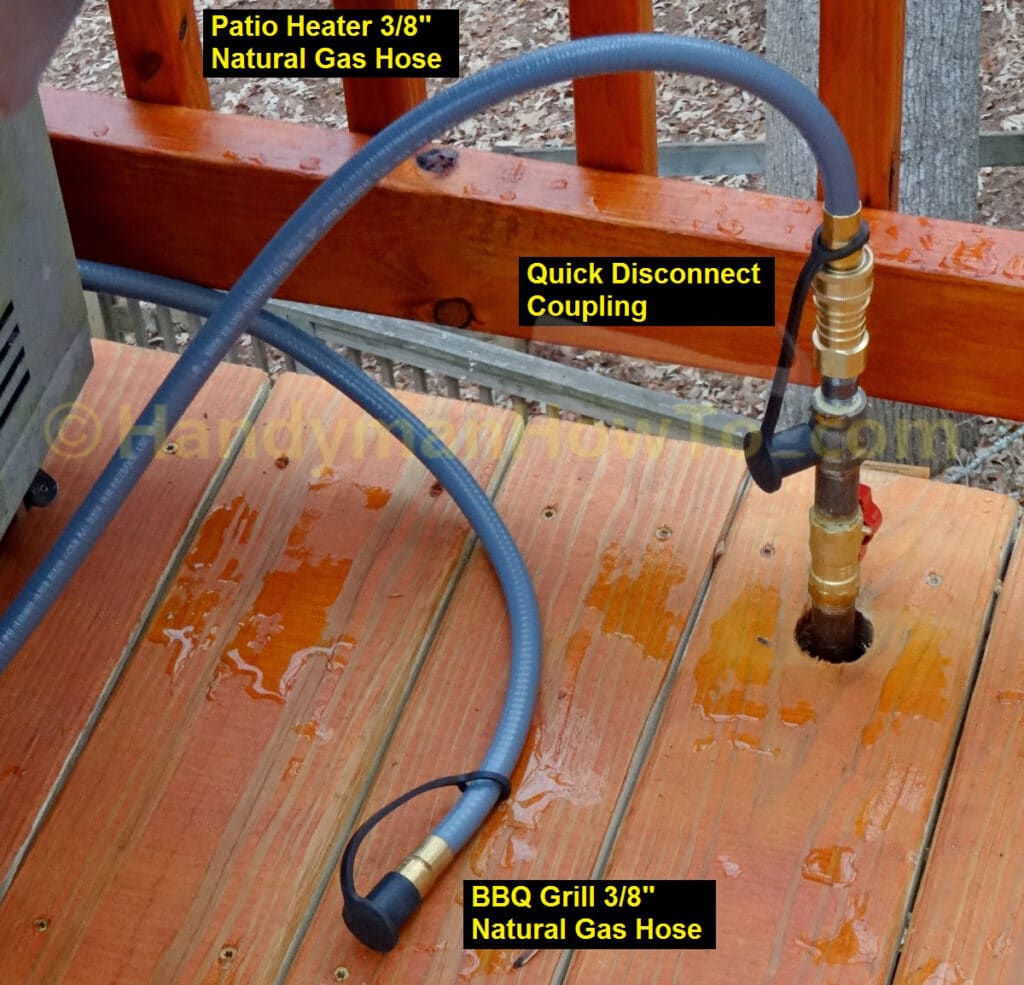
I can switch natural gas supply hoses between the grill and patio heater in seconds.
The patio heater does a good job. The post is 2-1/2 inches diameter and too large to fit through the umbrella opening in my patio table… good to know when shopping for a patio set.
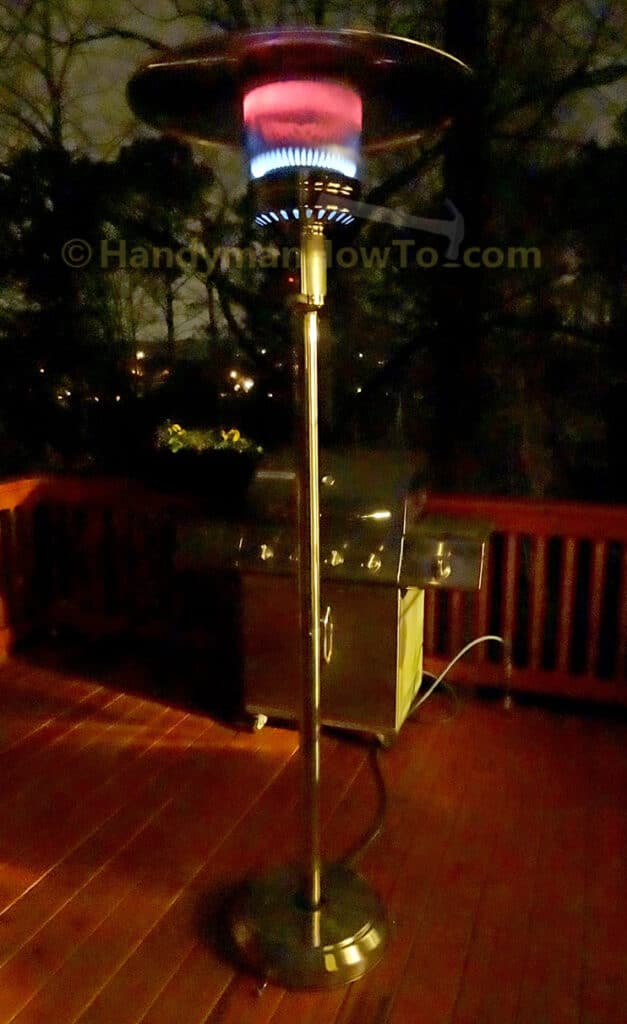
At maximum heat it’s quite warm. We had several friends visiting the other night and we were comfortable standing 5 to 8 feet away in 45 degree weather.
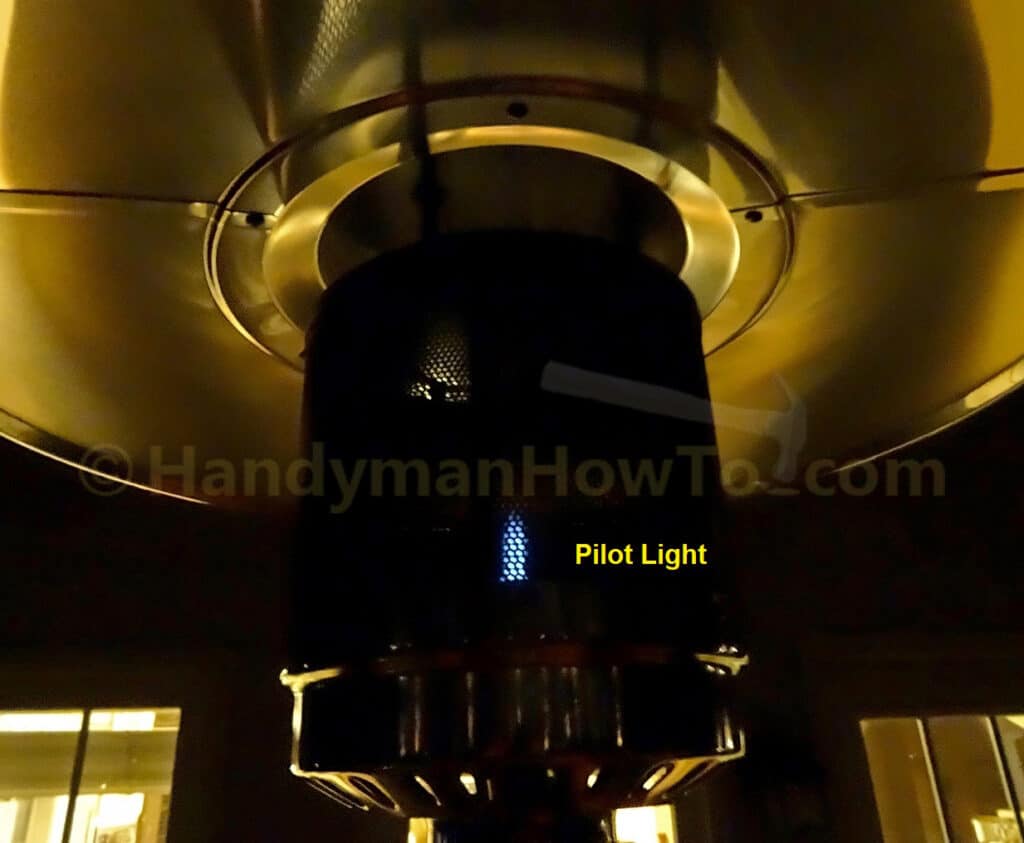
Start the heater by turning On the natural gas shutoff valve, hold in and turn the control knob to “Pilot”, then press the red Igniter button to light the pilot light. Adjust the control knob to your desired heat setting.
The patio heater took about an hour to put together. The owner’s manual says to fill the plastic water tank (located under the metal base) with water for ballast, however there’s no drain cap gasket and it leaked. Better to fill the base with sand or fasten the three (3) base brackets to the deck.
I bought a 12 foot by 3/8 inch natural gas hose for the patio heater. About 7 feet of hose fits inside the heater base and post to reach the burner, so keep this in mind when thinking about where you want to place the heater because you might want a longer hose.
Hope this helps,
Bob Jackson