The exposed copper water pipes by the wood deck froze and burst. I bought the home in February and didn’t notice the problem until Spring when I turned on the water shutoff valve inside the basement.
To fix the problem, I installed a 1/2 inch brass elbow with a drain cap to empty the water from outdoor copper pipes. The pipes still froze and split the following Winter because the basement water valve had a slow leak that filled the exposed pipes. The leaky water shutoff valve is replaced with a SharkBite ball valve and I’ve not had a problem since.
How to Prevent Outdoor Water Pipes from Freezing and Bursting
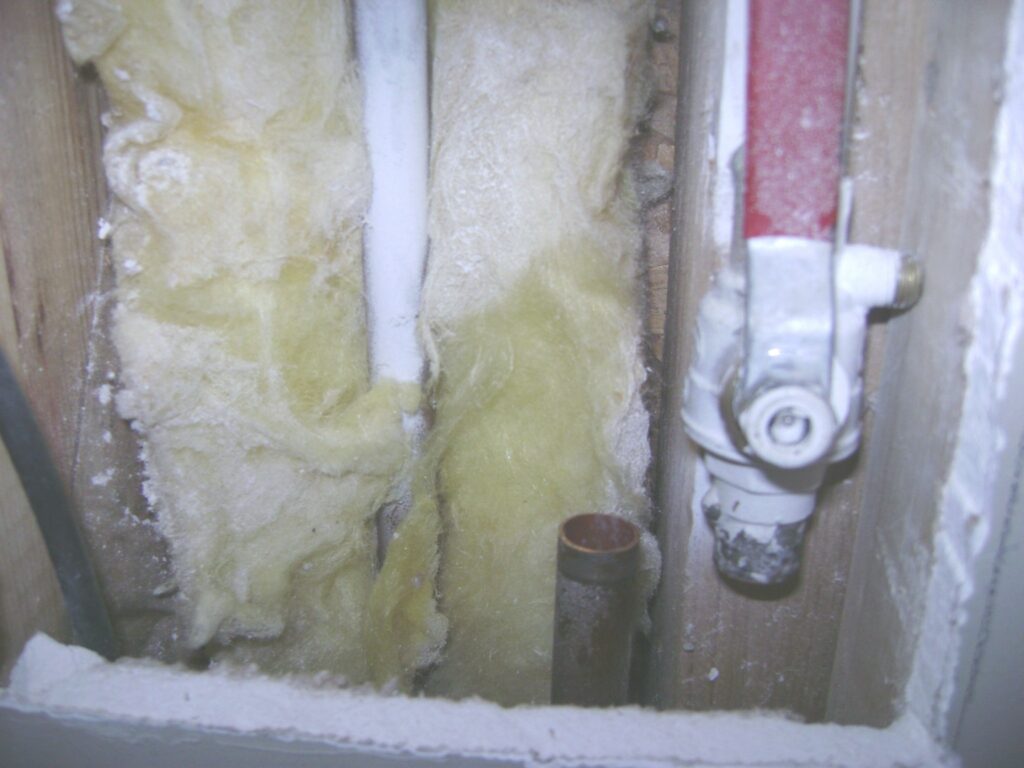
The water hose bib and exposed 1/2 inch copper pipe illustrate why the pipes freeze:
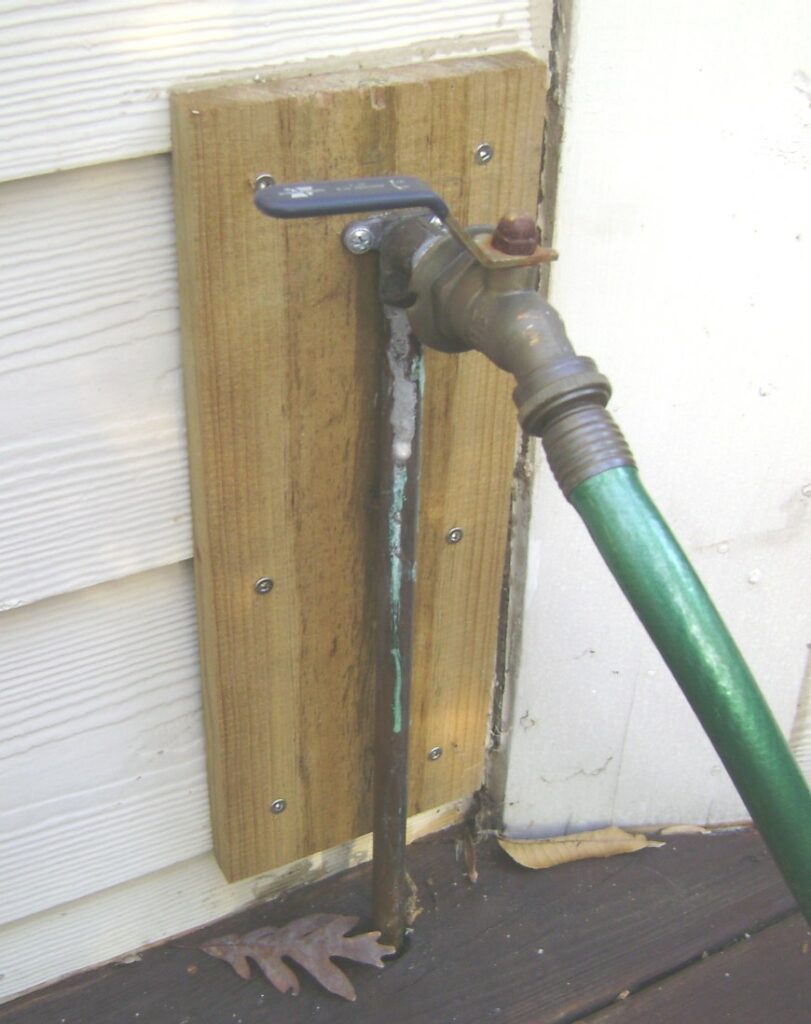
The 1/2 inch copper water pipe exits the basement wall and goes up through the wood deck to the water hose bib. Notice the brass elbow with a drain cap (which are tarnished green due to copper weathering). I soldered on the elbow and drain in an attempt to remedy the freezing and bursting pipe problem. To winterize the pipes I do the following before freezing temperatures set in:
- Shutoff the water supply valve inside the basement.
- Open the water hose bib valve (see the above photo).
The hose bib is opened to allow air to enter the pipes as the water drains. - Remove the drain cap from the brass elbow.
The water drains out of pipes very quickly. I waited about 5 minutes for the last of the water to stop dripping. - Replace the drain cap.

Ways to Prevent Pipes from Freezing
Various solutions for freezing pipes are:
- Insulate the exposed pipe – only delays the freezing in prolonged cold weather.
- Wrap the pipe in Heat Tape – heat tape is like an electric blanket for pipes. For this location, it would be difficult to plug into an electrical outlet. I also wanted a permanent low maintenance fix. Heat tape works well, not when the electricity is out. Winter storms, the power lines are down, freezing temperatures then the pipes freeze and burst.
-
Replace the interior shutoff valve and fix the root cause.
This is what I decided to do.
How to Replace a Leaky Water Shutoff Valve
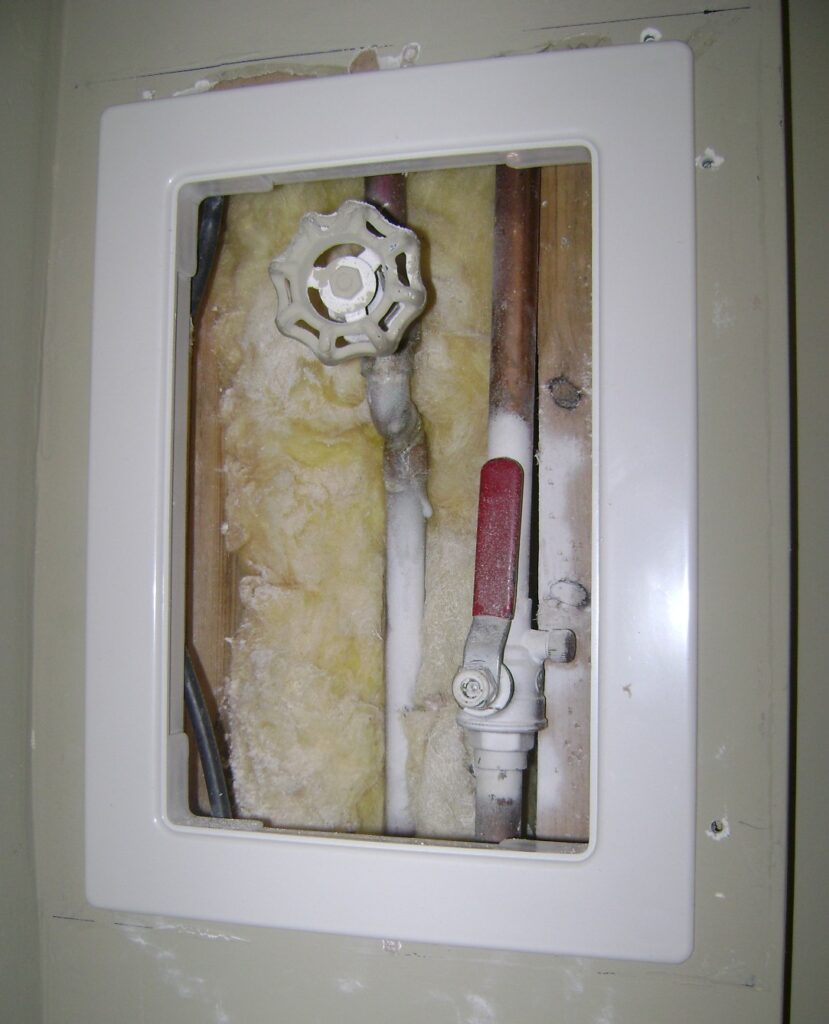
Replacing the water shutoff valve presented a major challenge because it was in a confined space inside the drywall of the finished basement. The leaky valve in question is on the lower right with the red handle.
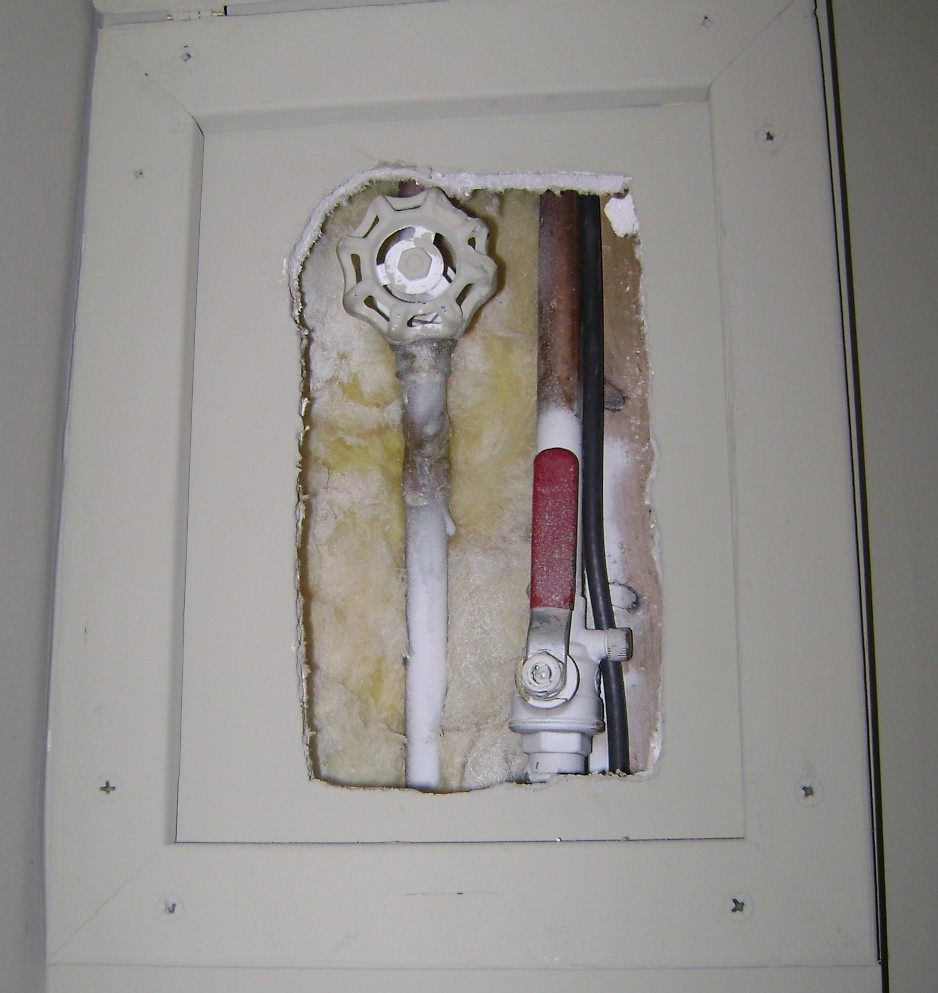
The normal procedure to replace the valve is to remelt the solder joints with a propane torch and remove the old water valve. This would present a fire hazard and be difficult in such a confined space right next to the 2×4 wall studs. The lower solder joint is mostly inaccessible because of the sloppy rough opening in the drywall. The contractor attempted to cover up this ugly job with a wood frame and plywood cover.
I went to Home Depot expecting to get a new ball valve and flameproof material to protect the wall cavity from the torch. The helpful Home Depot employee in the Plumbing Dept. asked me if I needed help and I explained my situation. The Home Depot employee asked if I’d heard of the SharkeBite Connection System by Cash Acme, Inc. It uses an easy push-fit connection system. No soldering, no glue or clamps! The SharkeBite video tutorial is here.
I was skeptical but gave it a try because it could turn this difficult job into an easy one.
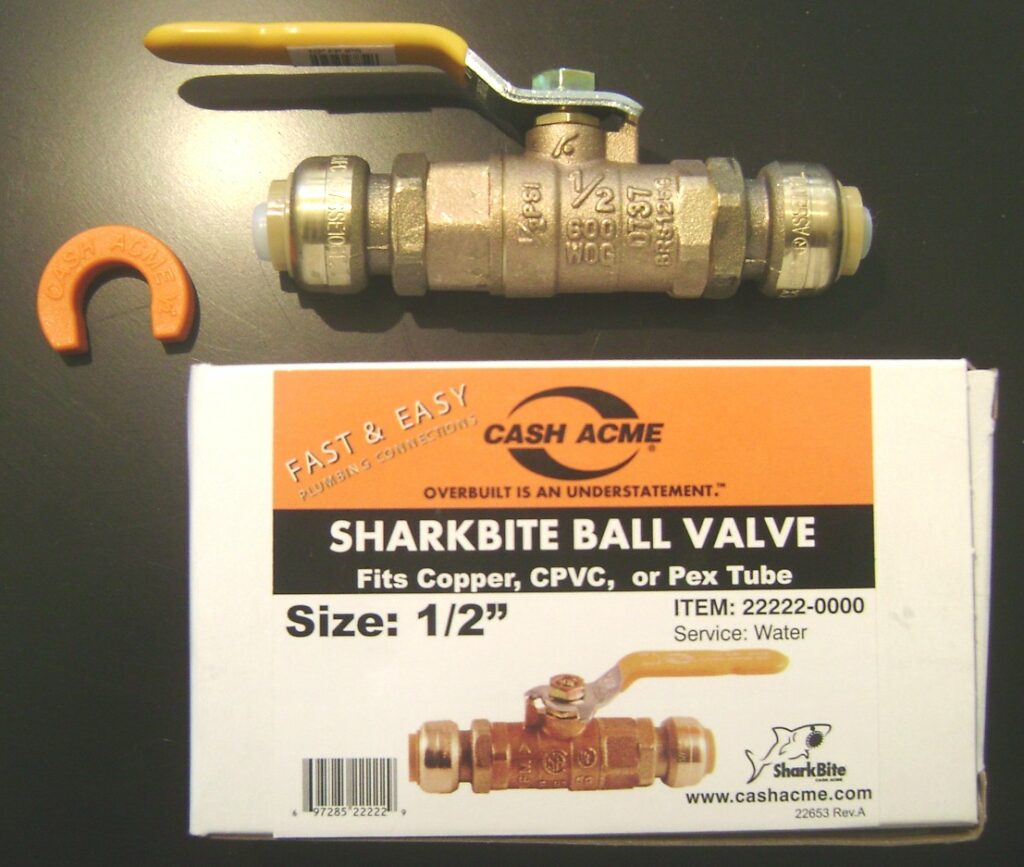
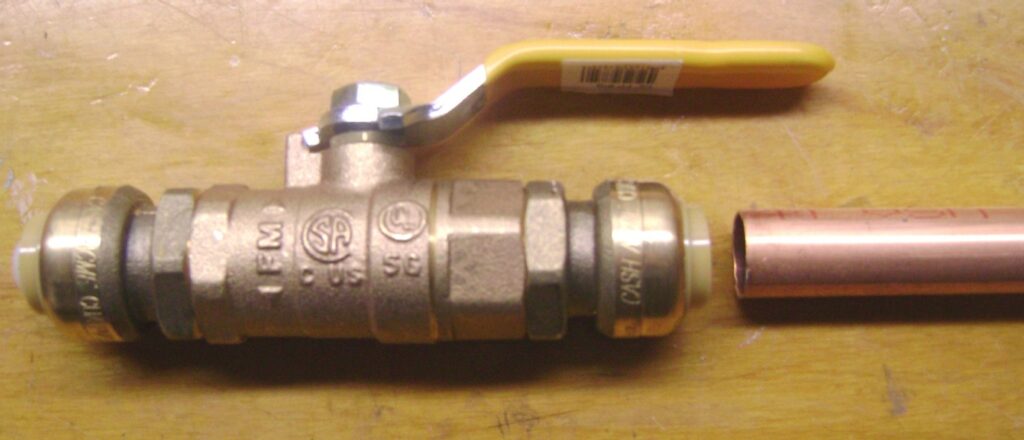
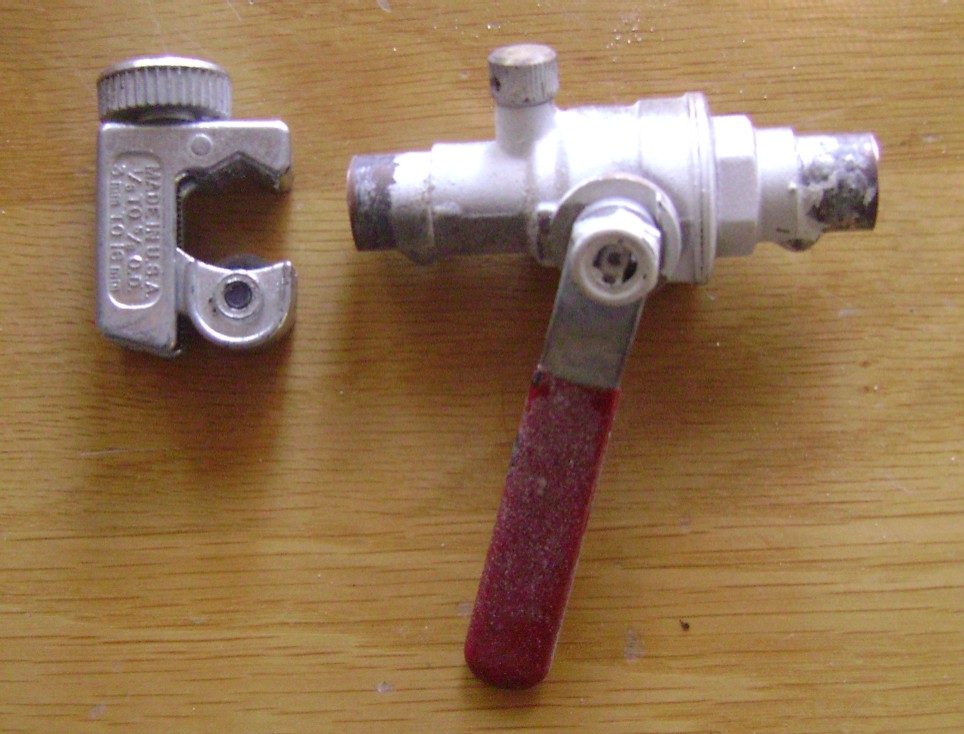
I bought a SharkBite 1/2 inch ball valve. The orange disconnect tool on the left. SharkBite connections are easily disassembled by pressing the disconnect tool against the joint to remove the fitting:
SharkBite Ball Valve Installation
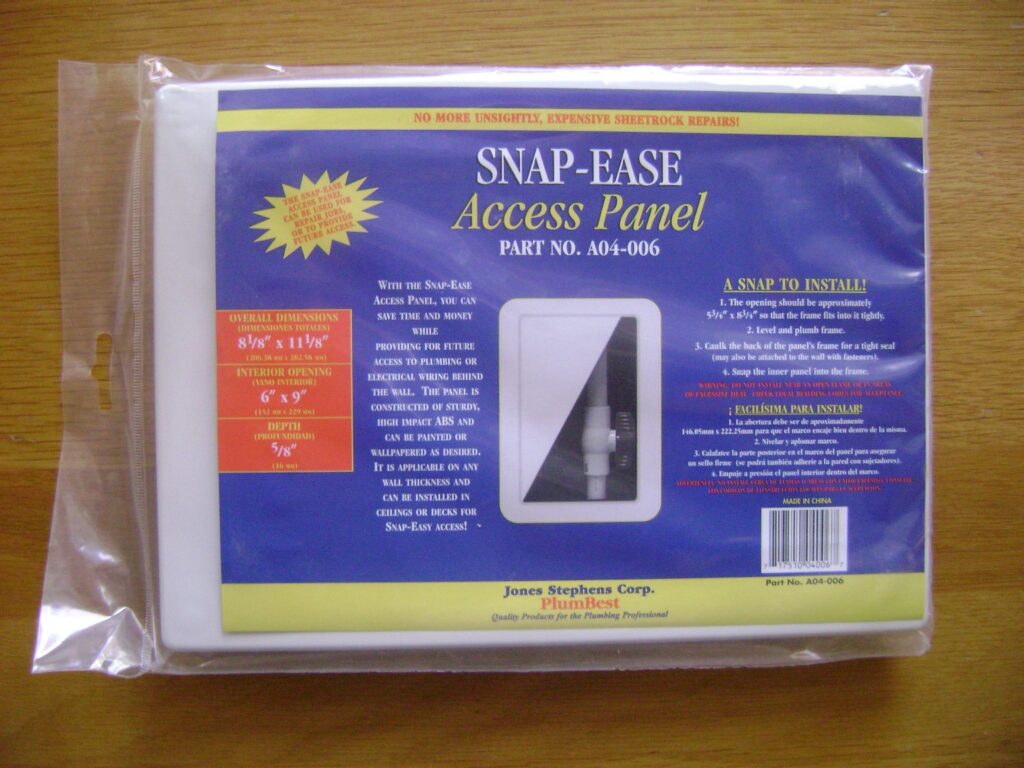
The drywall rough opening needed to be enlarged and done in a better way. I purchased a 6 in by 9 in SNAP-EASE Access Panel from Home Depot and sawed the drywall to fit the new panel:
A drywall jab saw, square, tape measure and level are needed to layout and cut the opening for the new access panel:
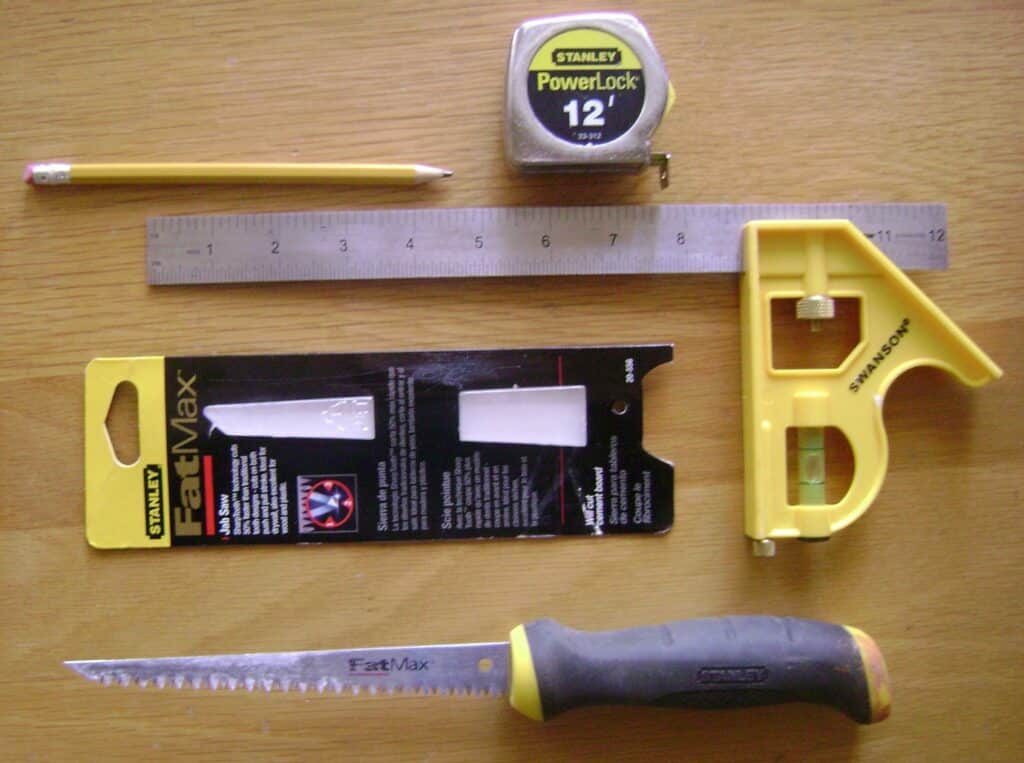
The dimensions of the access panel are drawn in pencil with the aid of a tape measure, square and level. The drywall opening is cut with a jab saw:

The frame for the access panel is dry fitted. Later it will be secured with caulk. Notice the new opening is positioned to allow access to the lower joint of the ball valve:
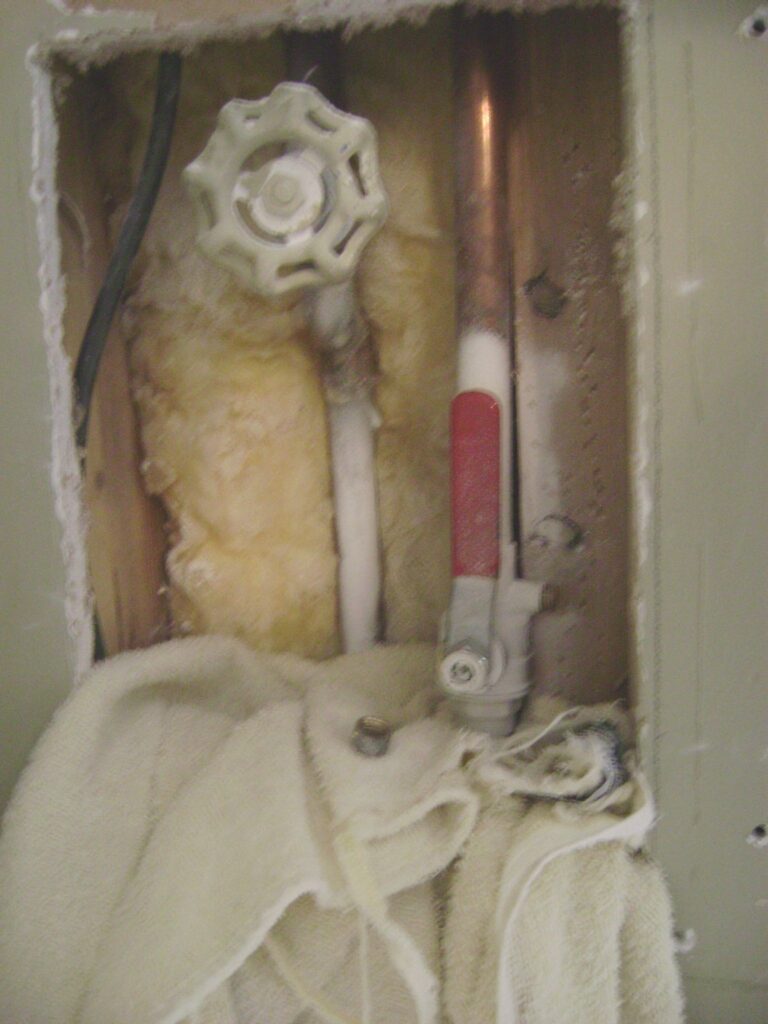
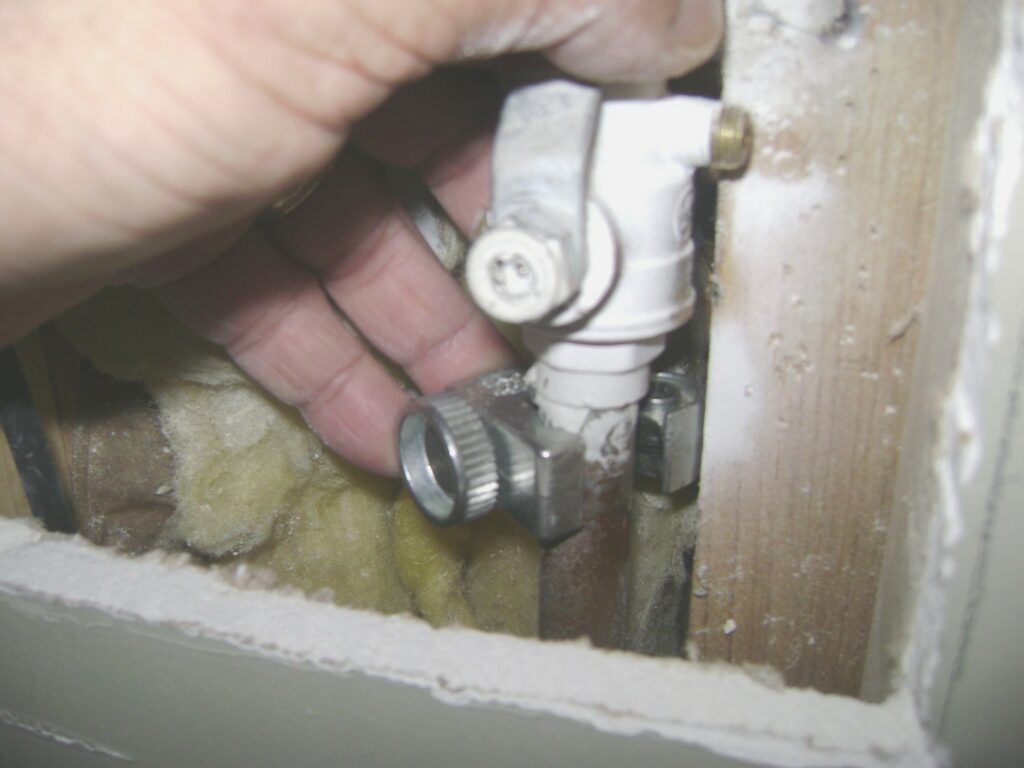
The water must be drained before cutting out the old ball valve. This was done buy shutting off the valve the round handle that is “upstream” of the ball valve (otherwise I would have to turn off the water at the water meter). A second hose bib at the basement deck was opened with the hose bib on the upper wood deck to complete drain the pipes. I confirmed the pipes were empty by removing the ball valve drain cap with a towel in place to catch drips:
The old water valve is soldered to the 1/2 inch copper pipe and it would be a problem to melt the solder with propane torch in such a confined space because the heat and flame may cause a fire. I removed the old valve by cutting it out with a rotary pipe cutter. This takes less than a minute. Just clamp it on the pipe and spin it around while retightening the cutter every two or three revolutions. Cut the copper pipe as close as possible to the valve:
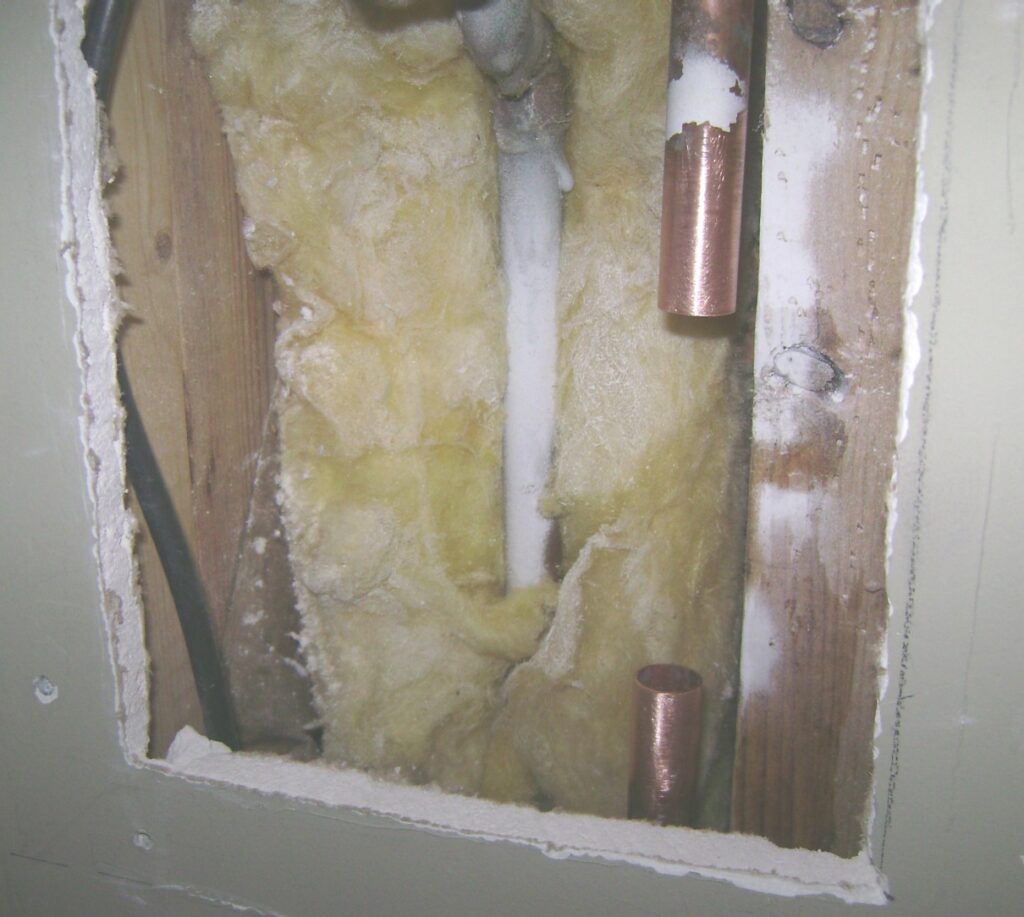
Here’s the first pipe cut at the bottom of the ball valve:
Measure and Fit the SharkBite Ball Valve
Measure twice, cut once.
Before making the second pipe cut to remove the old ball valve, it is extremely important to measure and make the cut in exactly the right place. If I cut too much pipe then I’ll have to splice in a new section of copper pipe.
To figure out where to make the second cut:
- I installed the SharkBite ball valve on a spare section of 1/2 inch copper water pipe.
Just push-fit the SharkBite valve until it’s fully seated on the pipe.
- Marked the pipe where it met the SharkBite fitting:
- Measured the length from the blue mark to the end of the copper pipe:
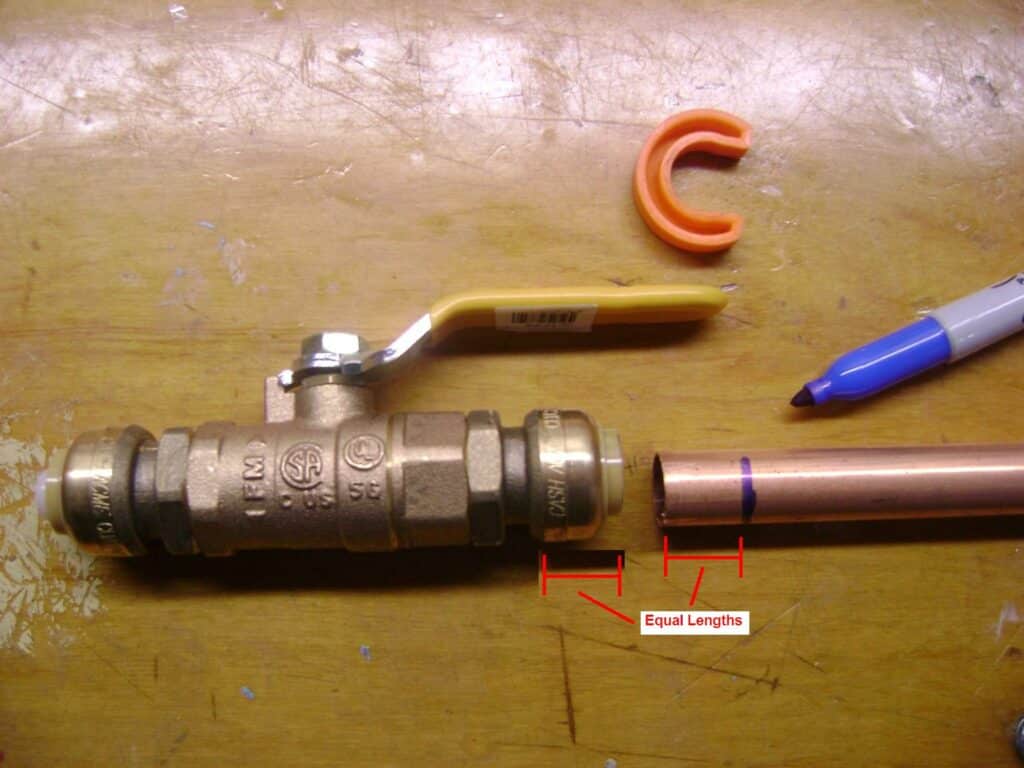
I visually compared where the copper pipe bottoms out inside the SharkBite ball valve… seats at the bottom of the shiny bell housing.
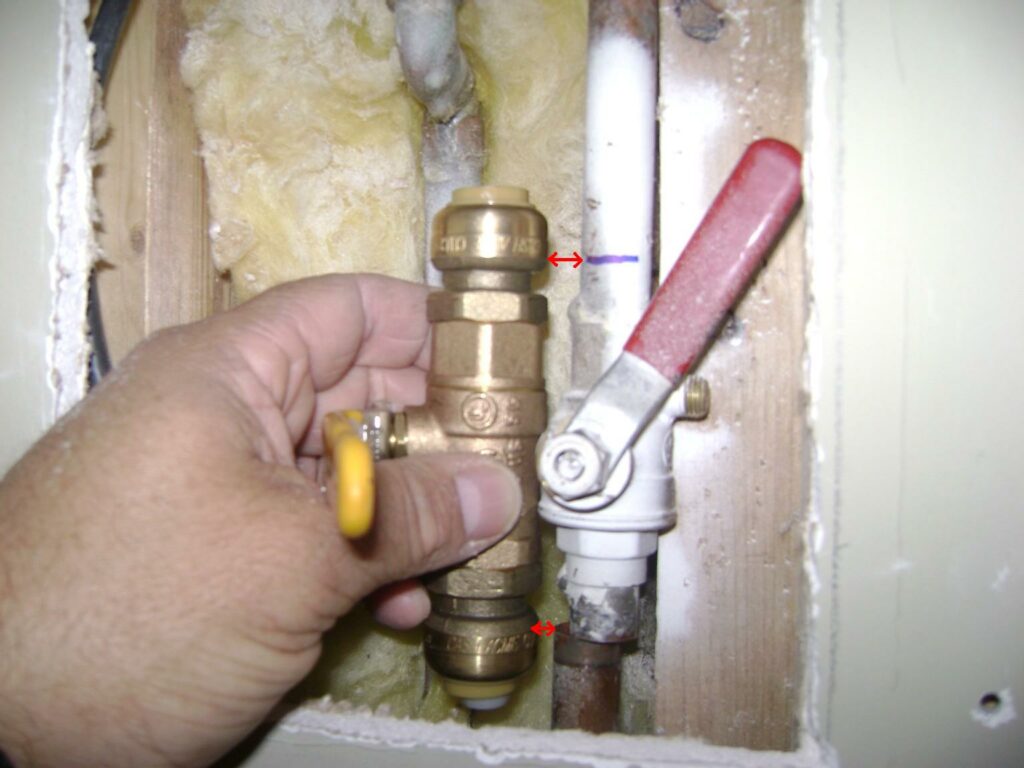
The SharkBite ball valve is aligned where it will seat on the lower pipe, then the location for the top pipe cut marked as shown:.
The top pipe connection was cut with the rotary cutter and the old ball valve removed. Here’s the pipe cutter and old ball valve:
The copper pipe ends must be clean, even and free of all burs, gouges, scratches for a leak free SharkBite fitting. The ends of the pipe were polished to smooth shiny finish with 600 grit sand paper (don’t use coarse sand paper because it will scratch instead of polishing the pipe). I would’ve used my 4-in-1 pipe brush tool (available here from Amazon), but there was no room for it:
The SharkBite ball valve is pressed into place on the lower copper pipe:
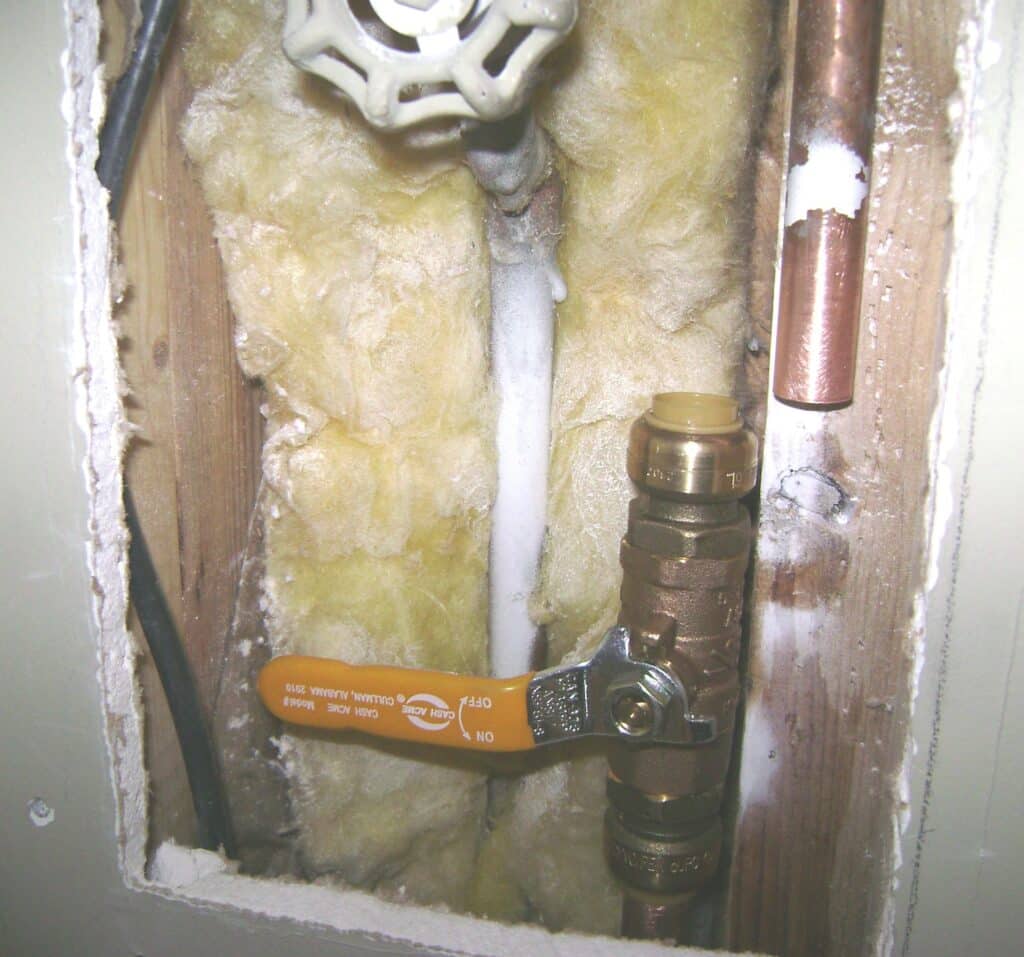
I had some wiggle room in the upper section of copper pipe to raise and insert it into the SharkBite valve. I tried to pull the connection apart and it didn’t budge. The SharkBite fittings will rotate and this is normal; it will not leak:
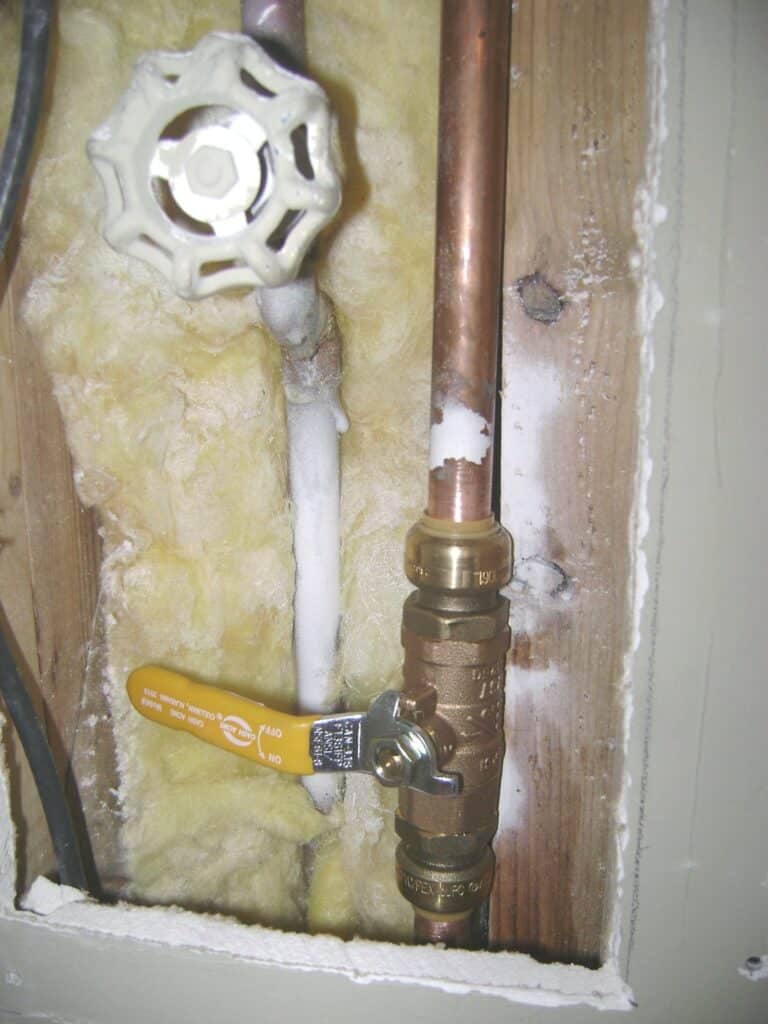
The water is turned on and the new valve checked for leaks. As of this writing, it’s been 10 days and water tight. Update: It’s been 5 years and the SharkBite fitting has never leaked.
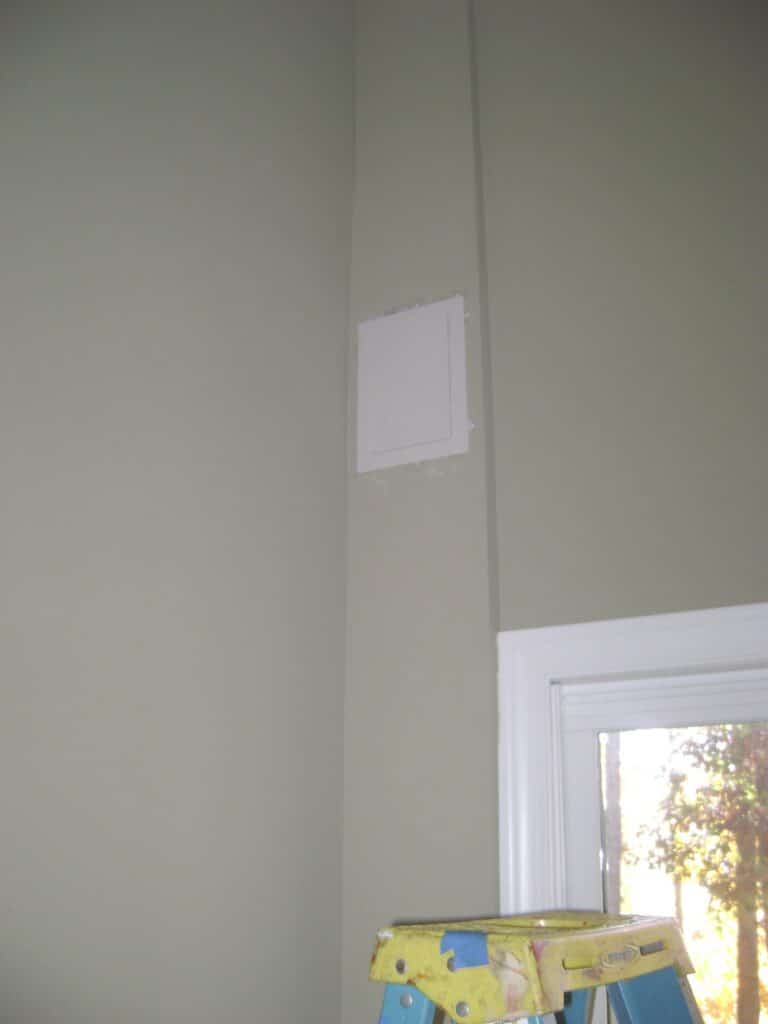
The frame for the drywall access panel secured with a bead of caulk, then the cover installed. The final task is to paint the access panel to match the wall color.
I also used SharkBite fittings for the basement bathroom plumbing and have been very satisfied.
Take care,
Bob Jackson