I’ve stabilized the deck addition and will now build a full height temporary support post and jack up the deck to replace the 6×6 deck post. This project is continued from How to Pull Together a Sagging Wood Deck. Also see the project introduction in How to Repair a Sagging Wood Deck if you’ve just landed here.
How to Replace a 6×6 Wood Deck Post
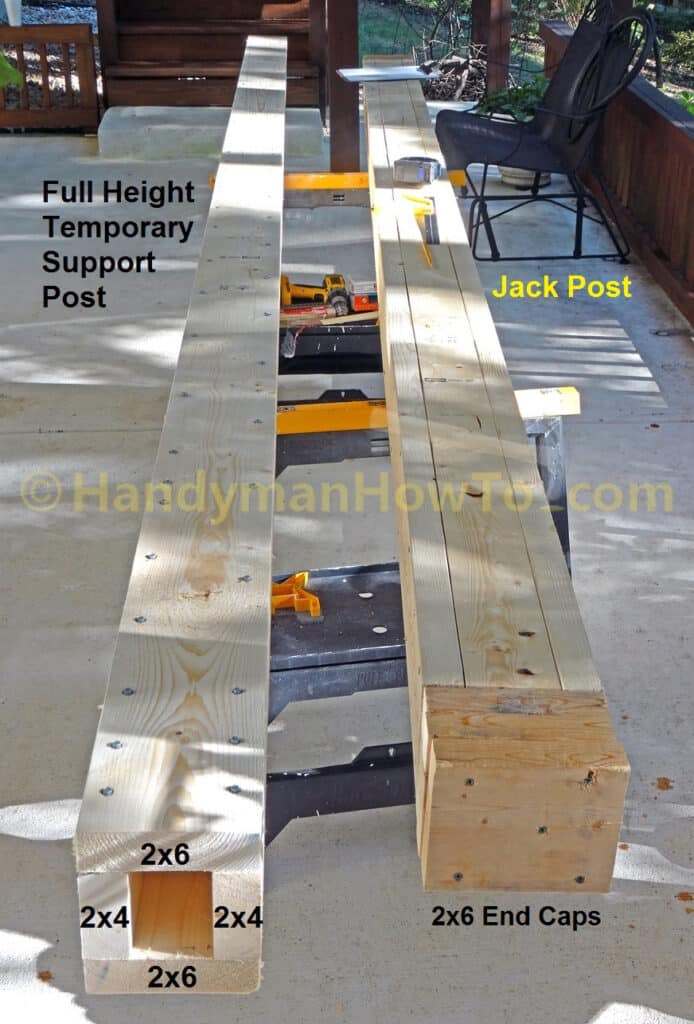
Build a Temporary Support Post
Two posts are made using 2×6’s and 2×4’s to jack up the wood deck:
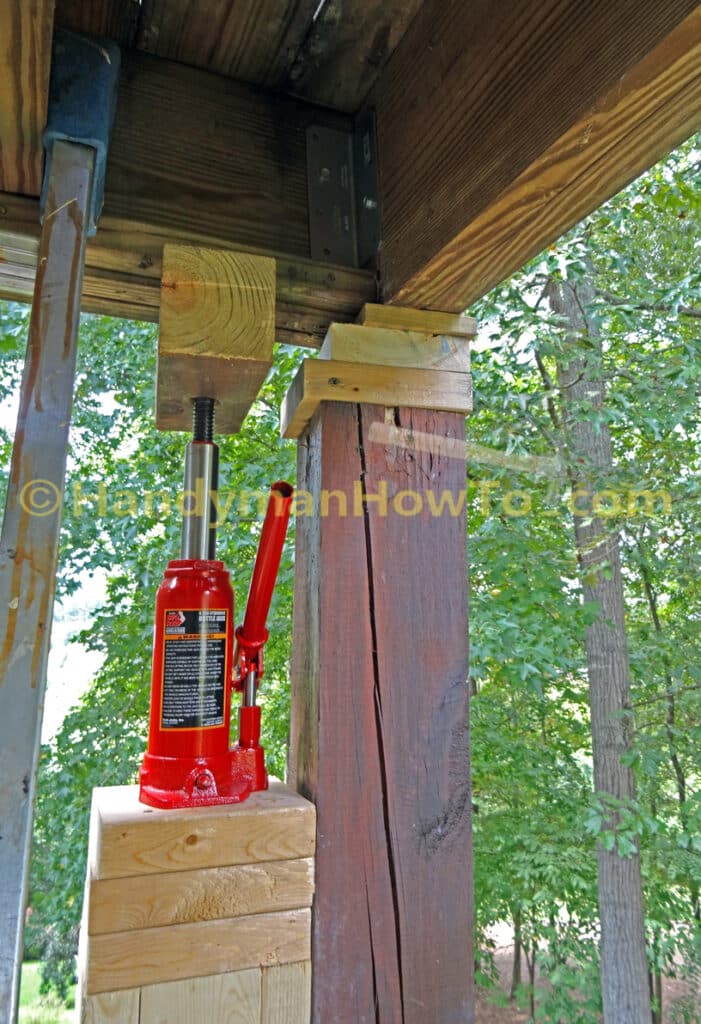
- Jack post – is a foot or so shorter to allow room for the hydraulic bottle jack to sit on the post.
- Temporary Support Post – to support the deck after the jacking and removing the old deck post.
I carefully measured the 14ft 8in height from the basement patio concrete slab to the bottom of the 2×10 deck beams, then built a full height temporary support post with 12 feet long 2×6 and 2×4 kiln dried lumber while leaving room for the base and end caps. 16 feet long boards would have avoided splicing boards but it was easier to haul 12 foot boards in the minivan. The base of the support post (facing the camera) has yet to be made. The temporary support and jack posts are shown together here:
The temporary support post will be holding up the deck for several weekends until I get the new concrete footer poured and 6×6 wood post installed. I therefore made it stronger using Simpson Strong-Tie SD #9 x 2-1/2 structural screws. I drove wood shims between the splice joints to ensure a continuous load bearing path. (Take care to stagger the splice joints.) This probably wasn’t necessary since the SD #9 screws will transfer the shear loads but it’s a simple safety precaution:
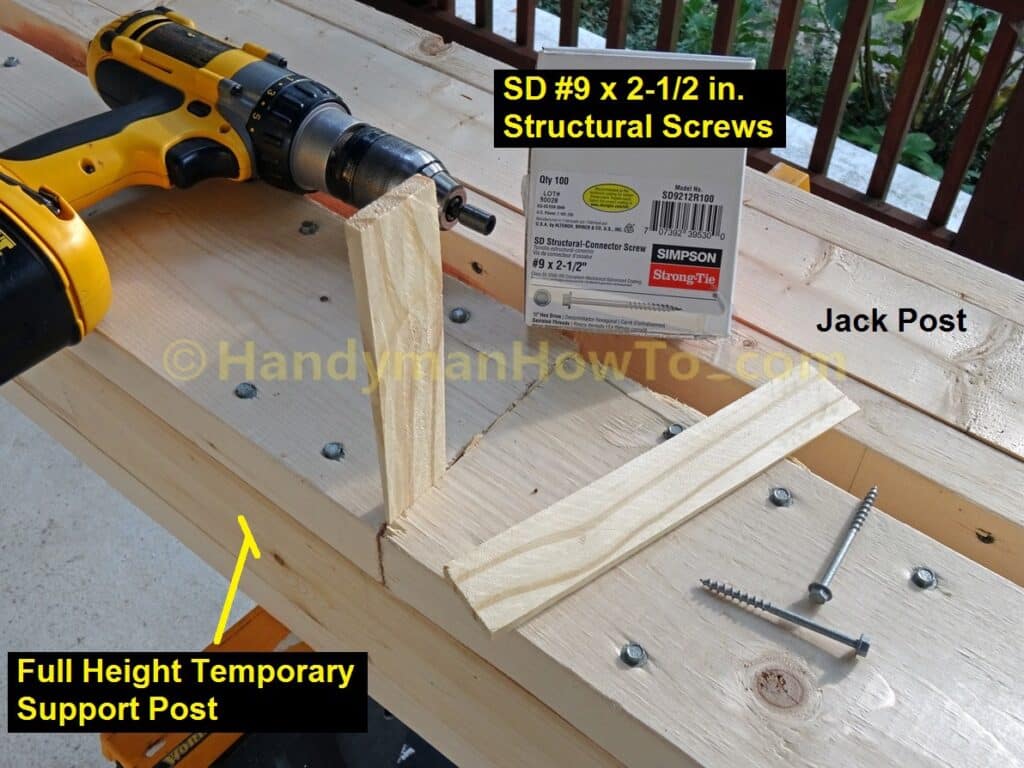
The Simpson Strong-Tie SD hex head screws were a pleasure to use. I used a Malco MSH14P Magnetic Hex Driver bit which held the screws well.
After pulling out the 16 penny nails that fastened the joists to the deck post and removing the 4×4 knee bracing, I installed Simpson Strong-Tie ML26Z angle (available here) with only two SDS 1/4 by 2-1/2 inch structural screws to reinforce joist connection.
The reason for only two screws now is to allow for some movement when jacking up the deck:

Referring to the above photo, I thought it odd that the home builder notched the inner 2×10 joist for the 2×2 ledger board over the deck post. This was completely unnecessary.
How to Jack Up a Deck
Caution: These next steps are potentially dangerous and if performed incorrectly or if the deck is not structurally sound, could result in a deck collapse causing property damage, injury and/or death. Please hire a professional deck builder if your are unsure of your abilities and deck structure.
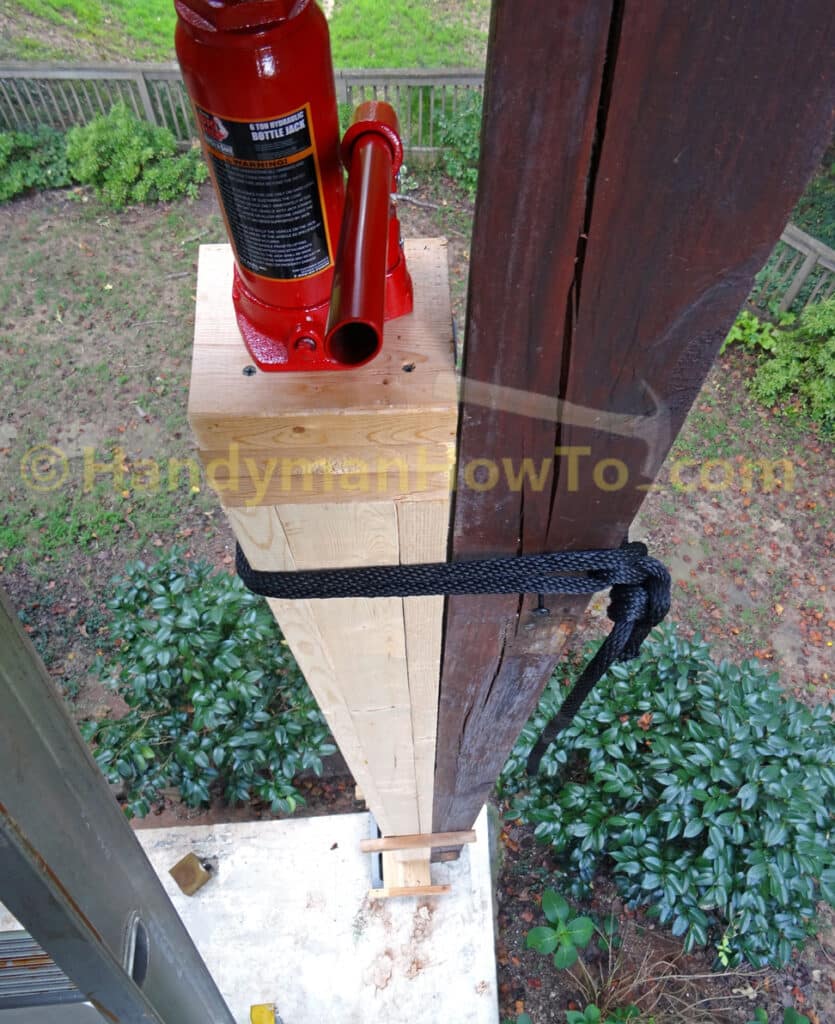
I was working by myself today and needed a way to hold the jack post in place, so I fastened two 2×4 braces with SD #9 screws to the sides of the deck post. The 2×4 braces were snug and pinched the jack post to hold it while I climbed the ladder to set up the hydraulic bottle jack:
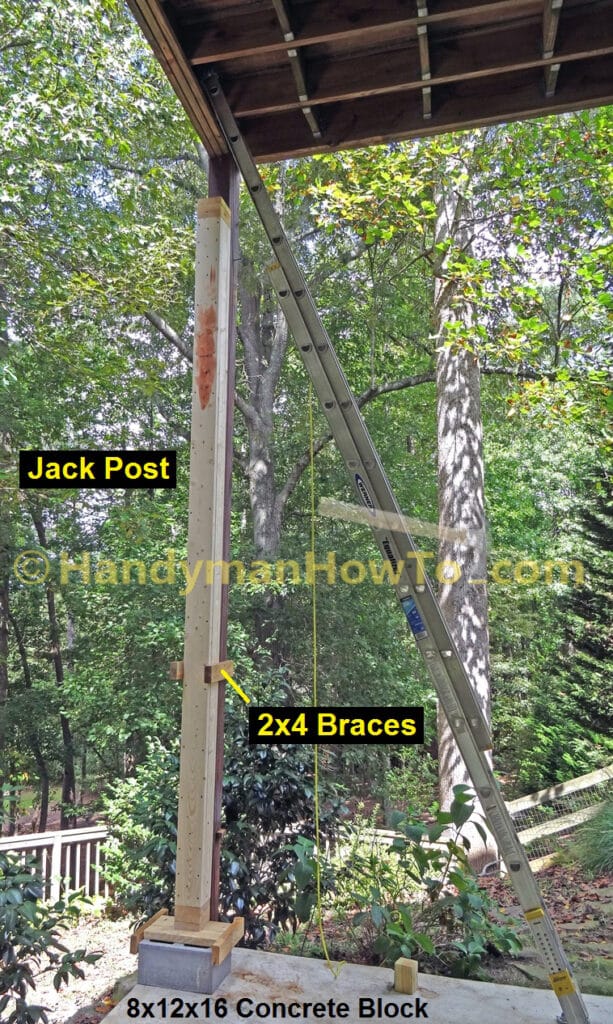
Another view of the jack post and 2×4 fork braces:
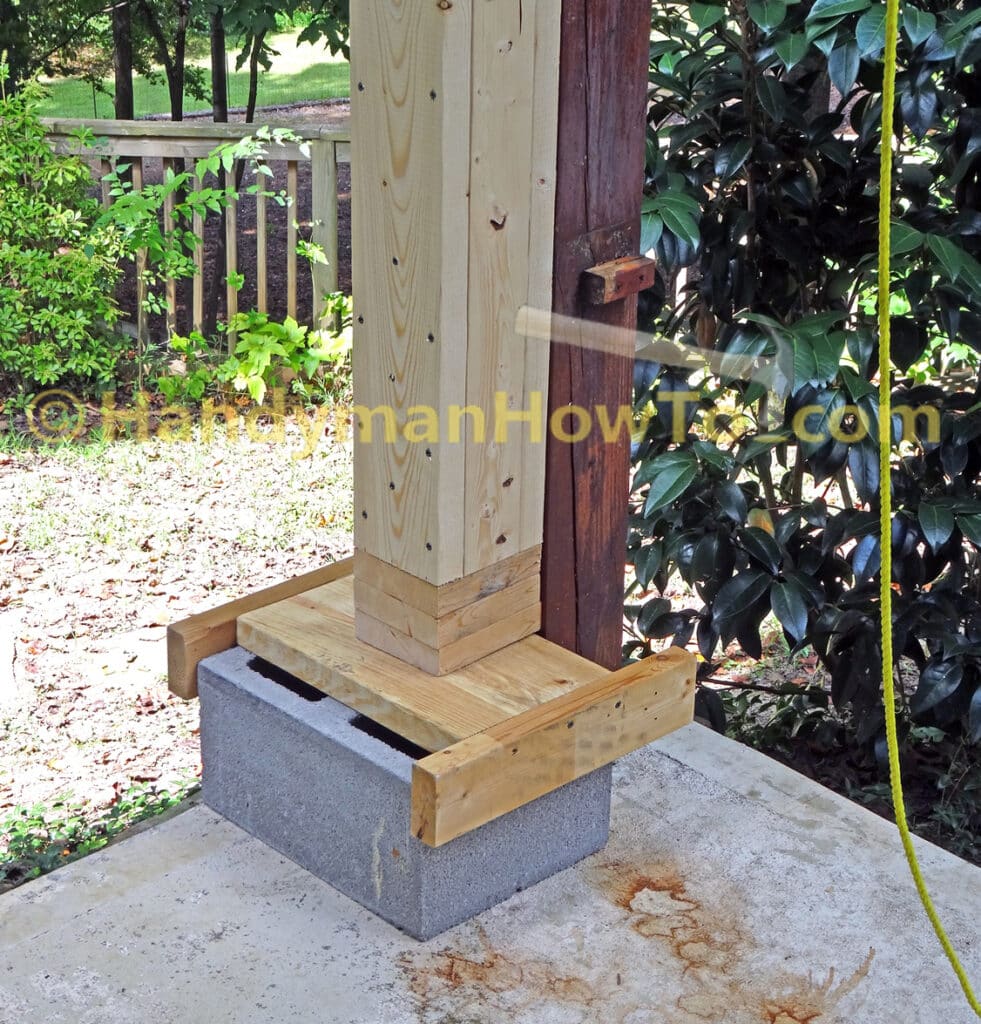
I’m using the same concrete block and 2×12 base as when I sistered the other deck post to fix the improper beam splice:
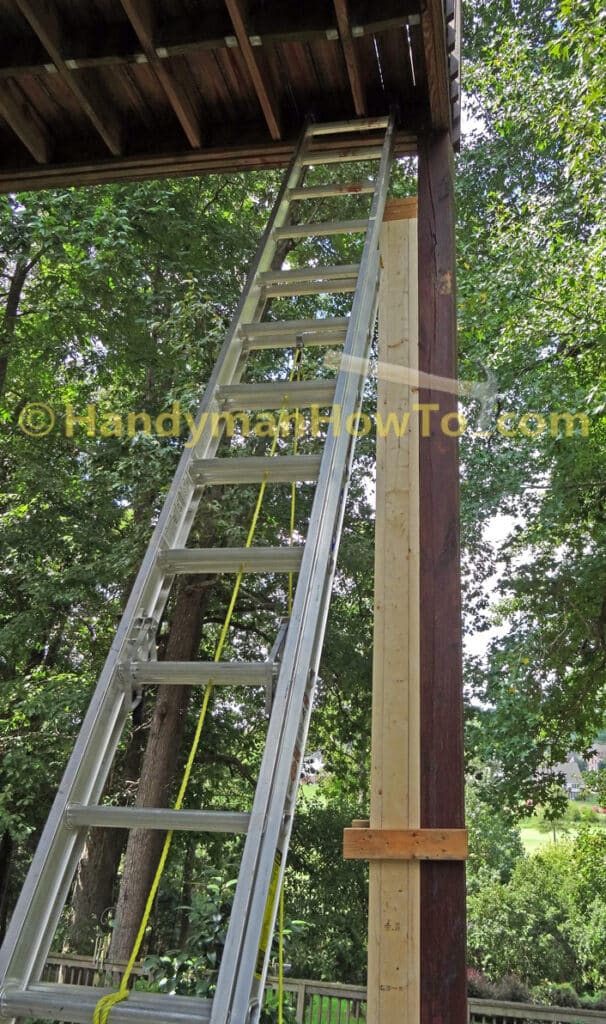
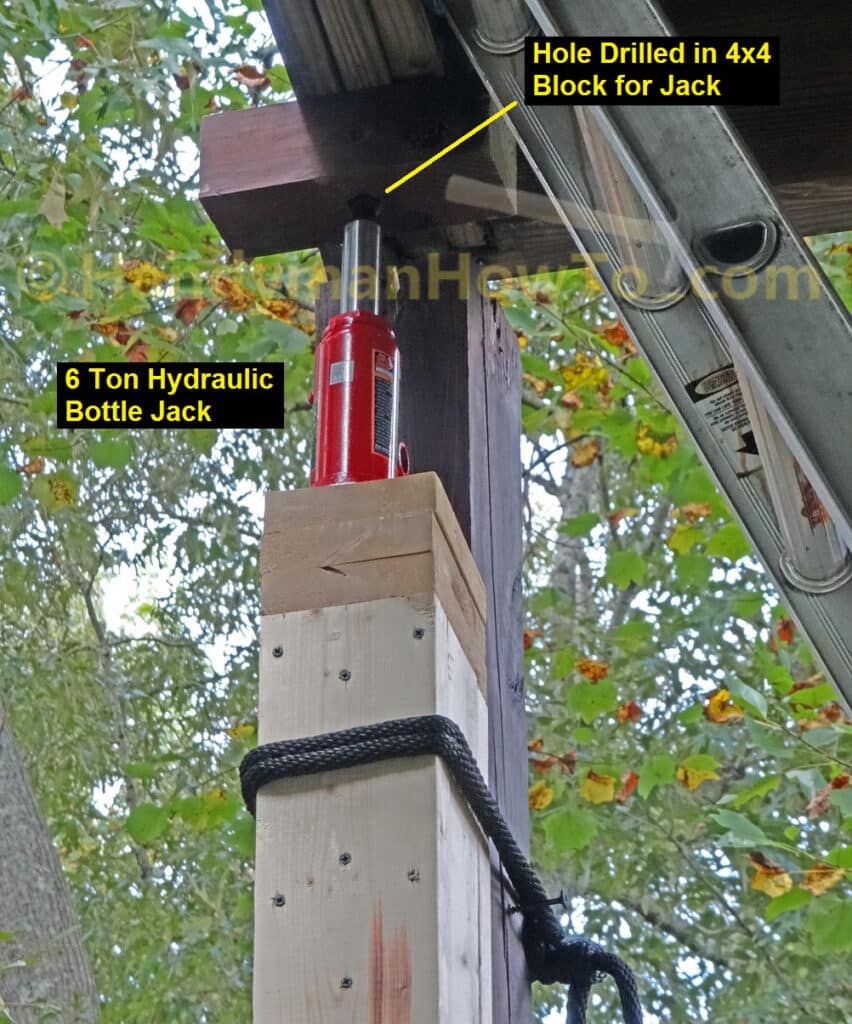
After tying a safety rope around the jack post, I set the Torin 6 ton hydraulic bottle jack and 4×4 block on the jack post, adjusted the screw and slowly jacked up the deck:
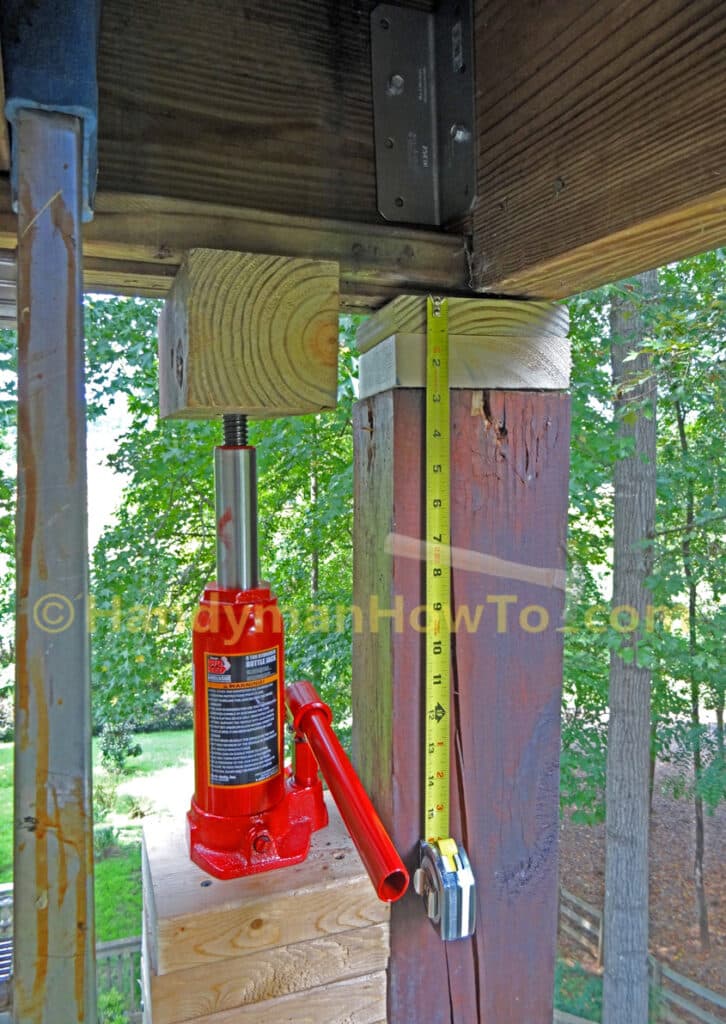
The deck is 14 feet 8 inches high from the patio slab to the top of the deck post:
I raised the deck very slowly about 1/2 inch at a time while listening for any cracking, checking for lateral (side) movement or pulling away at the ledger board. The deck creaked and groaned a slightly but was otherwise good. Pumping the 6 ton bottle jack was very easy and had it no problem lifting the deck.
I also considered the wisdom of jacking while underneath the deck on the 24 foot extension ladder. For me, the most convenient place with good footing on the concrete patio slab because the ground drops off about 3 feet at the corner post. Still it’s best to place the ladder outside the deck if possible to minimize risk. Hopefully your deck isn’t so high as mine.
Jack Up and Level the Wood Deck
I had previously determined the deck had sagged 2-1/2 inches. I placed scrap 2×6 (1.5 inch thick actual) and 5/4 x 6 wood (1 inch thick) on the post as I jacked the deck up a total of 2-1/2 inches to level:
Walking gently on the deck, I placed the 5 foot spirit level on the deck corner to check if it was level after jacking. After raising it 2-1/2 inches it was still a bit low:
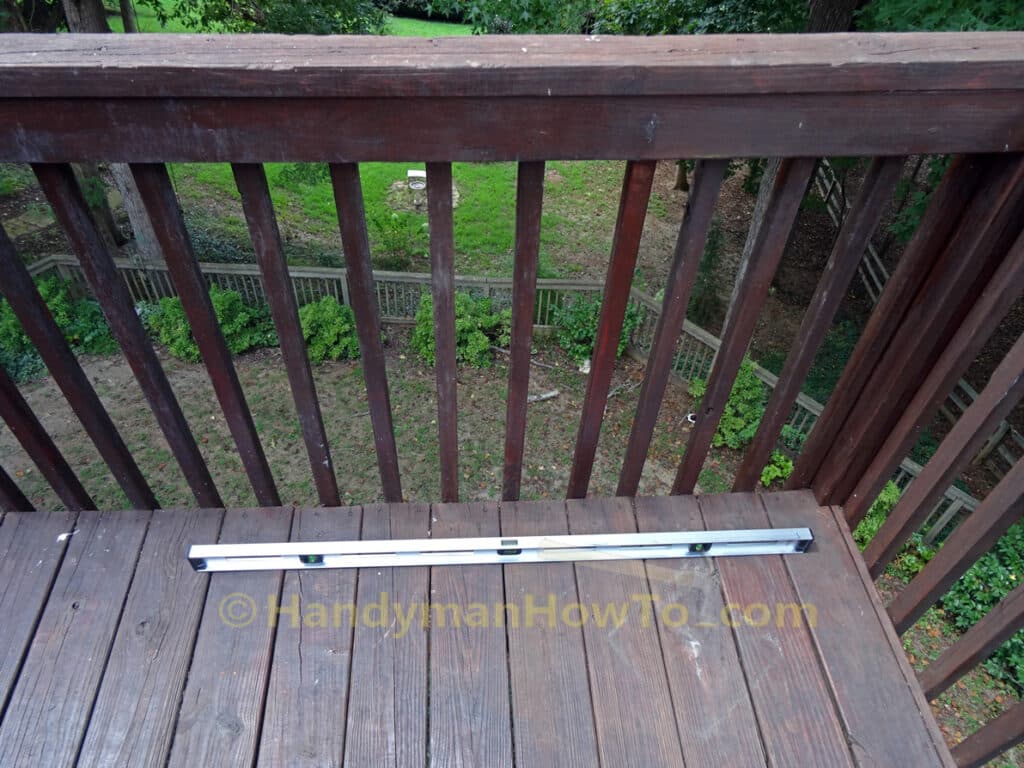
I swapped out the 1 inch thick 5/4 block for a 1-1/2 inch thick 2×6 block for a total of 3 inches of blocks. Rechecked the spirit level and the deck is now level after raising it 3 inches.
The deck must be jacked up not only until it is level, but a bit higher so I can set the new 6×6 deck post in place. I raised it a some more and placed a 3/4 inch thick block on top of the stack:
The deck corner is now slightly higher than level after jacking:

Next I’ll setup the full height temporary support post and remove the jack post in How to Replace a 6×6 Wood Deck Post – Part 2.
Take care,
Bob Jackson