The HardiPlank lap siding is replaced and the ledger flashing drip edge formed with a hand seamer to complete the deck rebuild. This project is continued from How to Replace Deck Ledger Flashing – Part 1. Also see the series introduction for a description of the sagging wood deck repair.
How to Replace Deck Ledger Flashing – Part 2
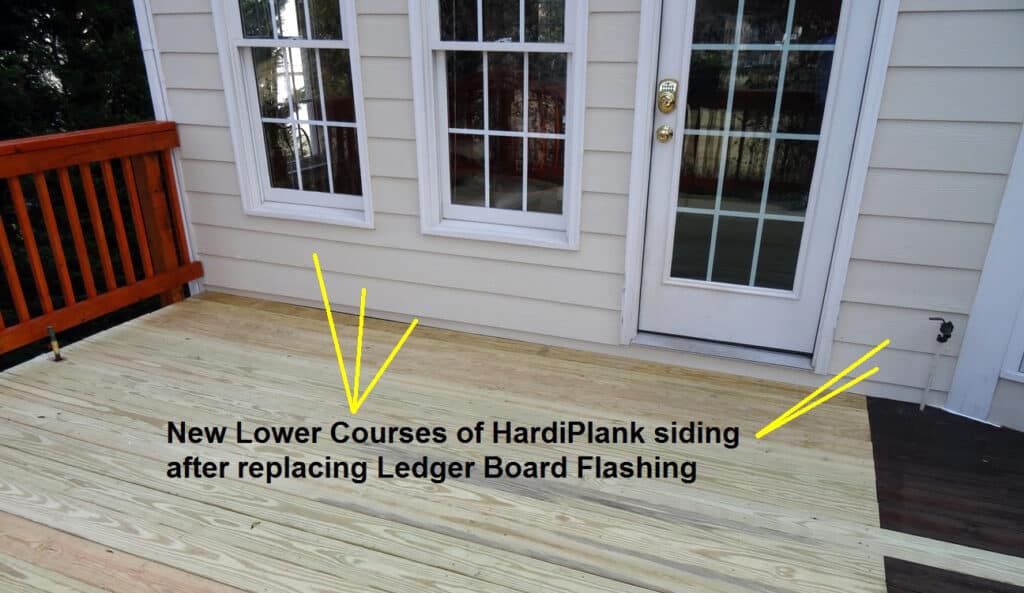
Install New HardiPlank Lap Siding
It was necessary to tear off the bottom rows of siding to remove the old ledger flashing that was full of nail holes and install the new flashing. The HardiPlank siding is installed, the joints caulked given a fresh coat of paint. Not visible in the following photo is where I sealed the crack between the lap siding and under the door aluminum threshold with GREAT STUFF Window & Door foam sealant, waited for the foam to cure and cut off the excess with a serrated knife.
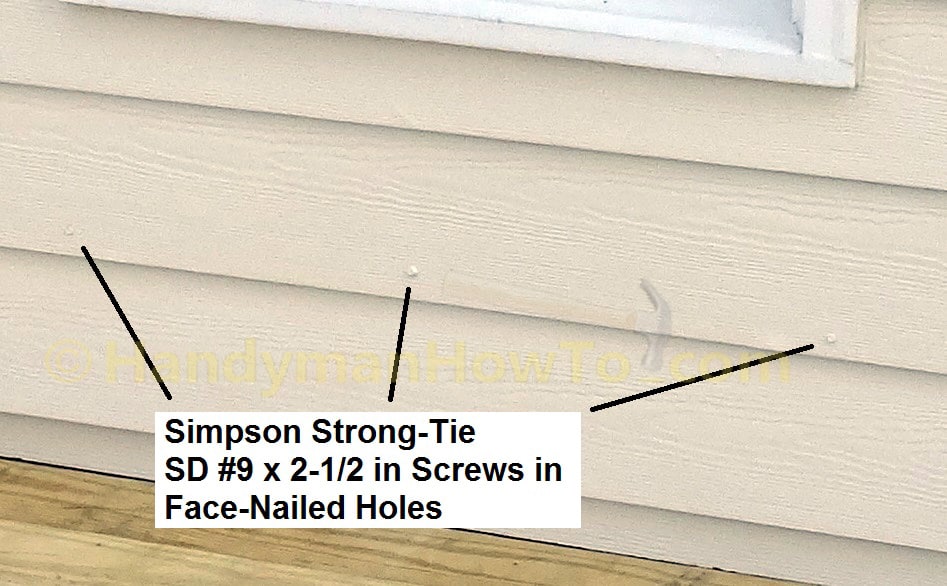
The 3rd row of HardiPlank that I didn’t tear off was face-nailed. This created a minor challenge when reinstalling the siding because there was a small divot where I pulled out the old nails and a new nail wouldn’t hold well. I used Simpson Strong-Drive SD #9 x 2-1/2 hex head wood screws set in the old nail holes to fasten the board. It blends well when painted:
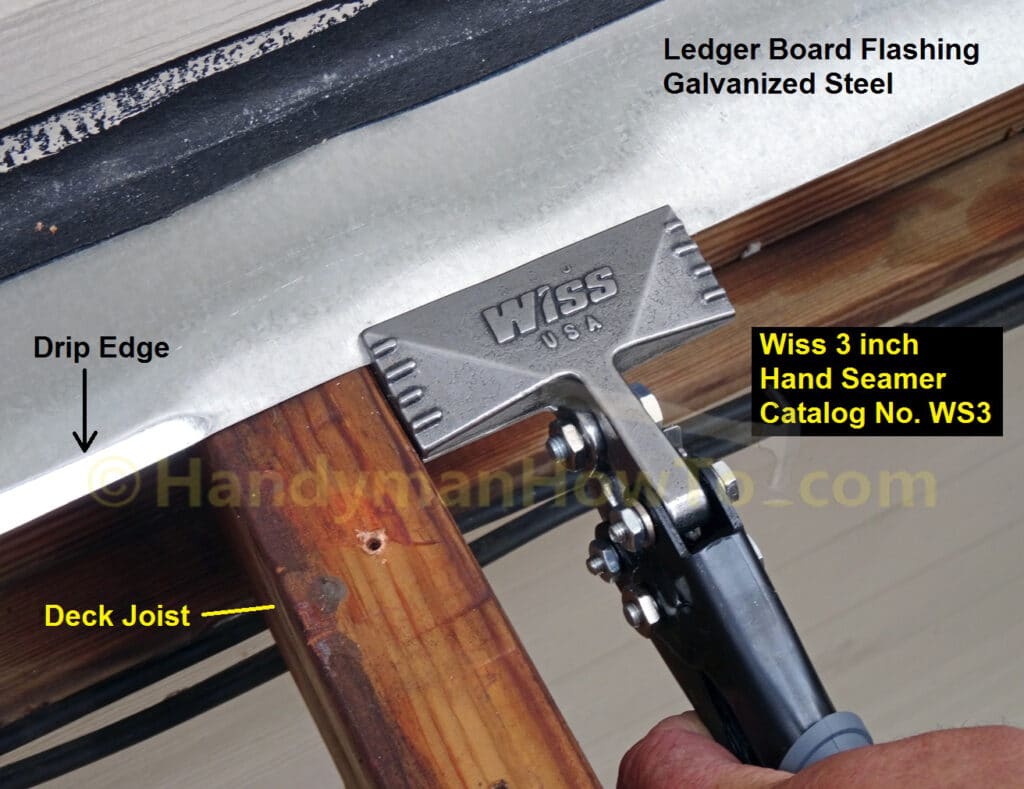
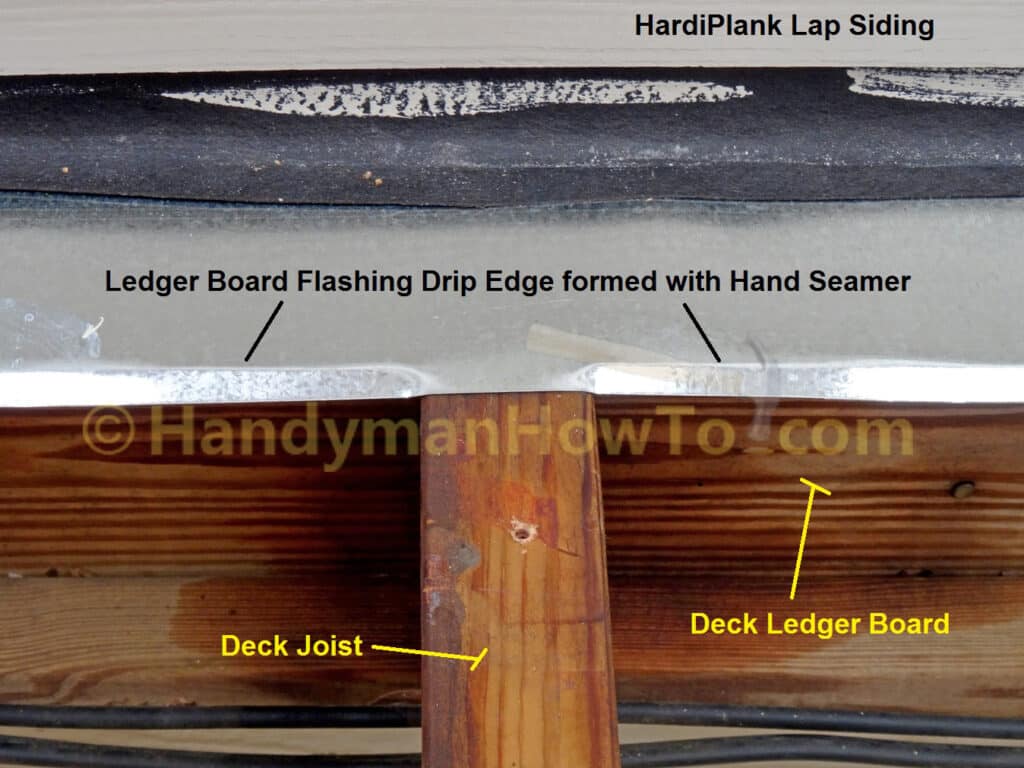
Bend Ledger Flashing Drip Edge with a Hand Seamer
A drip edge is required on the deck ledger flashing per the building code. Because I custom made the ledger flashing from flat roll flashing, I needed to form the drip edge to pass inspection.
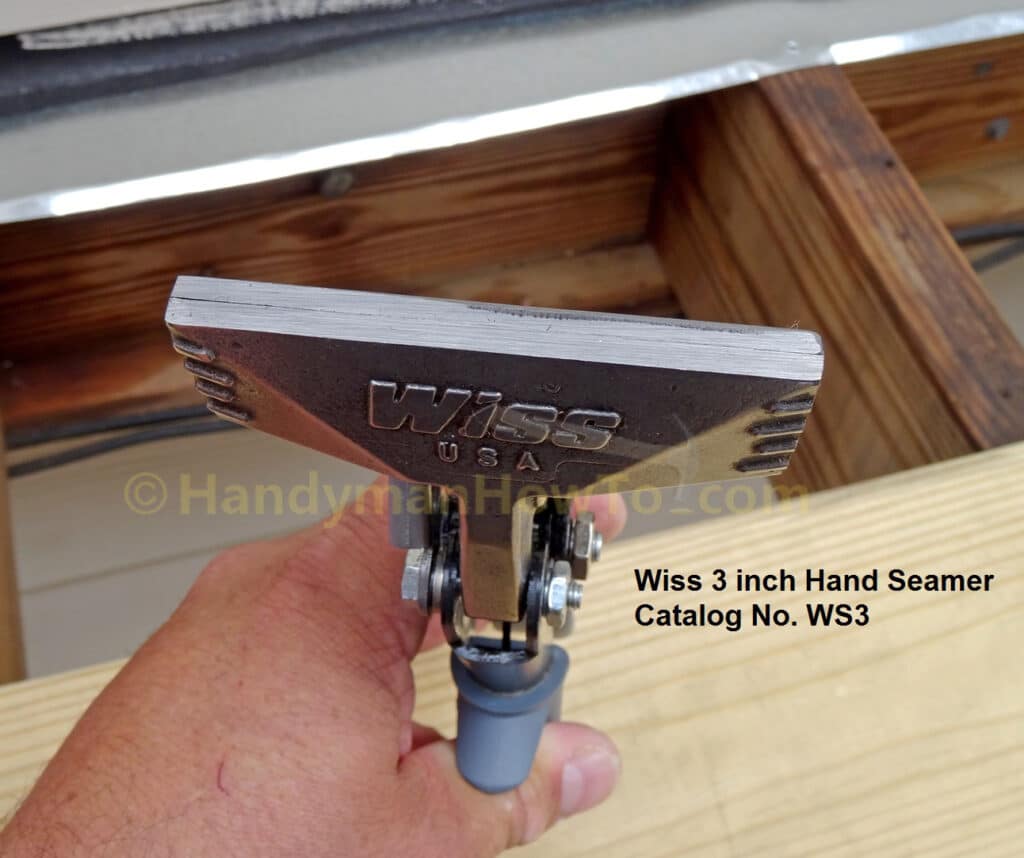
I removed the first two rows of deck boards next to the wall (this is why I like deck screws) to make room to work the hand seamer. The drip edge is made by working along the edge and overlapping each bend. The Wiss 3 inch Hand Seamer has depth markings on the jaw in 1/4 inch increments which I used to make a 1/4 inch bend:
A 6 inch wide hand seamer would be faster, but I wasn’t sure if that would fit in a tight space. The 3 inch seamer did just fine.
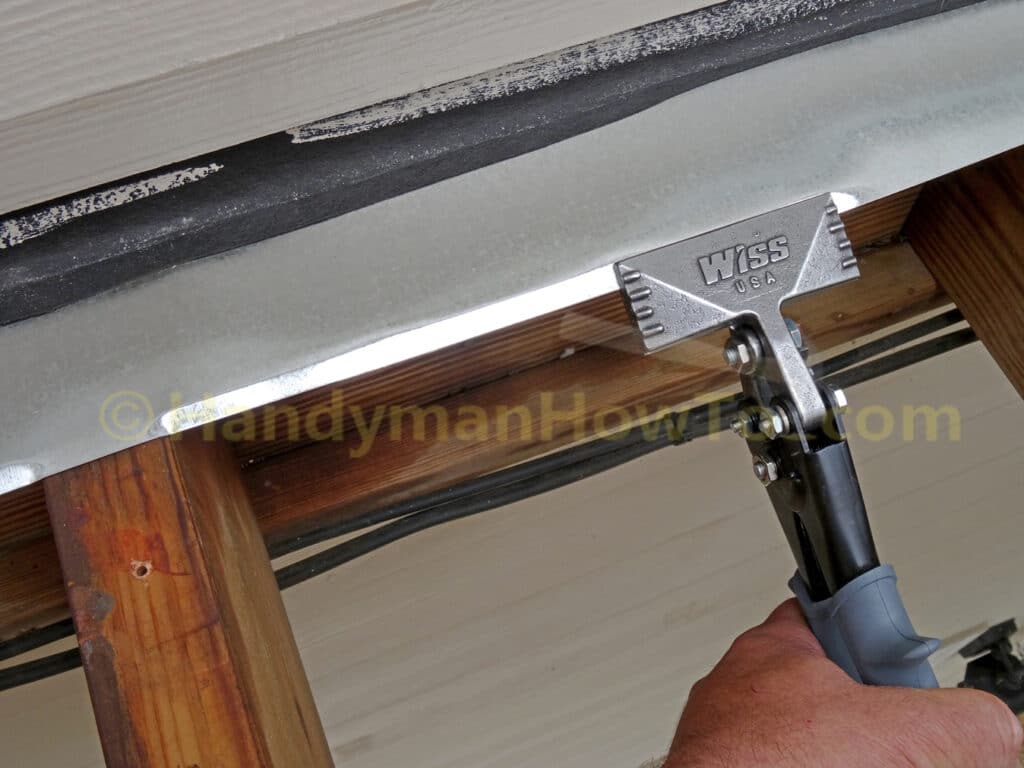
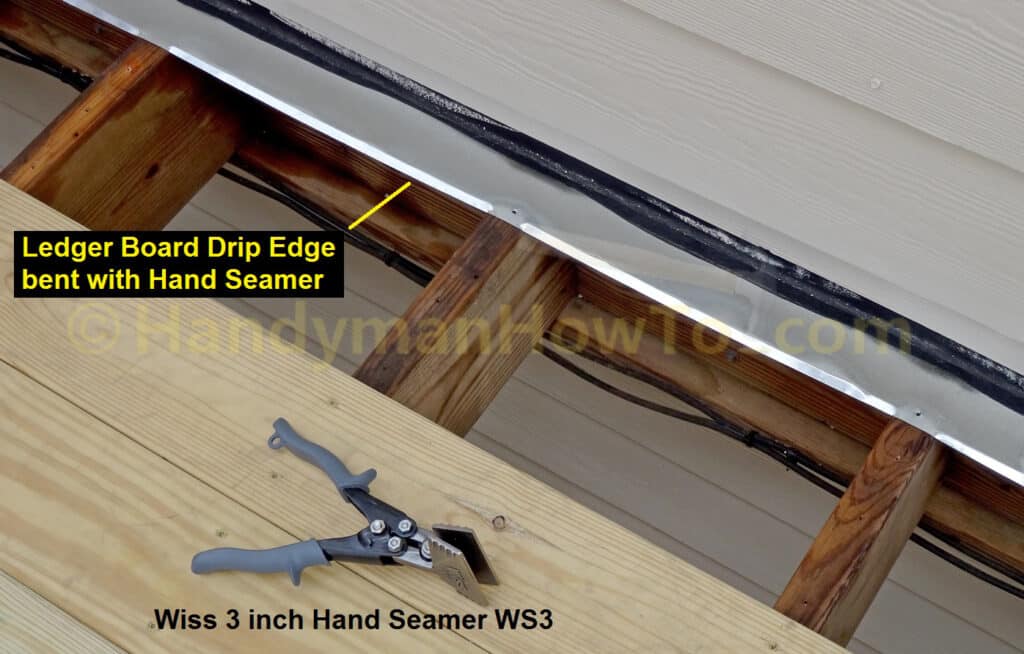
No need to cut the flashing at the deck joists because the sheet metal bends easily to conform to the joist. The darker areas on the wood are where I brushed on several coats of Copper-Green Brown Wood Preservative before installing the flashing.
The hand seamer jaws closed with almost no gaps – just a slight opening at the left side about the thickness of a sheet of paper. The seamer worked fine with no slippage.
I was done bending 12 feet or so of drip edge in a few minutes. Notice the deck board screw holes in the ledger flashing at the joists. A strip of the Grace Vycor Deck Protector on the joists would seal the fastener penetrations if I’d thought of it earlier. Aside: Deck joist flashing tape is not required by the Georgia Amendments Prescriptive Deck Details Based on the 2012 International Residential Code although I think it’s a great idea.
I installed the two deck boards and am nearly finished with the sagging deck rebuild:
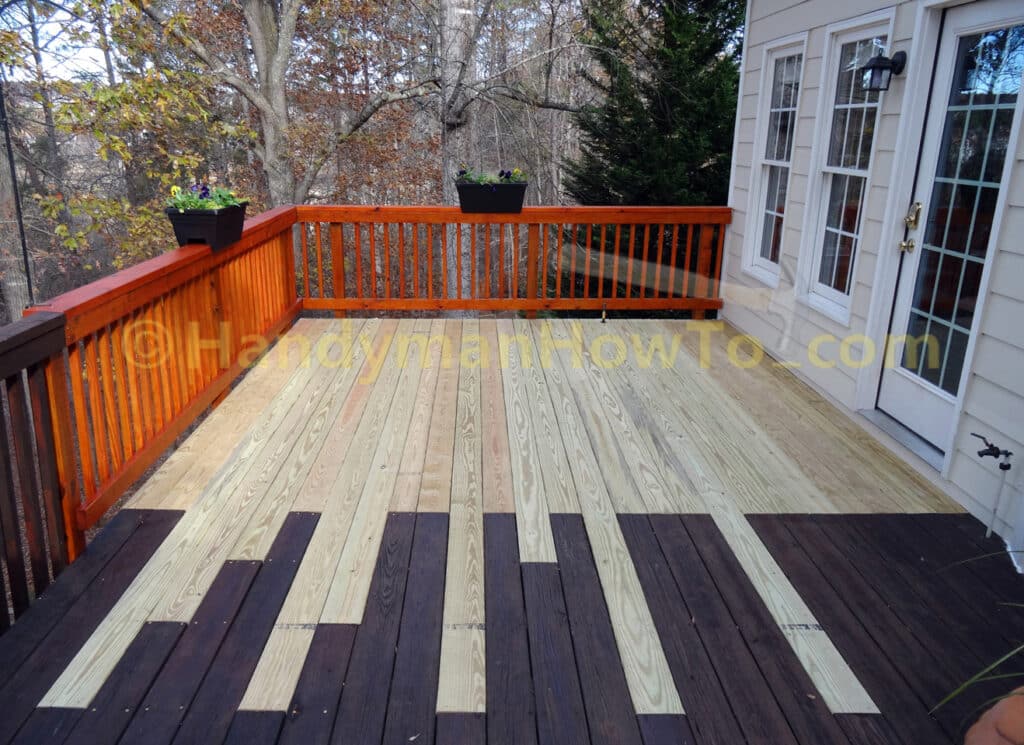
The deck rebuild series is concluded in How to Install a Natural Gas Shutoff Valve for a Grill.
Take care,
Bob Jackson