This project is continued from How to Install Bullnose Rain Gutter Covers – Part 1.
Before installing the new bullnose gutter covers, I cleaned most of the tree debris from the flip-up screen gutter covers that will be replaced.
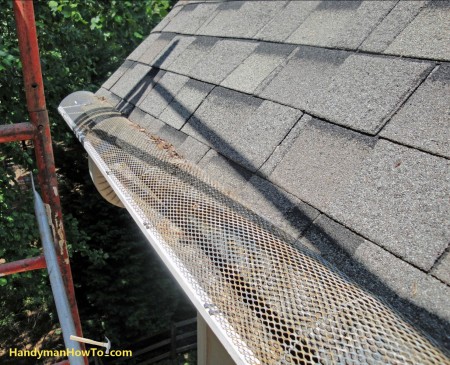
The flip-up gutter screens do a good job of keeping the gutters clean. The problem with the screens is tree debris is caught where the screen meets the roof and forms a dam.
Install Bullnose Gutter Covers
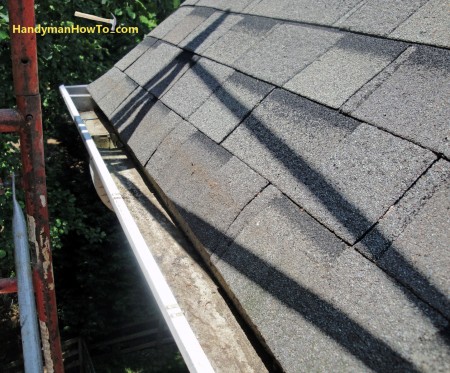
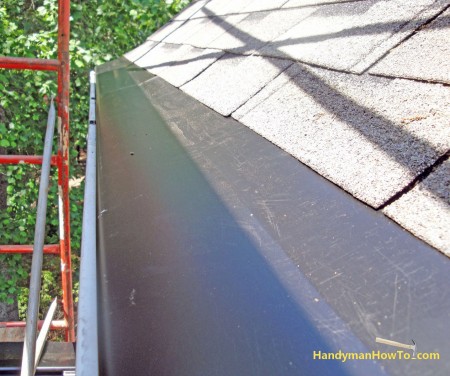
This is a ~13 foot section of gutter. The gutter drains well with no standing water so a gutter “tune up” to adjust the pitch for drainage isn’t necessary:
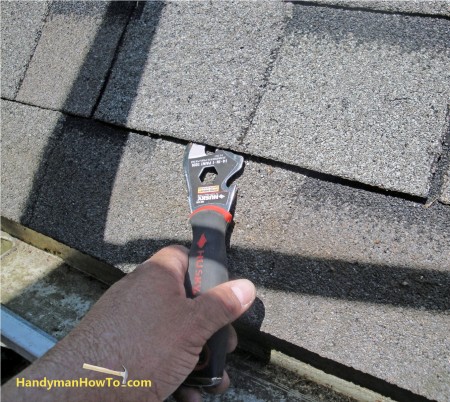
The Coverall Gutter Covers will slide underneath the second row of shingles. The adhesive bond under the shingle tab is carefully released with a 5-in-1 painters tool. It’s best to do this work on a warm day when the shingles are flexible to avoid breaking or cracking.
The gutter covers are slipped under the 2nd row of shingles and fasten to the gutter with one screw per bracket:
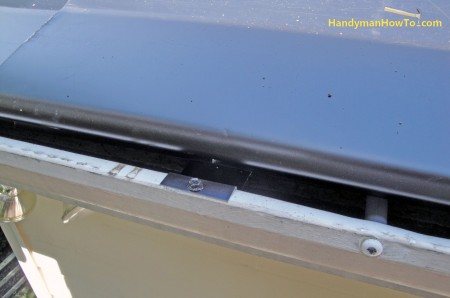
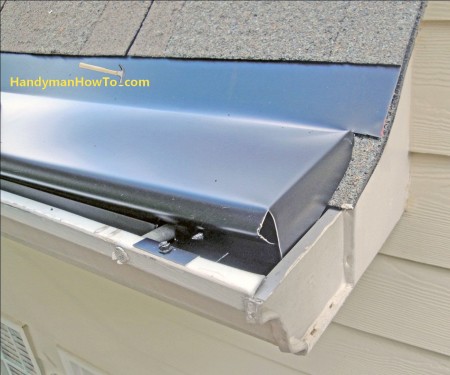
The gutter covers are over lapped by about 1 inch to allow for thermal expansion and the bracket is fastened to the gutter lip with a hex-head sheet metal screw:
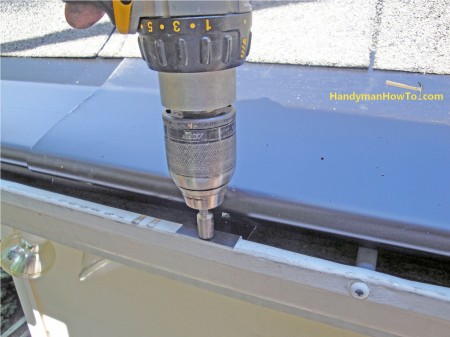
The screw and bracket system makes a secure installation:
The bullnose of the Coverall Gutter Covers installs even with the inside edge of the gutter. This is a limitation compared to other “nose forward” designs such that the bracket can be fastened with screws to the gutter. I can see where a “nose forward” design would be better at keeping debris out of the gutter. As I found after a couple of seasons, the smaller tree debris will wick into the gutter and settle on the bottom, but it did a good job keeping out twigs and leaves.
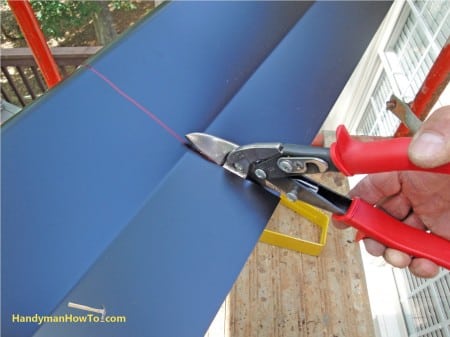
The metal gutter cover is easy to cut to length with tin snips. Be sure to cut the end about 4 inches longer than the gutter to make an end-cap:
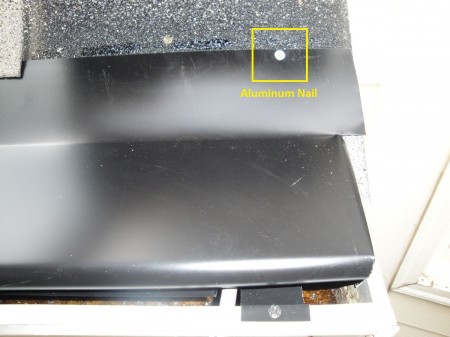
If the gutter cover doesn’t lie flush against the shingles or if your roof deck is “wavy”, an aluminum roofing nail should be used to set the gutter cover flush against the roof. Be sure to place a dab of roofing sealant beneath the gutter cover (i.e. on top of the shingle where the nail will penetrate) and also on the nail head to prevent any chance of leaks.
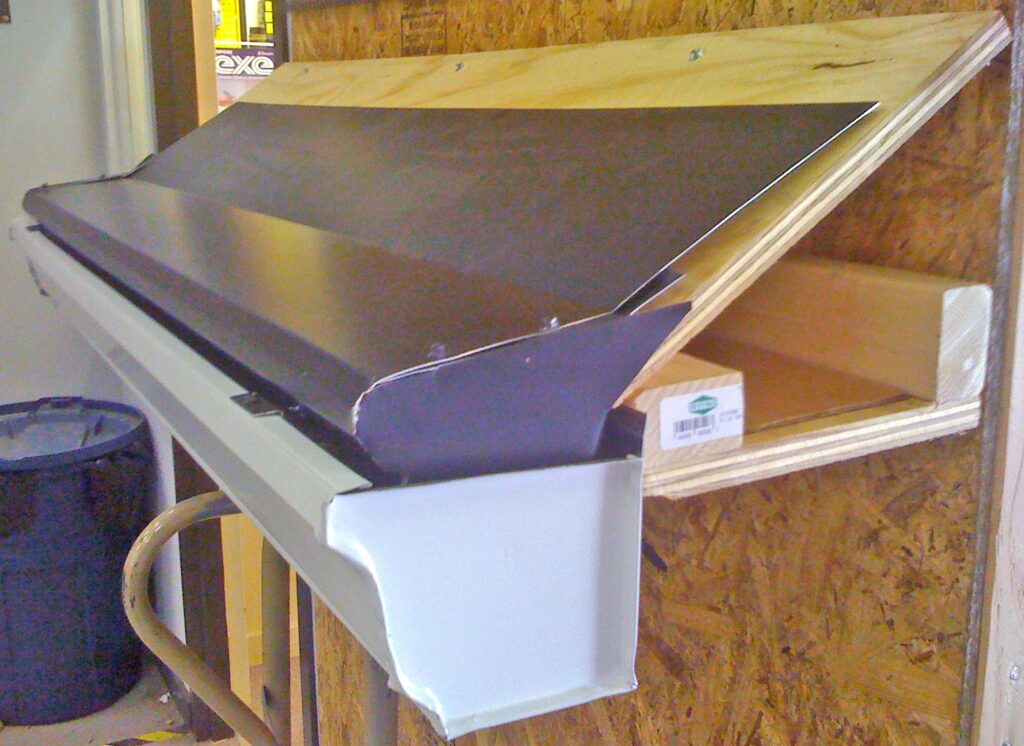
I made an end-cap by trimming a flap and folding it down inside the gutter to keep out birds and squirrels:
I had forgotten the more professional method for making an end cap that I saw at the Woodstock Gutter Supply product exhibit. The full profile end cap is easy to cut out with tin snips and fasten with two sheet metal screws. If I have critter problems with my folded end-cap, it’s easy enough to retrofit the full profile cap as shown here:
The low-profile metal gutter covers look nice and have performed well now for the month that I’ve had them on the house. Leaves and twigs just roll off the roof now on both dry and rainy days. I’m eager to see how well these do in the fall and next spring.

This project is continued in How to Install Bullnose Rain Gutter Covers – Part 3 where the gutters on the other side of house needed extensive tune-up work before installing the new gutter covers.
Hope this helps,
Bob Jackson