Connect the Delta single handle kitchen faucet water lines to complete the faucet installation. This series is continued from How to Install a Delta Single Handle Kitchen Faucet. Also see How to Replace a Kitchen Faucet to disconnect and remove the old faucet.
Delta Kitchen Faucet Water Line Connections
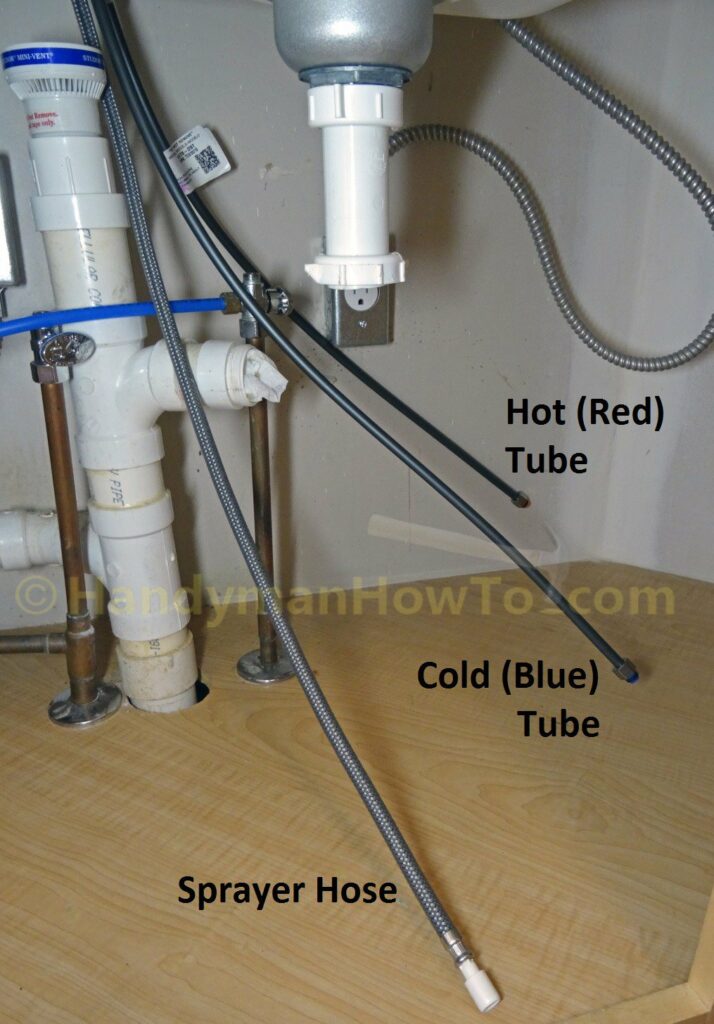
The water lines are hanging under the sink after mounting the faucet:
Delta Kitchen Faucet Custom Fit Connections
The hot and cold water supply tubes are quite long to suit most any plumbing arrangement. If the tubes are too long they can either be looped (minimum 8 inch diameter loop) or cut-to-fit per Figure 2 on page 5 of the Delta Leland installation instructions. I tried making a loop but it would be too small which can stress and crack the tubes. Therefore I’ll follow the Custom Fit Connections procedure on page 6 of the instructions to cut the tubes shorter.
The hot (red) and cold (blue) PEX supply tubes have 3/8 inch fittings. The hot water supply tube is shown next to the stop valve:
I won’t be able to use the red & blue factory fittings when I cut the tubes shorter. Instead, the Delta kit includes Plastic Sleeves to seal the connection:
Caution: Delta’s instructions says the installer assumes all responsibility for creating a leak-free joint if the tubing is cut.
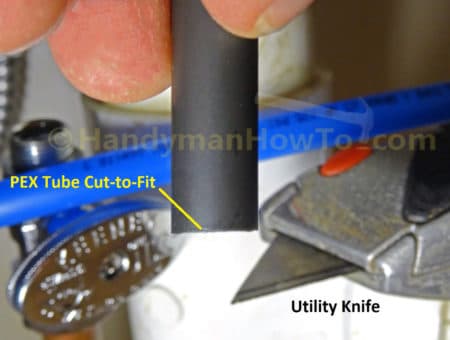
To cut the hot and cold water supply tubes to length:
- Hold the tube next to the stop valve 3/8 inch inlet.
- Make a mark on the tube about 1-1/2 inches longer than the valve inlet.
- Cut the tube evenly with a utility knife or PEX Tube Cutter.
A tube cutter is the easiest and surest way but a utility knife worked fine for me on this small tube. - Verify the cut is square and not slanted.
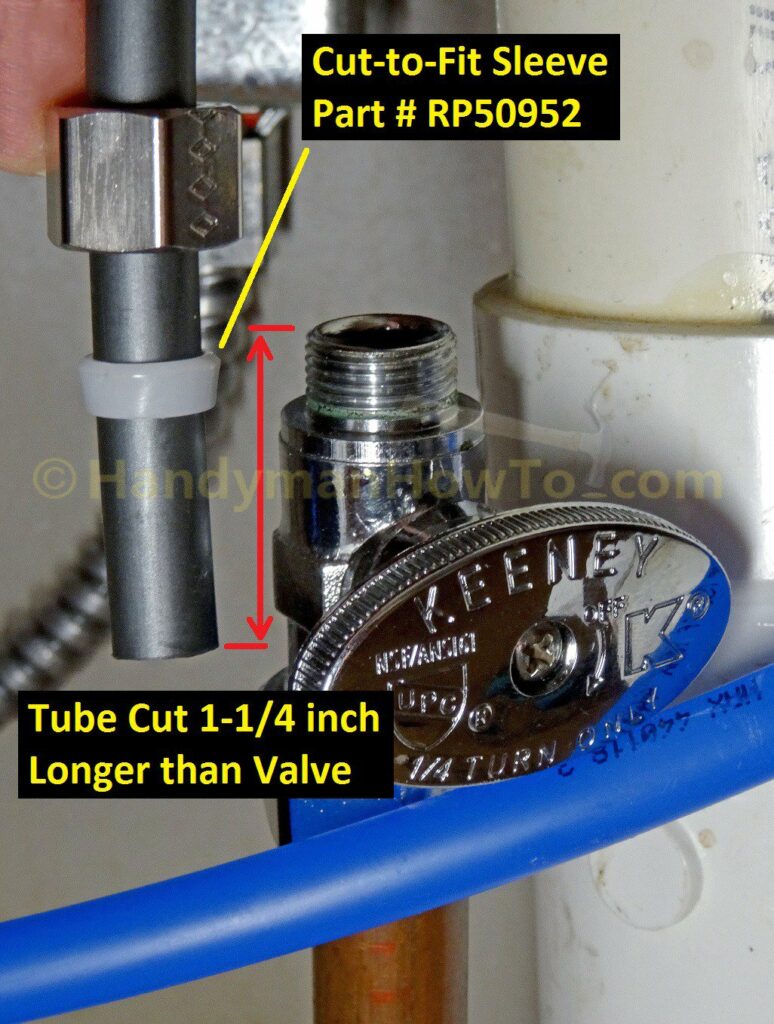
Slip the metal nut over the tube followed by the plastic sleeve. The wide end of the sleeve must face the nut for a leak-free connection:
You’ll need both hands for the next steps:
- Hold the PEX tube straight and insert it in the stop valve until it touches the bottom of the hole.
- Continue holding the tube straight & against the valve, then slide the plastic sleeve down to the stop valve inlet.
- Tighten the nut by hand then an extra 1-1/2 to 2 turns with a wrench.
Do not over tighten the nut because it can crush the plastic sleeve and cause a leak.
The completed hot and cold water faucet connections:
Note the practice cut I made on the cold water tube in the above photo.
Flush the Faucet Lines
Step 3 on page 7 of the installation instructions says to flush the supply lines by placing a bucket under faucet outlet tube, slowly open one stop valve at a time then open the faucet. It’s best to have a helper move the faucet handle while you’re under the sink holding the bucket and opening & closing the stop valves.
Close the stop valves after flushing the hot & cold water lines.
Delta Kitchen Faucet Sprayer Hose Connection
The sprayer hose is easy to connect and requires no tools.
Begin by sliding the hose weight over the end of the sprayer hose:
Lying on my back under the sink, I pressed the sprayer hose on the faucet outlet tube. This required both hands because I had to press hard to seat the connection:
The blue clip fits over the shoulders of the outlet tube and sprayer hose. The clip snaps on easily – if not the connection isn’t fully seated and you’ll have to press the two ends together some more:
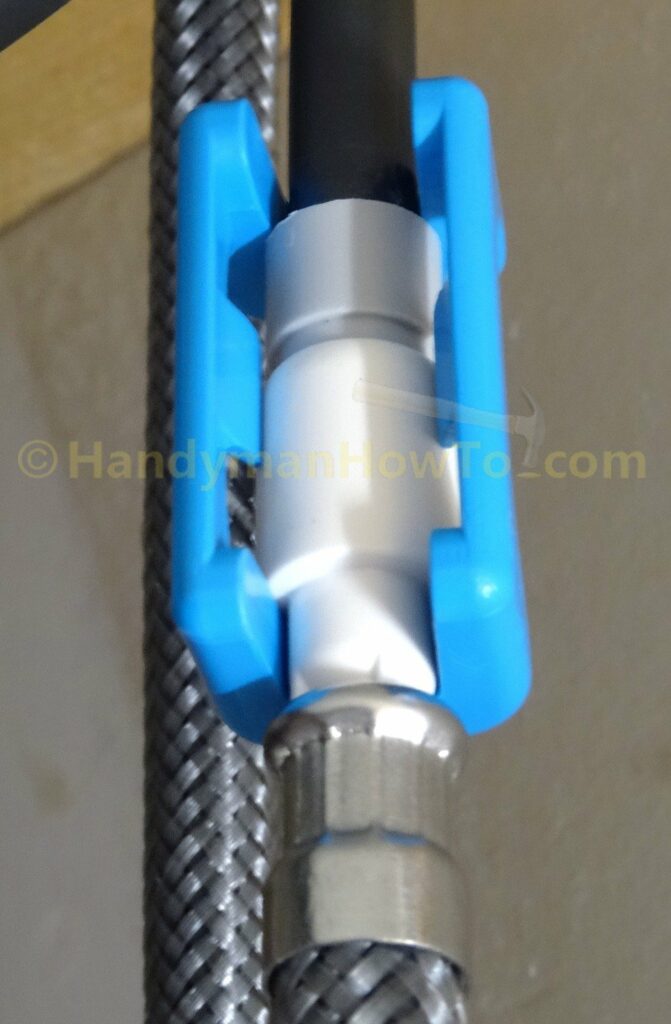
The clip orientation doesn’t matter and it can be rotated around the joint:
Reconnect the Kitchen Sink Drain Plumbing
As explained in How to Replace a Kitchen Faucet the P-trap and garbage disposal drain pipes were removed for easier access under the sink. I bleached and cleaned the PVC drain pipes and slip washers before reassembling:
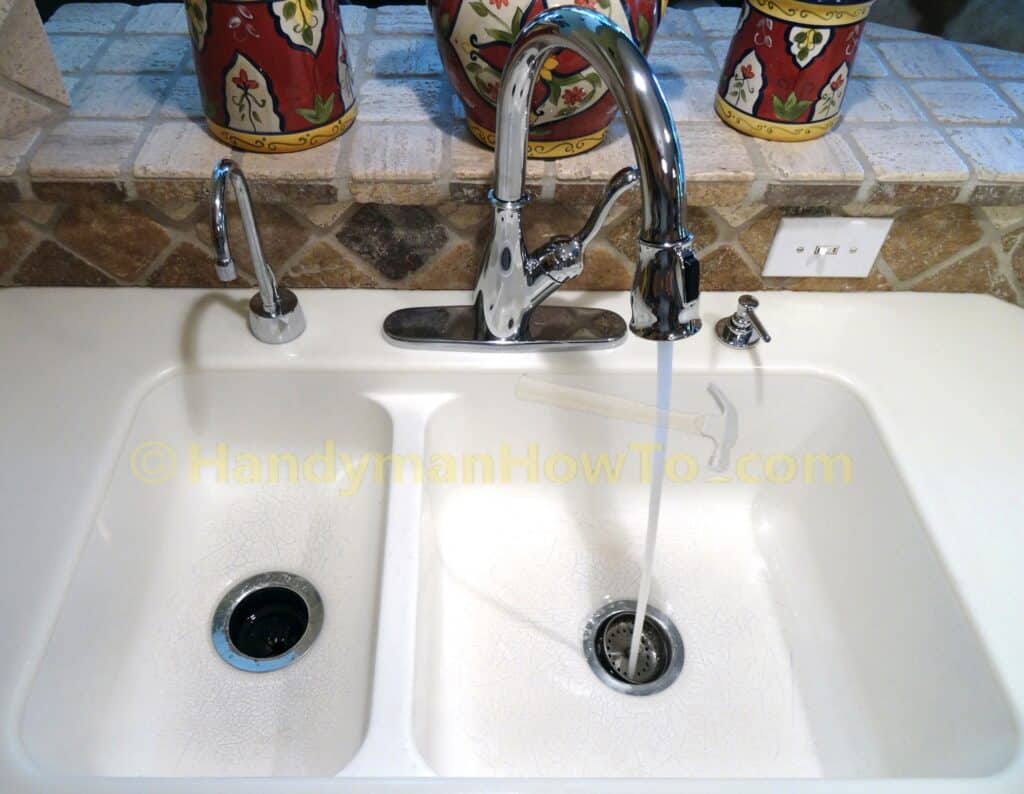
Delta Single Handle Kitchen Faucet Testing
With the drain pipes reconnected I turned on the stop valves then ran the faucet and checked for leaks:
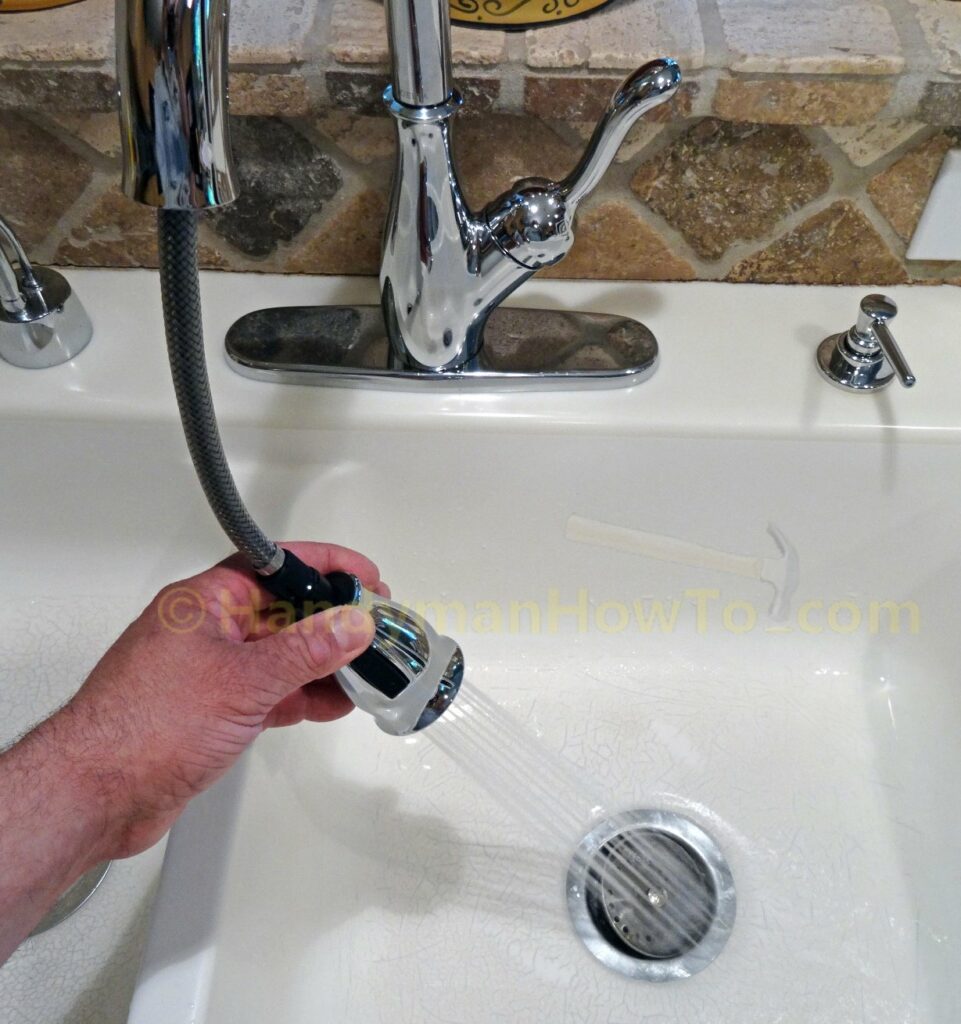
The pull-down sprayer features the MagnaTite magnetic docking system that holds the sprayer head firmly in place. A slight twist of the sprayer head causes the magnets to repel releasing the sprayer. A button on the sprayer switches between stream and spray functions:
Best of all my wife is pleased with the new faucet!
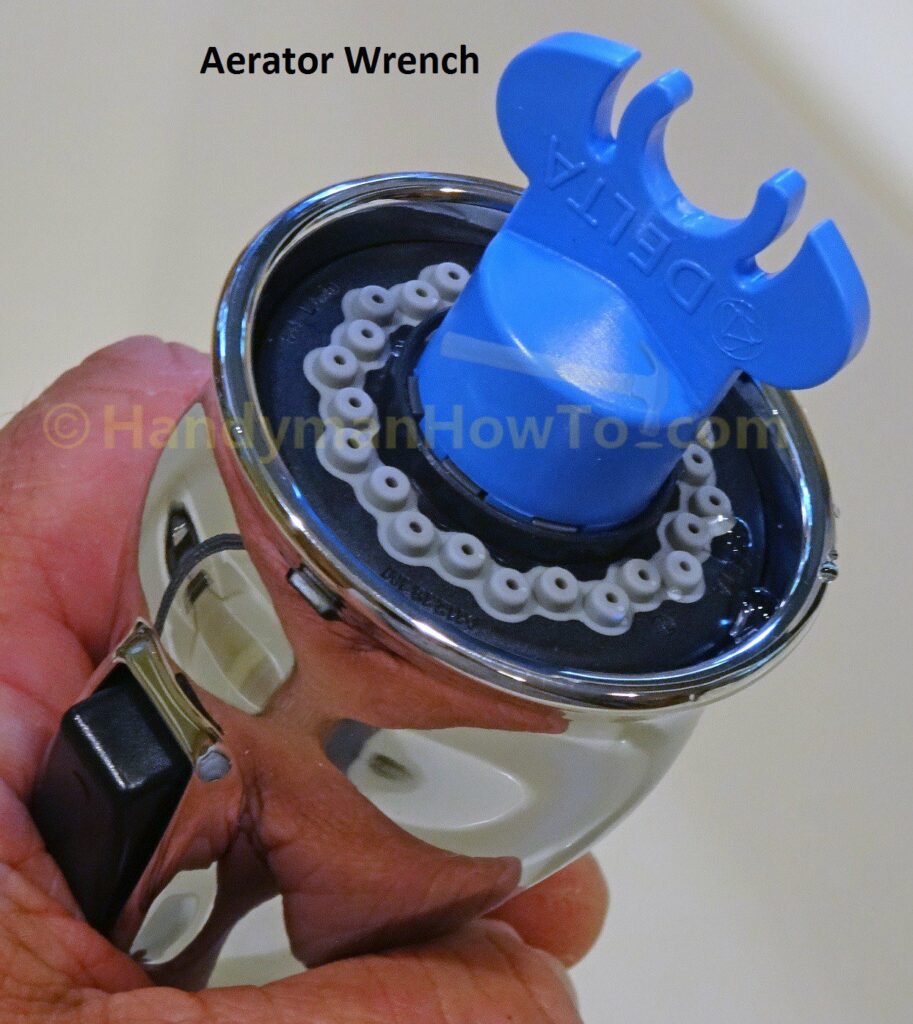
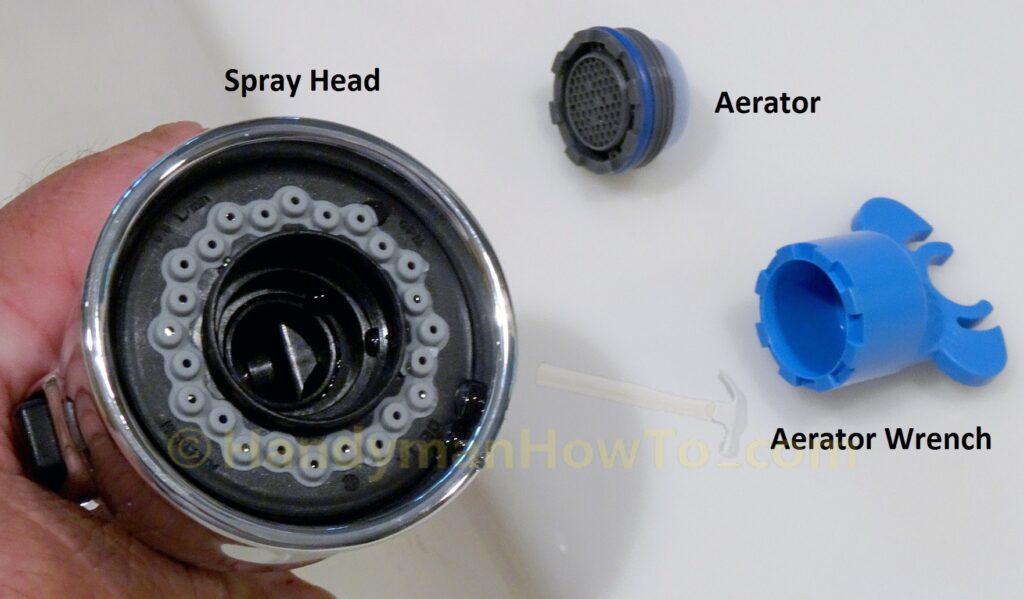
Delta Kitchen Faucet Aerator Removal
Mineral deposits might clog the aerator after a time. The Delta faucet includes a wrench to unscrew the aerator:
The aerator can be replaced or soaked in vinegar to remove the mineral buildup:
Next I’ll install the Delta dish soap dispenser (coming soon!).
Best,
Bob Jackson