How to Finish a Basement Bathroom: Connect the bathroom copper pipes to the main water supply lines.
This project is continued from How to Finish a Basement Bathroom – Part 7.
Basement Bathroom Water Supply Plumbing
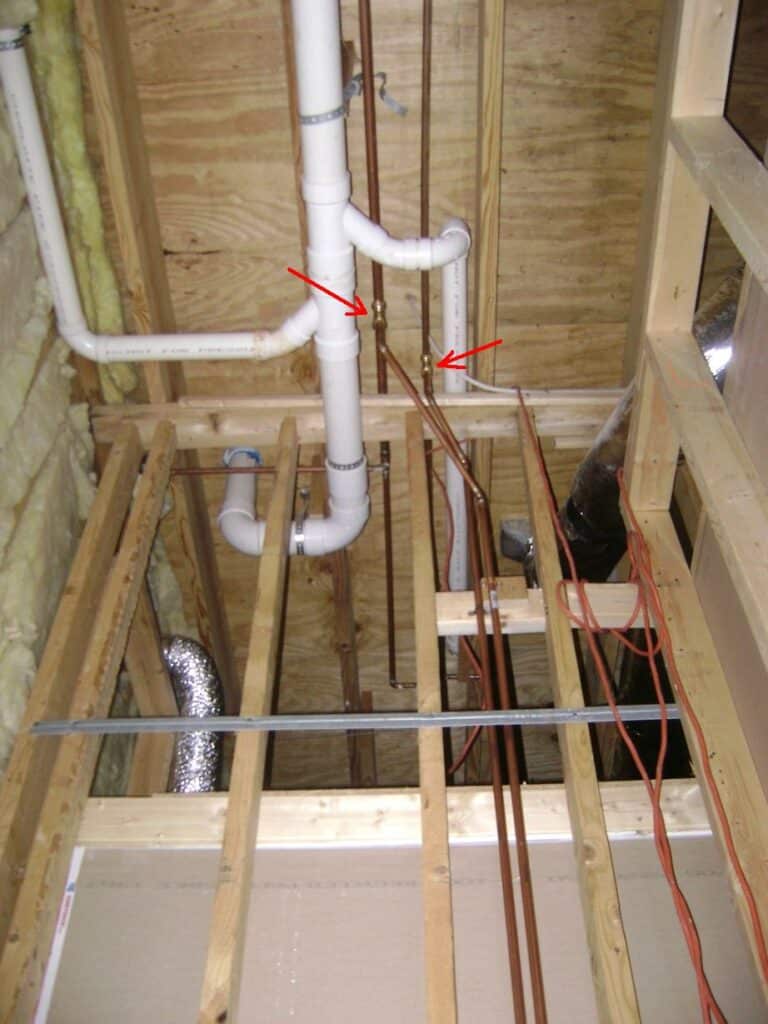
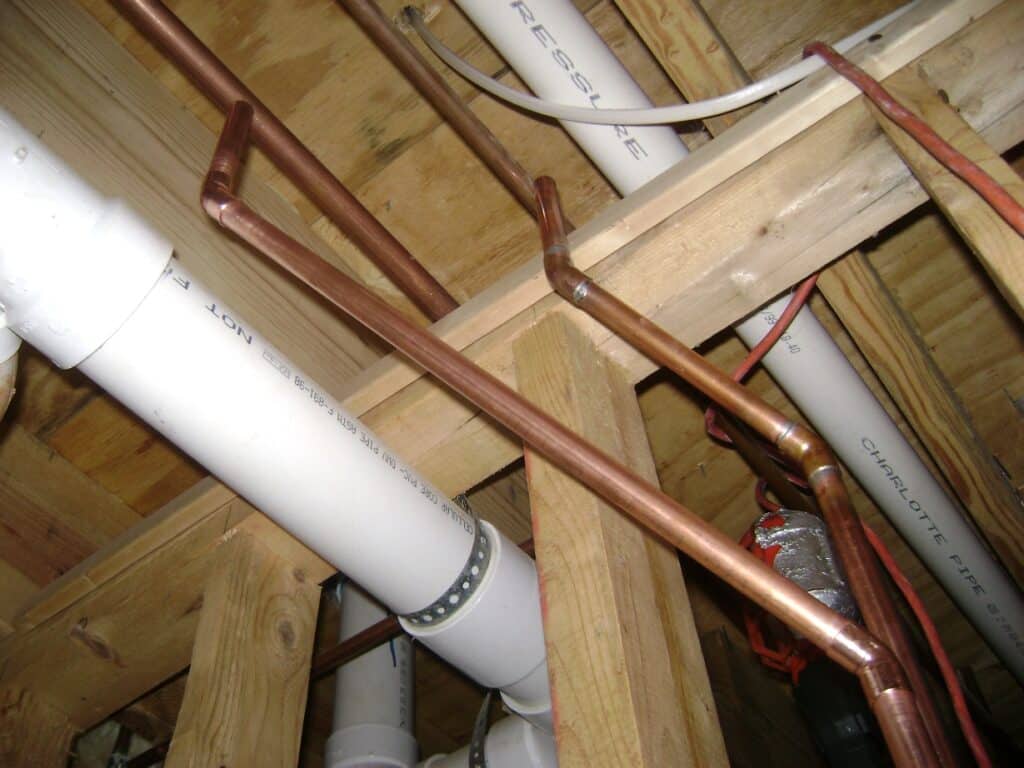
Jumping ahead for perspective, the hot and cold main water pipes that run between the main floor joists are cut to install T-fittings for the basement bathroom water pipes. The house sits on a hillside with a deep basement. It’s almost 17 feet from the concrete slab floor to the overhead floor joists. The T-fittings are indicated by the red arrows:
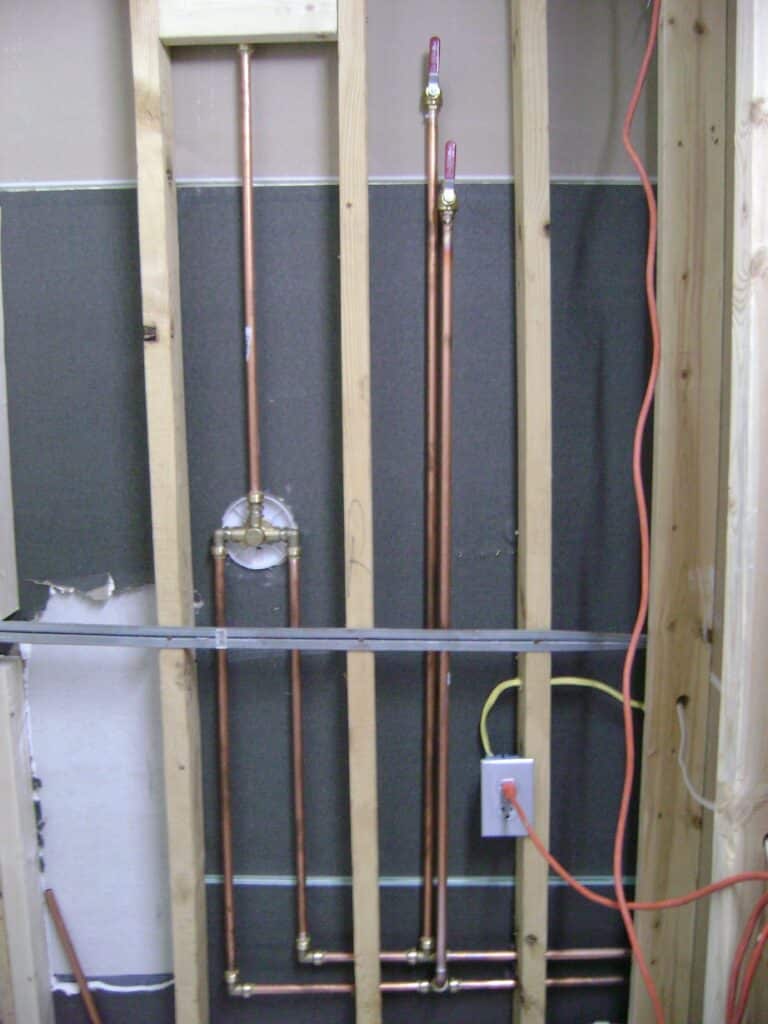
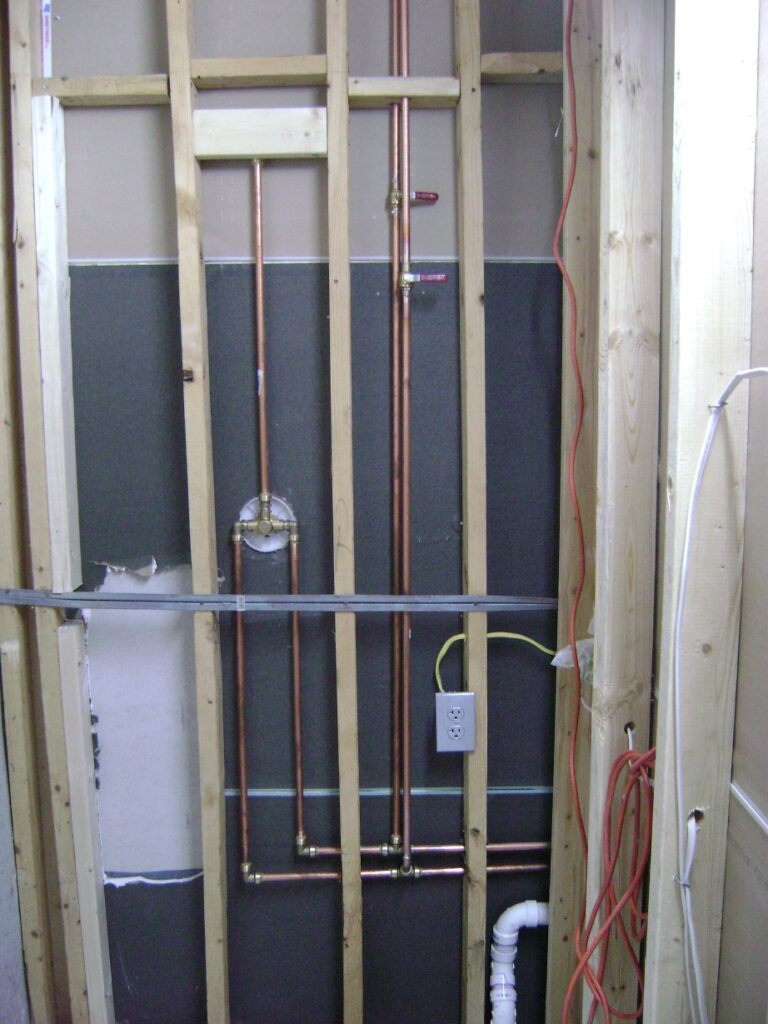
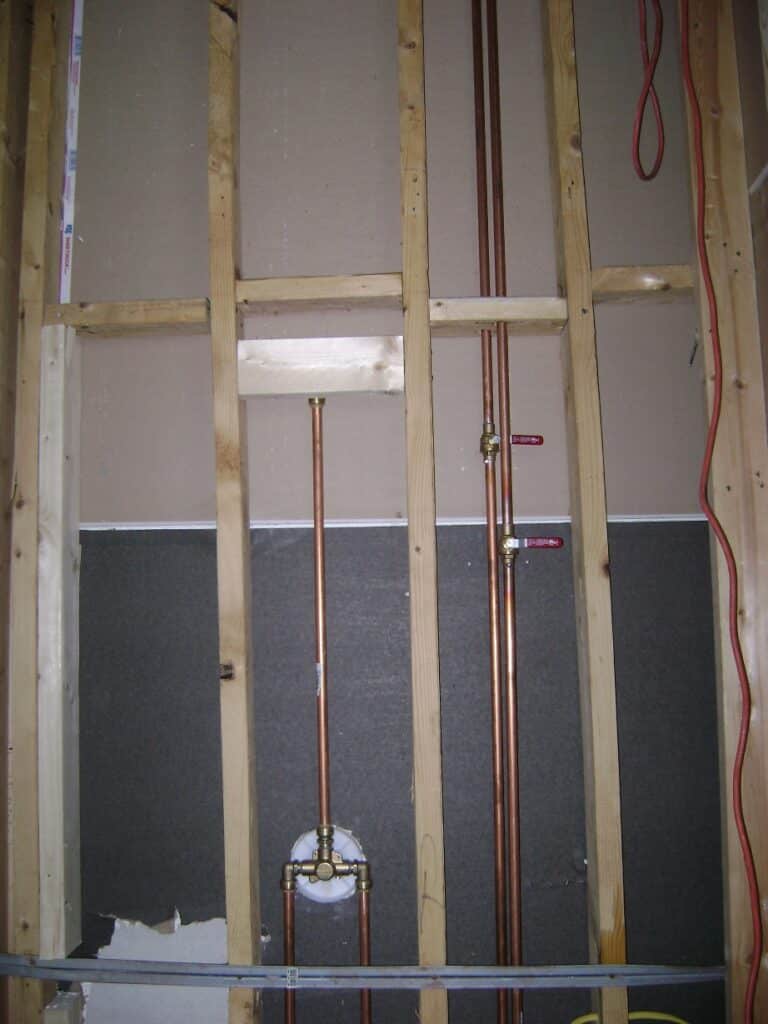
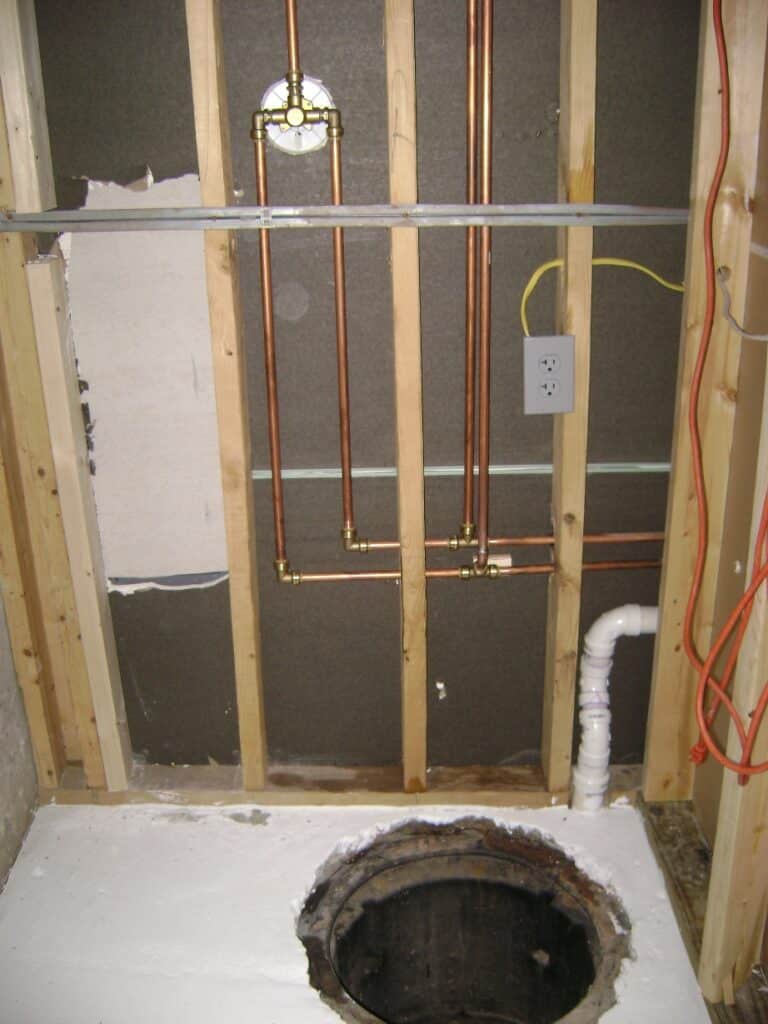
The basement bathroom copper water lines are installed from bottom to top, starting at the T-fittings at the bottom center of the following photo. Notice the solder joint shutoff ball valves with the red handles for hot and cold water pipes. The shutoff valves are a nice-to-have option. I’m thinking of adding a kitchenette in the basement and the shutoff valves will be a big convenience when working on the basement bathroom plumbing.
SharkBite Push-On Plumbing Fittings
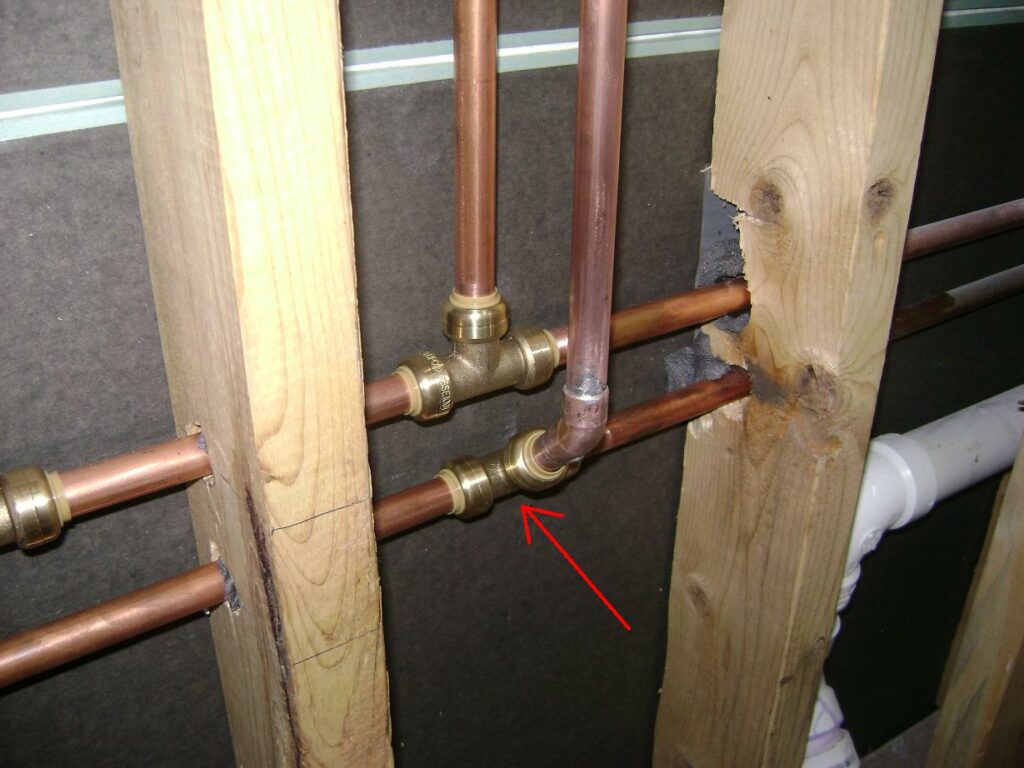
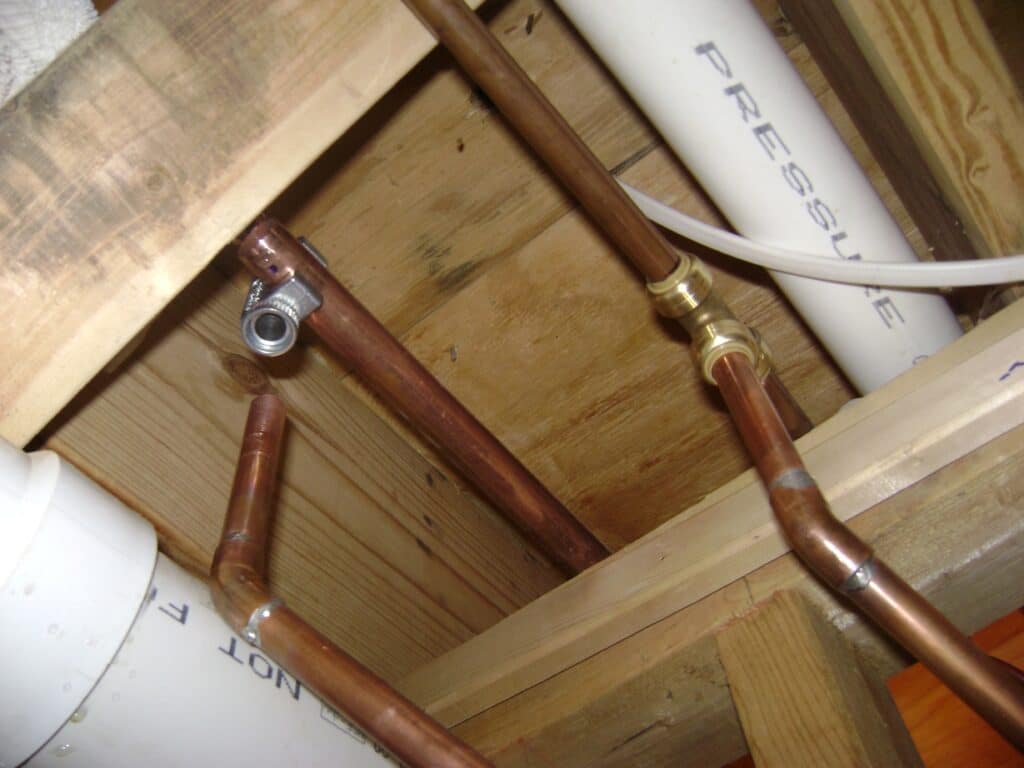
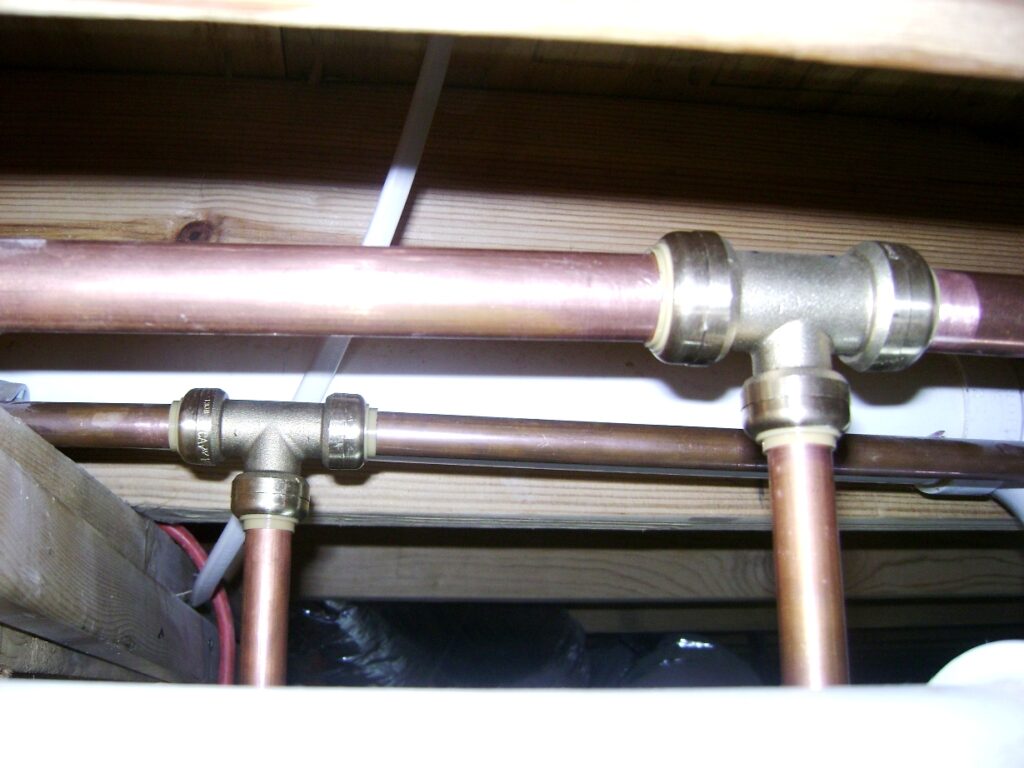
Below is a closeup of the SharkBite T-fittings. A huge advantage of the fittings is they freely rotate, making the 45 degree elbow installation really simple (red arrow) for perfect alignment with the copper water line.
BTW – That gnawed out area of the 2×4 stud to the right where the pipe passes through is the work of the contractor that finished the basement under the previous owners. If this had happened under my watch, I would’ve made the contractor replace the stud and drill a proper hole. It’s more of a cosmetic and quality concern than a structural issue (“everything is built by the low bidder”). I’ll fill in the area later with Great Stuff expanding foam to prevent rattling water pipes.
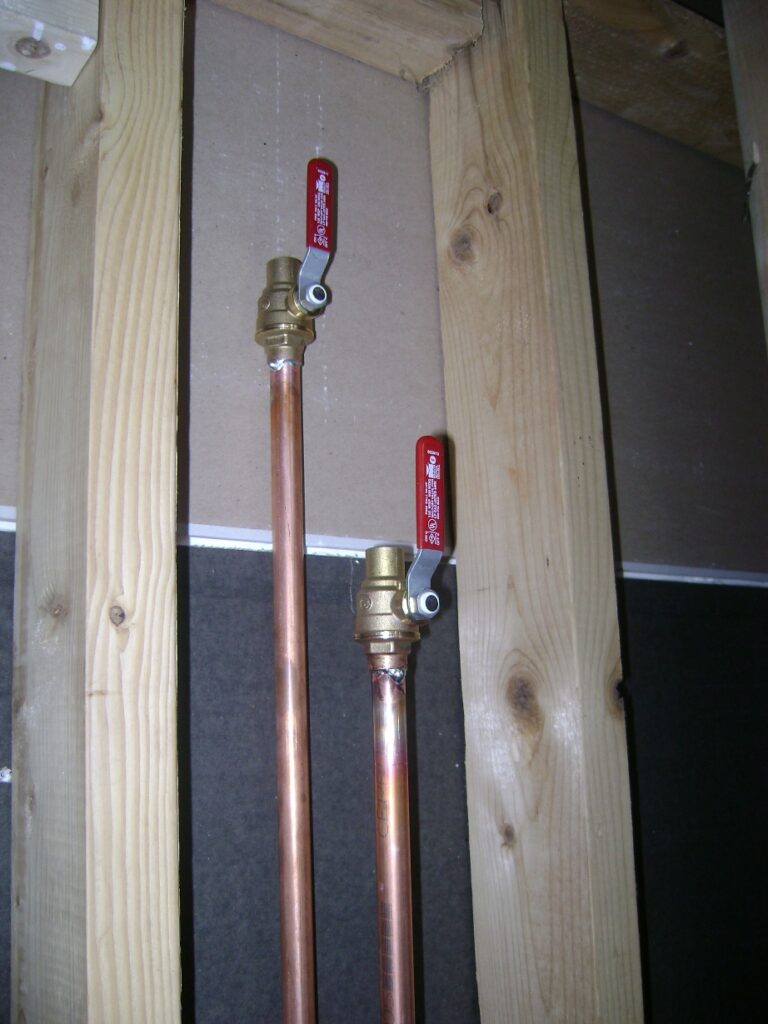
Closeup of the basement bathroom ball valves to the shutoff the water to the entire bathroom. The valves are require solder connections to the copper pipes. The valve positions are vertically staggered – otherwise the handles would interfere when turned Off.
A 2×4 bracing block is measured, cut to length and 3/4 inch holes sawn for the 1/2 inch copper riser pipes. This keeps the pipe vertically aligned and provides support when filled with Great Stuff to prevent pipe banging.

Water Supply Pipe: Solder 1/2″ Pipe Fittings
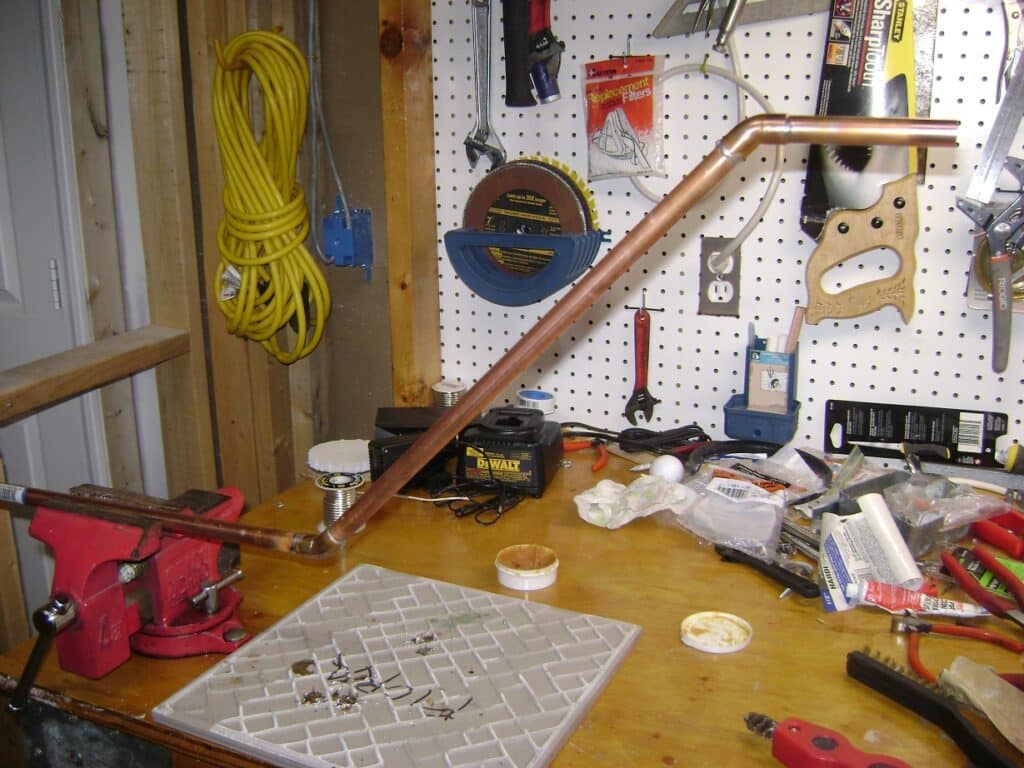
The 45 degree elbows are needed to make a ‘dog leg’ to clear the top plate of the 2×4 load bearing wall to connect to the main water supply lines. After measuring and cutting, the copper pipe is put together dry (the pieces are just pressed together) and held in place at the unfinished side of the bathroom wall to verify the plumbing rough-in is correct.
The pipe and fittings are taken down and disassembled, then each fitting is soldered together at the workbench. This way I avoided soldering in awkward positions on the ladder. Caution: Copper tubing is very soft and held gently in the bench vise.

After soldering the first two elbows (above) for the hot and cold water pipes, the sections are taken back to the bathroom to measure and fit the next elbow and pipe section. Dry fitting the elbow and riser for the cold water (left dog leg) 1/2 inch copper pipe connection. The 45 degree elbows for the hot water copper pipe (right side) have been soldered:
The final dog leg for the cold water supply pipe is soldered together at the work bench:
Here’s how the assembled riser pipes look with the dog legs. The next task is to connect the riser pipes to the overhead main water lines:

Next, the bottom end of the 1/2 inch copper water pipes are soldered to the shutoff ball valves (red handles) in center of the photo:
Basement Bathroom Main Water Supply Plumbing Connection
Now I’m ready to cut the main water supply pipes and install the T-fittings to connect the basement bathroom copper water lines. A mistake here could result in a water leak or a worse a burst connection flooding the basement!
To prepare for cutting into the main water pipes, it’s necessary to:
- Shut off the water to the entire house, either at the water meter by the street or the main shutoff valve in the basement.
- Drain the water from pipes by opening all of the faucets in the house and letting the pipes drain out through the garden hose bib at the basement deck. (This will introduce air into the water pipes, making for much sputtering when the water is turned back on.)
In the next photo, I’ve already installed a SharkBite T-fitting for the hot water supply line and started to cut out a section of the cold water main supply pipe. Measure 3 times and cut once – if I cut out too long a pipe section, I’ll have to cut an even longer section and install a straight SharkBite connector to fix the mistake. Fortunately, I got it right the 1st time on both T-fittings. Practice installing the SharkBite T-fitting on a scrap piece of copper pipe to validate your measurements and technique.
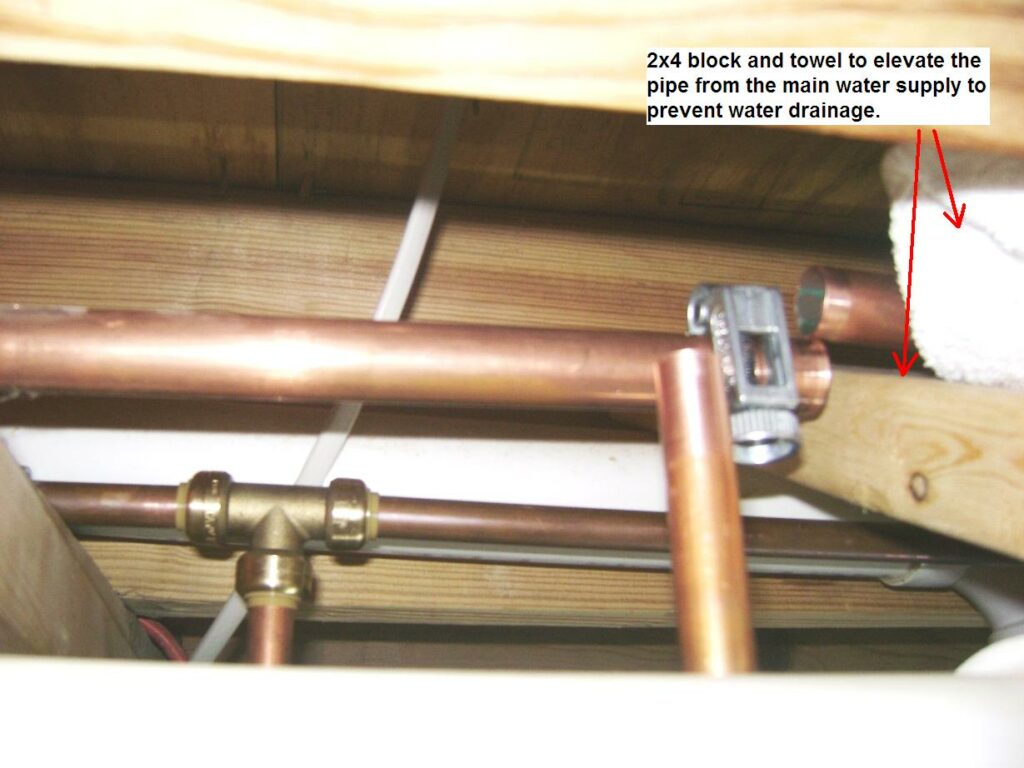
The second cut is made on the 3/4 inch cold water main line for the T-fitting.
This is where the SharkBite system really shines because water was running out of the pipe despite my efforts to drain the system. I stemmed the water flow by elevating the pipe with a 2×4 block. If I had been using a solder fitting, it’d been next to impossible to solder the joint with water in the pipe because any water in the pipe cools the joint and the solder will not wick into the fitting. SharkBite push-fit connectors can be installed wet or dry!
The SharkBite T-fittings are installed by flexing the 3/4 inch main water lines upward a few inches and slipping the ends into the SharkBite T-fitting. The 1/2 inch vertical riser pipe to the basement bathroom is then slipped into the center opening of the T connector:
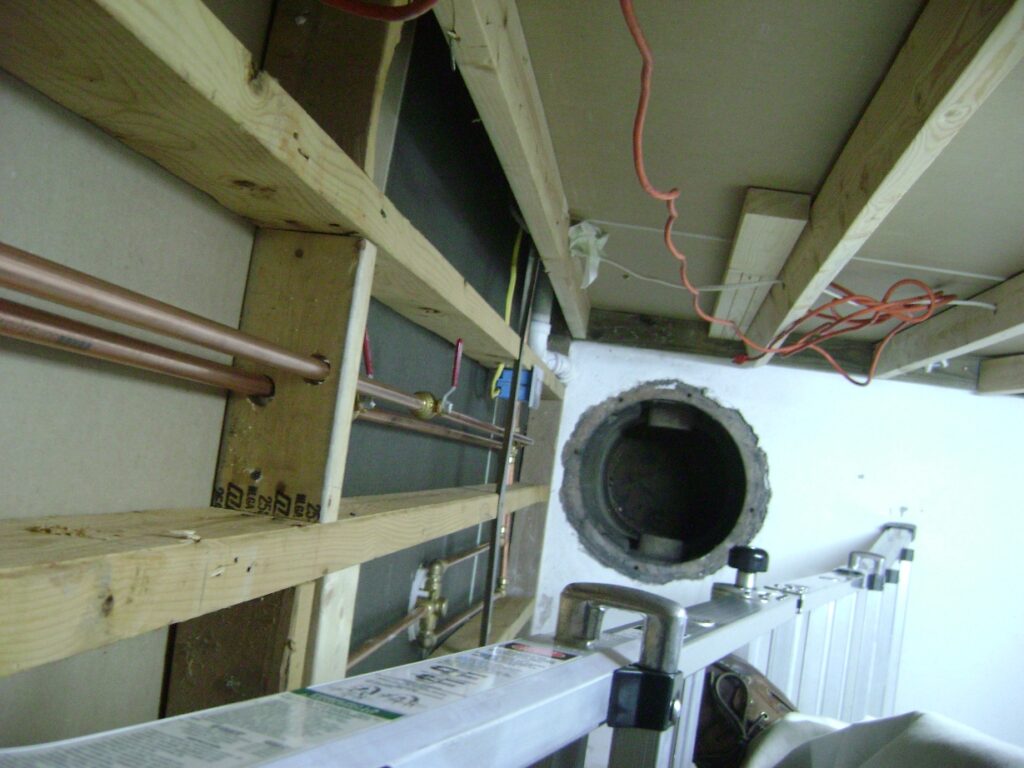
Looking down from the ladder: It’s 17 feet from the overhead water mains to the bottom of the sewage basin:
A survey of the completed basement bathroom copper pipe plumbing connections from floor to ceiling follows in the next three photos:
Basement Bathroom Plumbing: Leak Testing
Time for the “big event” – turn on the water and check for leaks.
I had a helper with a cell phone stand in the utility room while I turned on the main water valve to house. My helper would let me know if anything went wrong. The air was bled out of the faucets and water pressure restored. No leaks!
While holding a 5 gallon bucket below the shower head, I turned on the shower and checked the hot and cold water flow. Everything was OK. I also checked the water flow from the 1/4 turn ball stop valves at the toilet supply and vanity. These too were fine with no leaks! All SharkBite connectors and solder joints were leak free.
The sewage pump and sewer pipe connections are installed in How to Finish a Basement Bathroom – Part 9.
Take care,
Bob Jackson