The dormer roof flashing details are shown including the stucco step flashing, apron flashing (headwall flashing) and counter flashing installation steps. A section of rotted fascia board is repaired with PVC composite trim board. This project is continued from Hail Damaged Roof Replacement – Part 9.
Original Dormer Roof Caulk
This is the old hail damaged roof with a closeup of the dormer with stucco siding. I’m not sure if the thick line of caulk was an original part of the roof or added later to prevent a leak.
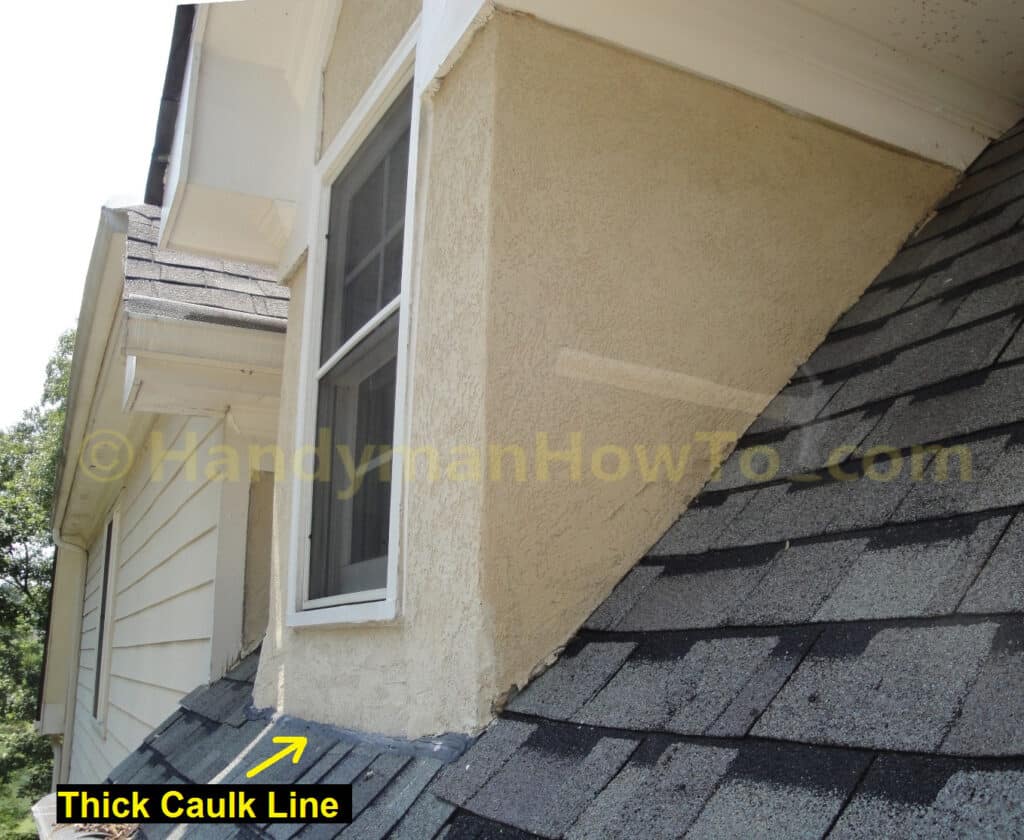
A caulk job like this at the roof-to-wall intersection just doesn’t seem quite right.
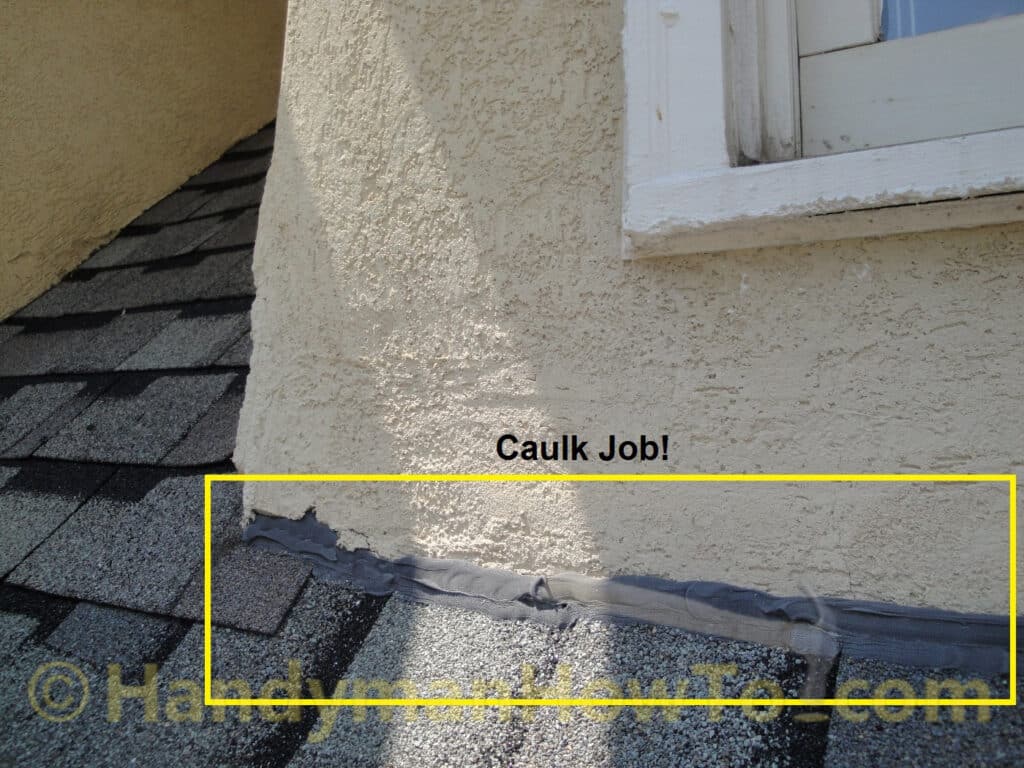
When the old roof shingles and felt were torn off, the roofers discovered there wasn’t any flashing under the shingles along the front of the dormer! Hence the odd looking caulk job to seal between the stucco wall and shingles.
New Dormer Roof Installation
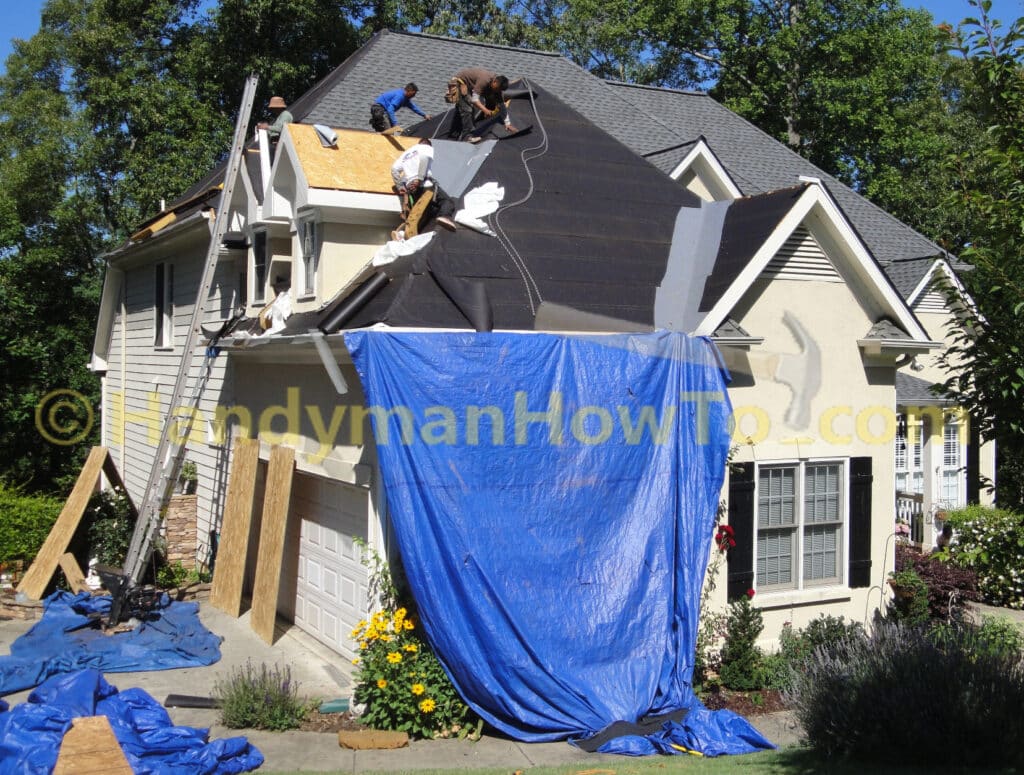
The old asphalt shingle roof has been torn off. The gray color GAF StormGuard® leak barrier (ice and water shield) has been installed in the roof valleys, followed by the GAF Shingle-Mate® fiberglass reinforced roofing felt (equivalent to 30 lb. felt). The drip edge flashing is being installed on the far left dormer, too.
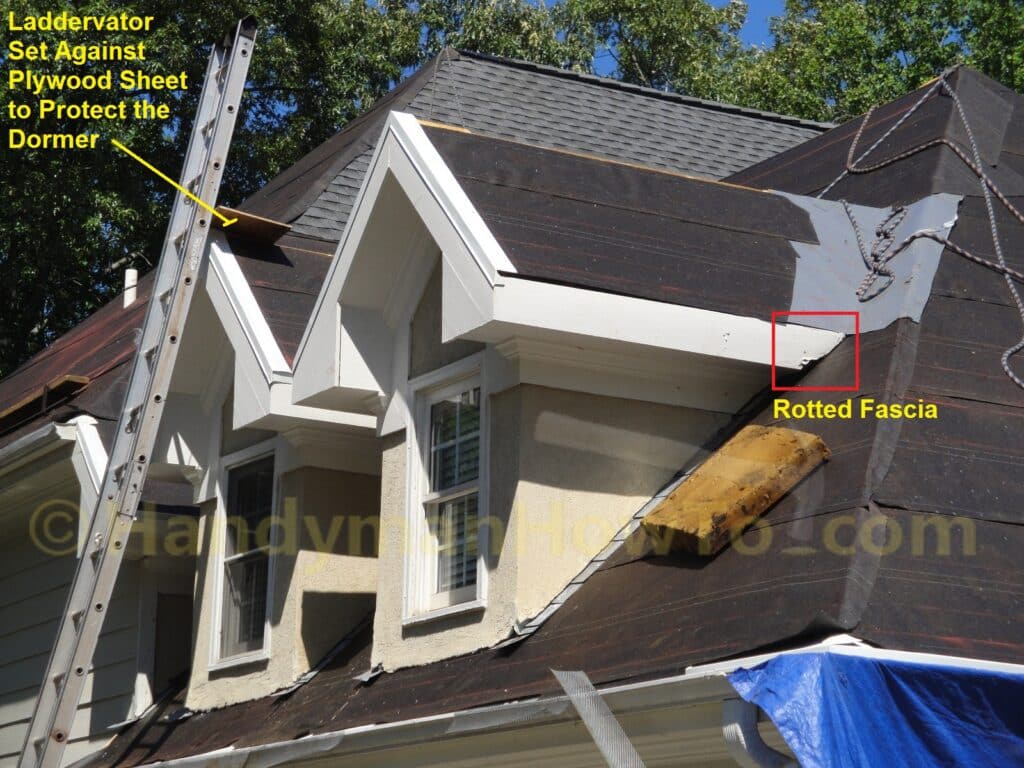
I was really impressed with the roofing crew’s care and attention to detail. A section of plywood is notched for the laddervator rails and nailed to the dormer to make a stand-off to protect the dormer drip edge flashing. The rotted fascia board end where it wicked up moisture from being in contact with the roof is highlighted in the red square. The old step flashing is left in place along the sides of the dormers because removing the old step flashing would damage the stucco.
Dormer Rotted Fascia Repair
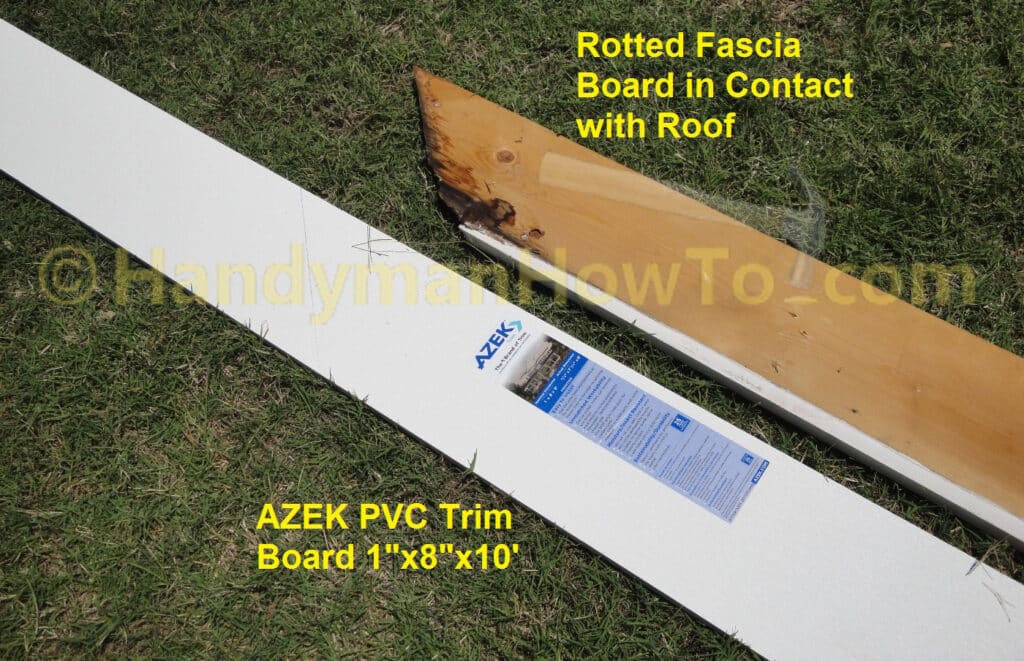
I bought a 1in x 8in x 10ft AZEK PVC trim board at Home Depot. The AZEK PVC trim board is waterproof, rot proof and insect proof. I asked the roofing crew if they would pull off the rotted trim board and install the new AZEK fascia board if I sawed and mitered the new board with my DeWalt compound miter saw (available here). The roofing crew agreed as it was a small job and had I won their goodwill by loading up the freezer with 24 packs of bottled water that I handed to them throughout the hot days.
This is the rotted wood fascia board with the AZEK PVC trim board:
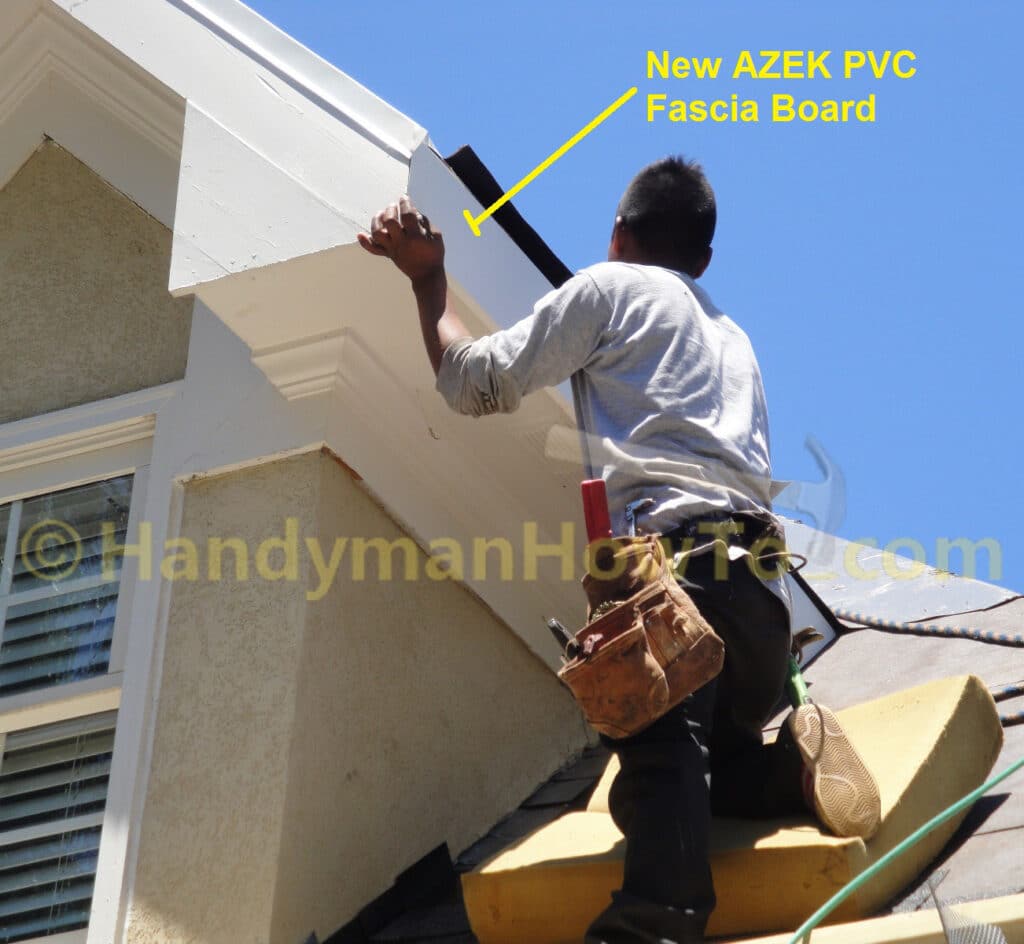
The new AZEK 1″ x 8″ PVC fascia trim board being installed:
Dormer Roof Corner Flashing & Step Flashing Installation
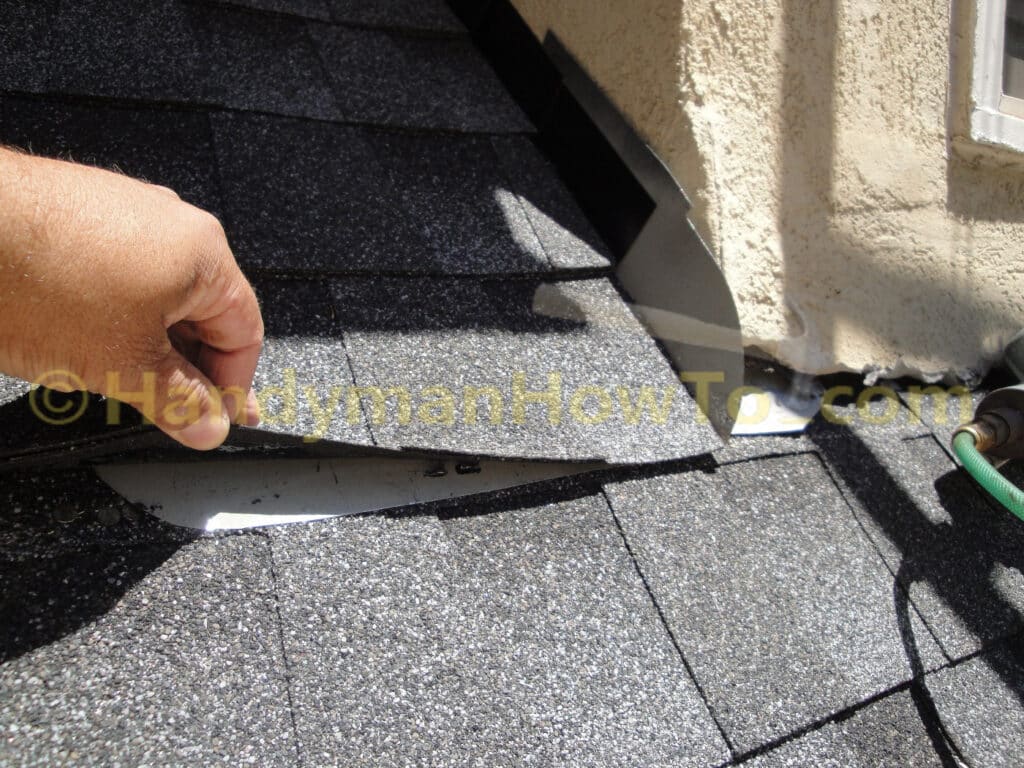
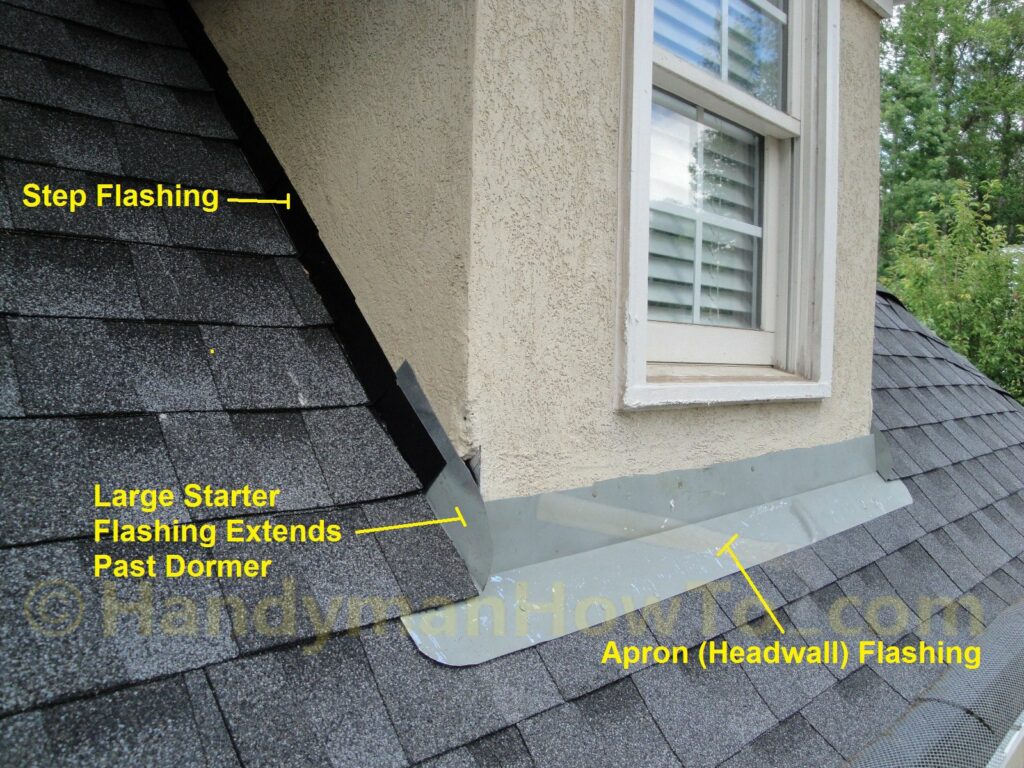
Two pieces of galvanized roll flashing and bent and cut with tin snips to start the flashing at the outside corner of the dormer: 1) A flat section is slipped under the stucco and extends to the left under the original step flashing (not visible here); 2) A starter piece of step flashing with a rounded kickout extends to the left under the shingles.

Lifting a shingle, the starter piece of galvanized corner flashing with a kickout extends under the shingle:
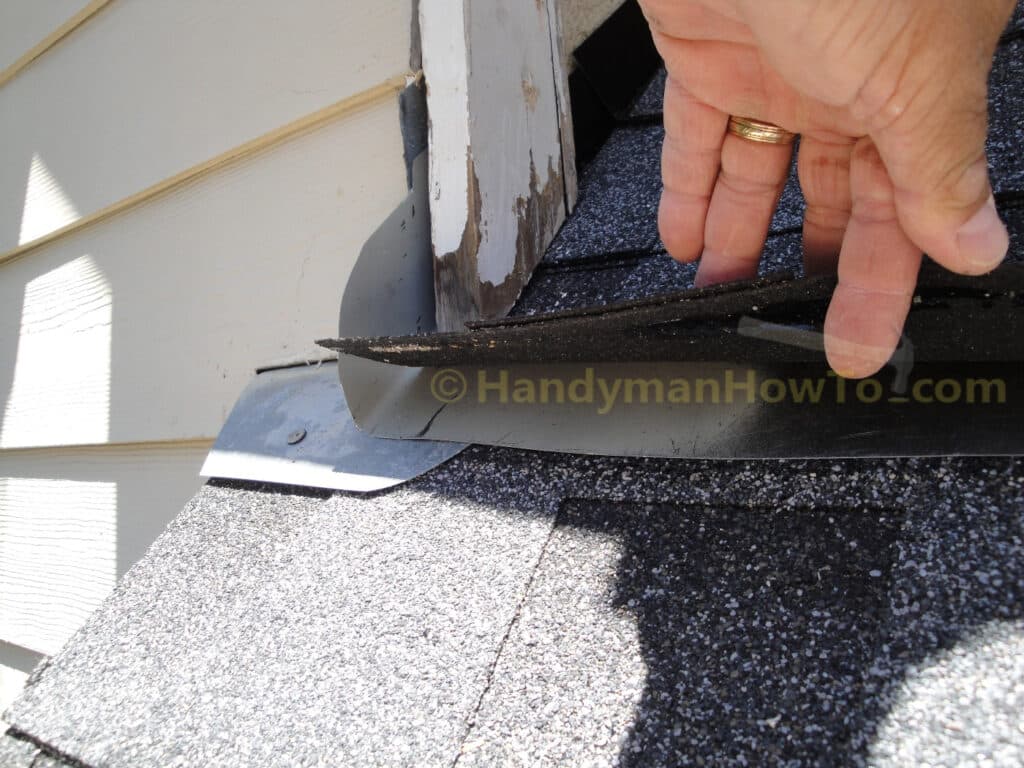
This photo of the outside corner flashing opposite the dormer provides a clearer view of the roof flashing installation technique:
A section of apron flashing (also called headwall flashing) is cut from galvanized flashing stock and installed at the front of the dormer to cover the roof-to-wall joint. The apron flashing lays on top of the shingles to shed water. The ends of the apron flashing extend under the step flashing with kickouts at the corners of the dormer.
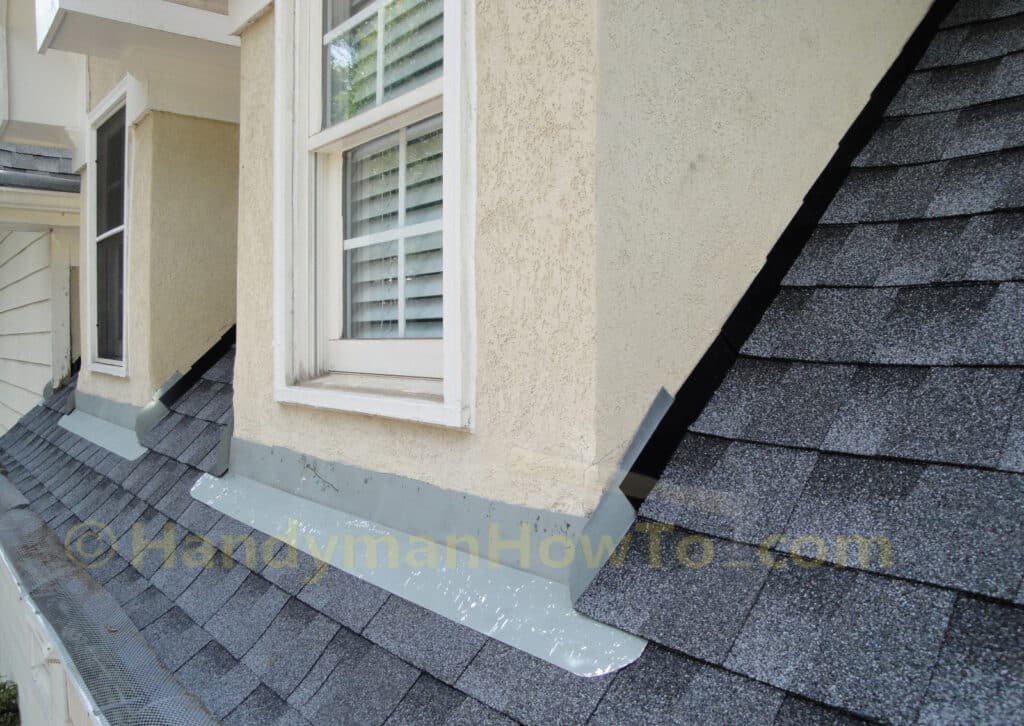
View of both dormers and apron flashing installation progress:
Counter flashing is installed over the step flashing and apron flashing with hammer drive anchors set in the stucco. The counter flashing is caulked with BASF Sonolastic® NP 1™ to make a watertight seal against the stucco wall. Notice the red arrow where a section of galvanized kickout flashing is installed behind fascia board to keep water away from the plywood soffit.
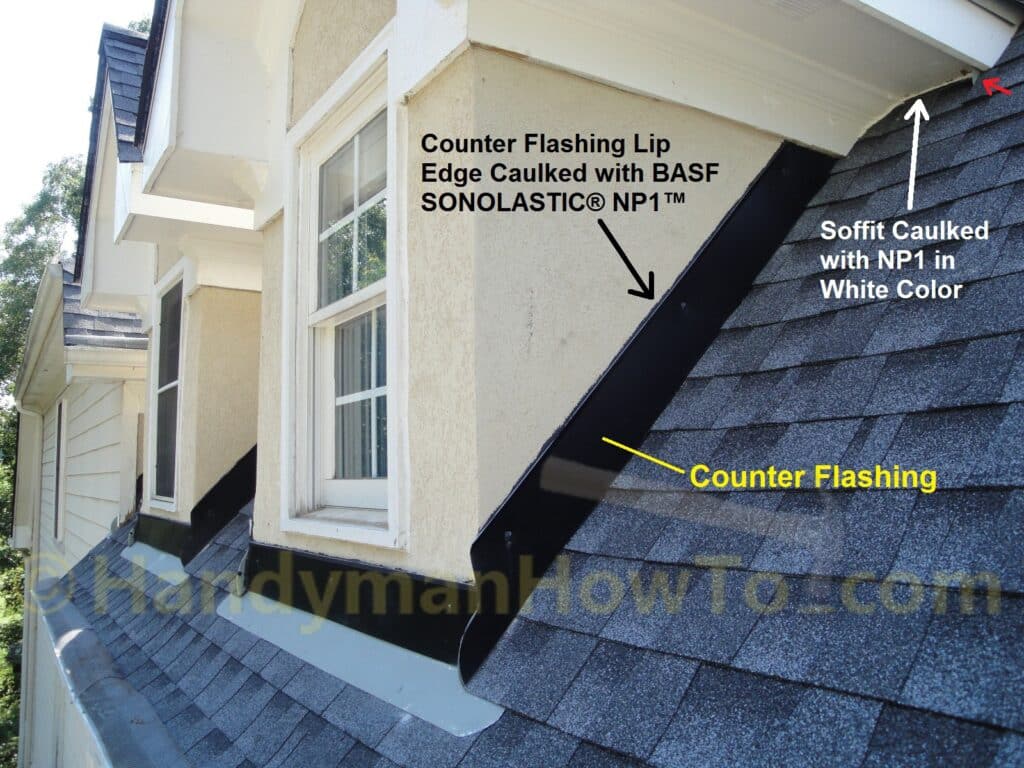
The hammer drive anchors and exposed nail heads in the apron flashing are sealed with NP1:

Photo of the new dormers and new roof. The dormers now have:
- Full ridge vents
- Drip edge flashing
- Counter flashing
- Apron (headwall) flashing in front of the dormers
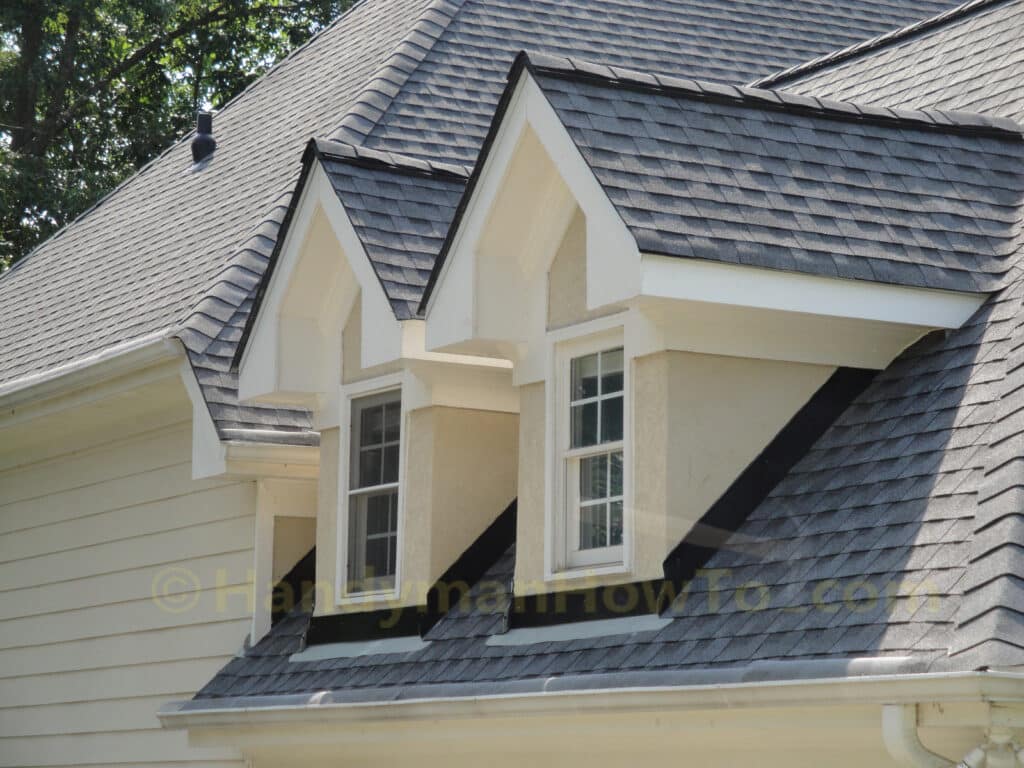
The new counter flashing and apron flashing sure beats that sorry looking caulk job!
This series is continued in Hail Damage Roof Replacement – Part 11.
Thanks for reading,
Bob Jackson