The rake wall roof corner flashing installation steps are illustrated in this project. This project is continued from Hail Damaged Roof Replacement – Part 11.
Roof Rake Wall and Outside Corner Flashing
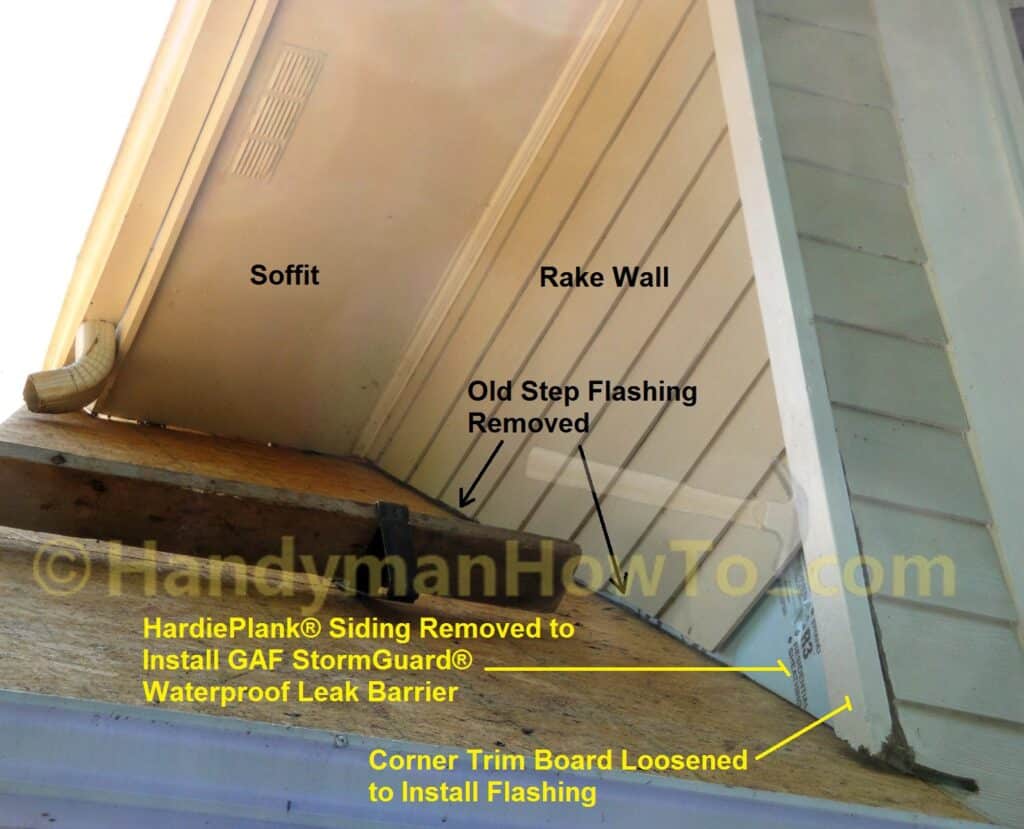
The old step flashing along the roof rake wall is removed in preparation for the new roof installation. The bottom rows of HardiePlank® lap siding are pulled off so GAF StormGuard® leak barrier (ice and water shield) can be applied to the subwall should splashing water get behind the siding. The corner board is loosened at the bottom to:
- Slip a sheet of ice and water shield behind the corner board.
- Install galvanized corner flashing and a large piece of step flashing with a kickout.
Roof Corner Flashing Installation
After the roofing felt and beginning rows of shingles are installed, a piece of galvanized roll flashing is cut with tin snips to make the corner flashing. The corner flashing is cut to make two “flaps”; the left flap lays on the roof while the right half is bent upward and slipped behind the HardiePlank siding. The red outlines in the photo indicate the corner flashing flaps that are hidden from view.
The starter piece of step flashing is cut from galvanized roll flashing and installed over the corner flashing.
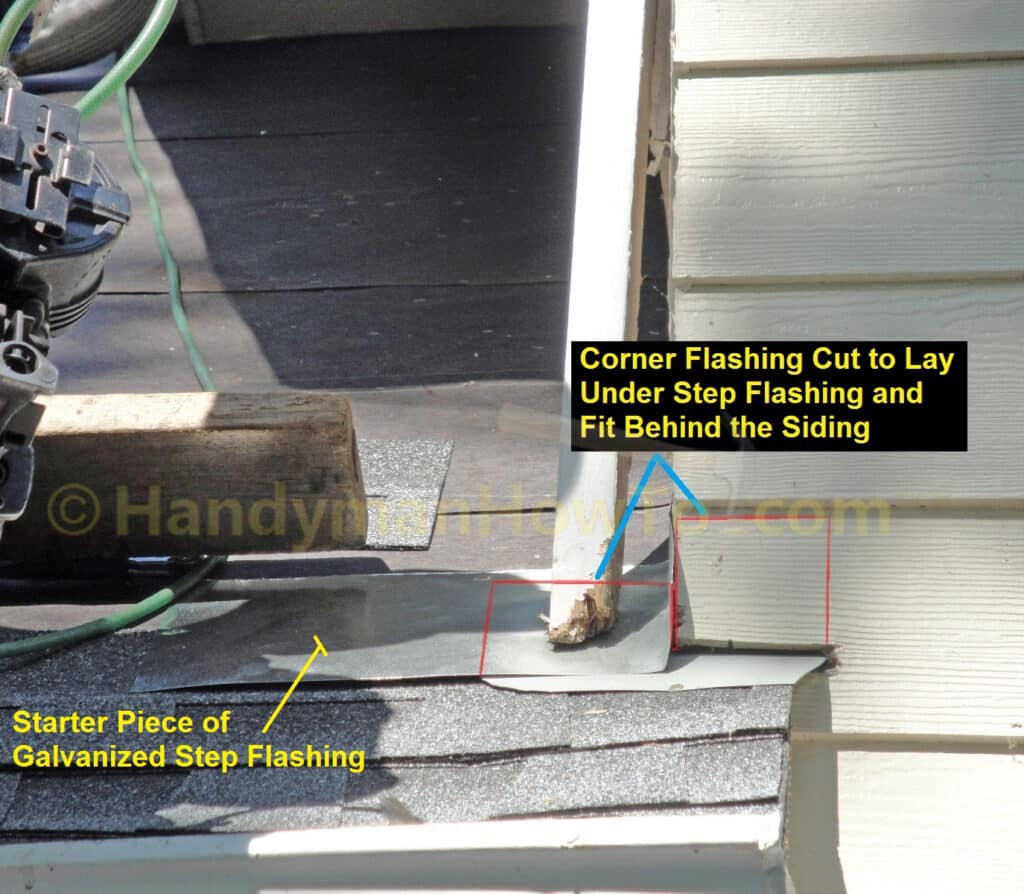
The end of the 2×4 corner board is a bit rotted from being in contact with the roof and wicking up water. I’ll saw 3/4″ off the bottom of the corner board later so it’s not in contact with the roof.
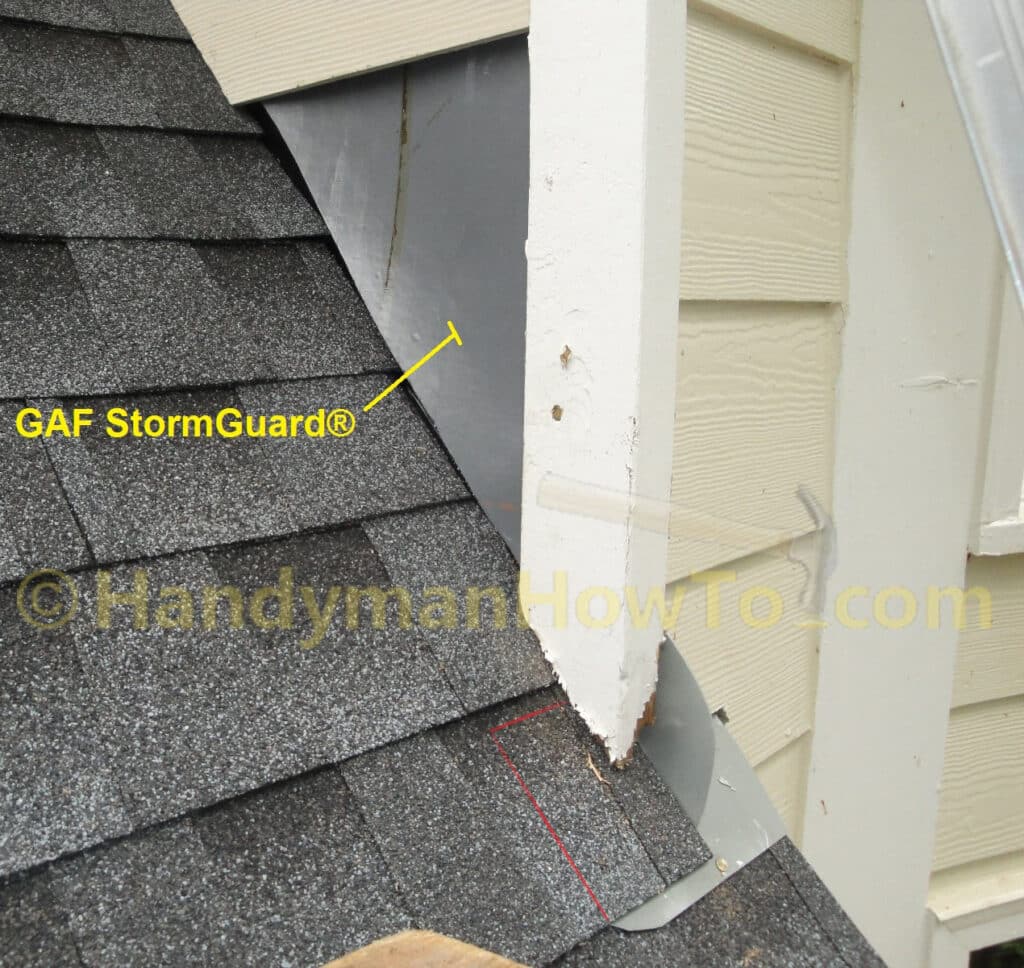
The step flashing slipped behind the HardiePlank lap siding along the rake wall as the courses of shingles are laid up the roof. The GAF StormGuard ice and water shield is then stuck to the subwall behind the siding and draped over the step flashing. The red outline indicates the corner flashing under the first piece of roll step flashing. Notice the step flashing has a rounded kickout extending beyond the 2×4 corner board to keep water off the wall.
The 2×4 corner board is nailed back in place and new sections of HardiePlank lap siding cut and installed. The seams and nail heads are caulked with BASF SONOLASTIC NP1.
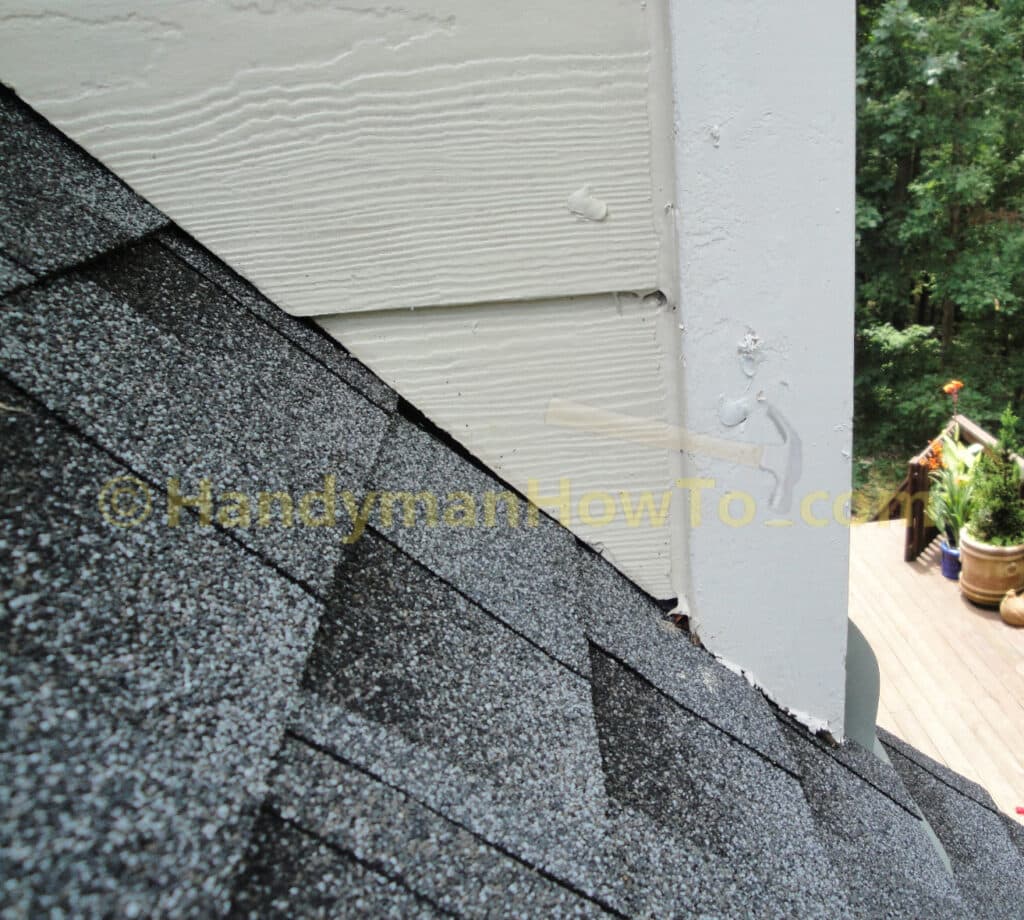
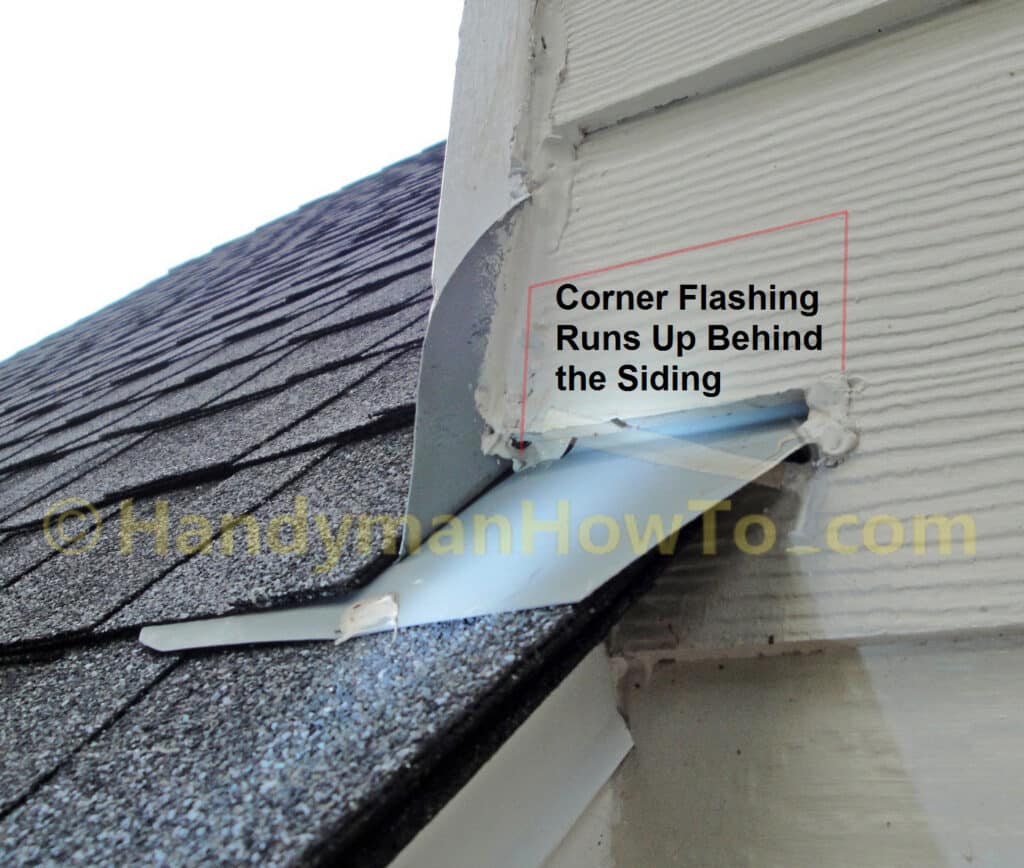
Detail of the rake wall corner flashing. I’m shining a flashlight to show how the corner flashing extends upward behind the lap siding. The joints and nail heads are caulked with SONOLASTIC NP1 and painted.
Thanks for reading,
Bob Jackson