This project is continued from Hail Damaged Roof Replacement: Part 1 – Materials & Tear Off.
The roof replacement details around the chimney are illustrated. The HardiePlank® siding is pulled off the chimney to install peel-n-stick ice and water shield with new step flashing and apron flashing.
Chimney Leak
A year or so before the hail storm, the roof developed a leak at the corner of the box chimney. I learned from that experience best way to prevent chimney leaks is to pull off the HardiePlank® lap siding, wrap the chimney in ice & water shield followed by new step flashing and siding boards. I was careful to negotiate this requirement in the roofing contract.
Hail Damaged Roof Replacement: Part 2 – Chimney
Chimney Leak Protection & New Roof Installation
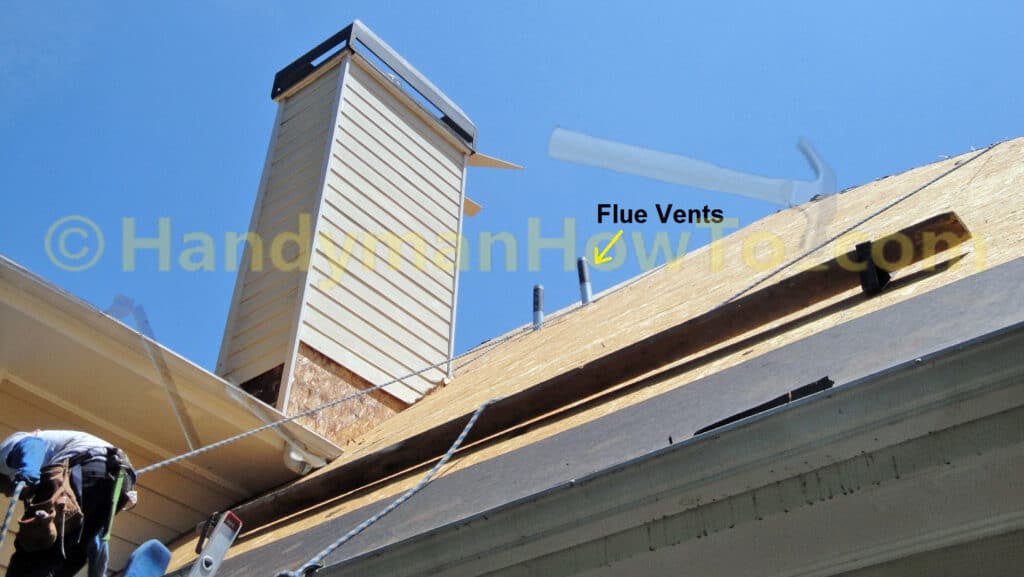
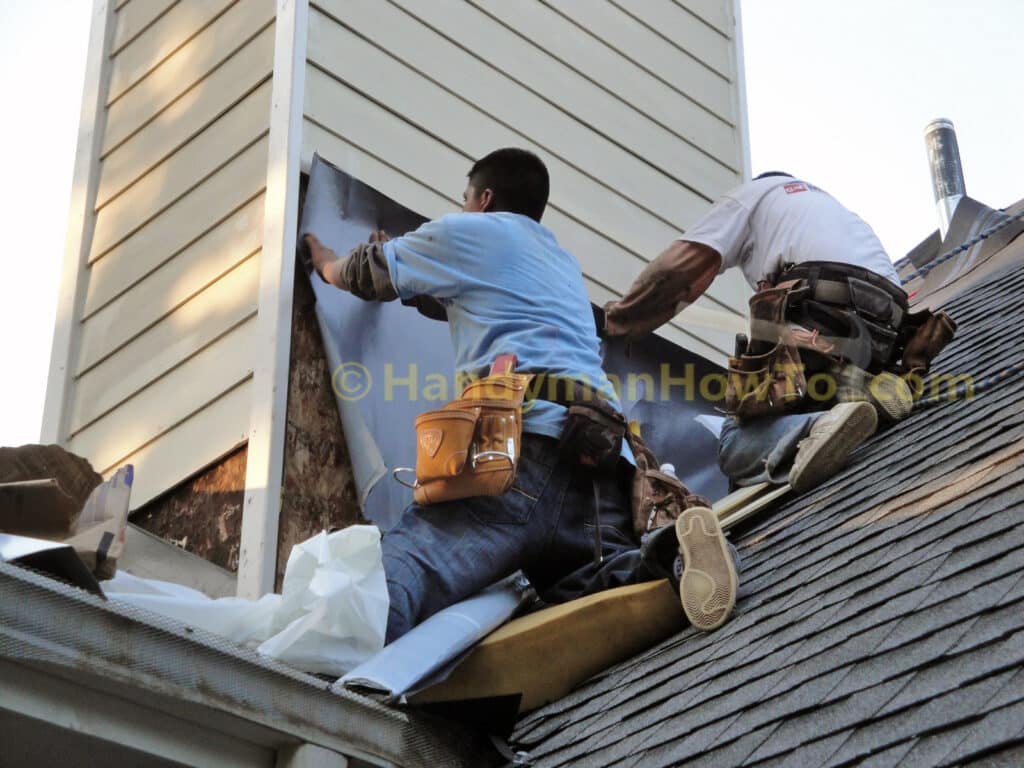
Due to the steep roof slope, a full ten (10) siding boards were removed to expose the south side from corner-to-corner, with fewer boards on the other sides of the chimney. In this photo you can see the siding boards and flashing being removed from the chimney, roof brackets and walk board, first row of GAF Shingle-Mate® roofing felt and the HVAC Type B gas flue vents stripped of cap, storm collar and flashing boot.
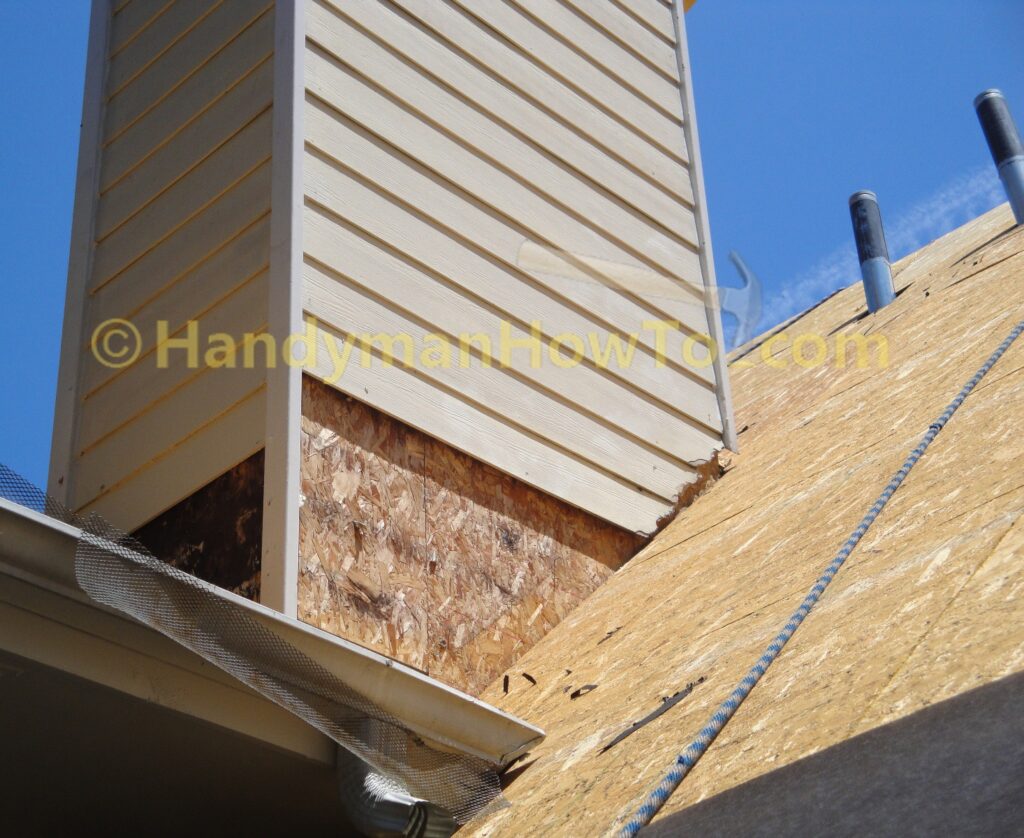
A close-up of the chimney work in progress:
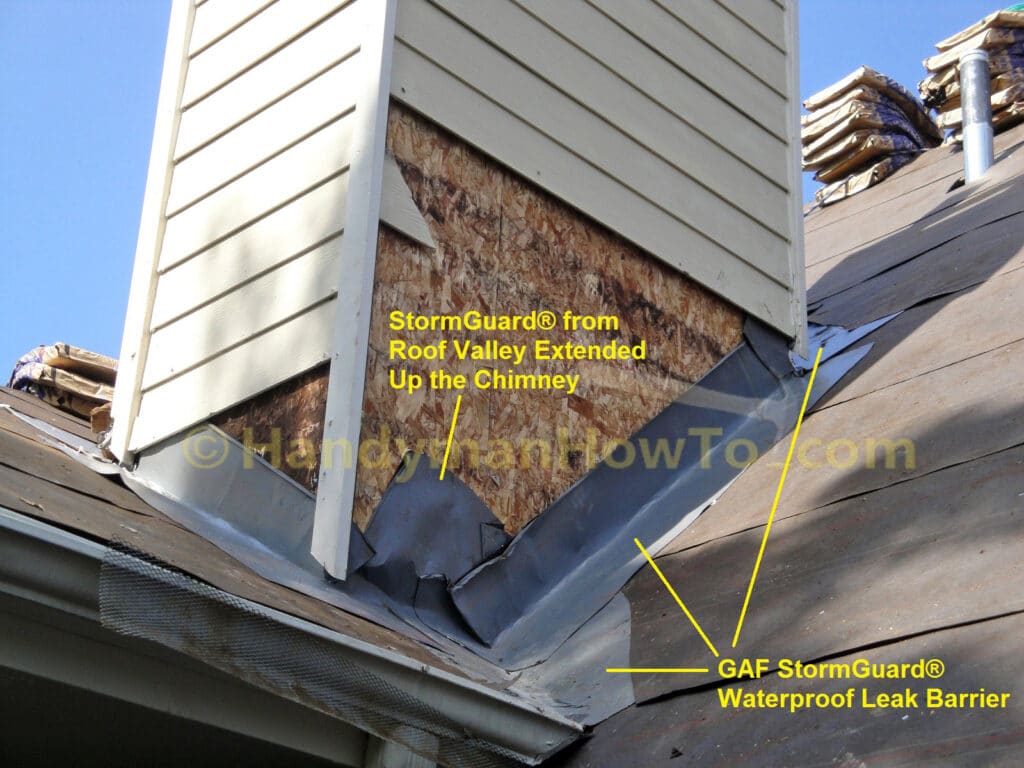
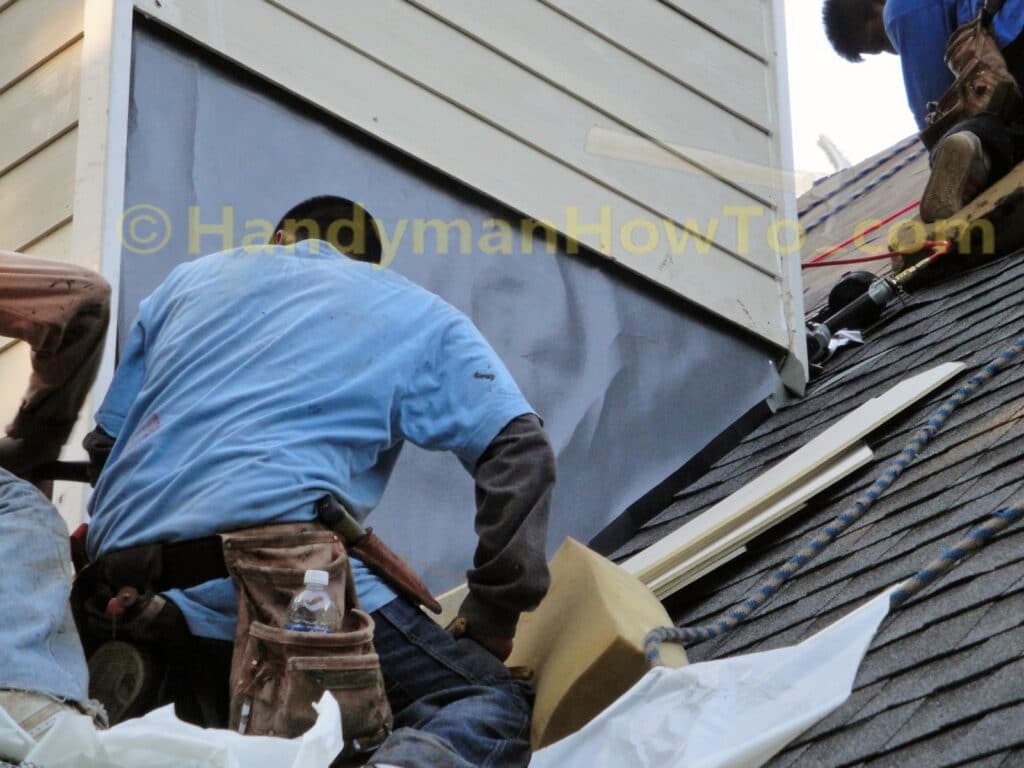
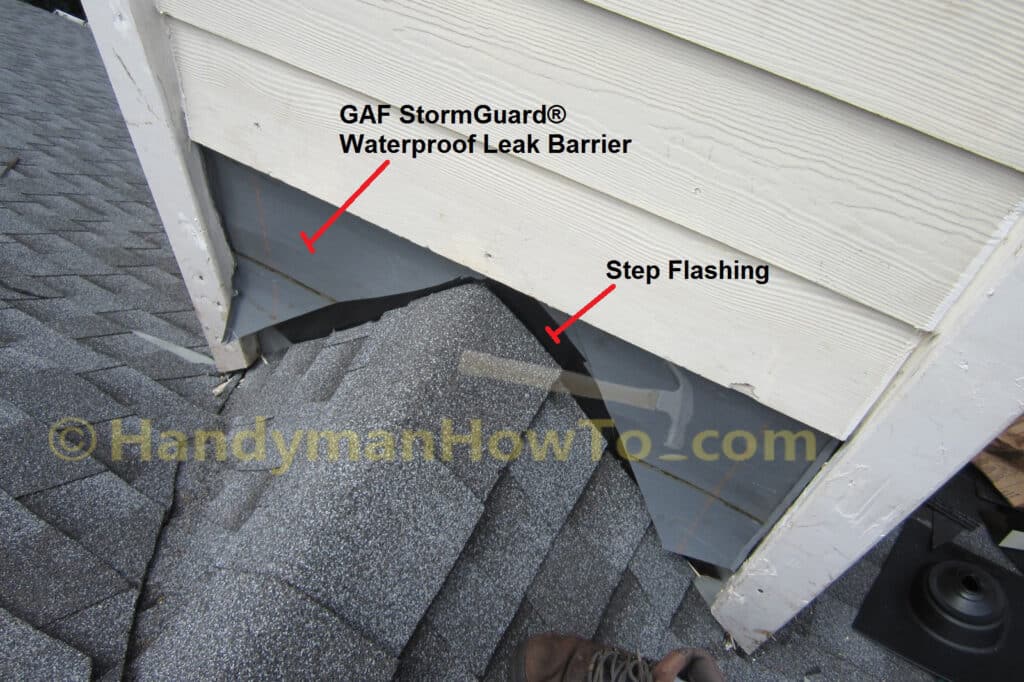
GAF StormGuard® (peel and stick ice & water shield) is applied to the roof valleys, the roofing felt is then applied, then the chimney is wrapped in StormGuard. Notice how the materials are applied such that water will be directed away from the chimney should it get past the shingles and flashing.
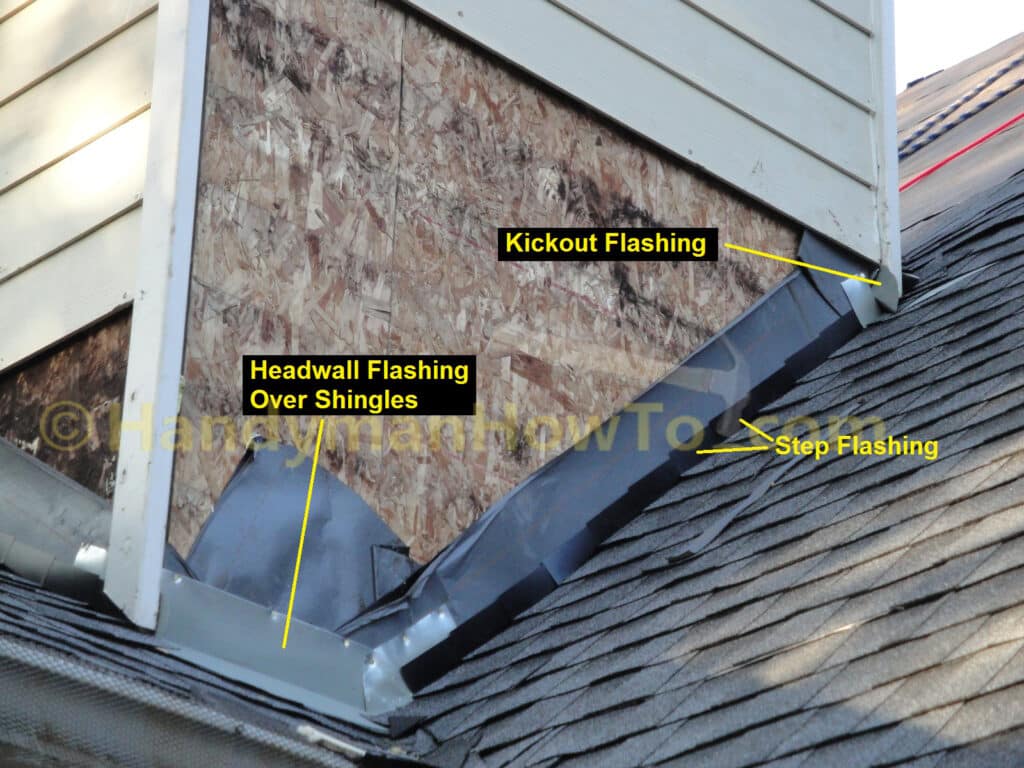
Black pre-painted step flashing is interleaved with the shingles along the chimney. Additional coil flashing is cut to size and installed behind the chimney corner board, then gray painted headwall flashing (apron flashing) is installed so it lays on top of the shingles at the lower left corner of the chimney.
If you’re not careful, a roofing contractor who’s trying to cut corners or in a rush will not pull off the siding boards, install ice & water shield and may try to reuse the old step flashing because it’s difficult to remove and wiggle in new step flashing behind the siding. Most homeowner’s will not know to ask about these details and the chimney base often can’t be viewed from the ground, so you’d never know!
A layer of GAF StormGuard ice and water shield is applied to the exposed OSB panels on the chimney on all four sides:
Notice how the ice and water shield overlaps the top of the black step flashing to shed water and condensation:
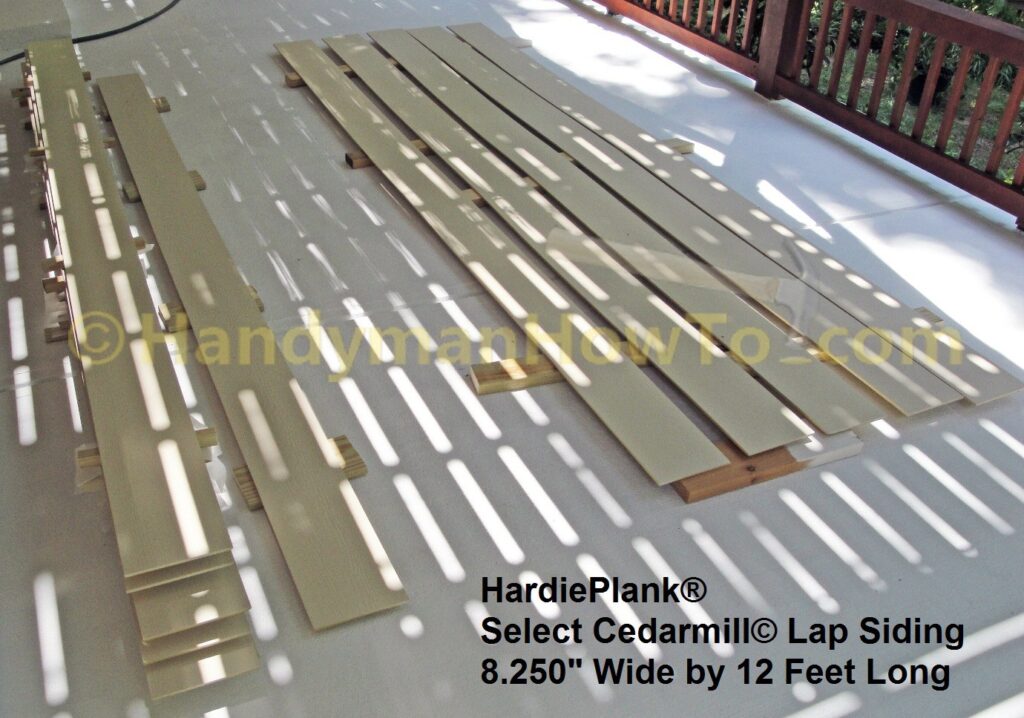
The week before the roofing crew was scheduled to start work, the roofing contractor delivered a dozen HardiePlank® Select Cedarmill© siding boards that we estimated was sufficient for the chimney roof repair. I rolled on a matching coat of Sherwin Williams Duration exterior latex paint. Duration is an excellent product.
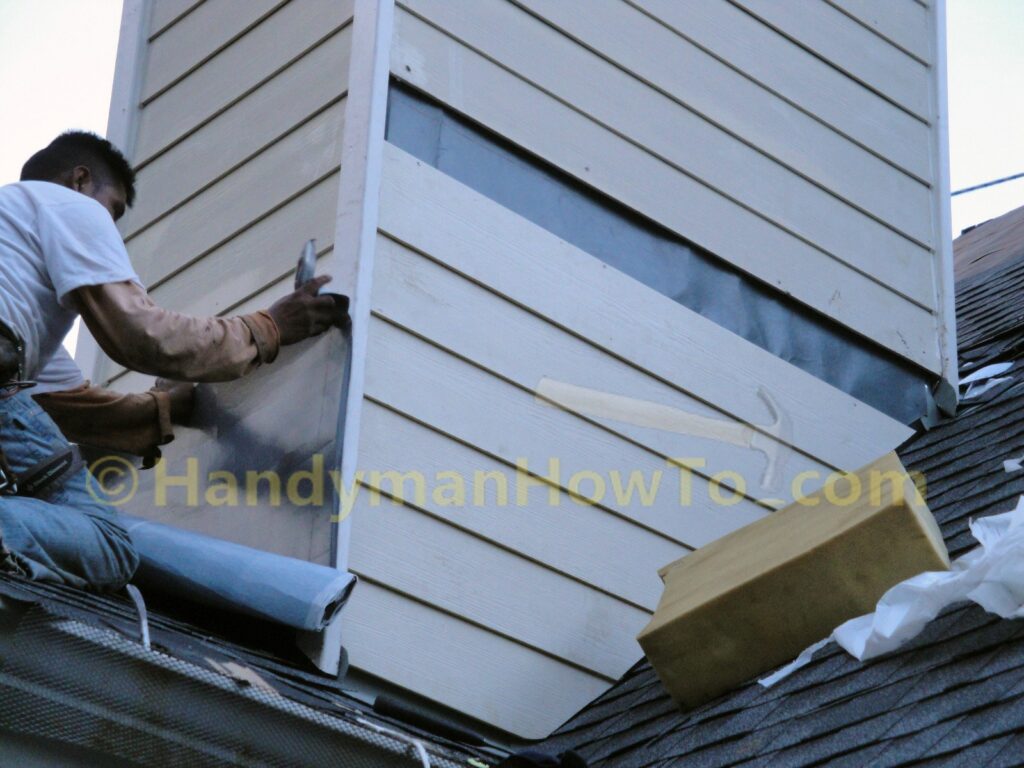
GAF StormGuard ice and water shield is being applied to the other side of the chimney. The new HardiePlank siding boards are going up the other side of the chimney:
Chimney Cricket Roof Installation
The siding was removed from the area where the cricket meets chimney, step flashing and ice & water shield installed. Notice the kickout flashing inserted behind the chimney corner board to direct water away from the chimney.
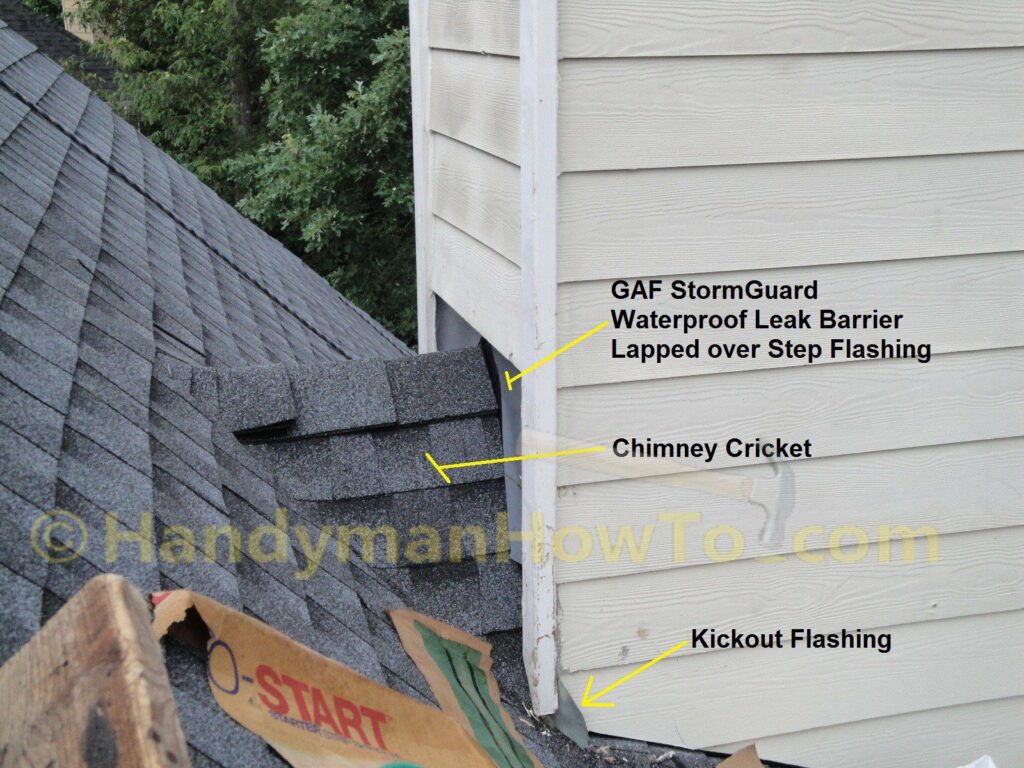
Closeup of the chimney cricket flashing:
New Roof Installation: Chimney
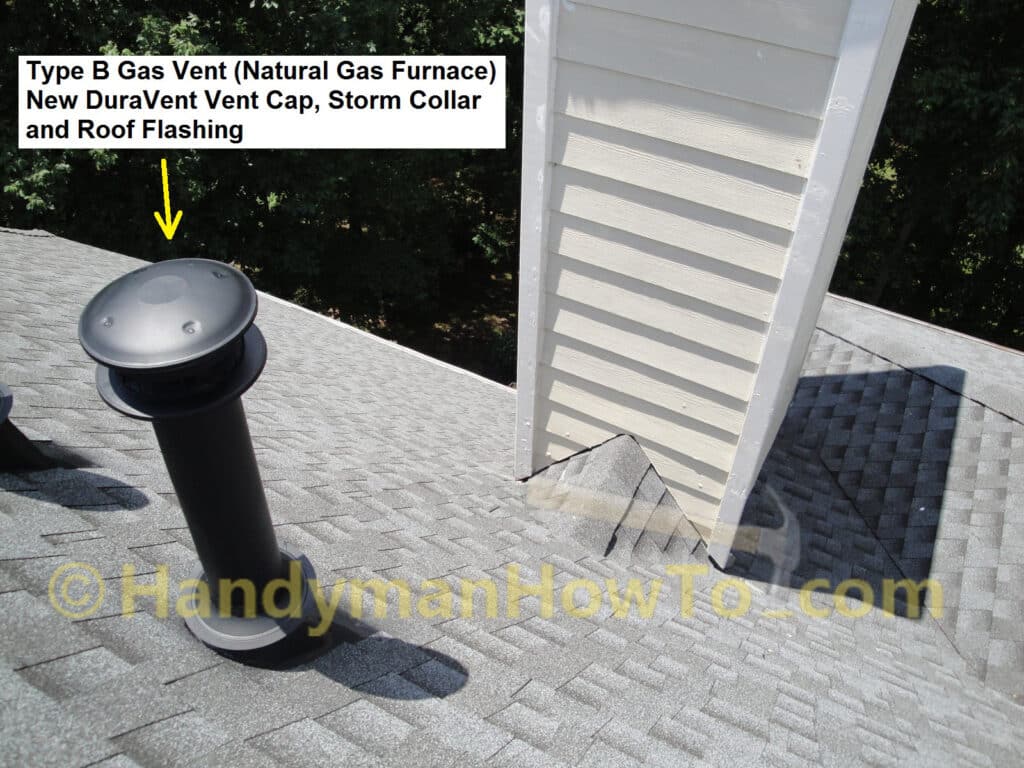
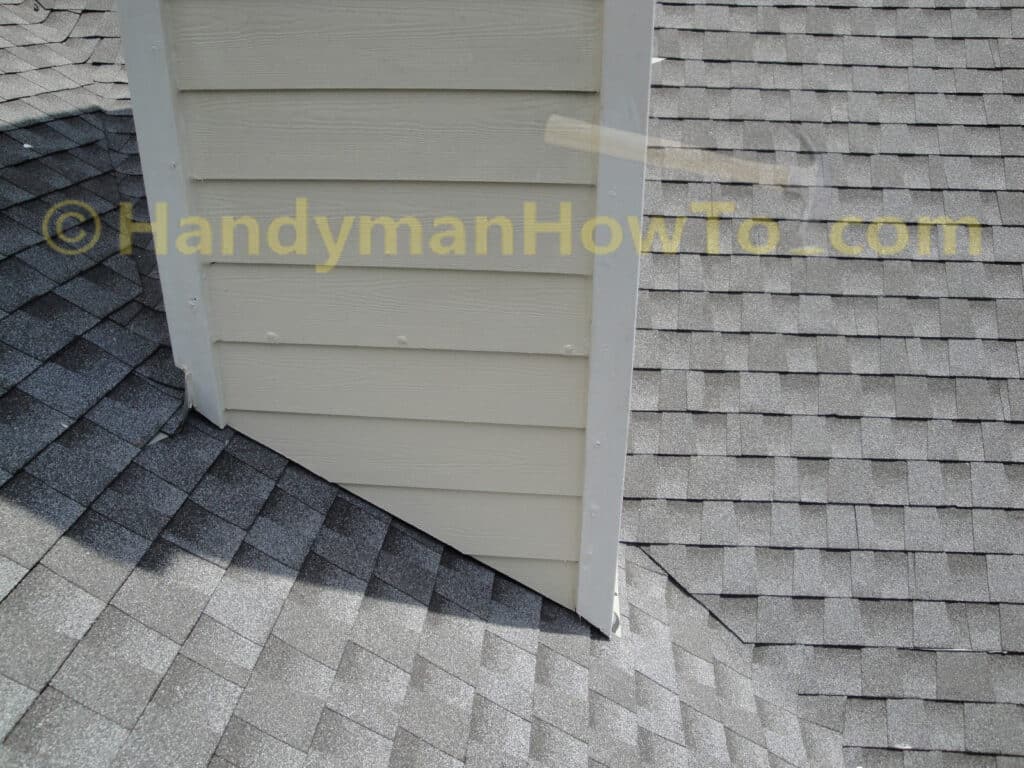
Here’s the new roof showing the finished chimney, cricket and HVAC flue vent (Type B Gas Vent). A new vent cap, storm collar and roof flashing were installed on the flue vent.
North side of the chimney showing the new roof, cricket and corner flashing:
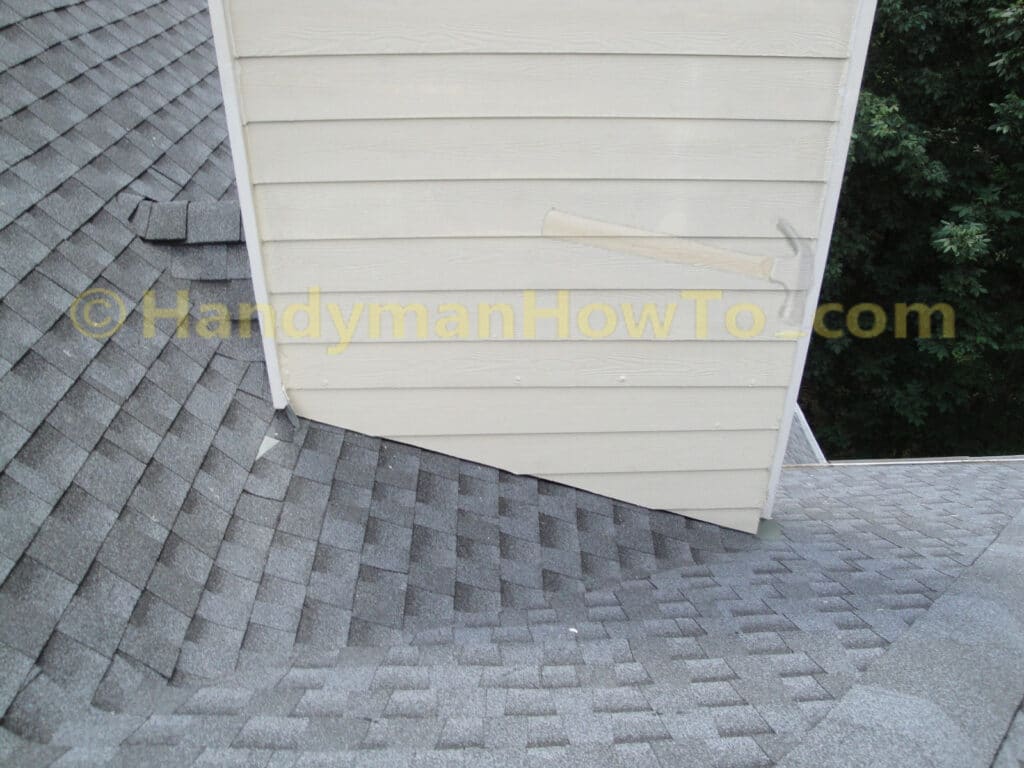
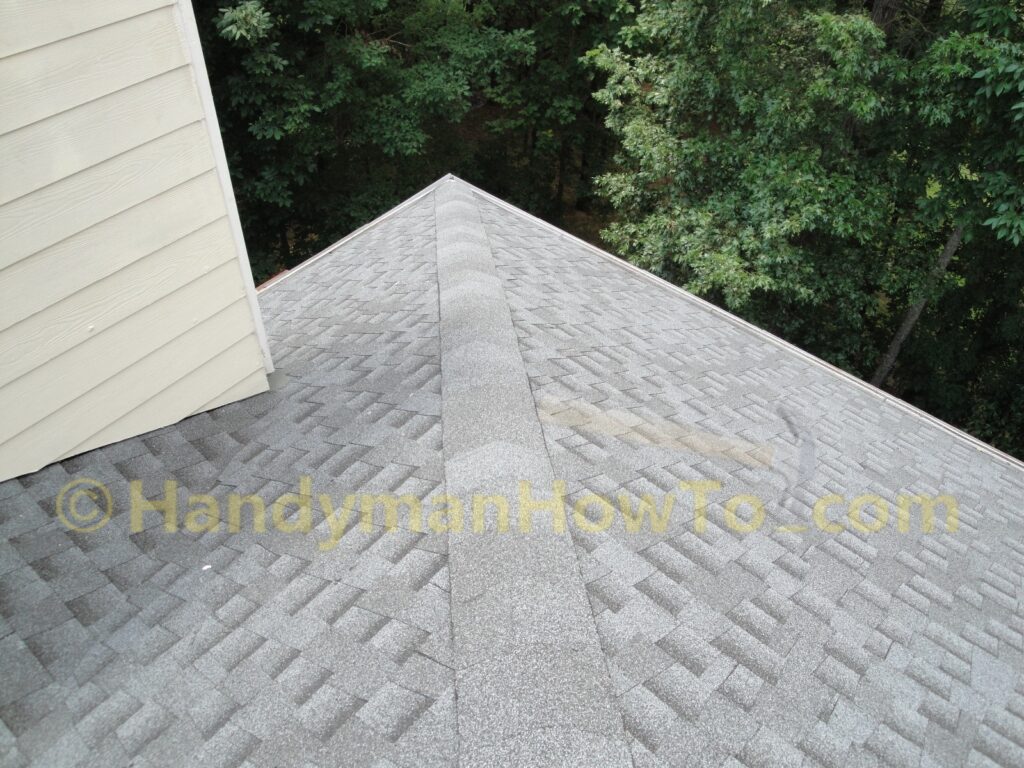
The new GAF Timberline® HD™ shingles and TimberTex® Ridge Cap looks fantastic!
The roofing crew caulked the corner boards, flashing joints and nail heads with BASF SONOLASTIC NP1, then painted the boards and siding using house paint that I provided. Nice job!
This project is continued in Hail Damaged Roof Replacement: Part 3 – Attic Ridge and Box Vents.
Take care,
Bob Jackson