This project is continued from How to Build a 2×6 Porch Rail – Part 3.
While holding the 2×6 porch rail flush and level against the wall, the top corner of the 2″ x 2″ x 36″ picket is marked on the house wall.
The picket will be the anchored to the wall and serve as primary support for this end of the porch rail.
Build a Porch Rail: Install the 2×2 Pickets
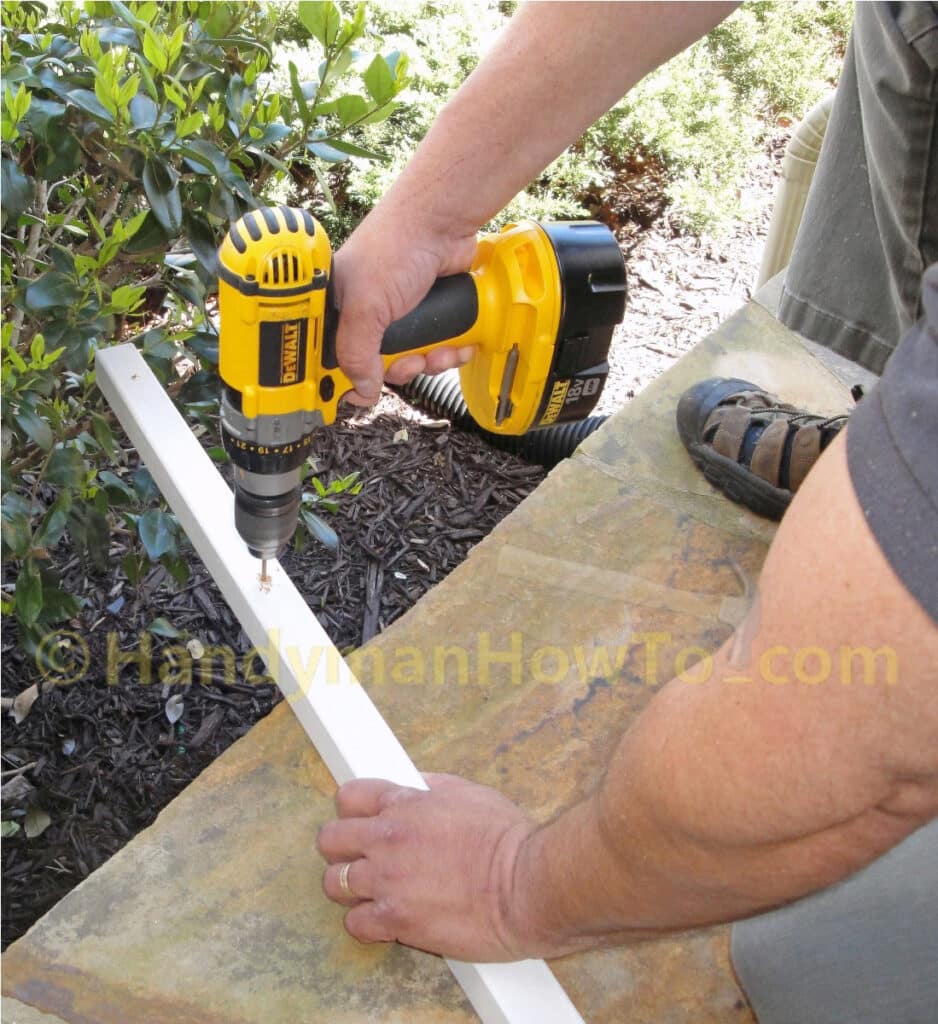
1/8 inch holes are drilled in the picket at four locations so the screws don’t split the wood. By the way, I’m using the DeWalt drill/driver that I rebuilt in this project – it still looks shiny and new.
To install the porch rail support picket:
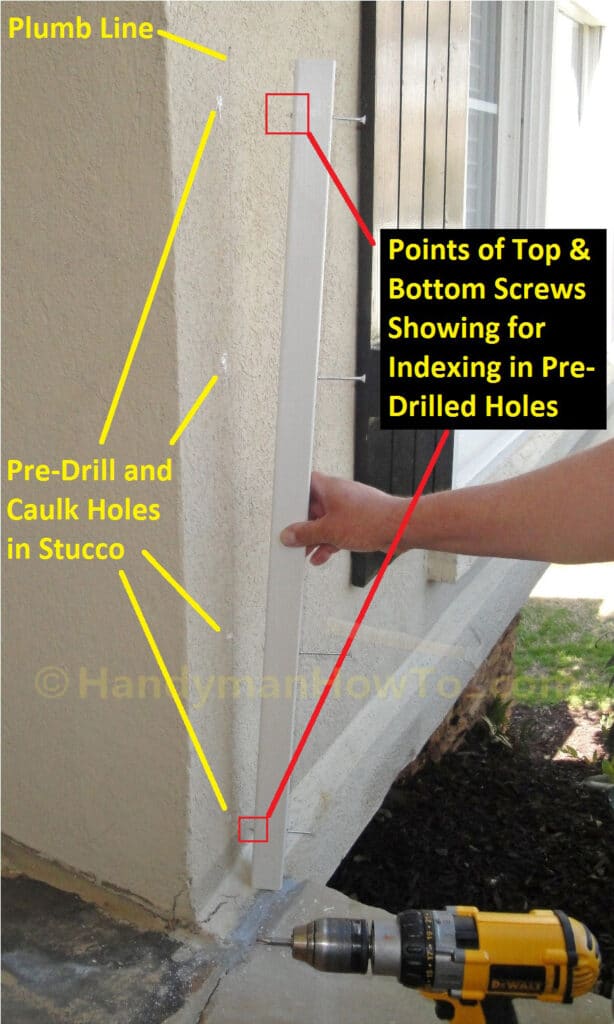
- Mark a vertical plumb line on the wall in pencil with a carpenters level, beginning at the top corner position marked previously (see the first photo above).
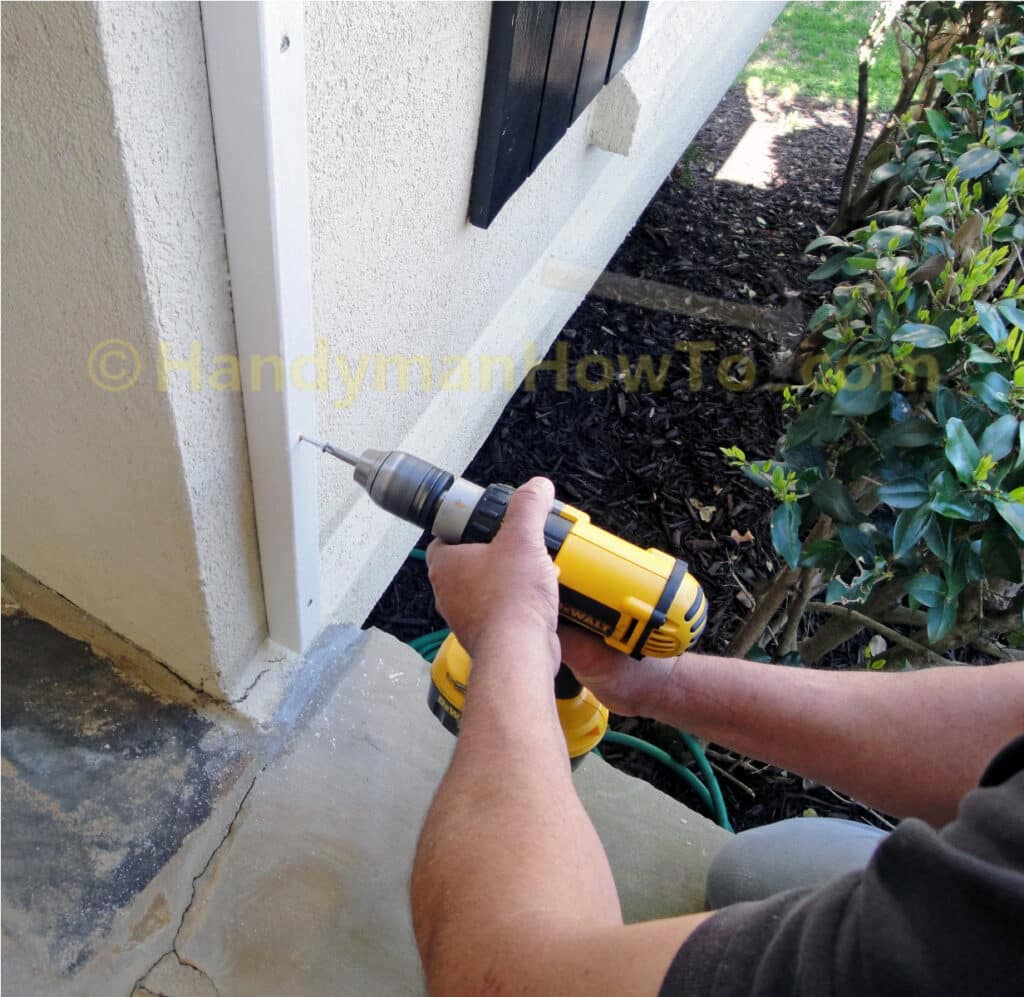
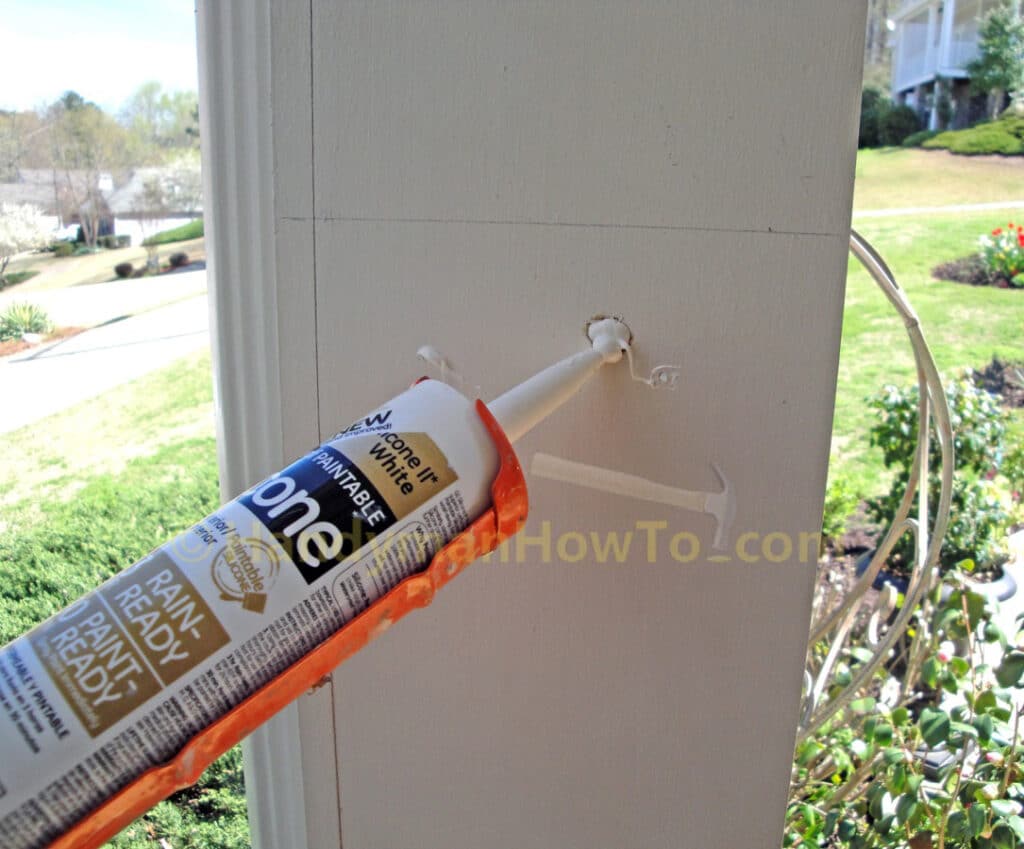
- Hold the picket against the wall at the exact height and position marked. Drill pilot holes through the cement stucco with a 1/8″ masonry bit using the pre-drilled holes in the picket as a jig (i.e. guide for the drill bit).
- Prime the stucco pilot holes with a dab of exterior silicone caulk to seal the screws.
- Partly set the four 3″ stainless steel screws in the picket for convenience (see photo below).
- The top and bottom screws are driven about 3/8″ through the picket to serve as indexes into the stucco holes.
The above steps are summarized in this photo:
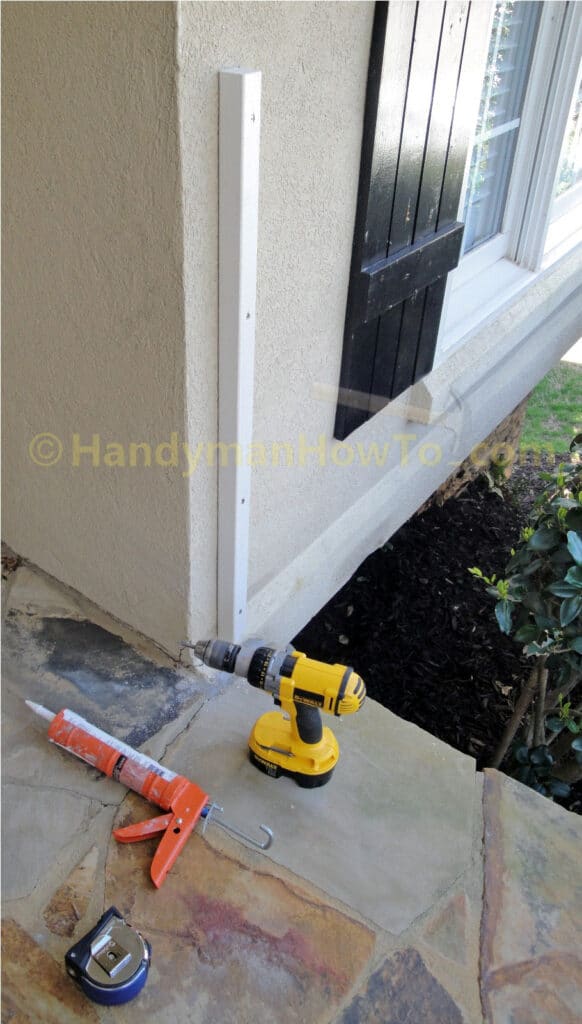
The 2×2 support picket is anchored to the wall with 3 inch stainless steel screws:
Cedar picket fastened to the wall with four (4) stainless steel wood screws:
Porch and Deck Rail Load Bearing Capacity
You may be asking yourself “How do I know a 2×2 picket is sufficient to support the porch rail plus the loads imposed by a person leaning, pushing or sitting on the rail?!” Answer: The exterior corner of the wall is made of 2×4 framing which the 3″ inch stainless steel screws are driven into, making the picket a very sturdy load bearing attachment. I was confident the screws hit the wall framing because resistance steadily increased as I drove the screws and I never “punched through” into a void, confirming contact with a 2×4 framing member.
Each #8 wood screw typically has a shear strength of ~300lbs and in the neighborhood of 1,360 lbs tensile strength – values are for the Deck Mate® screws, the Grip-Rite #8 stainless will be similar. The estimated margin of safety to allow for the uncertain holding strength of the cedar picket and wall frame attachment is:
- Shear strength: 4 screws * 300lbs/screw = 1200 lbs.
The building code requires the rail to support 200lbs., so the safety factor is:
1,200 lbs / 200 lbs = 6, meaning a factor of 6 margin of safety in shear. - Tensile strength: 4 screws * 1300 lbs/screw = 5,200 lbs.
5,200 lbs / 200 lbs = 26 factor margin of safety in tension.
These holding strength values are theoretical based only the strength of the screw. The wood will be the weakest point and typically fail long before the screw breaks. The depth of the screw threads in the wood is extremely important in estimating the actual holding (or pull out strength) of the joint. If you want to do the math, see Chapter 8 in the Wood Handbook Wood as an Engineering Material by the Forest Products Laboratory. However, it’s reasonable to believe with theoretical margins of safety of 6 and 26 in shear and tensile strength respectively, the rail-to-wall joint will meet the 200lbs load bearing capacity required by the building code. I verified this later as I worked my 215 lb body weight against the rail.
Your situation may be different if the porch rail meets the house away from a corner and all you have is the siding and oriented strand board (OSB) sheathing inside the wall for load bearing support. Siding and sheathing isn’t strong enough to support a 2×2 picket as I’ve shown here. Instead, you’ll need to install a 2″ x 6″ x 39″ wall plate to distribute the load and set 5 pairs of screws (10 total) equally spaced along the length of the board as highlighted in yellow in this diagram:
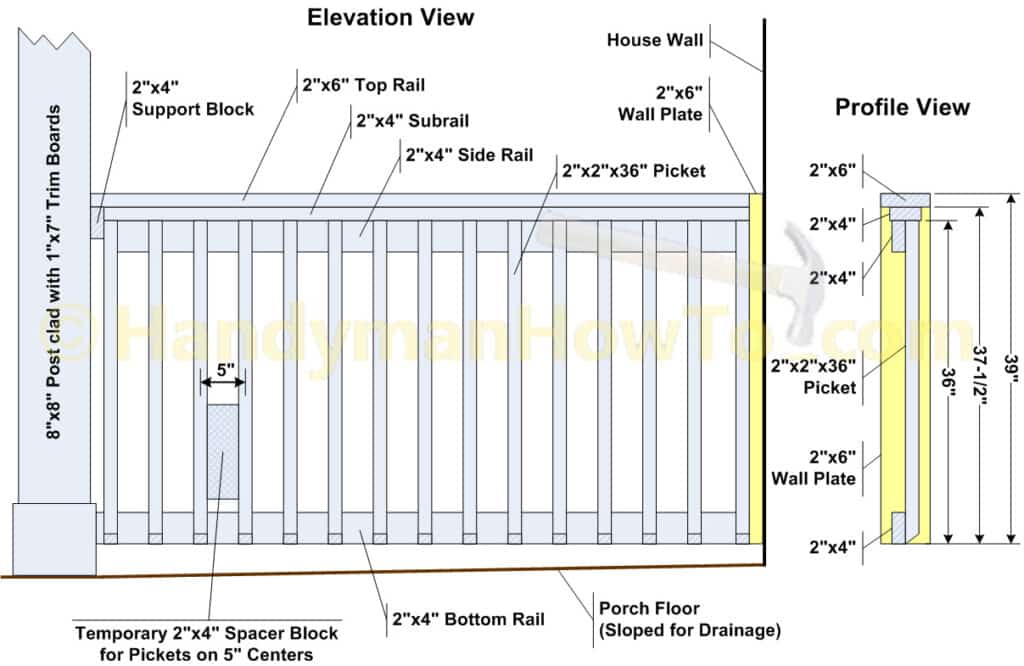
Use a stud finder and maybe you’ll get lucky and find a 2×4 framing member in the wall where the 2×6 wall plate will go to better set your screws. If you install a wall plate, the top and bottom rails will be fastened with screws set in a “toenail” fashion, meaning the screws are driven in at a slant angle.
Build a Porch Rail: Install the 2×4 Support Block
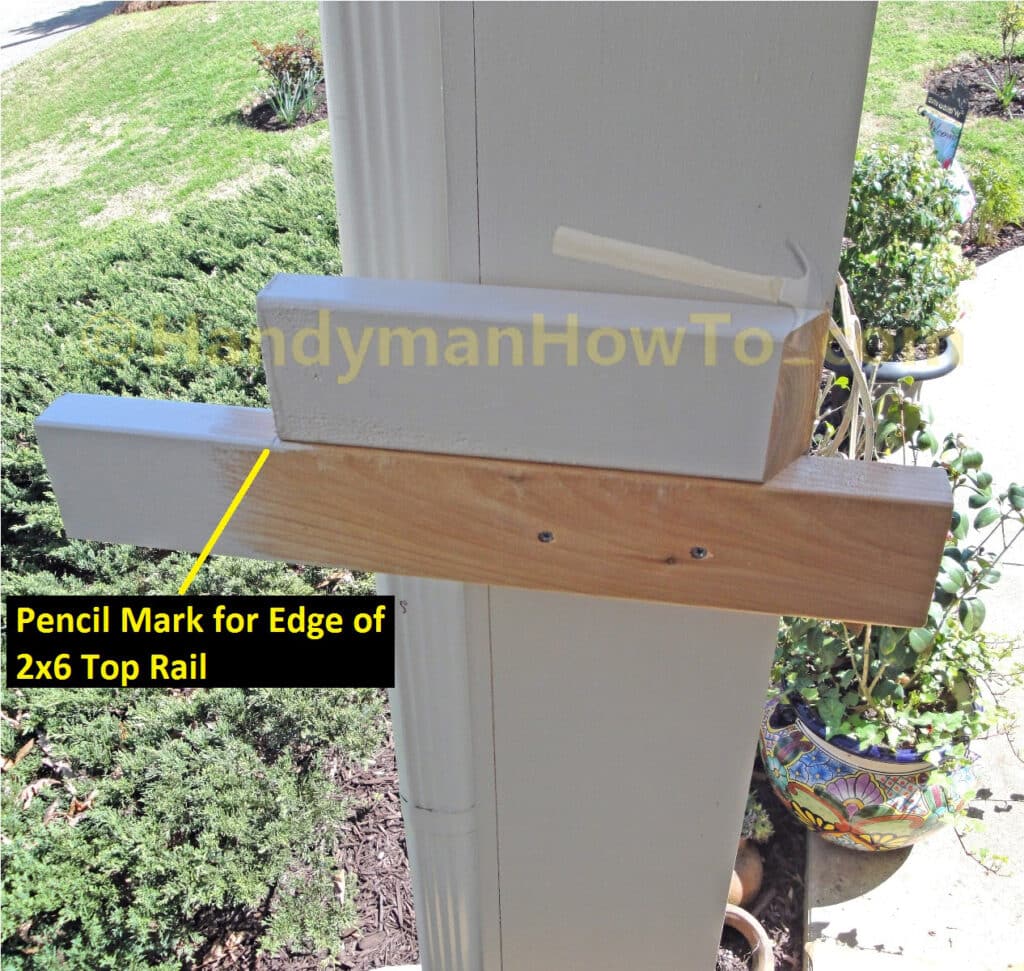
Using the mark I made on the temporary 2×4 support block at the end of part 3, I transferred the mark to a painted 2×4 cedar block and beveled the outside edge with the Dewalt Miter saw. See the photo after this one for a better understanding of the construction method.
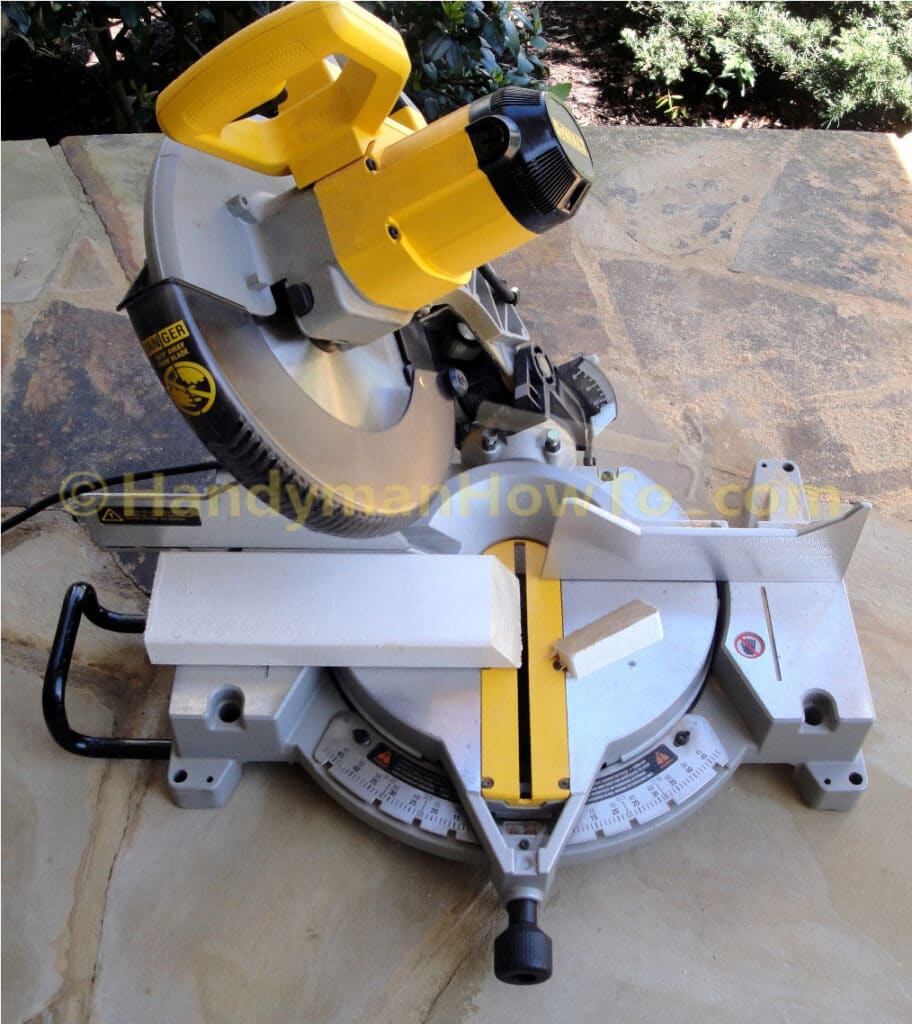
This photo points out the pencil mark for the outside edge of the 2×6 top rail. I simply marked (no measuring required!) the positions of the top rail outside edge and post corner on the painted 2×4 cedar block, then I made the cuts on the miter saw. You can see the purpose of the bevel was to remove a sharp edge that someone could bump into and cause an injury:
The temporary 2×4 support block is removed to install the permanent 2×4 support block. The holes drilled in the post are filled with caulk:
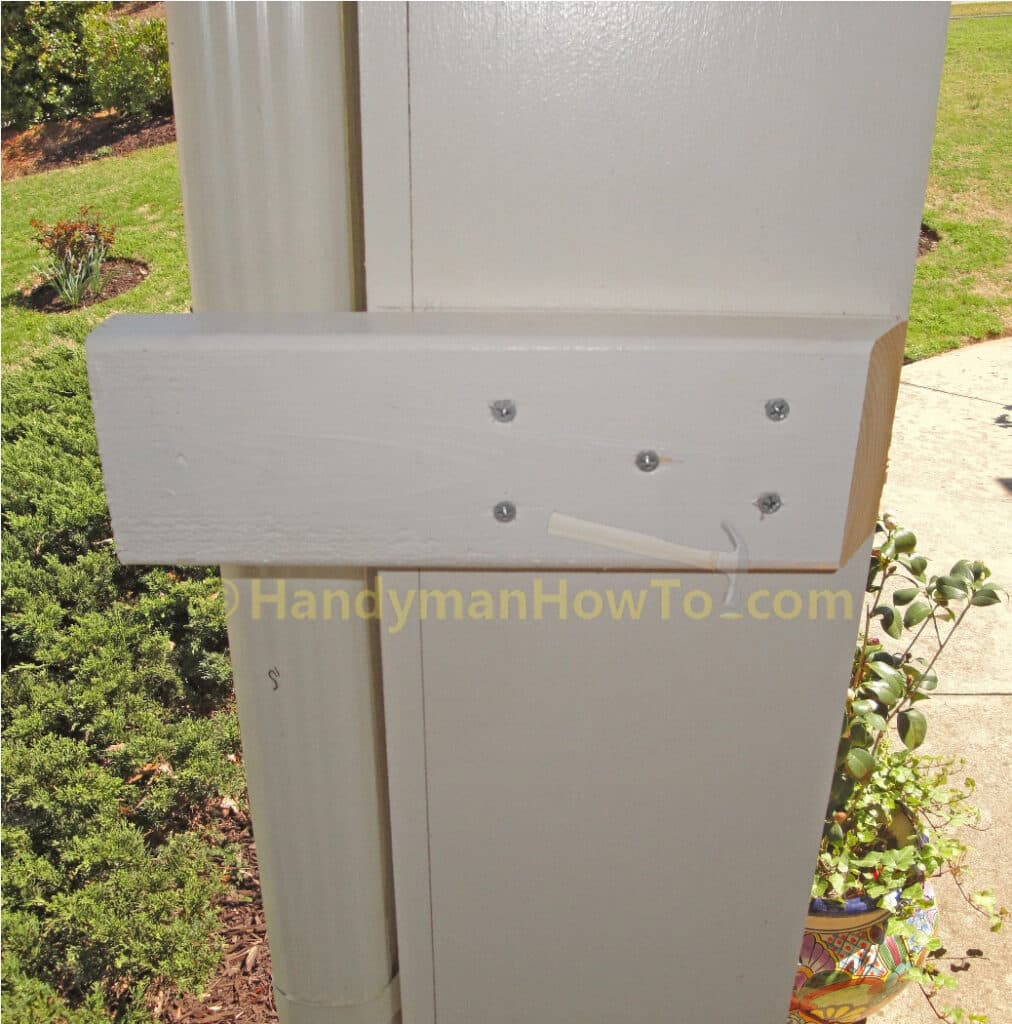
The permanent 2×4 support block is fastened to the 8×8 inch porch support post with 3″ stainless steel screws. The top of the block is even with the 41 inch high level line drawn in pencil on the post. The block extends past the corner post because the house wall and porch post are not aligned:
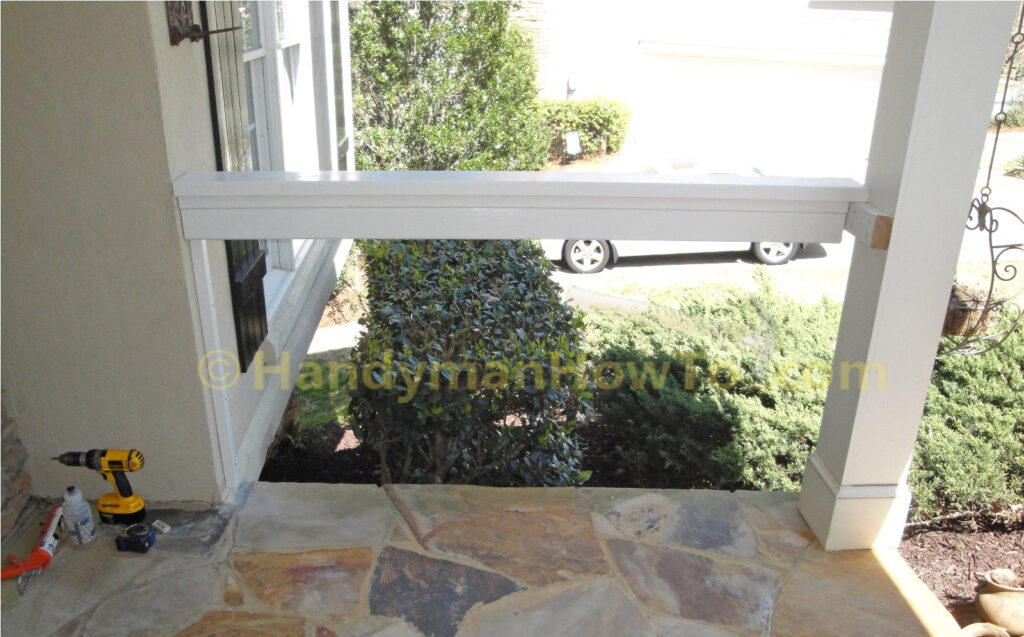
The porch rail fits perfectly on the 2×2 picket and the 2×4 support block. The rail is just sitting on the end supports in this photo, ready for permanent attachment with wood screws:
This project is concluded in How to Build a 2×6 Porch Rail – Part 5.
Regards,
Bob Jackson