The basement closet 2×4 corner post and door frame are built in this installment of How To Build a Basement Closet. This project is continued from How to Build a Basement Closet – Part 2.
Basement Closet 2×4 Corner Post Framing
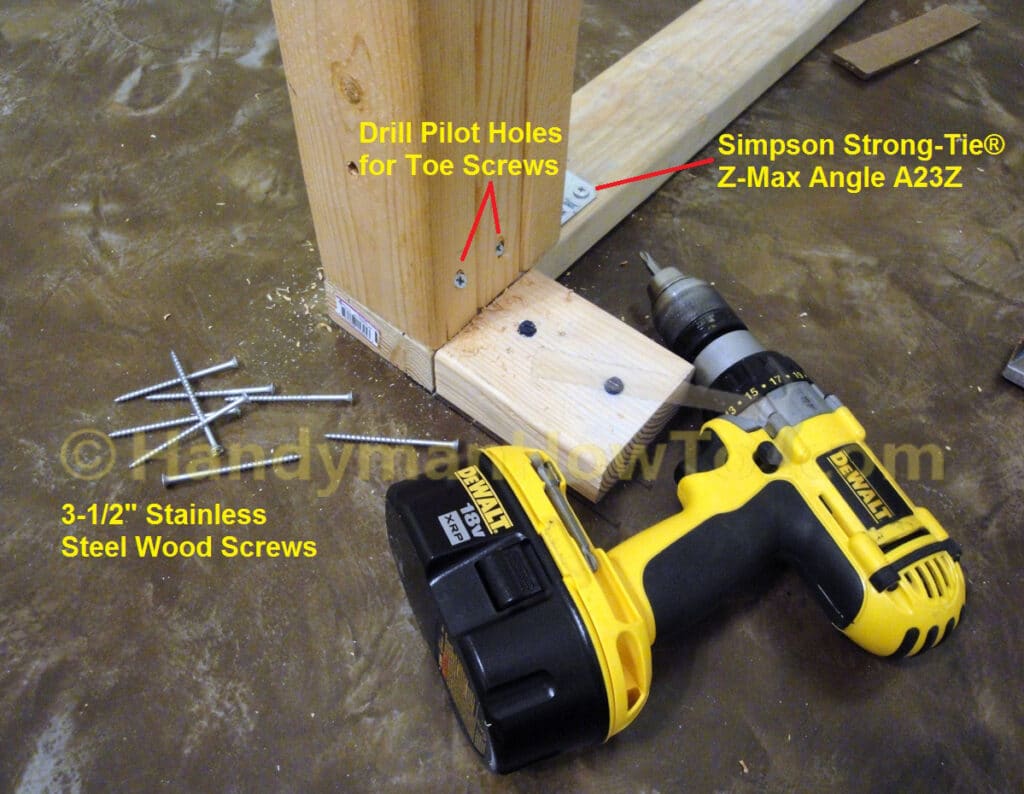
The basement closet 2×4 corner post is constructed by fastening three very straight 2″ x 4″ x 8′ studs with 3 inch stainless steel wood screws spaced about 16 inches apart along the length of the stud. Stagger the screws from one stud to the next to avoid collisions. A contractor will usually save on lumber by substituting wood blocks for the middle 2×4 in the post because the center board is just for spacing. The corner post is initially fastened to the sole plate with a Simpson Strong-Tie® Z-Max Angle A23Z (product drawing) with eight (8) Simpson Strong-Drive SD8X1.25 structural wood screws.
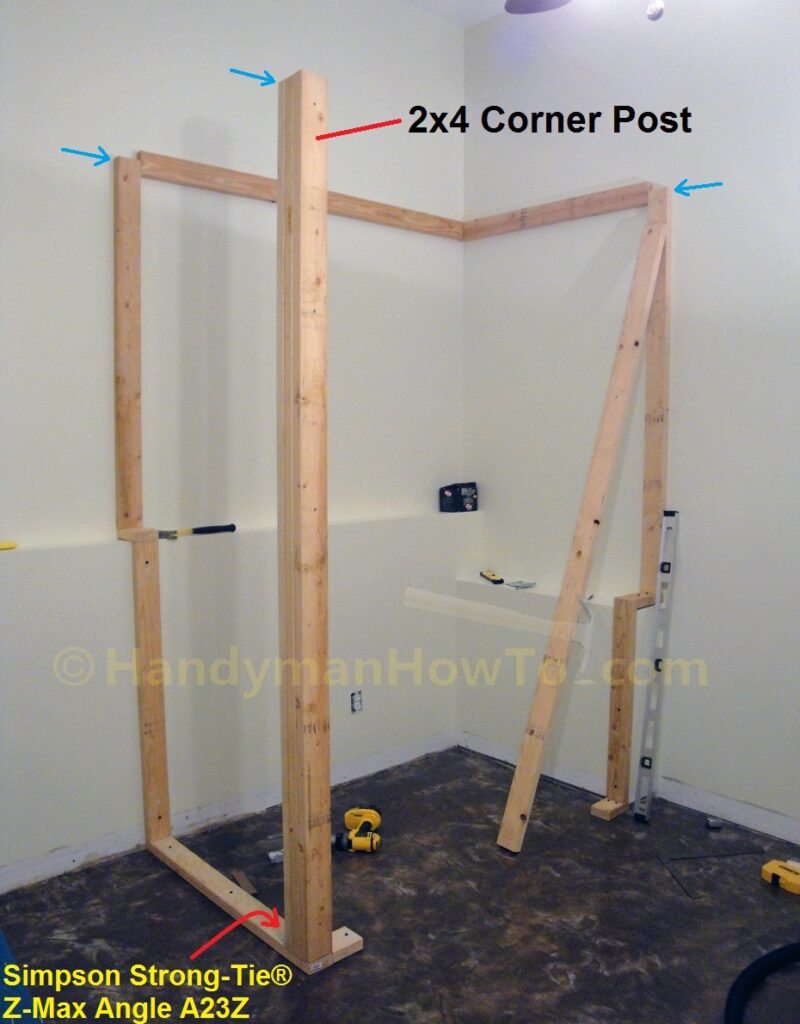
Important! As indicated by the blue arrows in the above photo, verify the height of the starter studs fastened to the exterior walls and the corner post are level. Why?
- If one or the other starter studs are higher than the corner post (perhaps due to a slightly uneven concrete floor), then there will be gap between the top of 2×4 studs in the closet walls and the 2×4 top plate. This means your full length 8 feet (96 inch) wall studs will be too short! (Aside: As I described in Part 1, I’m building the walls with 96 inch “full length” 2×4 lumber.)
- Should either of the 2×4 starter studs fastened to the exterior wall be higher than the corner post, mark a level line with the top of the corner post, remove the starter stud (you are using wood screws so it’s easy to remove and adjust a board, yes?) and cut it a bit shorter so it’s even with the corner post. You may also need to lower the ledger board a corresponding amount to maintain the 1.5 inch “seat” for the top plate.
Basement Closet 2×4 Top Plate Framing
To install the front 2×4 top plate:
- Carefully level the corner post on both sides such that the post is perfectly vertical.
The corner post will be a bit wobbly, so you’ll need a helper to hold the post in place while continuing to check it’s plumb with the 4 foot bubble level. - Lay an 8 foot long 2×4 board in the seat made by the starter stud and ledger board, with the other end across the corner post.
The front side of the top plate and the corner post should be flush (even). - Verify again the corner post is plumb with the level, then mark the length to be cut along the top edge of the corner post.
- Saw the top plate to length.
- Fasten the top plate to the starter stud with a Simpson Strong-Tie Z-Max A21Z metal angle structural connector using four (4) Simpson Strong-Drive SD8X1.25 wood screws.
- Fasten the other end of the top plate to the corner post with two 3 inch long bugle-head wood screws. Set the wood screws flush the top plate the screw head doesn’t interfere with the closet plywood cap (or drywall cap if you prefer).
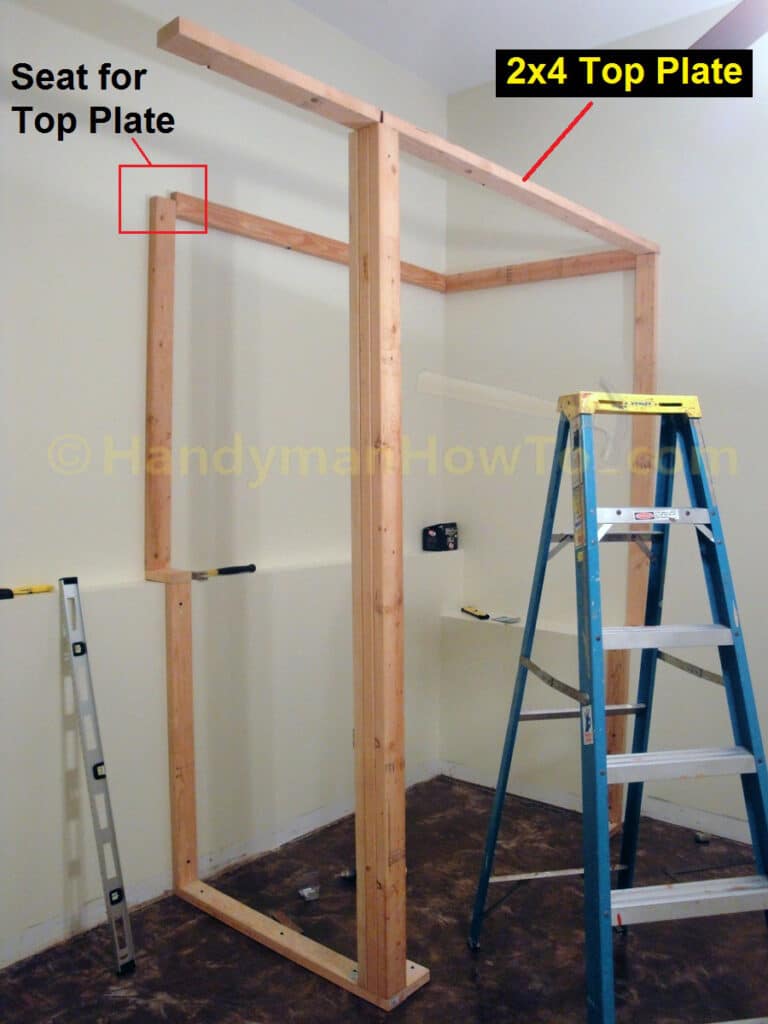
The 2×4 top plate for the other closet wall is set in place, the corner post checked for plumb and the length marked for sawing. Installation is the same for the first section of wall top plate.
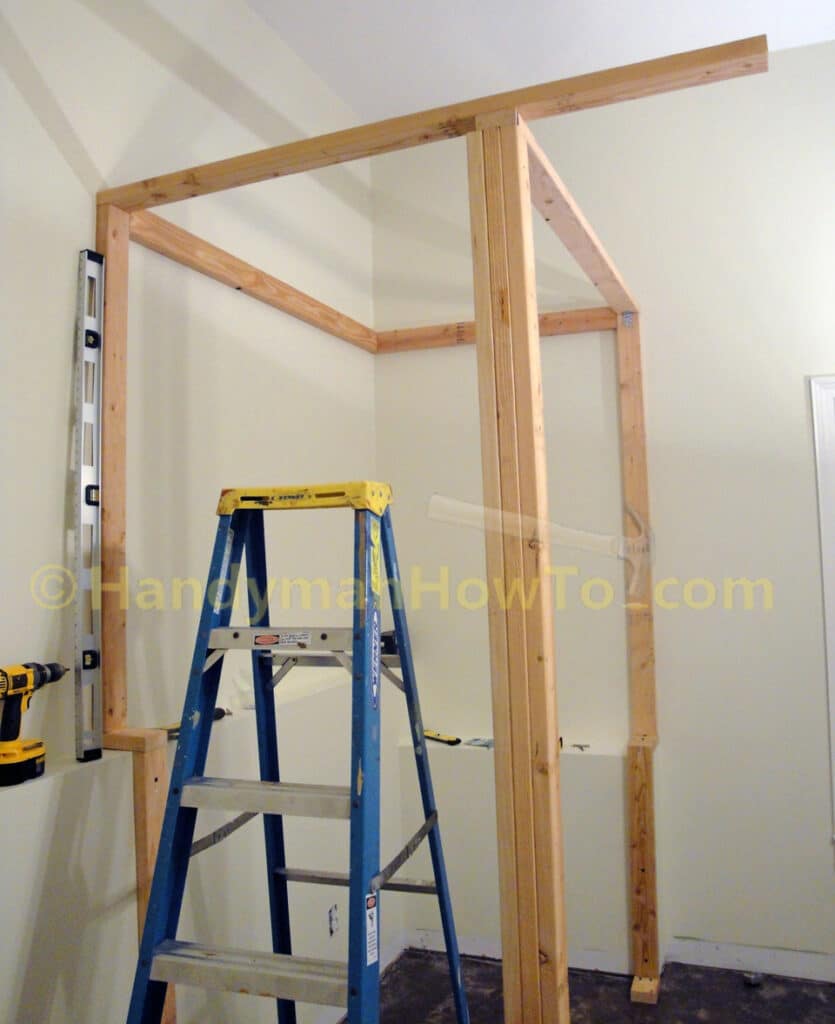
Fasten the Closet Wall Corner Post
At this point, the bottom of the closet wall 2×4 corner post was fastened to the sole plate with a Simpson Strong-Tie A23Z metal angle. Now that the top plates are installed, the post is secured with two 3 inch stainless steel wood screws on the other side.
2 x 4 x 8 Framing Lumber
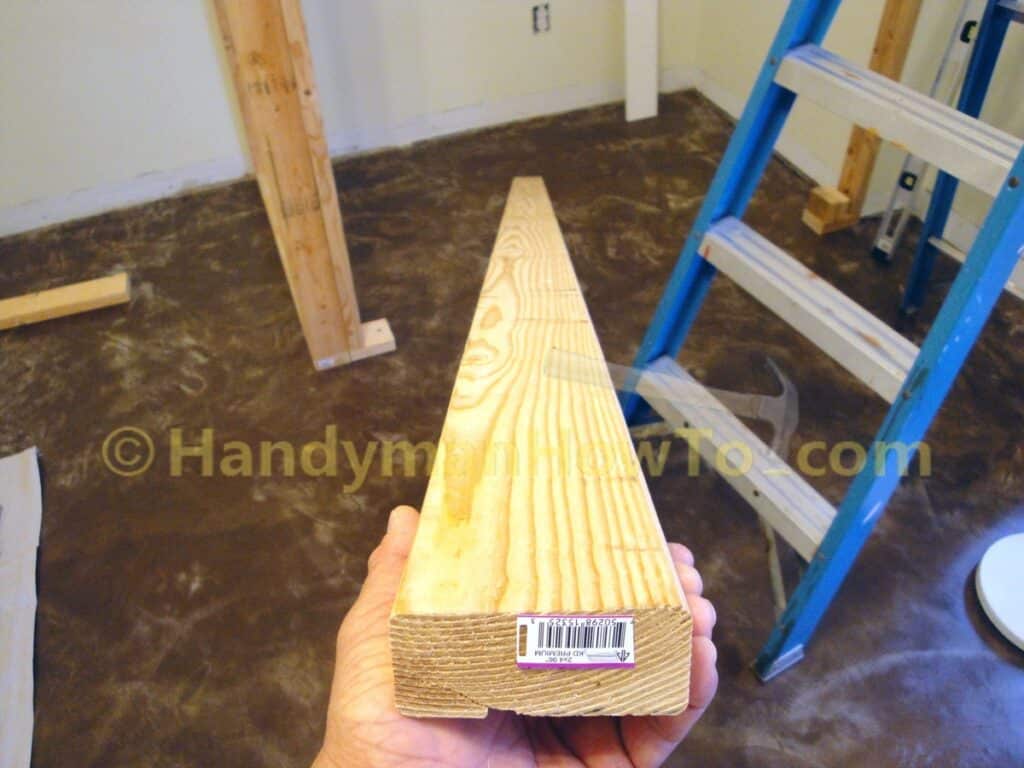
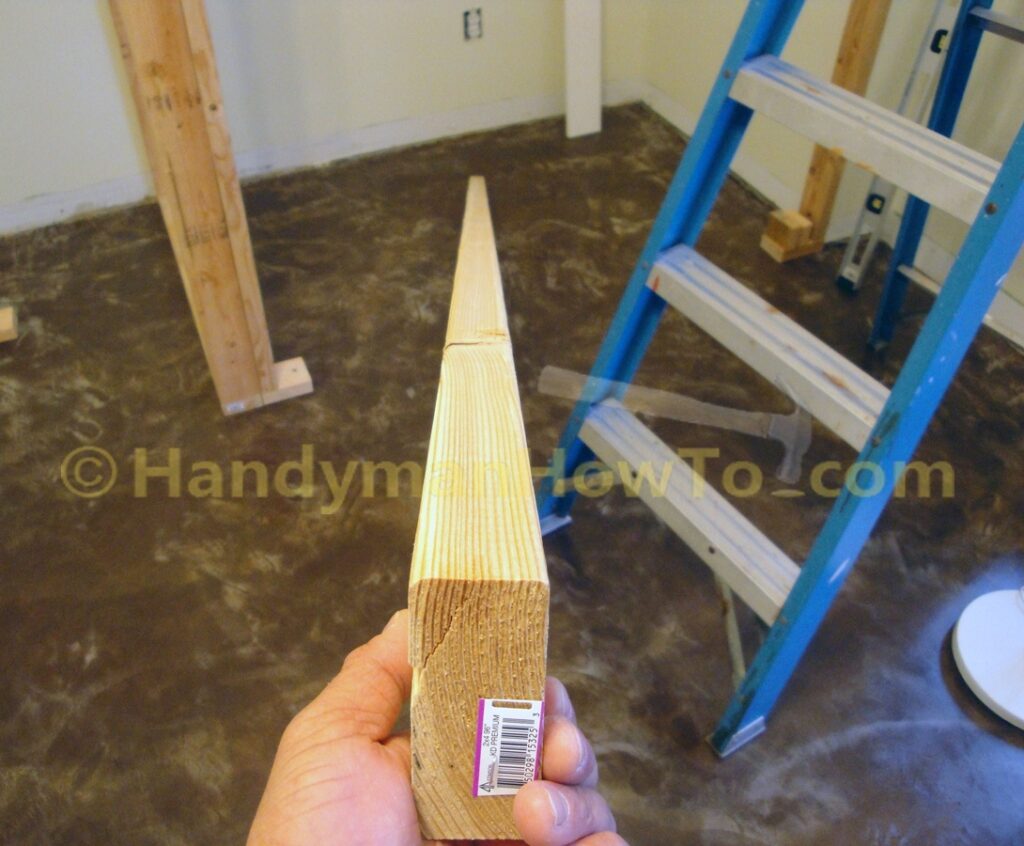
I carefully sorted through the kiln-dried 2 x 4 x 8 (full 96 inch length) lumber at the home improvement store, choosing only the best boards that were straight without knots or defects. This meant rejecting 2 or 3 out of 4 boards in the stack of lumber to find the best ones.
Example of a very straight 2x4x8 stud:
Edge view of stud, checking for warps and twists:
The Importance of Straight and True 2×4 Lumber
Straight boards without warps and twists are critical, because rather than framing the closet door rough opening ~2.5 inches wider and 2 inches taller than the finished door opening per normal practice and shimming the door jambs, I plan to make rough opening with precision such that it’s just wide enough to fit the 11/16 inch thick door jambs. The bi-fold rough opening framing scale drawing is:
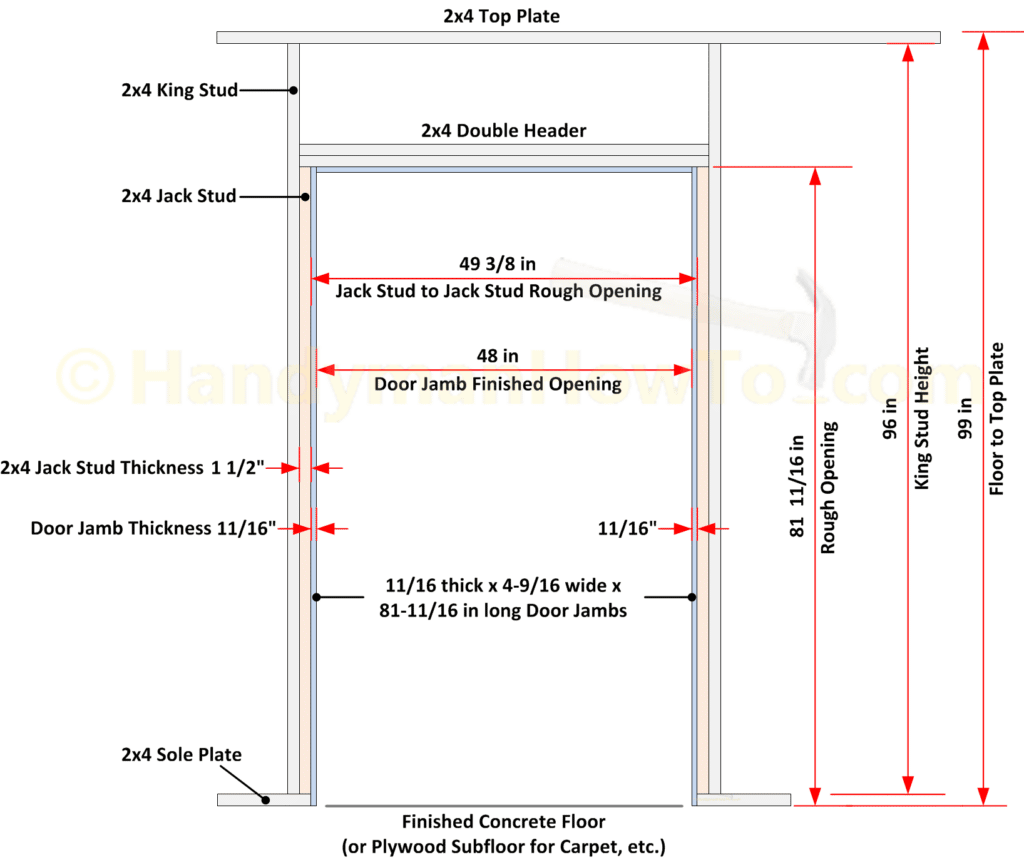
- My 2×4 rough door opening will be the 48 inches finished door opening width plus 1-3/8 inches (= 2 x 11/16 in.) for the two 11/16 in. door jambs, for a rough opening that is 49-3/8 inches wide from jack stud to jack stud.
- The door rough opening height will be 81-11/16 inches, which is the height of the ready-to-install door jambs. Building the rough opening to match the finished door size (minus the door jambs) is possible only with careful measurements, precise saw cuts and building with very straight and true 2×4 lumber.
Basement Closet Framed Rough Opening
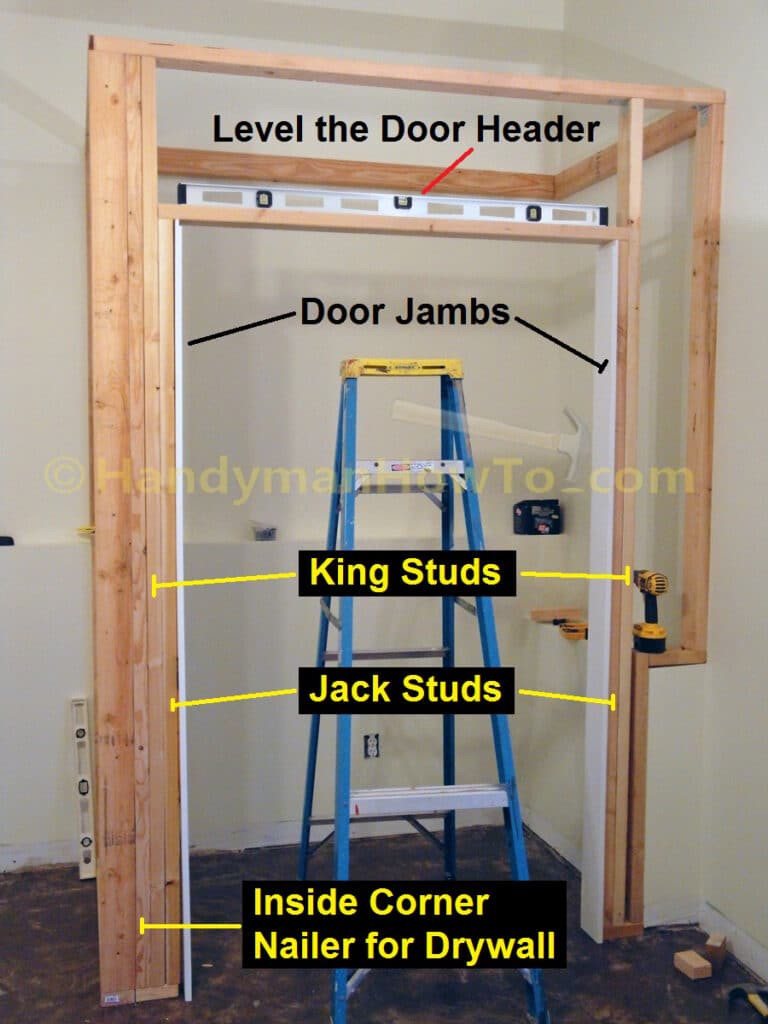
The closet door rough opening framing steps are:
- Fasten the 2×4 nailer stud with 3 inch wood screws to the corner post, spacing the screws about 16 inches apart, working from top-to-bottom while checking the stud face is flush the corner post as you go.
The purpose of the nailer stud is to provide a surface to the fasten the drywall at the interior corner of the closet. - Attach the king stud on the left side to the nailer stud with wood screws.
Verify the studs are plumb with the 4 foot carpenter’s square.
See the following photos for nailer- and king stud installation details on the sole plate. - Set the king stud on the right side in place, plumb it with the 4 foot level, and fasten it to the top plate and sole plate with Simpson Strong-Tie Z-Max A21Z metal angles and wood screws.
- Cut two jack studs (also known as “trimmer studs”) 80-3/16 inches long (= 81-11/16″ rough opening height minus 1-1/2″ for the thickness of the 2×4 sole plate).
- Take care to make the cut on the “long” side the measurement mark so the saw blade kerf (or width of the saw blade cut) doesn’t cause the jack stud to be shorter than the door jamb.
- Recall that I’m sawing 2×4’s with my DEWALT compound miter saw which makes precision cuts easy.
- Temporarily fasten the two jacks studs to the respective king studs with two wood screws.
- Measure and saw the the horizontal door header 2×4.
The door header will be made with two (2) stacked boards, but only saw the first board for now. - Set the door header in place over the jack studs.
Take care the door header fits without bulging or pushing the king studs apart because this will bow the door frame. - Stand the two 11/16 in. thick x 4-9/16 in. wide by 81-11/16 in. high door jambs in place inside the door opening.
The door jambs should rest against the 2×4 door header without pushing it up.
Use a helper to hold the door jambs in place or tack them in place with a single 1-1/2 inch brad nail if working by yourself. - Lay a 4 foot carpenter’s level on the door header to check for level as shown:
Sole Plate Tapcon Masonry Anchors
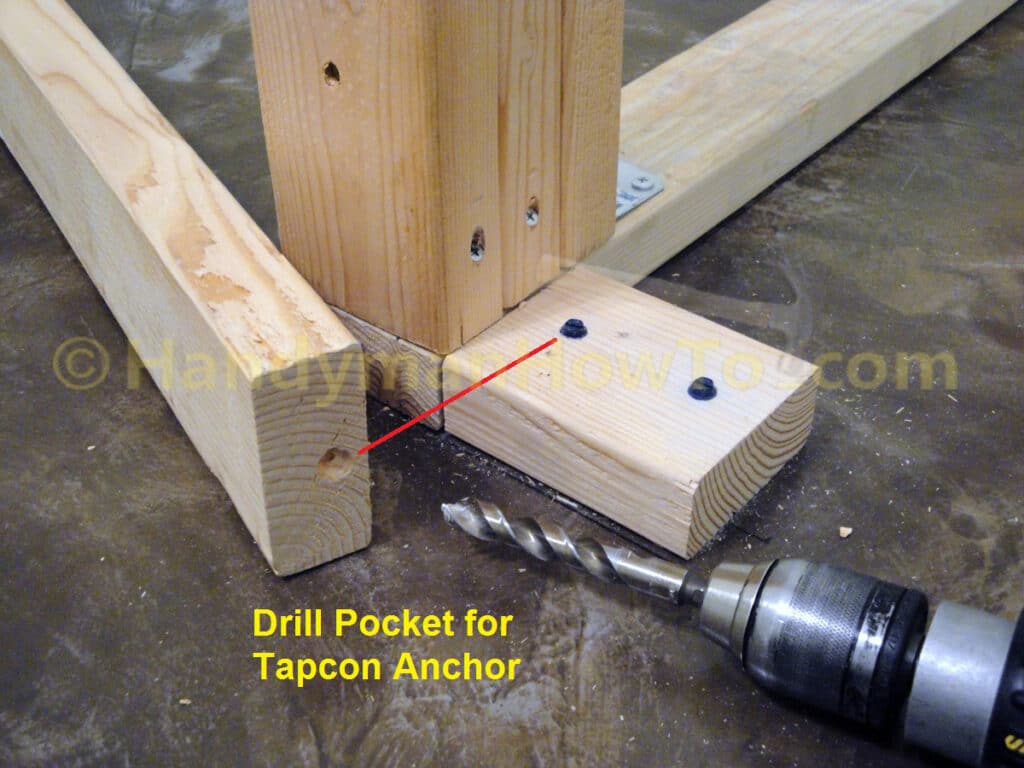
The 2×4 sole plate is fastened to the concrete floor with Tapcon masonry anchor screws. The sole plate happens to be the width of three (3) 2×4’s for the corner nailer, king stud and jack studs, therefore there wasn’t an unobstructed place to install the Tapcons. To fit the studs over the Tapcons, I drilled a 1/2 inch pocket in the bottom of the studs as shown. I stood the stud in place and pressed it down on the Tapcon to make an indentation to mark where to drill. Now the stud fits flush on the sole plate.
Level and Square the Closet Door Frame Rough Opening
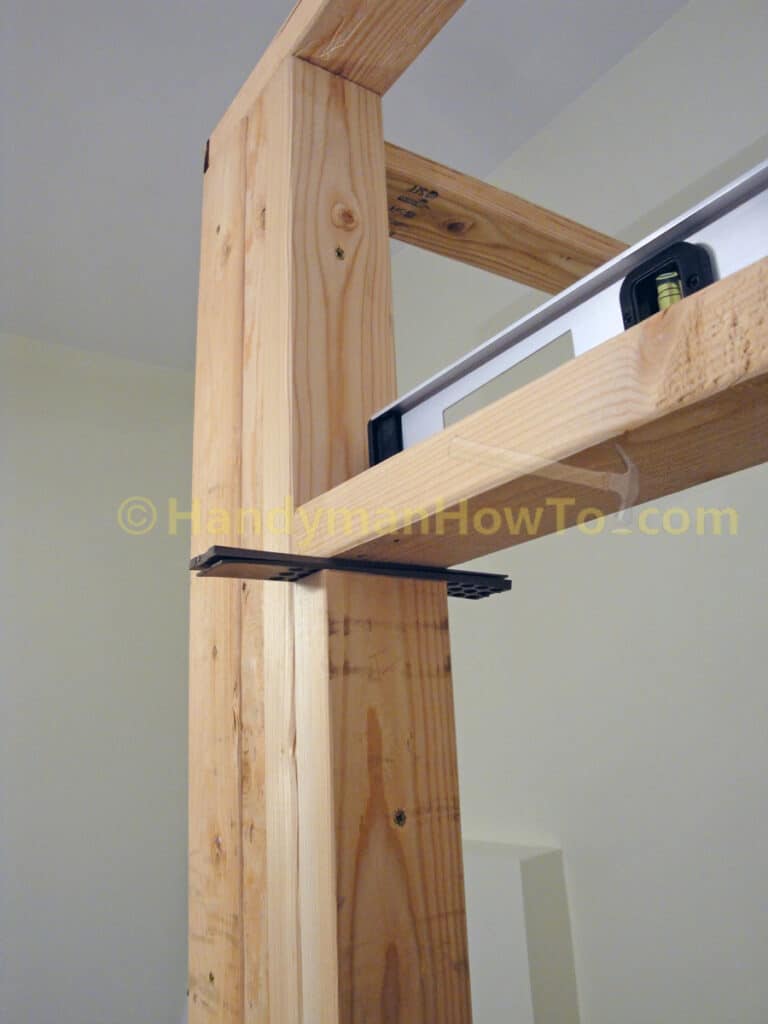
Set the door jambs aside and place the 4 foot carpenter’s level on the door header board.
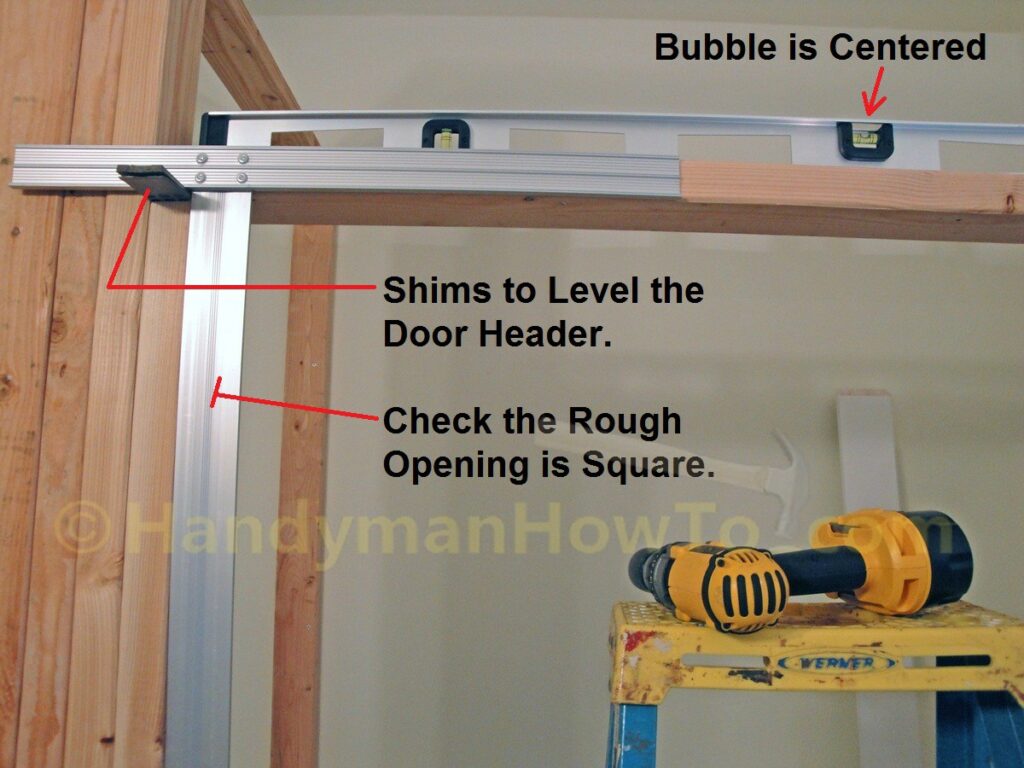
The door header 2×4 was slightly low on the left side due to differences in the concrete floor. Two plastic shims were inserted on opposites sides of the jack stud to level the header. Shimming on opposite sides makes for a flat surface and avoids tilting the door header.
The 54 inch drywall T-square is used to check the door rough opening is square and there are no bulges along the jack stud:
The door rough opening is checked again with the framing square. Both sides of the square fit flush against the rough opening with no gaps.
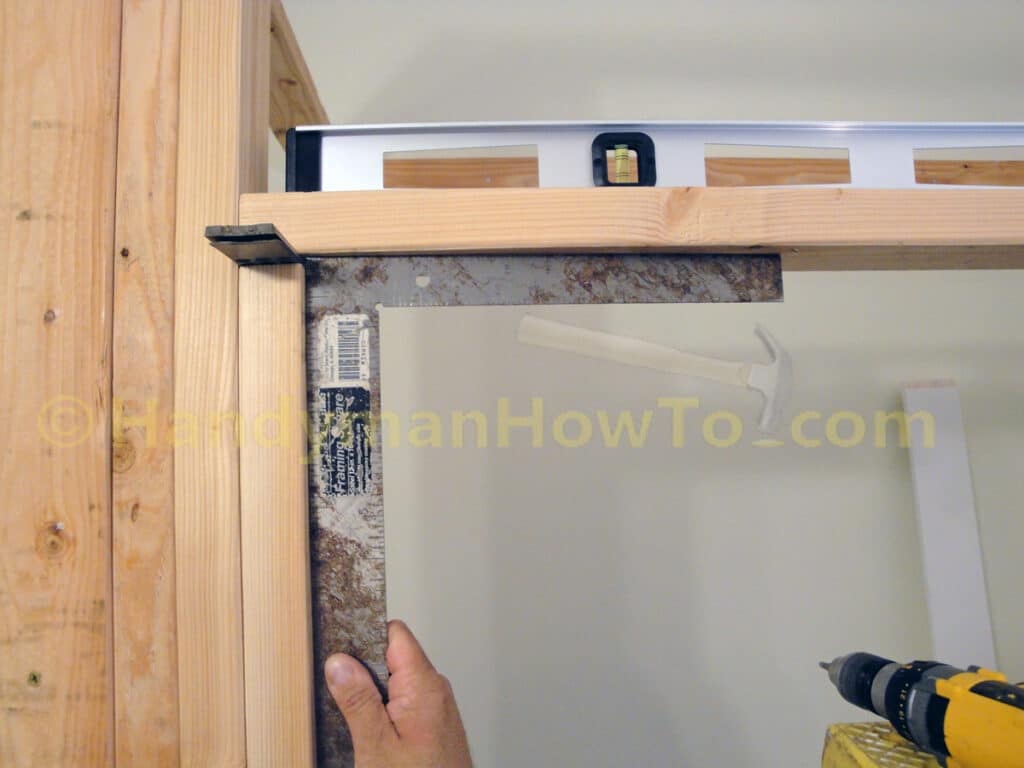
Verify the opposite side is also square with no gaps:
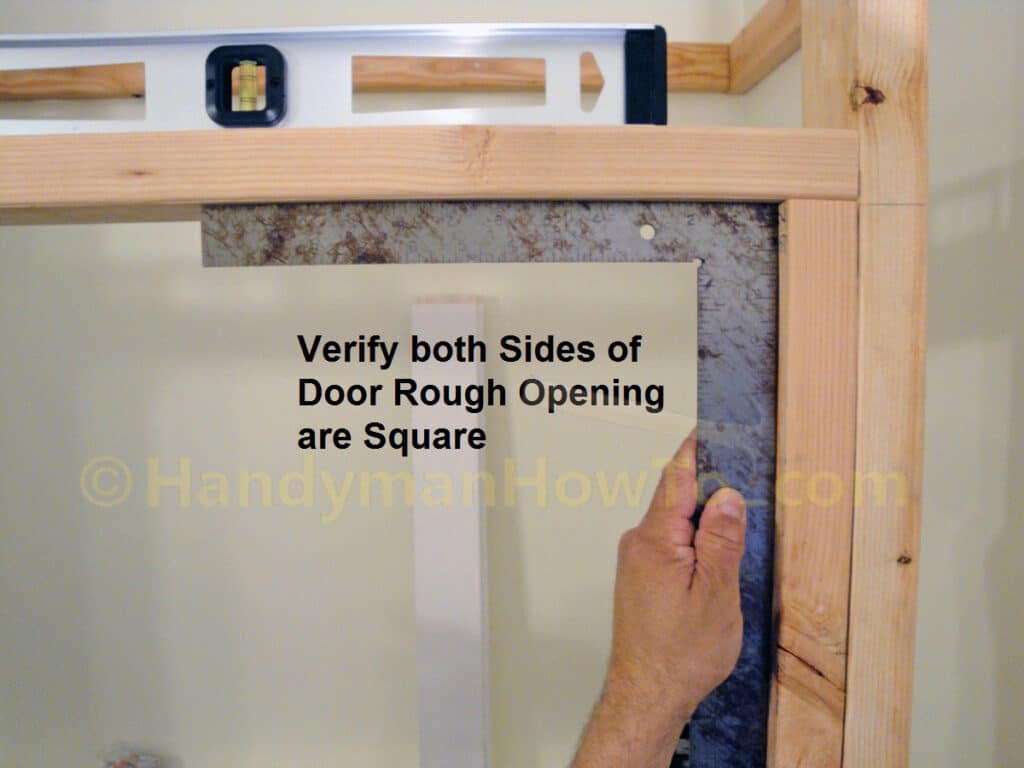
After leveling the door header and squaring the door rough opening:
- Measure and verify the width of the door rough opening is 49-3/8 inches wide from jack stud to jack stud.
This is for a finished 48 inch wide door after the 11/16 inch thick door jambs are installed.
11/16 in + 11/16 in + 48 in = 49-3/8 inches distance between jack stud faces. - Make measurements at the top, middle and bottom of the rough opening. The width must not vary more than 1/4 inch to fit the tolerances of the two 24 inch wide bi-fold doors.
- Permanently fasten the jack studs (a.k.a. trimmer studs) to the king studs with 3 inch wood screws.
Recall the jack studs were initially fastened with only 2 wood screws in case adjustments were needed to square the rough opening. - Drive two 3 inch wood screws in the ends of the door header into the top end of the jack studs.
- Measure and saw a second board to make a double door header.
- Fasten the second door header board to the king studs using Simpson Strong-Tie® Z-Max A21Z structural connector angles and Simpson Strong-Drive SD8X1.25 wood screws.
- Saw off the exposed parts of the wood shims with a hand saw so the ends are flush with the 2×4 framing.
The completed closet door rough opening with the double 2×4 header:
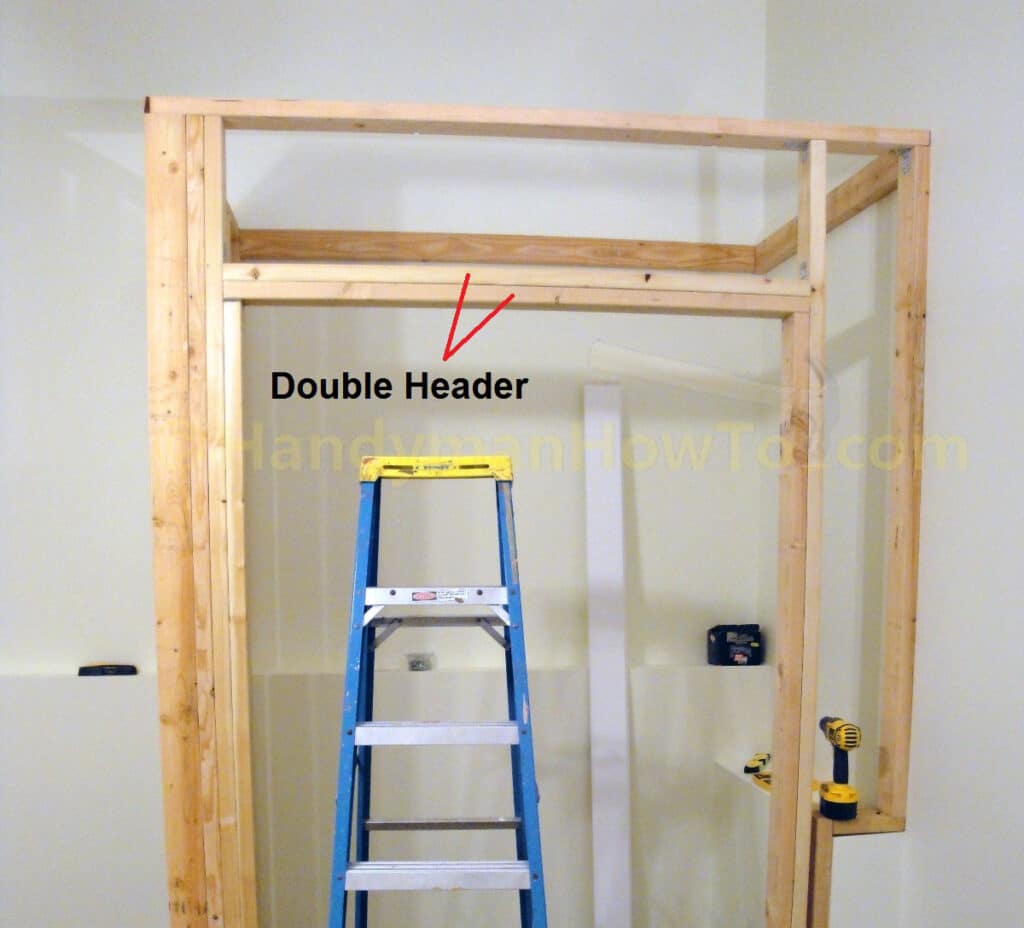
Closet door rough opening framing details showing the 2×4 double header and studs fastened with Simpson Strong-Tie Z-Max A21Z structural connector metal angles and wood screws. “Look Ma! No nails!”
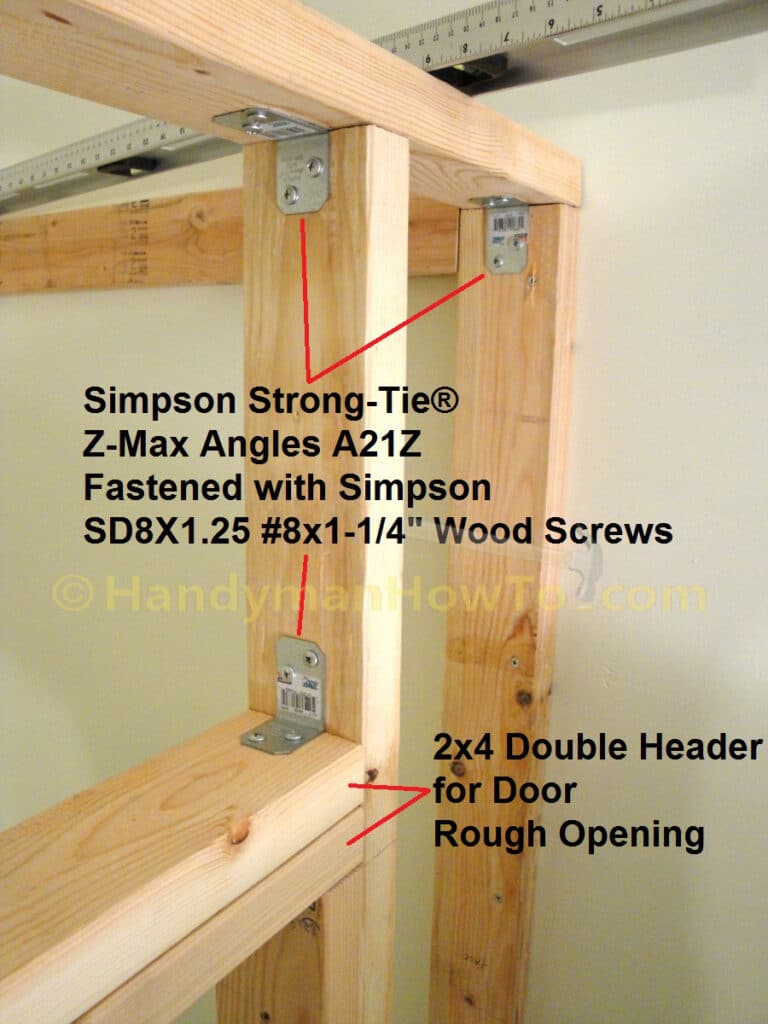
The door header cripple studs, wall studs, light switch electrical box and ceiling box are installed in the next part of this series.
Thanks for reading,
Bob Jackson