Heavy duty AC evaporator coil cleaning with a pump sprayer and commercial cleaning detergent used by the pros. This articles is a continuation of How to clean ac evaporator coil.
Homeowners are often concerned the interior (or upwind side) of the air conditioner A-Frame evaporator coils that are hidden from view may be clogged with mold, algae, dirt, pet hair and other debris that gets past the air filter. The problem is the A-frame evaporator coils are sealed on both ends by the metal support plates preventing access to the interior of the A-Frame coils. Inspecting and cleaning the interior of the A-Frame coils can be a challenge, especially if you suspect the coils are very dirty. Dirty evaporator coils will restrict the system air flow, even when heating in the colder months because hot air from the furnace pass through the evaporator coils.
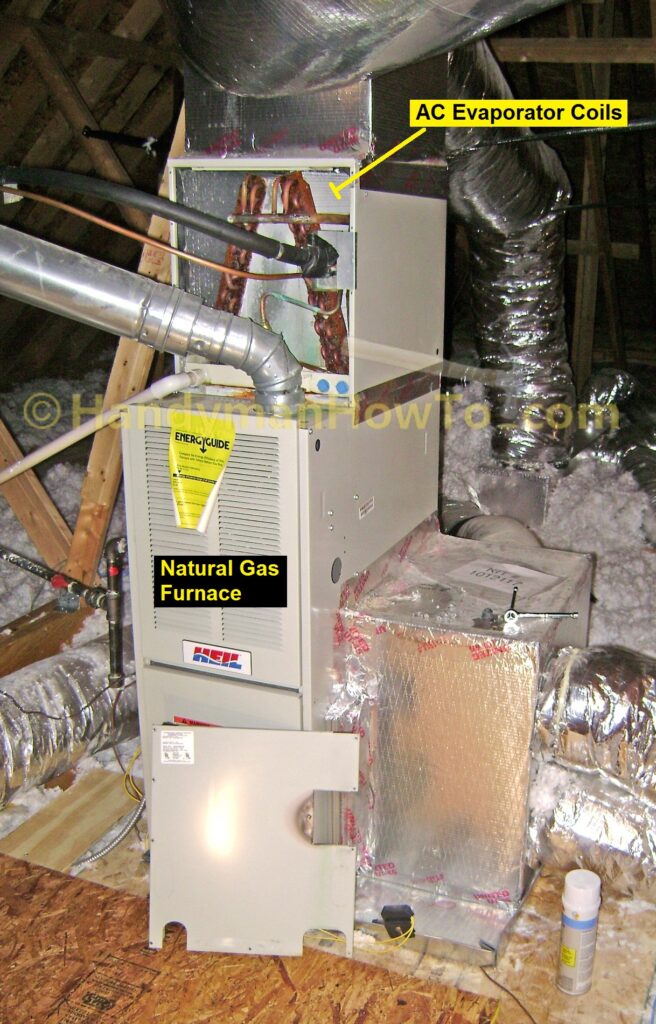
My central air conditioner air handler in the attic is an “updraft” model (air enters from the bottom right and exits the top) and consists of a natural gas furnace on the bottom with the A-Frame evaporator coils on the top:
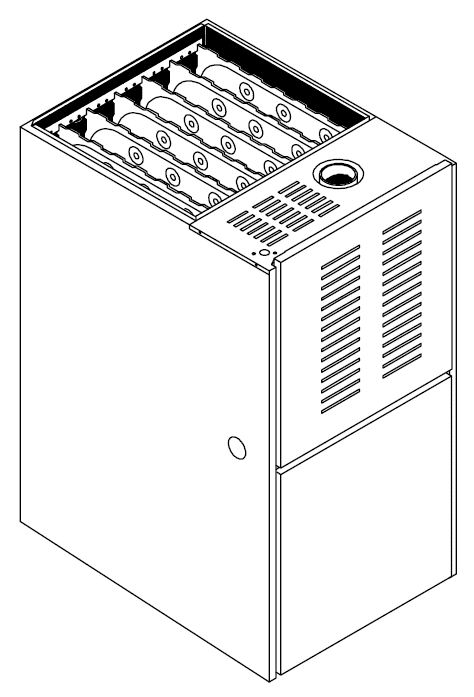
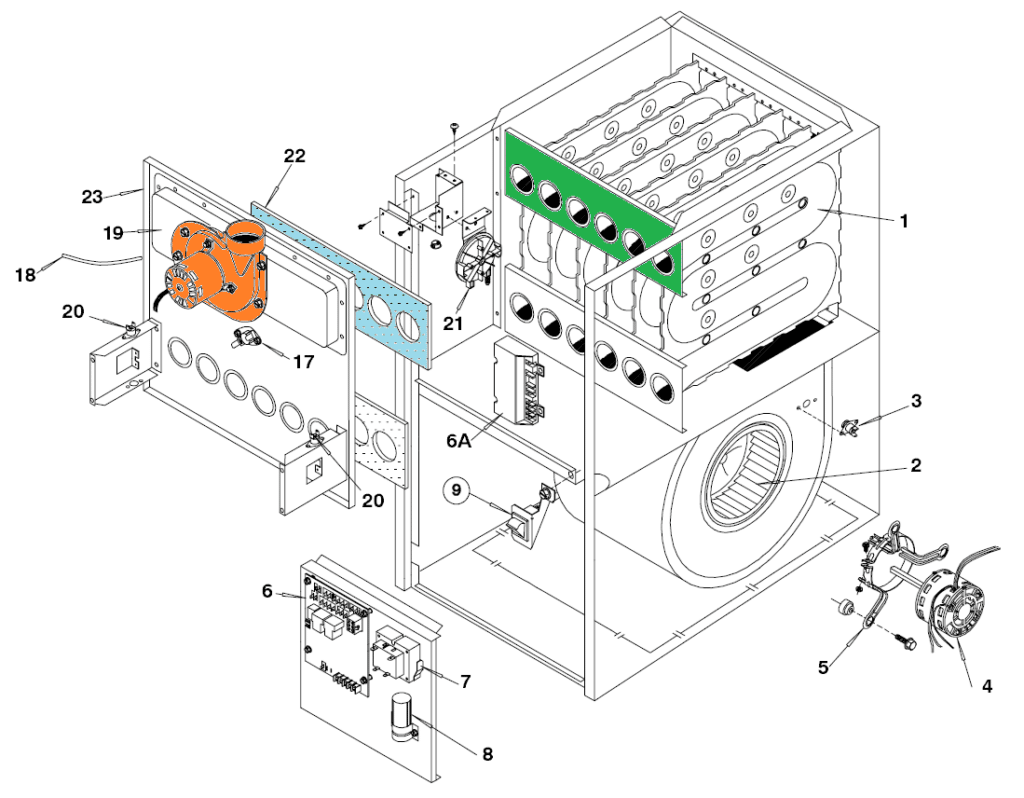
One may think it should be possible to view the interior of the A-Frame AC evaporator coils by opening up the gas furnace section, which looks like the following image for my unit. The heat exchangers are arrayed at the top of furnace cabinet – the air conditioner evaporator coils sits on top of the furnace, immediately above the heat exchangers:
An idea is to remove the inducer blower motor (orange) to look up through the heat exchanger array to the A-Frame coils. This strategy will not work because the heater exchangers are sealed by the blue and green metal baffles, blocking the view of the A-Frame coils:
A-Frame Evaporator Coil Inspection
An easy way to inspect the interior of the air conditioner A-Frame evaporator coils with a high intensity flashlight. No complicated disassembly required!
I’m shining my flashlight through the evaporator coils. It’s apparent the exterior surface of the coils are shiny and clean, but what inside the coils?
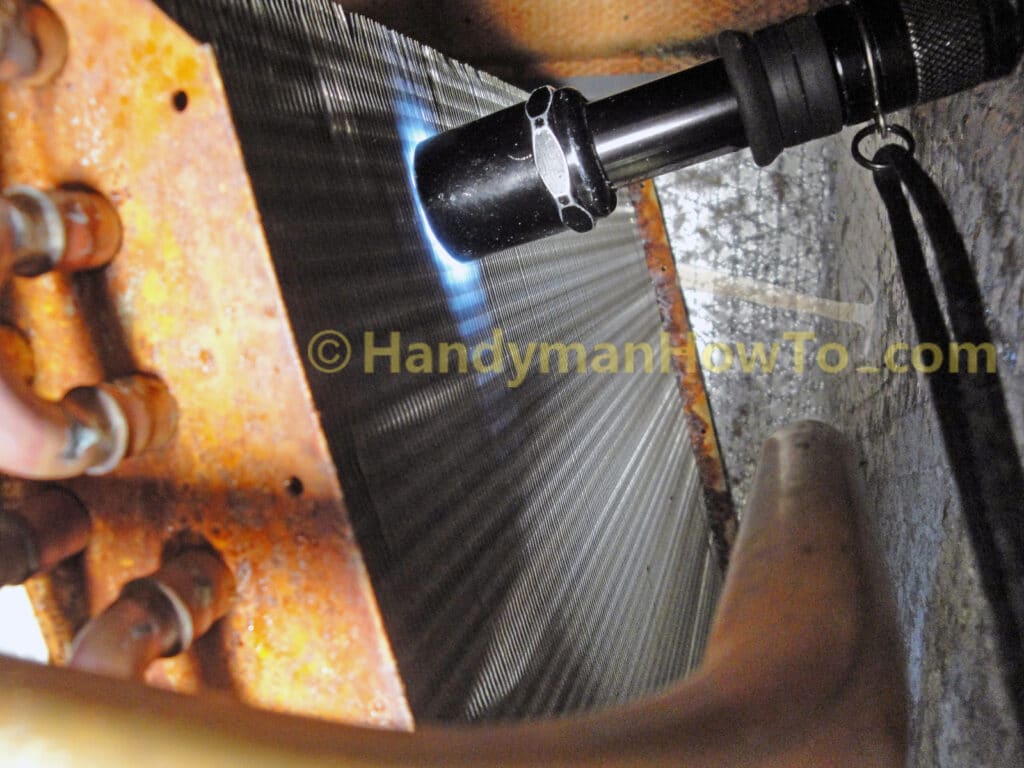
I can tell that the inside of the A-Frame evaporator coils are indeed clean because the high intensity flashlight shines brightly through to the far side, reflecting off the foil-faced insulation on the far side of the evaporator coil case:
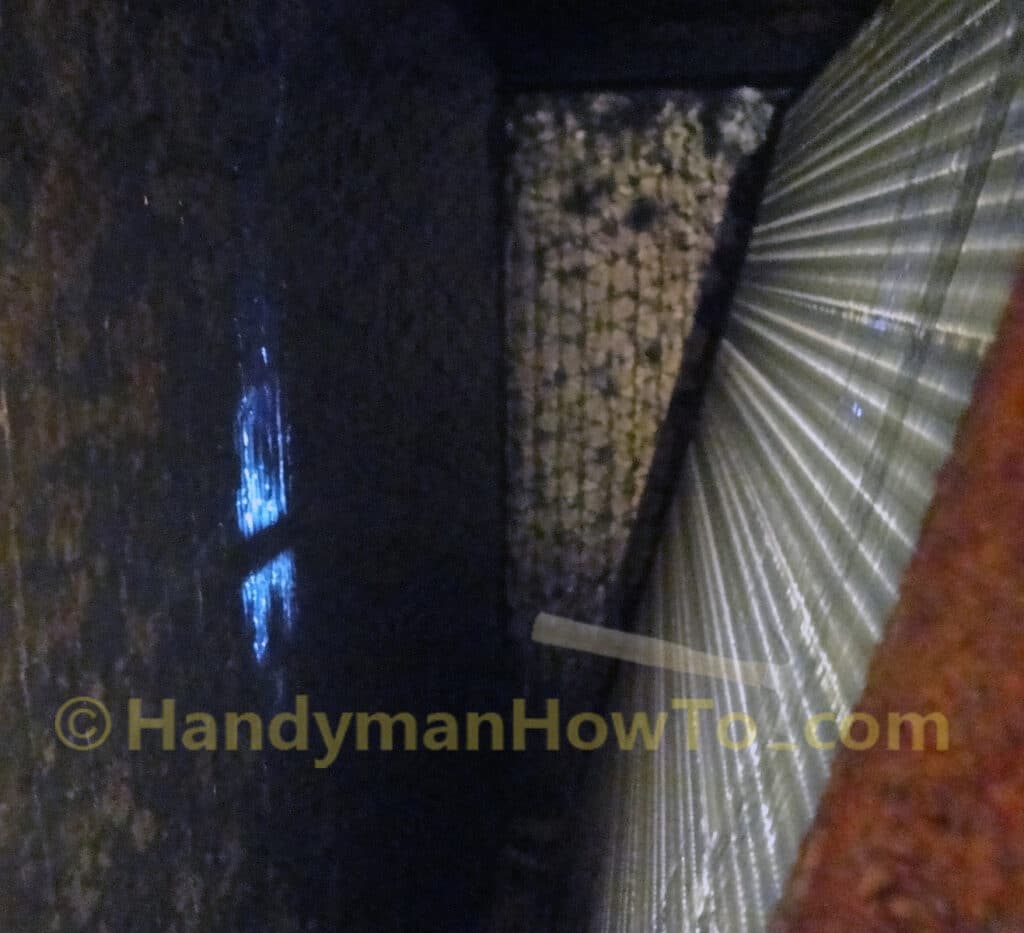
Full view of the flashlight on the right shining through the evaporator coils:
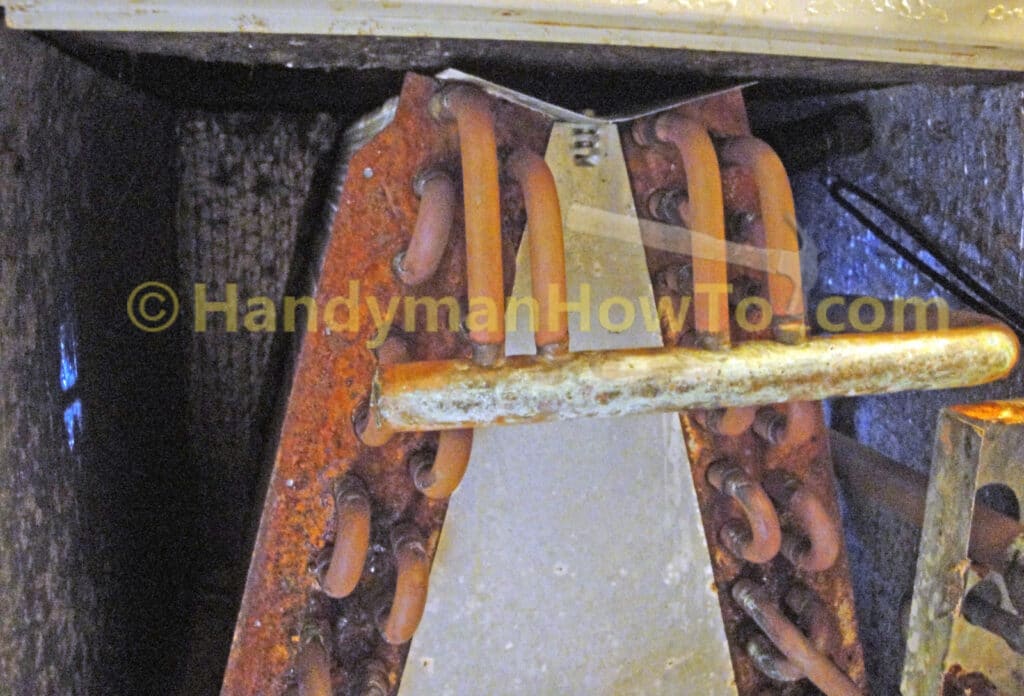
In practice you should place the flashlight on the unobstructed side (i.e. left in my situation) of the coils, then wave it back and forth while watching the beam shine through to the far side of the cabinet. (It was easier to take the photo with the flashlight on the right side.) If the flashlight beam does not shine through the coils, that is strong indicator the interior of the coils are dirty. A small handheld mirror is useful to look back through coils towards the flashlight to see if the coils appear moldy or “hairy”.
Take care not to bump the coil fins with the flashlight or mirror because the fins are very delicate and bend easily.
Heavy Duty AC Evaporator Coil Cleaning
If the interior of the A-Frame coils requires a heavy duty cleaning, a hand-pump sprayer with Nu-Calgon Evap Pow’r-C AC evaporator coil cleaner is needed to shoot through the coils to clean and remove the interior dirt and crud. The pros use Nu-Calgon and you won’t find it at the big box home improvement stores. The spray wand can reach those tight spaces and the cleaning spray will loosen the dirt and mold off the inside of the coils. I had the evaporator coils at my former home in Florida cleaned this way by an HVAC technician because the air conditioner maintenance had been neglected by the prior homeowner.
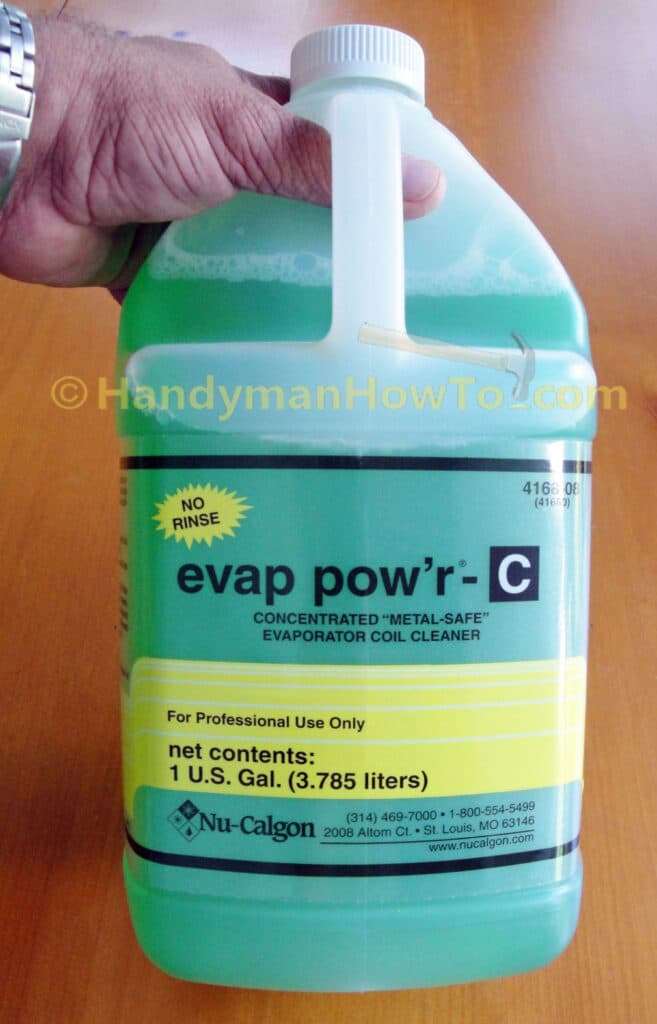
Evap Pow’r-C is mixed 1 part evaporator coil cleaner to 3 parts water, so a 1 gallon bottle should be sufficient for many coil cleanings.
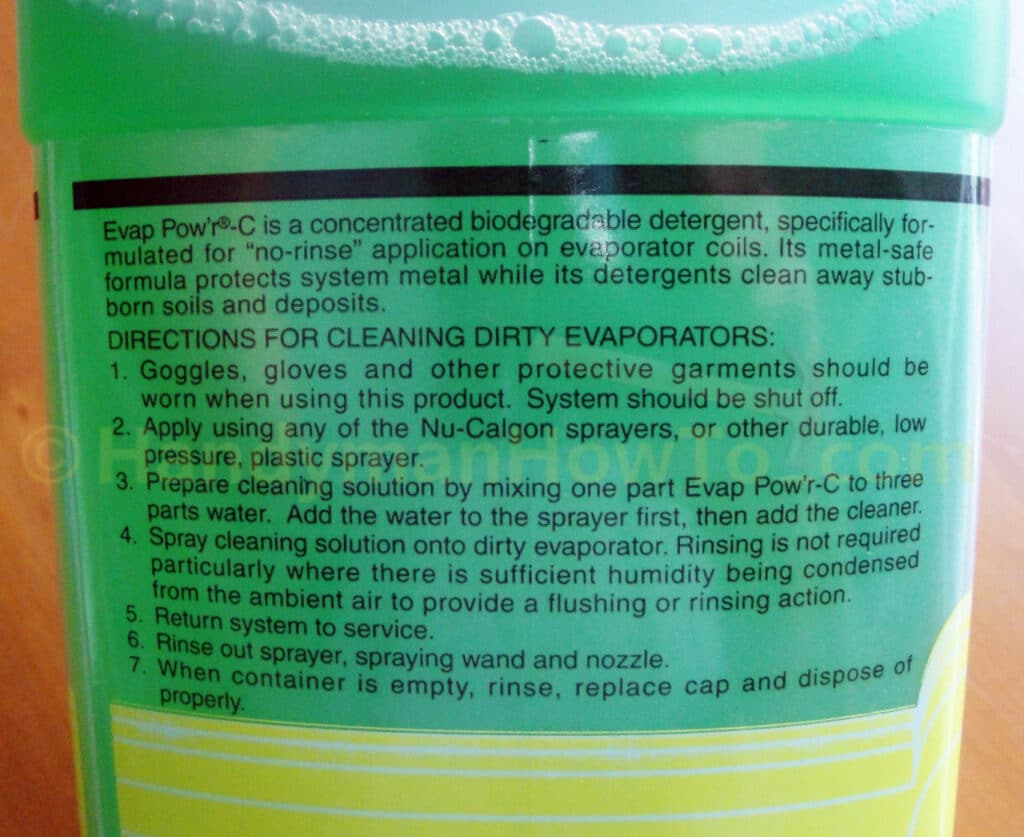
Evap Pow’r-C has an ammonia like odor, but not overwhelming.
Pump Sprayer AC Evaporator Coil Cleaning Steps:
-
Purchase a brand new hand pump sprayer in the 1 gallon to 2-1/2 gallon size.
You don’t want to risk using an old pump sprayer that may have been used for weed killer, insecticide or other poisons!
A 1 gallon pump sprayer is fine if your coils are not heavily soiled and only need a routine cleaning with 1/2 gallon of cleaning fluid & water mixture (remember to leave room in the sprayer for the air charge). A larger 2 or 2-1/2 gallon sprayer is convenient if your coils are very dirty and need a heavy cleaning with several applications of Evap Pow’r®-C. - Turn the air conditioning system Off.
- Mix 1 part Nu-Calgon Evap Pow’r®-C evaporator coil cleaning solution with 3 parts water (hot water is better) according to the manufacturer’s instructions.
- (Optional) For a heavy cleaning pre-soak:
- Adjust the spray wand to a wide fine spray pattern.
- Spray down the evaporator coils. Let the cleaning solution soak for 5 minutes.
- Adjust the spray wand to a narrow 1/4 inch heavy spray pattern.
- Methodically spray the down the coils; you should see the dirty cleaning solution running
down to the condensate drain pan. Lots of dirt in the condensate drain pan means it’s working. - Check that the spray jet is not so forceful that it’s bending the coil fins.
Most 1 and 2 gallon pump sprayers won’t generate enough force to be a concern, but larger sprayers may. - Wait a few minutes for the cleaning solution to run off the coils.
- Check the condition of the coils with a flashlight as described above.
- Turn On the air conditioner system.
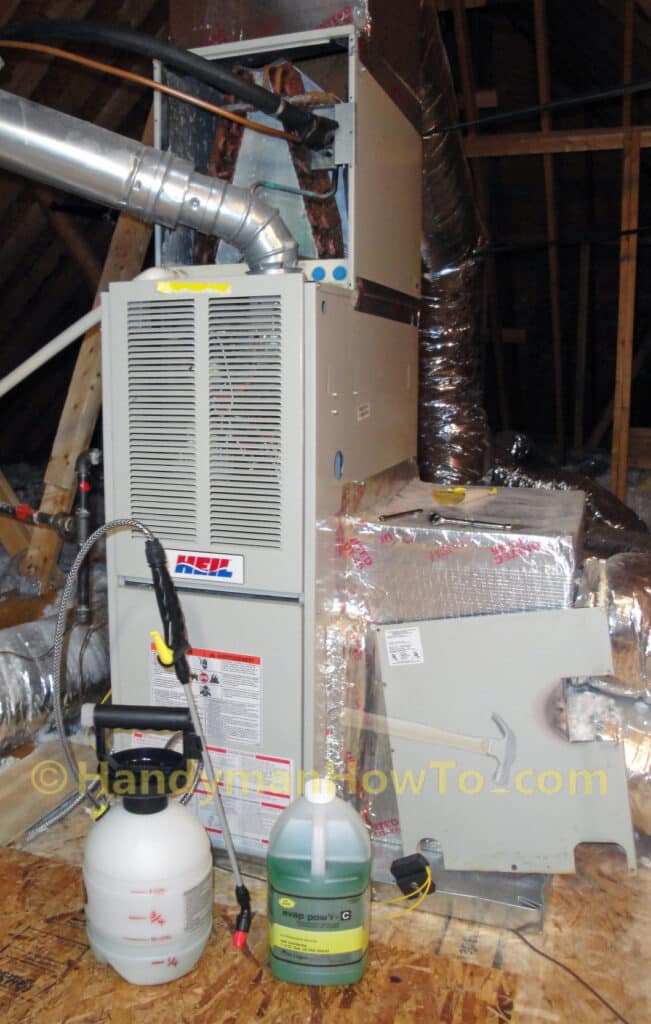
The evaporator coil cabinet cover is removed to expose the A-frame coils. I’ve mixed 1/2 gallon of cleaning fluid which is 3 pints water + 1 pint Nu-Calgon Evap Pow’r-C in a pump sprayer. I don’t need a lot of cleaning fluid since my evaporator coils need only a routine maintenance cleaning.
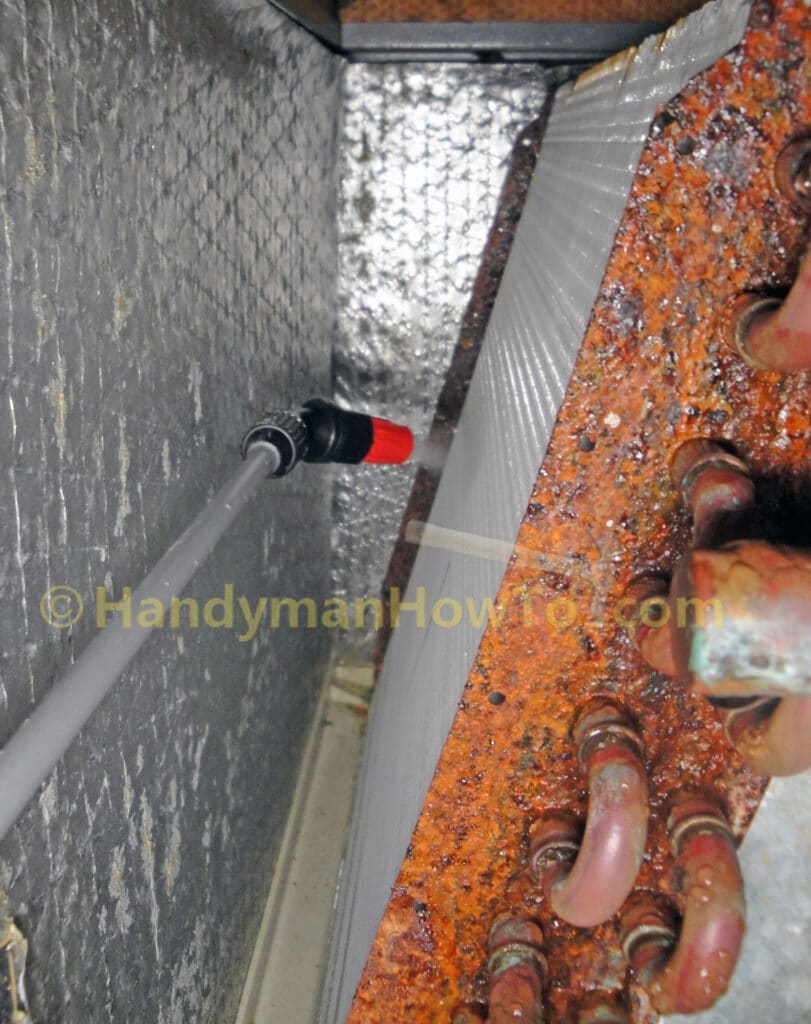
Both sides of the A-frame AC evaporator coils are methodically sprayed with the coil cleaner. The spray wand is great for reaching way back in the cabinet. The cleaning fluid quickly wicked down the coils and into the condensate drain pan, which is good because it disinfects the drain pan and condensate drain line. In my experience there is almost no overshoot past the interior side of the coils even with a heavy focused spray. Verify there’s a healthy volume of cleaning fluid flowing in the drain pan and out the condensate drain line.
If you believe the coils need a second cleaning, wait an hour while the system is running for everything to dry in case some of the cleaning fluid dribbled onto the furnace heat exchangers, this way you won’t have the cleaning solution forming a puddle on the blower motor in the bottom of the unit.
Cleaning Inside the AC Evaporator Coils
The outside surfaces (or downwind) of the coils as shown in the above photo may look clean but the inside (or upwind) face of the coils can be dirty. See How to Clean Inside of AC Evaporator Coils for instructions on removing the coil cover plate and cleaning the coils with a pump sprayer and brush.
How to Keep the AC Evaporator Coils Clean
The #1 air conditioner maintenance item is to regularly change your air filter. A clogged air filter makes the air conditioner work extra hard, running up your electric bill. Check that the air ducts, plenums (rigid ductwork) and air filter housing are sealed to prevent unfiltered air bypassing the air filter. Unfiltered air which will turn your evaporator coils into dirt catchers. I seal the end of my air filter slot with a strip of metal foil HVAC tape to prevent unfiltered air being being drawn in.
Ultraviolet Light for Evaporator Coil Mold and Mildew Prevention
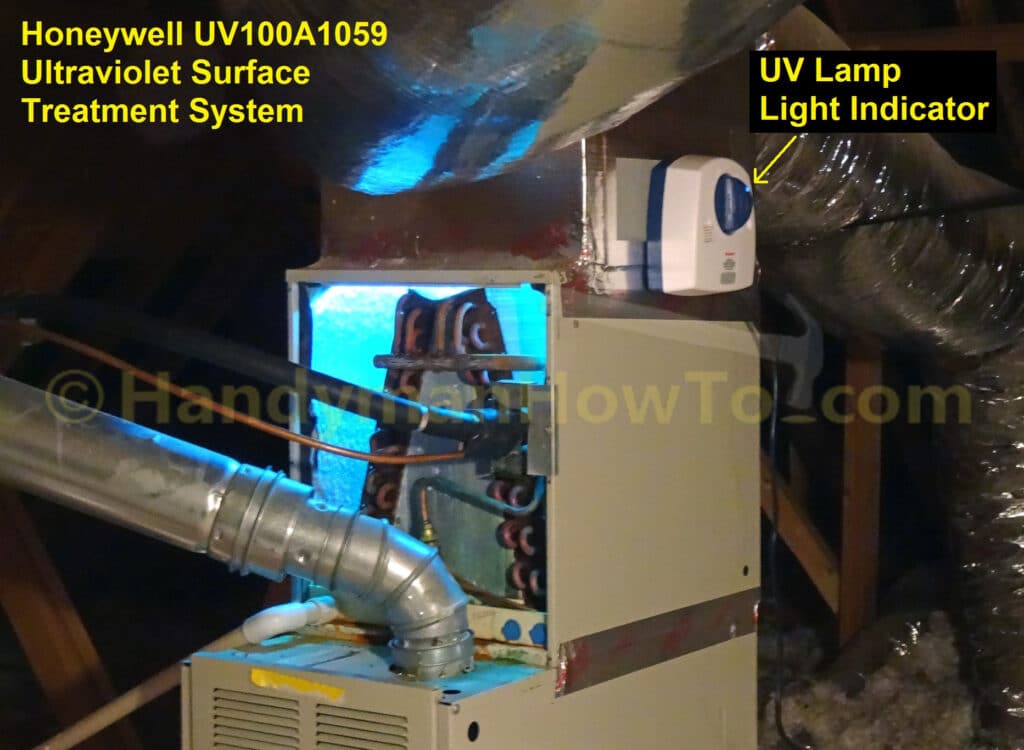
Consider installing an Ultraviolet Germicidal Light (UVGI) in the air handler to prevent and kill mold on the evaporator coils, drain pan and plenum:
Regular system checks by an HVAC professional in the Spring and Fall is recommended to ensure your air conditioning system is operating smoothly.
Hope this helps,
Bob Jackson