This project shows how to clean and blow out a dryer vent with the LintEater Dryer Vent Cleaning System and an electric leaf blower. It worked amazing well!
Laundry Room Maintenance
My laundry room had linoleum floors with a laundry sink that was too wide and rubbed against the clothes washer and dryer. I kept putting off cleaning the dryer vent because the dryer metal feet dug into the soft linoleum and would tear it when moved. Dryer vents should be cleaned at least once a year for drying efficiency (unobstructed airflow) and fire prevention. When the dryer motor bearings began to wear out and make a loud grinding noise I decided it was time for laundry room makeover and opportunity to clean the dryer vent and duct.
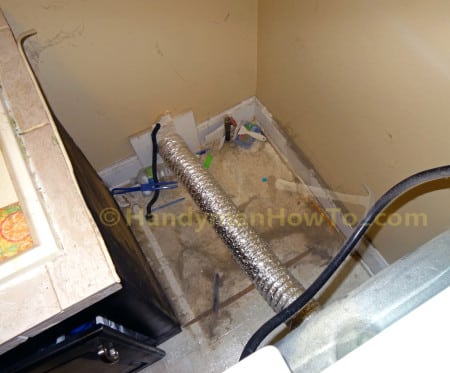
This is the old linoleum floor, too-wide laundry sink, lint and items that have fallen behind the clothes dryer when I pulled it out from the wall. Yuck!
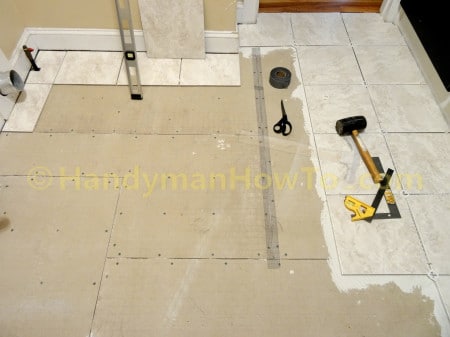
I took out the washer, dryer, old laundry sink and linoleum flooring, then put down backer board over the plywood subfloor and laid tile:
After the tile job was finished I bought a new LG clothes dryer and LintEater Dryer Vent Cleaning System.
How to Clean and Blow Out a Dryer Vent
LintEater Dryer Vent Cleaning System
I bought the LintEater Dryer Vent Cleaning System and an extra set of 12 ft. Extension Rods to clean the dryer vent. The basic kit includes four (4) 36 inch rods for a total of 12 feet but my dryer duct is quite long and I needed the optional 12 ft. Extension Rod kit:
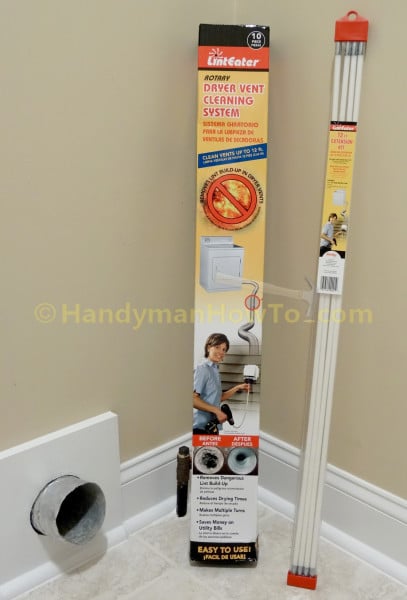
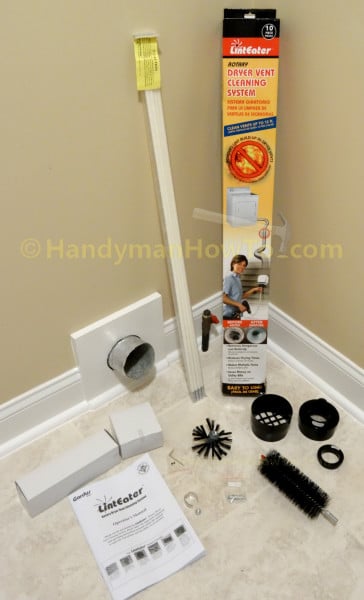
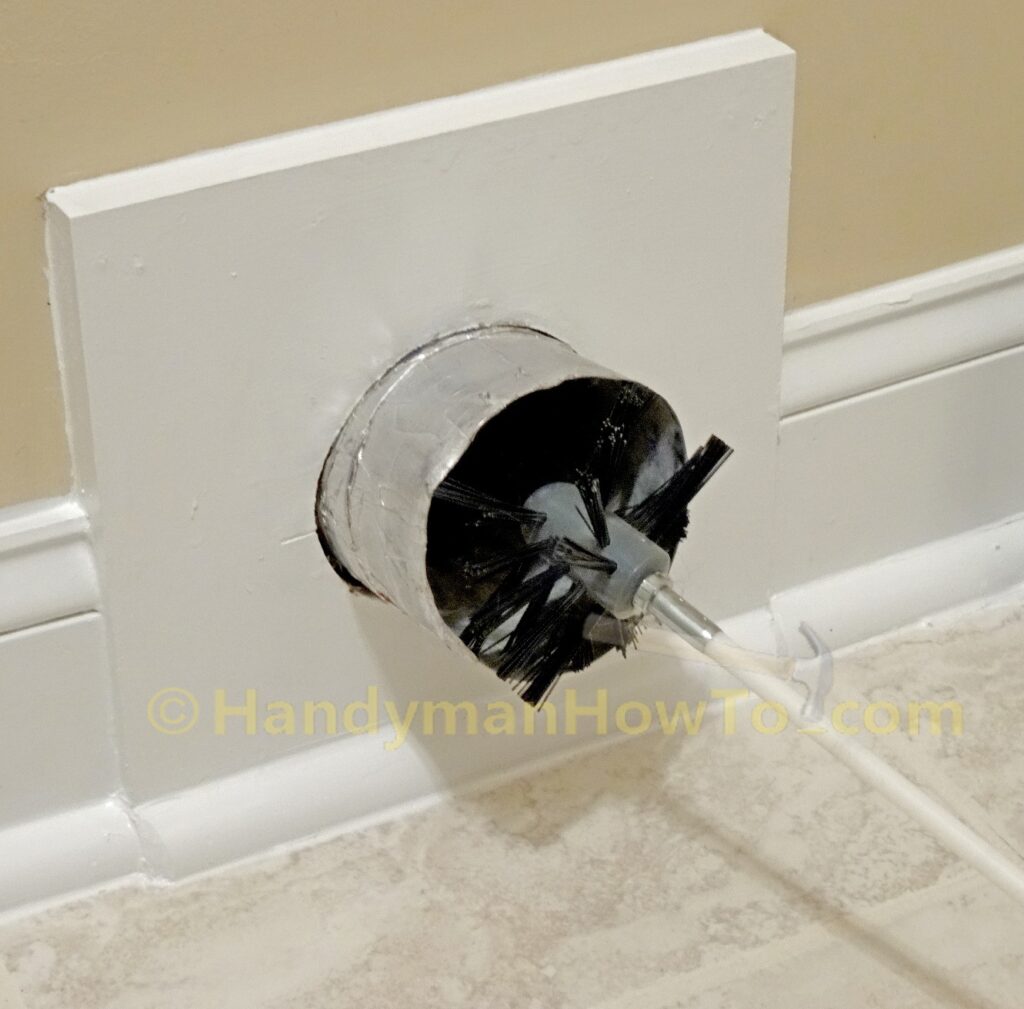
The LintEater Dryer Vent Cleaning System box contains a 10-piece kit including flexible rods that screw together, 4 inch auger brush, 2-1/2 inch lint trap brush, vacuum adapter, dryer adapter, blockage removal tool and instruction book:
I strongly recommend reading the well illustrated LintEater Instruction Book which covers the various accessories and cleaning methods, e.g. “Cleaning from Inside toward the Outside” and “Cleaning from Outside toward the Inside”. I cleaned my vent in both directions.
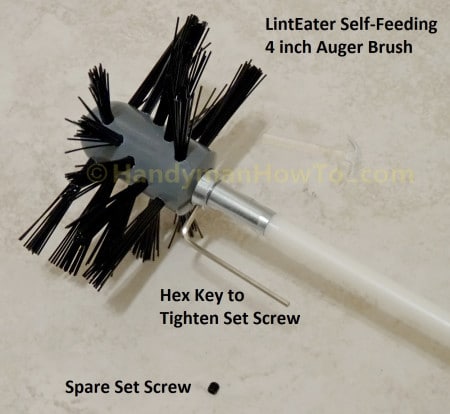
The LintEater rods and brush are easy to assemble. The self-feeding auger brush screws onto a flexible extension rod and is secured with a small set screw:
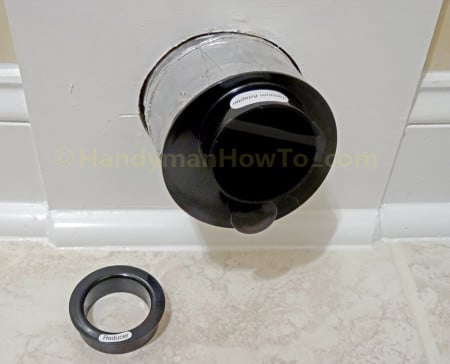
The vacuum adapter fits inside the 4 inch dryer duct and designed for 2-1/2 inch shop vac hose (recommended) and includes a reducer ring for a 1-1/2 inch vacuum hose, however a 1-1/2 inch vacuum is not recommended as it may clog the hose with lint:
I didn’t use vacuum adapter and shop vac preferring a leaf blower.
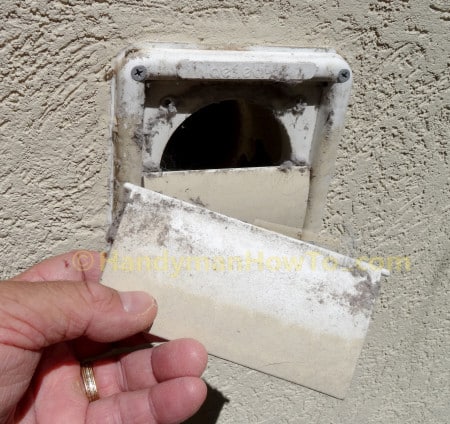
Remove the Dryer Vent Cover and Louvers
The dryer vent cover simply snaps off the base by squeezing the sides:
Then carefully bend and remove the vent louvers. Clean the louvers in warm soapy water before reinstalling:
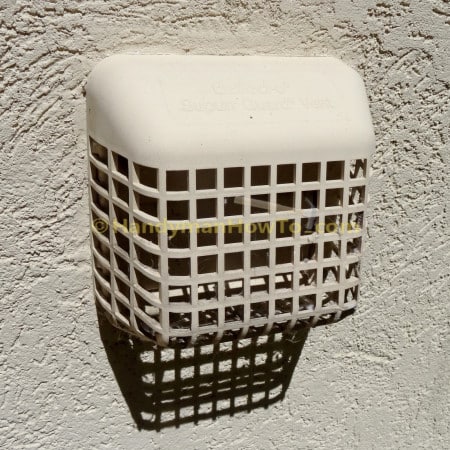
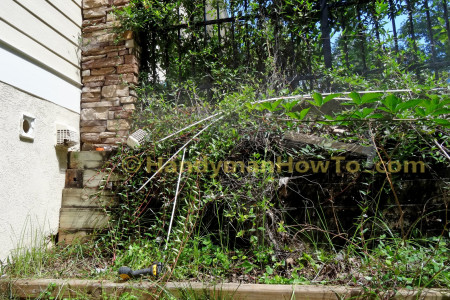
The dryer vent just might need cleaning:

LintEater Dryer Vent Cleaning
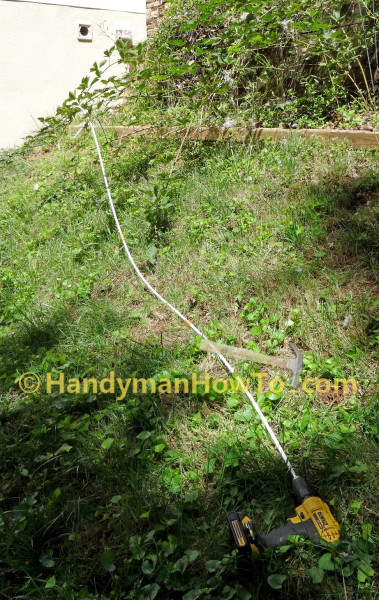
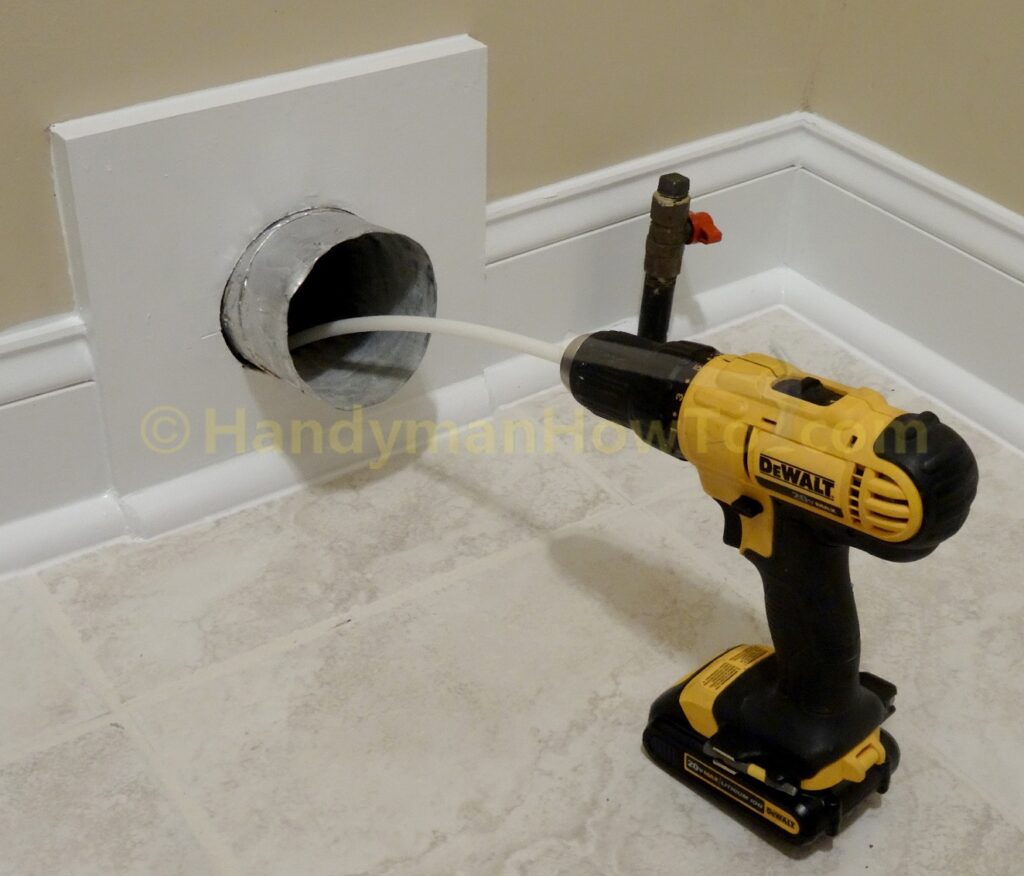
I attached the flexible extension rods to a cordless drill and ran the auger brush through the dryer duct. Per the instruction manual the drill is set to low speed and slowly fed into the vent. Each additional section of 3 foot extension rod is tightened with two pairs of pliers and the union secured with orange electrical tape. The extension rods are flexible and I had no problem making it through a 90 degree bend.
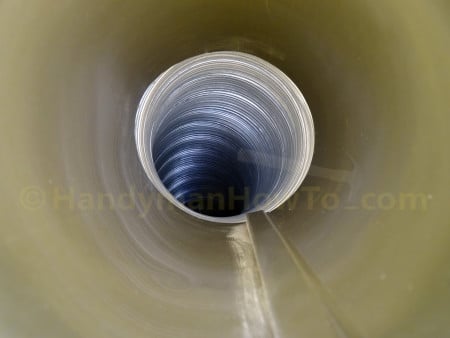
The leaf blower isn’t used at this time because I’m only dislodging the lint in the dryer vent duct. A big clump of lint came out when I withdrew the auger brush:
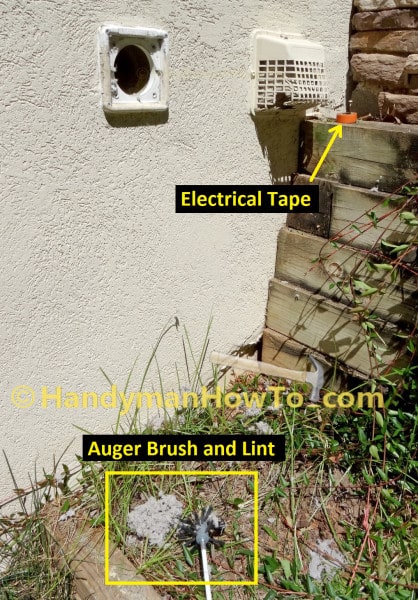
I needed a lot of extension rods to reach the laundry room dryer vent:
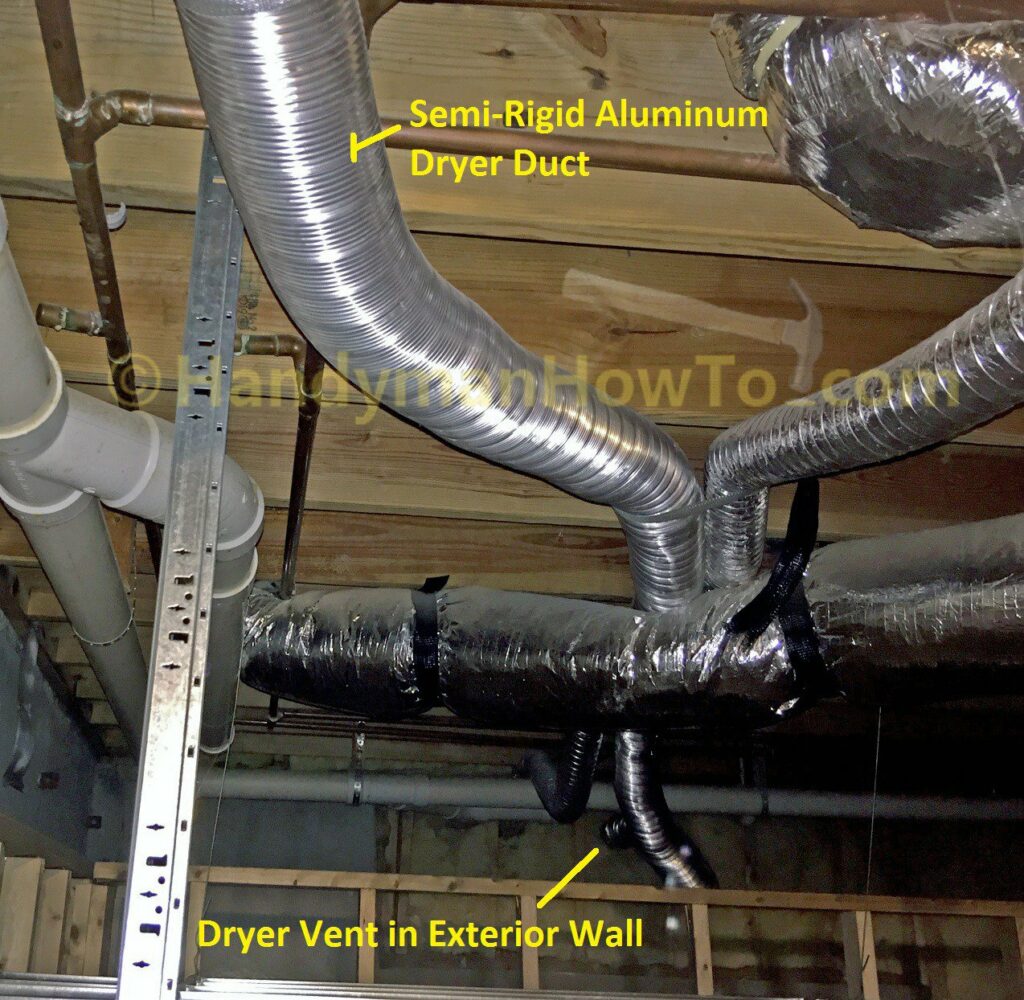
This extra long semi-rigid aluminum dryer duct is why I needed the 12 foot extension rod set:
Blow Out Dryer Vent Lint with a Leaf Blower
Having run the auger brush through the dryer vent to loosen up the lint, I’ll blow it out with a leaf blower.
I skipped the shopvac option in favor of blowing the lint out with an electric leaf blower because a leaf blower is way more powerful than a shop vac. My leaf blower has a rectangular nozzle so I set it inside the sheet metal dryer duct and sealed it with low-tack blue painter’s tape:

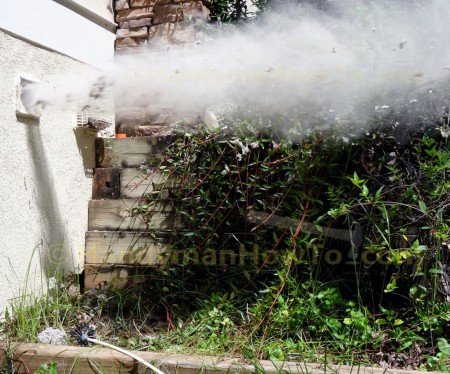
A gas powered leaf blower should not be used indoors due to the toxic exhaust fumes.
I called my son who is manning the leaf blower and said “Go!”. I didn’t know what to expect and was shocked by the rocket exhaust lint plume blasting out of the dryer vent!! Wished I’d made a video. (No smoking because the lint cloud is flammable.)
I ran the auger brush through the dryer duct again for another blowing out. Only fine dust blew out this time:
Back inside the laundry room I ran the LintEater brush the other way about 3 feet in to clean the 90 degree bend under the floor:
The flexible rod easily navigated the 90 degree bend as I worked it back and forth:
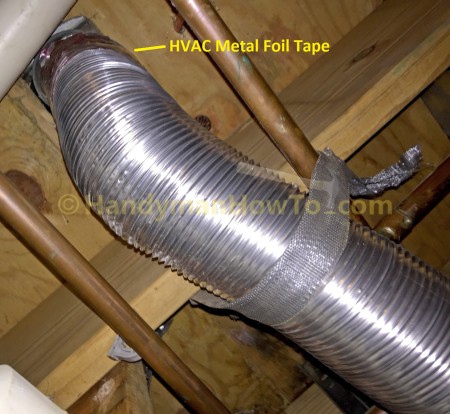
This is the 90 degree bend in the semi-rigid dryer duct. I had concerns about how the semi-rigid duct is fastened to the sheet metal duct with what only appears to be HVAC metal foil tape but it held fast while blowing out the lint:
The 3rd blowing out only made a faint plume of very fine dust/lint:
LintEater and Leaf Blower Dryer Duct Cleaning Results
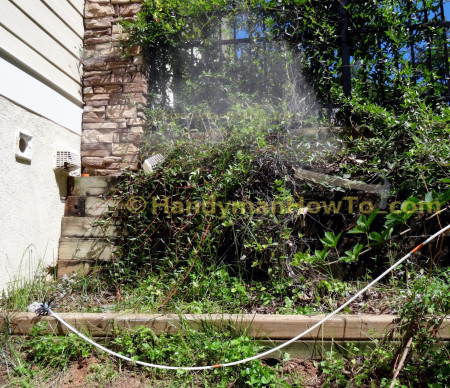
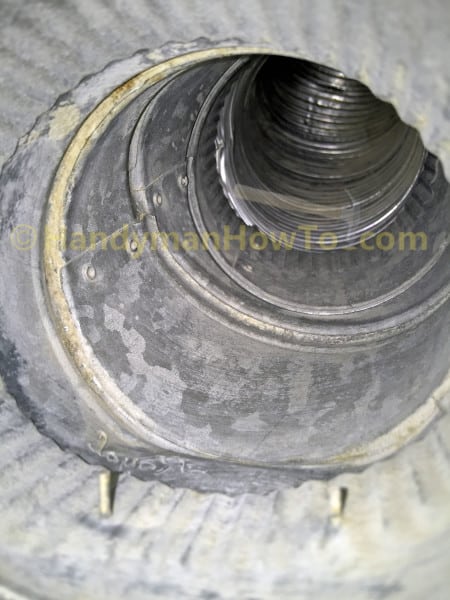
Remember that lint clogged outdoor dryer vent? It’s clean as a whistle now!!
The laundry room dryer duct and 90 degree bend is also clean:
Laundry Room Makeover
This is the original linoleum floor and too-wide laundry room sink. When clothes washer shook it rattled the sink and cabinet and caused it to pull away from the wall:
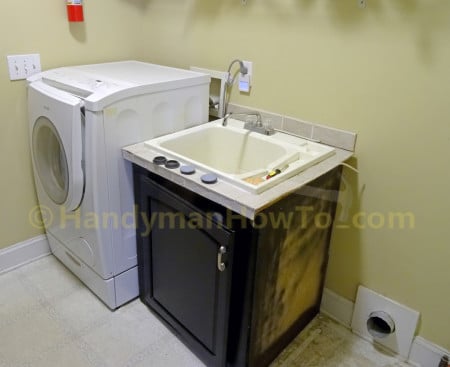
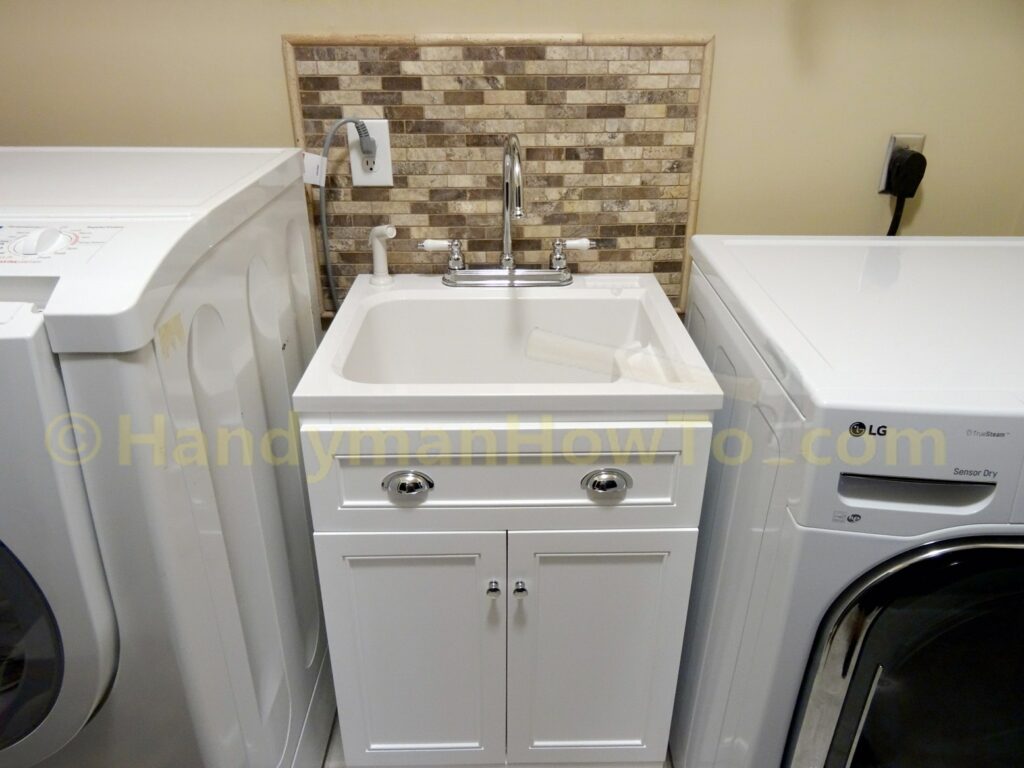
I laid a mosaic tile backsplash and bought a narrower sink from Home Depot. Now there’s plenty of room between the sink, washer and new LG dryer:
Silent Feet Anti-Vibration Pads
I installed the SILENT FEET Anti-Vibration Pads under the washer and dryer to prevent the metal feet from scratching the tile and minimize vibration/noise transmitted through the floor and walls.
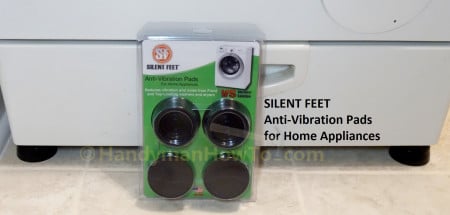
The Silent Feet pads work really well. A glass of water is mirror smooth when sitting on the floor beside the washer during a shaky spin cycle. The Silent Feet pads feature:
- Sorbothane® polymer to absorb vibration.
- The front pads grip the floor to prevent walking.
- The rear pads have a felt bottom to slide washer / dryer over the floor.
Lift the front of the washer up, remove the front feet and pull it out from the wall sliding it on the rear felt bottom feet.
Thanks for reading,
Bob Jackson