Do you own a Samsung refrigerator with an ice maker? If so, you may experience instances where the ice maker freezes and stops making ice.
Don’t panic. There’s nothing wrong with your ice maker. You just need to defrost it, and we’ll show you how.
Check out this guide for step-by-step instructions on defrosting your Samsung ice maker and restoring it to its regular operation.
Signs You Need to Defrost Your Samsung Ice Maker
While it’s recommended to defrost your Samsung ice maker every three to six months, if you observe any of the following signs, you may need to defrost it more frequently.
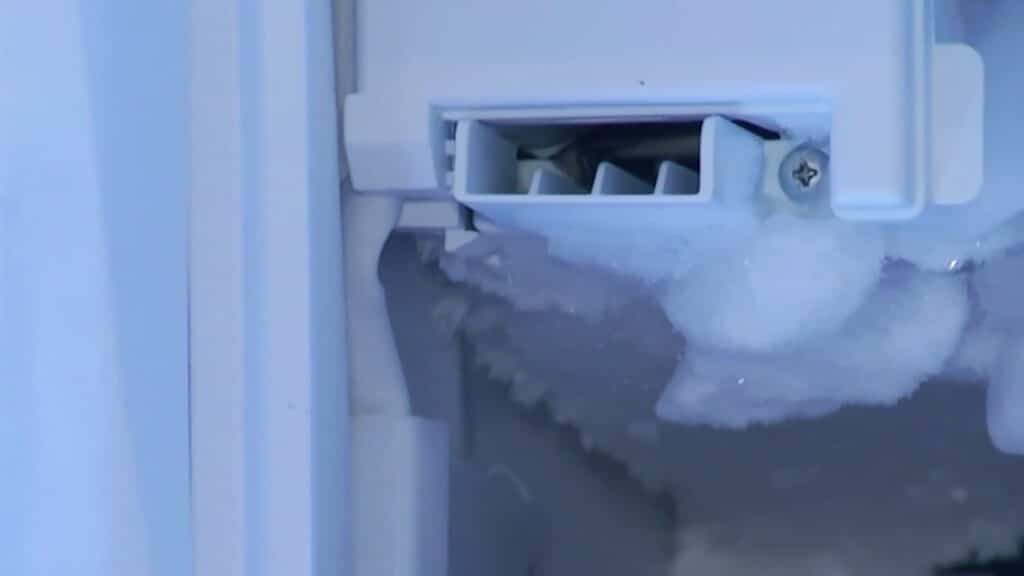
The first sign is reduced ice capacity. Have you noticed a decrease in the amount of ice your ice maker produces? This may be due to an ice build-up on the evaporator coils or a clogged water line that needs to be removed.
The second sign is a change in the ice cubes’ appearance. If your ice maker has ice buildup, the ice cubes will come out smaller than usual. This is due to insufficient water supply to your ice machine, which may be brought on by a blocked water pipe.
Your ice maker requires a defrost if the ice cubes are cloudy or have a strange taste. The cloudiness and strange taste indicate a buildup of contaminants on the evaporator coils.
The third sign is hearing unusual noises from your ice maker, such as popping or cracking. These sounds could be a sign that ice has built up on the evaporator coils, which causes the ice maker to work harder than usual.
If you experience any of these issues, defrost your ice maker as soon as possible to prevent further damage or issues with your refrigerator. Let’s guide you on how to do that in the next section.
Defrosting a Samsung Ice Maker: A Step-By-Step Guide
Defrosting an ice maker is a regular maintenance task every homeowner should do. Here are the general steps to defrost your Samsung ice maker.
1. Turn Off the Refrigerator
The first step in defrosting your Samsung ice maker is to turn off the power to prevent the fridge from producing ice while you’re defrosting it. To turn it off, simply unplug the refrigerator from the outlet.
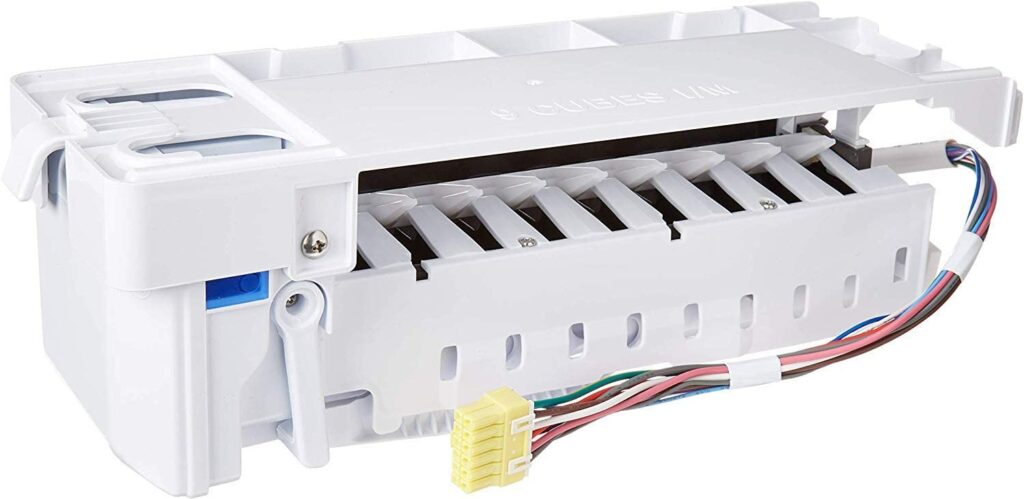
2. Take Out the Ice Bin
Next, you must remove the ice bin from the fridge, which is the container where the ice crystals are stored. Simply lift the ice bin out of the ice machine housing to remove it. If the ice in the bin is cemented together, you may need to gently break it up with a spoon or a spatula before you can remove the container.
3. Melt the Ice on the Evaporator Coils
After you’ve removed the ice container, you can begin melting the ice formed on the evaporator coils. You’ll find the coils behind the freezer’s panel. Unscrew the panel and carefully pull it away from the back of the freezer’s compartment. You may need to twist it a bit to loosen it up.
Once you’ve located the evaporator coils, use a hair dryer or a heat gun to melt the ice on them. Keep the hair dryer or heat gun moving to avoid damaging the coils. You should also avoid getting water on the hair dryer or heat gun, as this could create a short circuit.
The safest option would be to let the ice melt on its own, so if you aren’t in a rush to defrost your ice maker, it’s best to go with this method.
4. Defrost the Water Line
While defrosting the ice maker, it’s a good idea to check its water line, too. The water line may become clogged with ice or debris, preventing water from running to the ice machine.
To inspect the water line, turn off the water supply valve located near the bottom of the fridge and detach it from the valve. Check to see if the water line is blocked — if you can’t blow through it, ice or debris may be clogging it. If so, melt the ice with a hair dryer or a heat gun, or use a tiny brush to remove debris.
5. Check If the Defrost Thermostat Is Operational
While defrosting, it’s also a good idea to check if the defrost thermostat is working as it should.
The defrost thermostat is a tiny component found on the evaporator coils. Its job is to turn on the defrost heater when the evaporator coils get too chilly. If it’s faulty, this may be the reason why your ice maker doesn’t work.
To check the defrost thermostat, you’ll need to use a multimeter. Set the multimeter to the AC setting and touch the two probes together to ensure the meter works.
6. Clean and Reassemble the Ice Maker
To ensure everything has fully melted, let the ice maker defrost on its own for a couple of hours. You can place towels or a shallow pan underneath the ice maker to absorb excess water.
In the meantime, use a soft cloth or sponge to clean the inside of the ice maker and the ice tray. You can use warm water and mild detergent to clean any stubborn stains or residue.
Once the ice maker is clean and dry, reassemble it and turn on the power. Allow the ice maker to cool, and it should start making ice again.
The Importance of Defrosting an Ice Maker
Conducting a thorough defrost is a crucial maintenance task that boosts the ice maker’s performance, quality, and lifespan.
First, defrosting an ice maker avoids ice buildup. Otherwise, it’ll have to work harder than necessary, producing less ice and higher electricity costs. In some cases, the ice can even become so thick that it blocks the airflow to the ice maker, causing it to stop working altogether.
Additionally, defrosting an ice maker removes dust, filth, and other particles from reaching the water and, eventually, the ice cubes. If you don’t defrost the ice build-up, those particles will stick to the ice and into your drink. If the bacteria from the dirty ice maker enter your body, they may be harmful to your health.
Maintaining your ice maker free from ice buildup will also extend its lifespan. The parts undergo a lot of stress when the ice maker is clogged up with ice buildup, and this improper functioning will deteriorate its functionality faster.
Lastly, you’ll prevent the likelihood of water leaks. The water pipe leading to your ice maker could freeze and burst if you don’t defrost it, causing the cracked pipe to leak water into the ice container or onto the floor, creating a huge mess.
How Often to Defrost a Samsung Ice Maker?
As a general guideline, defrosting your Samsung ice maker at least once every three to six months is enough to maintain its optimal performance. However, this is relative because how frequently you need to defrost it depends entirely on the Samsung refrigerator model you have and how often you use the ice maker.
Instead of waiting three or six months to defrost it, look for signs of ice buildup periodically, and take immediate action if something is off.
Conclusion
In conclusion, defrosting a Samsung ice maker is a simple but essential maintenance job that you should complete at least once every six months!
To ensure optimal performance, always look for signs that your ice maker needs to be defrosted, such as reduced ice production, small or cloudy ice cubes, and unusual noises.
To defrost a Samsung ice maker, start by turning off the power to the fridge and emptying the ice tray. Allow the ice maker to unfreeze on its own or speed up the procedure using a hairdryer or heat gun. Next, inspect the water line, defrost the thermostat, clean it thoroughly, and reassemble it before turning it back on.
And that’s it! You’ve helped your Samsung ice maker to continue delivering clean, fresh ice cubes. Remember to read your owner’s manual for specific directions on how often to defrost your ice maker and other maintenance tips.