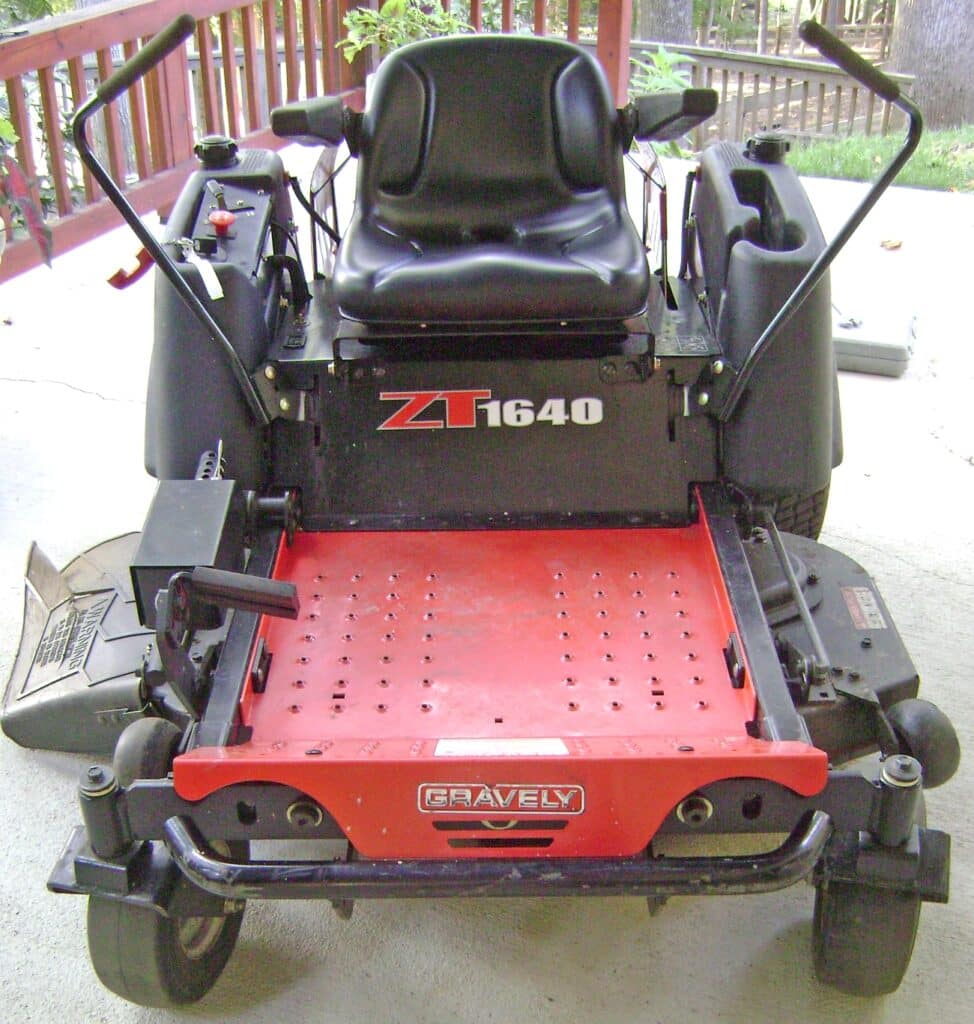
This tutorial explains how to diagnose and repair a broken lawnmower fuel line for a Gravely ZT1640 lawn mower (Model #915034) that ran briefly, quit and wouldn’t start.
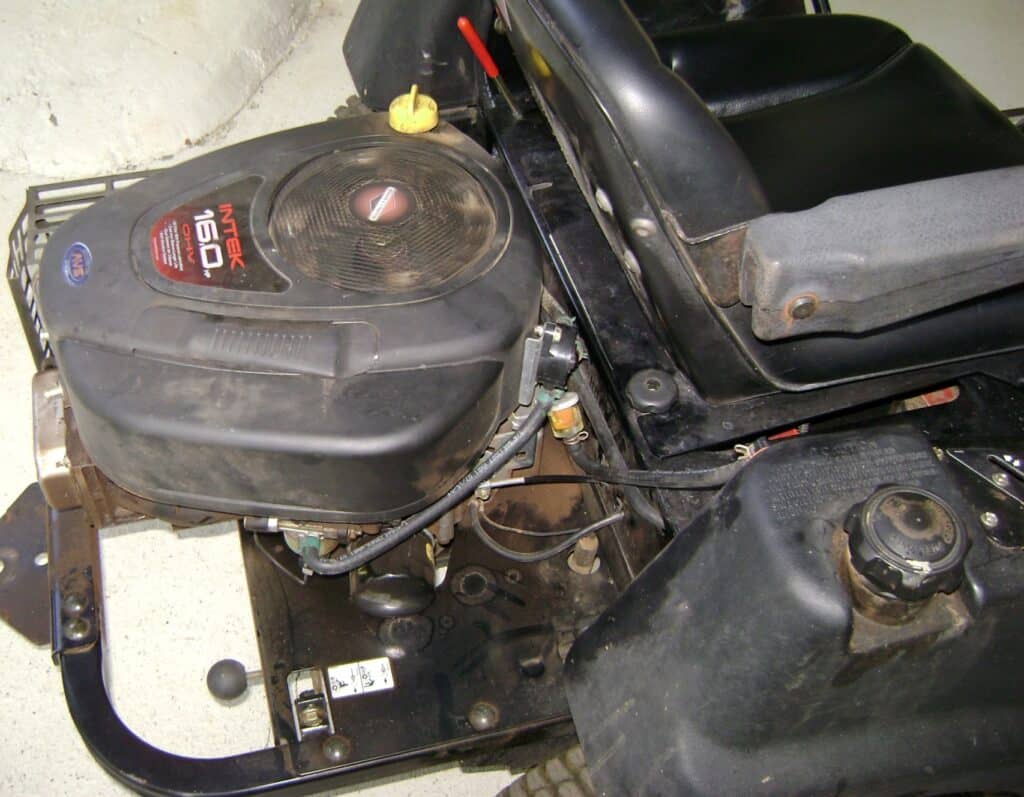
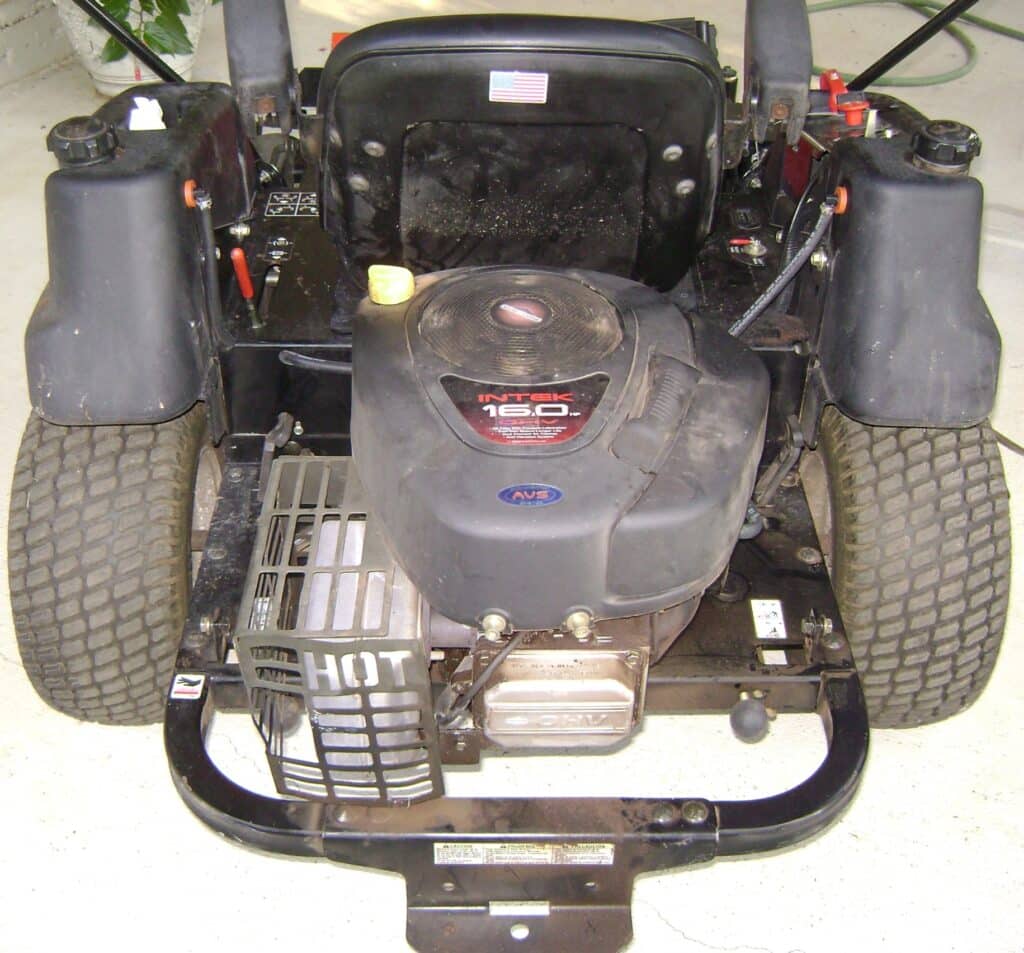
The spark plug, air cleaner and fuel lines are checked until the problem is found and repaired. The mower is about 4.5 years old, has about 280 hours on the engine hour meter and is equipped with a 16 HP Briggs and Stratton Intek OHV single cylinder engine.
The problem began one morning when I backed my mower out of the garage to mow the lawn. The mower started up immediately, ran strong but quit shortly after I backed it out of the garage. I tried restarting the engine, it would fire maybe once or twice on full choke, but wouldn’t start. After checking a few basics like the fuel selector switch it wouldn’t fire at all when cranking. The engine sounded exactly like this fuel starvation sound file on the Briggs and Stratton customer support site.
Lawn Mower Engine Starts, Then Shuts Down
Every engine needs fuel, spark and air in the correct amounts to run. I always check the oil, air filter, fuel tanks and tires before mowing. When the engine won’t start, the troubleshooting steps are:
Bad Gas
Although I don’t use fuel stabilizers during the winter months, I’ve never had a problem with bad gas and have refilled both tanks a couple of times this season with newly purchased gas. The mower stays in the garage so I tended to discount the possibility of bad gas.
Air Filter
A dirty air filter can prevent a mower from running. I rechecked the air filter, it was clean. Just to be sure, I removed the air filter and cranked the engine. No joy. I replaced the air filter.
Spark Plug
The spark plug had been replaced at the beginning of this mowing season, so I doubted if the spark plug itself was bad. To check if the spark plug was being energized, I took a 12 inch strand of NM 14/2 copper wire and stripped about 1 inch from the ends. Bending one end of the wire into a U shape, I pulled off the spark plug wire and gently pressed the U end of the copper wire into the spark plug boot. I used a pair of insulated electricians plies to hold the boot and wire. The other end of the copper wire was held next to the head of the spark plug while a helper turned the starter key. I had a strong bright blue spark between the copper wire and spark plug. OK – I’ve got spark, so there doesn’t appear to be problem with the electrical system.
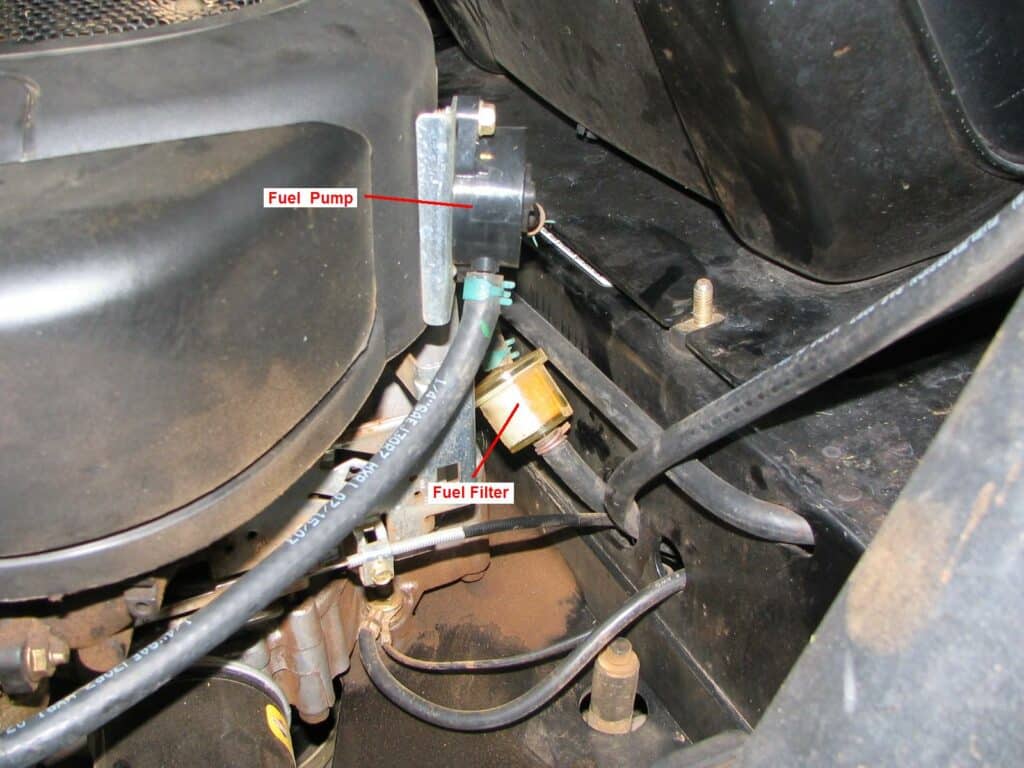
Fuel Pump
The ZT1640 has a vacuum driven fuel pump. To check if fuel were getting to the carburetor, I got a fire extinguisher (just in case!) and a plastic can to catch the fuel. I removed the fuel line from the carburetor expecting fuel to drain out. The carburetor and fuel line were dry! Not a single drop of gas. Now I’m getting somewhere! The problem is fuel starvation. But why?!
Holding the carburetor fuel line in the plastic can, I had a helper crank the engine. No fuel was flowing. I was also looking at the fuel filter and noticed air was bubbling up from the bottom of fuel filter. Ah ha! This told me:
- The fuel pump was working.
- The fuel filter empty of gas.
Therefore a fuel line must be clogged or maybe I had a bad fuel selector / shutoff valve.
Clogged Fuel Filter, Fuel Line or Fuel Shutoff Valve
I removed the metal clips that secure the fuel lines and removed the fuel filter. Blowing gently through fuel filter I found the fuel filter to be clear, so this isn’t blocking the fuel flow.
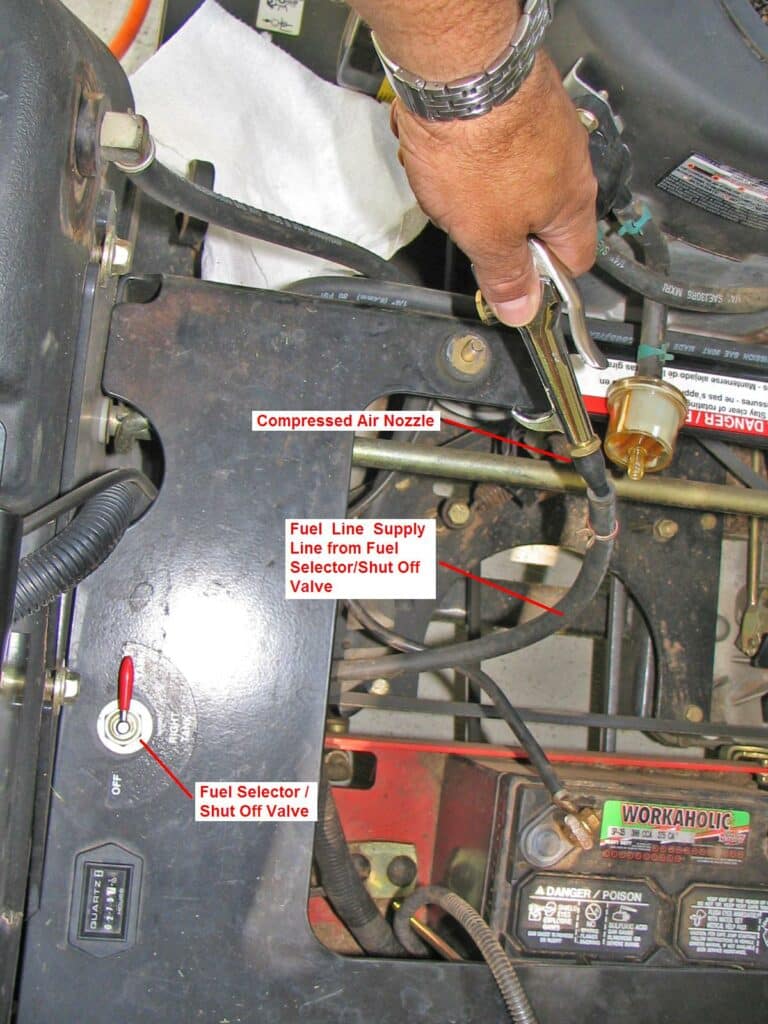
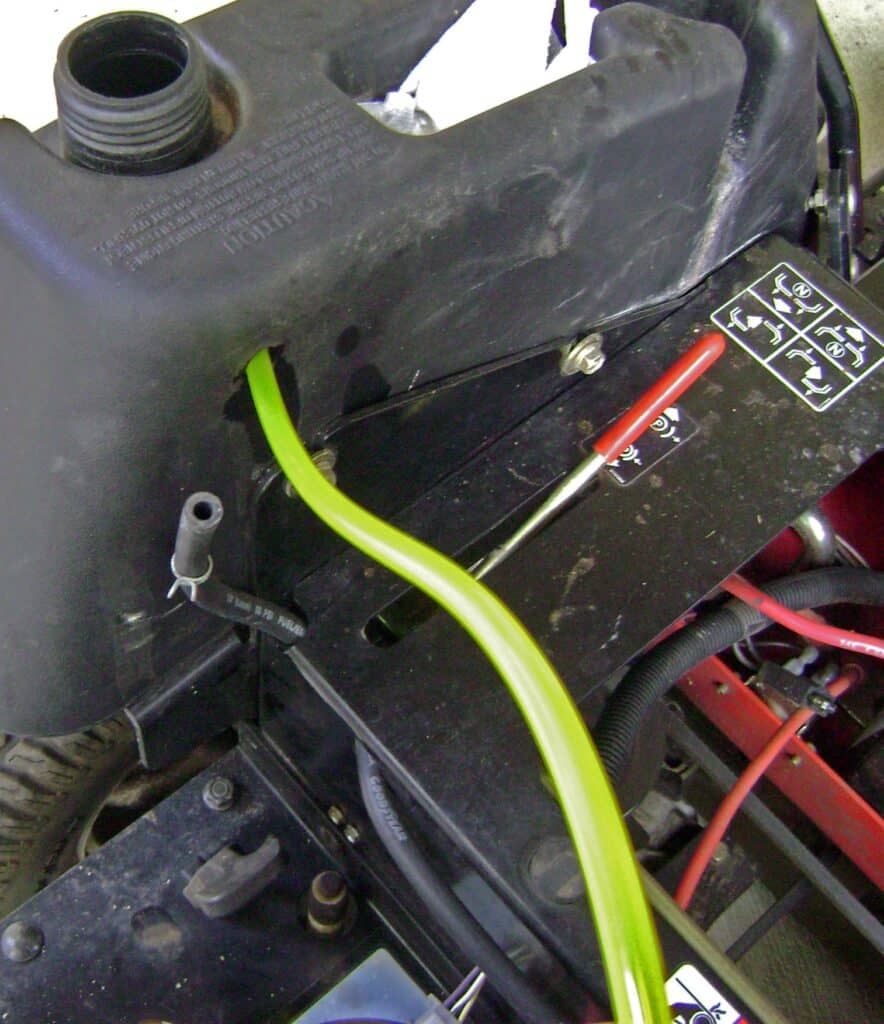
Using my portable air compressor and a blow gun with a tapered rubber nozzle, I checked the fuel lines by:
- Setting the fuel selector valve to the right tank.
- Removed the gas cap for the right gas tank.
- Pressed the air nozzle to the fuel filter supply line.
- Blew some air into the line.
- Repeated steps 1 to 4 for the left fuel tank.
The air whistled out of the fuel tank in good volume. Huh!? Something’s wrong here. The fuel lines aren’t blocked, but the air shouldn’t whistle; rather it should bubble up through the gasoline in the fuel tank.
I repeated the blow-through tests on the fuel lines while shining a flashlight into the fuel tanks. Definitely – the air was blowing into the top of the fuel tank, not bubbling up through the gasoline as one would expect.
Lawn Mower Broken Gas Tank Fuel Lines
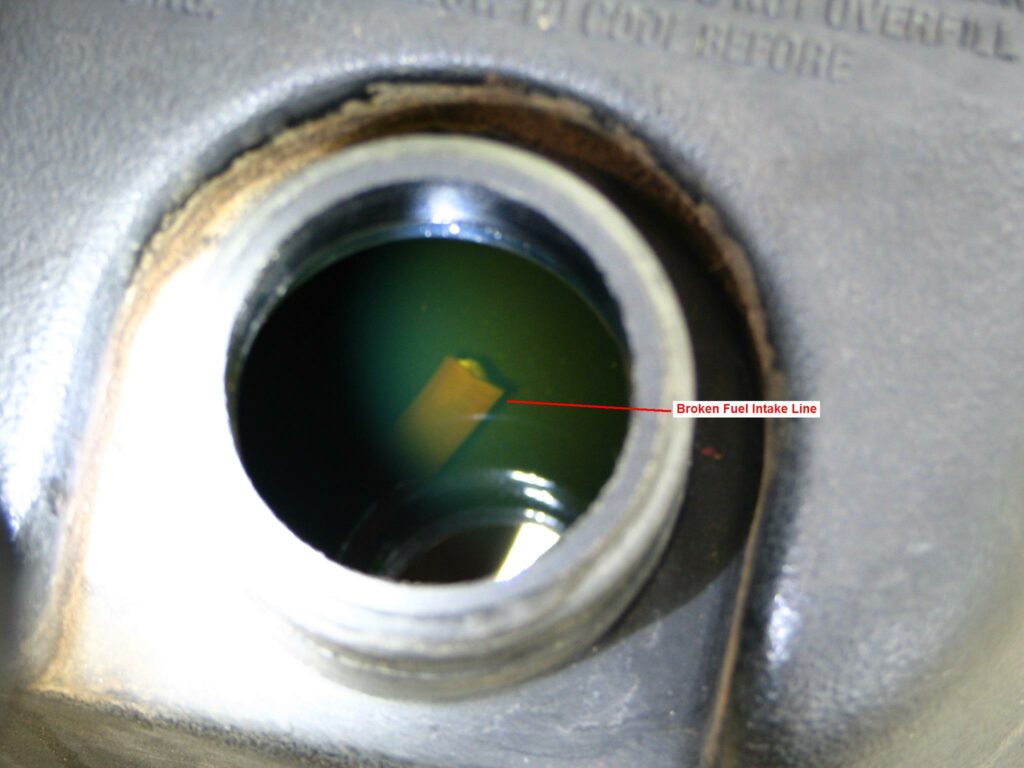
I grabbed my high intensity flashlight and shined it into the left fuel tank. I could see the fuel line lying on the bottom of the tank, but it is the head or tail of the line? It was difficult to tell. I checked the right fuel tank and saw the yellow/tan fuel line running down the side of the tank from the external fuel line fitting. I touched it with a metal rod to trace it’s direction and it fell off and sunk to the bottom of the tank! Disappointing, but mystery solved – the fuel lines are broken inside the tank.
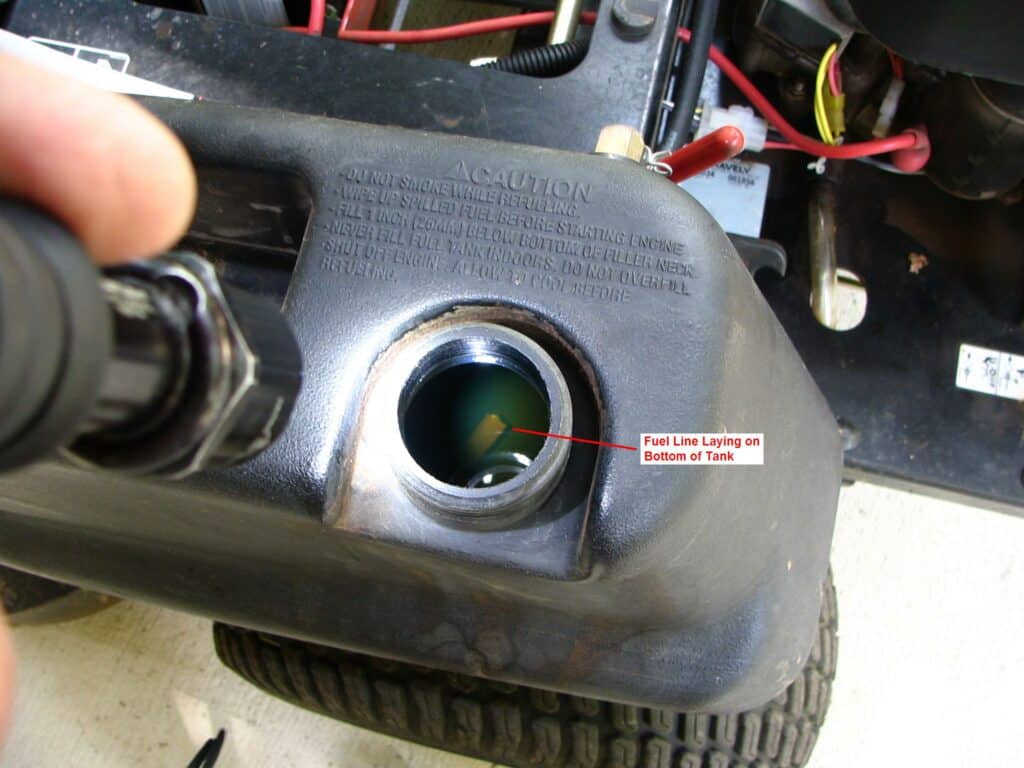
Here’s a closeup of the broken fuel line at the bottom of the gas tank.
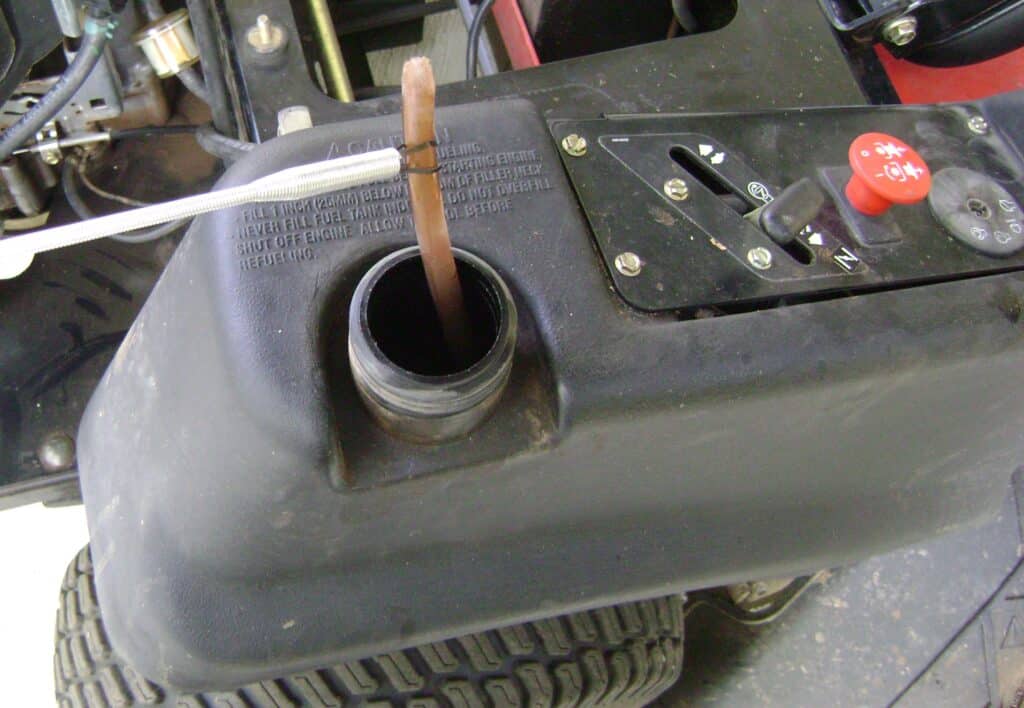
Remove the Broken Fuel Lines
It was obvious that a special tool would be needed to fish out the broken fuel line or I’d be here all day. I went to my local auto parts store and bought a 24 inch retriever claw for about $6.

A retriever claw is used to grab items in difficult to reach places – such as when you drop a bolt or nut when working on a car engine. This is the business end of the claw.

The retriever claw and a flashlight made quick work of extracting the broken fuel lines.
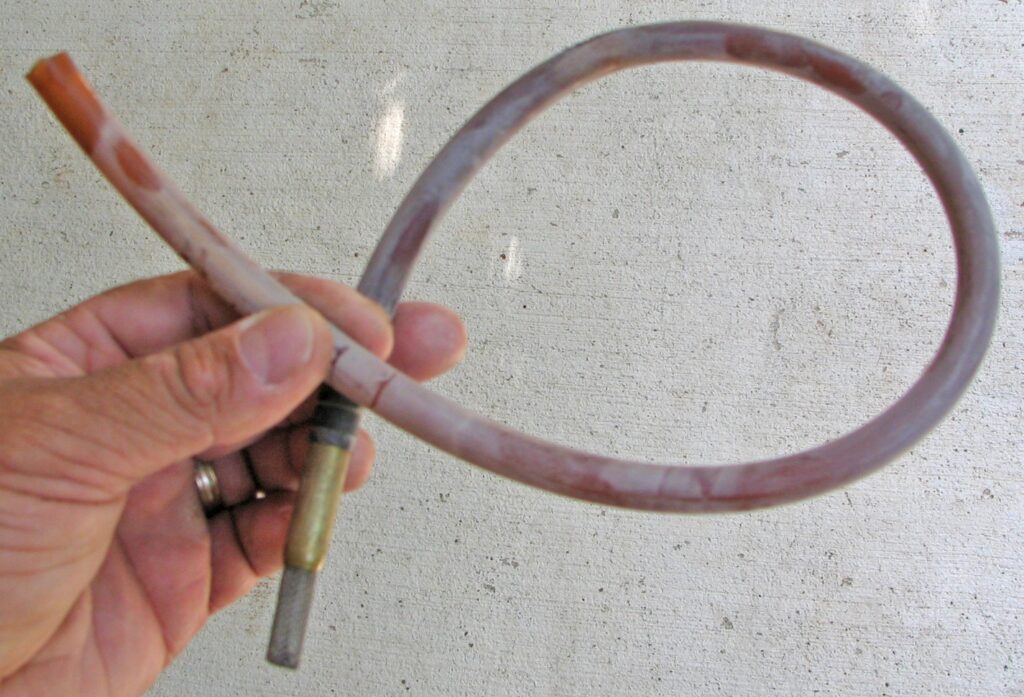
The old fuel line. The left top end broke off at the metal fitting at the gas tank sidewall after deteriorating in the gasoline and/or mower vibration. The bottom end is weighted so it sits on the bottom of the tank and has a metal screen. I didn’t see any identifying marks on the fuel line – it appeared to be vinyl that had aged to a tan color.
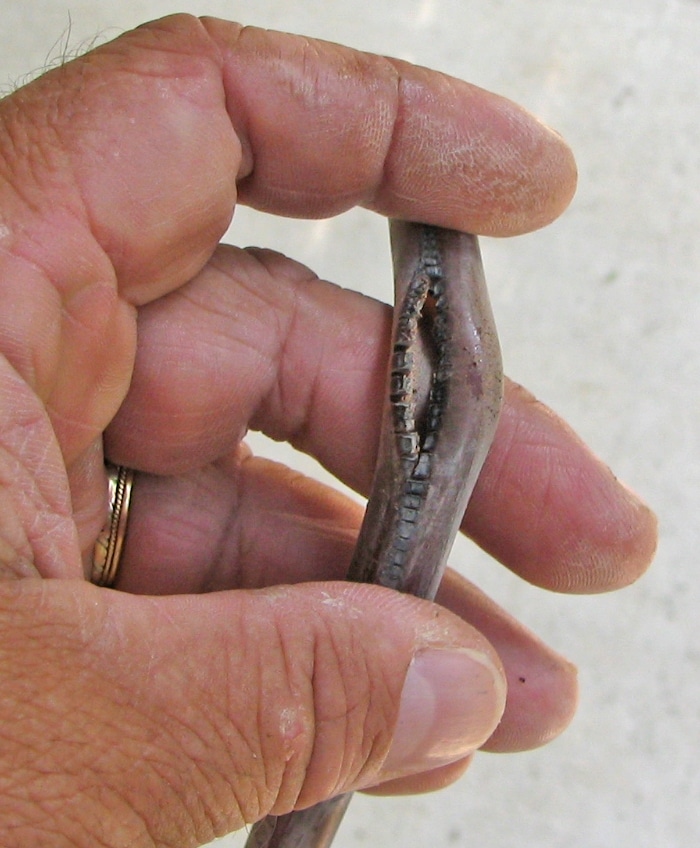
Overtime, the fuel line deteriorated and became brittle and cracked where it laid on the bottom curve of the gas tank. This particular crack wasn’t the cause of the fuel starvation since it was below the fuel level about 6 inches from the weighted brass end.
Lawn Mower Replacement Fuel Line
I visited the Gravely web site, clicked on Parts at the top of the web page, entered the model # and serial # for my mower, and looked up the parts diagram for the fuel tank. I noticed the fuel tank diagram doesn’t show the interior fuel intake lines.

I called my local Gravely dealer, explained what I’d found with deteriorated fuel tank lines and asked about replacements. The dealer said they’ve seen this problem quite often and had a new fuel line kit available that used Tygon F-4040-A fuel tubing. More on this later.
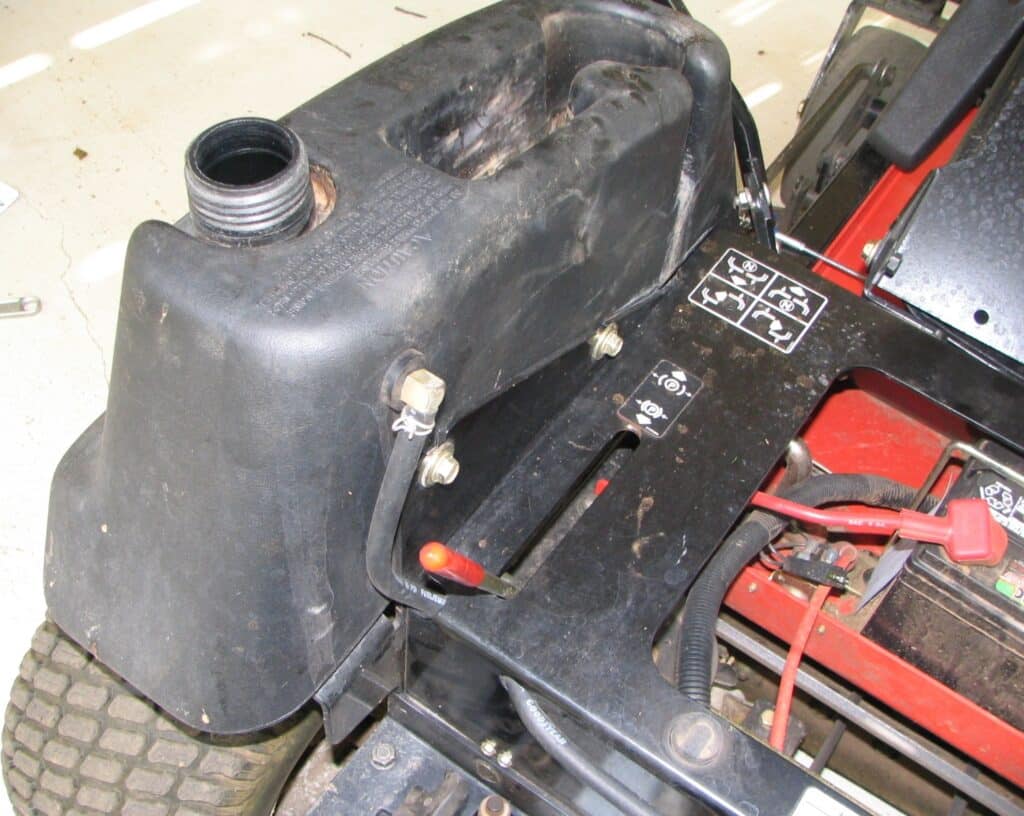
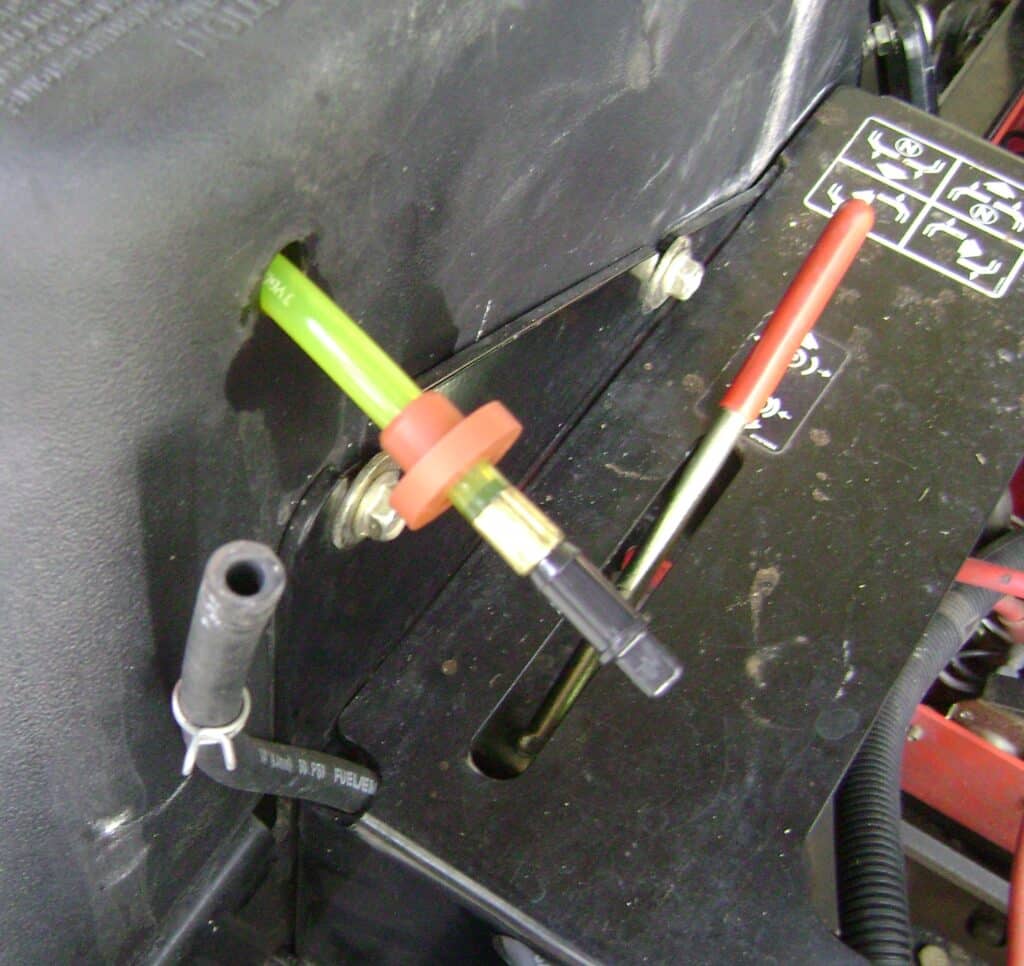
Remove the Fuel Tank Fittings
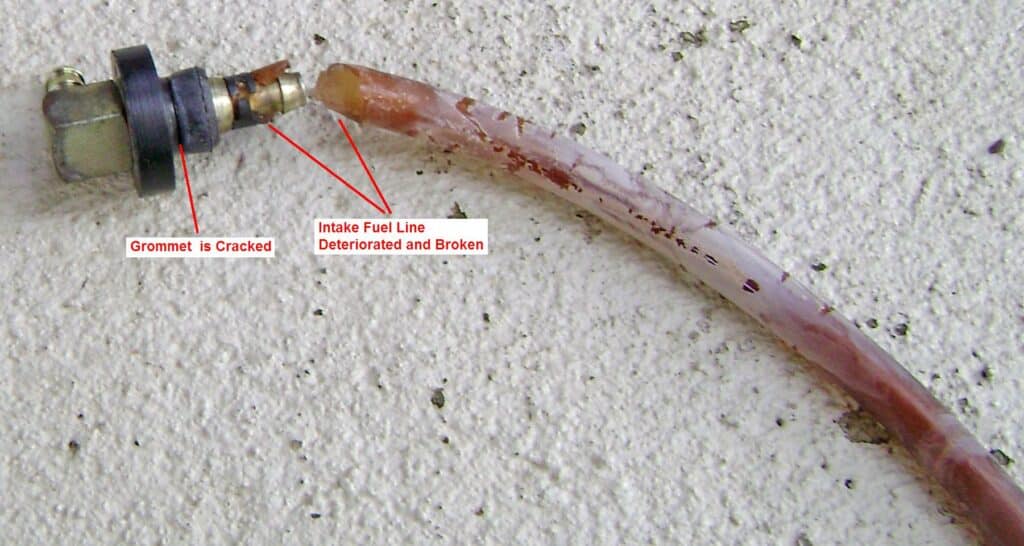
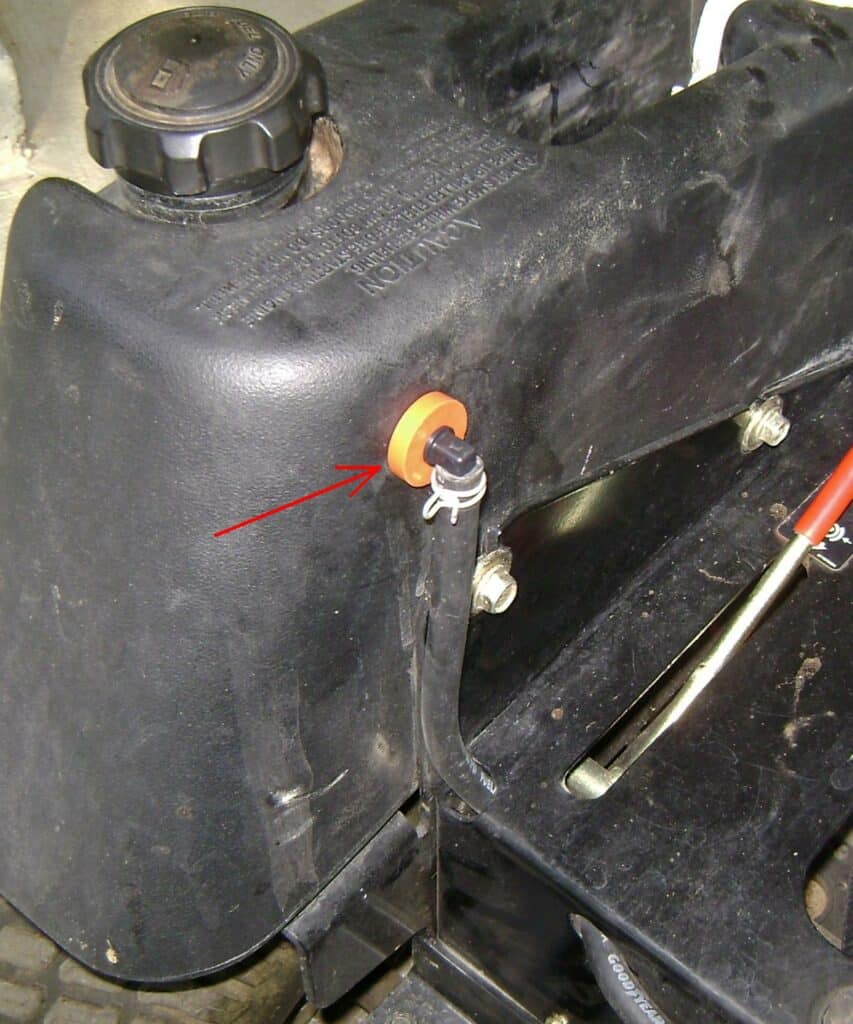
The old intake fuel lines had broken off inside the fuel tank causing fuel starvation. It was necessary to remove the metal fuel tank fittings to replace the fuel lines. Note the square brass fitting and black fuel line on the side of the tank in this photo:
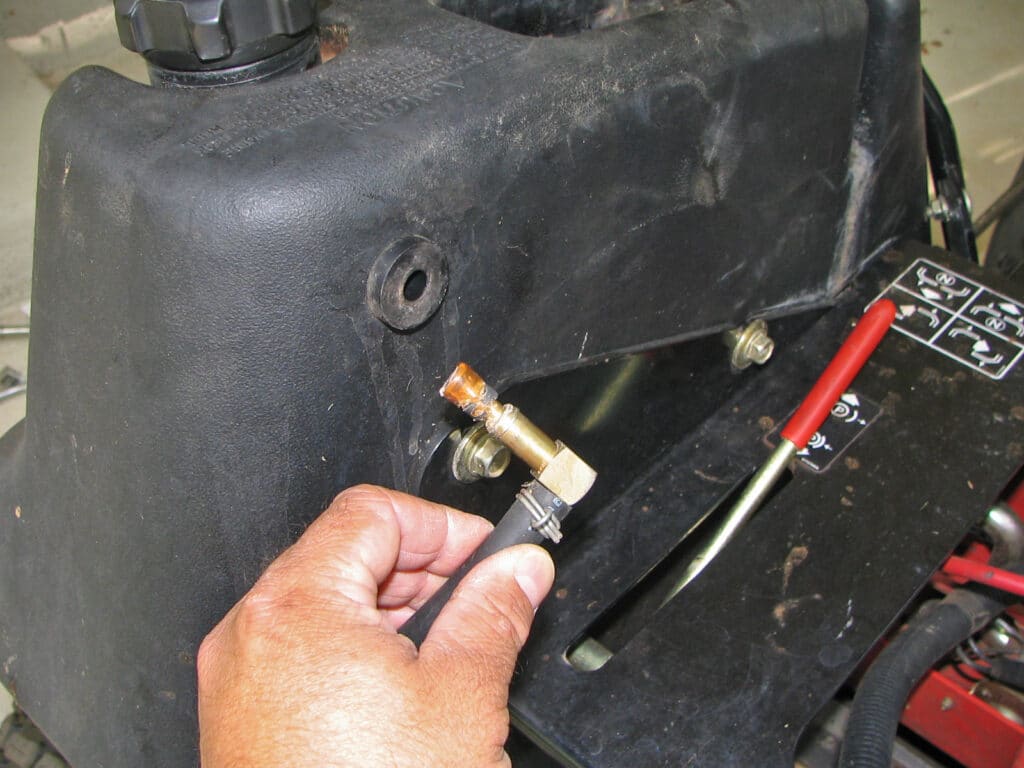
Remove the brass fuel fitting by pulling it out of the rubber grommet. Here you can see the remains of the broken fuel line on the brass fitting.
Remove the black fuel hose from the brass fitting by compressing the wire hose clamp with a pair of pliers and slide the clamp a few inches down the hose. The wire clamp is reusable so take care not to damage it.
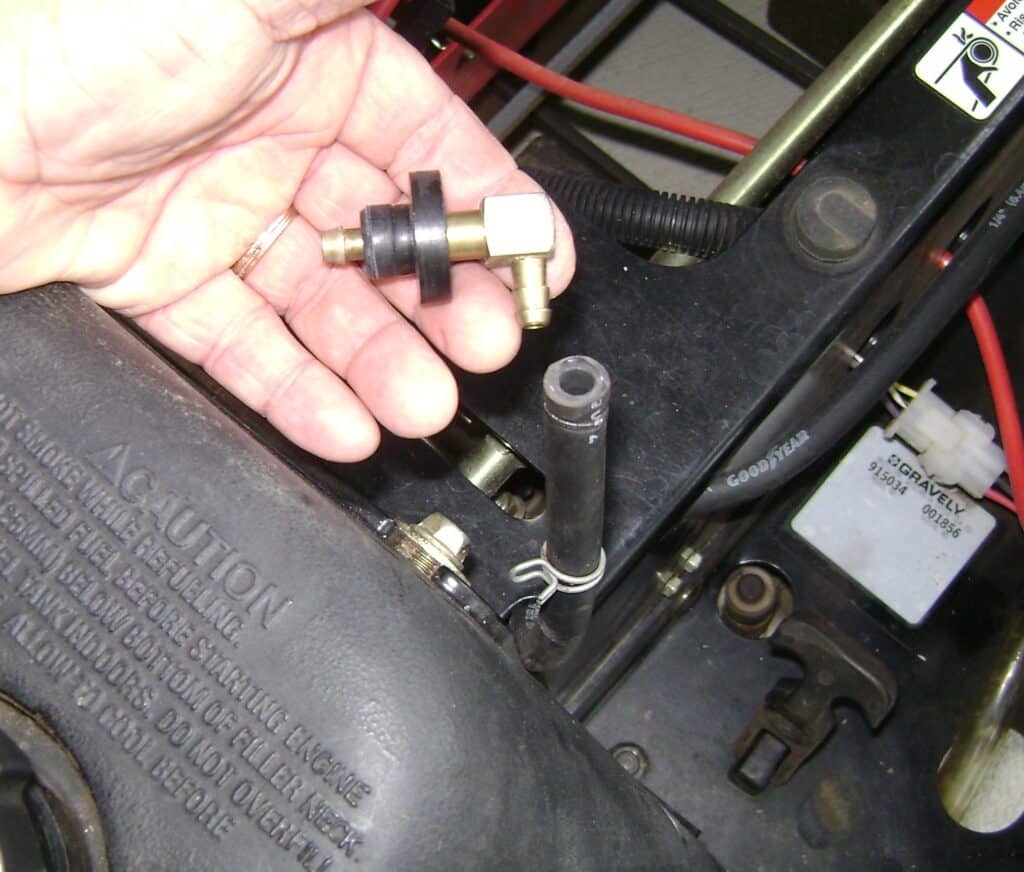
Remove the rubber grommet from the tank sidewall by gently prying it out. Here are the various parts after disassembly:
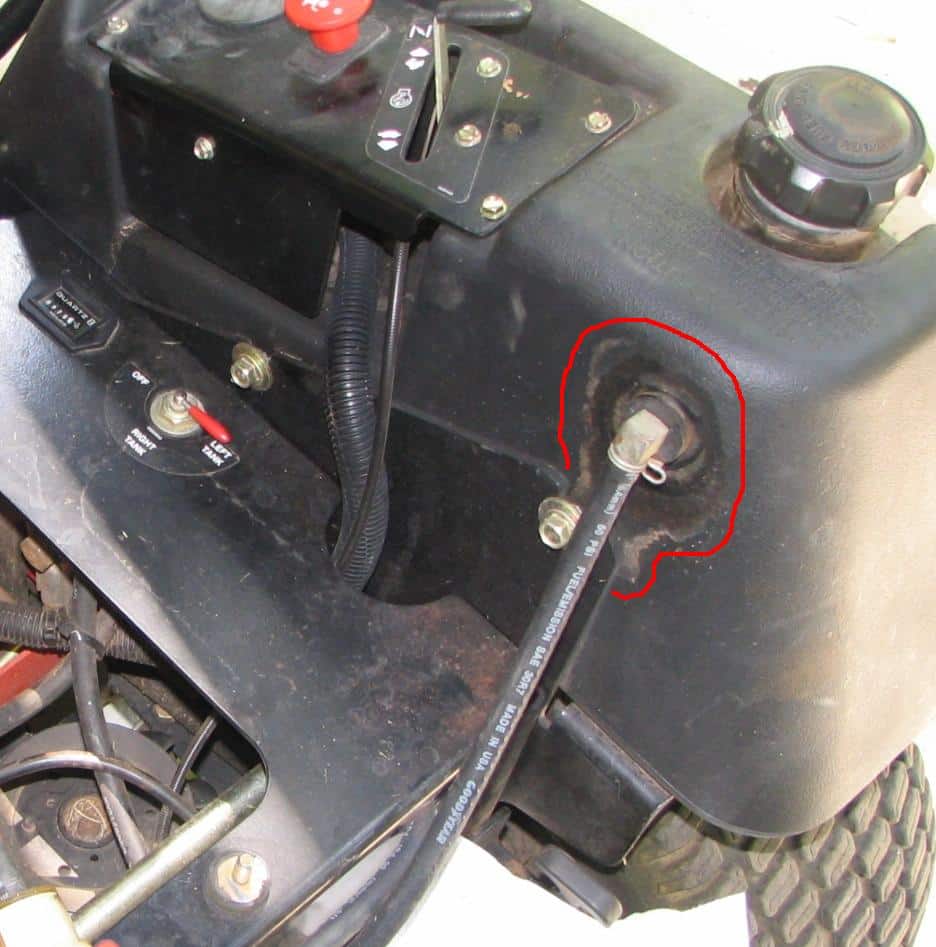
On the right fuel tank, I took notice of a stain from a gasoline leak around the rubber grommet as outlined in red. The leak was minor and happened occasionally when the tank was very full and gas sloshed around inside.
After removing the parts, I saw the gas leak was caused by a split neck of the rubber grommet. Here’s the grommet and broken intake line from the right gas tank:
Tygon® Lawn Mower Fuel Lines
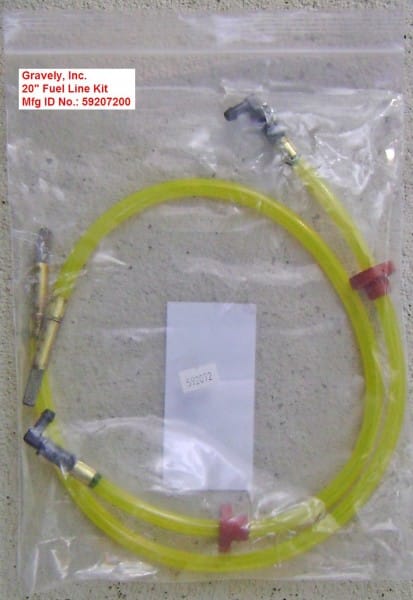
My local Gravely dealer said he’s seen a lot of deteriorated intake fuel lines and had just gotten this new fuel line kit, Mfg. Part #59207200 for about $30. The new fuel lines are Tygon® F-4040-A that are designed to resist swelling and hardening in gasoline and other fuels. Gravely is obviously is aware of the problem with the original fuel lines is offering this repair kit with everything you need – fittings, Tygon tubing and grommets.
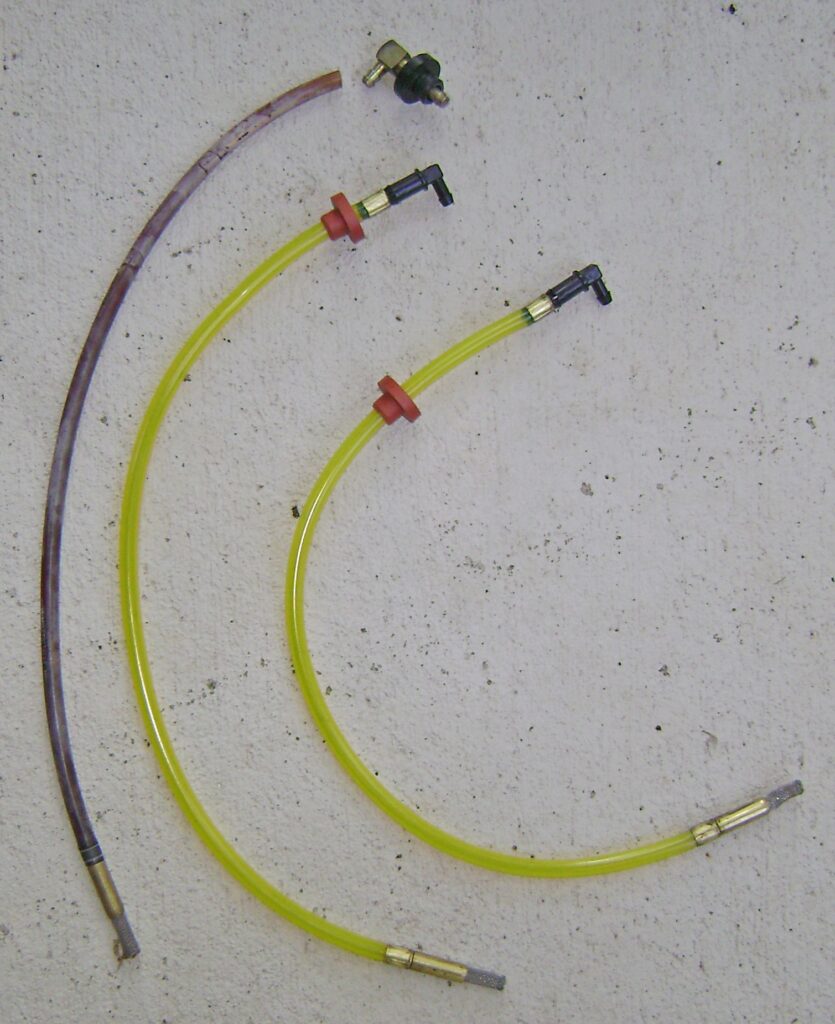
Here’s the new Tygon F-4040-A fuel lines compared to the original deteriorated and cracked fuel line:
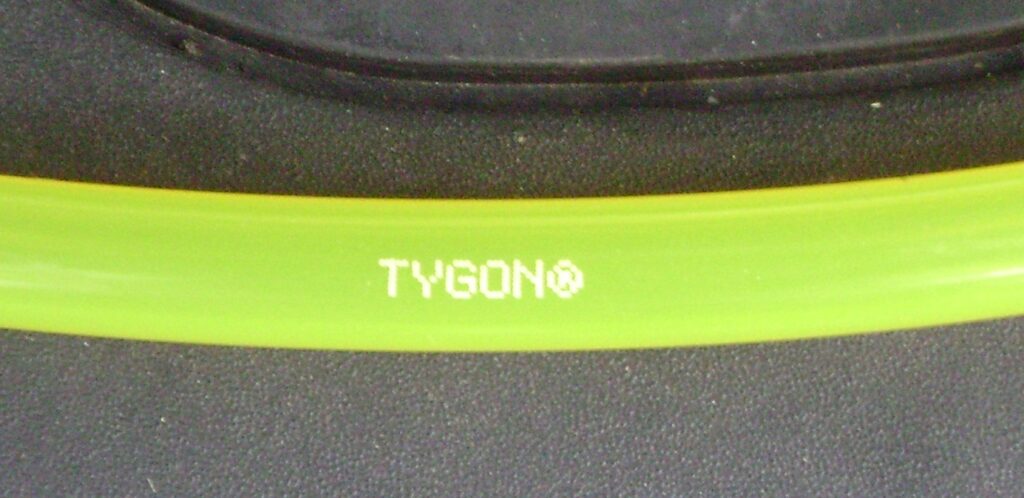
A closeup of the Tygon brand marking on the new fuel line.
Lawn Mower Gas Tank Fuel Line Installation
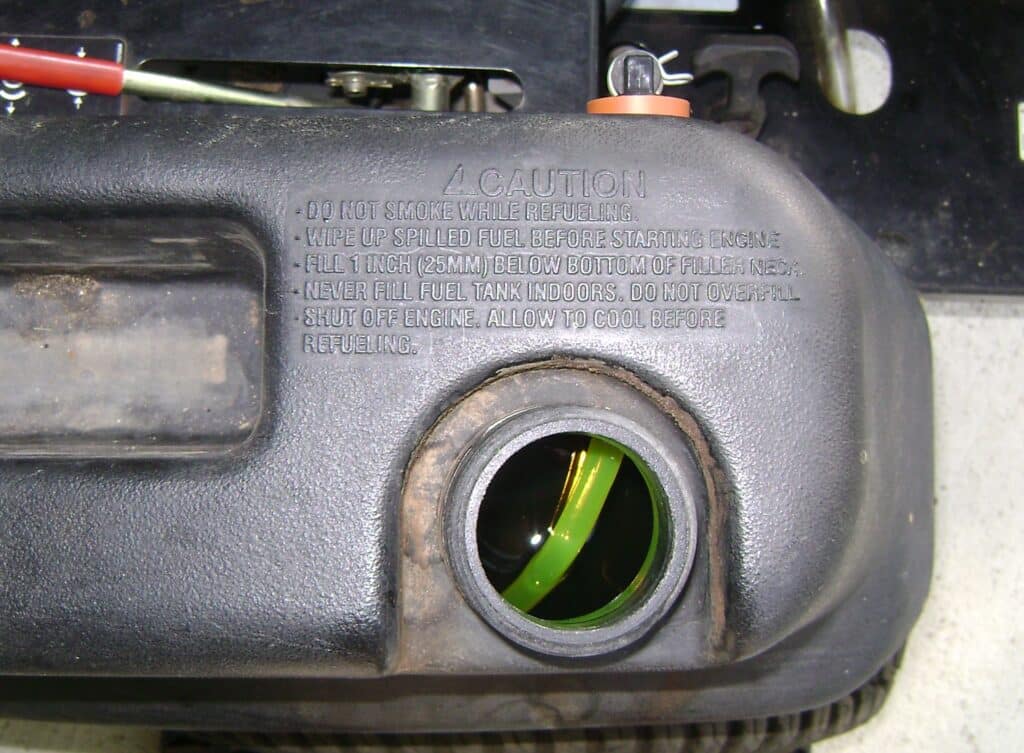
Insert the fuel line into the tank – the end with the brass fitting and filter screen goes in first. Look inside the gas tank to see that the line is guided to the “deep” or “far end” of the tank and doesn’t coil up.
Slide the orange rubber grommet up the fuel tube until it almost meets the brass band as shown:
Press and seat the orange grommet into the fuel tank hole. Use only your fingers – do not use a screwdriver or other tools to avoid damaging the grommet.
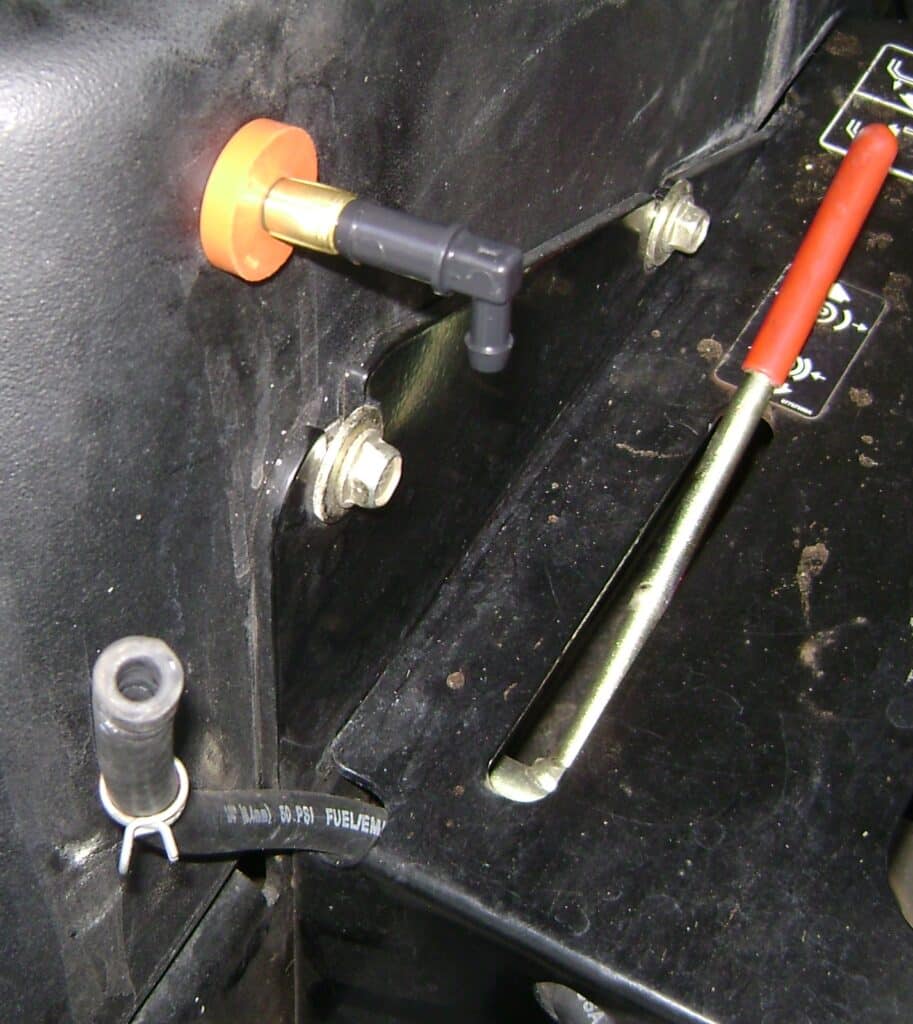
Push/press the fuel fitting into the grommet until seated as shown. Be extra careful to press straight in on the square head of the fitting. You risk breaking the 90 degree nipple if you press on it.
It took a bit of effort to press in the fitting, don’t be in a hurry. Consider wearing gloves if it digs into your palm.

Push the black exterior fuel line onto the fuel fitting and secure with the wire hose clamp. Inspect the yellow Tygon fuel line inside the tank with a flashlight to verify it’s laying in the deep end of the gas tank.
Screw on the gas cap and reinspect your work.
Repeat the procedure for the other fuel tank.
Replace the Lawn Mower Fuel Filter
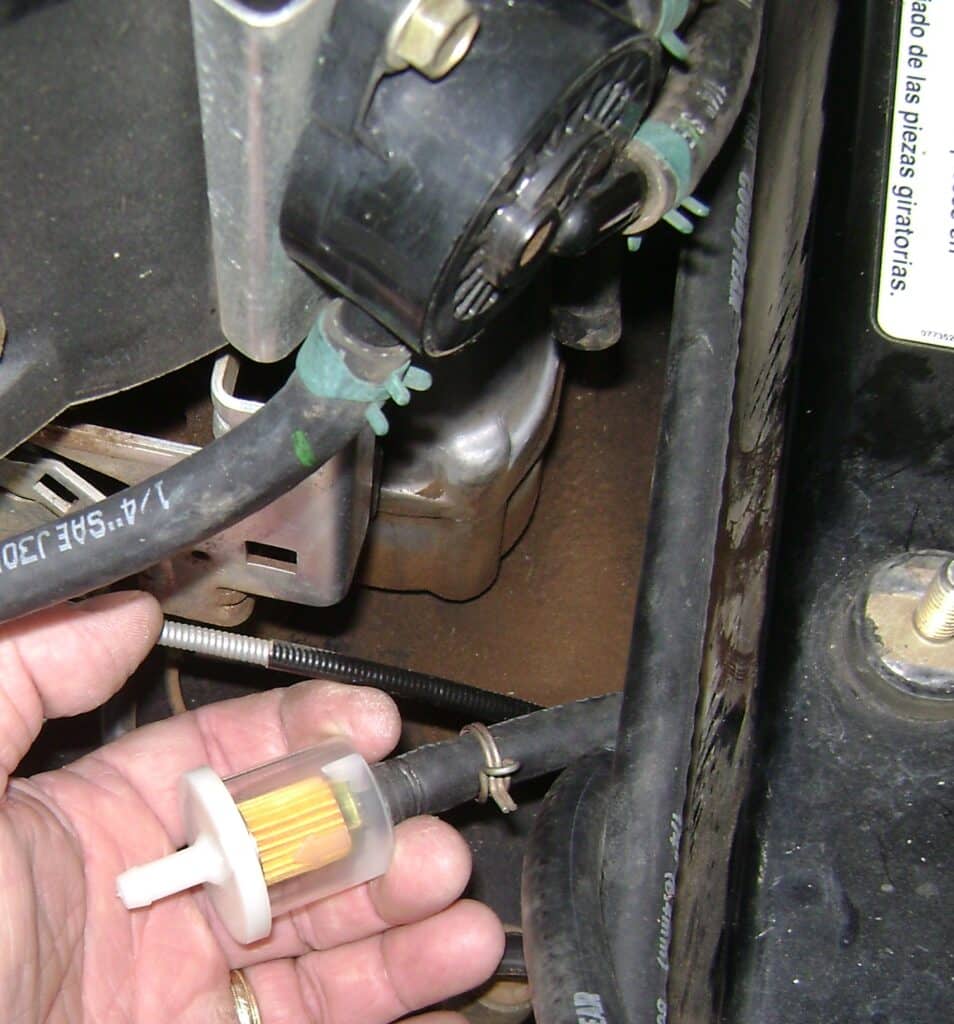
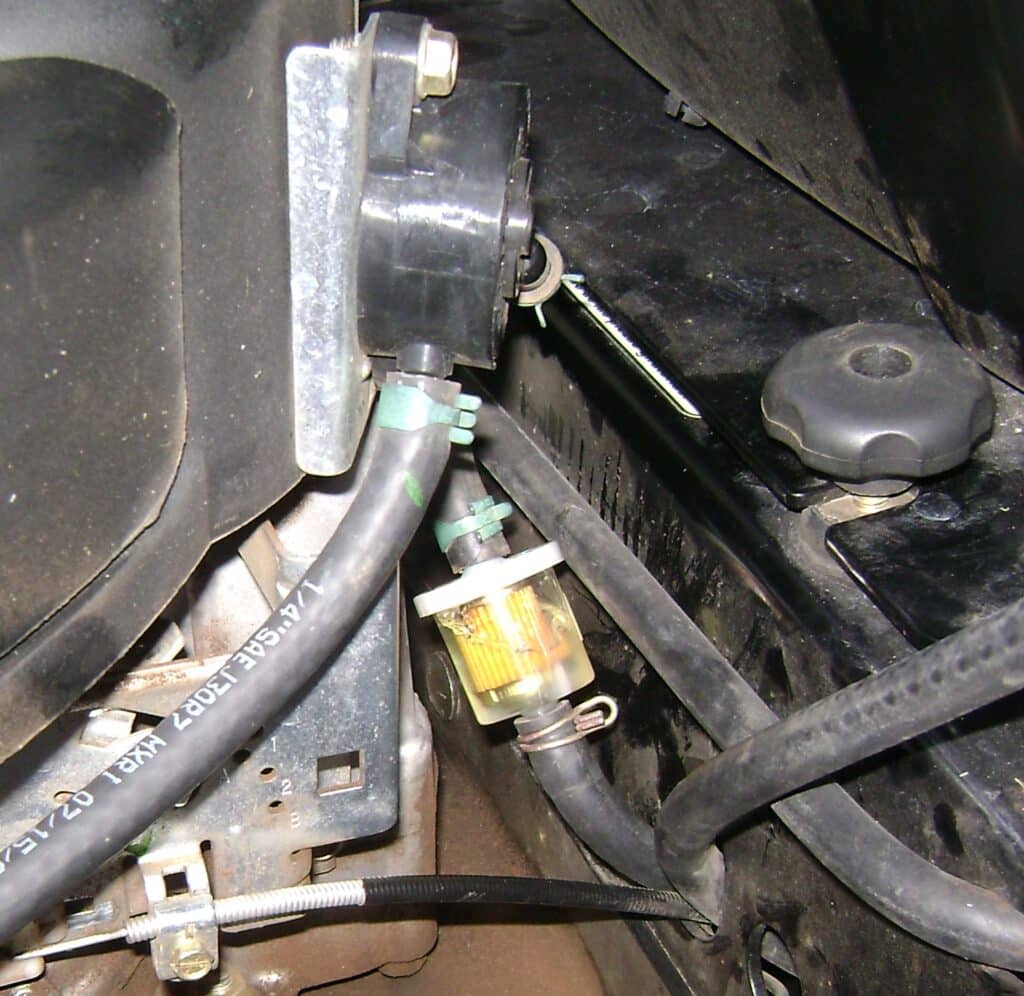
After replacing the broken and cracked fuel lines inside the gas tanks, I replaced the fuel filter for preventive maintenance. The fuel filter is located on the right front side of the engine. The fuel hoses are secured to the filter by two hose bands.

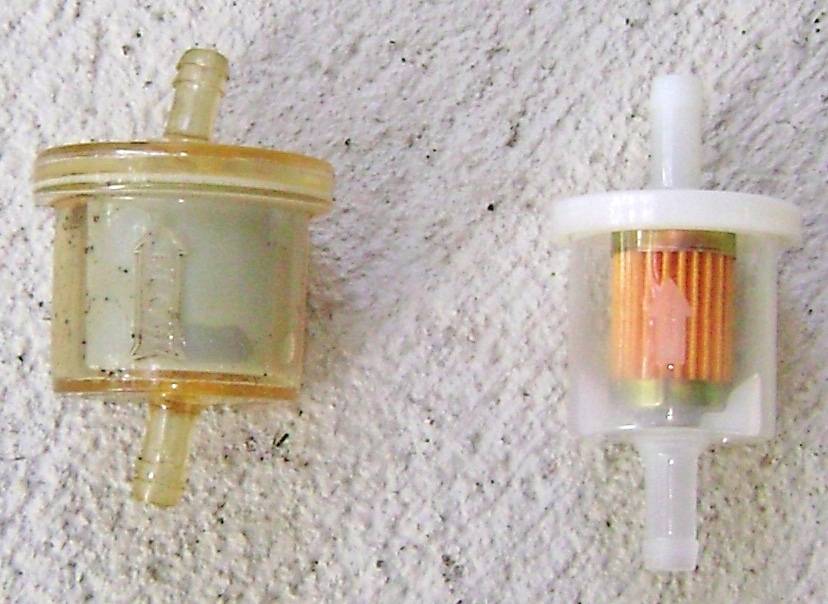
The old and new fuel filters are shown in the following photo. The black bits of dirt are on the outside case of the old filter. I purchased the new filter from my local Gravely dealer for about $4.
Notice the arrow imprinted on the case of both filters indicating the direction of fuel flow. The filter is installed with the arrow pointing towards the fuel pump.
Remove the old filter by releasing the hose band with a pair of pliers and slide the bands an inch or so down the hose. Pull the hoses off and remove the old filter.
Install the new filter by pressing on the hoses and fasten with the hose bands. Take care to install the filter with the arrow on the filter housing pointing towards the fuel filter.
Restart the Lawn Mower Engine
The engine stopped running because the intake fuel lines inside the gas tanks had deteriorated and broken off. The fuel lines, fuel filter and carburetor were bone dry when the engine quit due to fuel starvation. This is the first time starting after installing new fuel lines and all the lines are dry.
To restart the engine:
- Set the fuel selector/shutoff valve to the RIGHT tank (because it’s closest).
- Set the throttle position to Full Choke.
- Had a helper turn the starter key ON while watching the fuel filter. Gasoline was flowing through the fuel filter in about 3 seconds. The engine started after another 2-3 seconds of steady cranking. I set the throttle to Fast Run and the engine ran smoothly.
- I let the engine run a couple of minutes on the right tank, then set the fuel selector the left tank. I saw a few air bubbles in the fuel filter and the engine continued to run smoothly on the left tank.
The fuel level in the fuel filter dropped some with the engine running on full throttle. The engine continued to run strongly. After 10 minutes or so, I drove the mower up and down the hill and mowed some grass. Everything was fine.
Engine running after replacing the fuel lines and fuel filter.
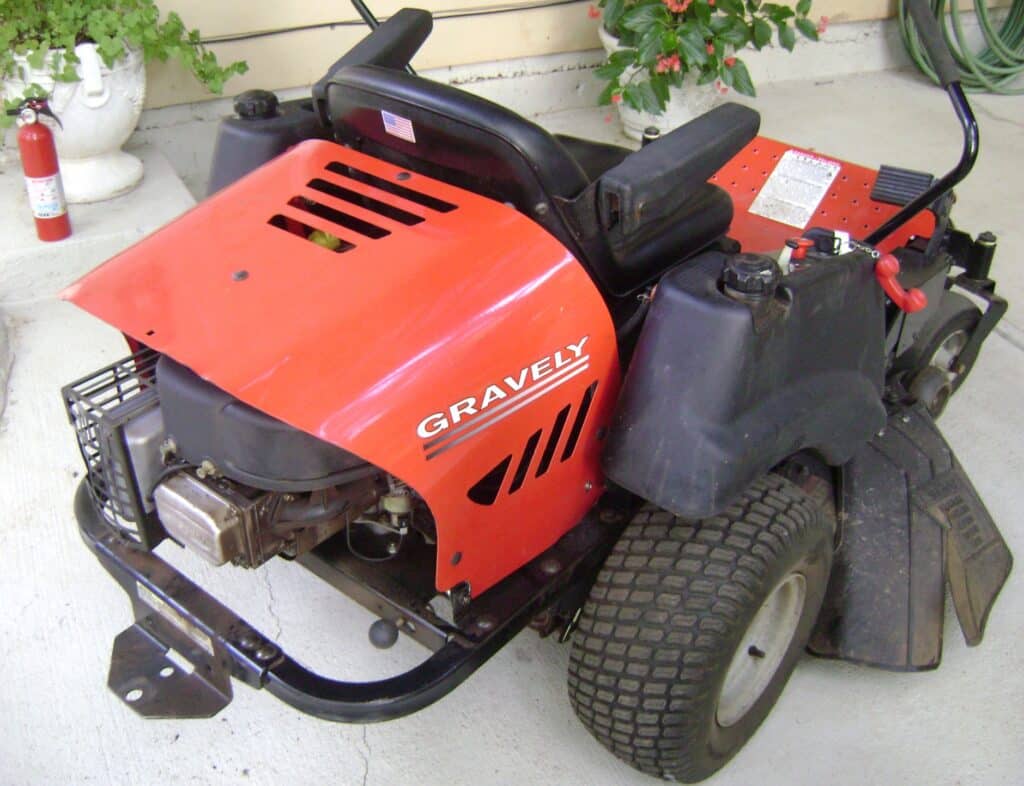
I reattached the engine hood and am now ready for the rest of the mowing season.
The total cost of this repair was $36 for parts from my local Gravely Dealer and about 1.5 hours of my time. The first hour was spent diagnosing the fuel starvation problem and 30 minutes to remove and install the new parts.
Take care,
Bob Jackson