This project explains how to fix a leak between the wheel rim and tire bead on a lawn mower tire. The tubeless tire on my zero turn riding mower had a slow air leak. I finally got tired (pun intended) of adding air every two weeks and decided to fix the leak once and for all.
How to Fix a Leaking Lawn Mower Tire Rim
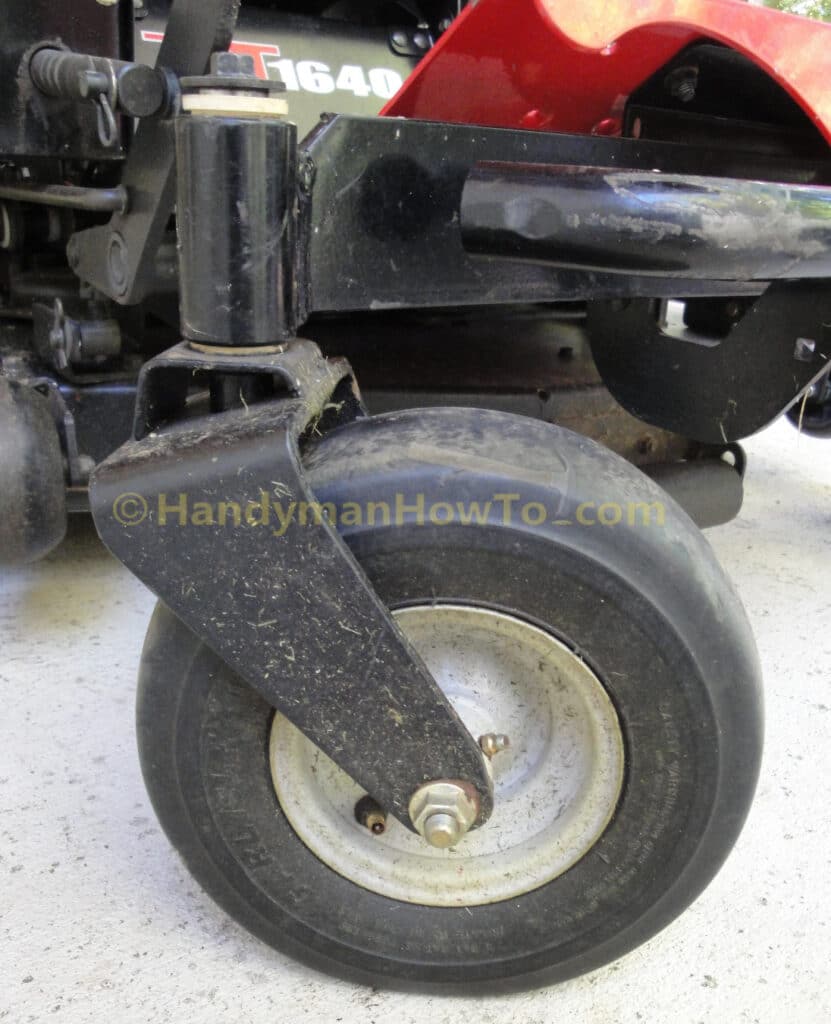
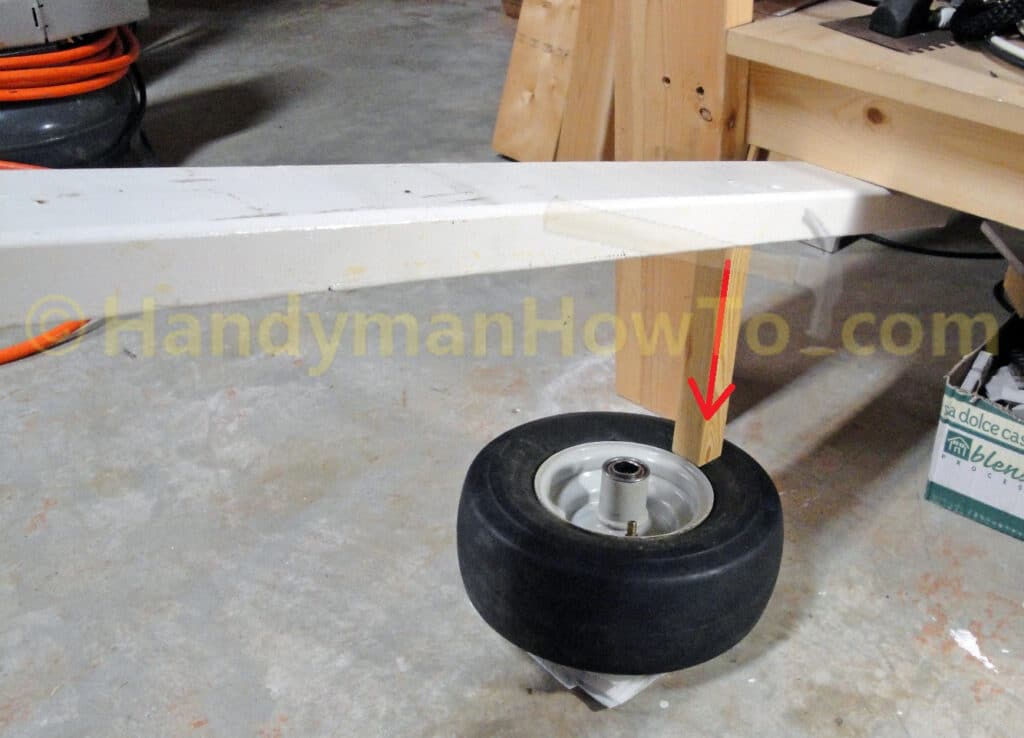
The tire must be removed to locate the source of the air leak by placing it in a bucket of water and looking for bubbles. After propping up the front of the mower on some sturdy blocks to get the tire off the ground, the axle bolt is removed with two 3/4″ socket wrenches. Two wrenches are required: one to hold the bolt head and another to remove the lock nut. A box-end wrench will also do fine, but a socket wrench is quicker:
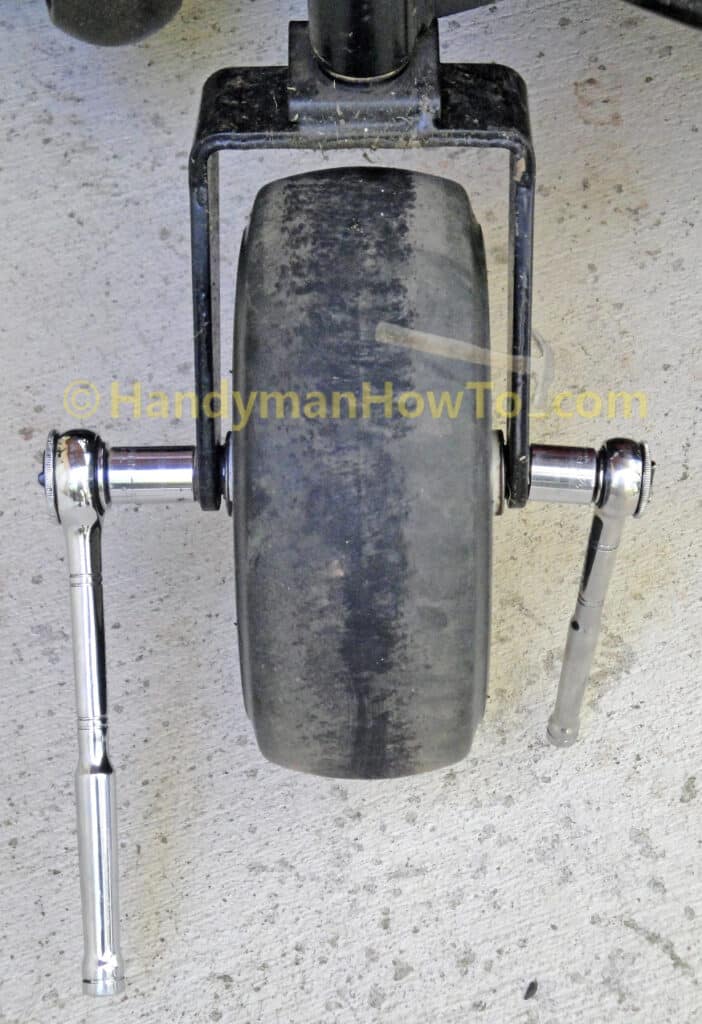
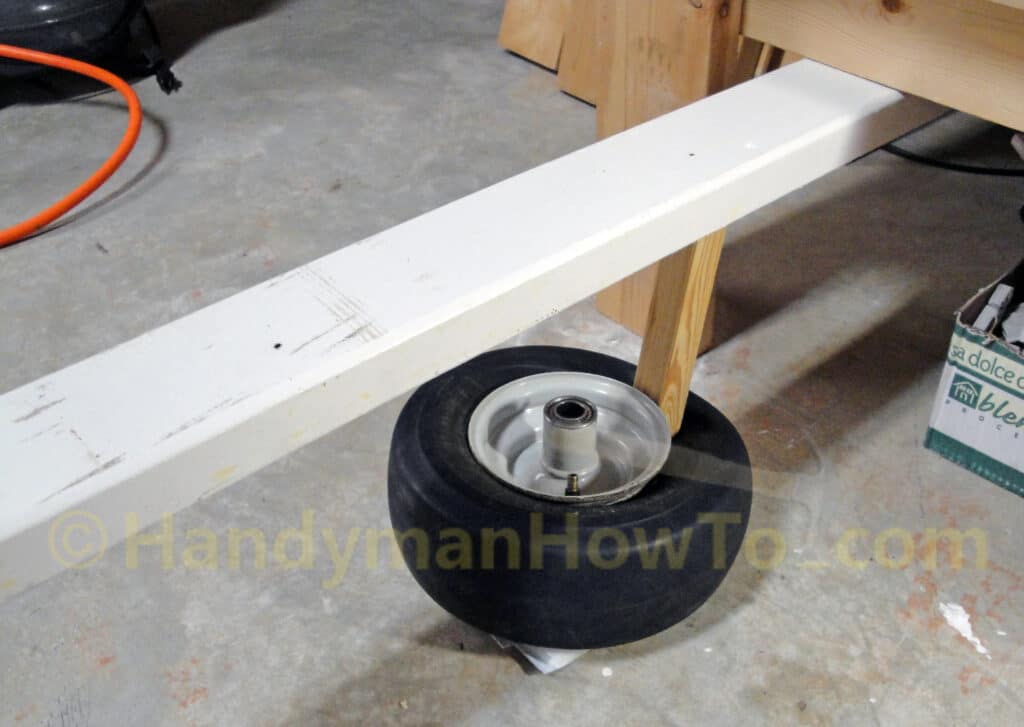
The wheel will drop free from the caster after removing the axle bolt:
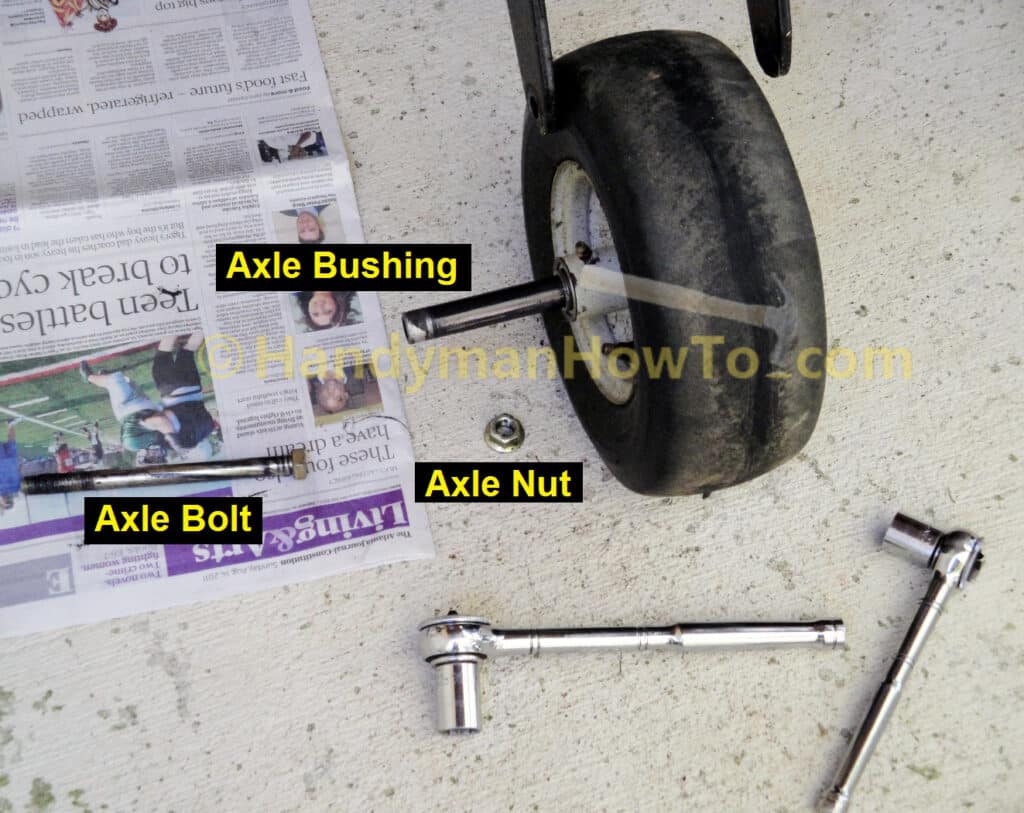
The axle bolt rides inside a greased bushing and the bushing will slip out of the wheel if the tire is tilted, so best to remove it to avoid a grease stain on the floor.
Leaking Tire – Water Bucket Leak Finder
The tire is cleaned of dirt and grass clippings so as not to muddy the water. The tire is filled with compressed air to bring it up to full pressure then placed in a bucket of water filled to just below the axle – best not get water in the bearings. The tire is slowly rotated to look for bubbles indicating an air leak:
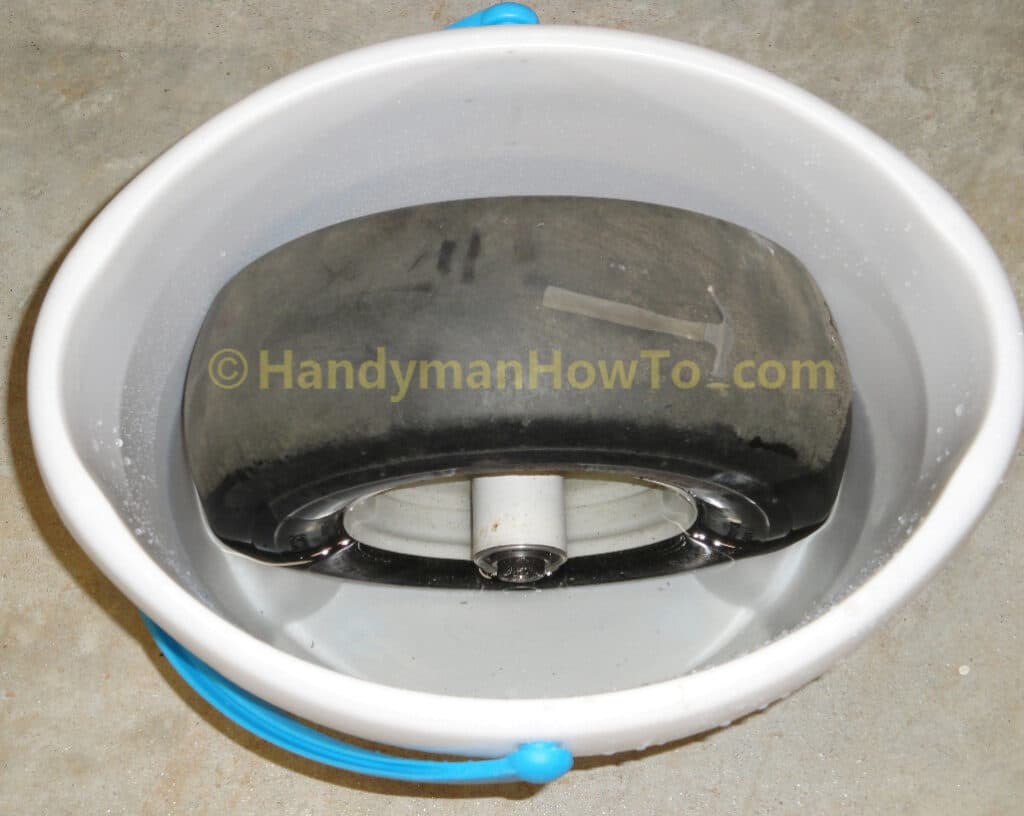
I didn’t find any leaks in the tire face or sidewall, but there are several leaks between the wheel rim and tire bead. The bead is the part of the tire that contacts the rim. Four rim/bead leaks are seen in the video below:
- One slow stream of small bubbles near the water line.
- One slow stream stream of larger bubbles at the 1st blue pen mark.
- Two fast streams of bubbles at the 2nd pen mark.
An alternate way for locating an air leak is to spray soapy water on the tire and looking for soap bubbles indicating an air leak. This is convenient if you don’t want to remove the tire or if a large enough bucket isn’t available. However, the underwater method is the surest way to find even the smallest air leak. On occasion, I’ve even used the bathtub to check a large diameter tire for leaks, for example a 26″ bicycle tire.
Use Tire Bead Sealer
Tire Bead Sealer is a thick fast drying rubber compound that’s painted on the tire bead and wheel rim to fill small imperfections and make an air tight seal. While bead sealer isn’t a glue, it does have has adhesive properties and can make the tire harder to remove from the wheel rim.
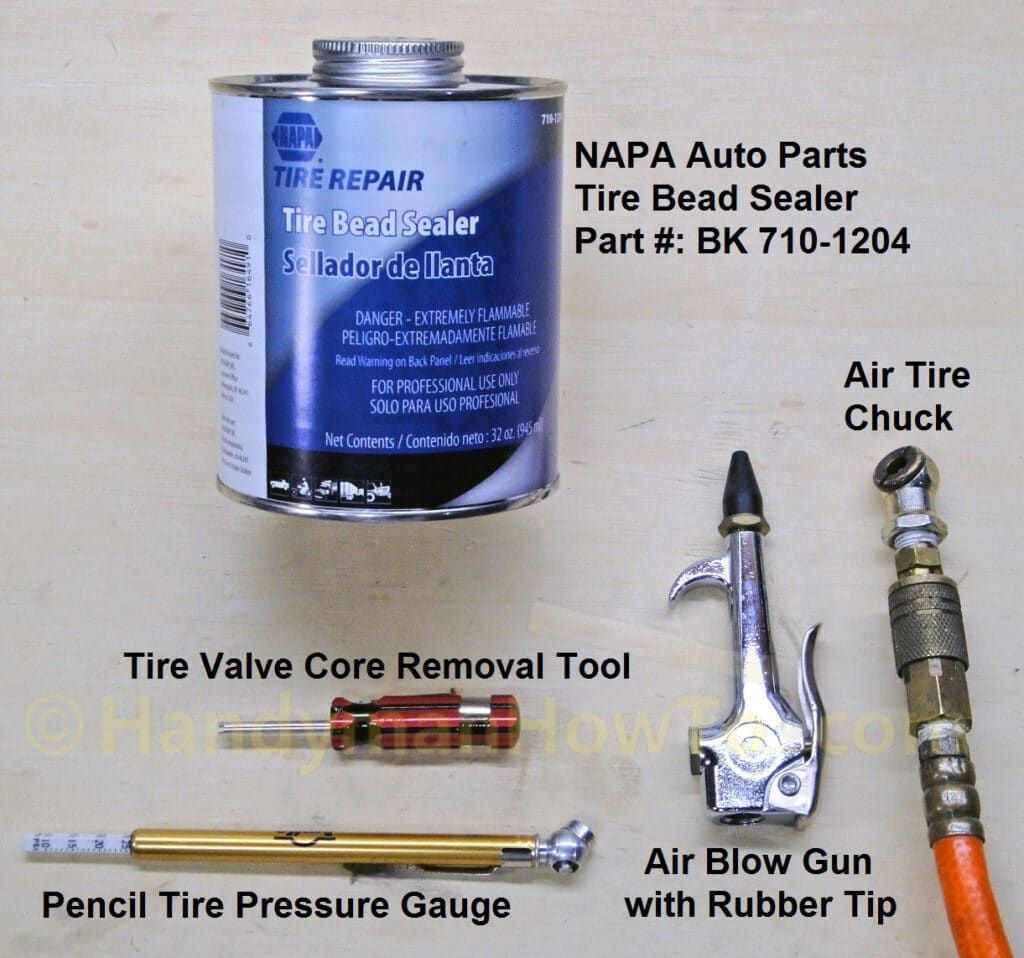
I purchased a quart can of bead sealer from NAPA auto parts (many brands are available) and used the following tools to repair the lawn mower tire:
- Pencil tire pressure gauge
- Tire valve core removal tool
- Air blow gun with a rubber tip
- Air tire chuck for inflating tires
- Portable electric air compressor (not shown)
- Wire brush (not shown)
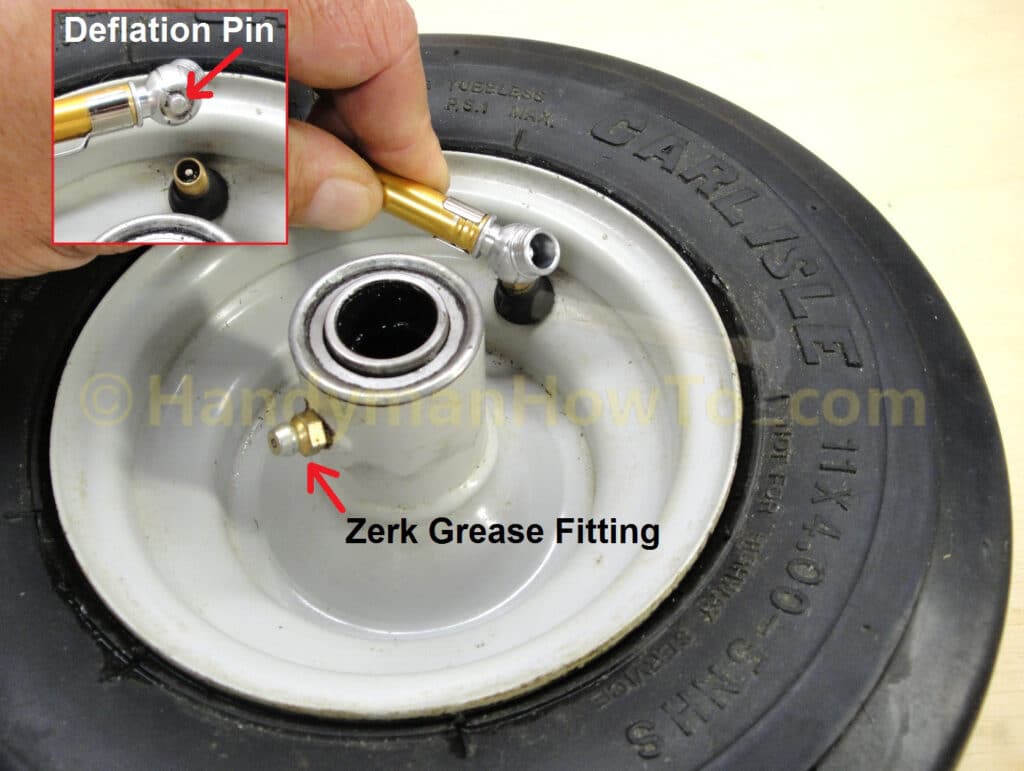
Deflate the Tire
The tire must be deflated to relieve the air pressure that presses the tire bead to the wheel rim. Hold the deflation pin of the tire gauge against the Schrader valve as shown until no more air comes out.
Remove the Schrader Valve Core
The tire valve core should be removed to ensure there is no residual air pressure in the tire and allow for “bead breaking” in the following steps without building up pressure in the tire. The valve core removal tool has a slotted head and hollow tip that fits over the valve core to unscrew it from the valve stem. Remember: “Lefty Loosey, Righty Tighty” when unscrewing the valve core.
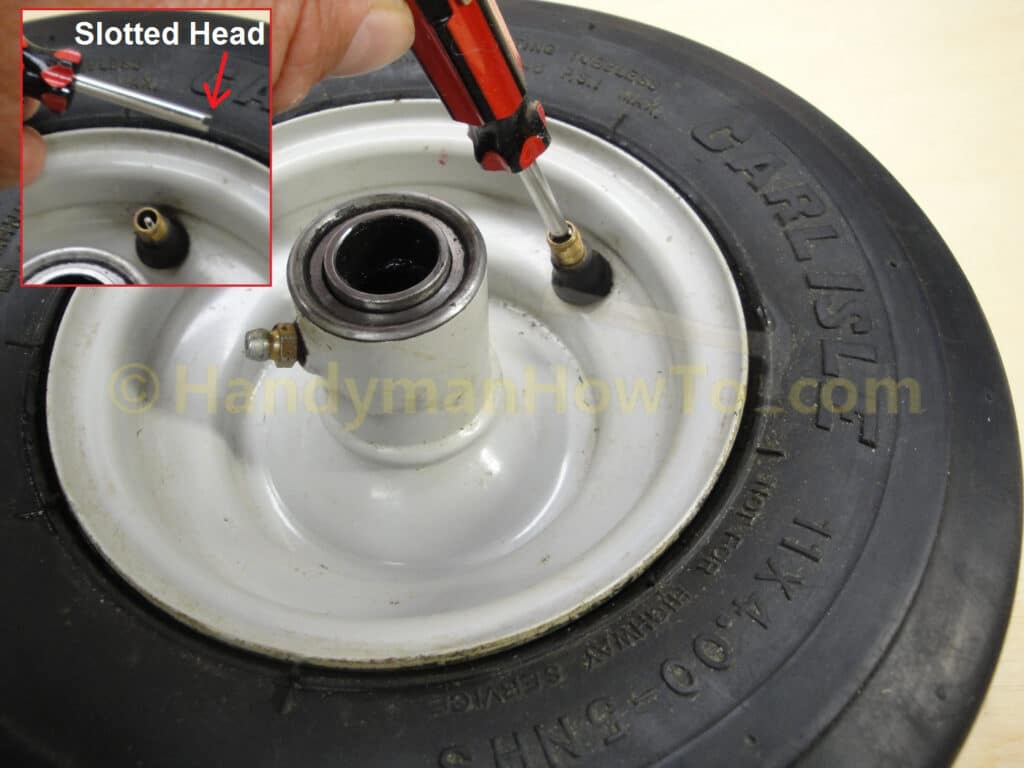
After unscrewing the valve core, pull it out of the valve stem with your fingers. Put the valve core aside in a safe and clean place. It’s small and easy to lose.
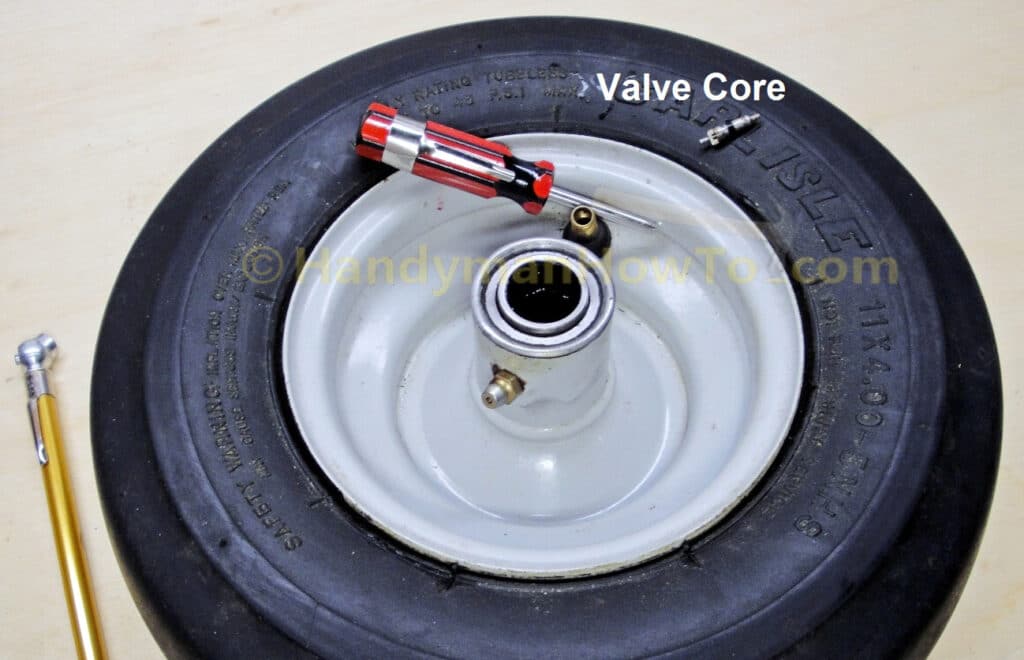
With the valve core removed, the tire will “breathe” freely as the tire is worked to break to the bead.
Break the Tire Bead
The tire bead bonds to the wheel rim over time due to the tire rubber adhesion, rust and dirt buildup. The bond must be broken to clean the rim and bead before applying bead sealer.
You can work all day if you don’t know the correct way to break a tire bead. A garage will have a tire bead breaking tool, but since I rarely have a need for one, a simple way is to use a 6 foot long 2×4 placed under the work bench as a lever on a wood block as shown:
The 2×4 lever and 2×2 block made simple work of breaking the tire bead:
The 2×4 lever and 2×2 block were random pieces of wood I had lying around my workshop and worked perfectly for breaking the tire bead:

Flip the tire over and break the bead on the other side.
Clean the Wheel Rim and Tire Bead
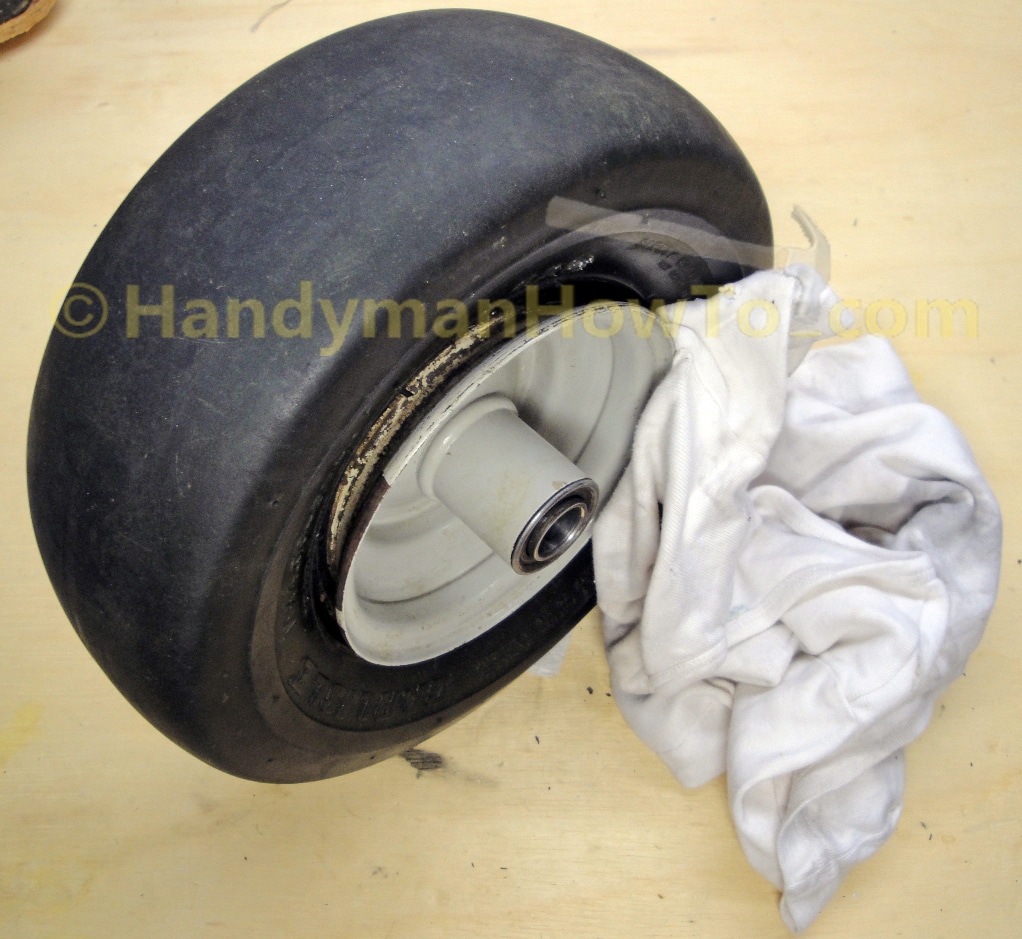
There was dirt, a few bits of grass, paint chips and rust between the wheel rim and tire bead. I cleaned the rim and bead with a brass wire brush (brass is softer than steel) and wiped it down with a cotton rag. This took several passes to get it clean.
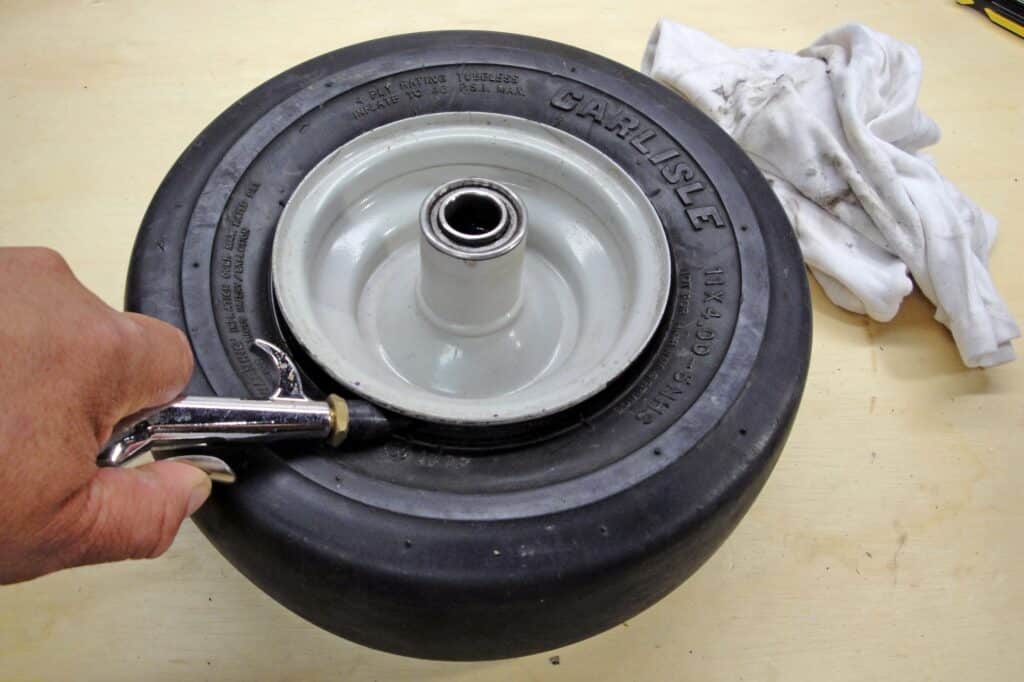
Next, I used the air gun to blow the bead clean with compressed air:
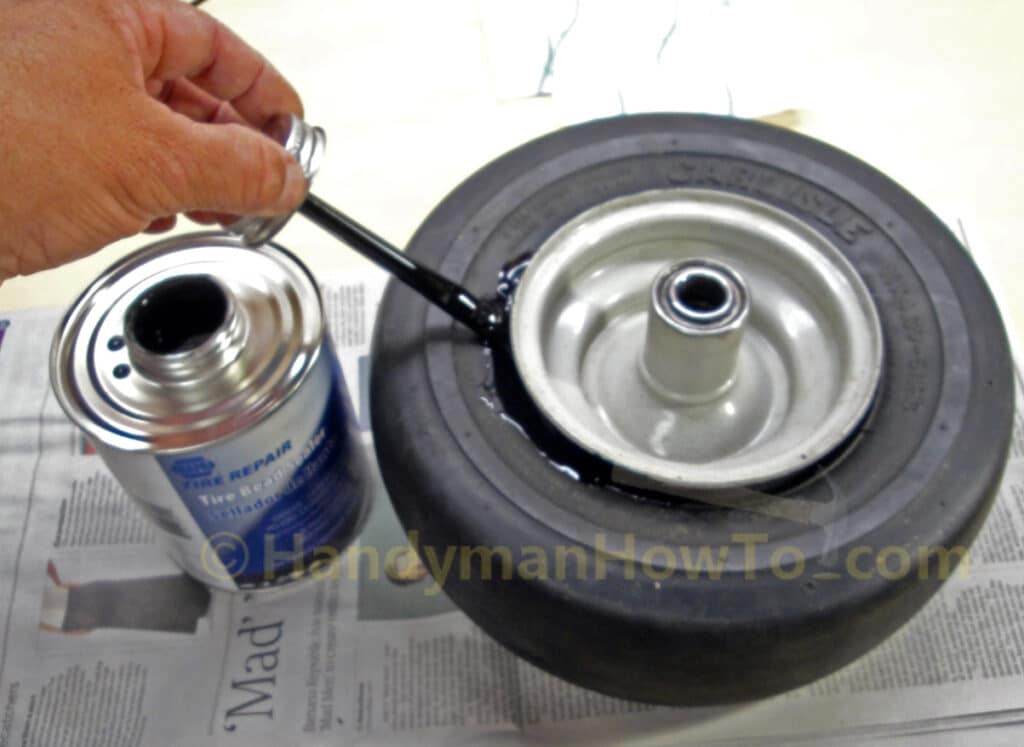
How to Apply Tire Bead Sealer
A generous amount of tire bead sealant is brushed along the tire bead as shown. Don’t worry about getting the bead sealant on the sidewall because it dries quickly to a non-tacky finish that blends with the tire. Notice the newspaper under the tire and can to catch any drips.
After painting the bead sealant on one side of the tire, flip the tire over and apply bead sealant to the other side.
Seat the Tire Bead against the Wheel Rim
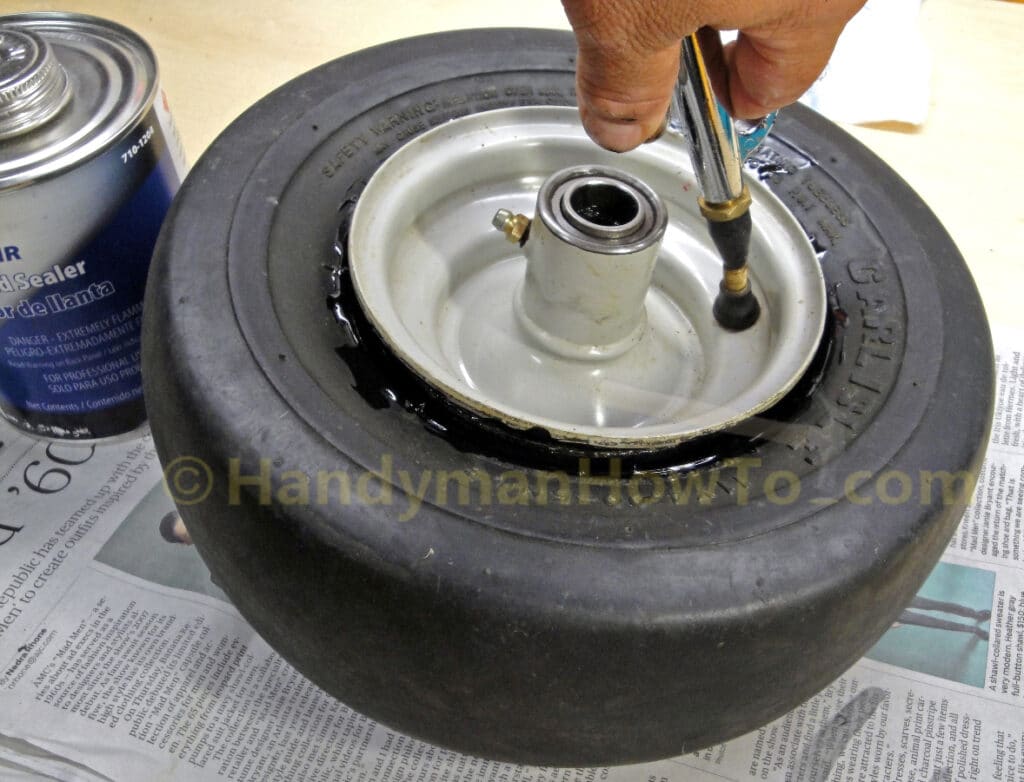
The tire bead is reset (popped back out) to seat it against the wheel rim by blowing a large volume of compressed air into the tire with the blow gun. The rubber tip of the air blow gun is held against the valve stem (remember – the valve core was removed so there’s no obstruction) and compressed air blown into the tire. This worked almost instantly to pop the bead back out against the wheel rim.
An alternate method for resetting the bead (especially if you have large tire) is to set a ratchet strap
around the tire and draw it tight to squeeze the sidewalls and bead outward against the rim. Use the blow gun if you have one to reset the bead. If you don’t have a blow gun, reinsert the valve core and fill the tire with compressed air in the normal way. The tire bead will pop out against the rim.
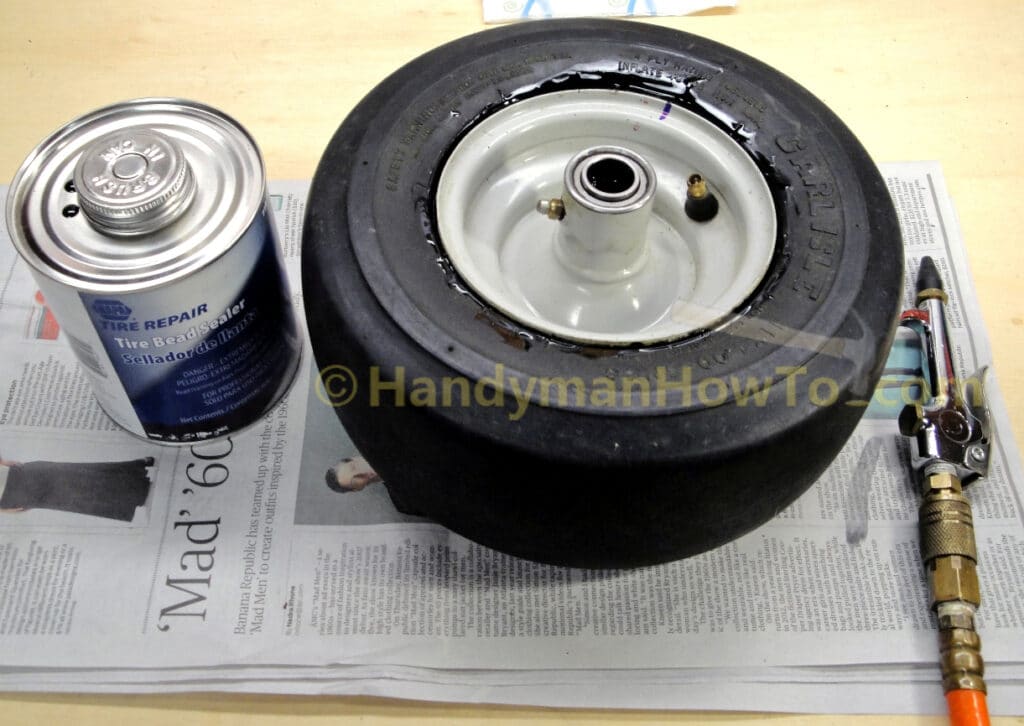
The tire bead popped out nicely against the wheel rim:

Once the bead pops out, it will stay in place when the blow gun is removed and there’s no air pressure in the tire.
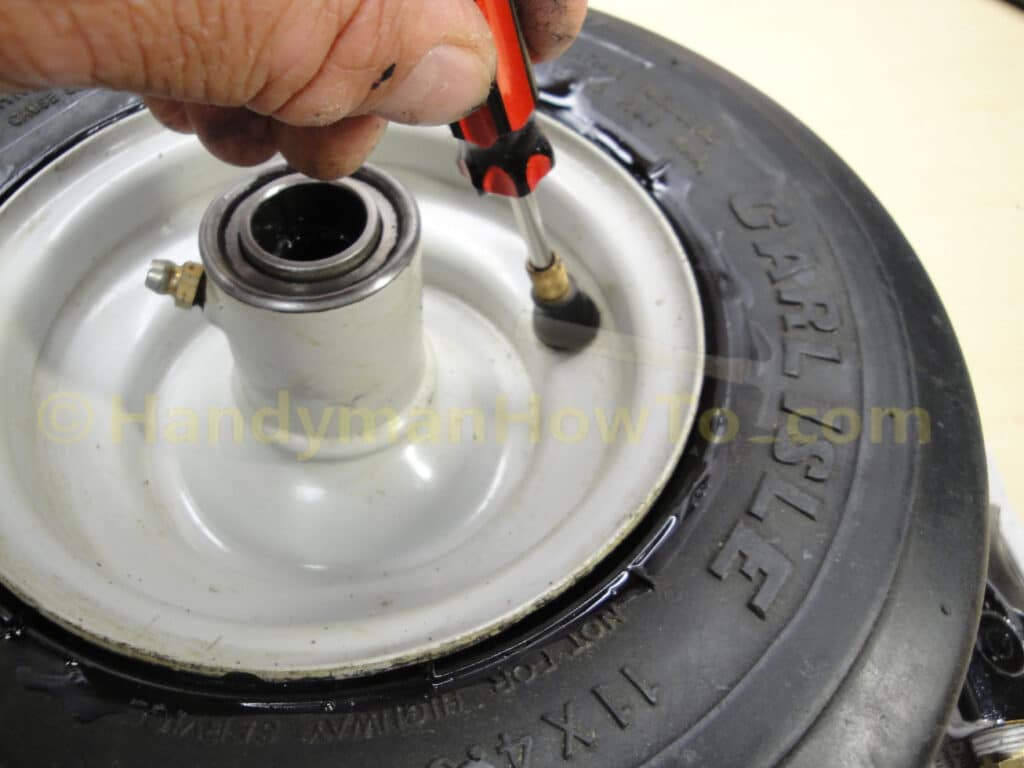
Install the Tire Schrader Valve Core
Insert the Schrader valve core back into the wheel valve stem. If your valve stem is damaged or dirty, you can buy replacements at the auto parts store for a couple of dollars.
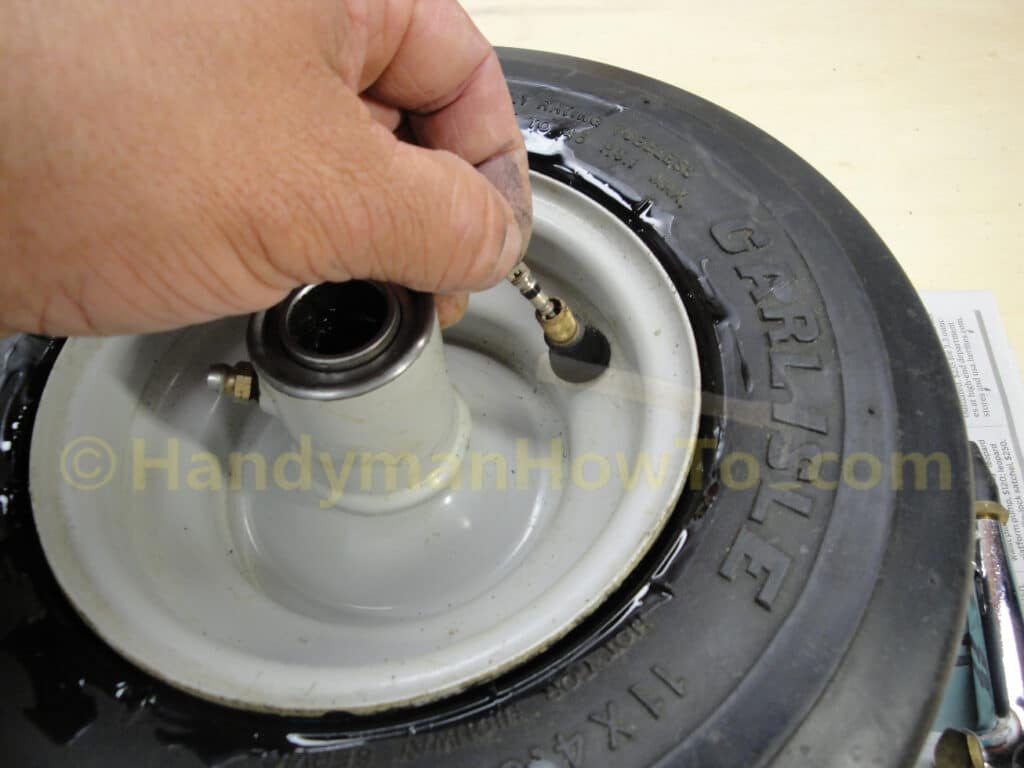
Screw the valve core into the valve stem with the valve core removal tool:
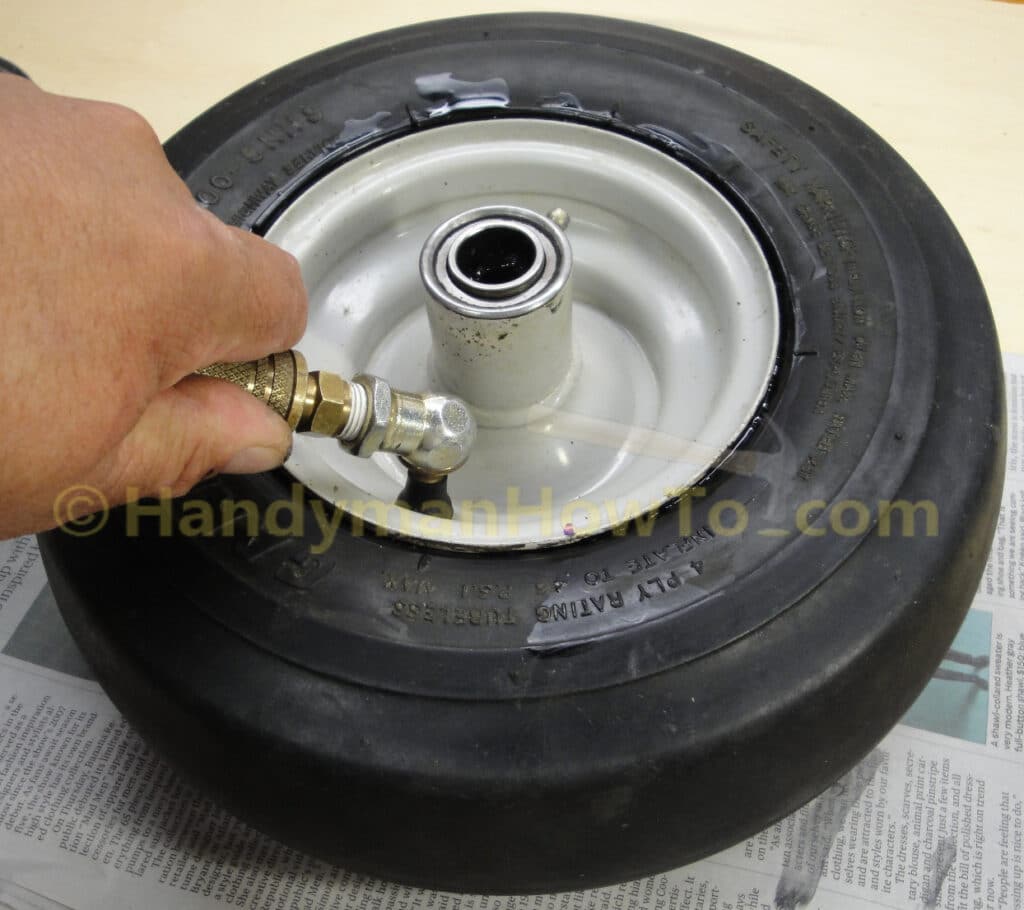
Inflate the Lawn Mower Tire
Inflate the tire with the tire chuck and air compressor. The recommended air pressure is stated on the tire sidewall. This tire should be inflated to 44 psi (Pounds per Square Inch).
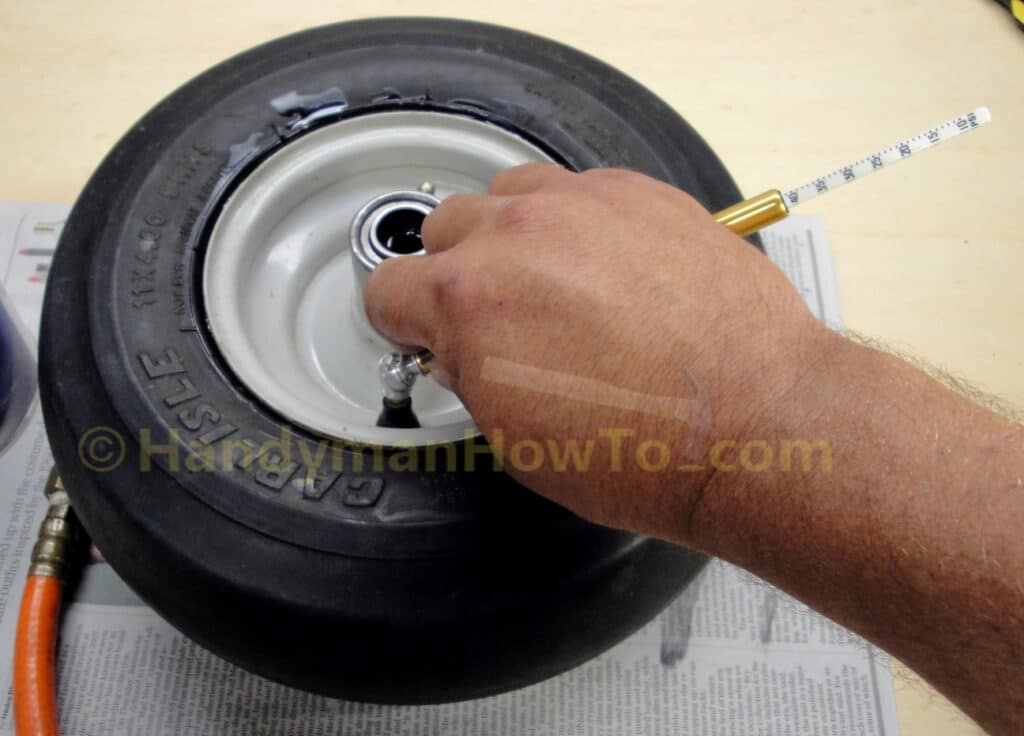
Check the tire pressure with the pressure gauge. The end of the gauge extends to the pressure reading. The pencil tire gauge is showing 42 psi.
Reinstall the Wheel on the Lawn Mower
Mounting the wheel back on the lawn mower caster frame is straightforward. With the lawn mower still on jacks, do the following:
- Insert the axle bushing in the wheel hub
- Hold the tire up to the caster frame so the center is aligned with the mounting holes in the caster
- Insert the axle bolt through the frame and wheel
- Screw on the axle nut
- Tighten the axle nut with the two socket wrenches
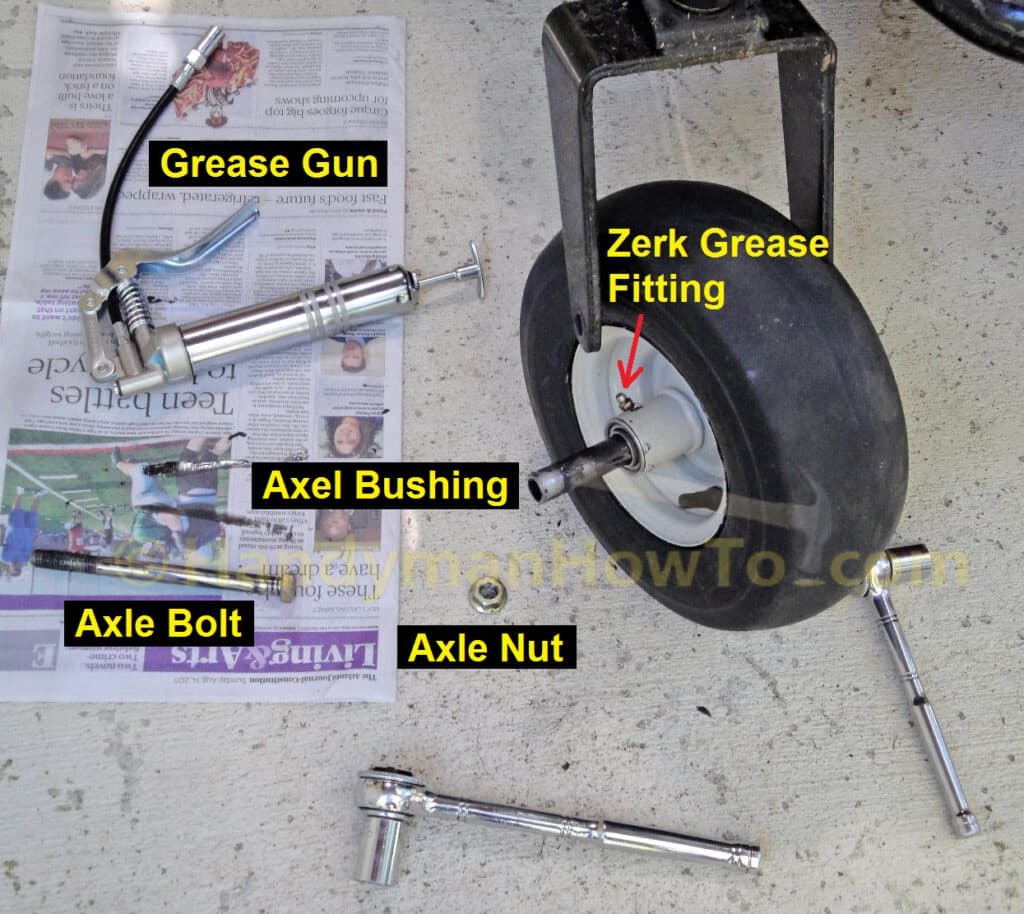
The axle bushing should be greased to replace any grease that was lost or wiped off when the bushing was removed. The bearing should also be greased for routine maintenance according to the lawn mower manufacturer’s maintenance schedule.
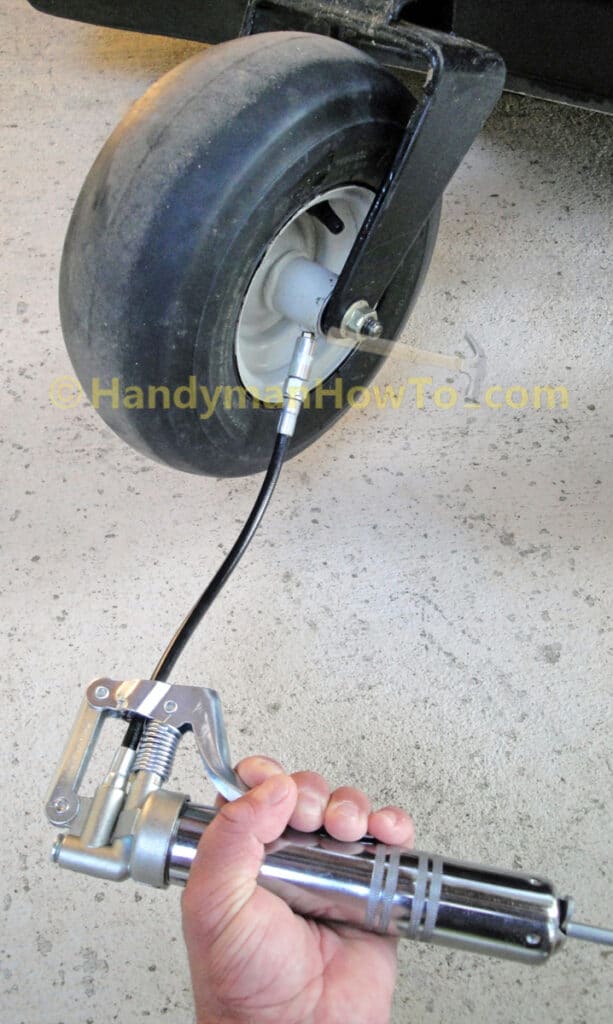
To grease the axle bushing:
- Check the Zerk grease fitting is clean and in good condition
- Pump the grease gun until grease is flowing
- Press the grease gun coupler onto the Zerk grease fitting. Check the fitting is secure
- Give the bushing 3 or 4 squirts of grease
- To remove the grease gun, angle the coupler off to the side and pull firmly
Sealing the tire bead definitely fixed the problem and the mower tires have held steady ever since. Before I was having to add air every two weeks.
Take care,
Bob Jackson
Excellent HOW TO explanation.
Well done Bob. Even a beginner could follow your instructions.
Really like you tire beed breaking tool. Well explained.
I have a similar problem with my 20″ snowblower. I will try your ideas. Thank you. May I point out that your instructions left out – testing the tire for leaks before re- installation.