I noticed rain water was leaking down the gas flue pipe into the attic. My home is heated by natural gas and two ‘Type B’ gas flue vents that convey the furnace and water heater exhaust gases to the outdoors. This project explains how to diagnose and fix the roof vent leak.
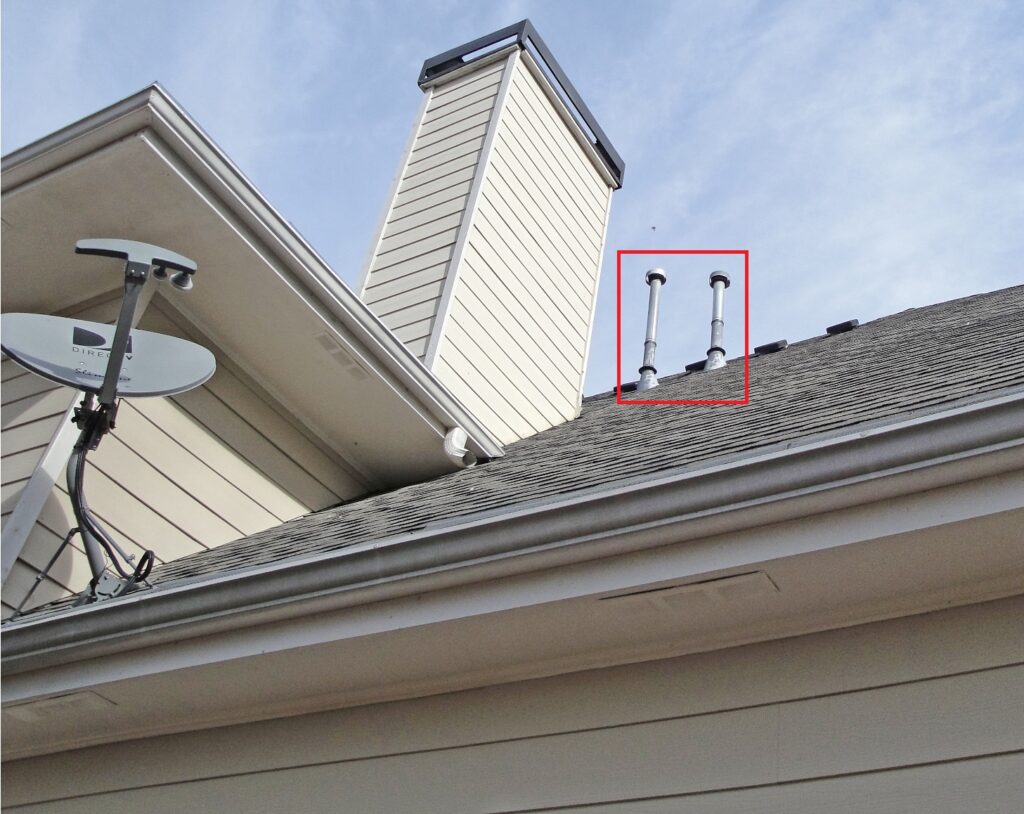
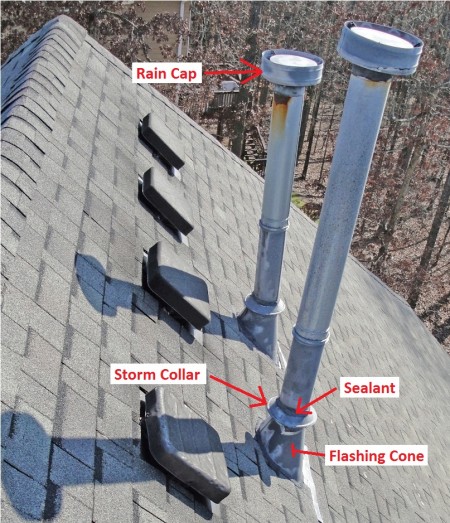
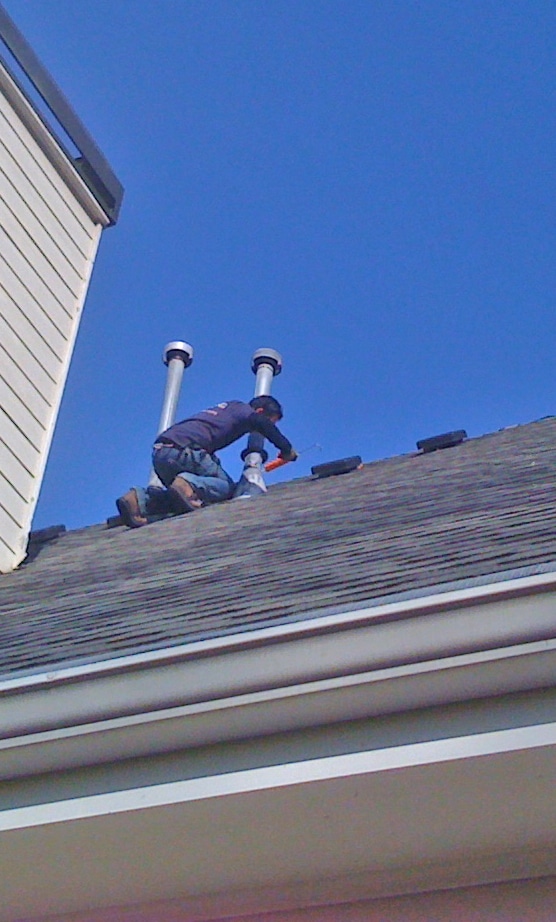
The gas flue vents are located high on the roof:
Locating the Roof Vent Leak
The primary combustion products of natural gas are carbon dioxide and water vapor. The water vapor can sometimes condense inside the flue pipe, pool and cause a leak. This most often occurs when the vent pipe is incorrectly installed with either:
- Insufficient slope – the pipe is laid too close to the horizontal.
I knew my problem was not caused by condensation buildup because it only leaked when it rained, even in warm weather when the gas furnace was off. - The pipe is too large in diameter, causing the exhaust gases to move to slowly.
Slow gas velocity means the pipe won’t heat up along the entire length and the water vapor will condense inside, pool and leak at a joint. When the furnace starts up, the pipe will be cold and there will be some initial condensation. However, a properly sized pipe will have sufficient gas velocity that the pipe will warm up, evaporate the initial condensation and the water vapor in the exhaust won’t condense until it hits the cool outside air. If in doubt, have an HVAC technician verify the pipe sizing for your system. The 4 inch diameter pipe on my system is correctly sized for the BTU loading. See this link for more information: Gas Vent Chimney Sizing & Application Guide by Hart & Cooley, Inc.
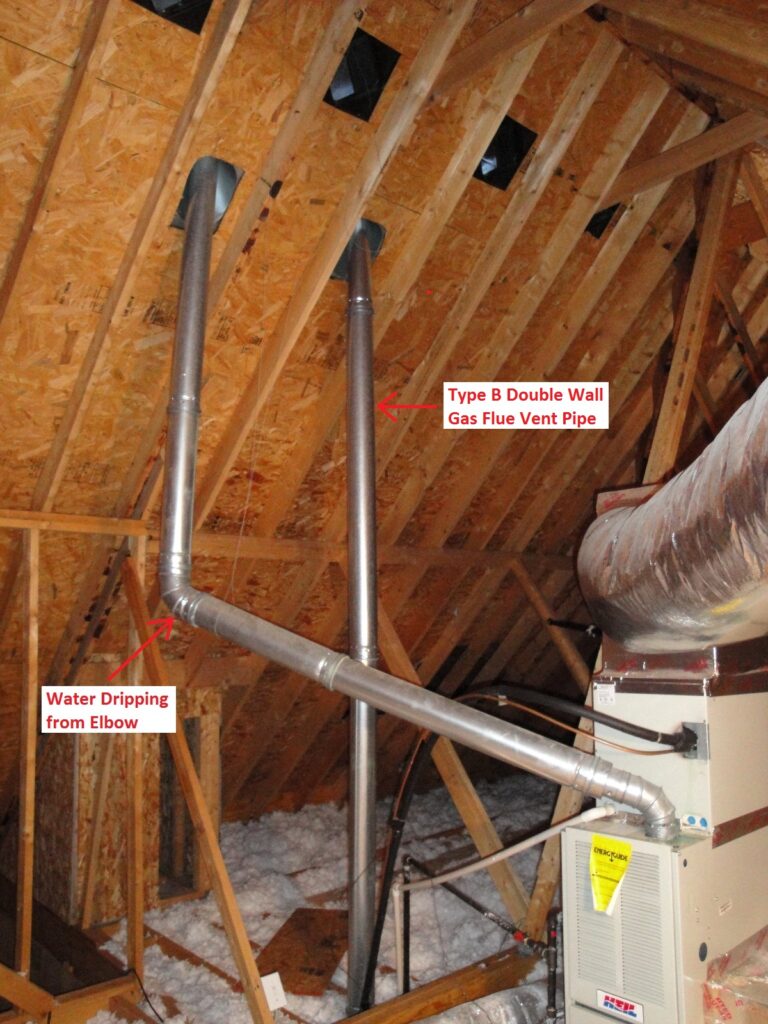
Of the two flue vents in the attic, only the pipe on the left in this photo leaked. Rain water would run down the outside of the pipe and drip off the elbow; maybe 1 drop per minute.
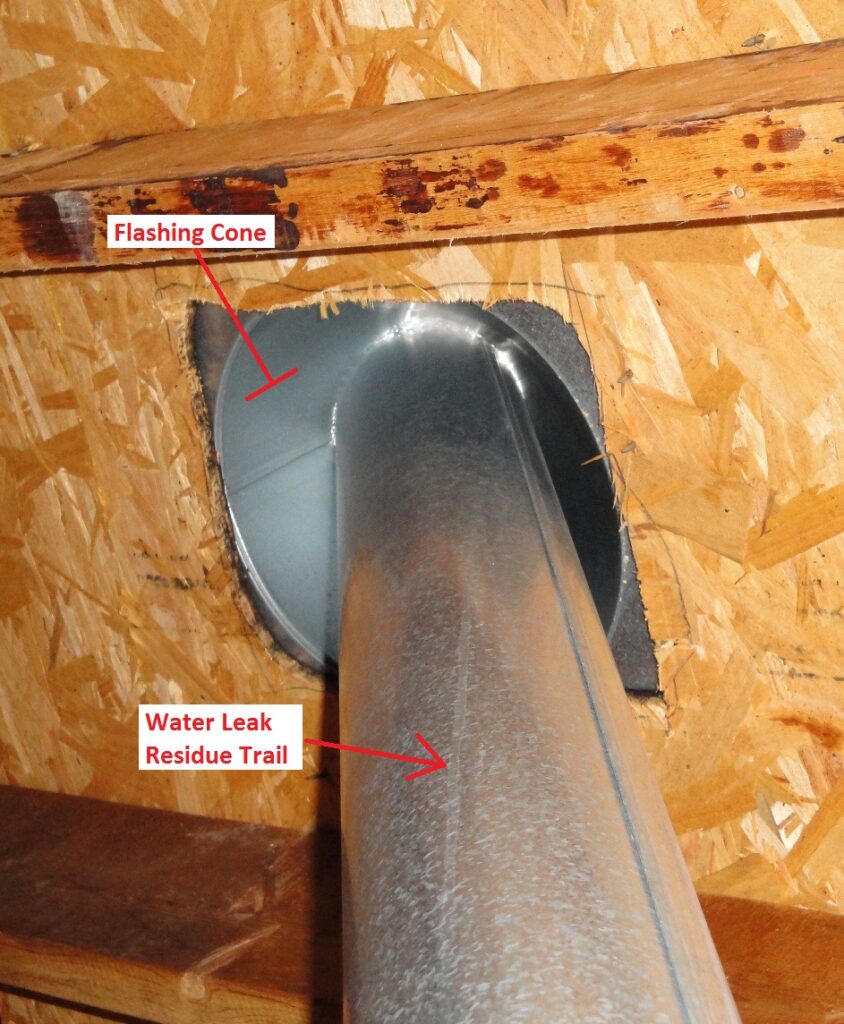
Looking up at the roof penetration, I could see a trickle of water down the side of the pipe when it rained. The water originated at the junction of the flashing cone and vent pipe. Fortunately, the leak was very slow and only wetted the insulation, not reaching the ceiling drywall.
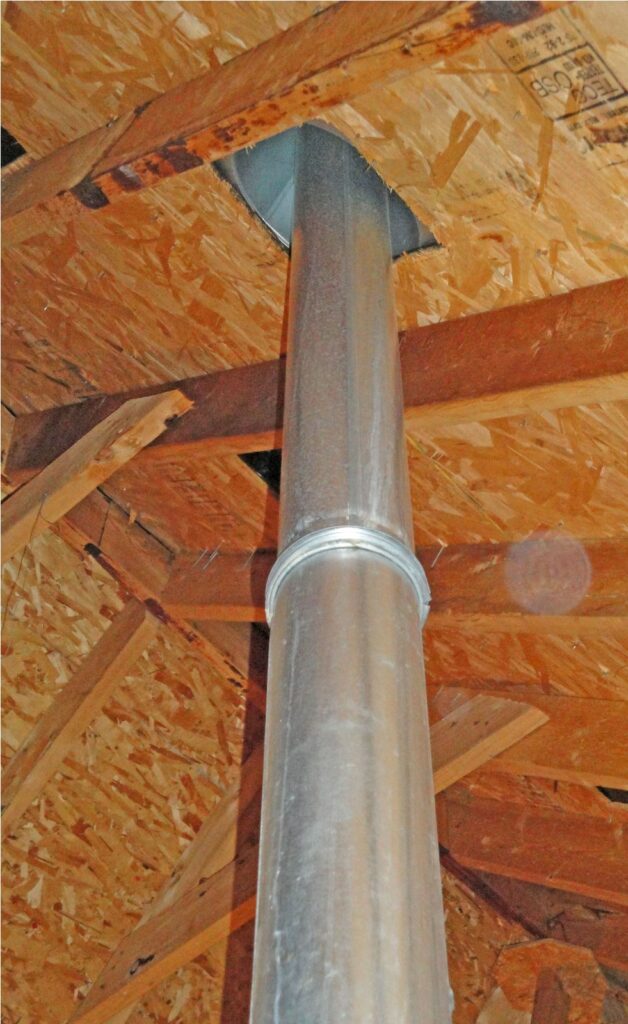
A larger view reveals several evaporation trails from the rain water leak down the side of the flue pipe.
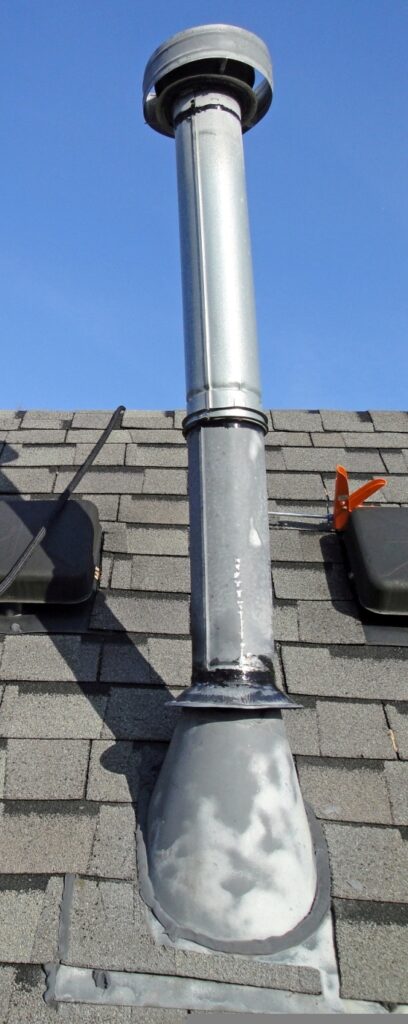
The gas vent stacks extend several feet (per building code requirements) above the roof. In addition to the rain water leak, it looks like I need to replace the rain cap and top section of vent pipe due to rust. I think it’d look better to paint these black, too. There’s nothing like a steep 10/12 pitch roof to get the circulation going!
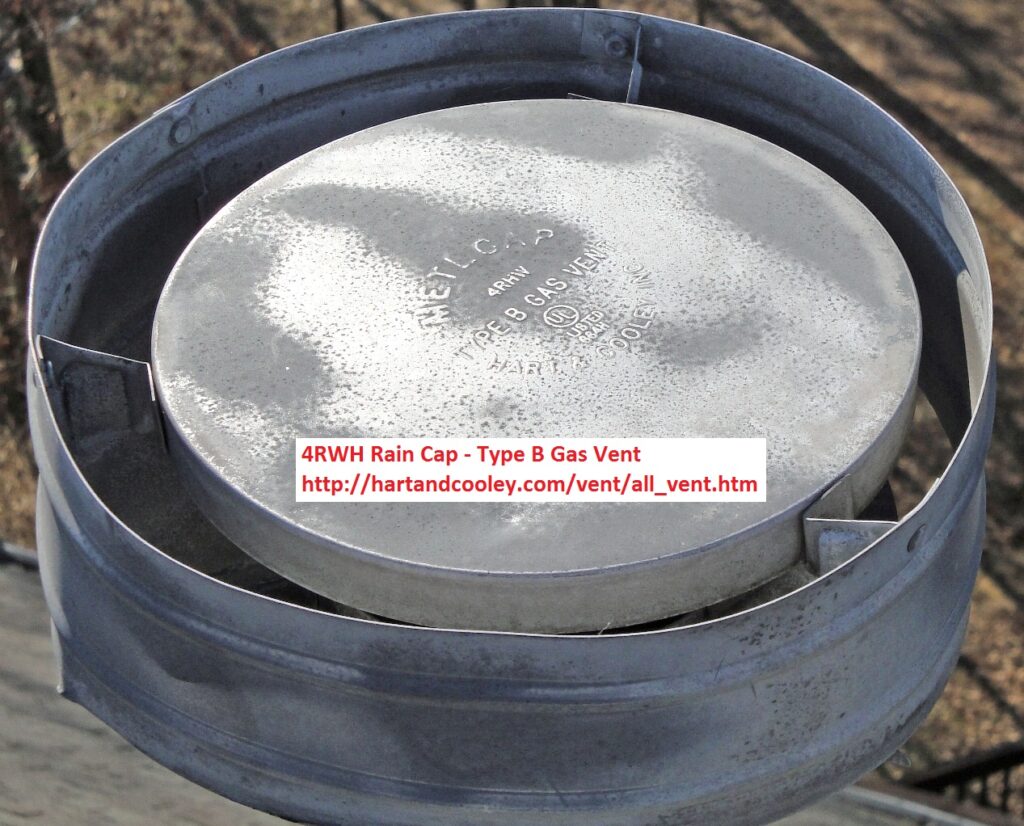
The gas vent pipe and various fittings are manufactured by Hart & Cooley, Inc. of Grand Rapids, MI.
Common Causes of Gas Vent Pipe Roof Leaks
There isn’t much structural support for the long and slender runs of gas vent pipe as you can see in the above photos. Wind loading causes the vent stacks to flex and possibly crack the sealant around the storm collar. The storm collar acts like an umbrella to prevent rain water from entering the metal-on-metal joint where the flashing cone meets the vent pipe.
Talking to several HVAC and Roofing companies, they said these gas vents can be a challenge due to the numerous metal joints. Leaks can occur at:
- The neck of the flashing cone where it meets the vent pipe. The storm collar is designed to protect this area.
- The rain cap if damaged or corroded.
- The vertical seam on the vent pipe or the flashing cone – only if corroded or compromised.
- At the junction between two vent pipes, especially if the pipe aren’t seated well or crooked.
The most likely places are the storm collar seal, vertical pipe and flashing seams and the rain cap.
Given the high steep roof, my regular HVAC guy wouldn’t take the job. He recommended that I find a HVAC contractor that does “new construction” or check with a roofer. The roofing companies I called were ready and willing to do the job, but cautioned that if I needed anything more than resealing the storm collar or roof flashing, I would need a licensed HVAC company. I felt confident the leak was coming in at the flashing cone / vent pipe junction and had the roofer do the repair.
Type B Gas Vent Information
The Hart & Cooley Type B installation instructions are a helpful for better general understanding of the topic. Always hire a licensed HVAC professional if you need to install or replace gas vent pipe systems. If done incorrectly, exhaust leaks can kill you or fill the attic with water vapor that will condense and cause numerous problems.
RTV High Temperature Silicone Sealant
Within the confines of this project – resealing the storm collar – the Hart & Cooley Installation Instructions state on page 6:
The RS storm collar must be placed immediately above the roof flashing. The storm collar must be sealed with roof cement or RTV silicone to seal the joint between the storm collar and the vent pipe. The storm collar provides protection against the entrance of any moisture into the flashing.
(See Figure 12.)
I chose the Rutland 500°F RTV High Heat Silicone Sealant to reseal the storm collar. The Rutland product is a “tough rubbery adhesive seal and maintains its flexibility at 450°F continuously and 500°F intermittently” which is recommended for this type of application.

The attic leak is believed to be caused by a bad seal around the storm collar. The storm collar acts like an umbrella to prevent moisture from entering the joint where the flashing cone meets the vent pipe.
Fixing the Flue Vent Storm Collar Leak
The storm collar simply slides over the pipe. To raise the storm collar, the old sealant is scraped off. The storm collar is raised to remove any sealant below the collar and to inspect the flashing cone / vent pipe junction.

The flashing cone was sealed to the vent pipe with metal foil HVAC tape. The metal tape looked to be in good condition, and after 10 years, appeared to be permanently fixed to the pipe. We therefore decided to leave the metal foil tape in place.
Old Vent Sealant
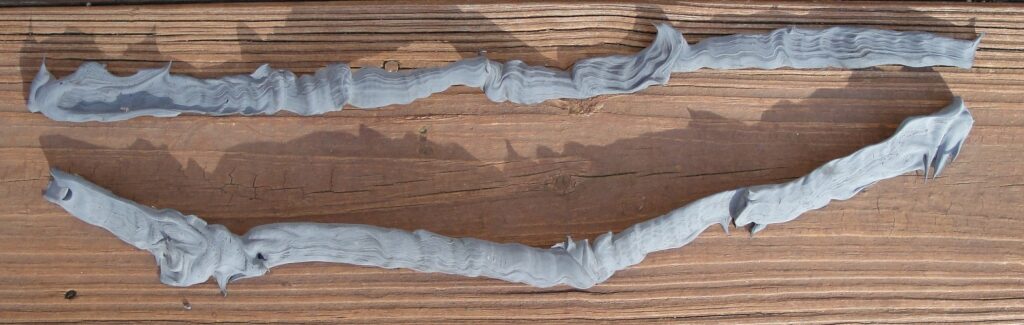
I expected the old sealant would have to be scraped off the with a 5-in-1 tool. Much to our surprise, the old sealant around the storm collar fell away in a single long ribbon! This stuff wasn’t doing anything to prevent rain leaking in! The old sealant was very flexible – like a large rubber band – but lacked any and all adhesion to the metal collar and vent pipe.
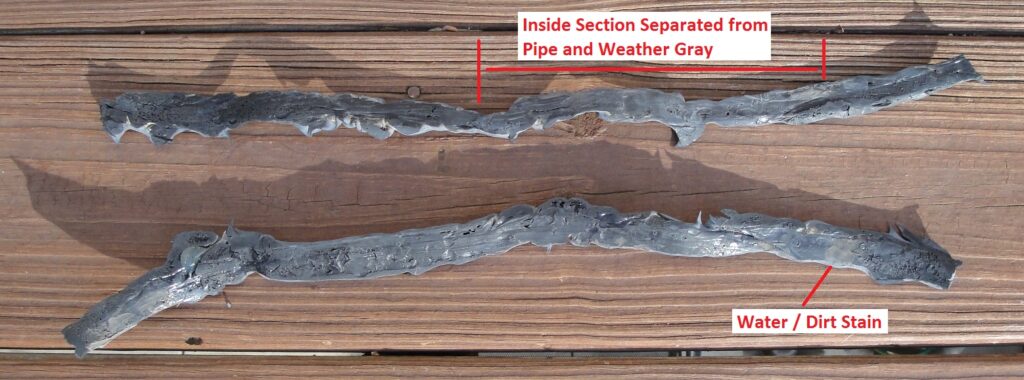
The interior side of the old sealant (where it met the metal surfaces) was weathered in sections with clear signs of water/dirt stains. It’s obvious this wasn’t a water-tight seal.
Reseal the Storm Collar
A bead of the Rutland 500°F RTV High Heat Silicone Sealant was applied just above the flashing cone, the storm collar slid down the pipe and back into the place, then a liberal amount of RTV sealant applied to the storm collar. The roofer in this photo is roped off with a safety harness around his waist and thighs. He’s also wearing Cougar Paws roofing boots.
Roof vent with new RTV sealant on the storm collar.
The Flue Vent Still Leaks!
The next time it rained the roof vent still leaked. The leak was no worse, but no better. The storm collar wasn’t the source of my leak.
The roofer said there was severe rusting at the rain cap that couldn’t be seen from the ground. This isn’t normal for galvanized pipe. The rust was significant for a 10 year old installation.
I e-mail this and other photos to a Hart & Cooley, Inc. representative explaining the leak and failed repair. The technician rain water could be getting inside the double-wall pipe, or water could be channeling down the vertical pipe seam. The best option is to replace the pipe and rain cap; the quick fix would be to apply silicone sealant to the vertical pipe seams. I opted for a total replacement.
Repair Cost
The total cost of this repair was the minimum $200 fee for a service call by the roofer. While the roofer was up there, I also had the other PVC pipe boot replaced that wasn’t done earlier in the year as a preventive measure.
Replacing the Roof Flue Vents
Update: Due to the corrosion and the rain water leak still not being fixed, I decided to replace the roof vents. See Furnace Roof Vent Replacement Tutorial article for details.
Take care,
Bob Jackson