How to fix a leaky shower drain with a lock nut against the bottom of the shower pan. This series is continued from How to Fix a Leaky Shower Drain – Part 7.
Reader Question: Leaky Shower Drain
I received this question from a HandymanHowTo.com reader with a leaky shower drain in loft shower:
Hello Bob,
I live in a loft with concrete floors and it has a small shower stall up on wood. My shower starting leaking about a week ago and at first I thought it was the caulk around the shower so I replaced it but it still leaked. So I took off the step in front of my shower to get underneath and ran water and found the leak coming from the drain body. So after finding this wonderful site, I tried to repair it but I am having trouble getting the strainer body to release. I’ve tried channel locks and a long screw driver but still no luck. I was wondering if you have any other tricks or tips.
Also mine does look slightly different from the one pictured, it has two square pegs cutout and those are what I’ve been trying to use for leverage.
Thanks,
T. Sparks
I asked Mr. Sparks to send photos of the shower drain to better understand the situation. Mr. Sparks replied:
I’m currently working 4 part time jobs and going to school so I’ve been quite busy lately. Anyhow here are the photos of the shower drain. I just unscrewed the locking nut and it still won’t budge and it really looks as though it’s been glued in with the purple plumbers glue. If this is the case is there anyway of taking this out without cutting the pipe?
Leaking Loft Shower Drain
Here’s the shower pan and strainer body photos provided by Mr. Sparks. The drain is stamped with the manufacturer’s information E.L.M. CLEVE OHIO PVC DWV 2″ 42-304. I searched the Internet but was unable to find the manufacturer or drain model.
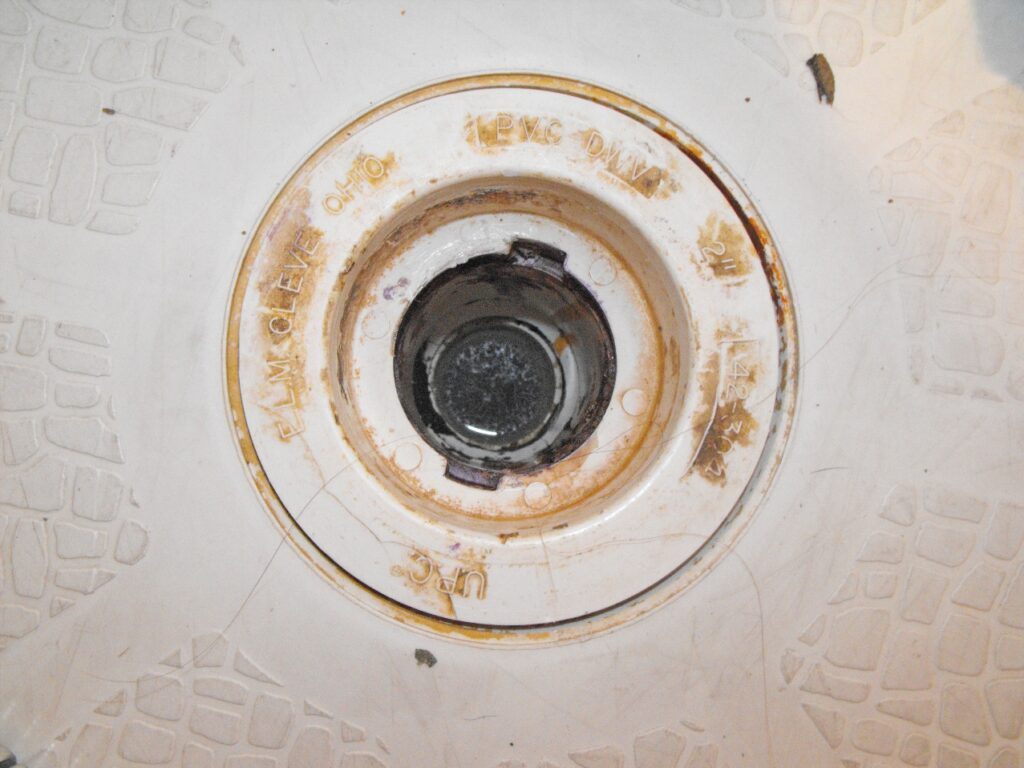
The strainer body screws into the drain and has two notches to accept a shower drain wrench like this one.
View of the leaky shower drain and PVC plumbing on the elevated wood platform:
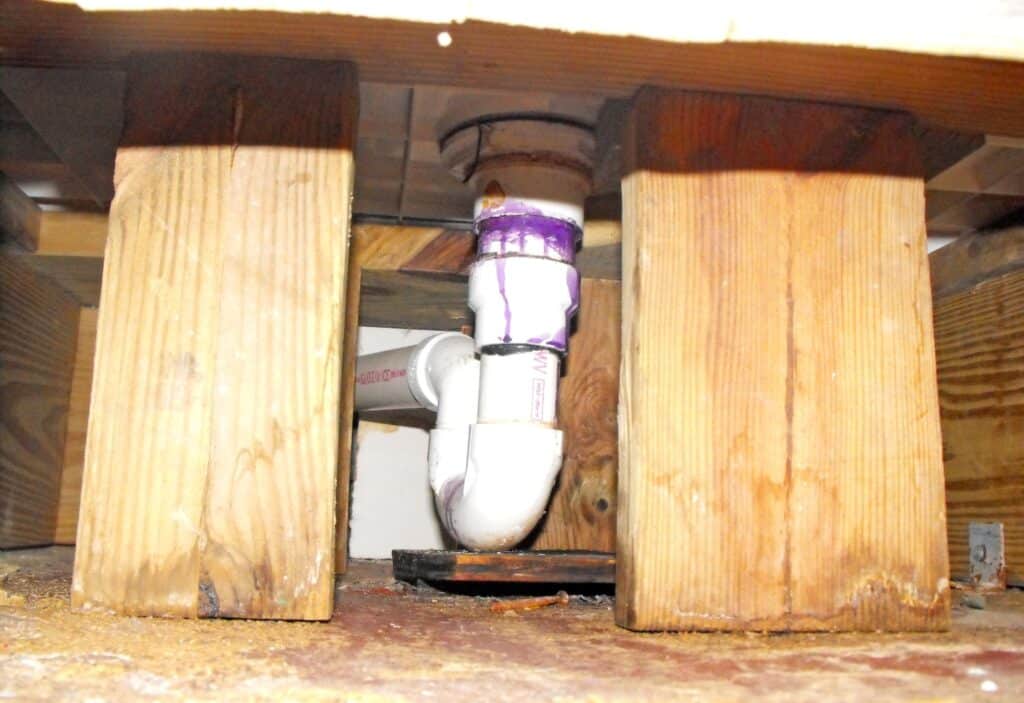
Closeup of the leaking shower drain in this next photo. This shower drain is a “solvent weld” model meaning the drain body is glued to the 2 inch PVC drain pipe. A standard 3.5 inch PVC lock nut compresses the black rubber gasket against the bottom of the shower pan for a water tight seal. A reducing coupler is used to adapt the 2 inch PVC pipe from the drain to the 1.5 inch PVC pipe to the P-trap.
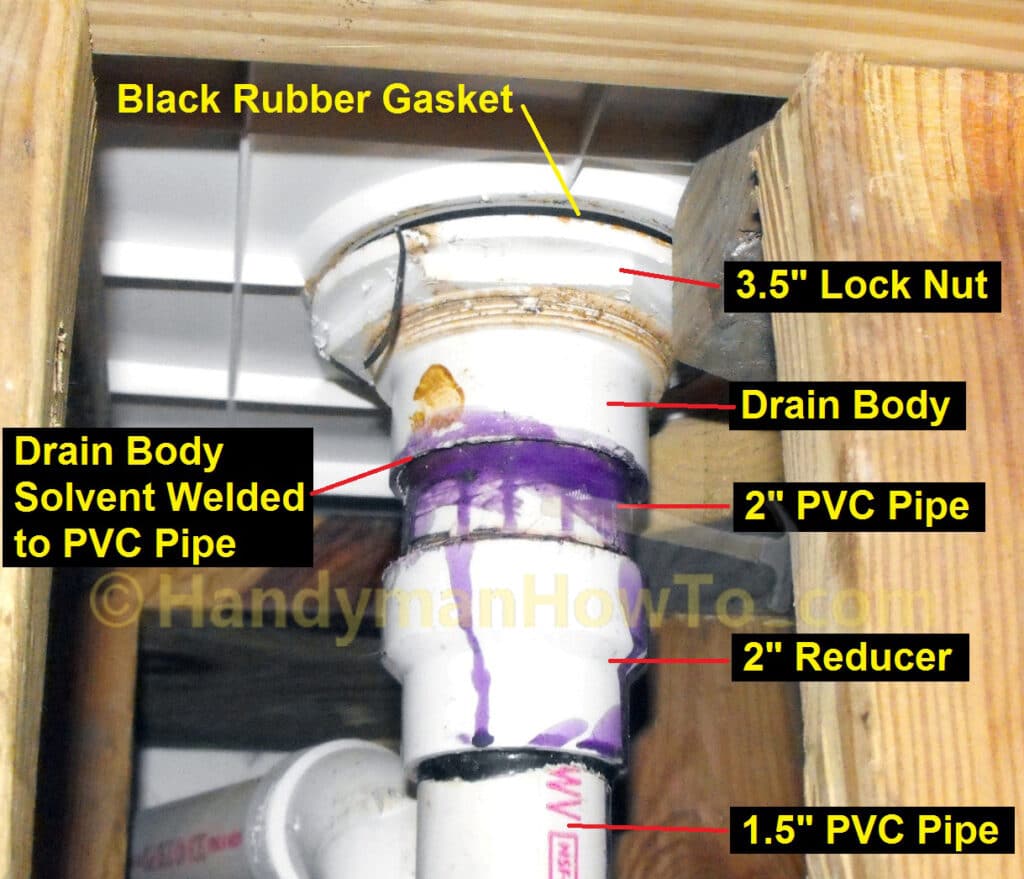
Shower Drain and Lock Nut Assembly
It helps to understand how the shower drain fits together before talking about the repair steps.
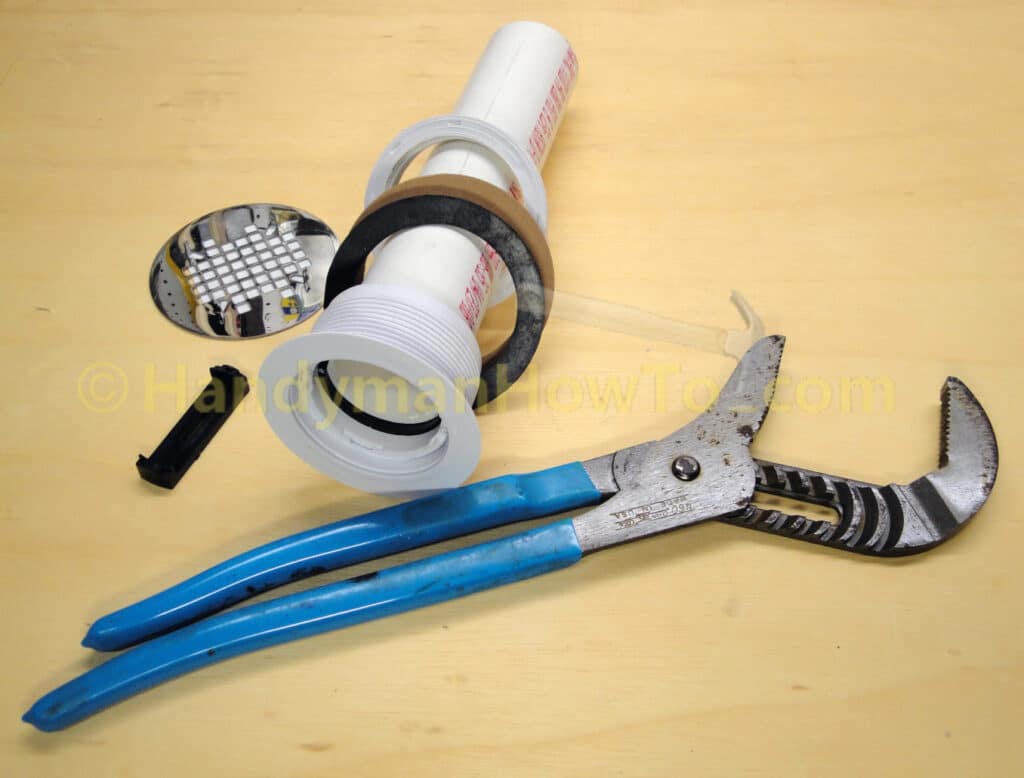
The loft shower drain is a solvent weld model, however it is similar to the Sioux Chief Shower Drain shown below. The key items being the drain lock nut is tightened to compress the black rubber gasket against the bottom of the shower pan to make a water tight seal. (Note the 2PK model has a cylindrical black rubber compression gasket inside the drain body instead of a bare plastic as for a solvent weld drain, but let’s ignore this minor difference for now.)
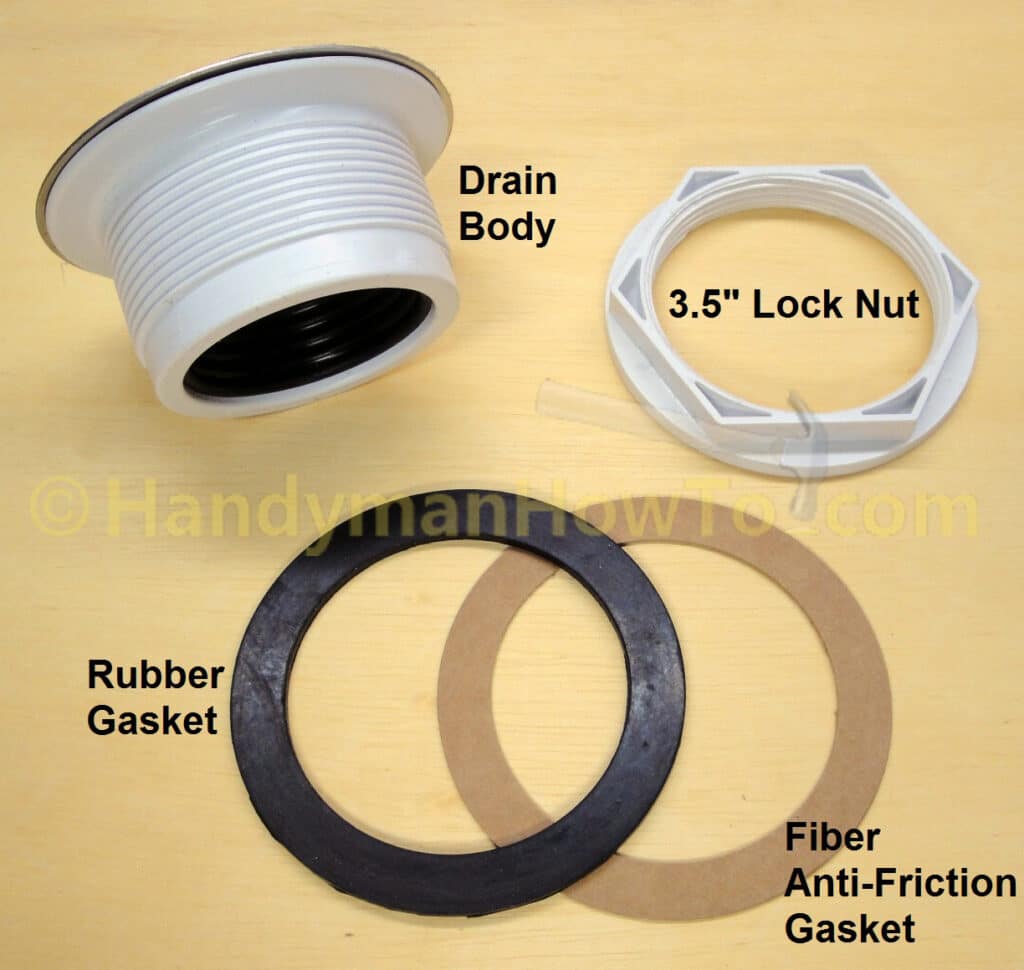
Below is shower drain as it installs on a 2 inch section of PVC drain pipe with the gaskets and lock nut arranged in the order of installation. For old work when repairing a shower drain, a large pair of Channellocks is needed to work the 3.5 inch lock nut.
The adjustable jaws on the Channellocks will open to 3.5 inches to fit the shower drain lock nut:
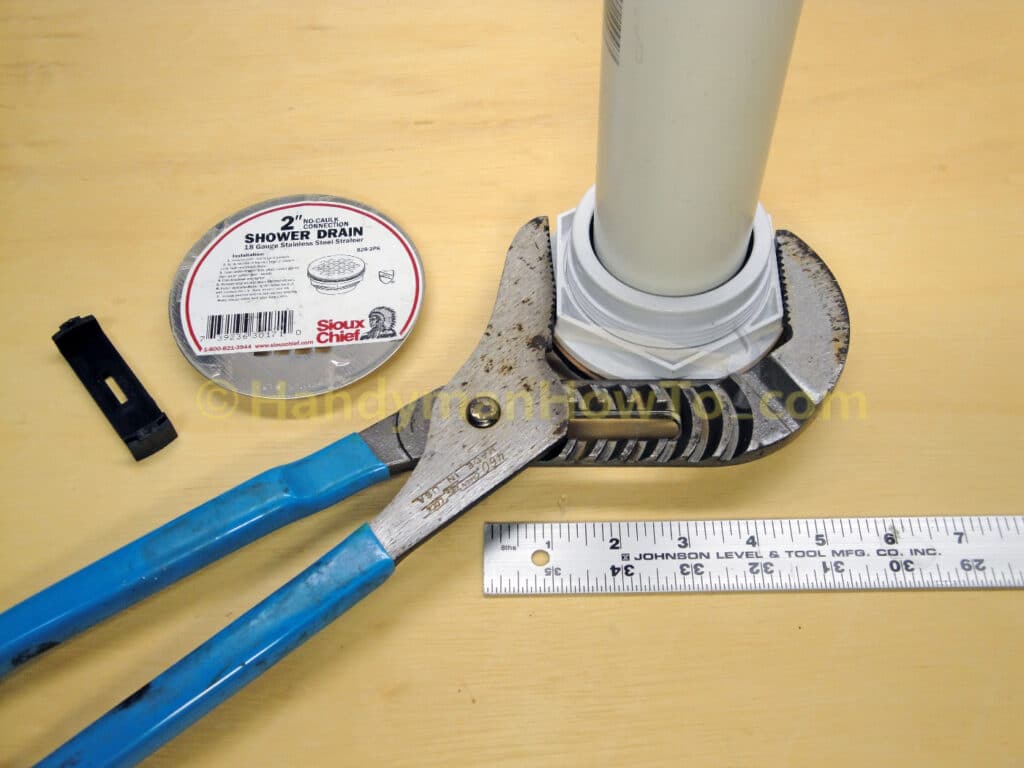
E.L.M. PVC 2″ Shower Drain 42-304 Details
The E.L.M. model 42-304 shower drain looked like a hybrid compared to traditional drains because it appeared to have both a screw-in strainer body and a bottom lock nut. I asked Mr. Sparks to unscrew the 3.5 inch lock nut, drop the black rubber gasket down the pipe and push up on the U-bend to see if the drain would raise up above the shower pan. Here’s the photos provided by Mr. Sparks…
View of the loft shower drain after unscrewing the lock nut and dropping it down the pipe along with the rubber gasket. Notice the brown evaporation ring around the bottom of the shower pan drain hole where water has been leaking.
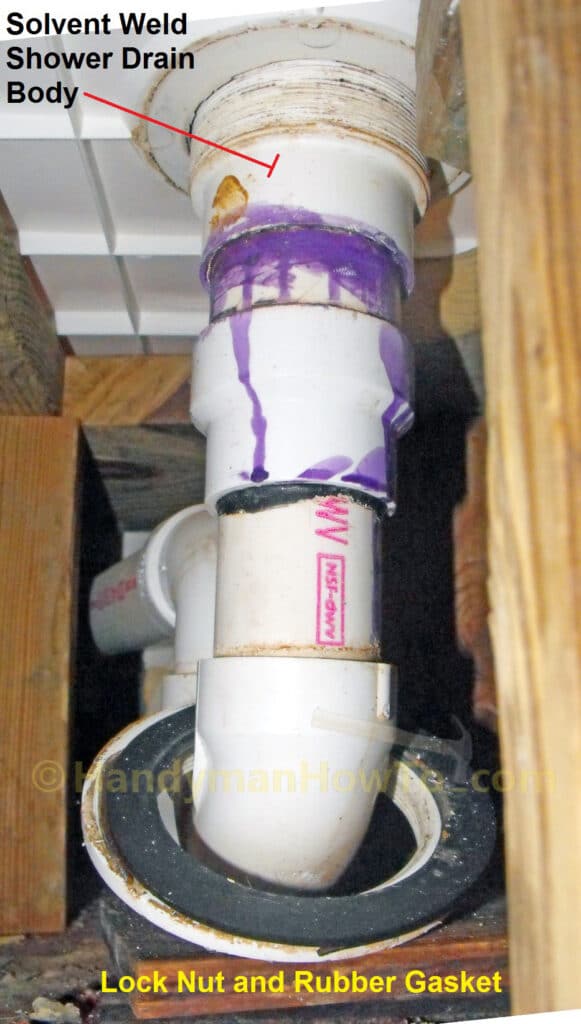
Mr. Sparks reported he was able to unscrew the lock nut by hand! The lock nut should be tight and require a wrench to loosen. A loose lock nut will not compress the black rubber gasket to make a watertight seal and will definitely cause a leak. My guess is the lock nut worked itself loose over time as the shower pan flexed slightly when a person steps in the shower.
Overall, the rubber gasket looks in good shape.
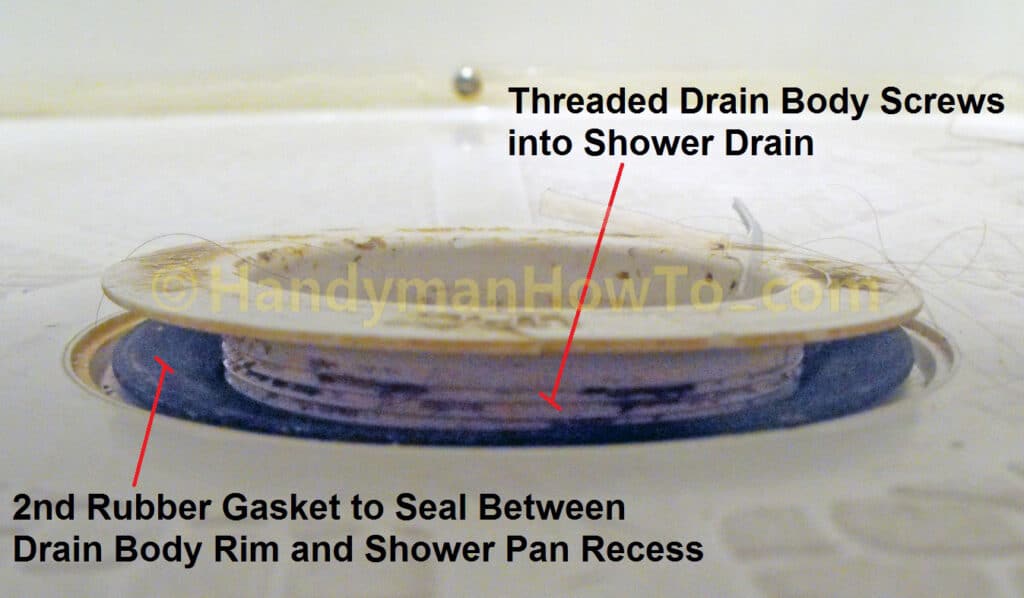
When Mr. Sparks pushed up on the U-bend, the shower drain body easily popped out of the shower pan drain hole recess revealing two interesting facts:
- The strainer body is threaded and therefore screws into the solvent weld shower drain body.
This confirms the purpose of the two notches inside the strainer body – which are there to accept a drain wrench. - A second black rubber gasket is used instead of silicone caulk or Plumber’s Putty to seal between rim of the strainer body and shower pan.
Leaky Shower Drain Repair Advice
My repair advice is:
- Get the Shower Drain Wrench.
- Unscrew the 3.5 inch lock nut from the bottom of the shower pan with Channellock or a similar wrench. This will relieve the clamping pressure on the strainer body.
Note: We already know the lock nut was loose (causing the leak) because Mr. Sparks was able to unscrew it by hand. - Use the Pasco drain wrench to unscrew the strainer body – take care to hold the drain body so as not to torque the drain pipe and P-trap.
If the Pasco wrench is too wide, grind down the ends to fit the notches in your drain.
Idea: Since the strainer body will lift out of the shower pan recess, you might be able to unscrew it with a rubber grip cloth used to open jar lids instead of the drain wrench. - Inspect the strainer and shower pan for cracks.
- Clean the dirt and crud from the strainer body, drain body and rubber gaskets as explained in the earlier installments of this series.
- Reassembly the drain by:
– Screw strainer body in over the shower pan gasket.
– Screw on the lock nut and tighten with a wrench to squeeze the bottom rubber gasket and clamp the strainer body down on the shower pan. Don’t over tighten the lock nut so as to avoid cracking the PVC plastic drain. - Run the shower and check for leaks.
Tighten the lock nut another 1/4 turn if a leak is noticed. Run the shower again and look for a leak. Recheck after a day or two to catch any very slow leaks.
Optional: Replace the Shower Drain Gaskets
Since the black rubber gaskets appear to be in good shape, this step is optional, but I would also replace the two rubber gaskets.
I verified with a new drain on my workbench the rubber drain gasket will stretch and can be slipped over the rim of the strainer body.
To replace the two rubber gaskets on this drain, do the following:
- Before reassembling the shower drain – meaning with the strainer body unscrewed and the top rubber gasket set aside – tie a piece of orange or yellow construction string (or kit string) to a new bottom shower drain gasket.
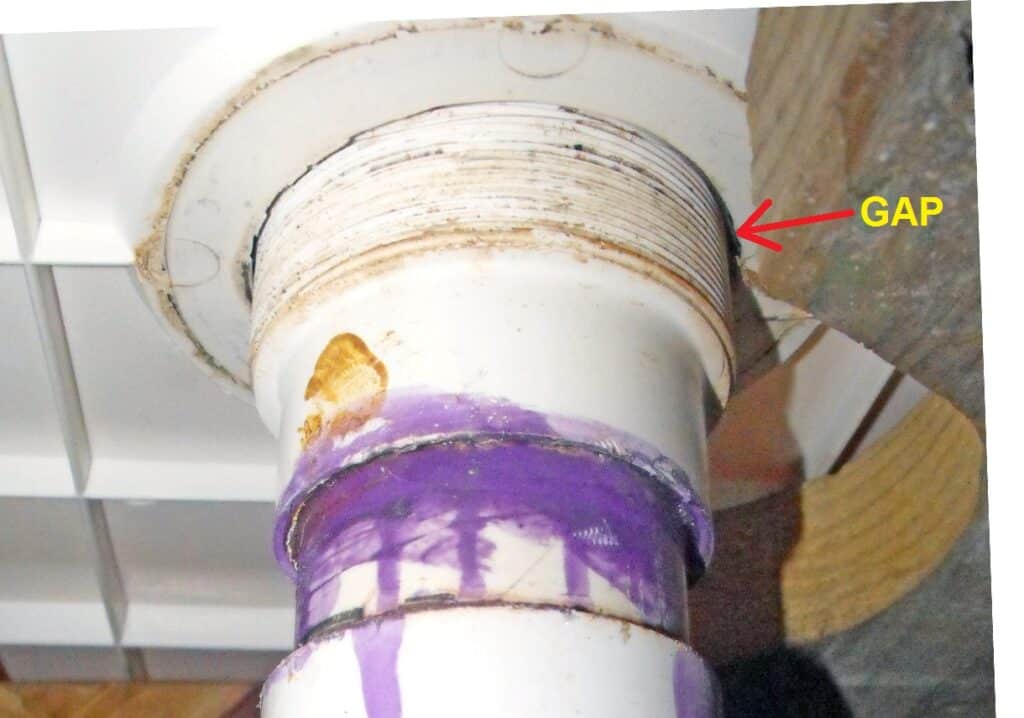
- Drop the end of the string through the gap between the shower pan drain hole and drain body as noted in the photo below.
- Pull on the string to start a section of the new gasket down the gap.
- Grasp the new gasket with your fingers and work around the shower drain body through the gap with the shower pan.
Mumble cuss words as needed, but the gasket will eventually make it through the gap. - When the new gasket is completely through and sitting on the old rubber gasket, cut off the old gasket with scissors.
- Reassemble the drain in the normal way.
Remember, to also install a new gasket under the rim of the strainer body.
Good luck!
Bob Jackson