This project shows how to install a Burnaby Natural Gas Outlet model G0101-SS-50-120DC on a wood deck for a BBQ grill. This project is continued from Burnaby Natural Gas Plug Overview.
Problem & Motivation
When I bought my home several years ago the previous owners had installed a natural gas branch line out to the wood deck for a BBQ grill with a basic shutoff valve. The problem is the gas valve was not protected from the weather causing the Quick Connect socket to rust and seize. I replaced the shutoff valve and socket but it was not an ideal solution. Later I built a roofed porch on the wood deck and had to relocate the natural gas line. This time I used a Burnaby Gas Plug – also called a “gas outlet box” – for a professional looking and safer gas appliance connection.
Gas Building Permit
Some jurisdictions only allow gas plumbing work by qualified, licensed plumbers/contractors. Contact your local Building Dept. to determine if homeowners are allowed to do their own natural gas installation. Always file a Building Permit and obtain the required inspections. The building codes are based on the International Fuel Gas Code (pay special attention to Chapter 4 – Gas Piping Installations) with potential local amendments. Natural gas installation errors and leaks can be unforgiving with potentially deadly consequences. If in doubt hire a licensed plumber / gas fitter.
In my area homeowner’s are allowed to do their own gas pipe installation. I visited my local Building Dept. to file a permit for extending the BBQ grill natural gas branch line with photos and drawings of the proposed work. The building inspector explained a permit wasn’t needed for this small job because gas permits were intended for major work such as piping an entire home or a heated swimming pool. I said I’d like to file for a permit anyway but the front desk declined. I was disappointed because I’d already bought a gas test gauge and fittings to disconnect the meter and pressure test the house piping in anticipation of a final inspection.
Shut Off the Natural Gas
My house does not have a main or “house-side” shutoff valve in the home. There I have to shutoff the gas at the “street-side” valve on the supply side of the natural gas meter.
Contact your natural gas company. Gas companies prefer that you do not turn Off the gas except in an emergency. More importantly turning the gas back On requires special care to prevent gas leaks, fires and explosions. The gas company can turn off the gas for you and when you’re ready, turn it On, relight and check your appliances.
The next steps are for information only and most homeowners should hire a qualified and licensed plumber.
Cautionary Gas Shutoff Steps:
- Turn off all natural gas appliances in the home including fireplaces, cook tops, clothes dryer, water heater, furnaces, etc. Each appliance should have an individual gas supply shutoff valve. See the furnace and fireplace shutoff valves for examples.
- Determine which appliances have electronic ignition (e.g. furnaces, cook tops) and which ones require manually relighting a pilot light.
My water heater is the only non-electric ignition gas appliance that I have to manually relight. Check your the gas appliance user manuals for start-up procedures.
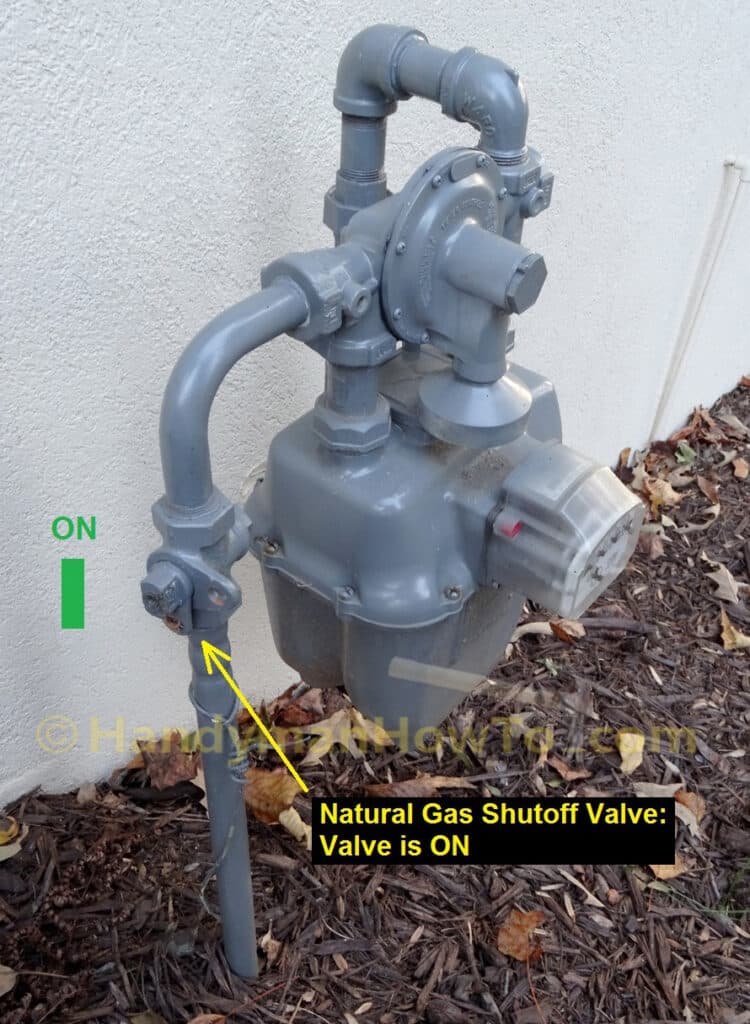
The street-side natural gas valve at the meter is in the On position.
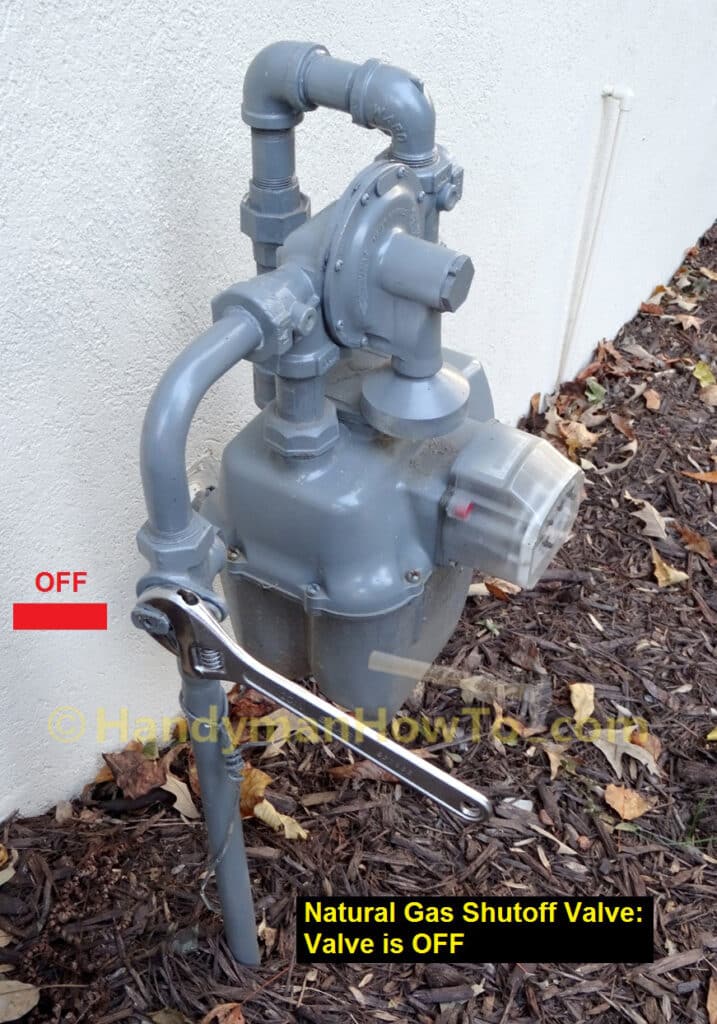
Use a wrench to shut off the gas by turning the valve 90 degrees:
How to Install a Burnaby Natural Gas Outlet
The Burnaby Manufacturing G0101-SS Gas Plug Installation video is excellent and explains how the outlet box is connected to piping in an exterior stud wall:
My installation is a bit different because the gas pipe is run under the wood deck for a BBQ grill.
Natural Gas Branch Line
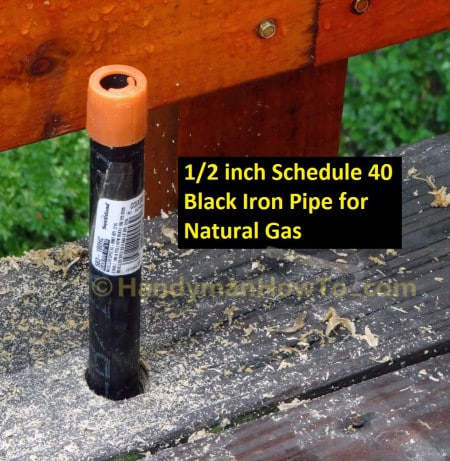
I installed about 18 feet of 1/2 inch Schedule 40 black iron pipe and elbow fittings under the wood deck to extend the natural gas branch line to a new location well outside the new roofed porch.
The Burnaby gas plug will be mounted to the 4×4 deck post in the following photo. I drilled a 1-1/4 inch diameter hole in the deck board to bring the pipe up just inside the bottom 2×4 deck rail. The hole is offset to the left of the 4×4 post due to the placement of the deck joists:
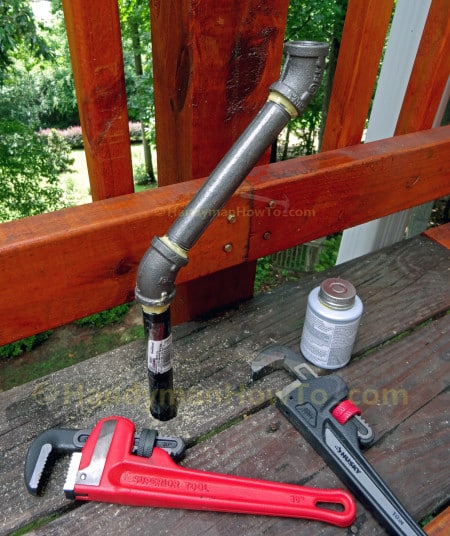
Two 45 degree elbows are needed to align the gas pipe with the 4×4 post where the Burnaby gas block will be mounted. I applied generous coat of RectorSeal No. 5 pipe thread sealant on the pipe threads:

Then tightened the bottom elbow followed by the same for straight pipe nipple and upper 45 degree elbow using two pipe wrenches. Take care to hold each lower section stationary with a pipe wrench when tightening the next fitting to avoid twisting and stressing the other pipe joints:
Burnaby Gas Block – Install the Valve Assembly
I decided a 5 inch long pipe nipple will place the Burnaby gas block at a convenient height above the deck and “dry fitted” the parts to estimate how close the riser pipe needs to be with the 4×4 deck post for mounting the stainless steel enclosure:
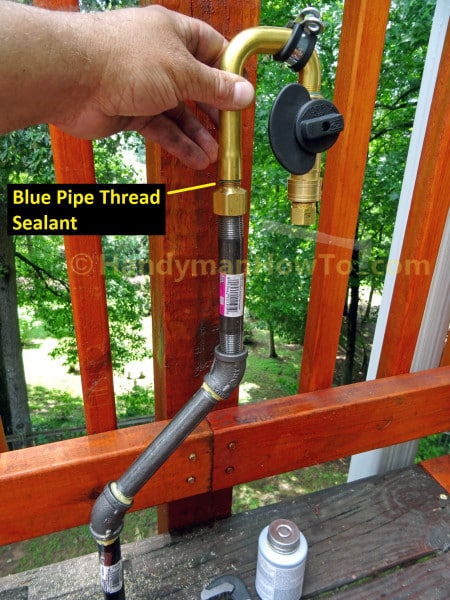
Important! Notice that factory applied blue pipe thread sealant in the above photo? If you put a pipe wrench on the valve tube or brace it with your hand when tightening the black iron pipe nipple it could break the blue sealant and cause a gas leak.
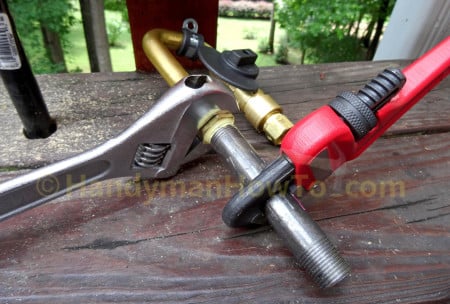
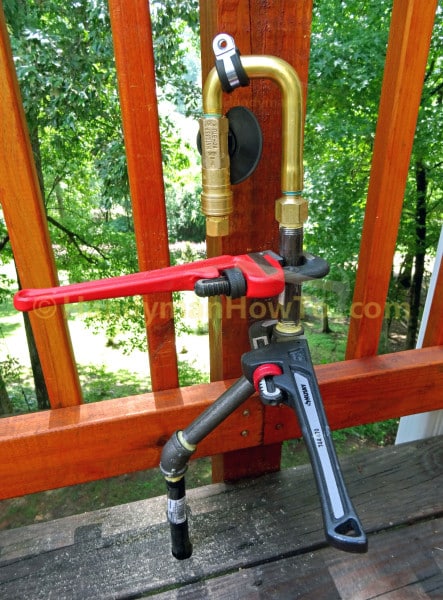
The correct method is to put an adjustable wrench on the valve hex nut then tighten the 1/2 inch black iron pipe nipple with a pipe wrench. (RectorSeal No 5 was applied to the pipe nipple threads before assembly.):
The bottom end of the pipe nipple is coated with RectorSeal No 5, then brass valve assembly and pipe nipple is tightened on the 45 degree elbow:
Burnaby Gas Block – Mount the Stainless Steel Enclosure
After final alignment of the two 45 degree elbow joints to bring the pipe closer to the 4×4 post, the next steps are:
- Slide the stainless steel enclosure behind the valve assembly and align it with the pipe strap mounting hole.
The pipe strap is located at the center of the brass U-bend (see the following photo). - The pipe strap is fastened with a wood screw which penetrates the 4×4 post.
- The back of the enclosure is fastened with wood screws to the 4×4 post.
I used Simpson Strong-Tie SD #9 x 2-1/2 inch long hex head wood screws. The stainless steel enclosure is a wider than the 4×4 post so I couldn’t install a 4th mounting screw at the top right position in back of enclosure, but with 3 structural wood screws it’s not moving:
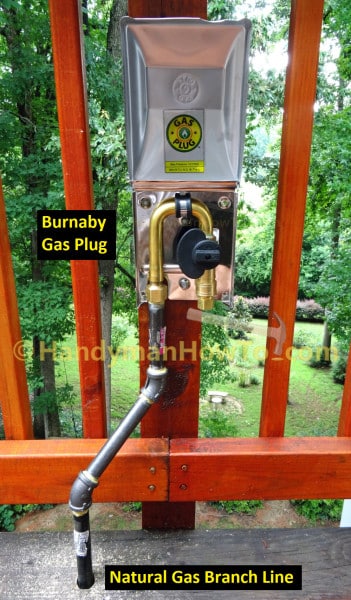
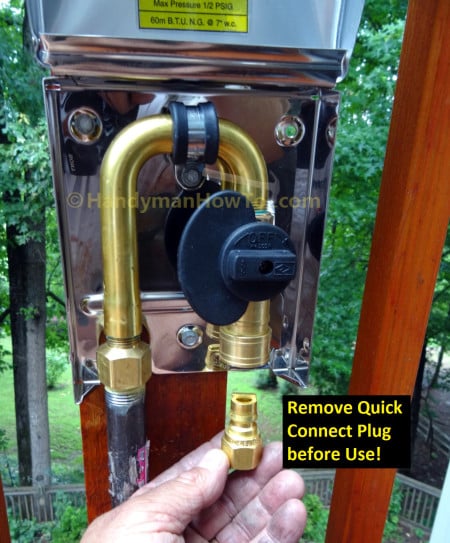
The gas outlet box is (almost) ready to use! I removed the 3/8 inch male plug (the plug can’t be removed unless the valve is Off) by pushing up on the Quick Disconnect socket ring and pulled out the plug:
I turned the gas back On at the service meter and relighted the water heater pilot flame.
Next up – How to Check Pipes for Natural Gas Leaks.
Take care,
Bob Jackson