This project shows how to install a DOD DP4 Dashcam Hardwiring Kit – fuse box connection and routing the wires behind the dashboard and interior trim. This project is continued from How to Hardwire a DOD Dashboard Camera – 2017 Kia Sorento.
How to Install a DOD DP4 Dashcam Hardwiring Kit
Fishing USB Power Cable
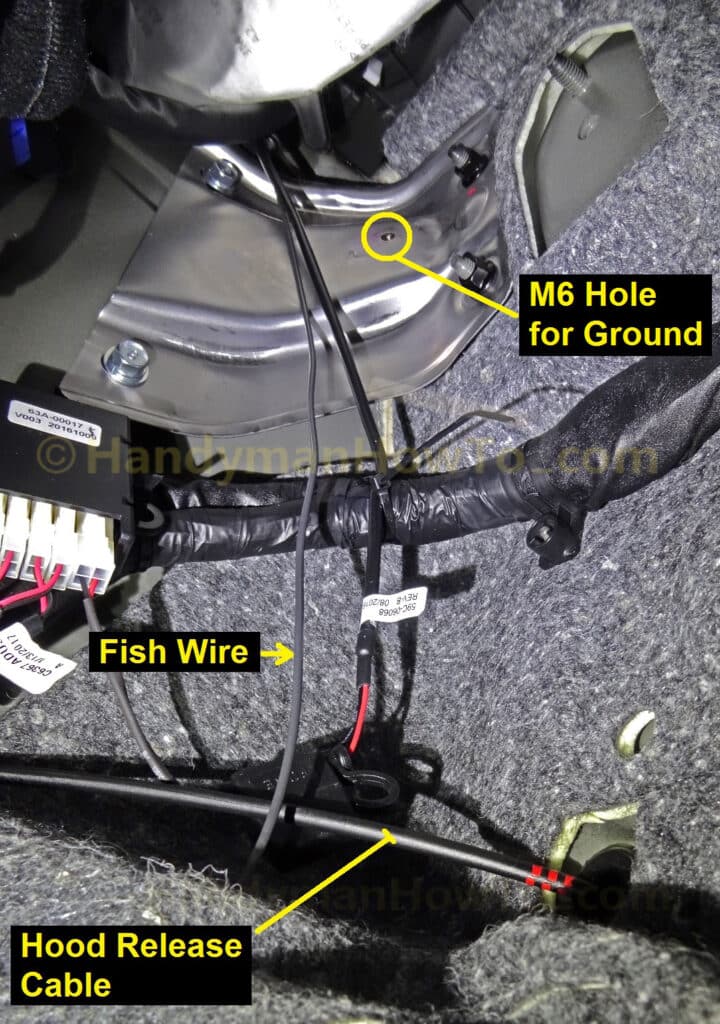
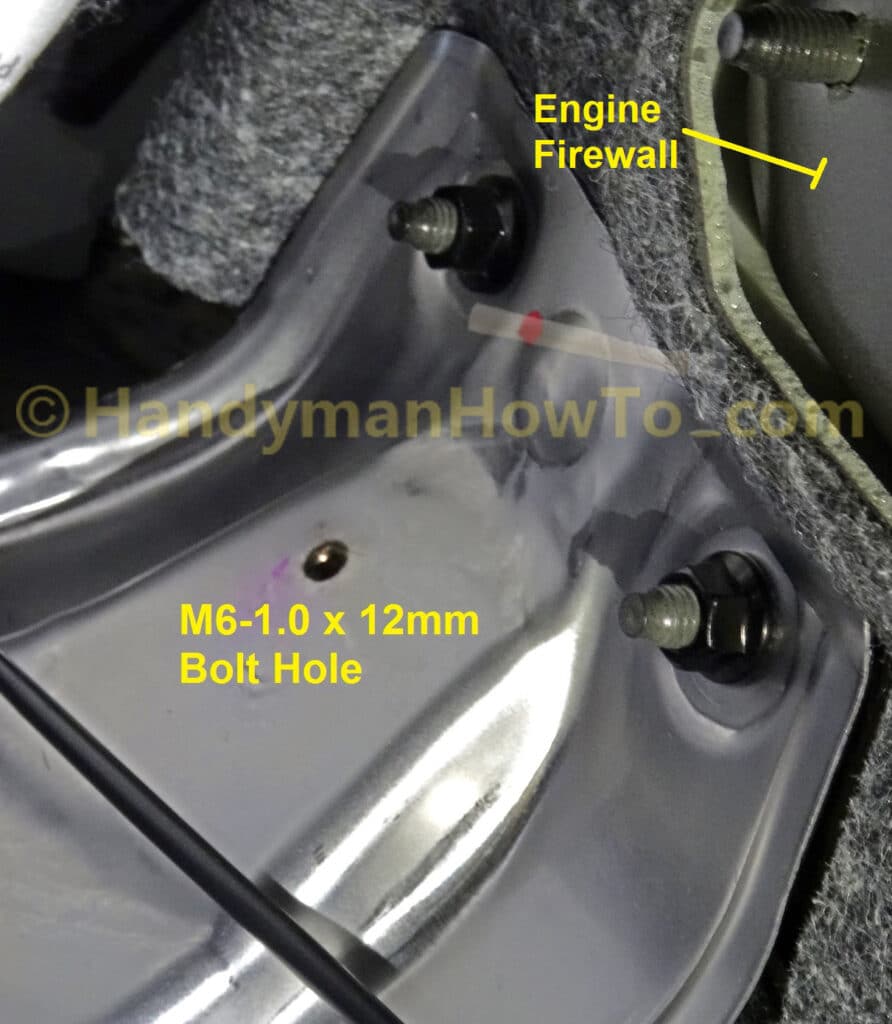
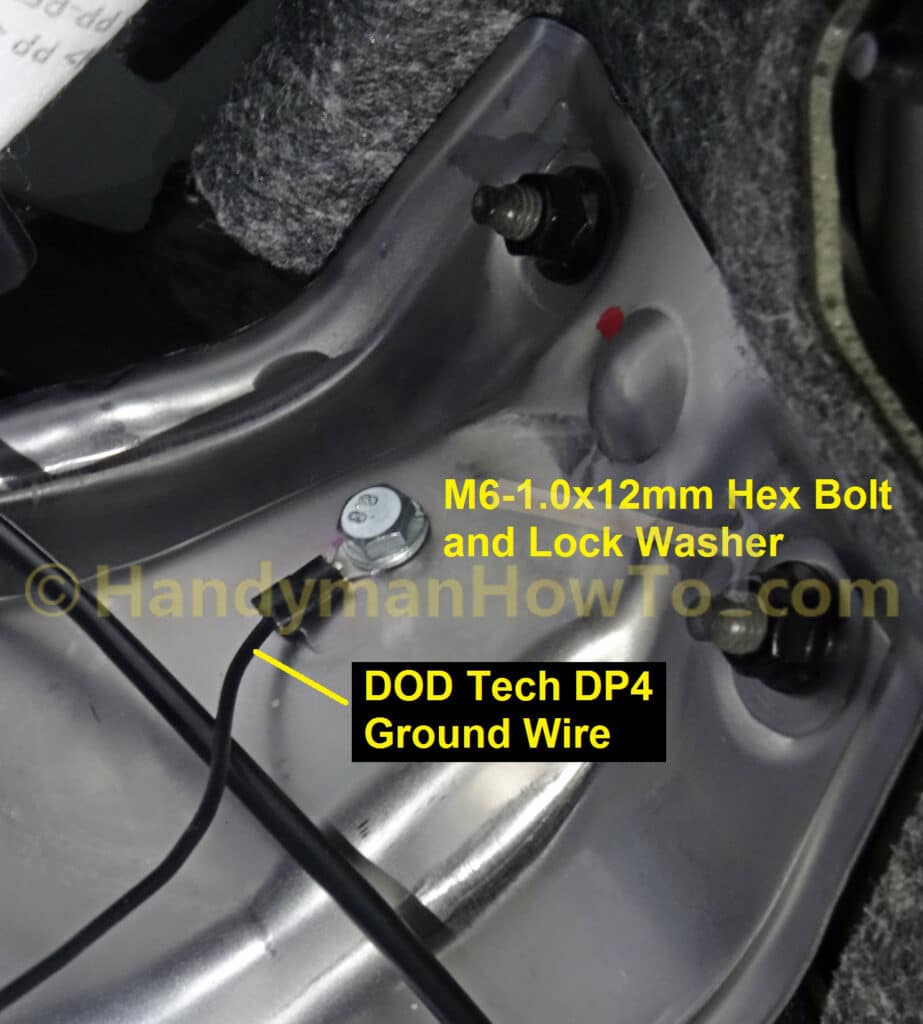
After removing the windshield/door A-Pillar trim, I inserted a 2-1/2 feet long wire through the base of the A-Pillar into the driver’s side footwell. The fish wire is the black wire taken from a scrap piece of NM-B 14/2 electrical cable I had laying about. I had to move the driver’s seat full rearward and lay on my back in the footwell. Notice the metric M6 (6 mm) threaded screw hole in the angle bracket between the front quarter panel and firewall – I’ll use that to ground the DP4 dashcam power adapter:
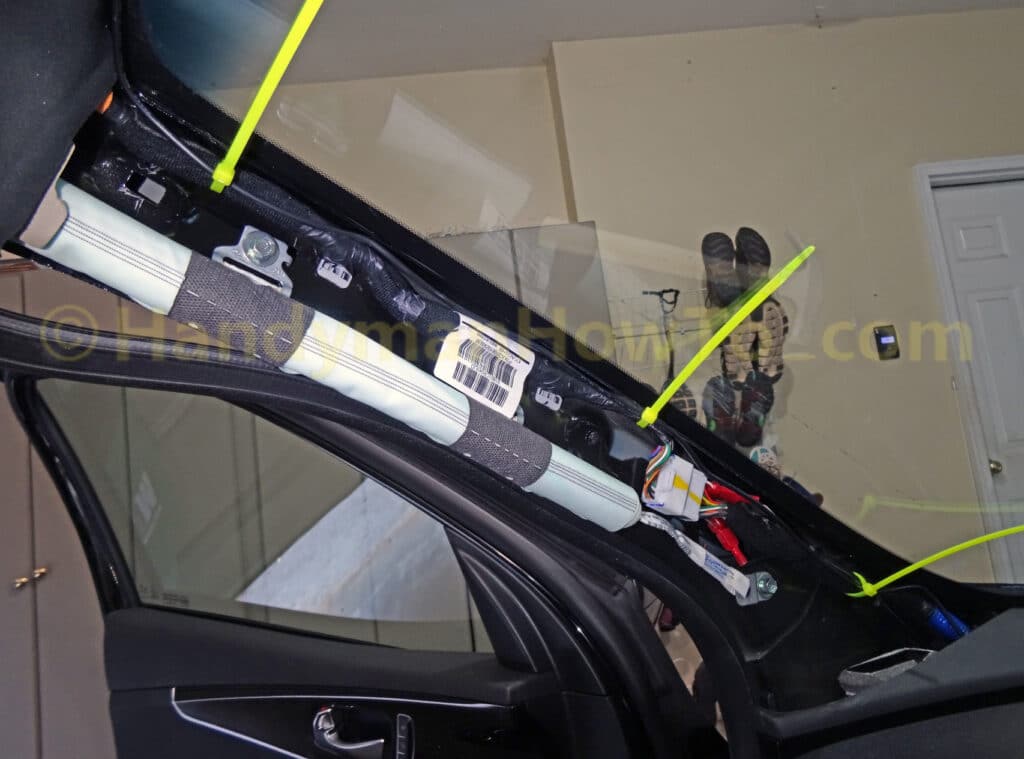
I taped the dashcam USB power cable to the end of the fish wire and pulled it up from the base of the A-Pillar. The USB cable is loosely fastened to a wiring harness inside the A-Pillar with yellow zip ties and tucked the cable inside the headliner along the top of the windshield. The zip ties will be tightened after I’ve completed the wiring hookup and taken up the slack. The air bag is the white roll inside the A-Pillar, take care not to disturb it:
DOD DP4 Ground Wire Connection
The DP4 hardwire kit must be grounded to the car or truck chassis. Fortunately, there’s a tapped screw hole in the quarter panel bracket. It’s located above the driver’s left foot and can only been seen with your head inside the footwell (I laid on my back to get to it). I knew it must be a metric thread but didn’t know what size. A 1/4 inch bolt would almost fit and I compared it with the metric screw gauge at the auto parts store and determined it should be a M6-1.0 x 12 mm thread:
I bought M6-1.0x12mm hex head cap screws and M6 lock washers. Lock washers are required to prevent the screw from loosening. The cap screws fits a 10mm socket wrench:
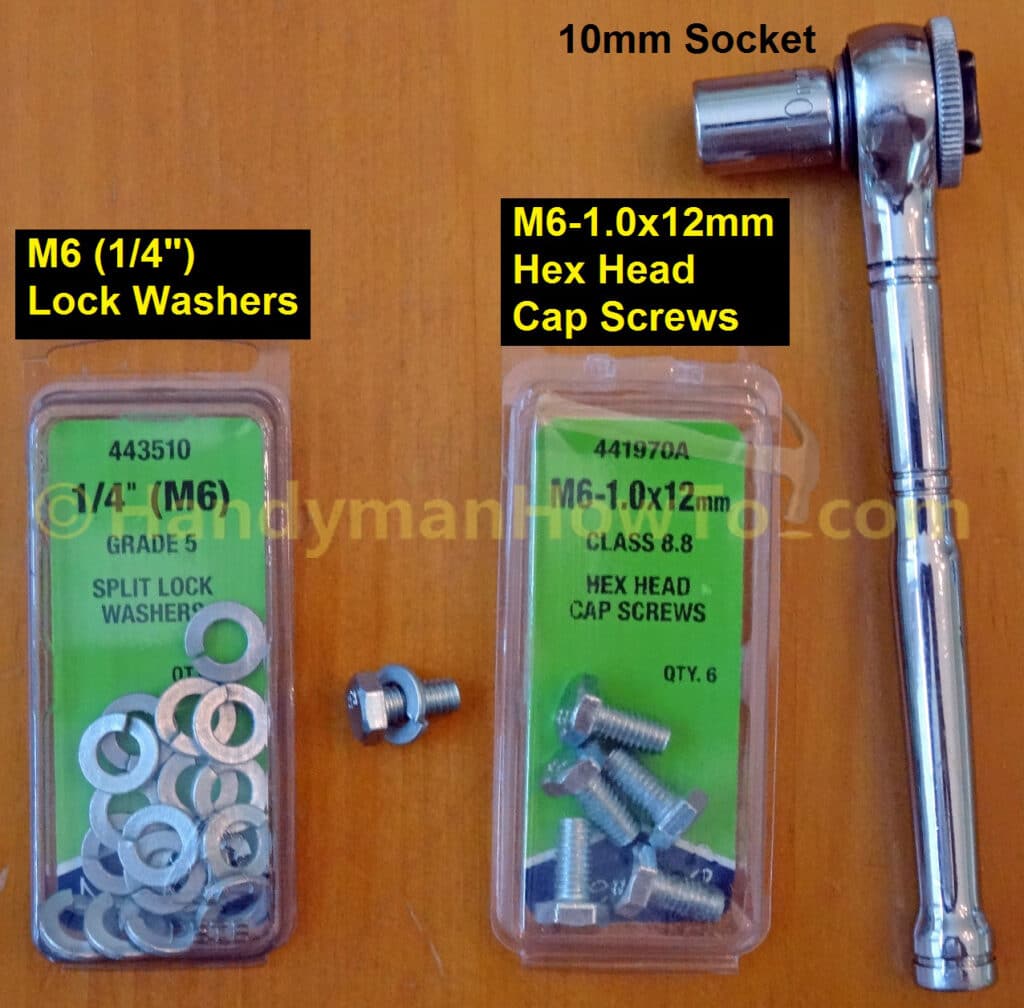
The M6 cap screw fit perfectly! The DOD DP4 ground wire spade terminal is placed under the lock washer. The challenge was I’m laying on my back in the footwell and could only reach it one hand:
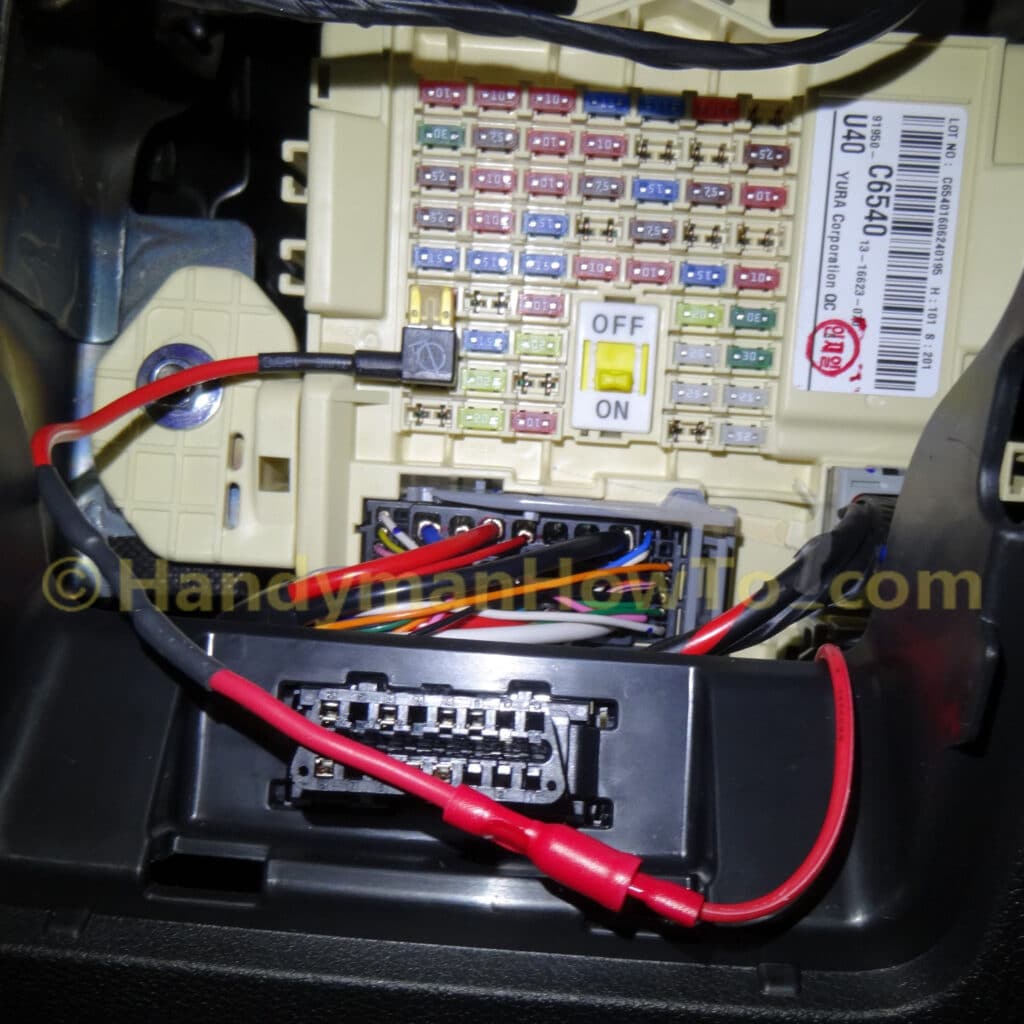
DOD DP4 Fuse Box Connection
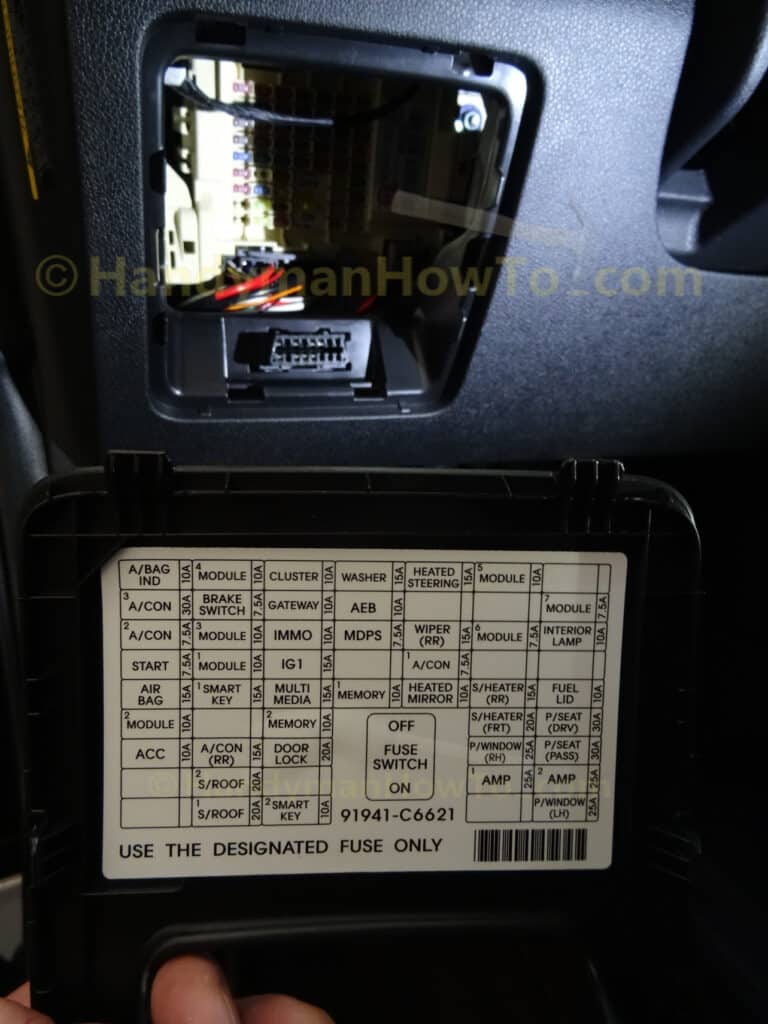
The DOD DP4 power adapter positive (+) red wire will be connected to the fuse box located on the left side of the steering column:

The fuse map is printed on the inside cover:
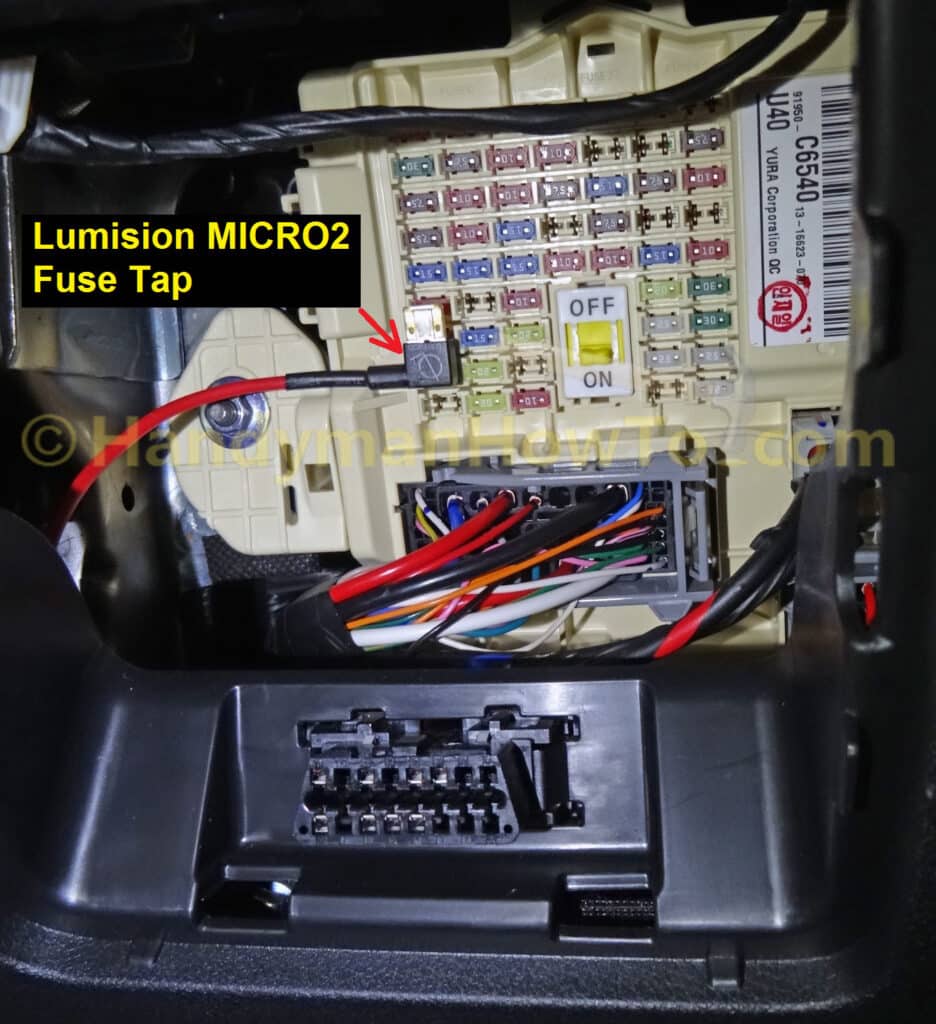
As described in the project introduction, I determined the two empty fuse positions on the lower left side of the fuse box are only powered in ACC (Accessory) and START/RUN modes. The Lumision MICRO2 Add-A-Circuit with the DOD DP4 bullet connector spliced on is ready to install in the fuse panel:
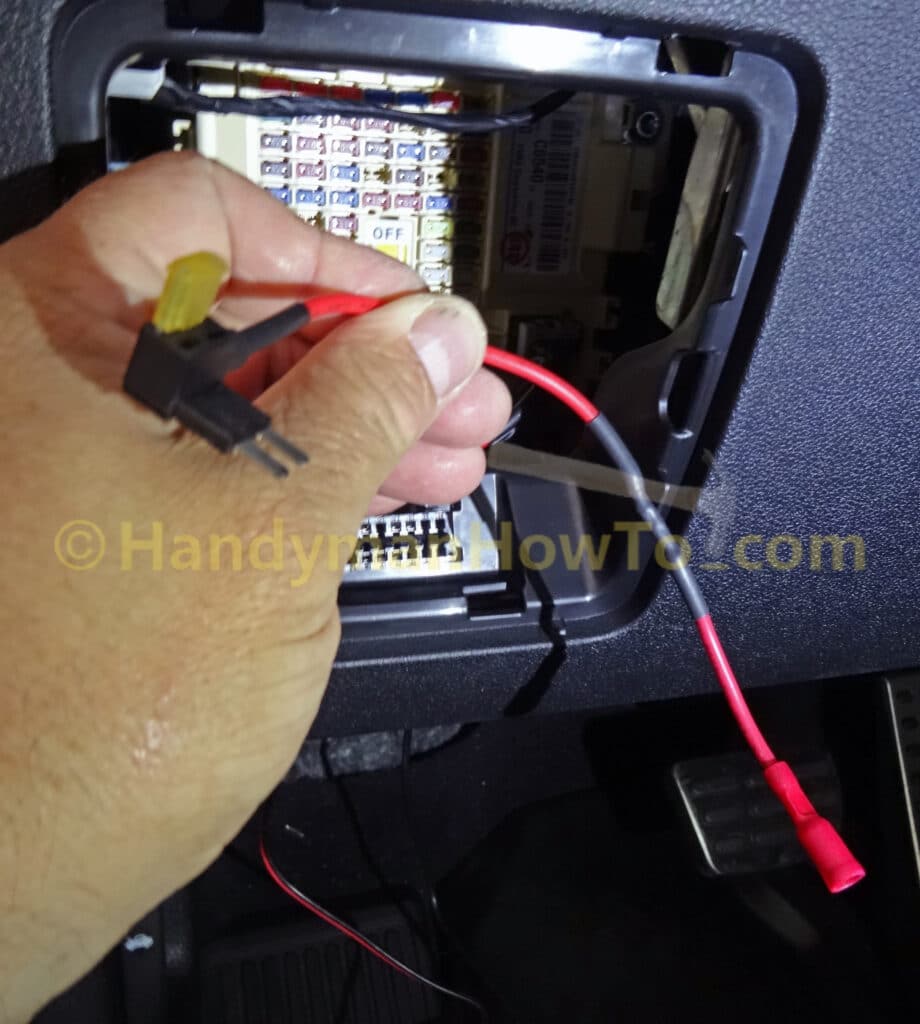
Aside: The DOD DP4 fuse adapters have a 2 AMP rated fuse. The smallest fuse provided with the Lumision MICRO2 kit is a 5 AMP fuse. I’ll buy a 2 AMP MICRO2 fuse and swap it later.
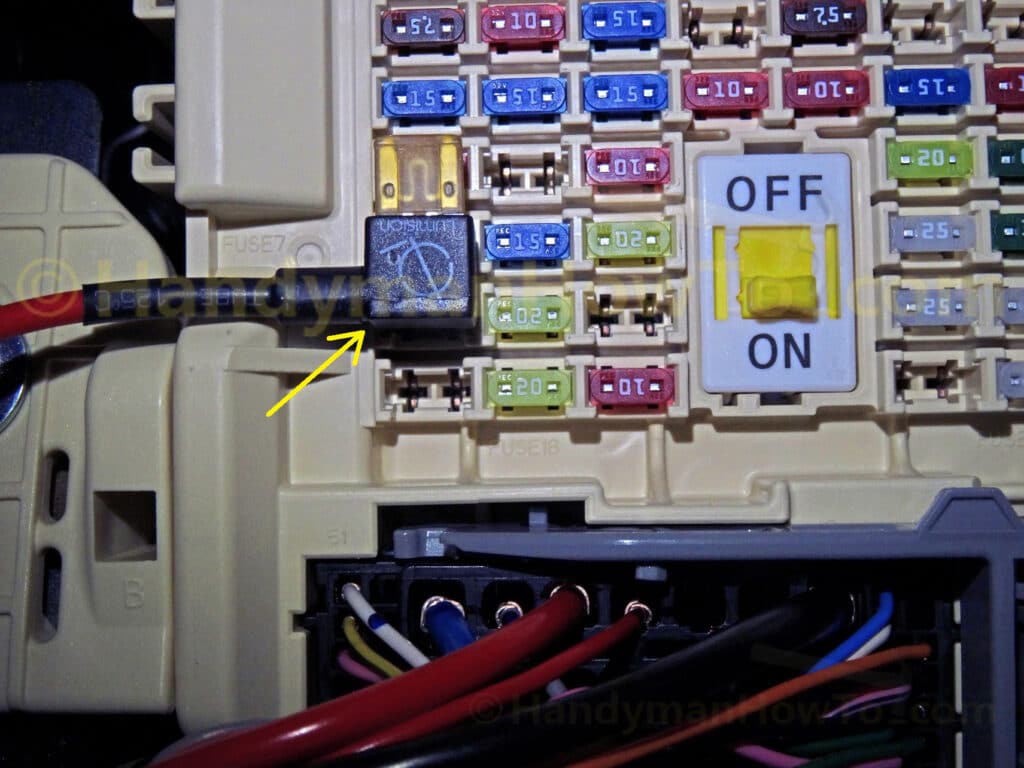
I could have inserted the Lumision MICRO2 Add-A-Fuse in either of the two spare fuse positions. The upper slot is better because the fuse adapter cord can sit in the valley at the edge of fuse panel:
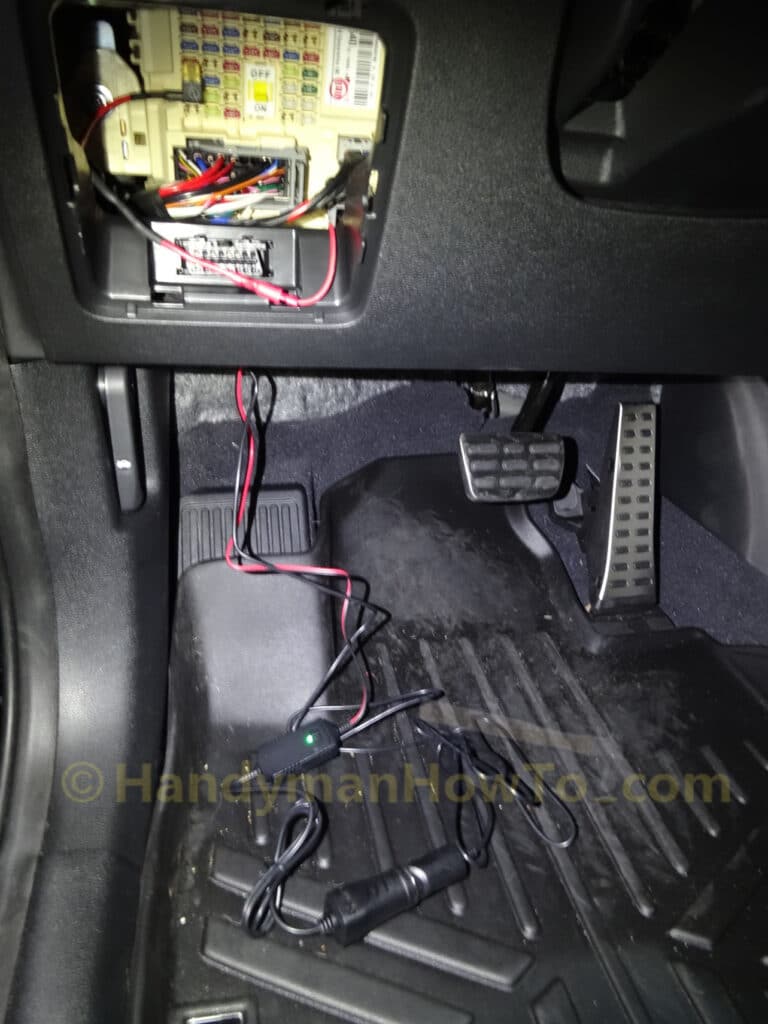
Hardwire Dashcam Power Testing
I tested the setup while wiring is exposed to verify everything is good. The DP4 instructions say you should crimp the bullet connector (bottom center of photo) but I used the tip of small screw driver to pry open the back of the male bullet connector a bit for a tighter fit which I thought was plenty snug and won’t rattle apart. This way I can unplug it should the need arise:
Next steps are:
- Verify the DP4 switch is set to 12 Volts.
- Plug the camera USB cord into the DOD DP4 cigarette lighter socket.
- Press the Kia START/RUN button once to turn on the Accessories (ACC mode).
- The DP4 power adapter LED illuminated green as expected. See the following photo.
- Start the engine.
The LED is still green. - Shutoff the engine.
The DP4 LED turned Off, meaning no power. - Plug the USB power cord into the camera and redo the test sequence. The camera operated correctly.
Mounting the DOD DP4 Kit under the Dashboard
Where to put the DP4 module, cigarette lighter connectors and extra cables? I tried mounting the DP4 power module to the back of the dashboard with the double-side sticky tape but it wouldn’t stick properly. The 2017 Kia Sorento has a small shelf behind the hood release cable that was the right size for the cigarette lighter connectors.
I zip tied the DP4 module and cigarette lighter connector to the hood release cable. Another zip tie to secure the coiled USB cable to a cable harness (center of photo) and zip tied the USB power cable going up to the A-Pillar:
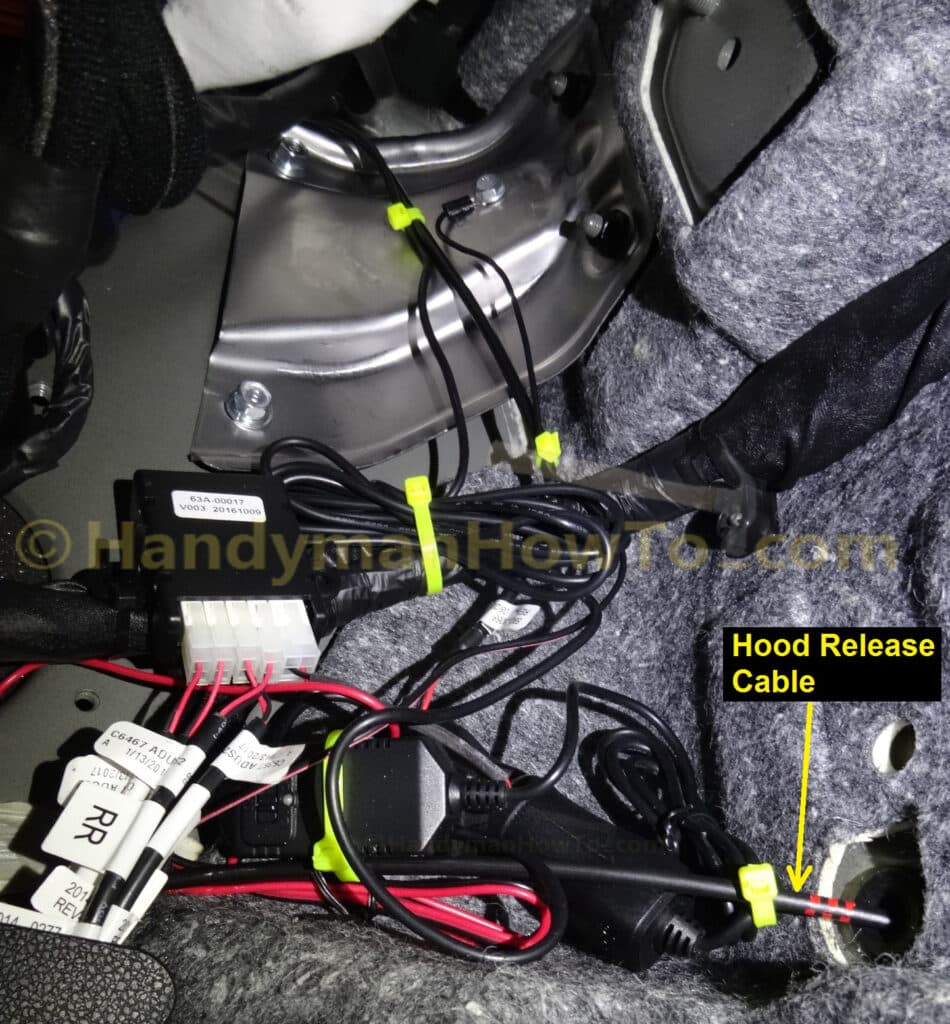
The MICRO2 fuse tap red wire was then routed on the left side of fuse panel for a more direct run to the DP4 module:
The camera USB cable is tucked behind the edge of headliner:

Reinstall the A-Pillar Trim and Door Weatherstrip
The A-Pillar trim is way easier to install versus removing it. Insert the bottom end into the dashboard, check the trim clip alignment with the door frame and press it in until it snaps in place. Then press the door weatherstrip back on edge of the door frame.
Best,
Bob Jackson