This article explains how to install a floodlight by running new electrical wiring and mounting the light under the soffit.
The light could be controlled by a standard on/off switch, however I choose to wire it into my Insteon home automation system for remote control. The floodlight is the “slaved” unit in the wiring diagram from this related how to guide.
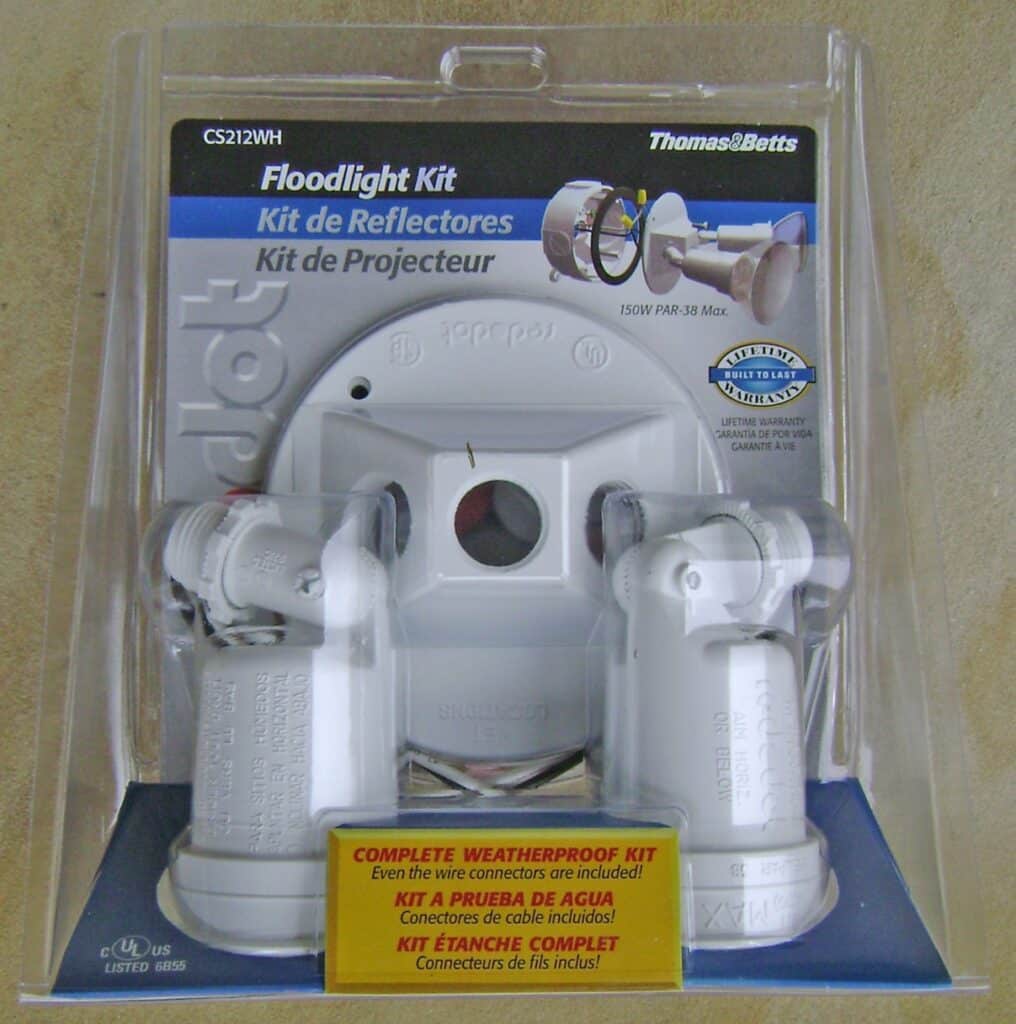
The 150watt floodlight is a CS212WH two-lamp kit made by Thomas & Betts that’s available for under $20 at many hardware stores. The zinc alloy body is durable and weatherproof.

Floodlight Soffit Mount and Wiring
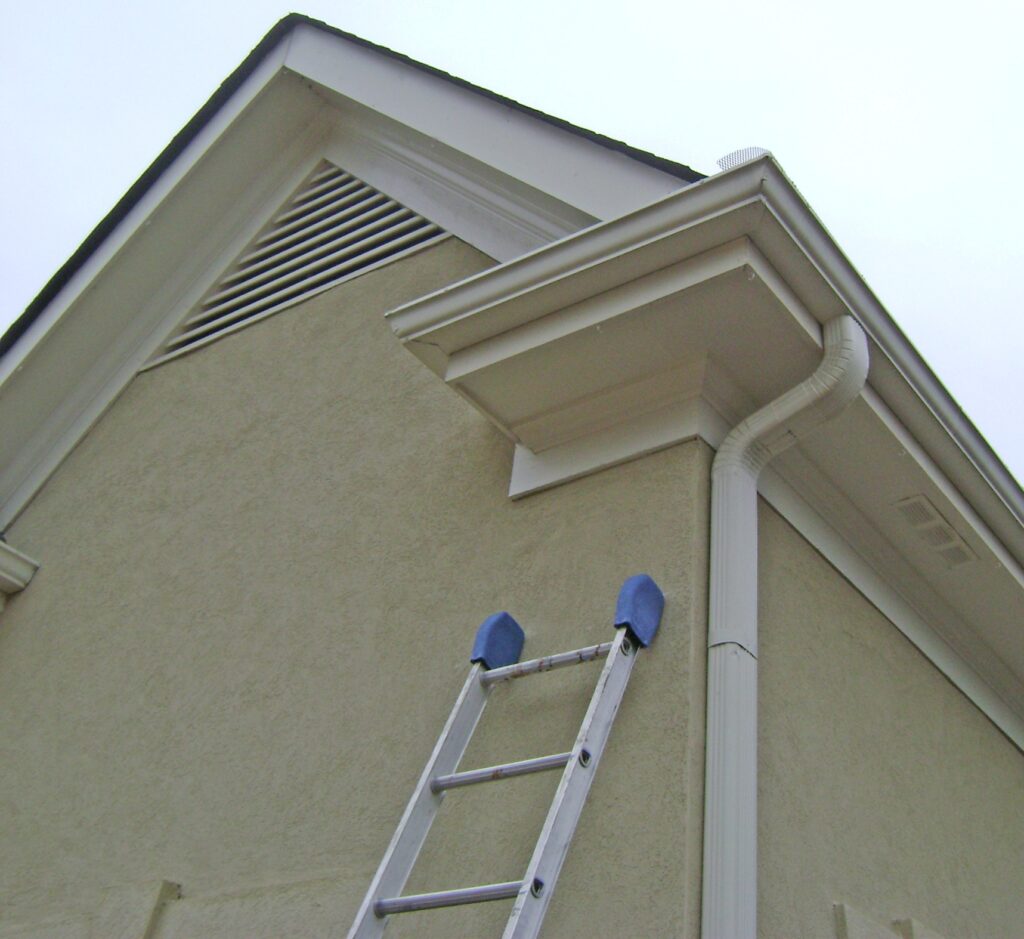
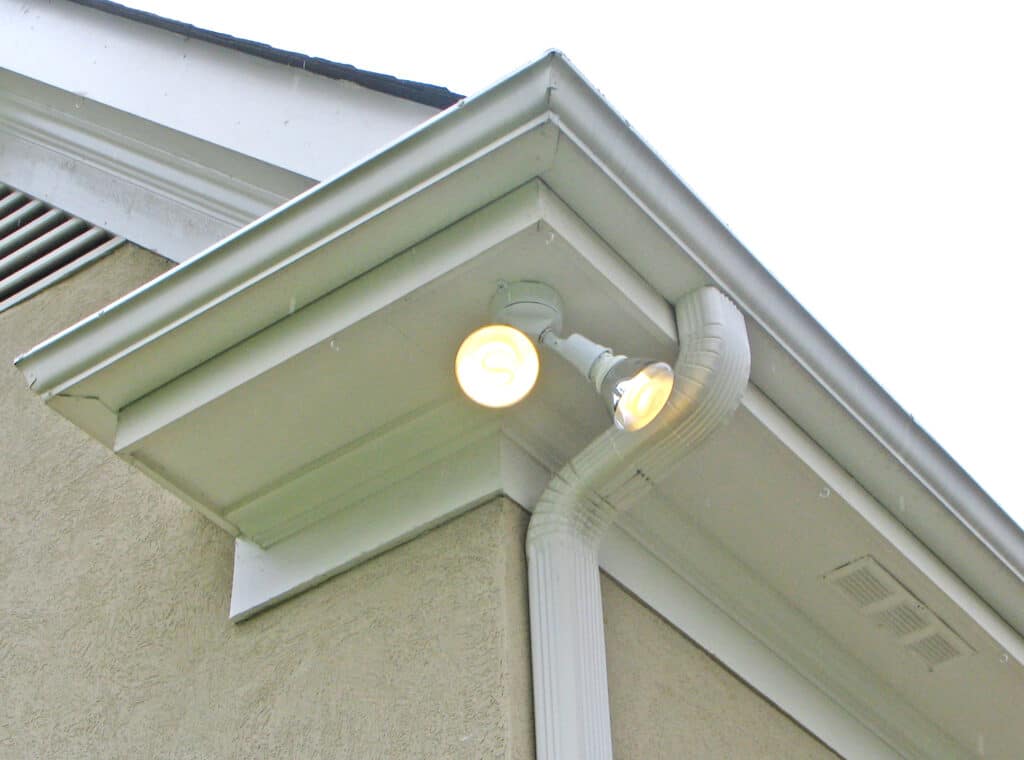
The new floodlight will be mounted at the corner of the garage under the soffit by the cornice return. This corner placement allows the two lamps to cover both sides of the garage.
Plan the Electrical Wiring
Before drilling a hole in the soffit for your new floodlight, think about how you will run the new electrical wire and where the electrical connections will be made. Take a look at your existing household wiring and layout a plan on a paper. A simple drawing will go a long ways toward organizing your work and avoiding mistakes. To run the new electrical wire to the far end of the garage, I built a drywall access panel in the bedroom closet over the garage to gain access to the crawlspace behind the gable vent.
Soffit Electrical Wiring
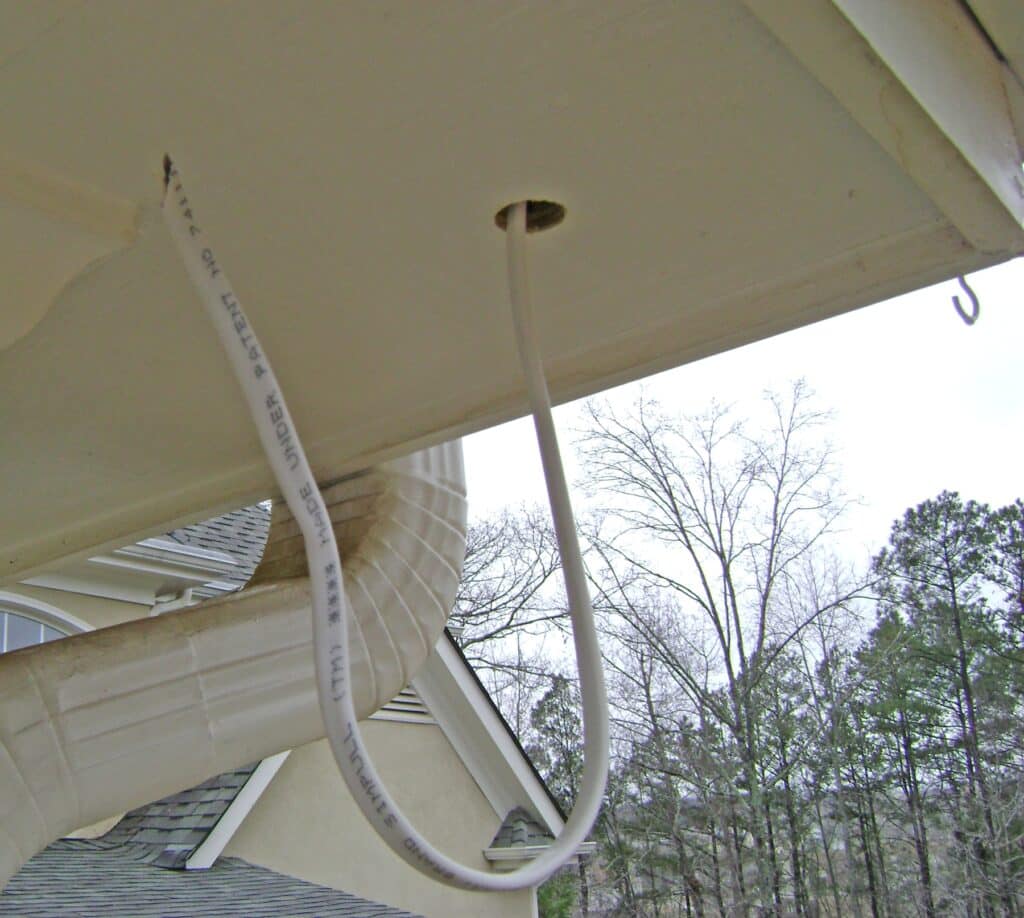
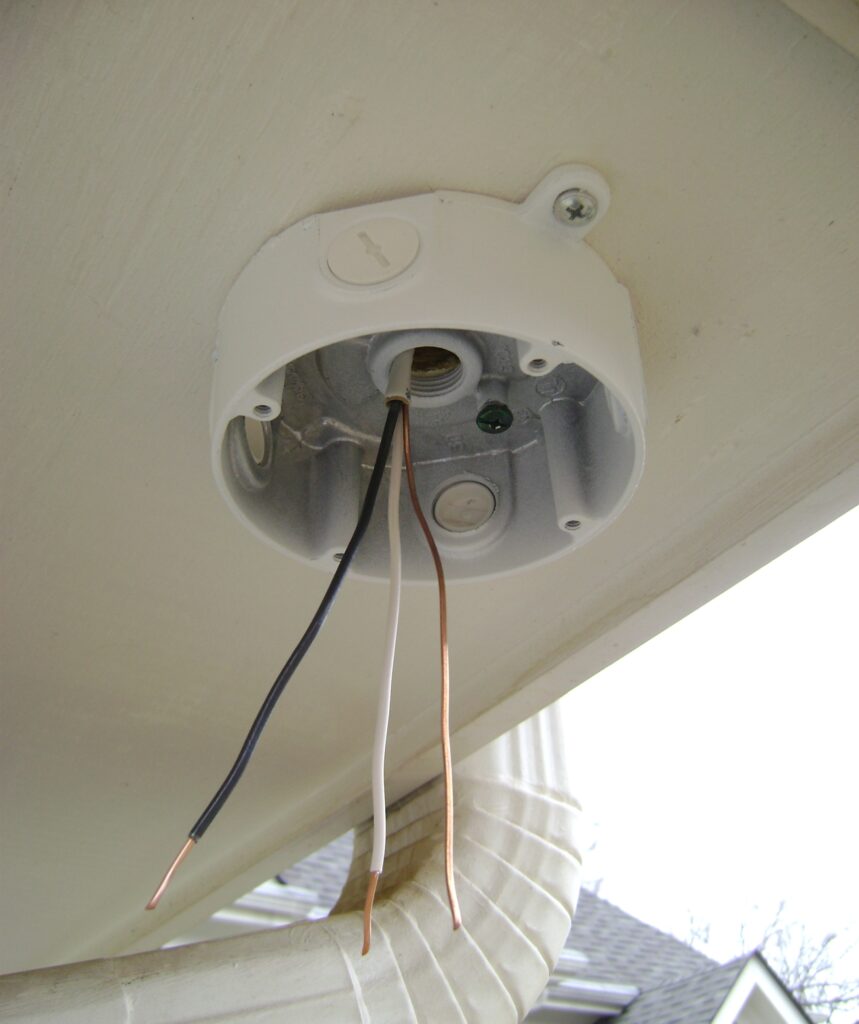
- Measure and mark the soffit where the hole will be drilled for the NM 14/2 electrical wire. I centered the hole between the corner of the wall the fascia board.
- Drill a 3/4 inch hole in the plywood sheathing of the soffit with a wood spade drill bit.
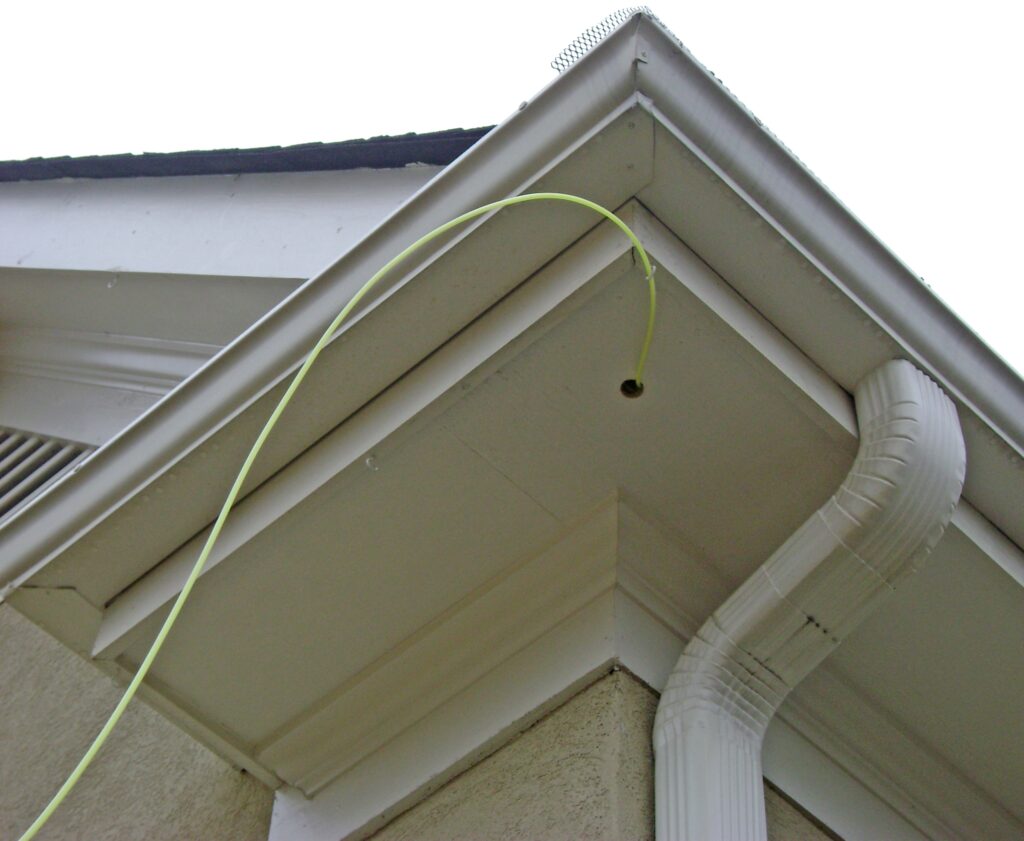
- Push the yellow nylon fish tape up through the hole into the attic crawlspace. Do this with a helper because there’s some of trial and error to get the fish tape to pop out where you can grab hold of it inside the attic.
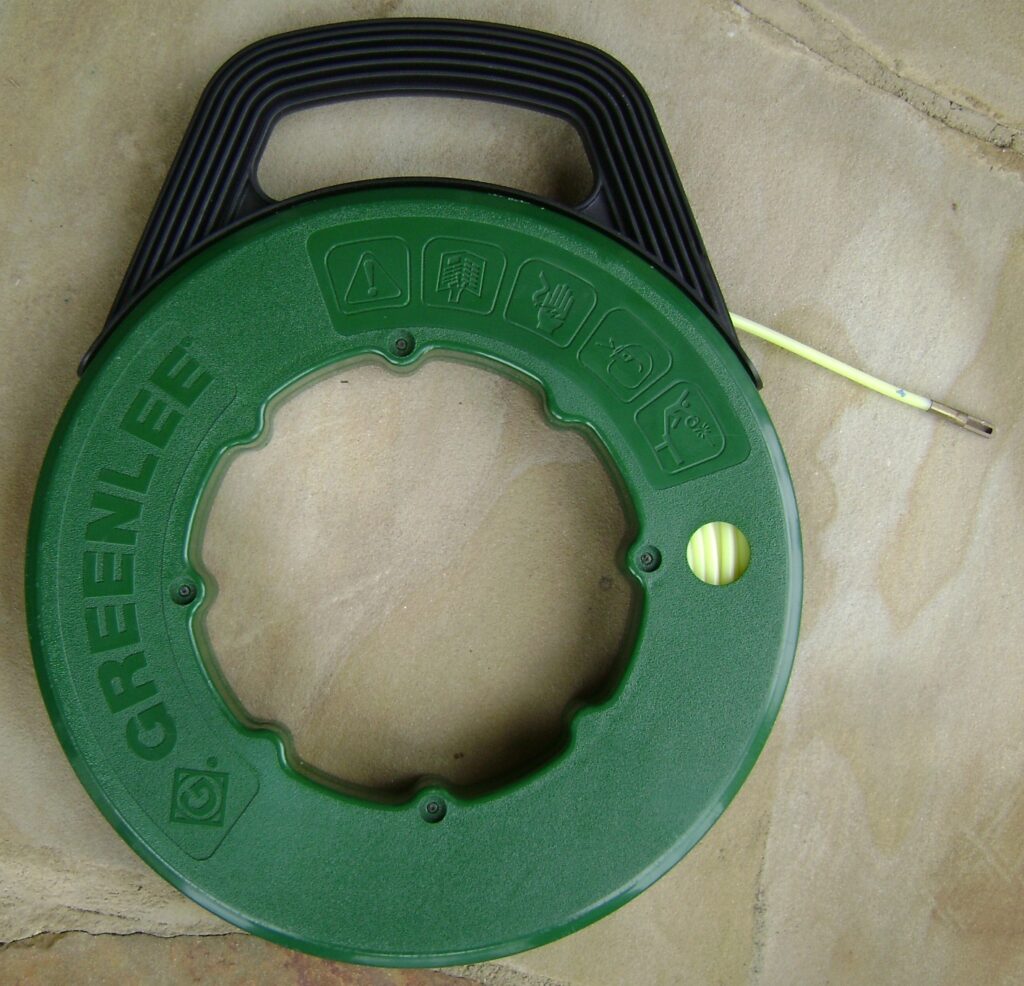
I’ve used both the round nylon and flat metal types of fish tape. Both work well. For long straight runs – especially across flat ceilings – stiff nylon rods are available that screw together in sections. Check out the Greenlee Fishing catalog for ideas.
For this job, I used the Greenlee MagnumPro 3/16in x 100ft Nylon Fish Tape with Case that I purchased at Home Depot.
Working in the attic crawlspace behind the bedroom closet (via my recently installed drywall access panel) the end of the fish tape was pulled out from behind the wall and is hanging free.

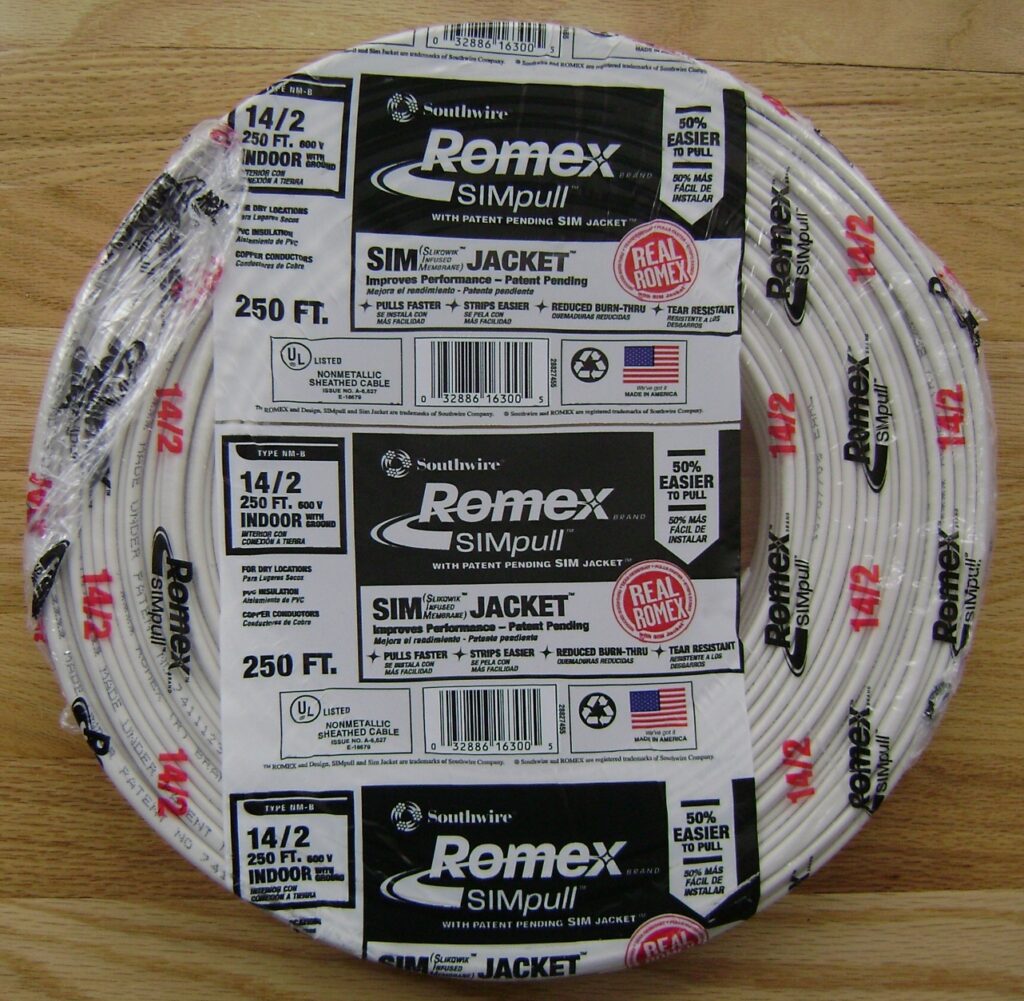
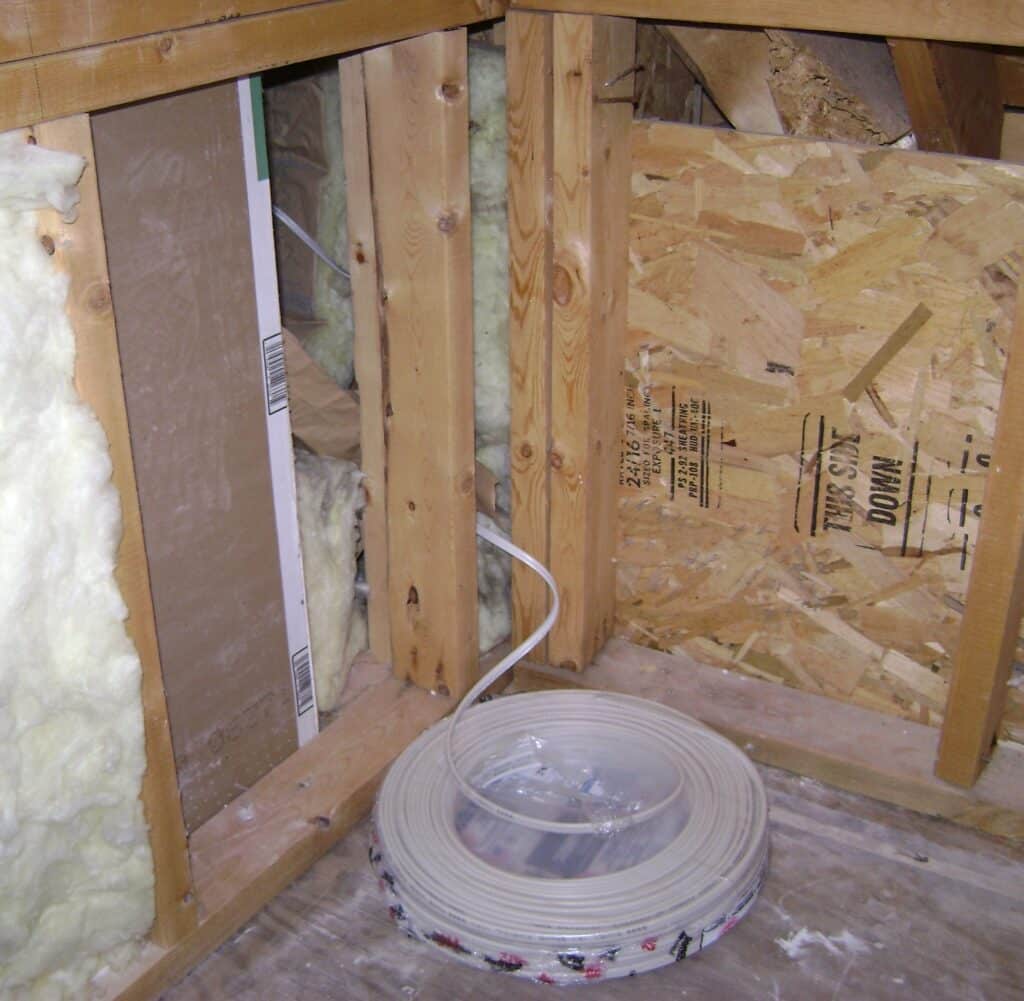
I’m doing several electrical jobs and bought a 250 roll of Romex 14/2 electrical cable.
In the attic crawlspace at the other end of the garage attic, about 20 feet of electrical wire is pulled off the roll and laid into the crawlspace to the reach the opposite corner of the garage. Take care not to kink the wire.
Fishing New Electrical Wire
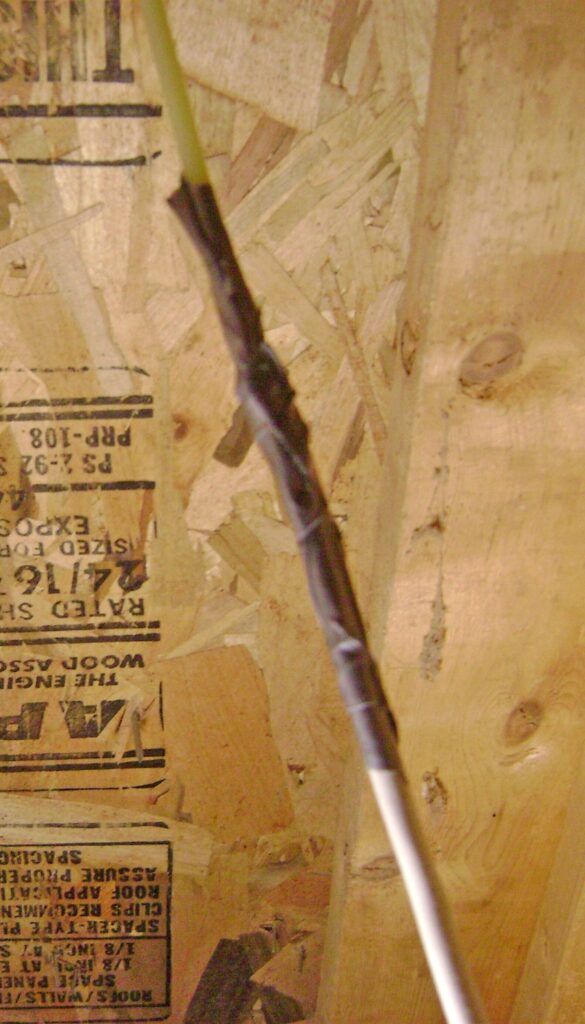
The new electrical cable is overlapped with several inches of the fish tape and the two are duct taped together.
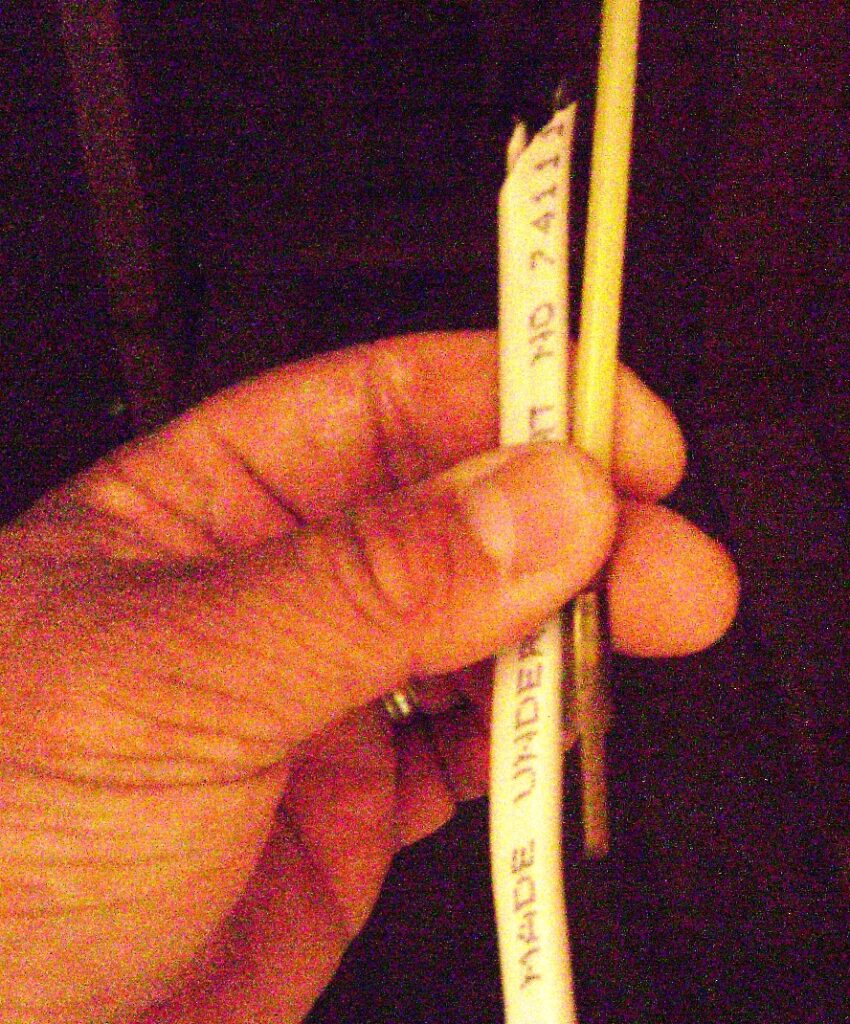
The fish tape and new wire for the floodlight are shown here duct taped together, ready for pulling from the attic to the outdoors.
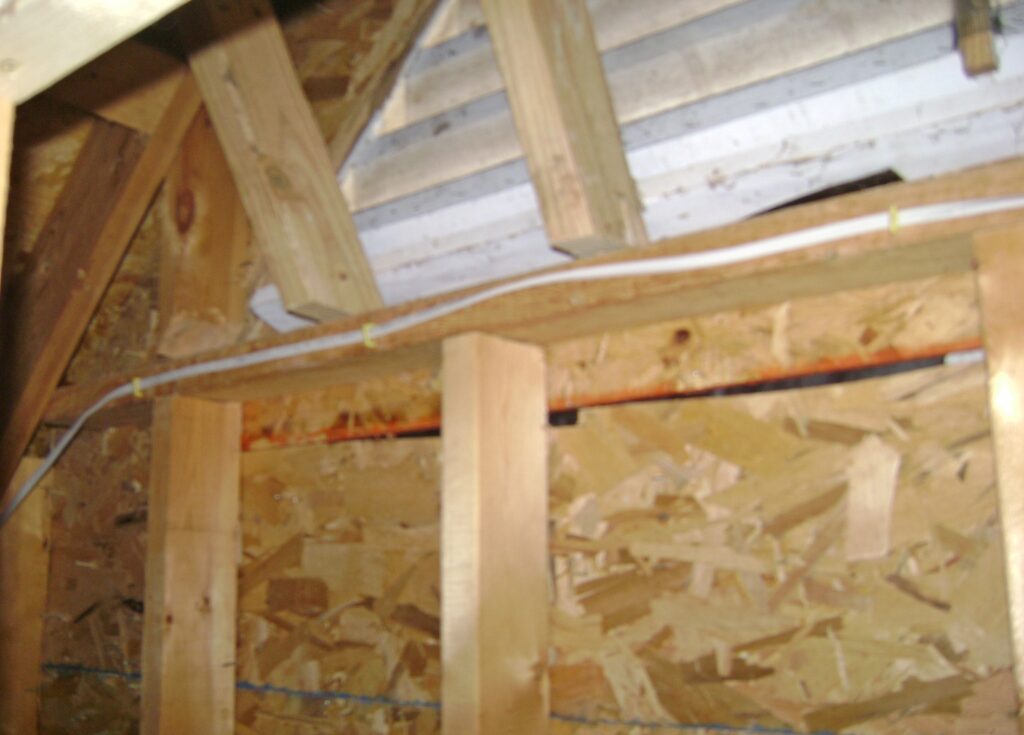
This next task is easier if two people work together; one person in the attic feeding the wire and the other person is outside on the ladder pulling the fish tape. The person outside pulls the fish tape and hollers when a couple of feet are exposed.

Back in the attic, the new run of electrical cable is fastened to the wall with insulated NM wire staples as shown.
Floodlight Mounting and Wiring
After pulling new electrical cable from the attic with fish tape, about two feet of wire is left exposed.
The weatherproof flood light is a Thomas & Betts CS212WH kit. See Part 1 for details about the kit.
The kit consists of these components – not really much to it! Assembly is simple and the Thomas & Betts instructions are easy to follow.
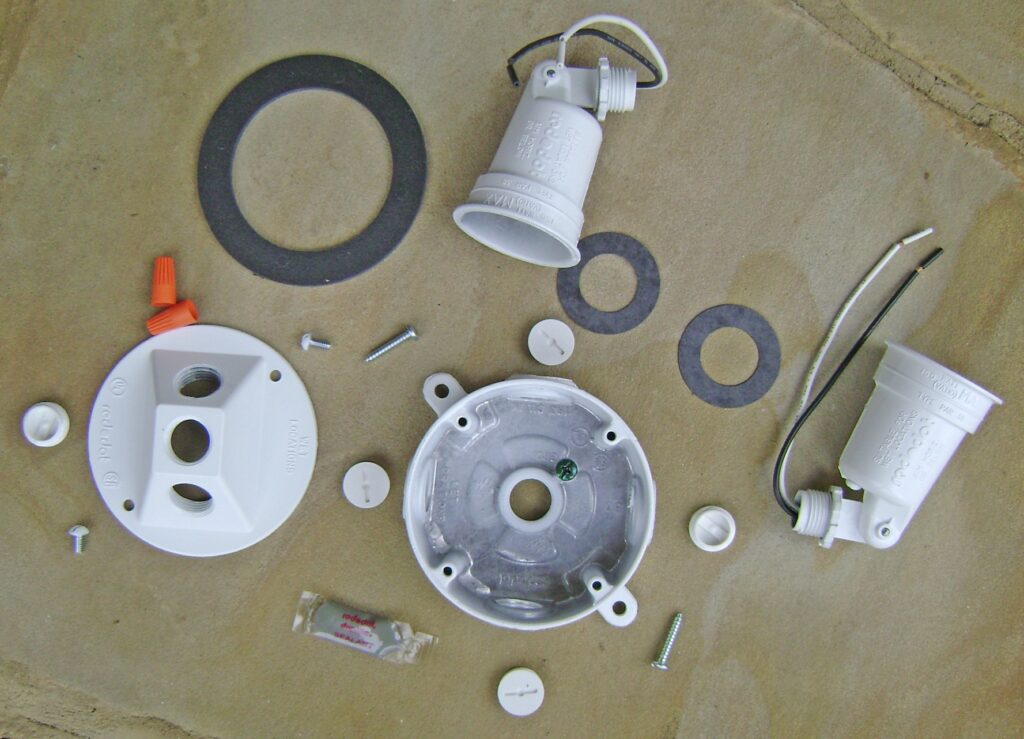
The first thing to do is apply sealant to the plastic plugs and install the plugs in the sides of the base and the center hole in the cover. The extra holes in the base are accommodate side wiring applications using conduit. The center hole in the cover for an optional motion detector that is purchased separately.
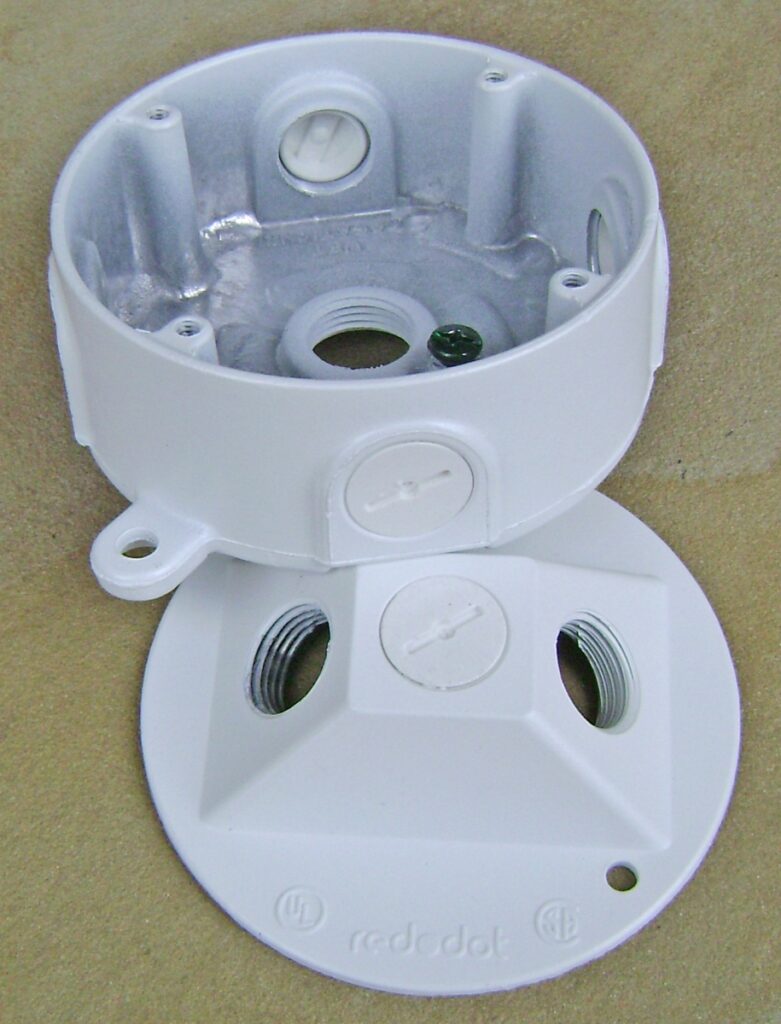
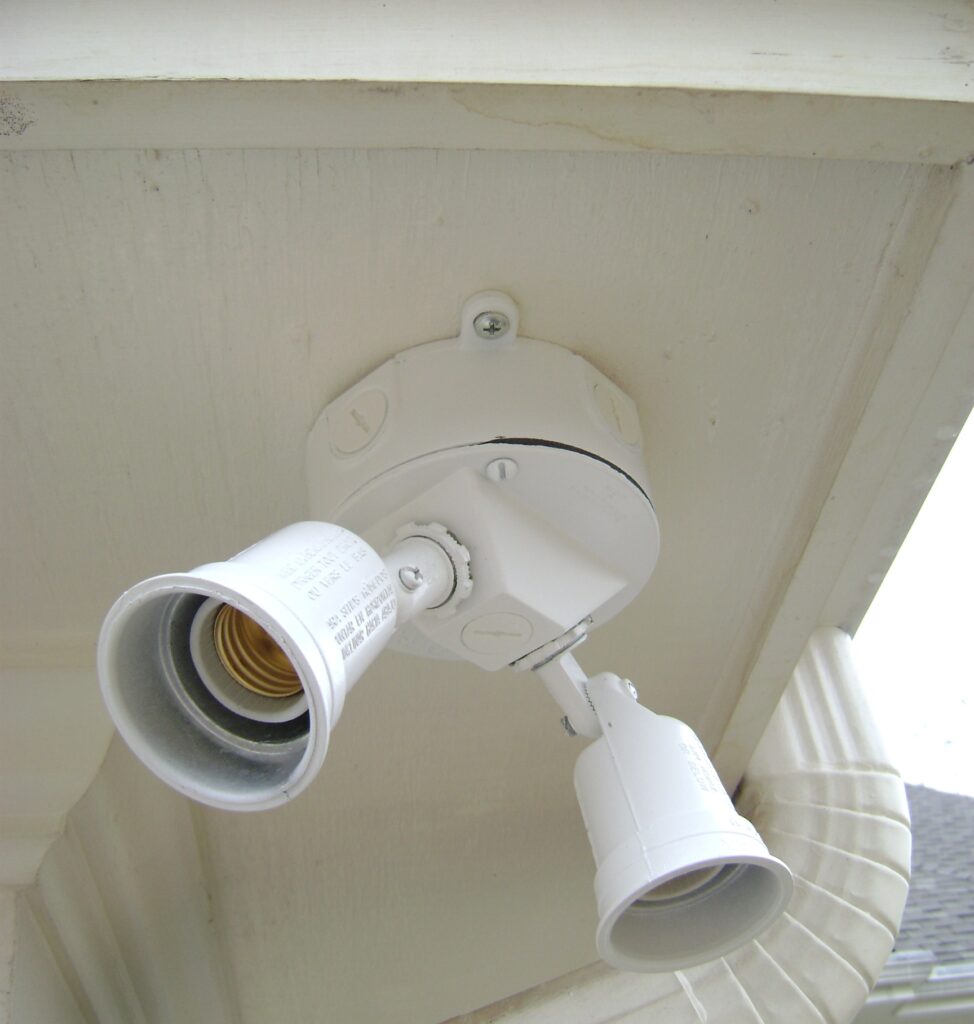
The base is centered over the hole in the soffit and mounted with two wood screws. The NM 14/2 wire is stripped and cut leaving about 8 inches of wire exposed as shown.
Project Update / Correction
As pointed out by diligent reader “Joe” (see the Comments section below), I forgot to install a 3/8″ NM cable clamp connector in the floodlight base box to secure the cable as required by the National Electrical Code (NEC). NM clamp connectors are widely available at home improvement stores. See these other wiring projects which use an NM cable clamp connector:
The required 3/8″ NM clamp connector for the floodlight is shown here:
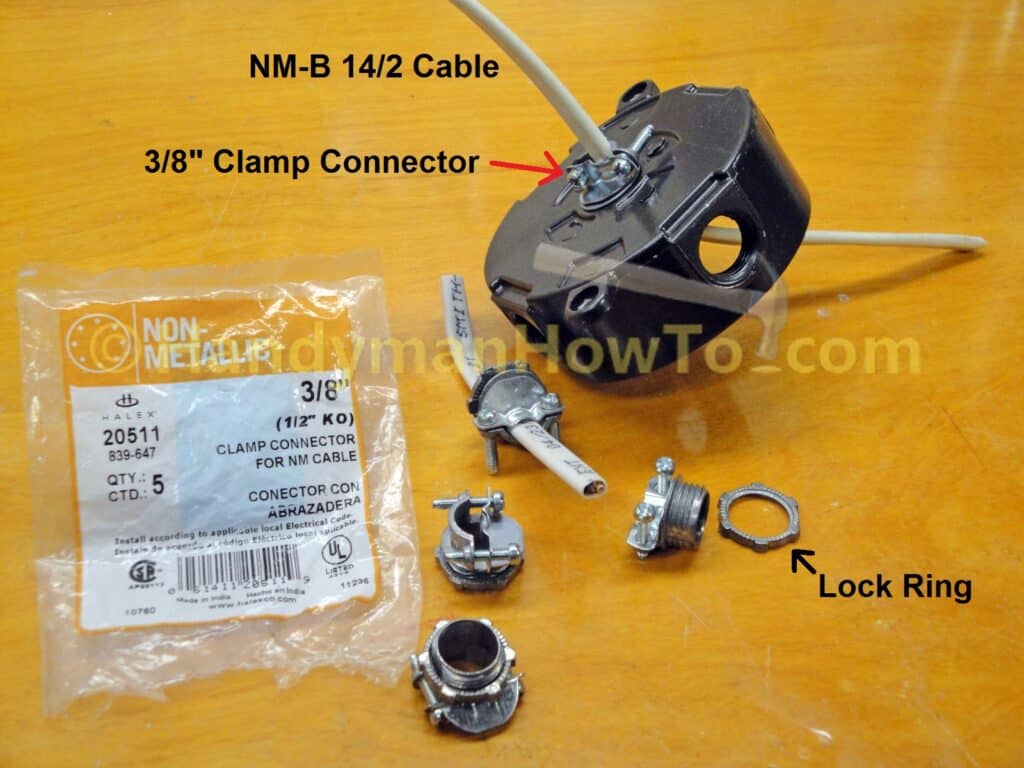
To install the 3/8″ NM cable clamp connector:
- Remove the lock ring and screw the clamp connector into the floodlight base until tight.
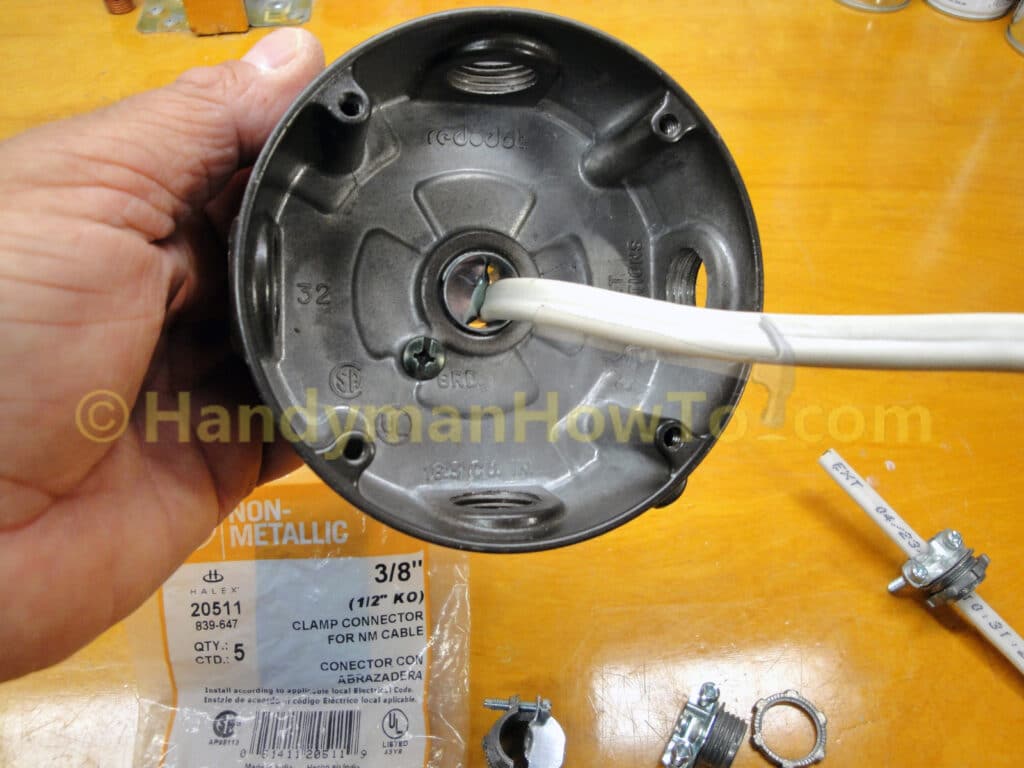
The lock ring is not needed in the thick metal base. (Aside: The lock ring is required for thin-wall steel junction boxes.) - Insert the NM-B 14/2 cable through the clamp connector.
- Tighten the two clamp screws until snug on the cable.
Do not overtighten the clamp to avoid damaging the cable insulation and/or crushing the wires.
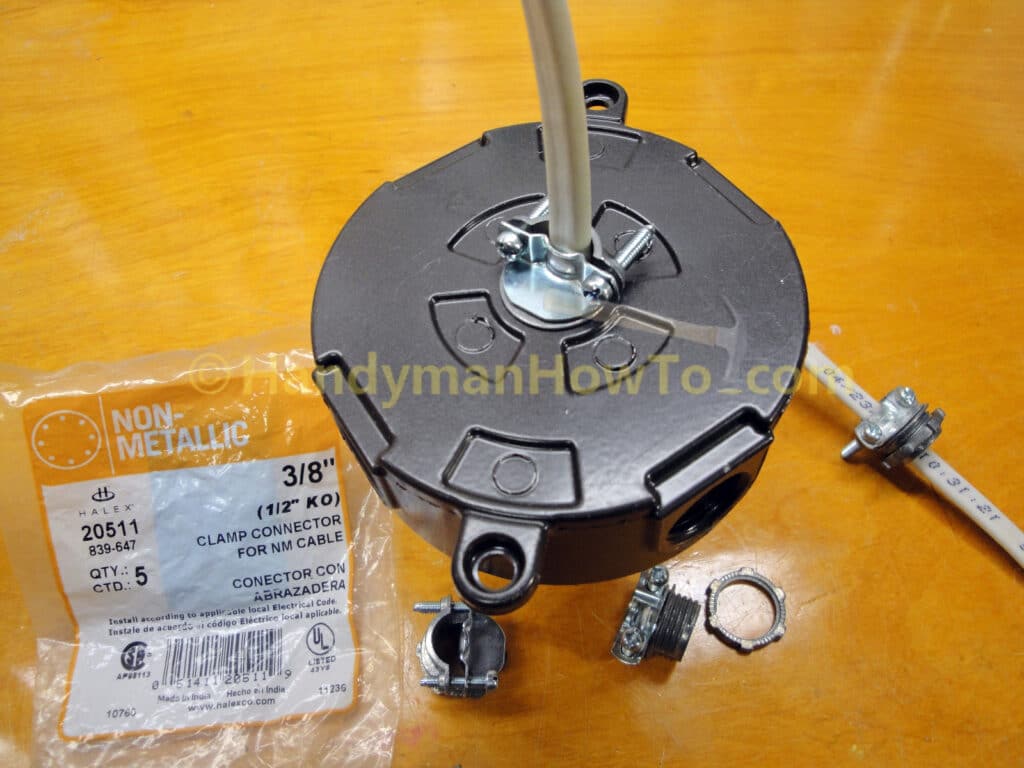
Interior view of the NM cable clamp connector mounted to the floodlight base box. Notice the clamp lock ring is not used or needed for the thick base box:
Now back the regular program…
The two lamp units are threaded into the cover part as shown. The two lock nuts at the base of the lamps are not tightened – leave that for later when aiming the lamps.
Tip: Remember to place the weather gasket over the wires as shown here before nutting the connections together.
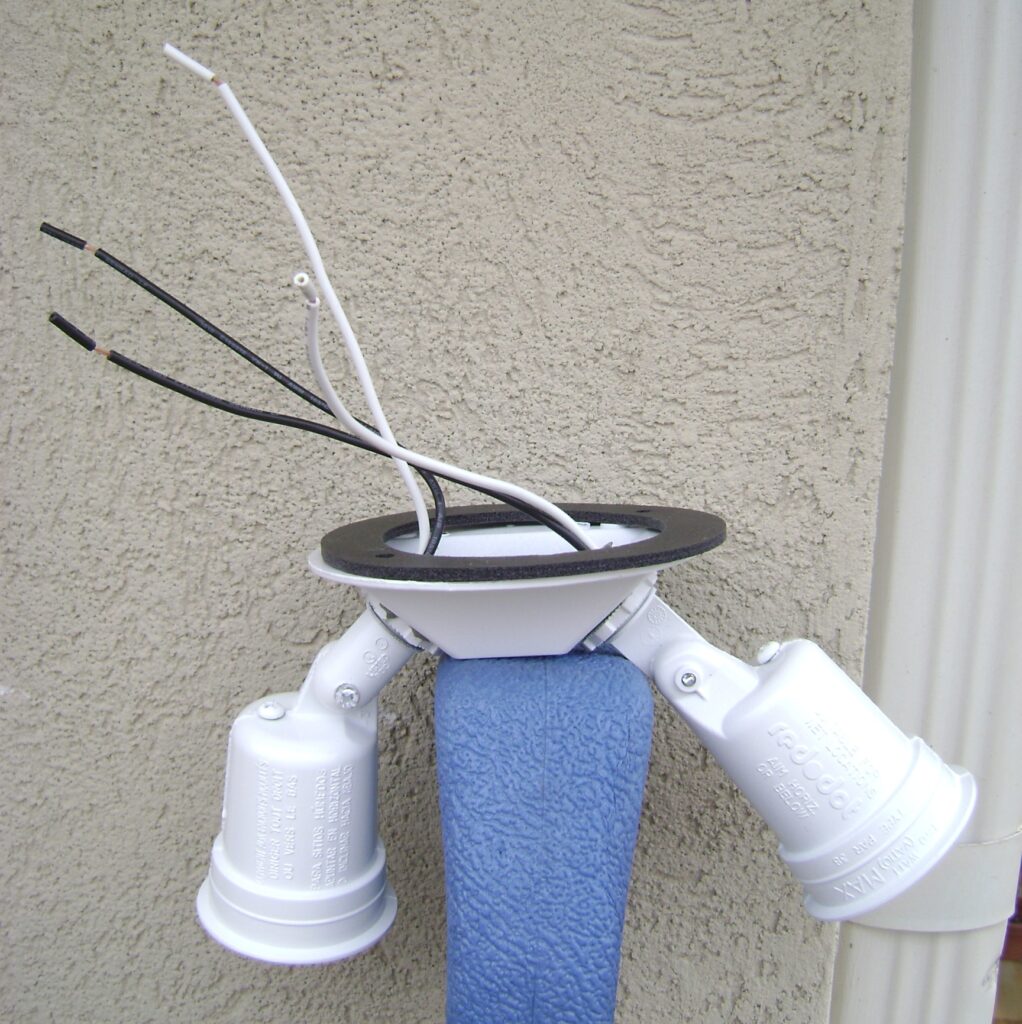
The lamp wires are nutted to the electrical supply wires from the attic. I prefer to use a larger wire nut instead of the small orange nuts supplied with the kit. The wiring connections are:
- Two lamp black wires (hot) to the black house wire.
- Two lamp white wires (neutral) to the white house wire.
- Ground wire (bare) the green ground screw in the floodlight base.
Remember at this point, the NM 14/2 supply wire from the attic isn’t connected at the other end, so there’s no power on the circuit. Note – I normally wouldn’t let a fixture hang by the nutted wires as shown here, but the lamp unit is fairly lightweight and I needed both hands for the camera. I rechecked my connections before attaching the cover to the base.
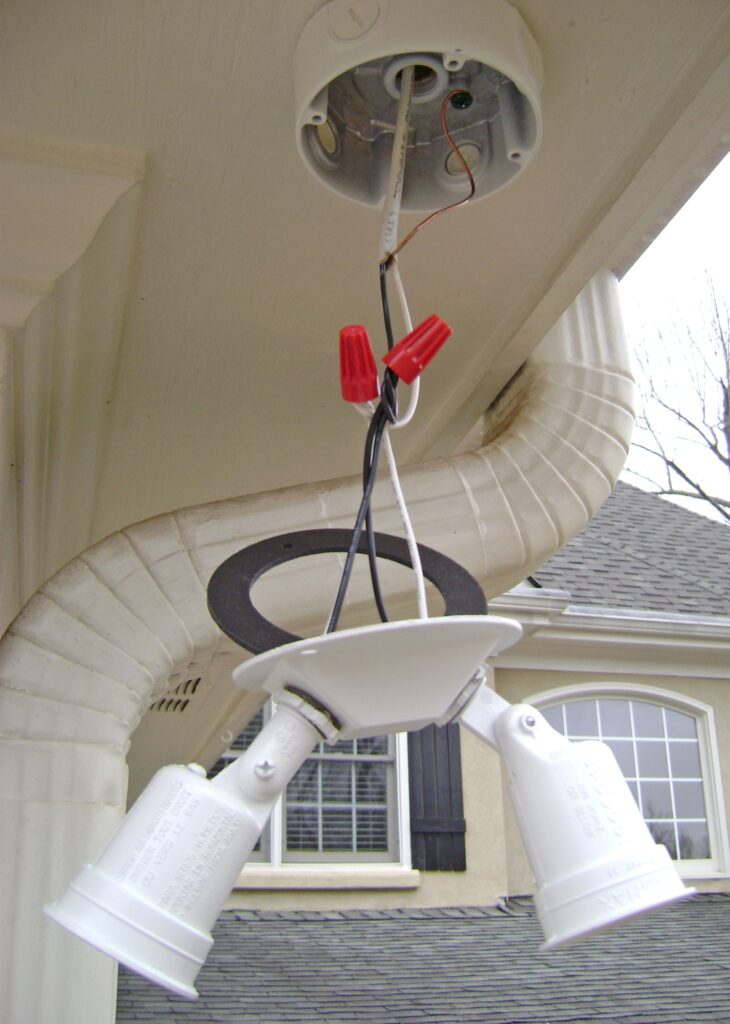
Carefully fold the wires into the base, align the weather gasket with the rim and attach the cover with the provided two screws.
Wiring the 120 Volt Circuit
For the supply side connection with the house mains, I chose to wire the floodlight as a slave unit with my home automation system as described here.
Alternatively, you could install a junction box in the attic and wire the light into a simple on/off switch.
Compact Fluorescent Bulbs
I prefer the new compact fluorescent light bulbs whenever possible. The bulbs are more expensive than traditional incandescent lights, but use 2/3rds less power for the same amount of light output and last 6 years. The newer compact fluorescent bulbs give off a “warmer” light too like traditional bulbs. After replacing most of my light bulbs with compact fluorescents, I’ve noticed a real drop in my electric bill.
For the floodlights, I installed GE 47483 26-Watt (90-Watt equivalent) Outdoor Floodlights. These particular bulbs take a few seconds reach full brightness and work really well.
Aiming the Floodlights
Leave the ladder outside until dusk to aim the lights to cover the areas of interest and tighten the lock screw and lock nuts.
Take care,
Bob Jackson