This product review explains how to choose and configure a Panasonic IP Network Camera with a Power over Ethernet (PoE) connection for Internet connectivity and power.
Panasonic Network Camera Review
The Panasonic IP Network Camera (Editor’s Note: this item is no longer available, so a still available option is linked here) product line packs a lot of features into a small and affordable package. An “IP Network Camera” means the camera is controlled and viewed over the local LAN or Internet connection with any web browser, including an iPad tablet, iPhone, Android or other smartphone.
Things you can do with a Panasonic Network Camera are:
- Remotely see what’s going in real-time with a web browser via the Internet.
- Pan, tilt and zoom the camera image using a web browser.
- Listen and talk to people through the camera – a one-way video conference with two-way audio!
- Review saved images for the past 24 hours or even days at up to 1 frame per second.
- Integrate the camera with your home security system and home automation system. For example, when the front door is opened, the camera will turn to that direction.
- Have the camera e-mail or upload pictures to a web site on a regular schedule or in response to an event, such when a motion sensor is triggered.
- Give family or friends a unique login to watch things while you’re away or to participate in special occasions, like a birthday. They can listen in and talk to you, too!
- See if the dog is lying on the couch again and tell it to get off. (OK – my dog doesn’t listen.)
- Unplug the camera, move it another location, plug it back into the network, and it just works with no reprogramming!
Panasonic IP Camera Network Diagram
The following network diagram illustrates how the camera is connected to a home network and accessed via the Internet.
The camera itself has two connections:
- Power over Ethernet (PoE) via a standard Cat5e cable connected to a PoE port on an Ethernet switch. I use a Netgear FS108P
, 8 port switch with four PoE ports. Any PoE switch will do equally well. The PoE connection provides power and data, greatly simplifying installation.
- Standard 1/8 inch PC speaker jack/cable to a pair of amplified (i.e. externally powered) personal computer speakers. The speakers must be externally powered because the camera doesn’t output enough watts to drive the speakers directly. The purpose of the speakers is to broadcast your voice when talking through a microphone connected to a personal computer.
 , 8 port switch with four PoE ports. Any PoE switch will do equally well. The PoE connection provides power and data, greatly simplifying installation.
At the far end, a Personal Computer with internal speakers allows you to listen to what the camera’s internal microphone hears. The camera’s onboard microphone is very sensitive and you can hear everything! With a microphone connected to the personal computer, you can speak and be heard through the PC speakers connected to the camera.
The ability to talk to people through the camera has endless possibilities; suppose you see a criminal in your house and call the police. As the police walk up to the front door you broadcast into the room “Hey luser! The police have you surrounded! You’re going to jail!”
More commonly, I check that my teenagers arrived home from school safely and ask “Hi! How was your day!”.
Panasonic Network Camera Product Comparison
Panasonic offers a variety of network cameras with different features, applications and price points. When evaluating cameras, I narrowed the selection to seven cameras in the Residential and Commercial product family. After studying product specifications at length, I created the following feature comparison chart to sort out the major points. Click on the chart for a full size view.
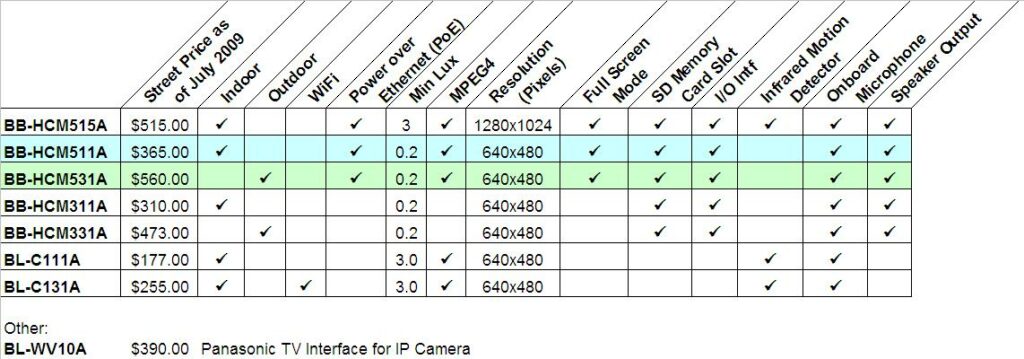
I choose the indoor BB-HCM511A and outdoor BB-HCM531A cameras for my application. Both are identical except for the outdoor approval rating on the -HCM531A model. This tutorial focuses on the -HCM511A installation.
Choosing a Network Camera
My criteria for selecting a Panasonic IP Network Camera are:
- Web browser access via the Internet.
- Power over Ethernet (PoE) – only one Cat5e cable for power and data. Makes installation simple because there’s no need for an electrical outlet and power supply.
- Pan and Tilt – does the job of several cameras because you can look in many different directions.
- Color camera.
- Good low light capability.
- Good resolution – to clearly see faces and details.
- On-board memory card – to save and review images for at least 24 hours.
- Support for a microphone and speaker.
I choose the Panasonic BB-HCM511A (indoor) and BB-HCM531A (outdoor) cameras because both met my requirements and are identical except for the outdoor rating.
The high resolution (1280×1024) model BB-HCM515A is attractive, but at significantly higher cost.
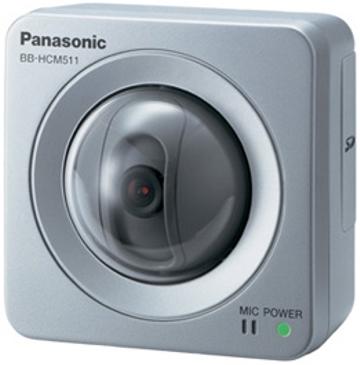
Panasonic BB-HCM511A Network Camera
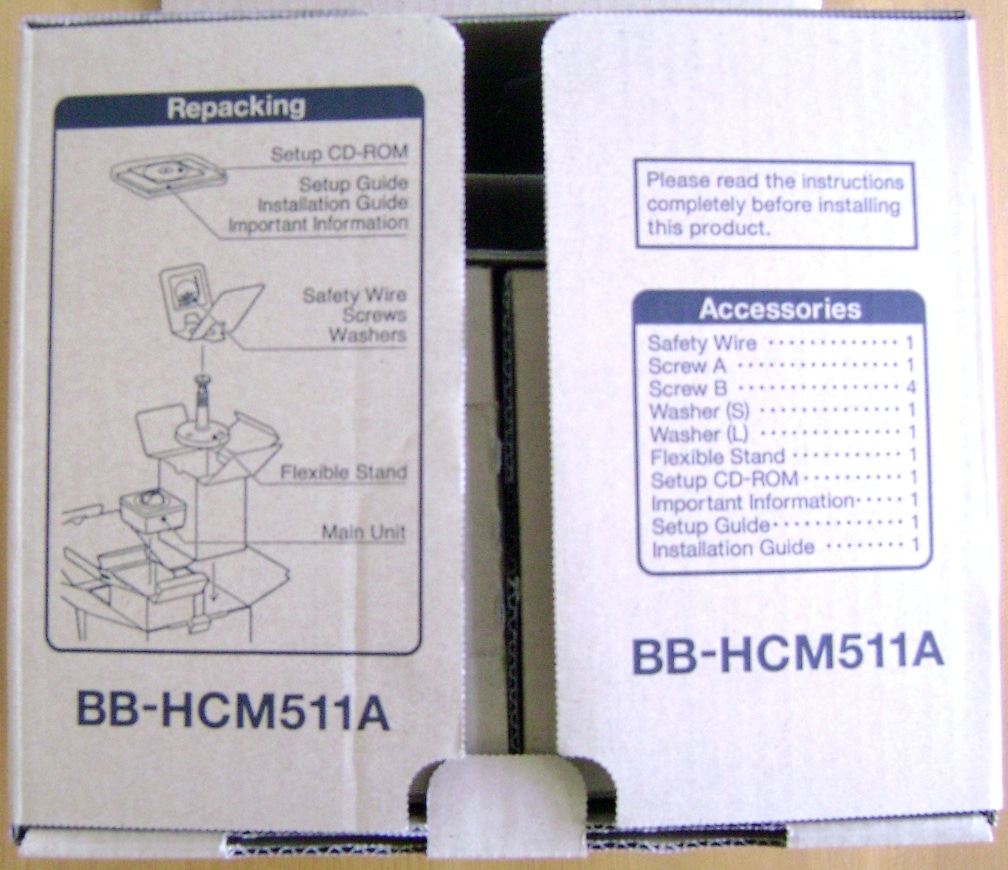
The BB-HCM511A is packaged in a cardboard box about 10 inches in size.

The inside flap illustrates the kit contents:
- CD-ROM and printed documentation.
- Mounting screws, safety wire
- Flexible stand
- Camera unit
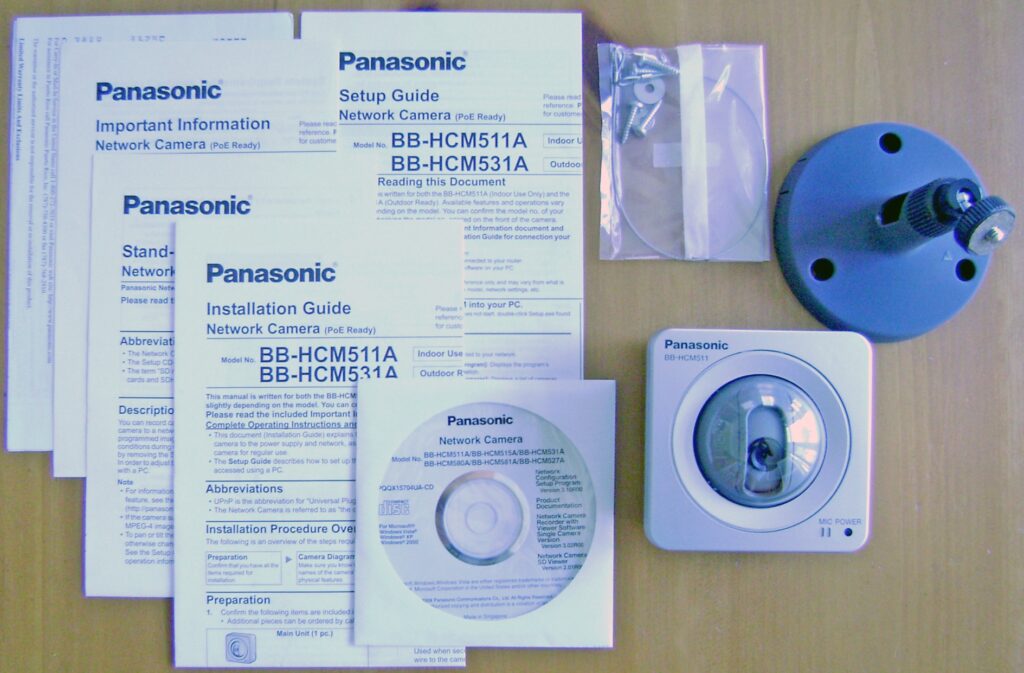
The kit contents:
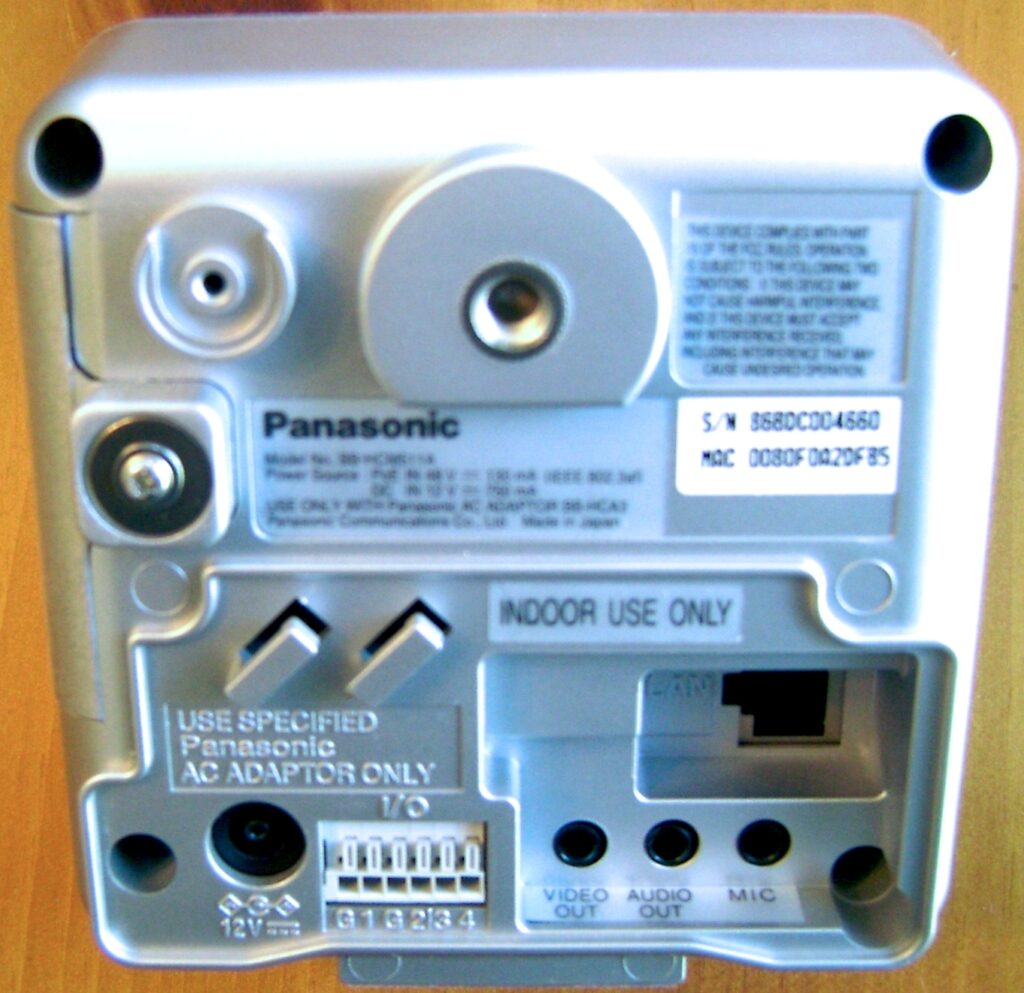
Closeup of the back side of the camera:
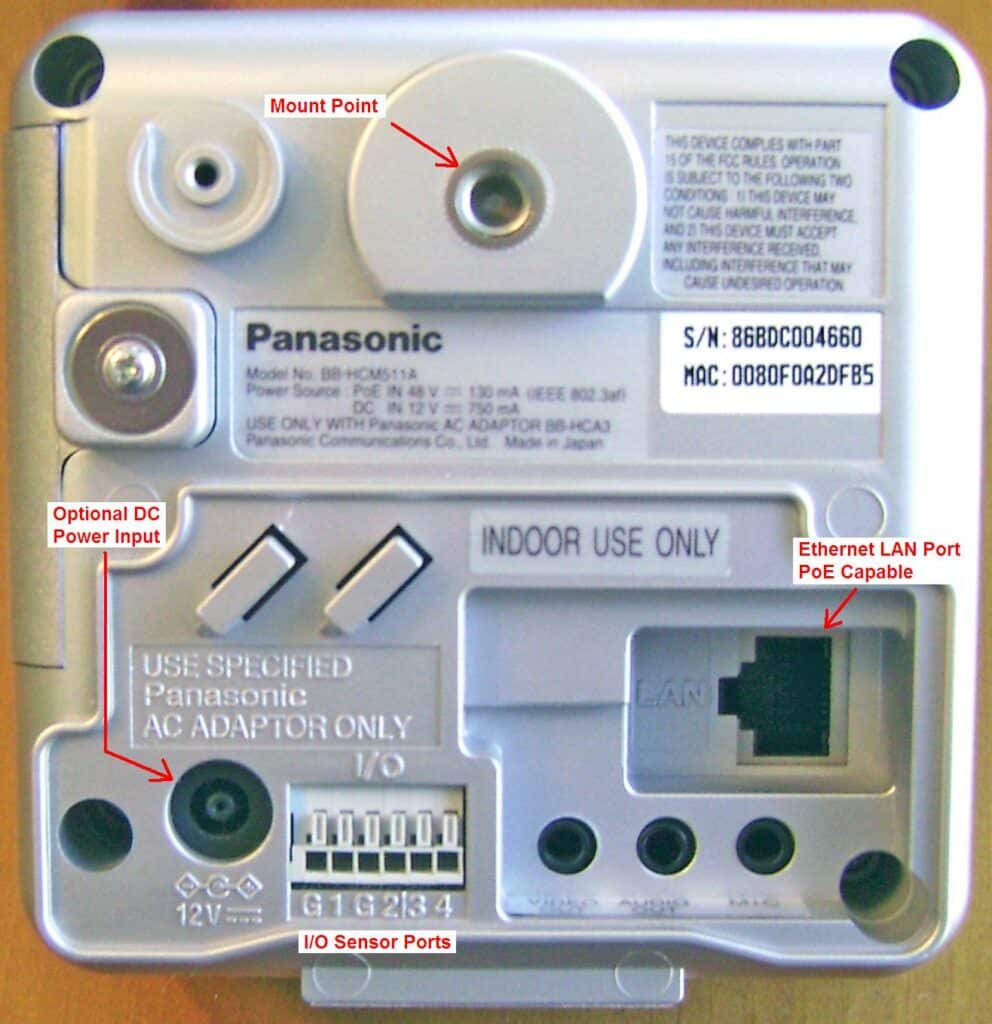
Slightly different angle so you can see the Video Out, Audio Out and Microphone jacks at the bottom right of the camera:
Bottom view and mounting hole:
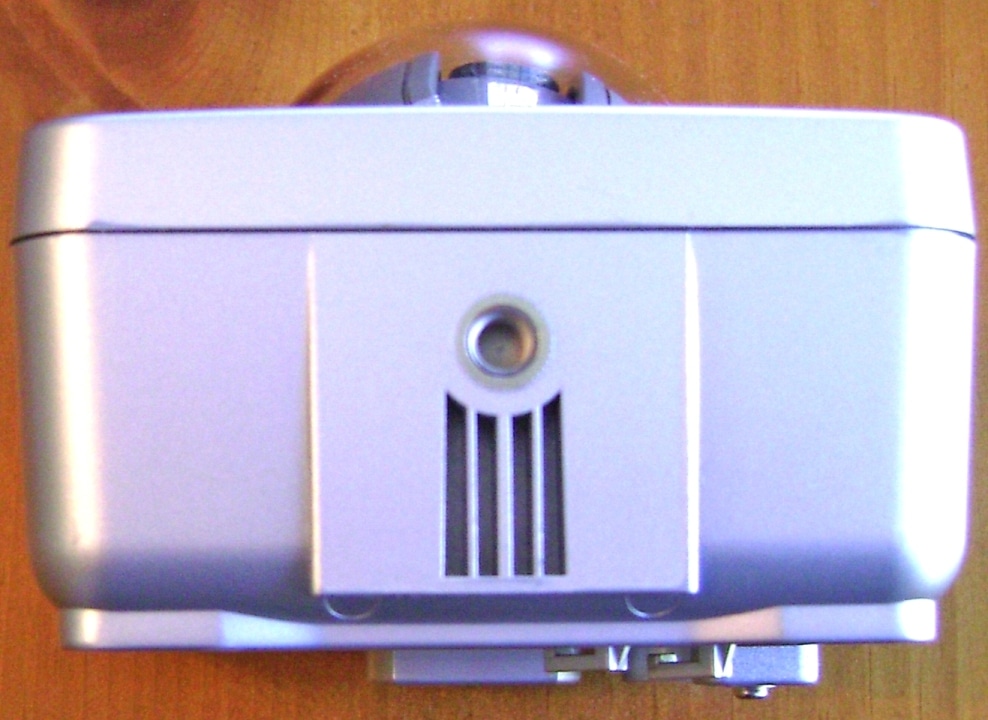
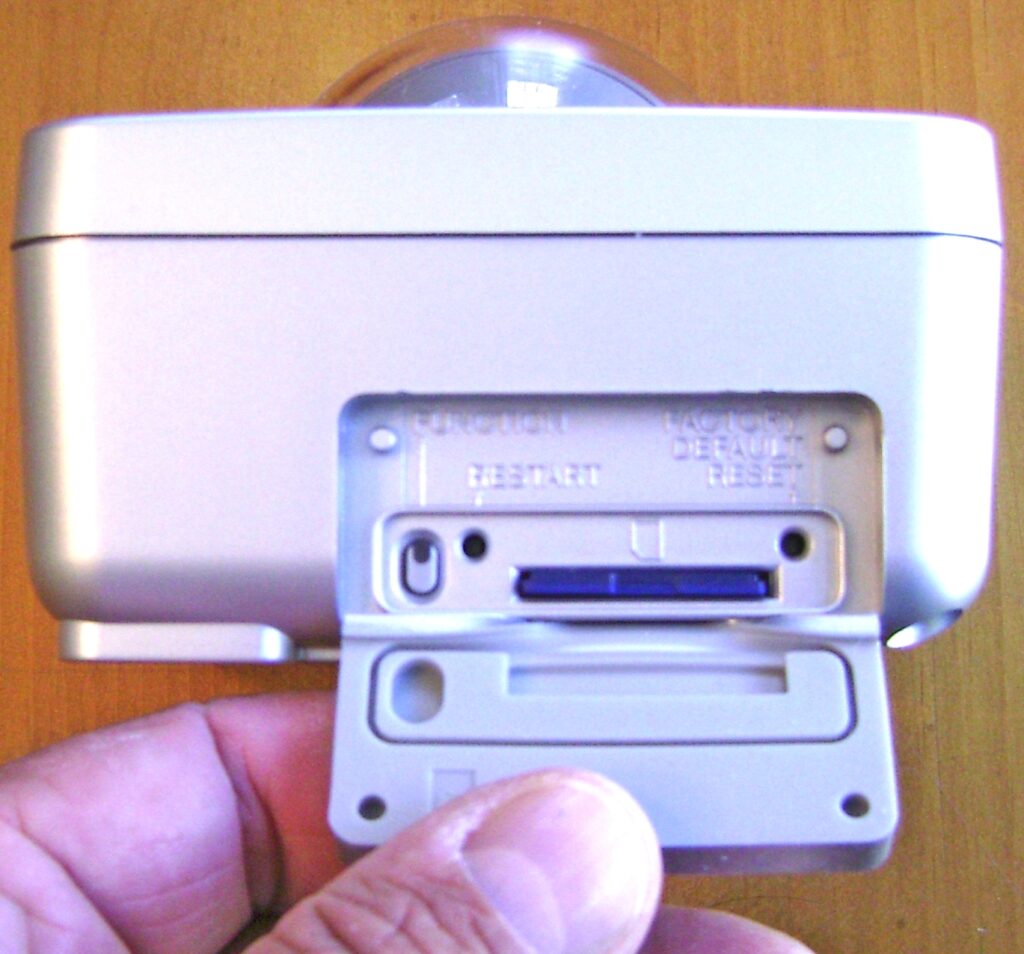
Side view of the SanDisk memory card cover:
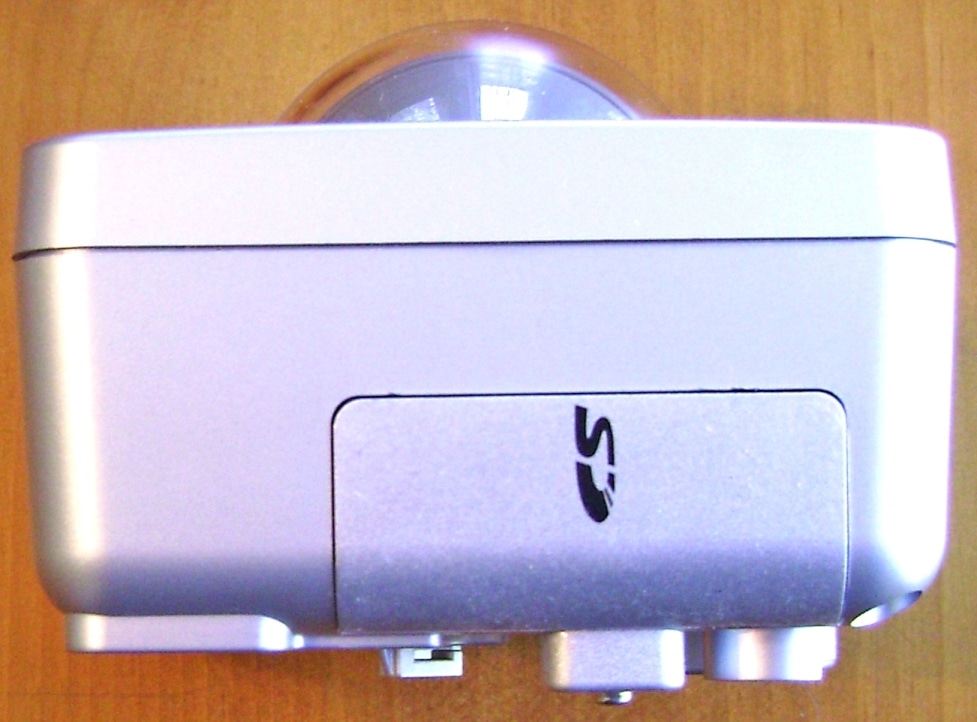
The side cover opens to reveal the:
- Function button
- Reset button
- Factory Reset button
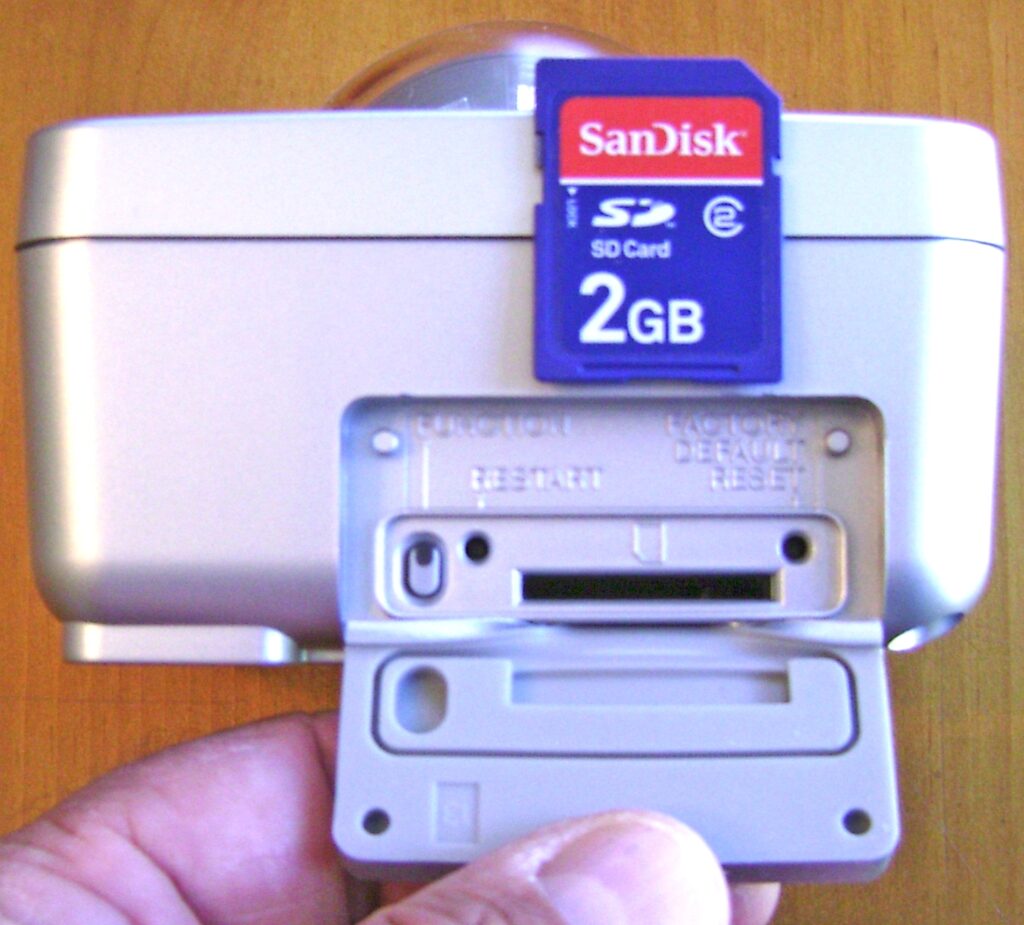
- San Disk memory slot and card
The 2GB SanDisk is purchased separately and installed by the user. The memory card is required to save images on the camera for later review or downloading. A 2GB card holds 24 hours of 640×480 color images at 1 second intervals. A single card can hold weeks or months of images if you save an image only once every several seconds, minutes or hours. When the memory card is full, the newest images overwrite the oldest images.
This is continued in How to Install a Panasonic Network Camera – Part 2.
Take care,
Bob Jackson