This project show how to install a Schlage Keypad Deadbolt lock, model # BE365 for keyless door access. The keyless deadbolt is a huge convenience (never worry about forgetting your house key!) and easy to install. The Schlage Keypad Deadbolt is available in a 8 different finishes to match your current door hardware. This particular model is the Plymouth design with a bright brass finish.
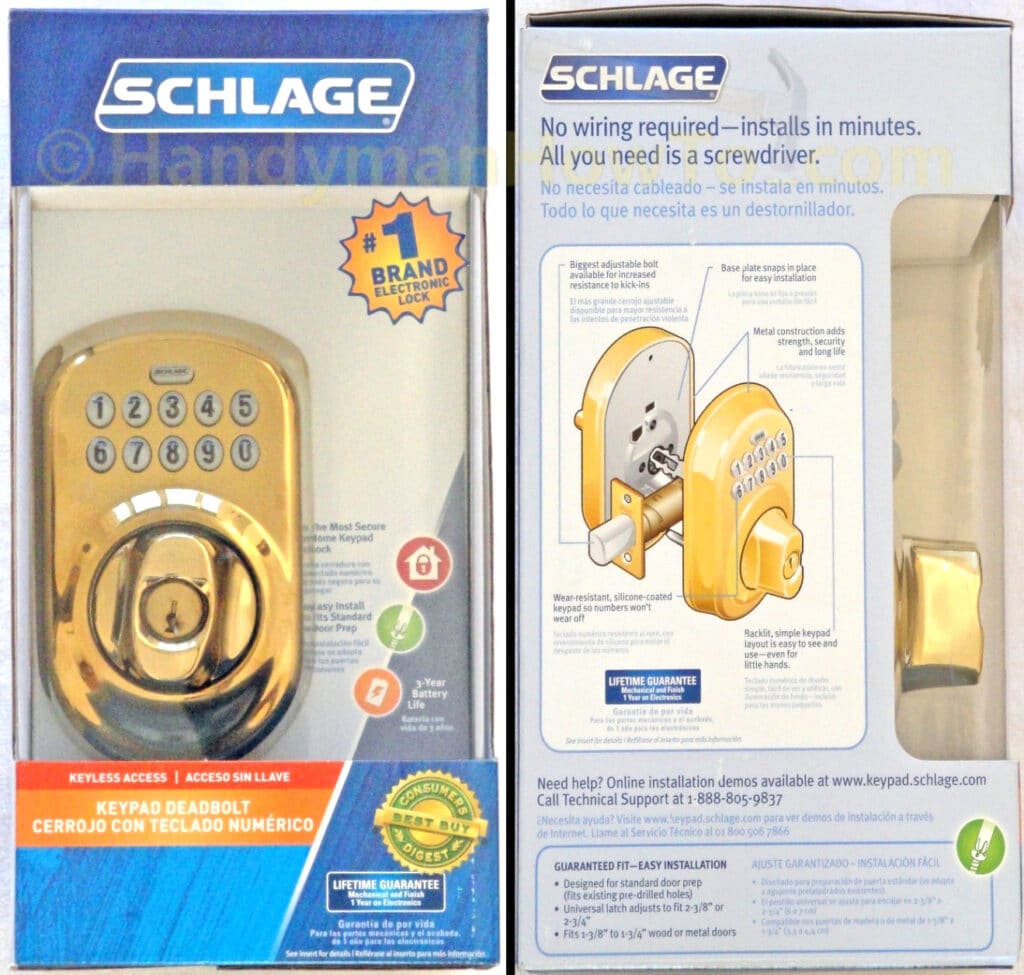
Schlage Keyless Deadbolt Features
I’ve had Schlage keyless deadbolts on my home for over 3 years and it’s saved the family from being locked out numerous times because I don’t need to carry a key and only need my 4 digit “user code” to operate the lock. The features and benefits of the keyless deadbolt are:
- Keyless access
- Easy to program and operate.
The lock is factory programmed with two user codes and ready to use. Programming is only necessary if you want to create your own user code(s). - Backlit keypad for nighttime use
- The keypad won’t wear or fade to show frequently pressed buttons.
- Heavy duty construction
- The thumb knob spins freely until activated by a valid user code to prevent thieves from cranking the lock.
- Lifetime guarantee on mechanical and finish. 1 year on electronics.
- Self contained with no external wiring.
- Simple to create and delete additional user codes in case someone needs access to your home.
For example, you can create unique user codes for renters or a house sitter while you’re away on vacation. The additional user codes can be erased when the renter moves out or you return from vacation. No worries about keeping track of keys or if someone has made a copy of your key. - 30 second keypad disable timer if an incorrect code is entered 4 times to prevent randomly guessing codes.
- 3 year long battery life on a single 9 volt battery (battery included).
- Low battery indicator
- Better security, no need to hide a backup key under the doormat or under a rock.
Keyless access is wonderful for kids and teenagers who are likely to forget or lose keys!
This is the Schlage keypad lock BE365 that’s been on my back door for several years:
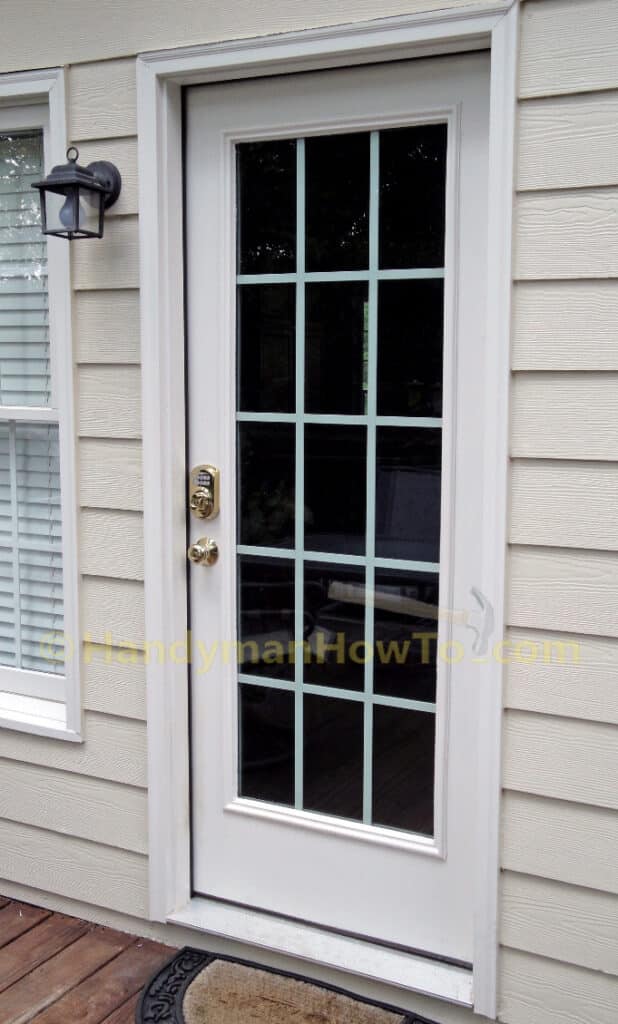
It’s still on the original battery and has worked like a champ!
How to Install a Schlage Keypad Deadbolt
I was visiting relatives who purchased a Schlage keypad deadbolt and needed someone to install it. I explained it would only take 15 minutes or so volunteered to do the job. The house is 30 years old and the brass lockset is badly tarnished – nothing a good polishing won’t fix.
Here’s the contents of Schlage keypad deadbolt model BE365 hardware kit. A Philips- and flat head screw drivers are all you need to install it.

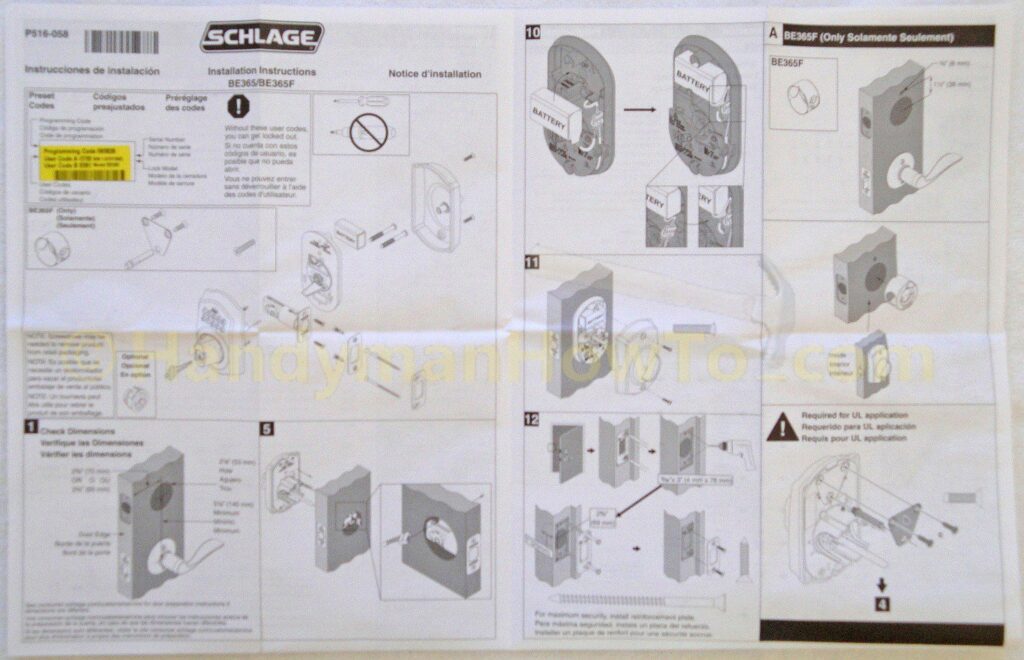
The installation instructions are well illustrated with a minimum of words in English, Spanish and French. Note the yellow sticker – this lists the Programming Code and two pre-programmed User Codes. You’ll want to file this information away in a safe place.
Schlage has an excellent installation video at the BE635 support site.
Remember to verify the Schlage keypad deadbolt will fit your door per the “Check Dimensions” listed in Step 1 of the installation instructions. The Schlage is standard dimension lock and will fit most doors.
Remove the Old Deadbolt Lock
Working from the interior side of the door:
- Unlock the deadbolt.
- Remove the screws from the deadbolt.
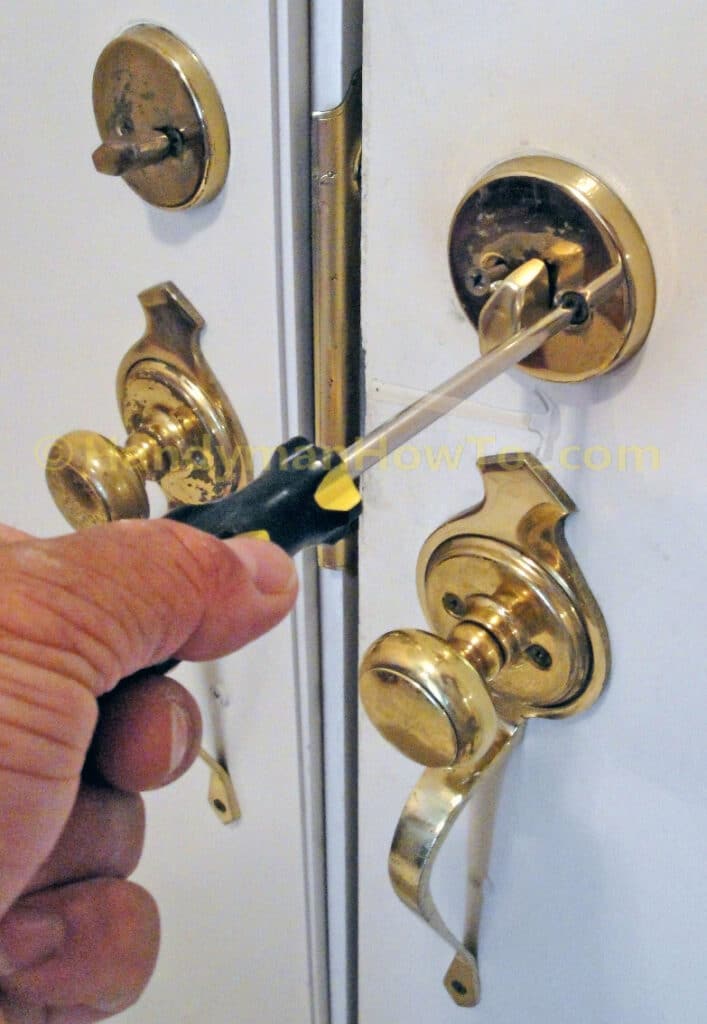
Slide the lock out of the door. The exterior lock trim plate is stuck to the door by paint and popped off with a nudge.
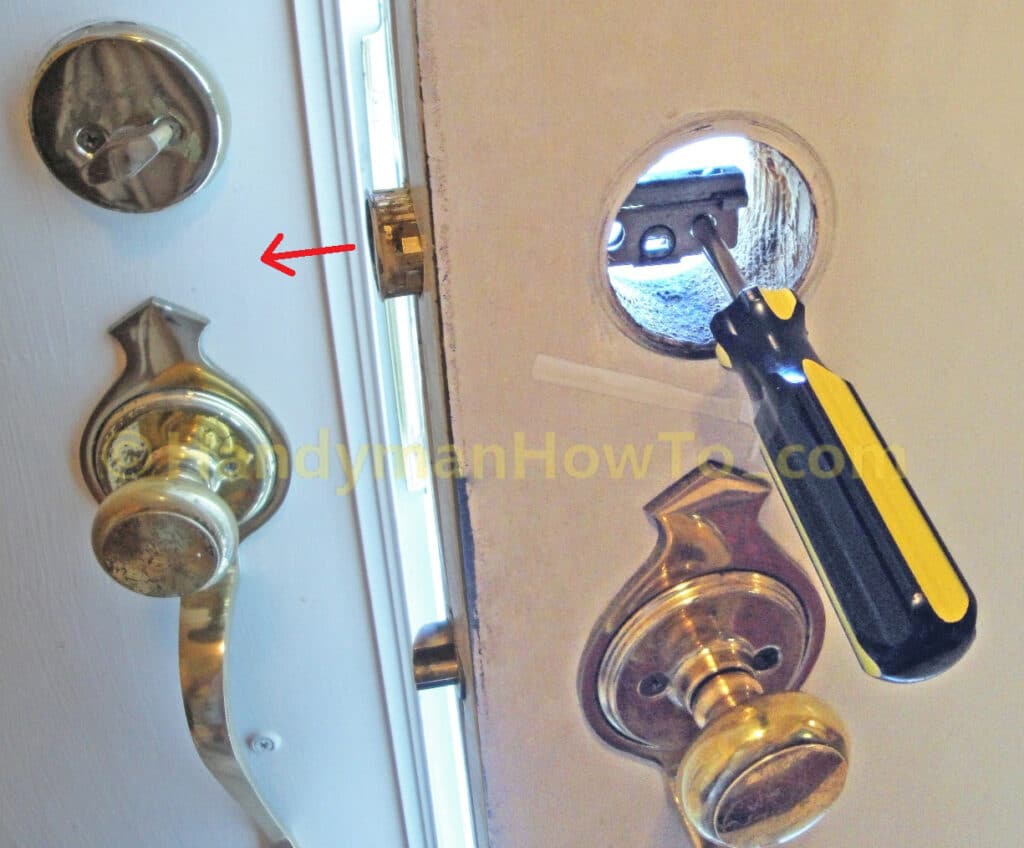
This door latch has a round faceplate in the door edge that held in place by friction. A screw driver is used to push out the latch. Your door may have a rectangular faceplate that’s fastened with two screws, if so remove the screws and pull out the latch.
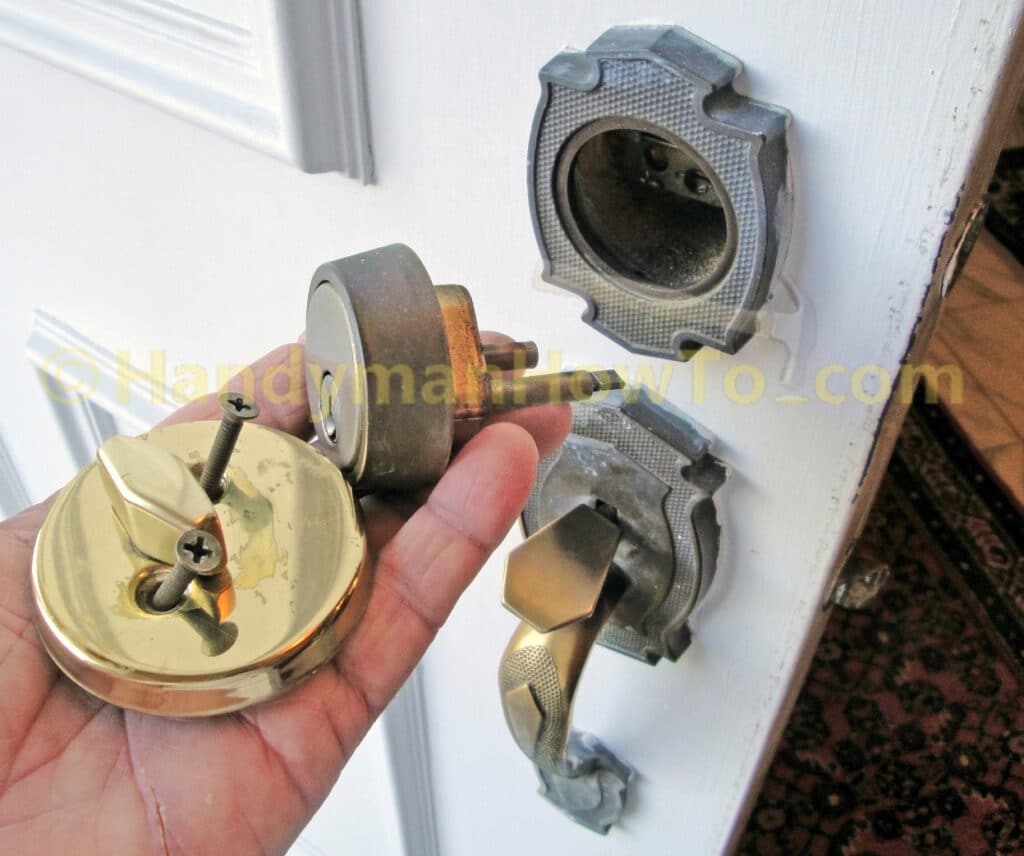
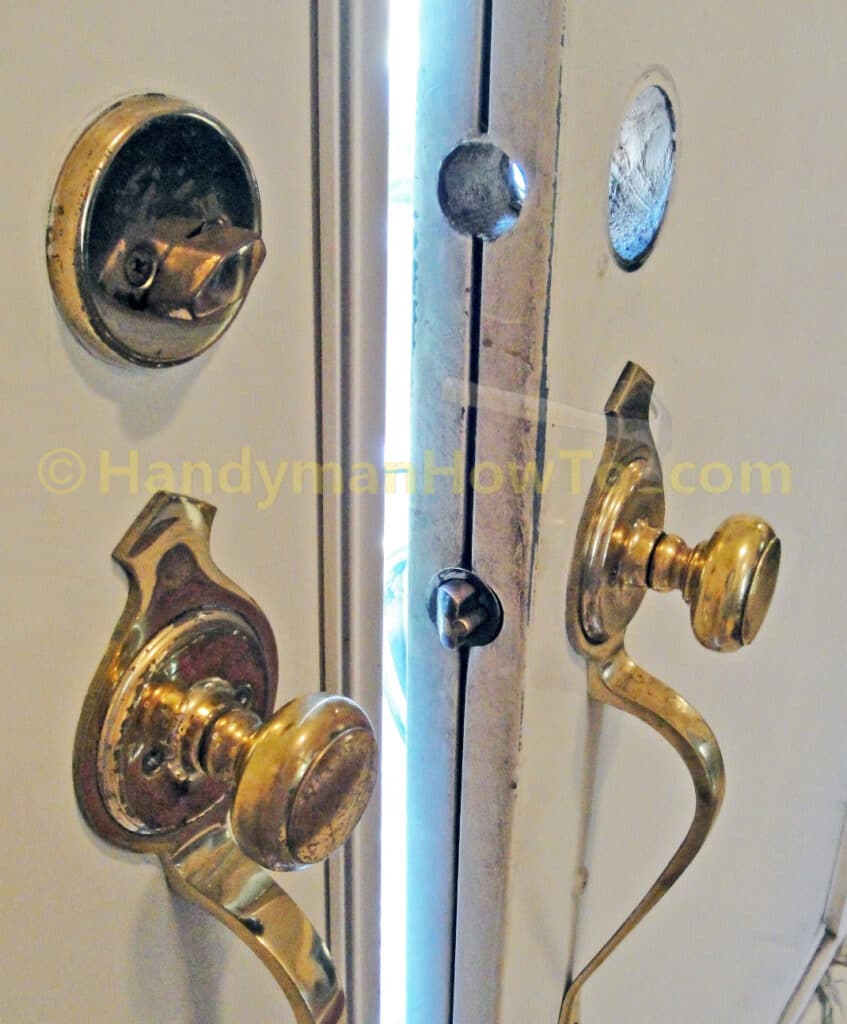
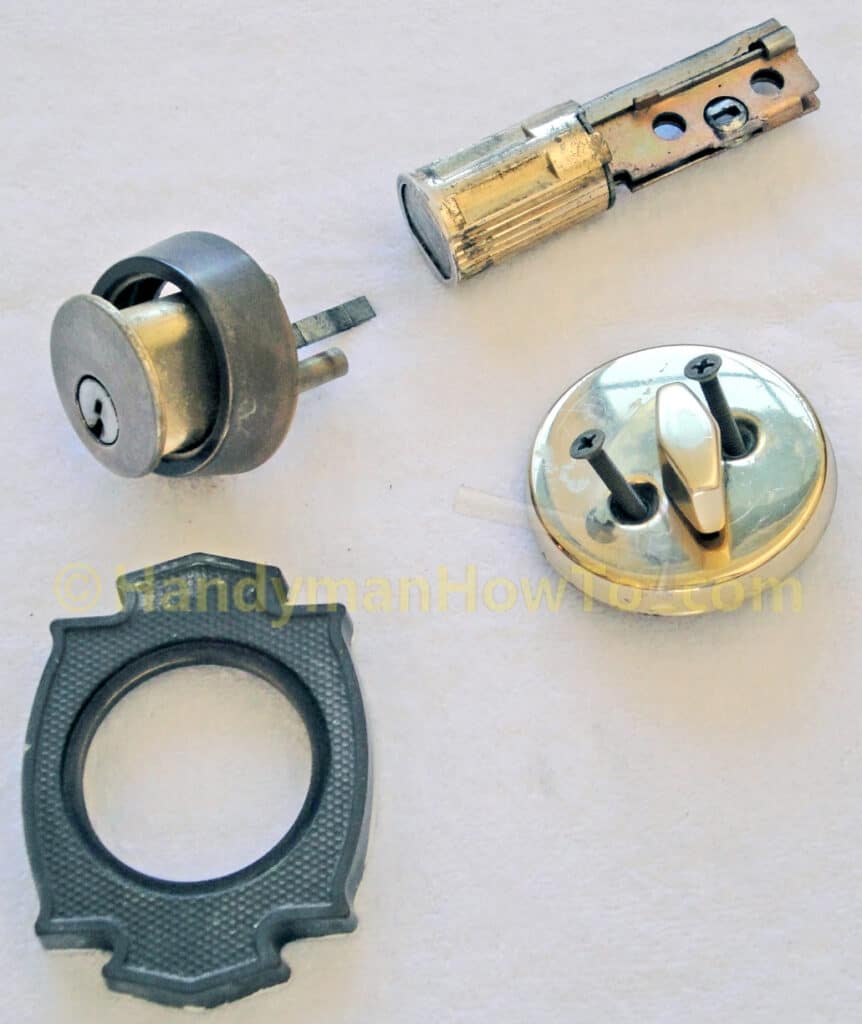
Closeup of the door after removing the old deadbolt (the deadbolt on the left is a dummy for appearances only):
The old deadbolt locks parts. Clockwise from top right:
- Latch
- Turn knob assembly
- Exterior trim plate
- Lock cylinder and ring
Adjust the Exterior Door Lock Latch Backset
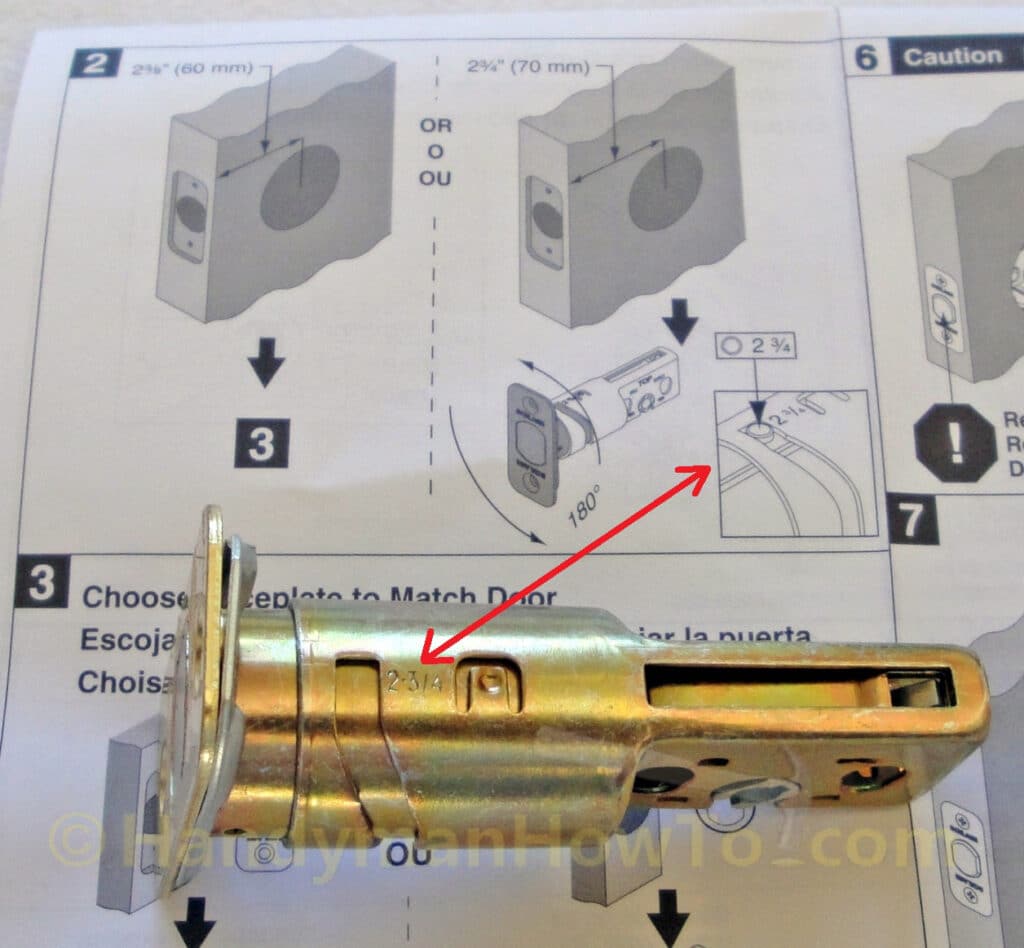
Backset is the distance from the door’s edge to the center hole for the doorknob, or deadbolt in this case. The Schlage keypad deadbolt is easily adjustable for a 2-3/8 inch or 2-3/4 inch backset. Instead of measuring the backset distance for the latch, I simply compared the new Schlage latch to the old latch. It’s obvious the door is a 2-3/4 inch backset:
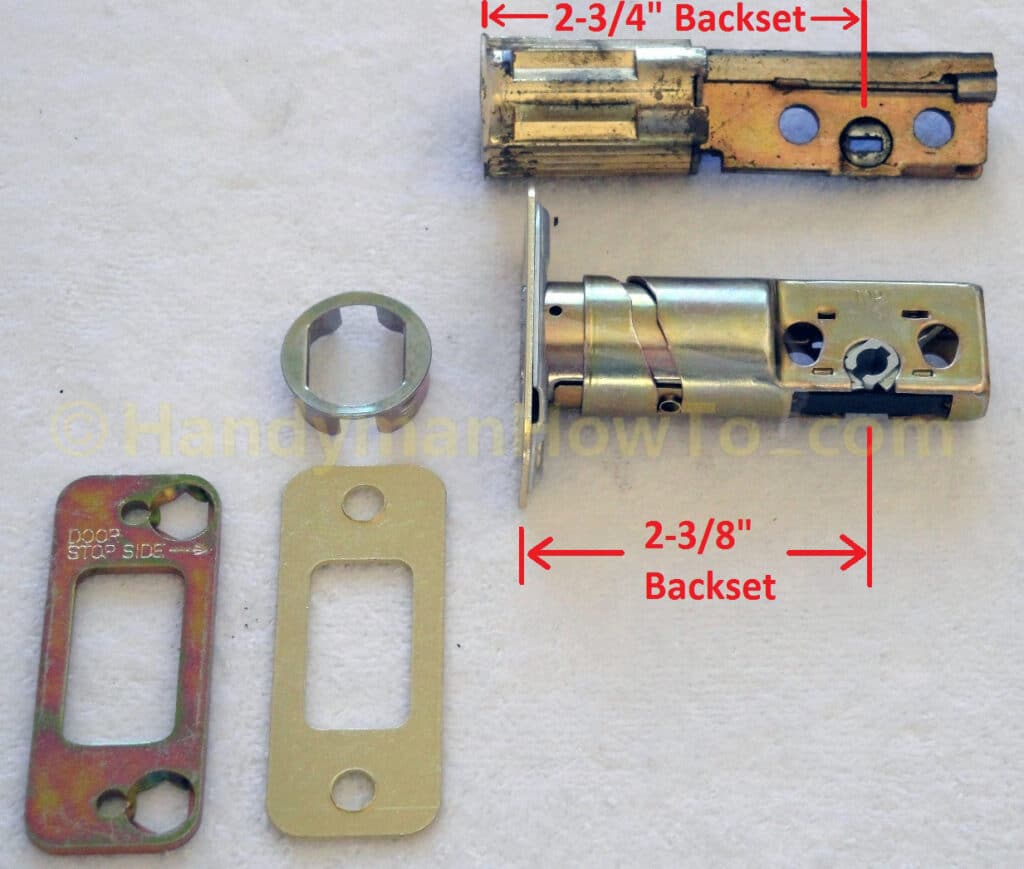
The latch backset adjustment is shown Step 2 of the installation instructions. Simply twist the faceplate 180 degrees to cam the latch to the 2-3/4″ backset position as stamped on the latch:
The 2-3/4″ backset now matches the old latch:

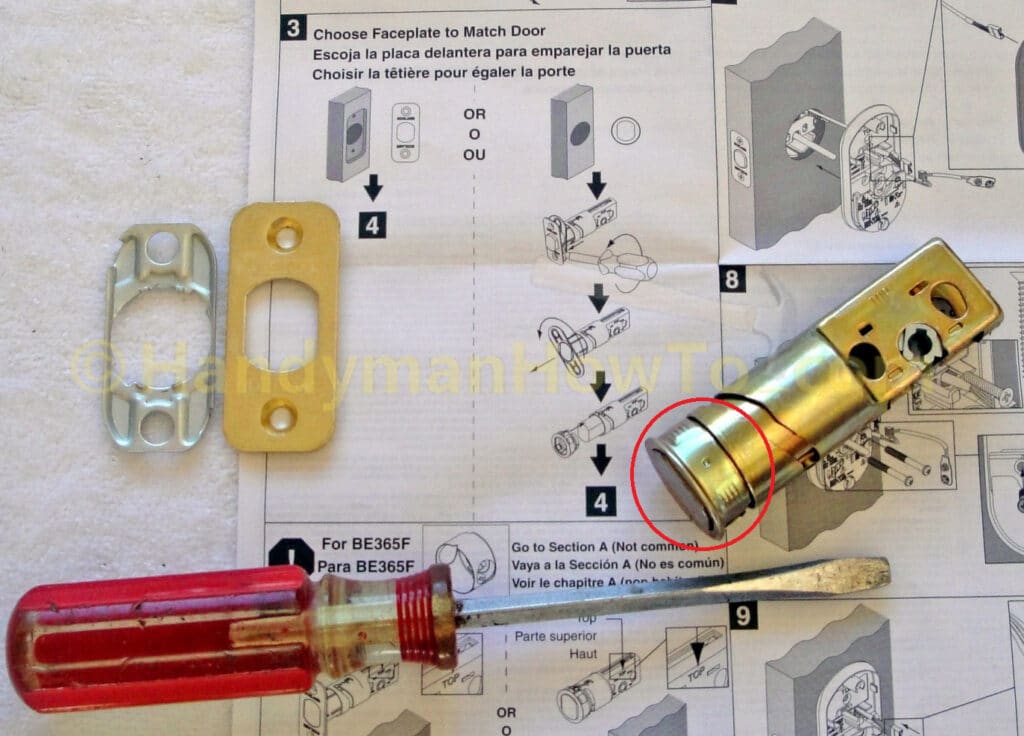
Change the Latch Faceplate
The Schlage deadbolt kit includes three faceplates – two rectangular with square and rounded corners, and a circular faceplate. If the factory installed faceplate doesn’t match your door, snap off the faceplate with the tip of a screwdriver and pop on a new one per Step 3 of the instructions. I needed the round faceplate as highlighted in red:
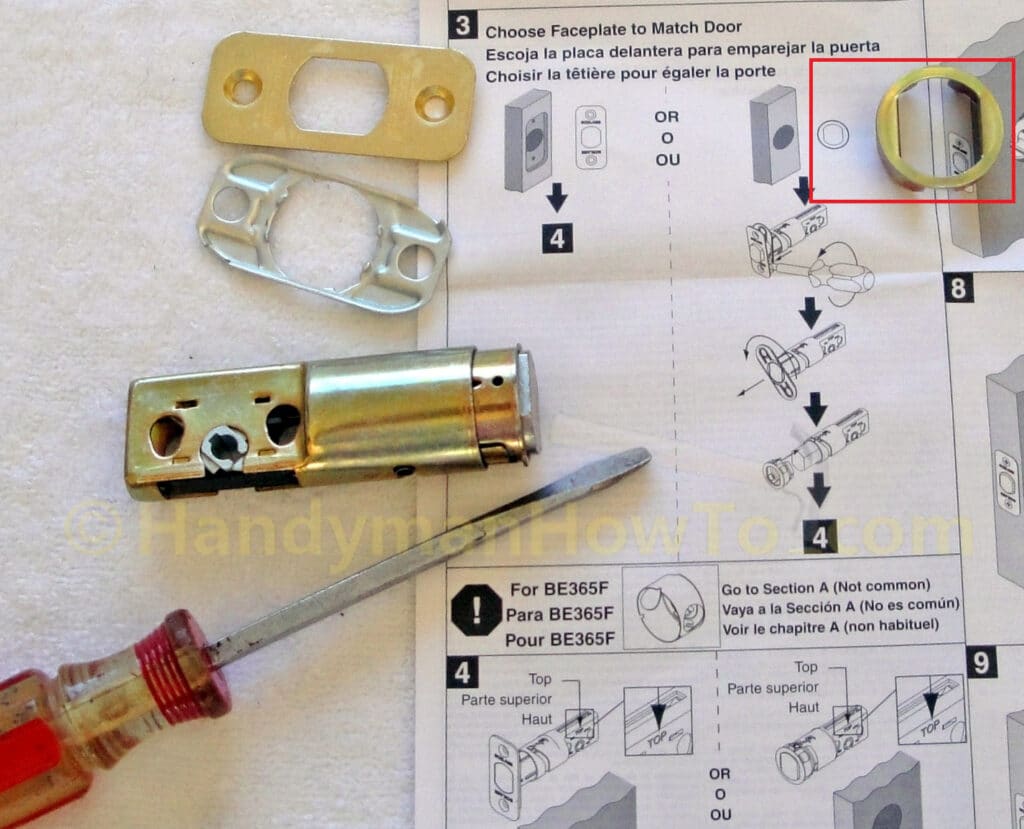
The round faceplate snaps onto the latch:
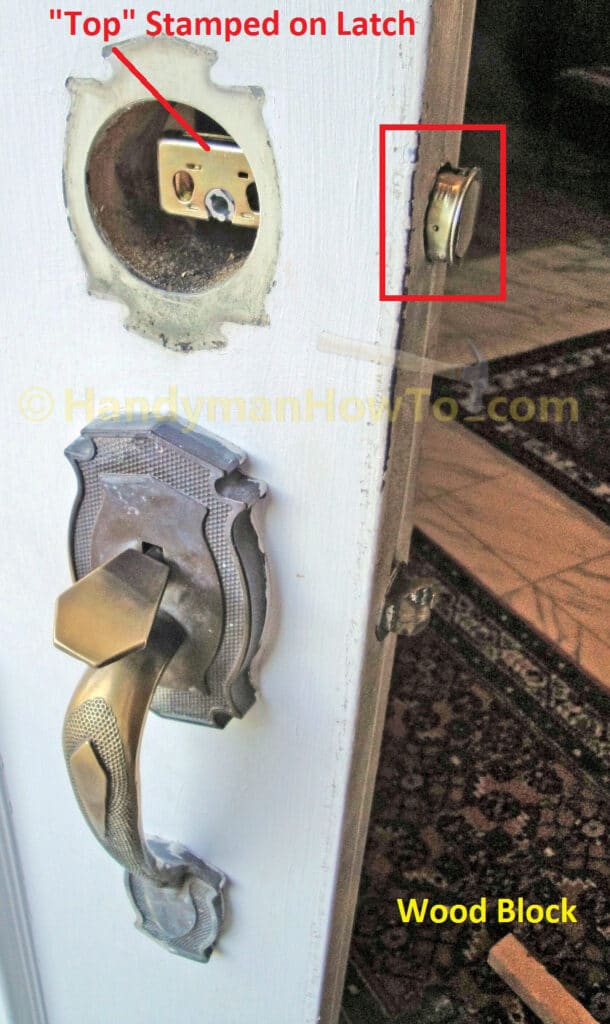
Orient the latch so the word “Top” that’s stamped into the latch body is on top, then slide the latch into edge of the door frame. By design, the round latch faceplate fits tightly into the door frame. A wood block is placed against the faceplate to protect it as it’s fully seated by a couple of taps with a hammer. If your faceplate is the rectangular style, fasten it with screws per the instructions.
This project is concluded in How to Install a Schlage Keypad Deadbolt – Part 2.
Thanks for reading,
Bob Jackson