This article discusses how to arrange the water supply line, drain hose and electrical wiring then set the dishwasher under the kitchen counter. It is a continuation of the series on How to Replace a Dishwasher.
Dishwasher Replacement Project Table of Contents
This article is part of a project series on replacing a dishwasher. The project phases are:
- Part 1 – Troubleshooting why the dishwasher won’t drain
- Check for clogs in the drain hose, sump and check valve.
- Discovered the old dishwasher is leaking on the floor.
- Decide the old dishwasher isn’t worth fixing.
- Part 2 – Disconnect and remove the old dishwasher.
- Disconnect the drain hose, water supply and electrical connections.
- Water was leaking on to the solenoid drain valve, causing it to go bad.
- Part 3 – Buying a New Frigidaire Gallery Dishwasher
- New Dishwasher overview.
- Consumer Reports, SquareTrade extended warranty, Mfg Installation Instructions
- Part 4 – Install a new Water Supply Line and Dishwasher Elbow
- Part 5 – Set the dishwasher under the counter and height adjustment (this article).
Dishwasher Cabinet Installation
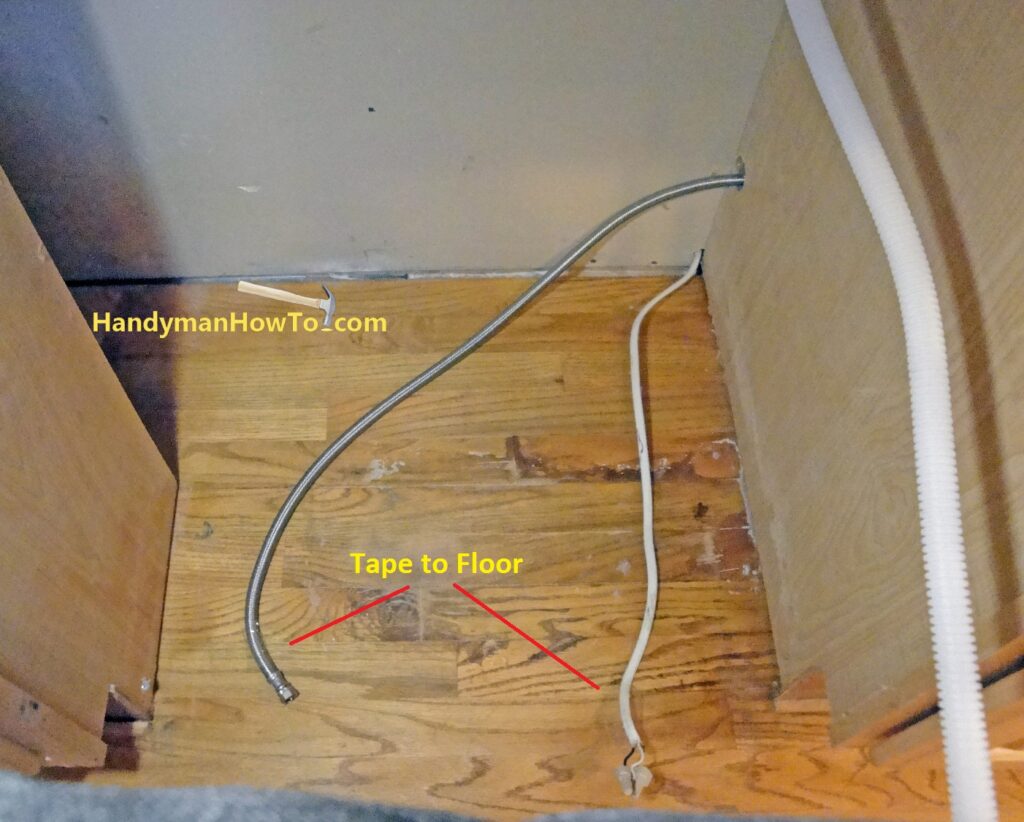
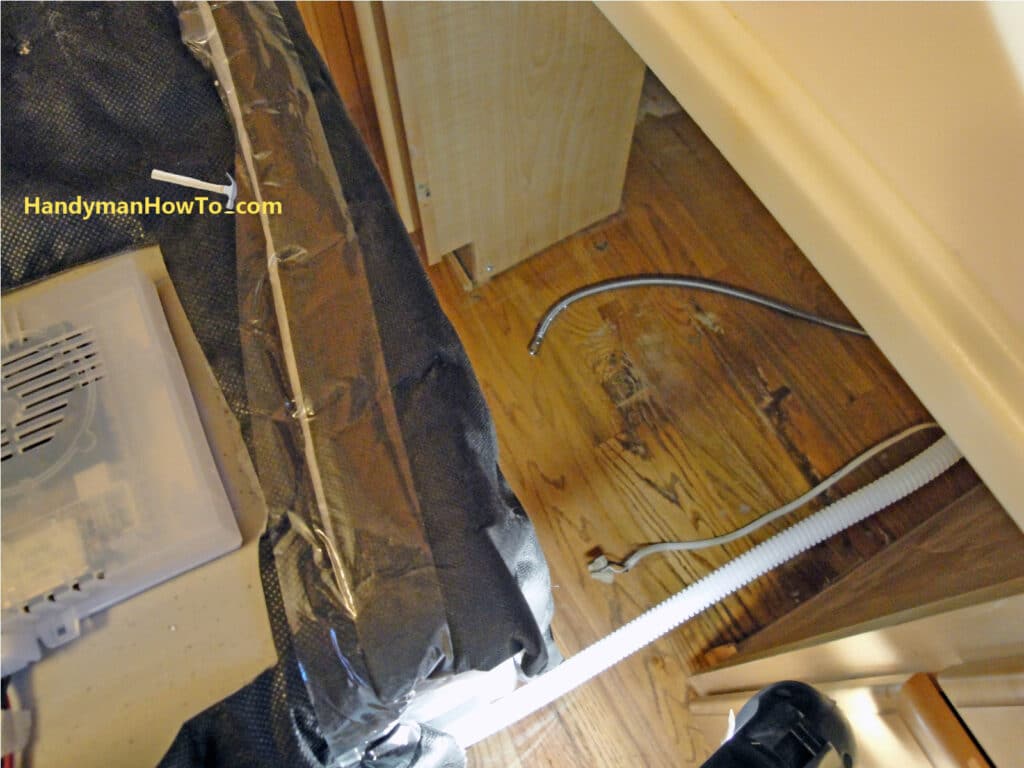
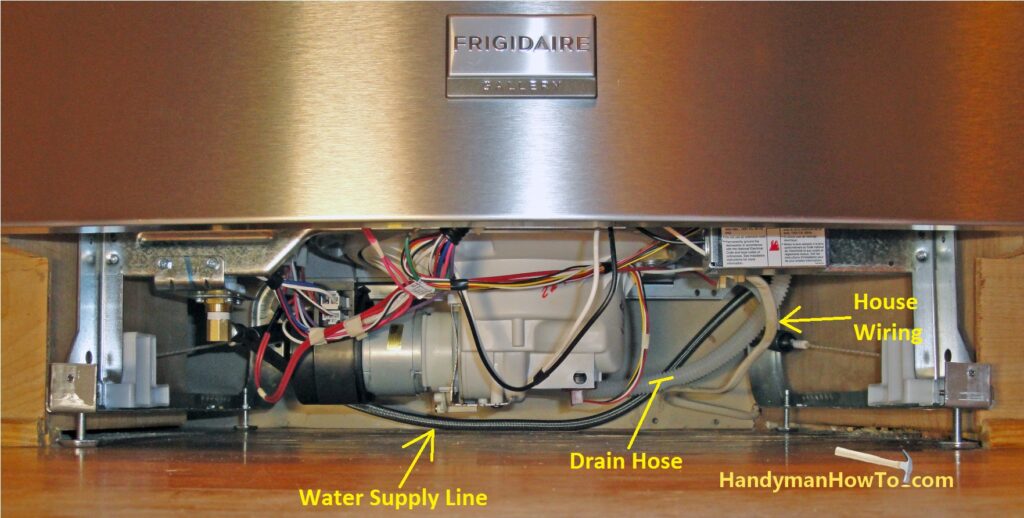
I’m almost ready to slide the new dishwasher under the counter. First, tape the water supply line and house electrical wire to the floor as shown. (I used clear packing tape that is hard to see in the photo.) Next, insert the flexible drain tube into the hole at the back of the cabinets as far as it will go so you can pull it through as you slide in the dishwasher.
Raise and Level the Dishwasher
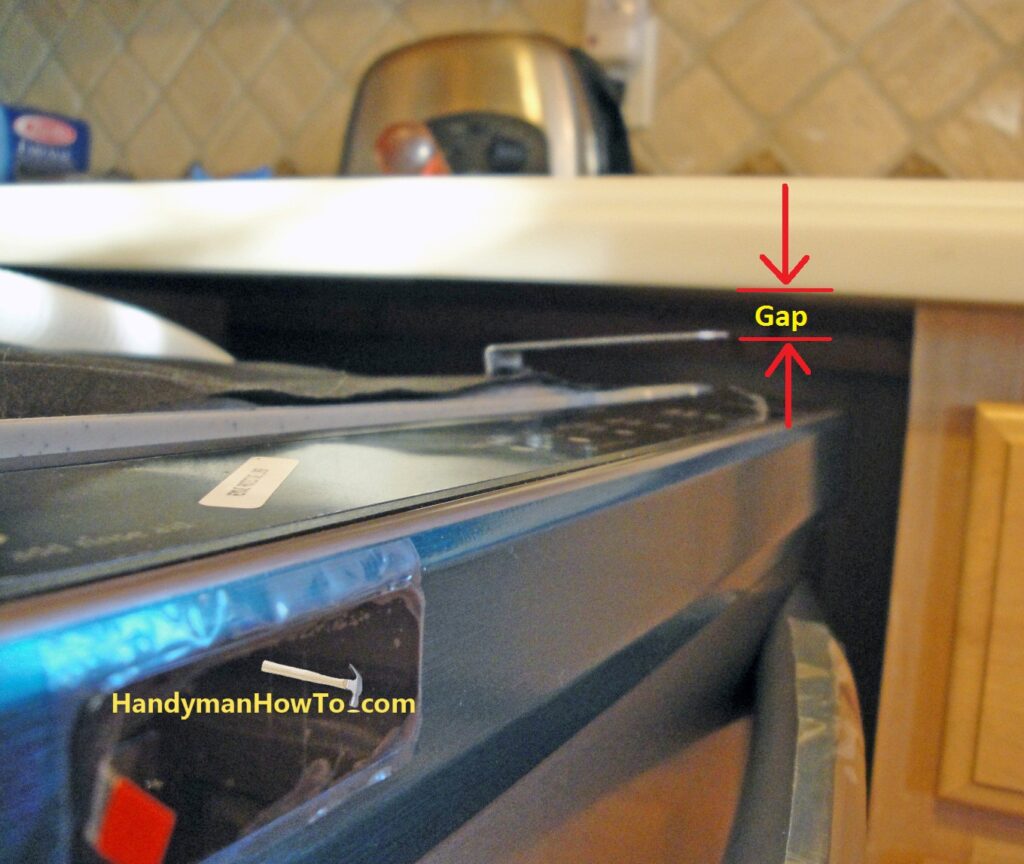
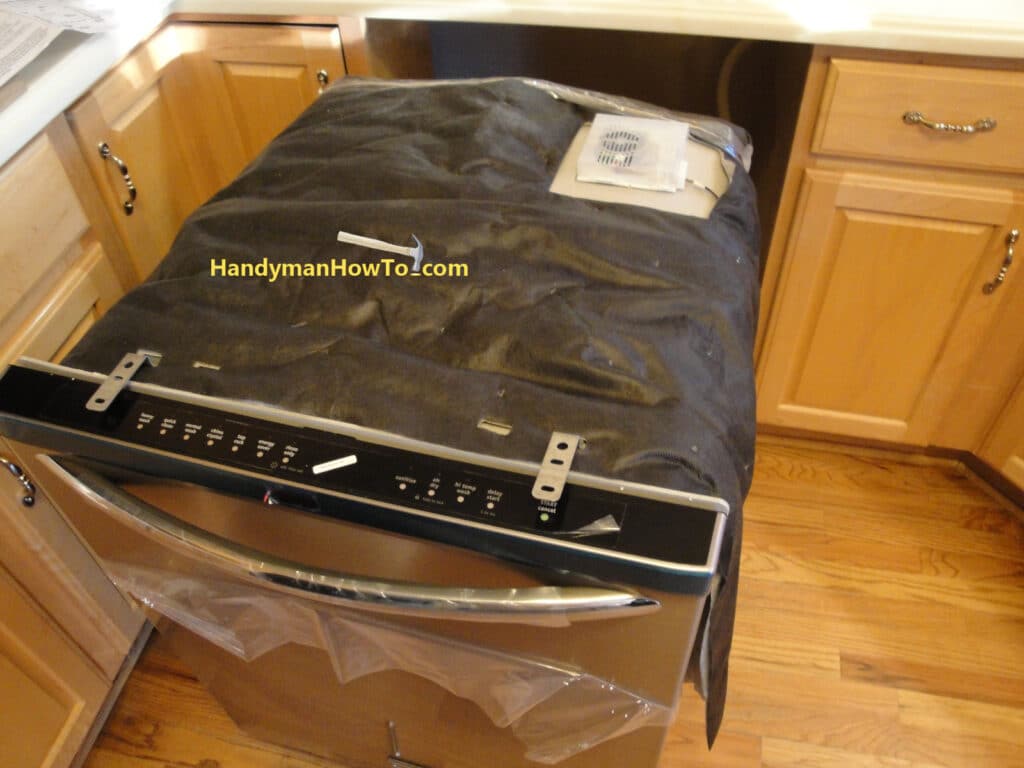
I slid the dishwasher sideways next to the counter to check the gap between the mounting bracket and bottom of the counter top. It’s way easier to make the major adjustments to the dishwasher feet while it’s out in the open. The dishwasher needed to be raised about 1″ so the bracket would be roughly even with the bottom of the counter.
Tip: A generous gap between the dishwasher and counter top is needed for venting, so don’t raise the dishwasher so high that you mash the mounting bracket.
The dishwasher is shipped from the factory with the feet fully retracted. The feet studs have a hex head that fits a socket wrench.

Unscrew the feet to raise the dishwasher, checking the mounting bracket clearance with the counter top. I found that if I raised the dishwasher (it’s not heavy) I could spin the feet out quickly with my fingers saving some time.
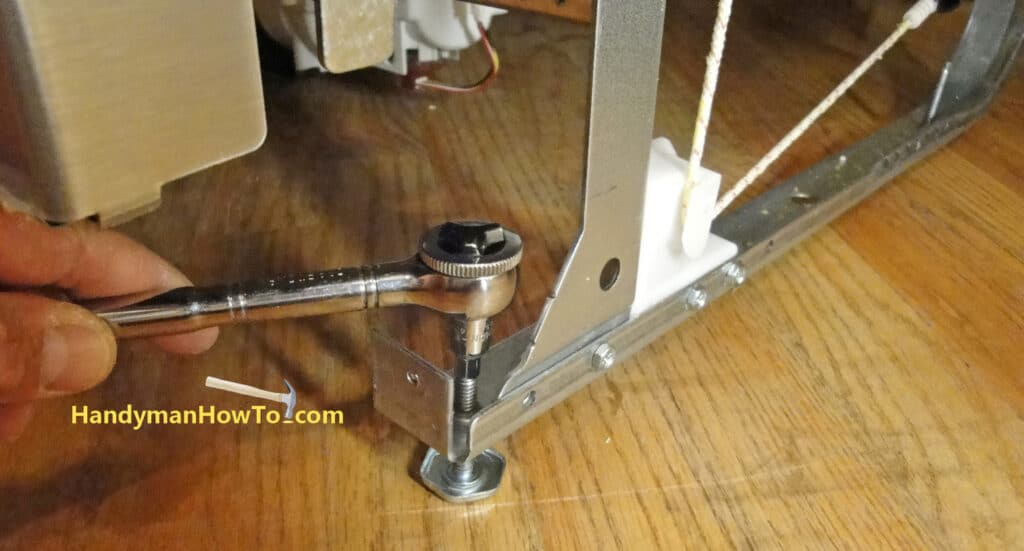
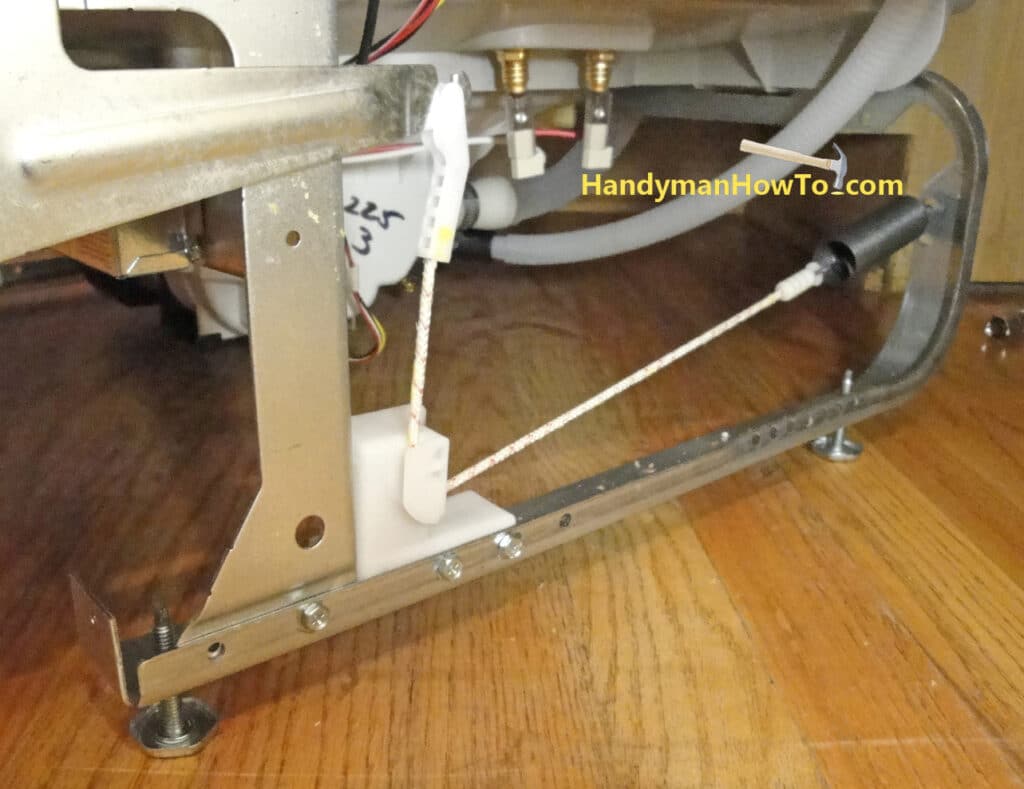
Front and rear feet adjustments to raise the dishwasher. Do the same for the feet on the other side.
Set the Dishwasher under the Kitchen Counter
Getting ready to slide the dishwasher in under the counter. Verify the hoses and wires are positioned as shown.
Gently slide the dishwasher into the space under the cabinet. Stop every foot or so to pull the drain line through the cabinet and check for kinks.
Check the dishwasher water supply line and house electrical wiring is accessible and positioned as shown.

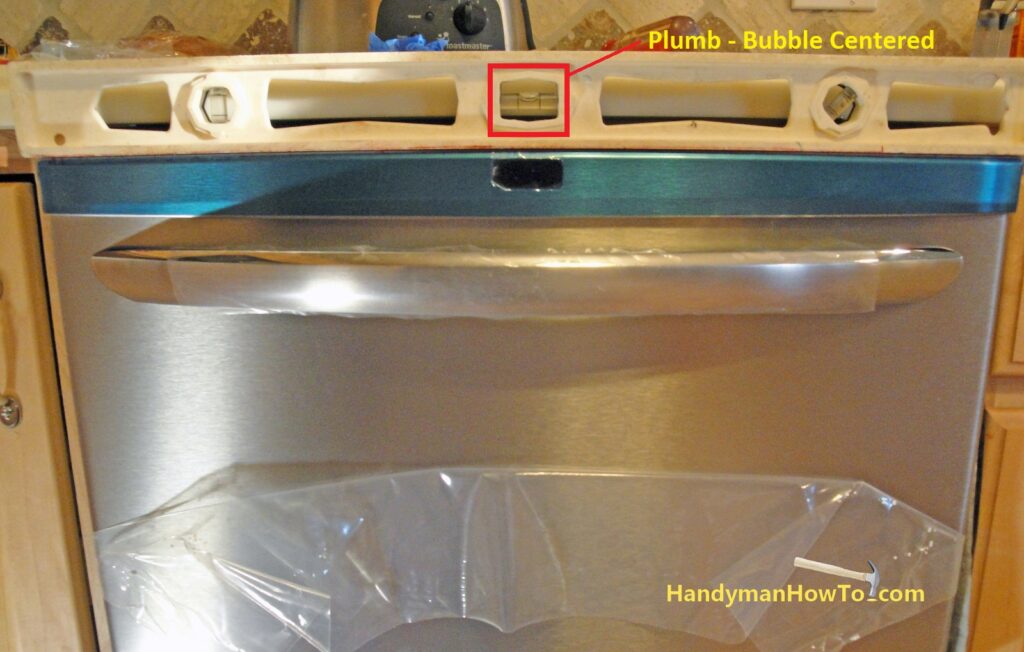
Level the Dishwasher
Level the dishwasher by placing a carpenter’s level on the door and adjusting the front feet. Adjust the rear feet as needed to remove any wobble. Place the level on the bottom frame to check it’s level front-to-back and adjust only the rear feet.
Dishwasher Countertop Mounting Brackets
The dishwasher mounting brackets are highlighted in the yellow squares. The brackets are attached to the counter top with the two screws provided with the dishwasher.
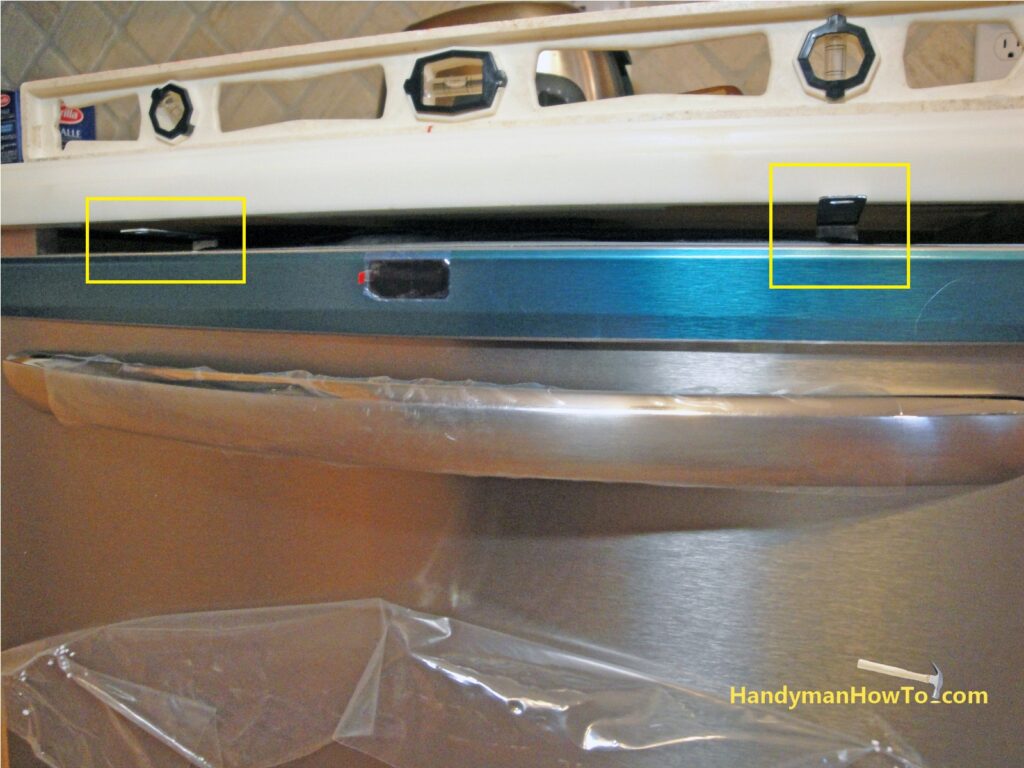
Set the dishwasher in the cabinet such that the sides of the tube (red arrows) is even with the cabinets face with an equal gap. The mounting brackets should be fully recessed under the counter top (yellow squares).
Careful! The dishwasher has a tendency to tip forward with the door open.

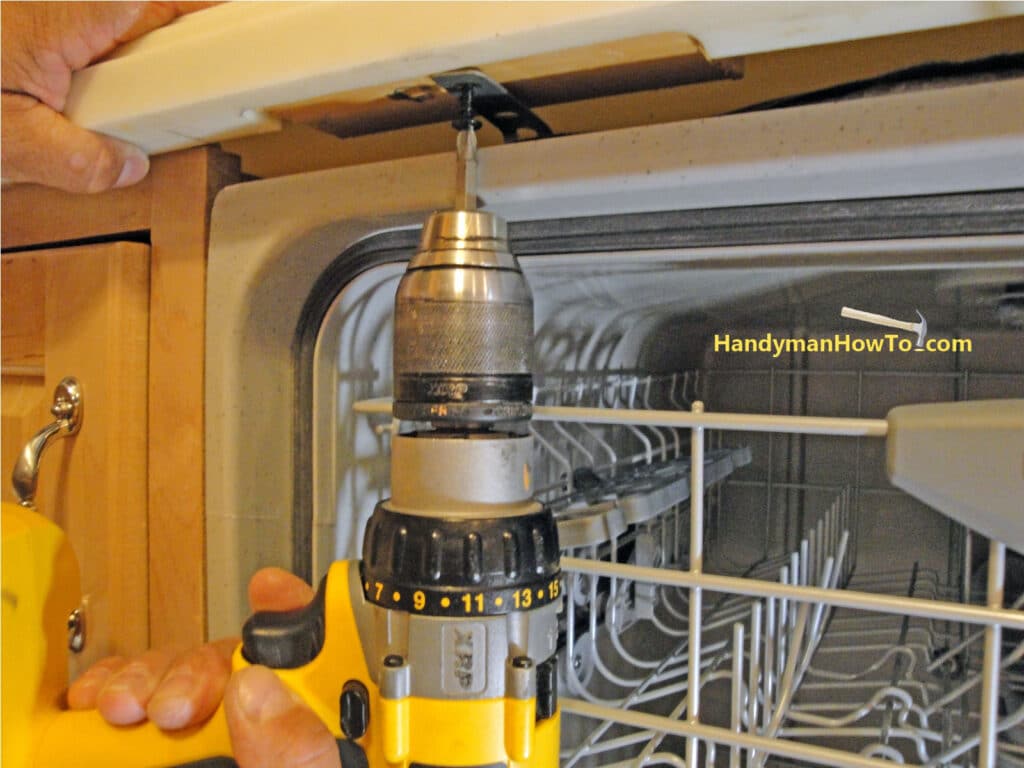
Fasten the mounting bracket to the counter top with the screw included with the dishwasher.
Connect the Water Supply Hose
Thread the water supply hose to the brass elbow until hand tight and tighten an extra 1/4 turn with a wrench. Do not use plumber’s tape or putty.
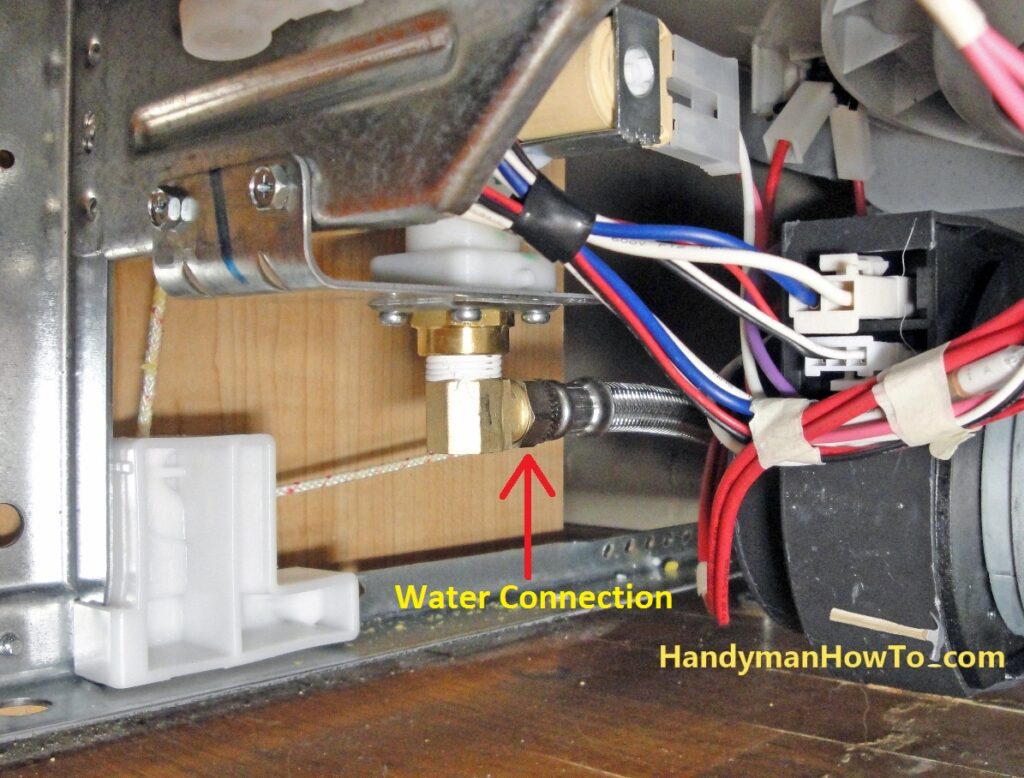
The connections will be checked for leaks later.
Dishwasher Electrical Wiring Hookup
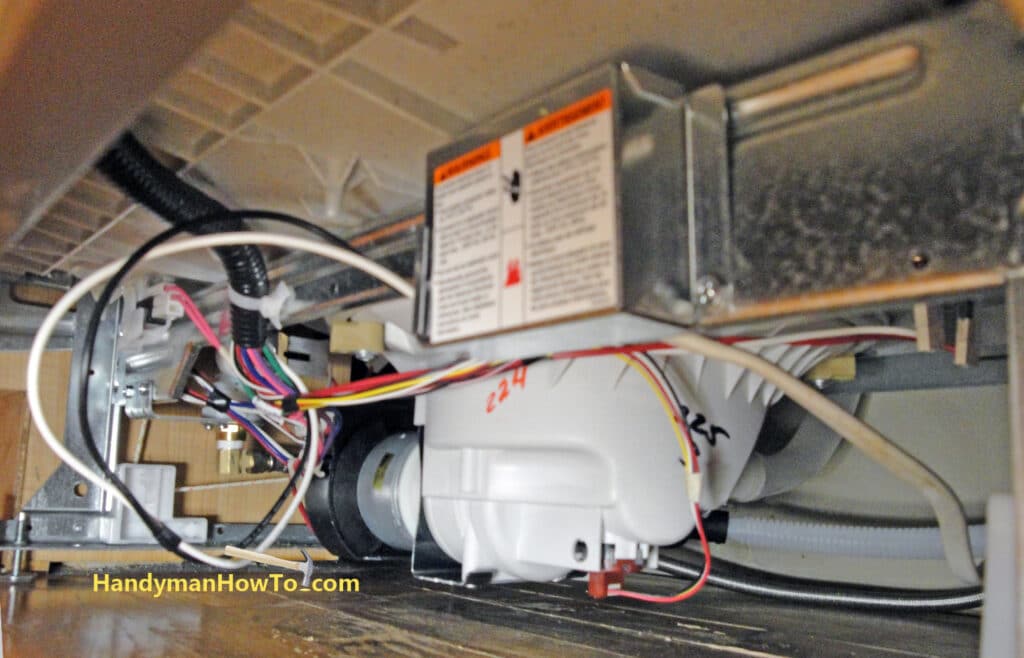
The dishwasher electrical connection is made inside the metal box on the right side of the dishwasher. Note the NM 14/2 house wiring lying on the floor.
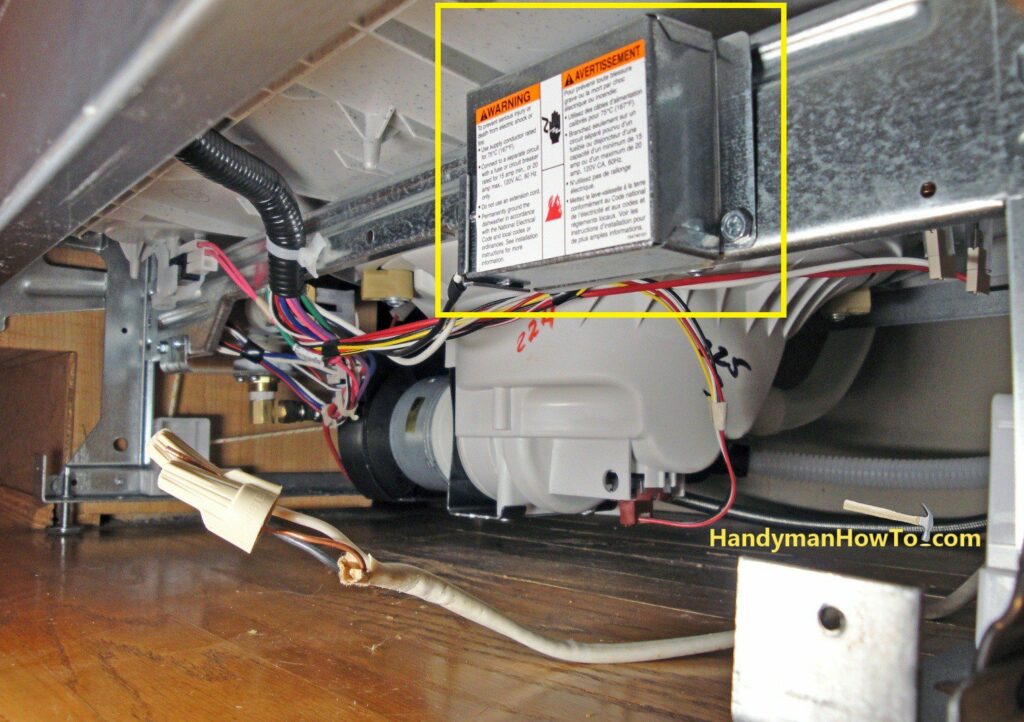
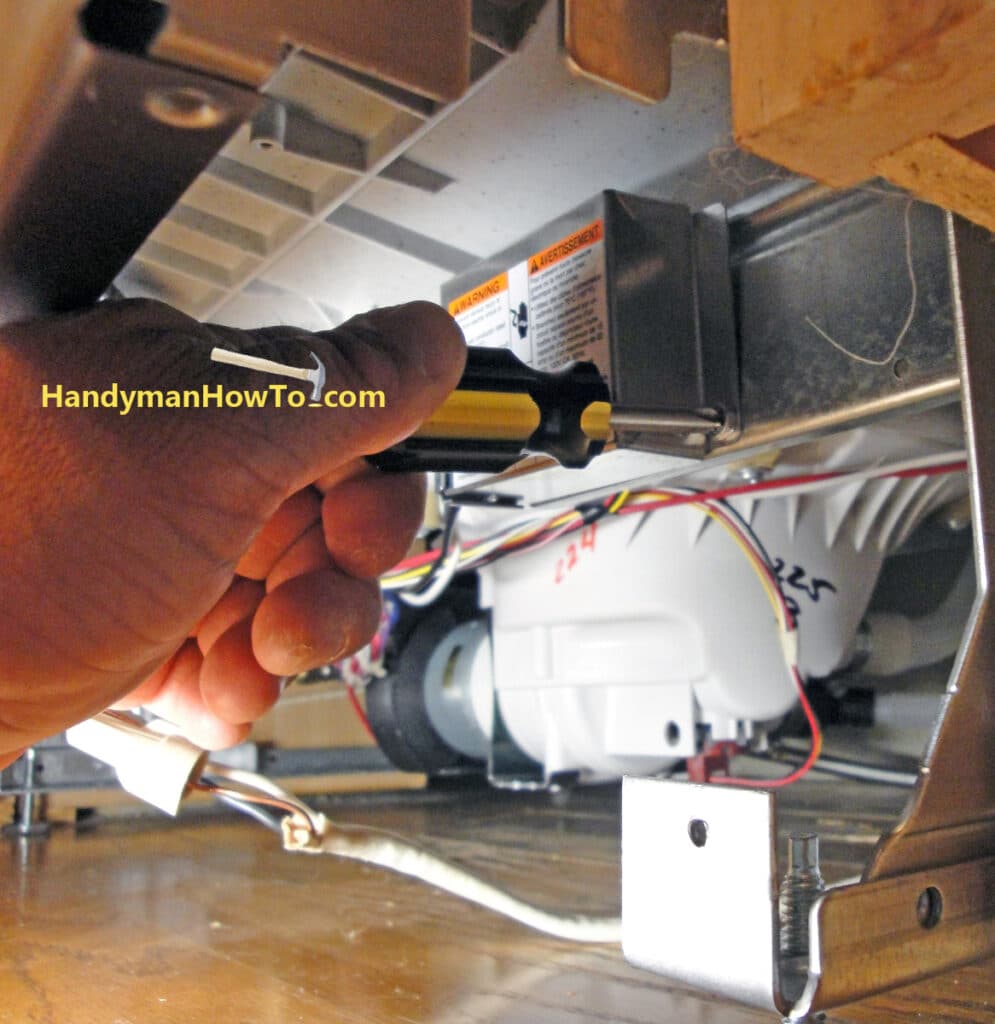
The cover to the electrical box is fastened with a single screw.
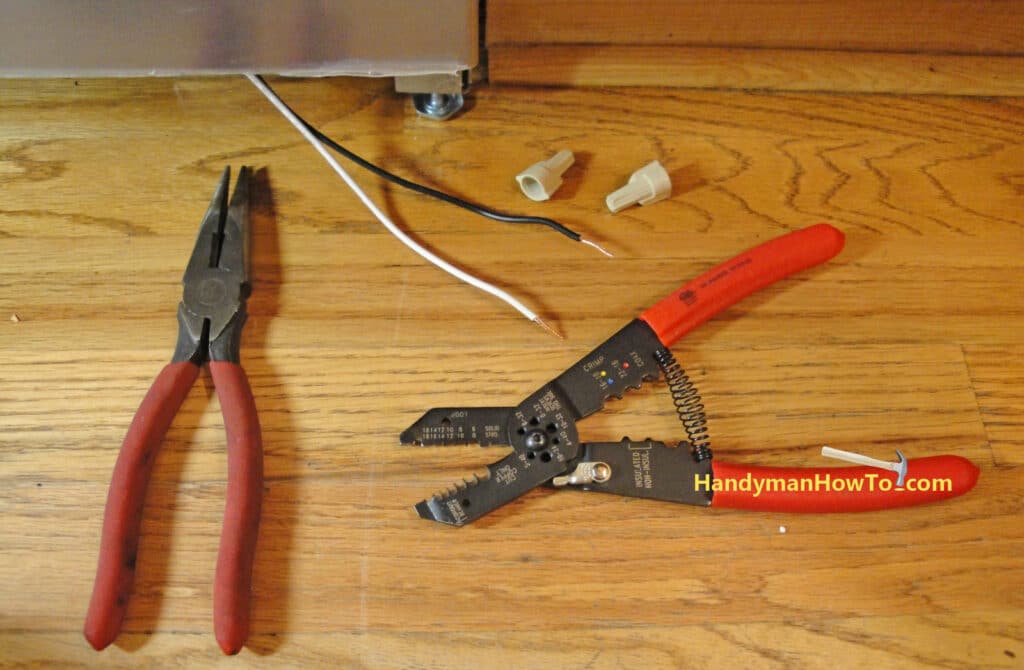
The Frigidaire Gallery dishwasher has hot (black) and neutral (white) wires. Ground is made to the chassis via a ground screw. A pair of needle nose plies and wire strippers is very helpful.
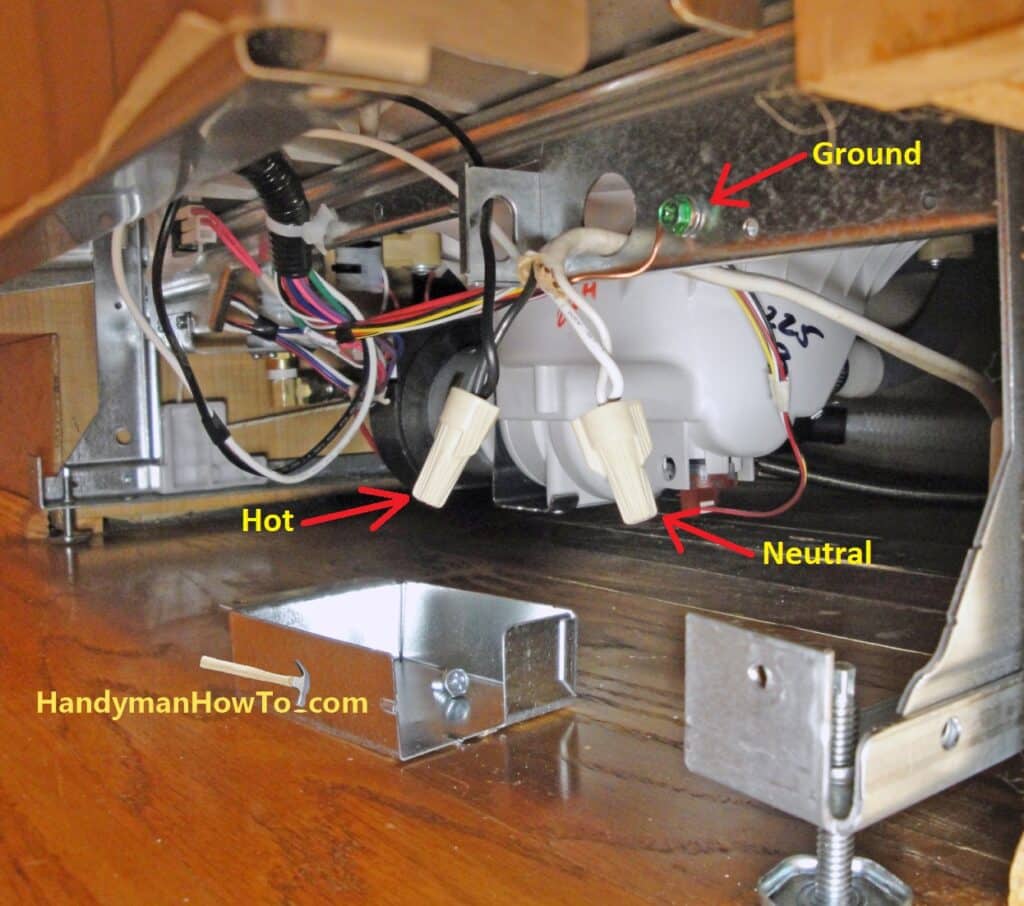
Twist the hot (black) and neutral (white) wires respectively together and fasten with wire nuts as shown. Form a small loop in the bare ground wire using the needle nose plies and fasten the ground wire to the frame with the green ground screw.
Tuck the wires up against the frame to fit inside the electrical box cover.
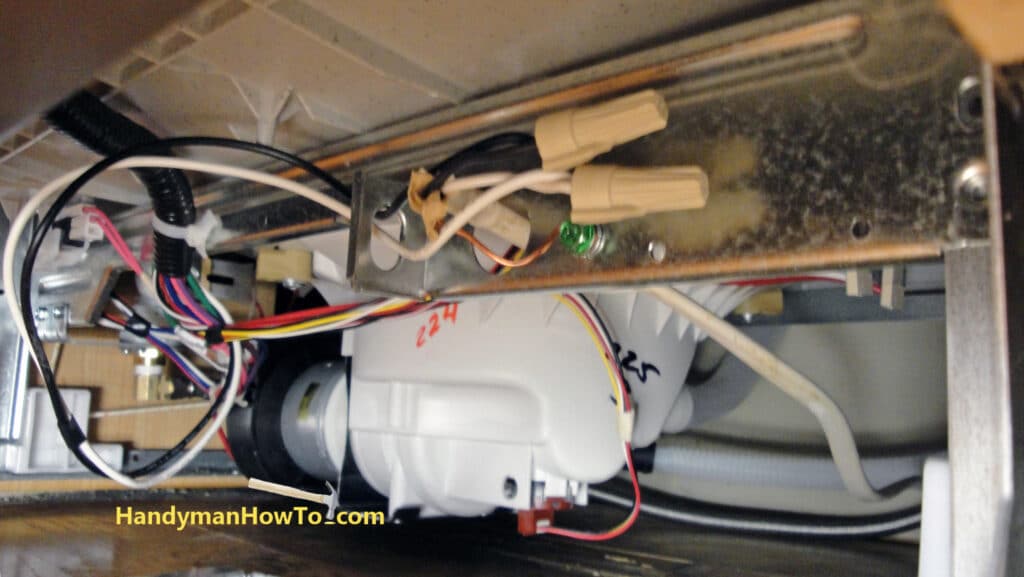
Reattach the electrical box cover.
View of the completed water and wiring connections.
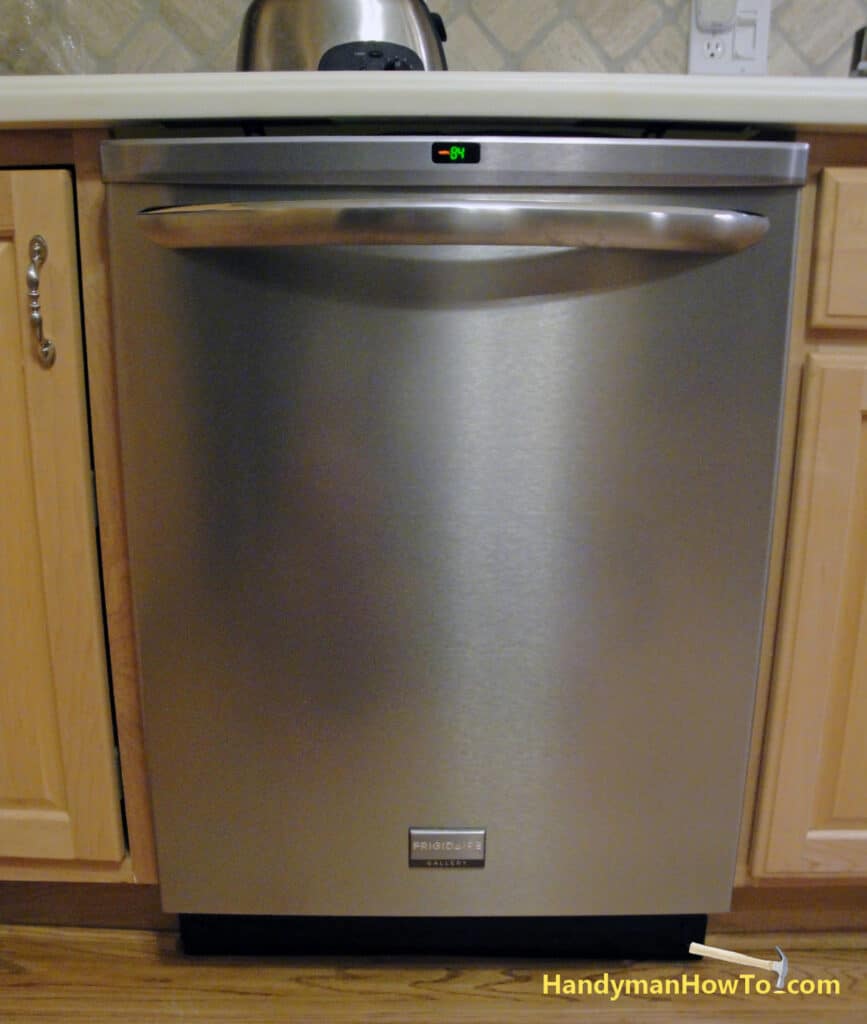
View of the new dishwasher installation:

The dishwasher is almost ready for operation. The remaining tasks are:
- Connect the dishwasher drain line under the sink.
- Turn on the circuit breaker.
- Turn on the water, run the dishwasher and check the connections for leaks.
- Install the front access panel.
Connecting the Drain Line
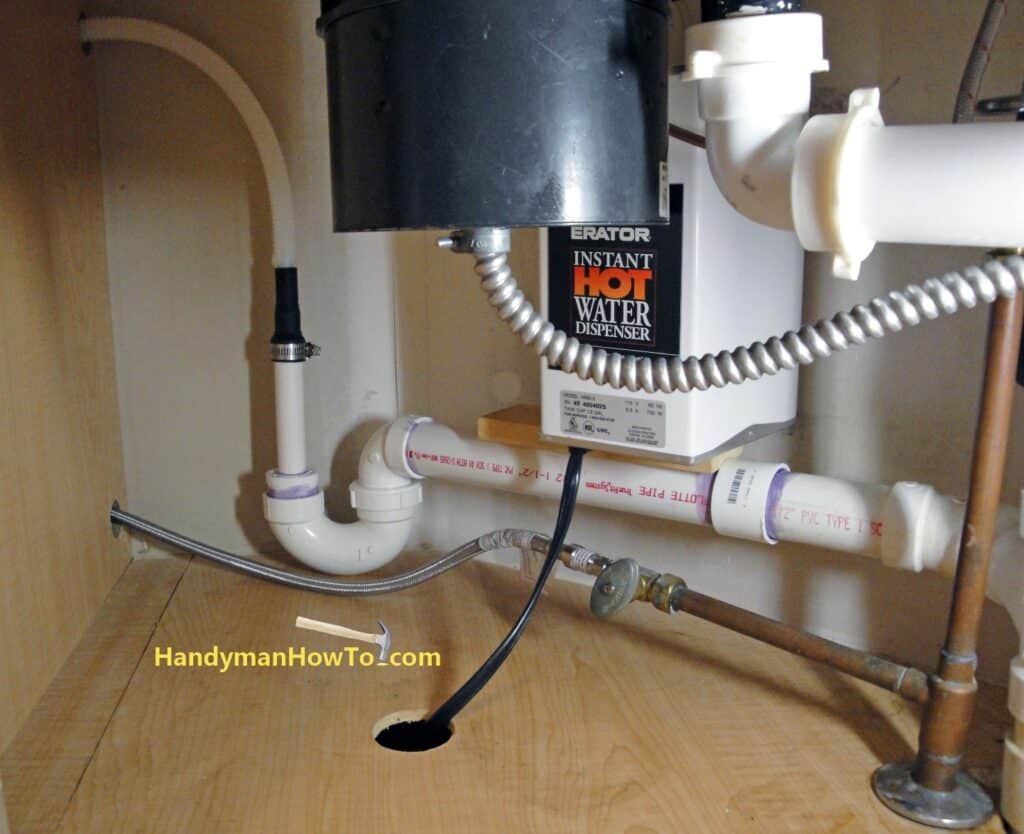
The dishwasher drain line is connected to the garbage disposal fitting or PVC drain pipe, according to which method matches your situation. The dishwasher drain line enters from behind the cabinet at the top left of this photo and is fastened to a 3/4″ PVC pipe with the metal band clamp:
The dishwasher installation is completed by:
- Turn on the water supply valve under the sink.
- Check all water connections for leaks. Tighten the connections as needed.
- Turn on the dishwasher circuit breaker.
- Run the dishwasher.
- Check the drain line connection for leaks.
- Reinstall the dishwasher toekick access panel.
Am I done? But nooo! I’m a perfectionist and it irritated me when troubleshooting the drainage problem on my old dishwasher that I couldn’t easily check the PVC P-trap for clogs.
Dishwasher Drain Pipe P-Trap Replacement
These steps are completely optional and won’t apply to most installations, especially so if your dishwasher drain line connects to the garbage disposal.
The Strategy
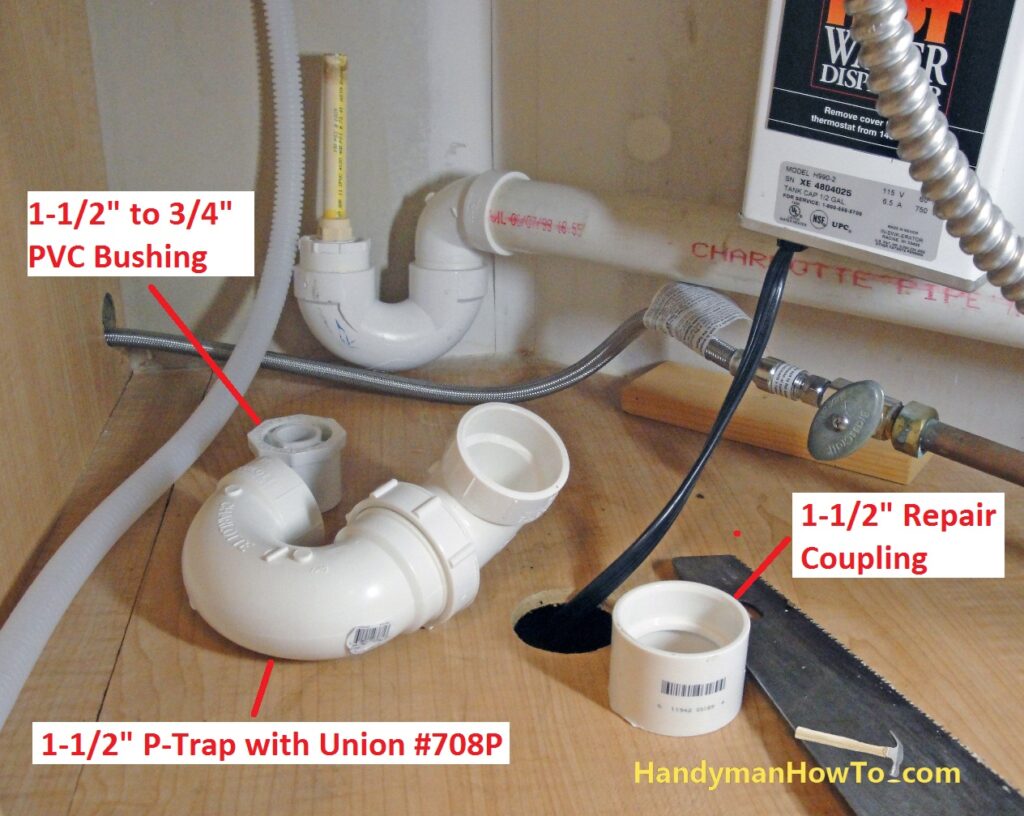
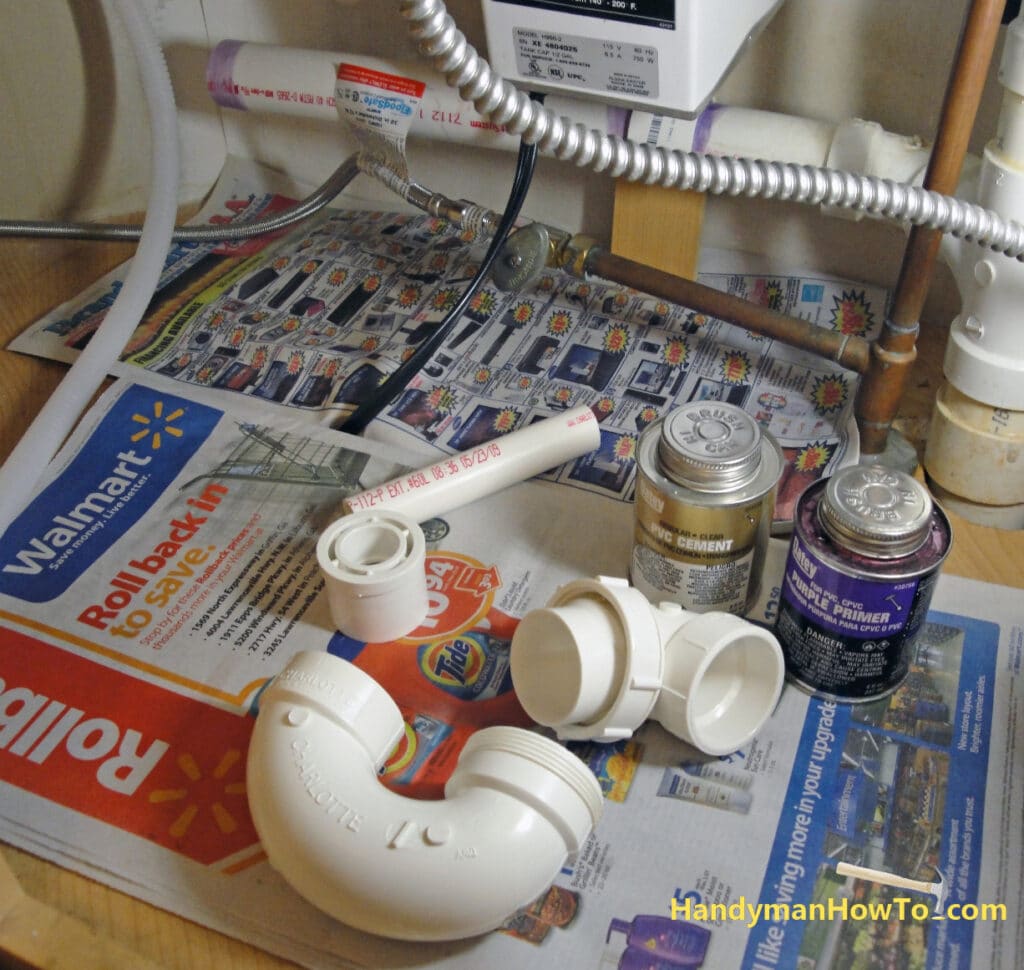
The new P-trap with Union by Charlotte Pipe has a threaded nut to disassemble and clean the trap. The parts list is:
- P-trap with Union
- 1-1/2″ to 3/4″ bushing
- 1-1/2″ repair coupling
- 1-1/2″ by 3 foot length of PVC Schedule 40 pipe (not shown)
- 3/4″ by 3 foot length of PVC Schedule 40 pipe (not shown)
Replace the Dishwasher Drain P-Trap
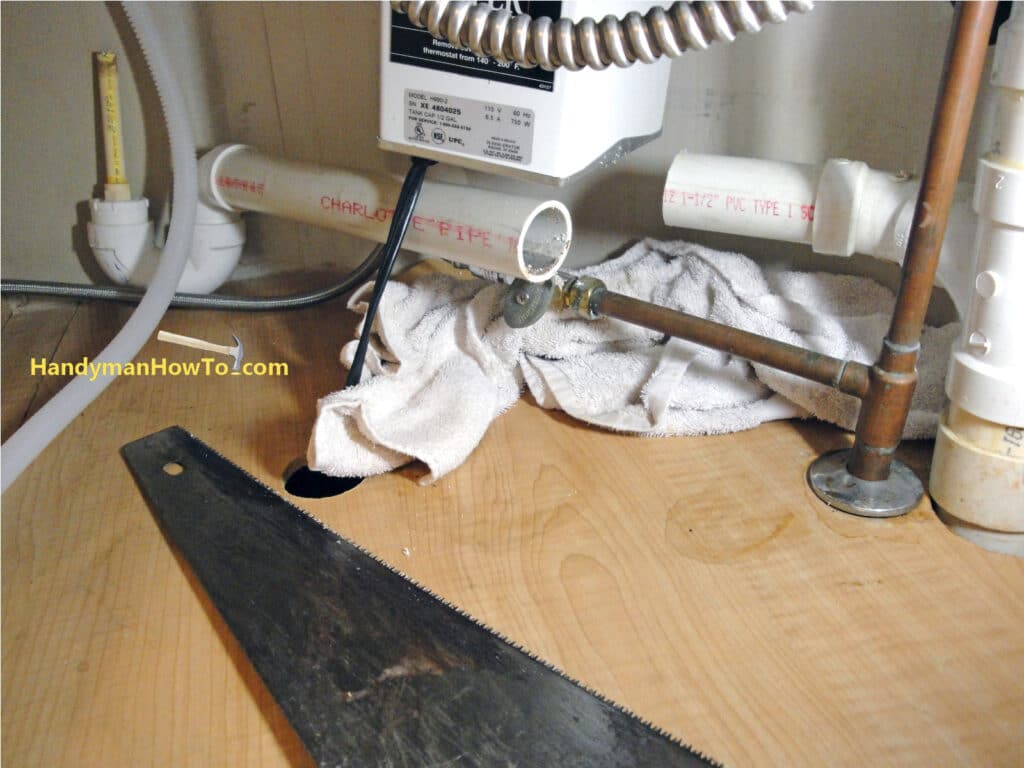
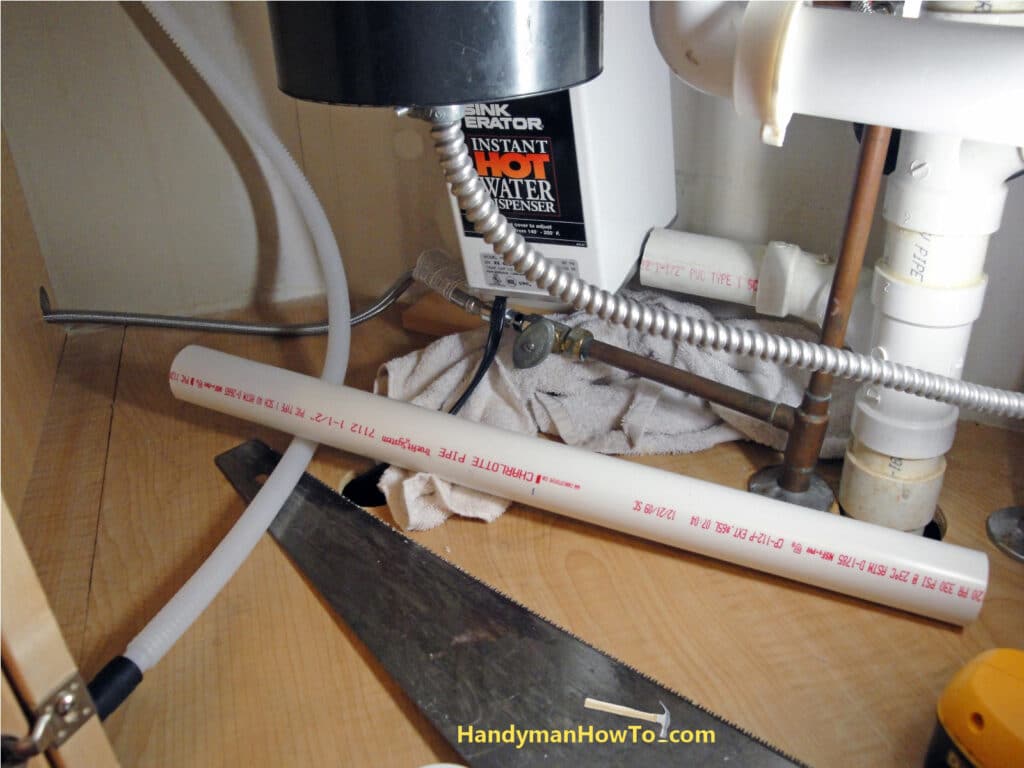
PVC pipe is wonderfully easy to cut and glue. I began the P-trap replacement by sawing off the 1-1/2″ PVC drain pipe at a convenient place about 6″ from the wye. This isn’t something you see everyday.
Sawn off section of PVC drain pipe plumbing – this will be thrown in the trash:
I purchased a 3 foot section of 1-1/2″ PVC pipe at Home Depot. The replacement section is marked with a blue line near the middle for cutting. I just eyeballed where to make the cut because precision isn’t necessary here.
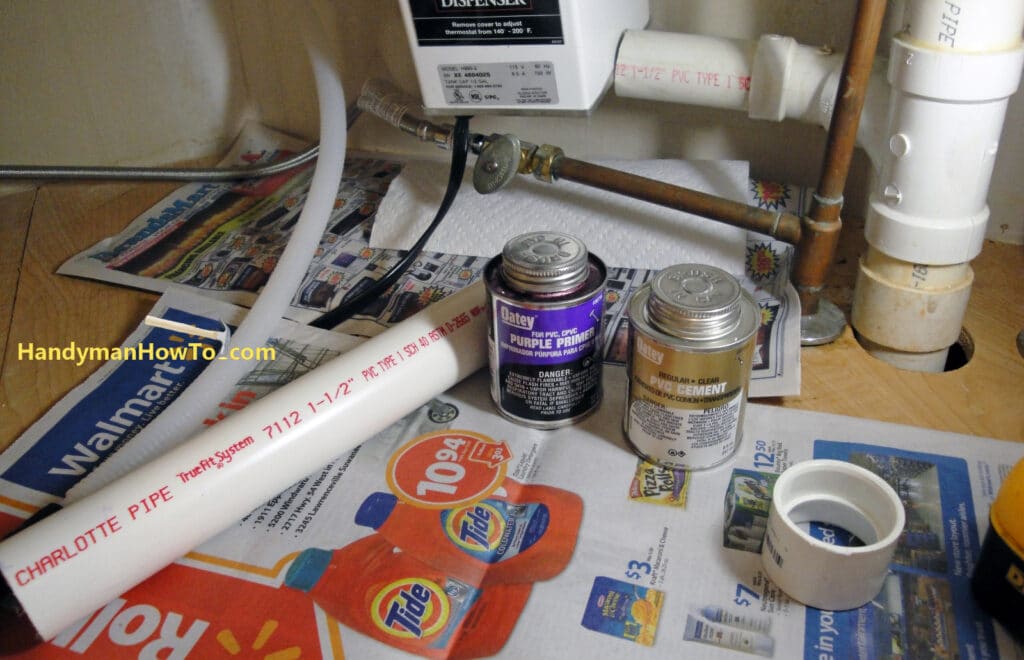
The shortened section of pipe and the repair coupling are ready to be primed and glued. Remember to deburr the ends after all saw cuts. The PVC Purple Primer stains badly and the newspapers are needed to catch any drips.
The replacement section of 1-1/2″ pipe is glued to the house plumbing as seen in the background of this next photo. Now I’m ready to assemble the new P-trap, bushing and 3/4″ PVC pipe.
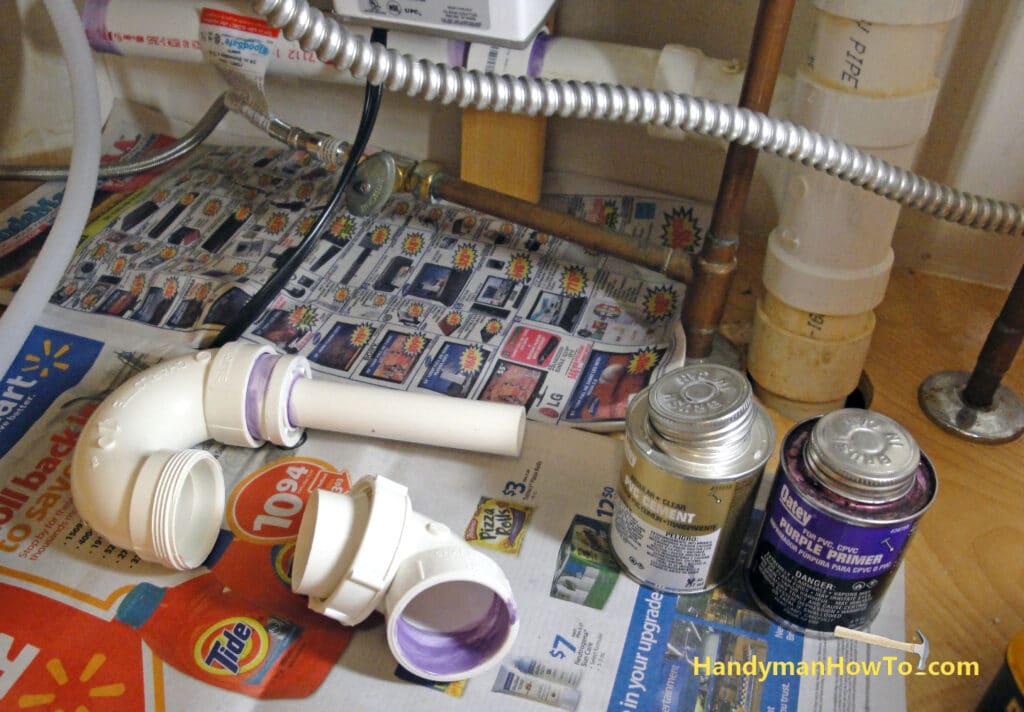
Do not prime or glue the threads of the union and nut.
The various joints are primed. The 3/4″ pipe, bushing and P-trap are glued together.
The P-trap elbow is glued to the end of the PVC drain pipe (center back of photo).
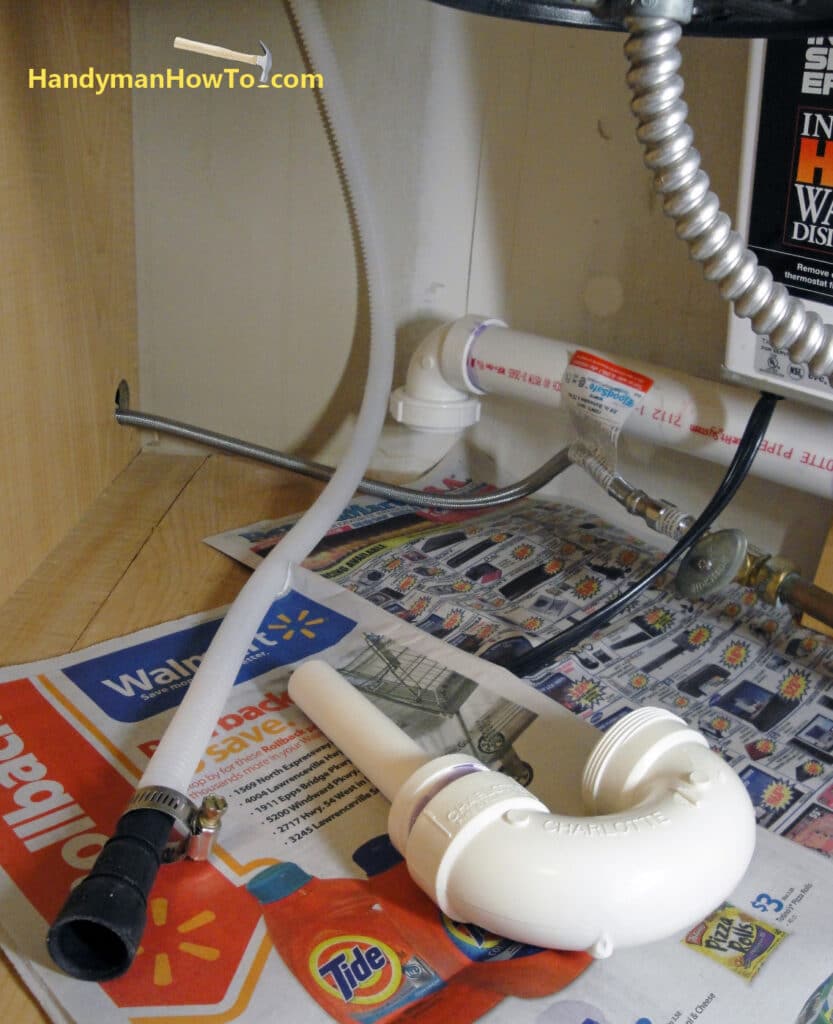
I fastened the dishwasher drain hose to the 3/4″ PVC pipe nipple first because it was easy to reach. The exterior diameter of 3/4″ PVC pipe is about 1″ and fits the 1″ molded end of the dishwasher drain hose snugly.
The P-trap is screwed to the union using the captive nut by hand – no tools necessary. If I ever suspect a clogged P-trap it will be easy to remove and clean.
Dishwasher Installation Final Steps
Repeating the final steps that were presented in the “short story” version above:
- Turn on the water supply valve under the sink.
- Check all water connections for leaks – no leaks found.
- Turn on the dishwasher circuit breaker.
- Ran the dishwasher.
- Check the drain line connection for leaks – no leaks found.
- Reinstall the dishwasher toekick access panel.
Installation Complete!
We’ve had the new Frigidaire Gallery dishwasher for a month and it’s working great! My wife is very pleased. My opinions about the dishwasher are:
- It’s runs whisper quiet
- The dishes are very clean and dry
- The dry cycle runs hot – almost too hot to touch the plates and glasses immediately after. This is noted in the “Use and Care” manual. Once I noticed a faint smoke and acrid odor coming from the top of the dishwasher during the dry cycle. I opened door and found the plastic top to a sports bottle had fallen onto the heating element in the bottom of the tub, melting it.
Update: Do not Buy the Frigidaire® Gallery Dishwasher, model FGHD2433KF1!
The dishwasher worked fine for 18 months until the circulation pump failed, just 6 months after the 1 year manufacturer warranty expired.
Take care,
Bob Jackson