This tutorial shows how to repair a broken marble side panel on a whirlpool bathtub with the MagnaPanel™ magnetic access panel hardware kit. The cultured marble side panel on the whirlpool bathtub broke when the plumber removed it to replace the leaking polybutylene pipe. The side panel was pinched between the bathtub rim and the wood subfloor due to settling of the house and broke in half as it was removed.
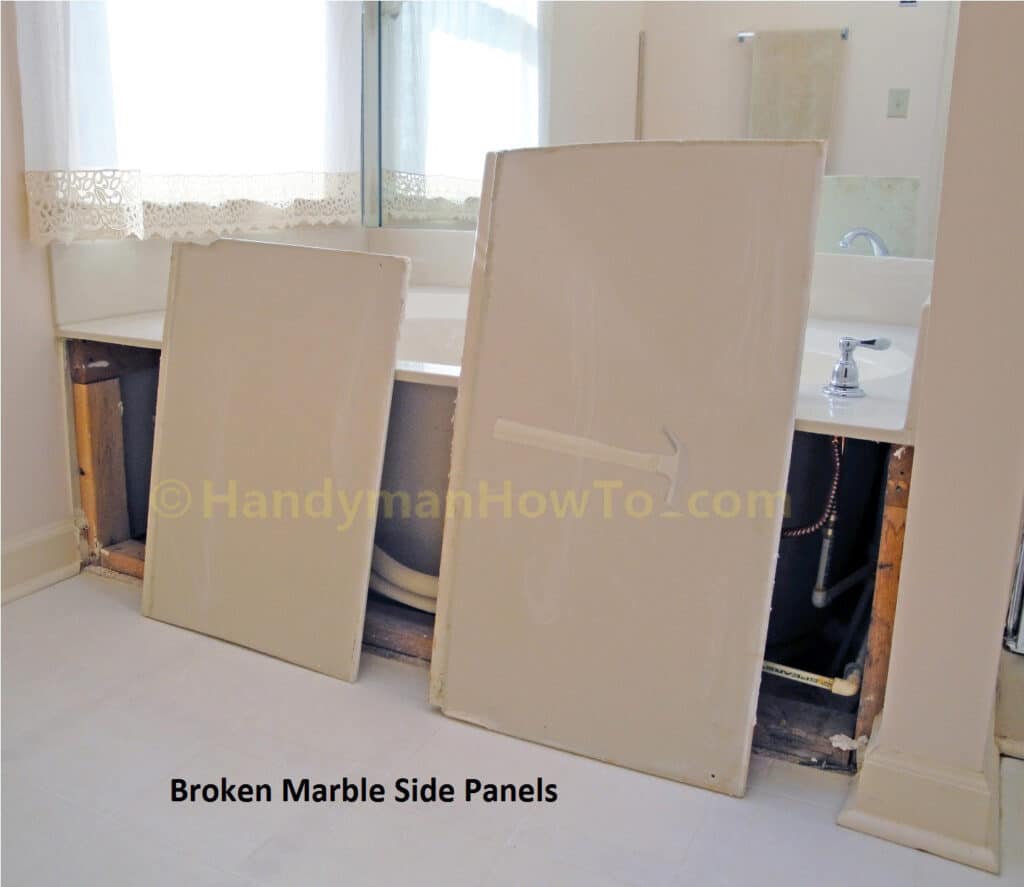
Bathtub Side Panel Repair Options
My recommendations to the homeowner for repairing the bathtub side panel were:
- Remove the linoleum floor cover and tile the bathroom floor. Throw away the broken marble side panel and create a matching tiled side panel on plywood- or cement backer board. Mount the tiled bathtub side panel using the MagnaPanel flush mount magnetic access panel system. Cost for tiling the bathroom would be in the $500 – $1000 range.
– or –
- Epoxy the broken cultured marble side panels together. Cover the crack with a trim strip. Mount the repaired tiled bathtub side panel using the MagnaPanel flush mount magnetic access panel system. Cost was $65 for materials and I donated my time and labor.
The homeowner had just spent several thousand dollars to replace all the polybutylene plumbing in the house and decided to go with the $65 low-cost option to repair the marble side panels.
MagnaPanel™ Magnetic Access Panel System
I first noticed the MagnaPanel access panel system when I saw a demo display at Specialty Tile Products while buying supplies for my basement bathroom project. I was really impressed by the MagnaPanel system and filed it away for future reference. Seeing the broken marble bathtub panel and the need to have a way to access the whirlpool tub plumbing and electrical system in the future, I knew MagnaPanel would solve the problem.
MagnaPanel works by gluing the high strength magnets to the back of the access panel, which is held in place by magnetic attraction against the lag bolts set into the wood bathtub frame.
I purchased a MagnaPanel Starter Kit for $39.96 at Specialty Tile Products. The Starter Kit contains everything you see here:
- Four lag bolts
- Four high strength magnets
- Flat washer
- 1-1/4″ wood spade drill bit
- Two epoxy packs
- Two mixing sticks
- Installation Instructions
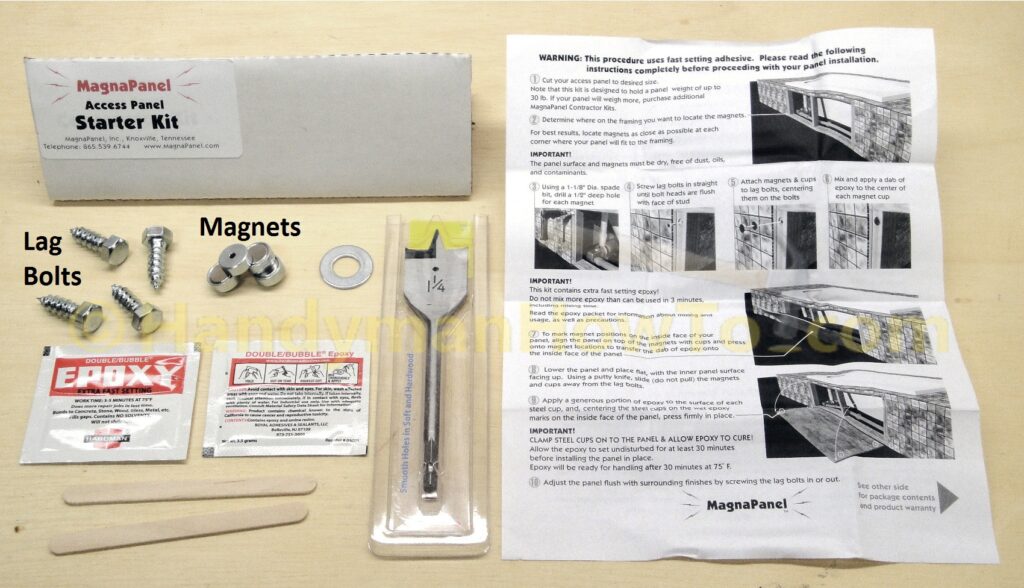
The four magnets in the Starter Kit will support panels up 30 lbs in weight. Panels heavier than 30 lbs are supported by installing additional bolts and magnets by purchasing Contractor Kits with four magnets, lag bolts and epoxy packs. Each Contractor Kit adds 30 lbs holding strength. For example, a 45 lb panel would require a Starter Kit and the Contractor Kit for a total of eight (8) lag bolts and magnets for a total holding strength of 60 lbs. The Contractor Kit the same as the Starter Kit but doesn’t include the wood spade drill bit.
Marble Side Panel Repair
The broken marble side panels were cleaned to remove the old caulk and laid on the garage floor. The panels were significantly bowed or warped in two directions – top to bottom and worse lengthwise – making alignment a challenge. Cardboard shims were placed under the marble to align the panels along the break. Simply gluing the panels along the crack wouldn’t be strong enough, so the break will be reinforced with two short 2×4’s about 16 inches long to distribute the load.
The 2×4 blocks will be bonded to the back of the culture marble panel with Loctite® Heavy Duty Epoxy, a 5 minute fast-setting two part mix for a total of 8 ounces. The Loctite epoxy is available at Home Depot for about $15.
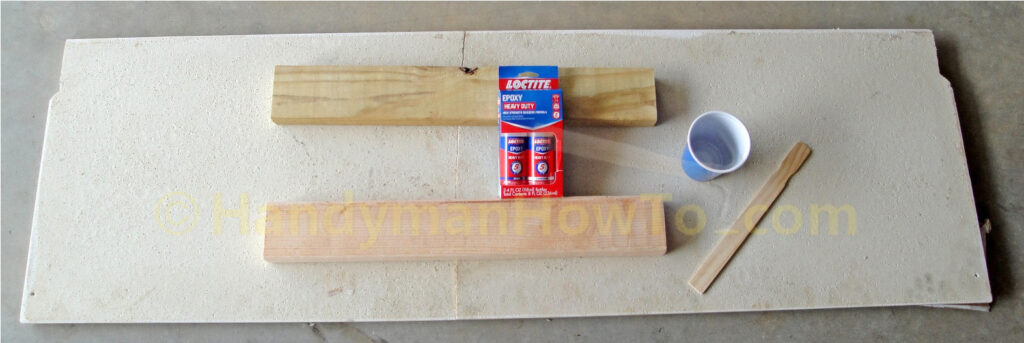
- After carefully aligning and shimming the marble panels, the positions of the 2×4 blocks were outlined with a red pen.
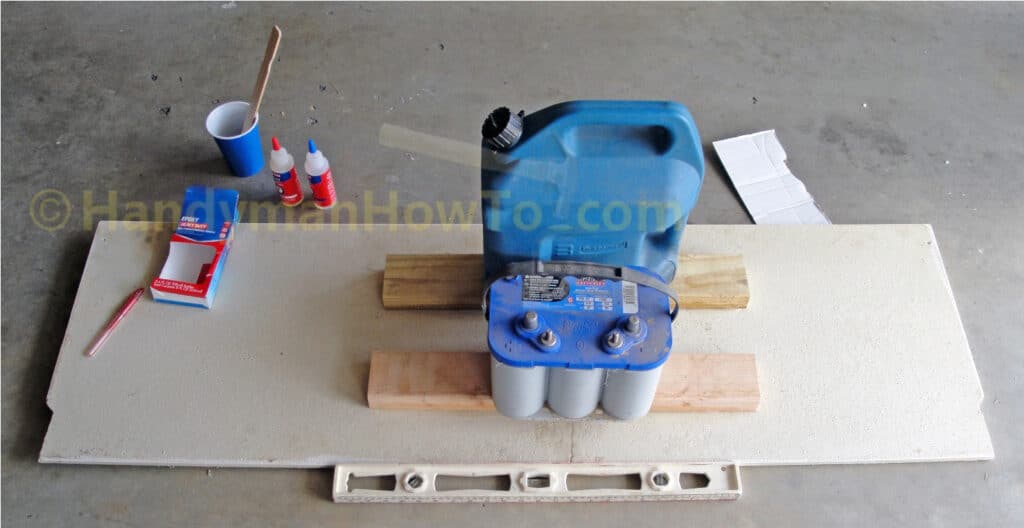
- The Loctite epoxy is mixed in equal amounts in a plastic cup, then poured and brushed onto the panel inside the red outlines where the 2×4’s will be placed. Be generous with the epoxy so as to fill all gaps between the marble and the 2×4 blocks.
- More epoxy is brushed along the edges of the 2×4 blocks using a disposable brush.
- The 2×4’s are weighed down with an old car battery and large can of water while the epoxy cures.
Bathtub Wood Frame Adjustments
The new 2×4 studs were mounted to the ends of the bathtub frame to mount the MangaPanel lag bolts. The problem with original frame is the top 2×4 was mounted with the end grain exposed and a lag screw here would split the wood. A Simpson Strong-Tie® metal bracket was installed at the bottom corner because the wood frame was a bit loose here and needed to be stabilized.
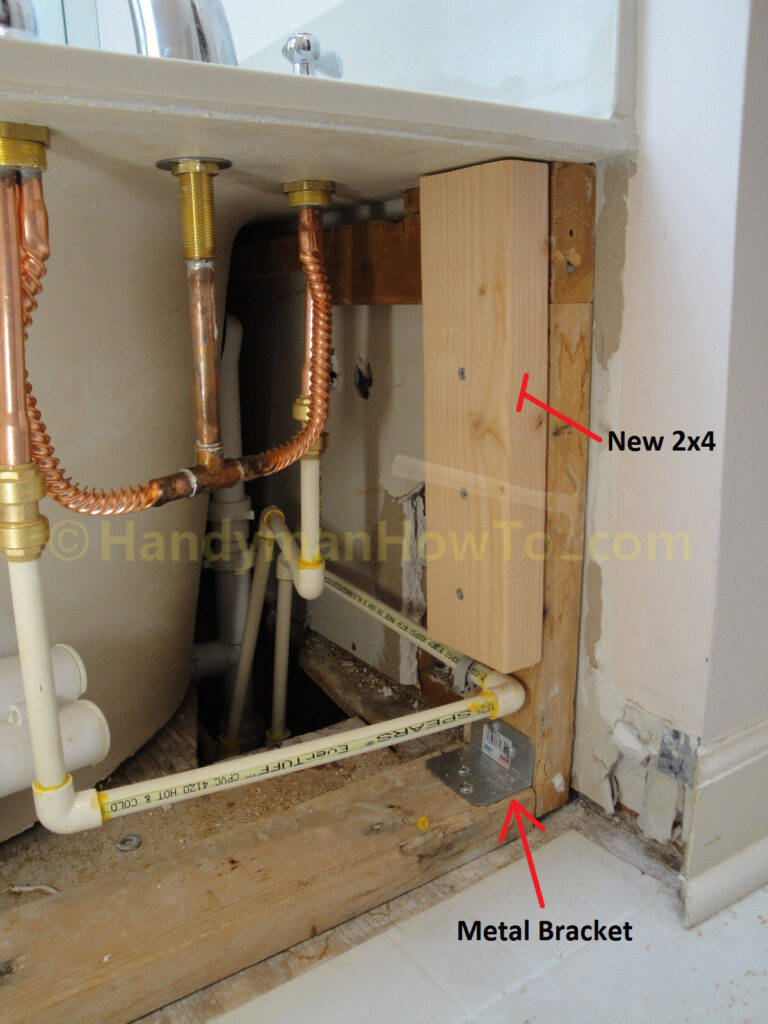
A new 2×4 was also installed at the other end of the tub to avoid the end grain of the existing frame member as shown in the photo below.
The marble panel was brought up from the garage with the epoxied 2×4 reinforcements to test fit against the tub frame. Test fitting was necessary because the floor had slightly settled causing the side panel it to bind against the tub (which is why it broke in the first place). About 1/8″ inch of material had to be ground off the bottom (unfinished) lip of the tub with a Dremel tool before the panel would slide in without binding.
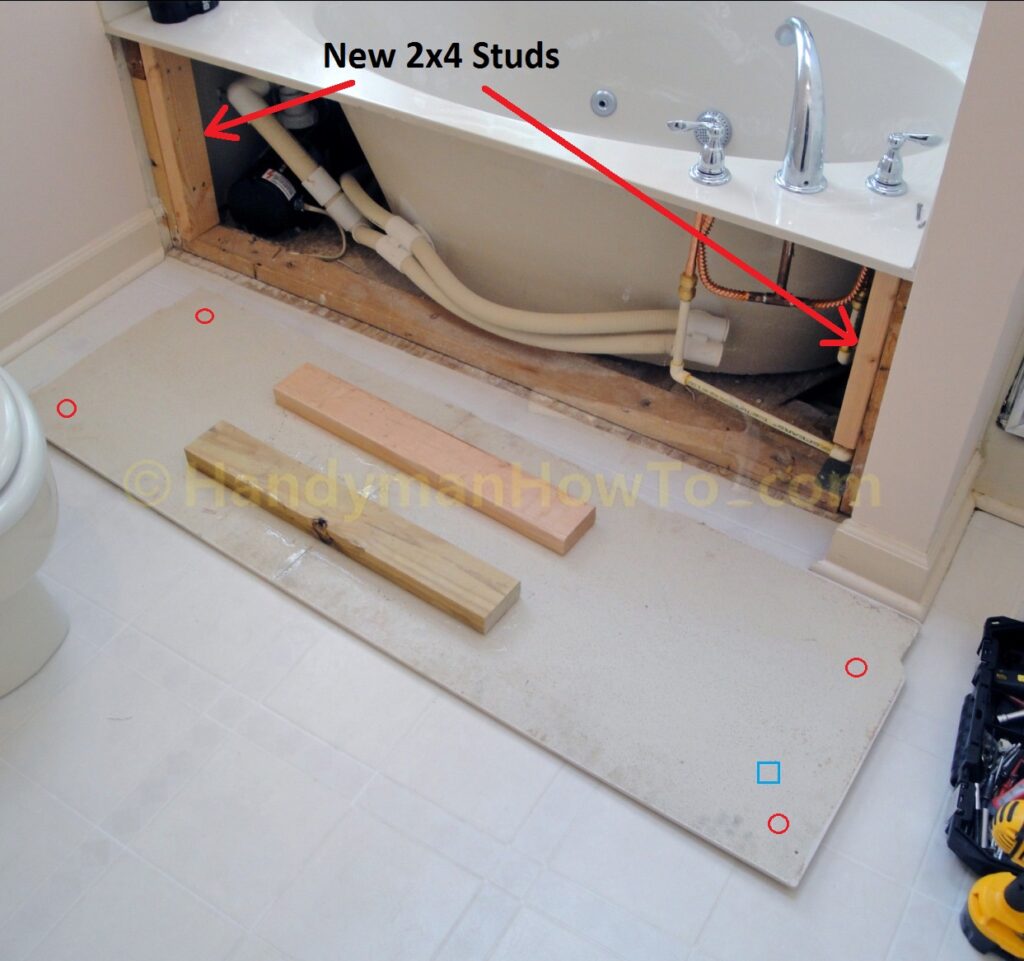
The red dots in the photo above indicate roughly where the MagnaPanel magnets will be epoxied to the back the marble panel. The blue square is about where the flat washer tied to a heavy string will be epoxied in place to assist with panel removal.
The 2×4 panel reinforcements proved to be very strong, better than I expected as some strong tugging was needed during the grind-trial fit-panel still binds-remove and grind-some-more iterations with the Dremel tool to remove all high spots under the lip of the tub to get a perfect fit.
MagnaPanel Hardware Installation
The MagnaPanel lag bolts are installed at the four corners of the wood frame. 1/2″ deep holes are drilled with the 1-1/4″ wood spade bit provided in the MagnaPanel Starter Kit so the magnets will be recessed to allow the panel to sit flush against the tub frame.
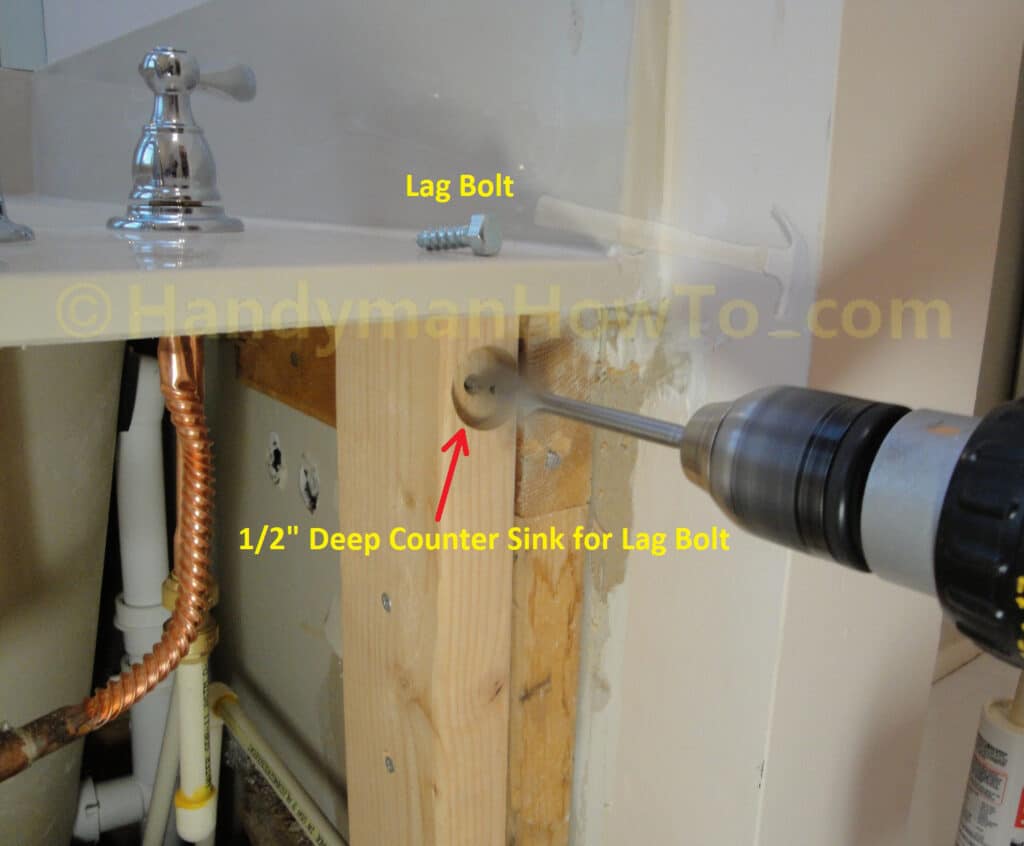
Screw in the lag bolt until it’s flush against the wood.
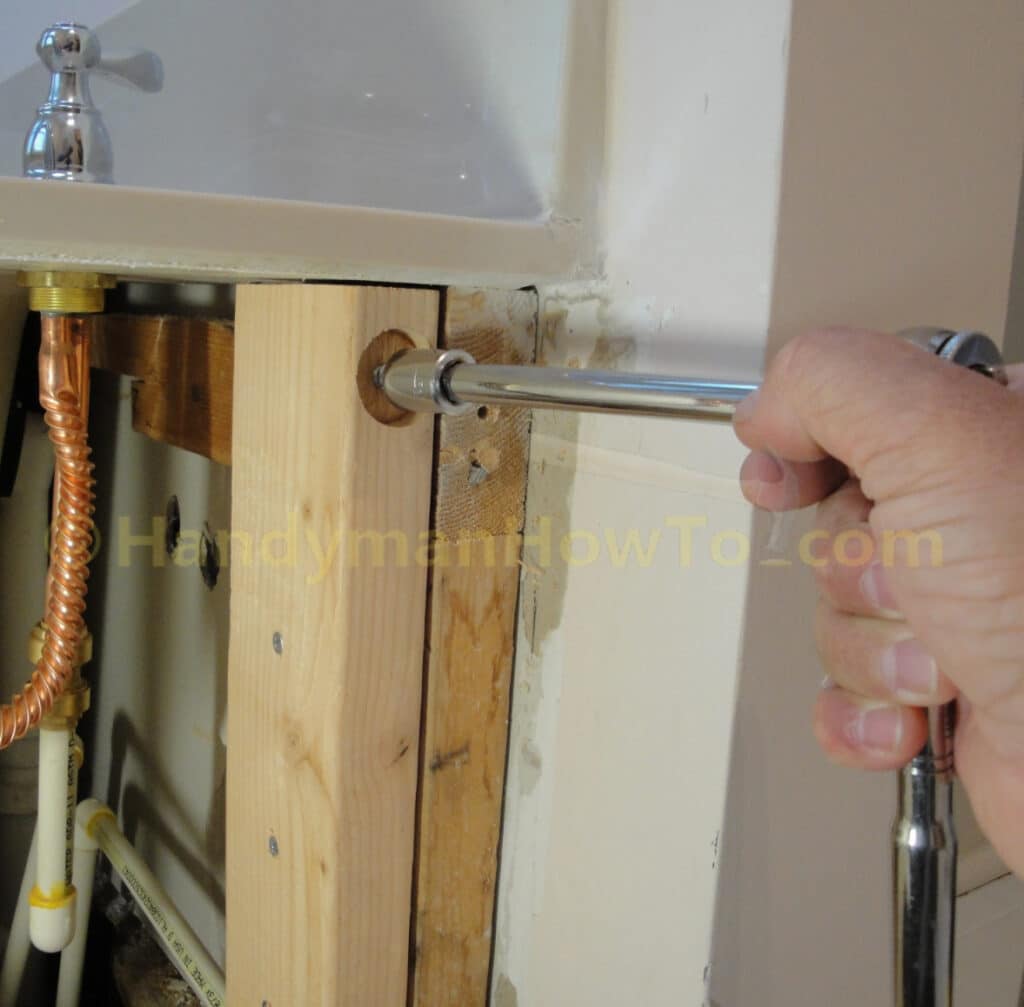
Place the MagnaPanel high strength magnets on the head of the countersunk lag bolts. Check that the magnet is even with the face of the wood frame, if not slide a putty knife under the magnet to remove it, then back out the lag bolt slightly.
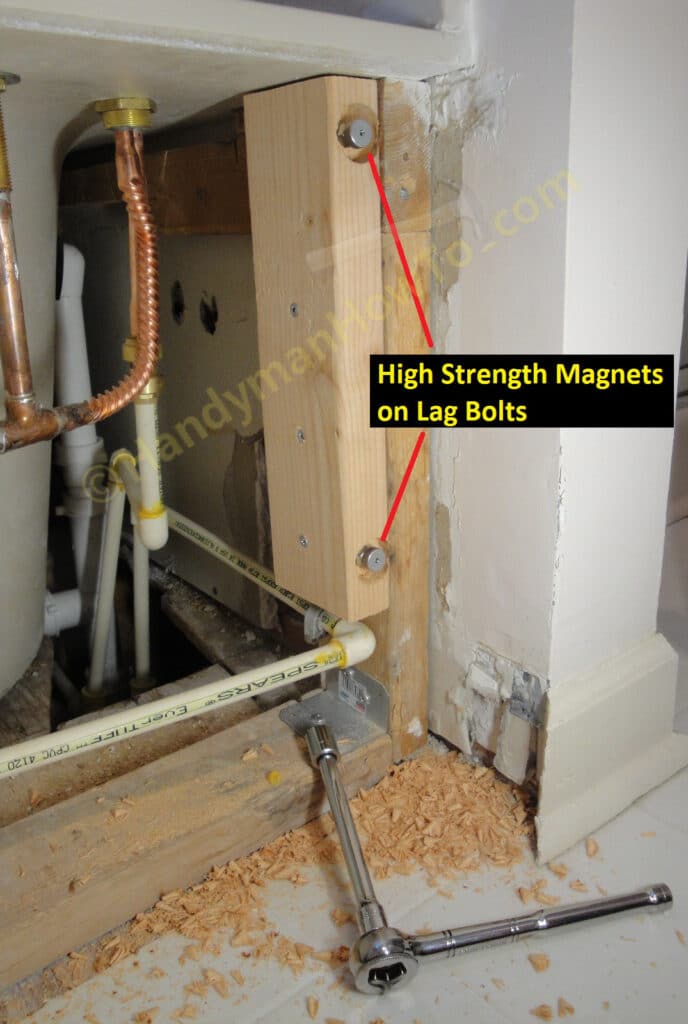
The magnets are really strong and you won’t be able to pull them off with your fingers. Sliding the corner of a 1″ putty knife under the magnet is the only way to remove it!
This project is continued in Part 2.
Thanks for reading,
Bob Jackson