This project is continued from Part 1.
A quick review the MagnaPanel™ project status is:
- The marble side panel has been glued together with epoxy and 2×4 reinforcement blocks.
- The side panel slides freely onto the side of the bathtub frame.
- The MagnaPanel lag bolts have been countersunk and screwed into the bathtub frame.
- The MagnaPanel magnets are placed onto the head of the lag bolts.
Epoxy the MagnaPanel Magnets to the Side Panel
The magnets will now be epoxied to the back of the marble side panel using the included HARDMAN Double Bubble Fast-Setting Epoxy. The epoxy sets quickly in only 3 to 5 minutes, so be sure to have your work organized.
The location of the magnets requires no measuring and is marked on back of the marble panel by a dab of wet epoxy. The magnet locating procedure is:
- A dab of epoxy is wiped onto the back of the magnets as they sit on the lag bolts.
- The marble panel set in place and quickly removed leaving a mark of wet epoxy on the back of the panel to perfectly locate positions of the magnets.
- More epoxy is mixed and the magnets are permanently epoxied to the back of the panel at the corresponding wet spots.
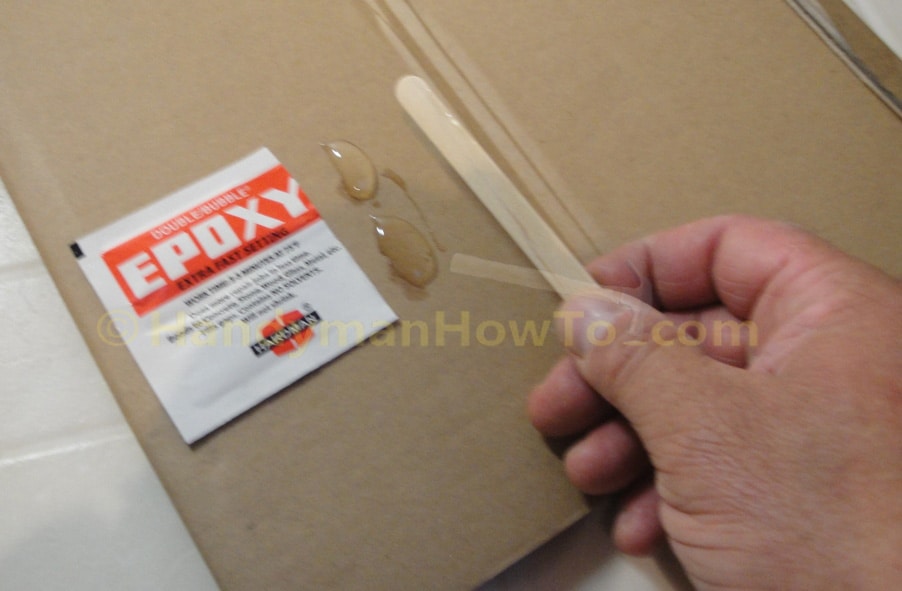
Cut off the end of the packet with scissors and squeeze out a small amount using the edge of the mixing stick onto a scrap of cardboard.
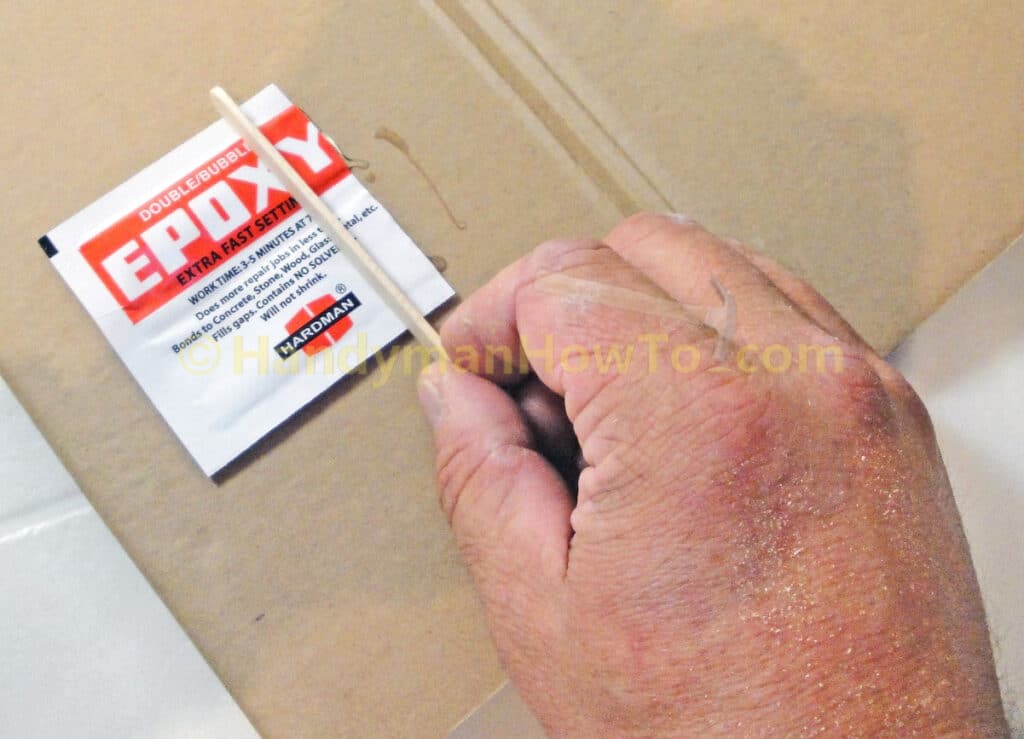
Mix the epoxy with the stick:
Apply a small dab of epoxy to each of the four magnets. This will leave a wet spot on back of the panel to precisely locate the positions of the magnets to be permanently epoxied to the marble panel.
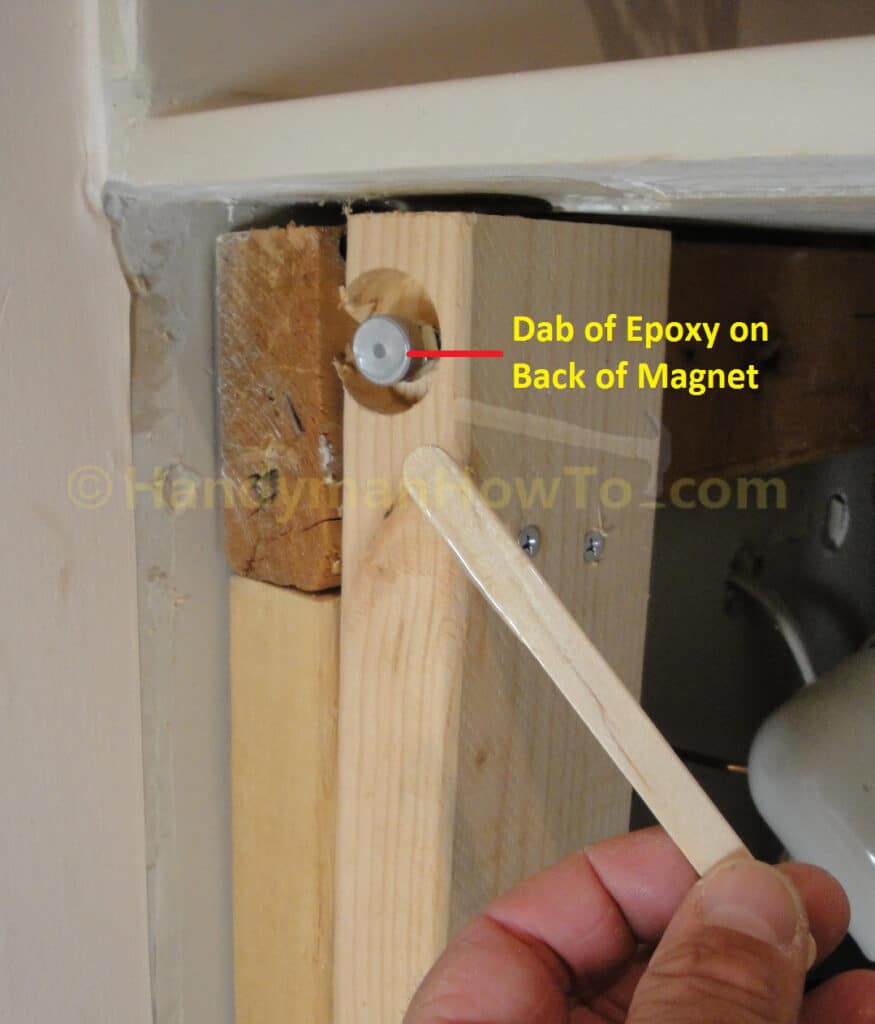
Stand the marble panel against the tub frame to transfer a bit of the epoxy from the magnet to the back of the panel, then quickly remove the panel. It helps to “bump” each corner with the palm of your hand above the magnet / lag bolt to ensure a good transfer of epoxy to the back of the panel.
Now with the panel laying face down on the floor:
- Mix the rest of the epoxy. I used one epoxy packet per two magnets, two packs and four magnets in all.
- Remove each the four magnets from the lag bolts with a putty knife.
- Place a generous glob of epoxy on the back of each magnet.
- Set each magnet in the previously marked wet spot on back of the panel.
- Tie a heavy string to the flat washer and epoxy the washer to the back of the panel near a corner.
- Wait at least 30 minutes for the epoxy to cure before installing the panel.
See the MagnaPanel installation instructions included with the Starter Kit for full details.
MagnaPanel Final Fitting
The bowed / warped marble panel required some additional fitting such that the magnets all made contact at the same time with the lag bolts. This was done by standing the marble panel in place and pressing against the corners with the palm of my hand. If the panel moved inward, the lag bolt was backed out slightly to eliminate the gap, or low spot, between the lag bolt and magnet. With a little adjustment, the panel sat firmly in place with all magnets “clicking” in contact on the lag bolts for a solid wiggle-free support.
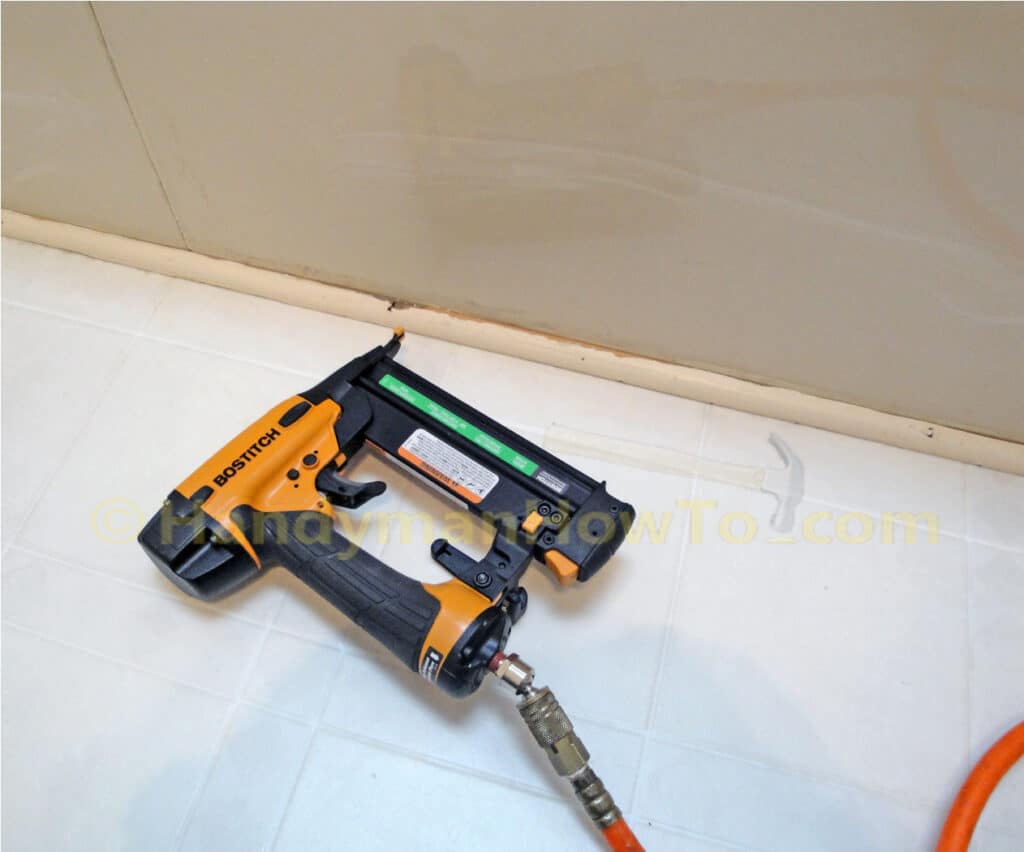
Moulding and Caulk Installation
The quarter-round moulding and side baseboards are reinstalled with a brad nailer running on compressed air. The brad nailer makes the job simple and easy, avoids jarring hammer blows and the risk of hitting the marble with a hammer. Take care to angle the brad downward so it misses the marble.
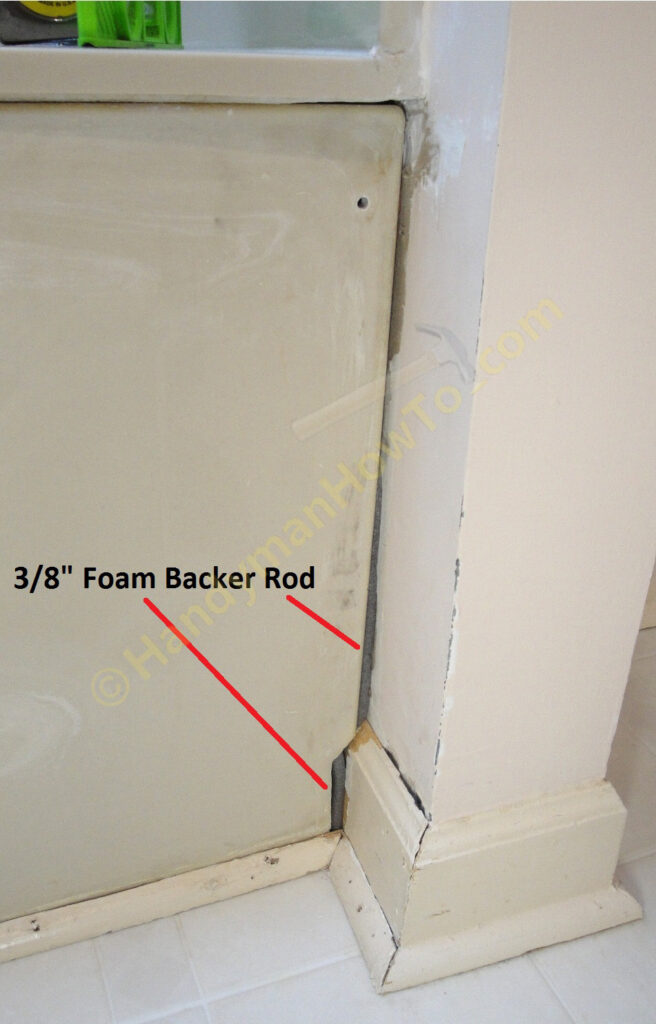
The large gap between the marble panel and wall is filled with foam backer rod before caulking. Notice the heavy yellow construction string that’s epoxied to the flat washer on back of the panel. The string is used to the pull out the panel if needed in the future.
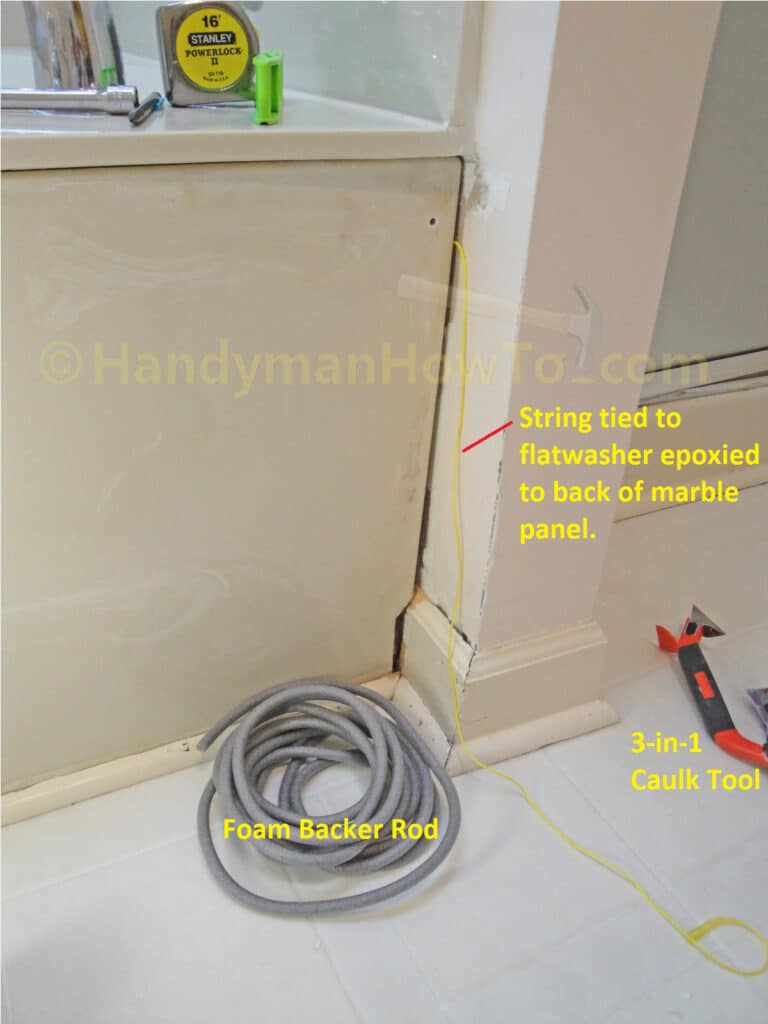
The string is pushed into the crack behind the backer rod where it can easily be found. The MagnaPanel instructions includes a grid to draw where the string is hidden behind the caulk line so you can find it later. Now all you have to do is not lose the map!
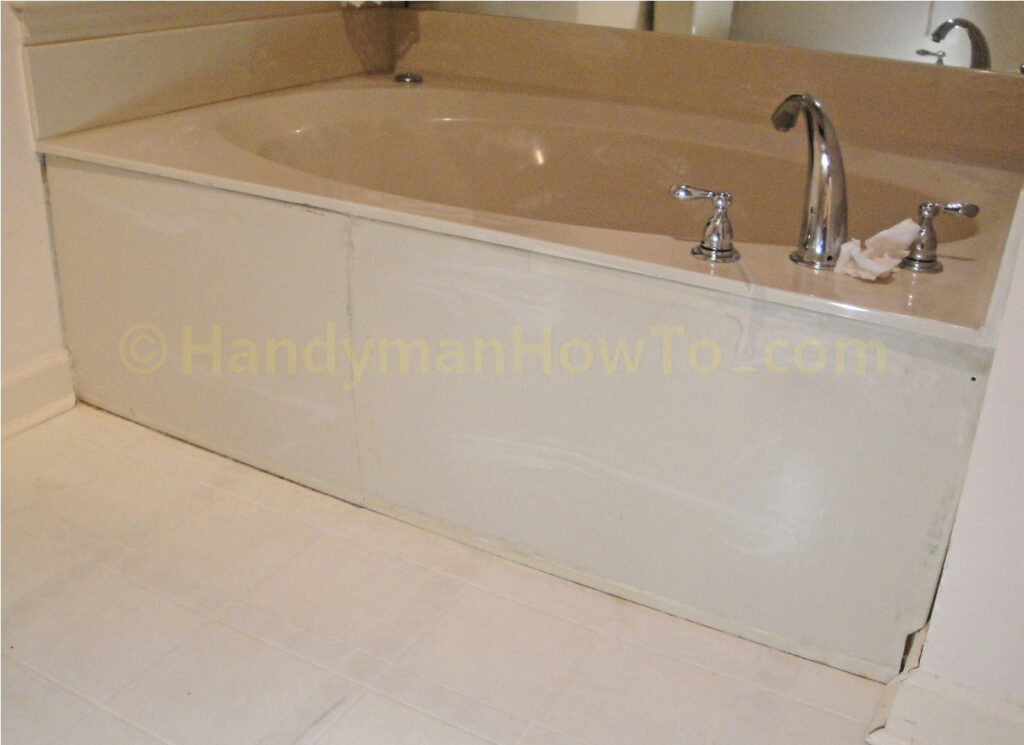
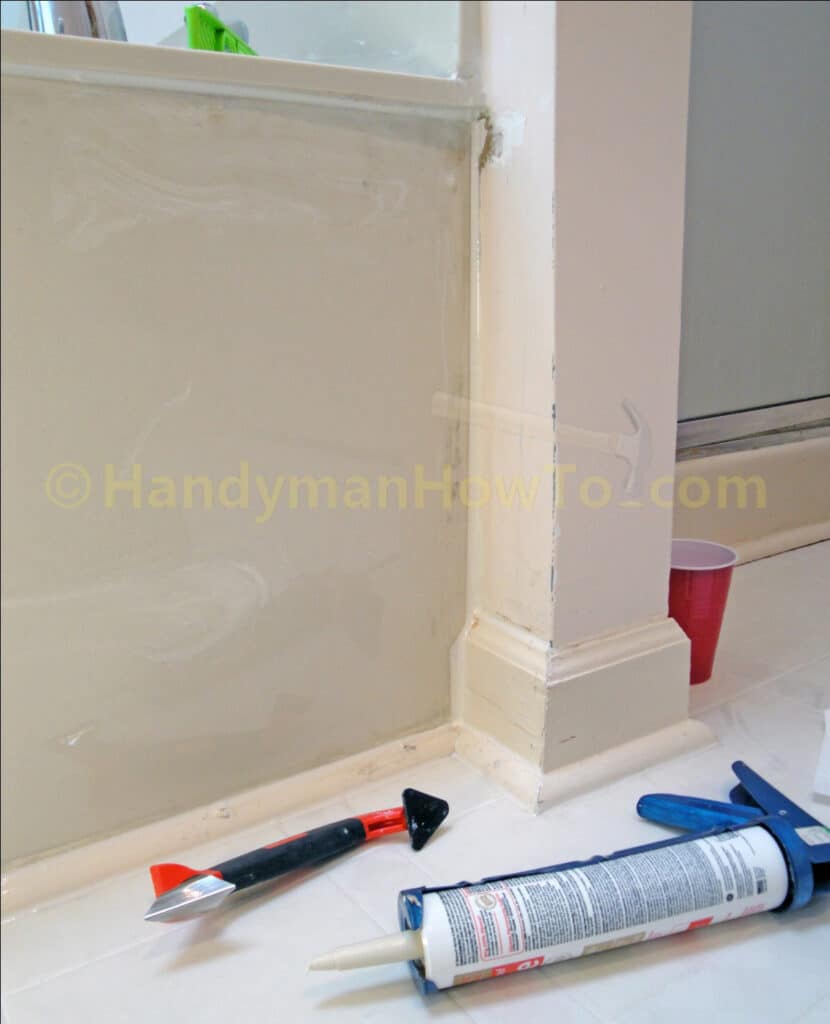
The panel and baseboard is caulked with a mildew resistant bath and tub caulk. The Husky 3-in-1 Caulk Tool does an amazing job of finishing the caulk lines for a professional looking job. What a difference a bit of caulk makes in the overall appearance.
Marble Crack Cover Up
The marble crack is covered up with a 1.5 inch wide by 1/4 inch thick PVC trim strip purchased a Lowes. The PVC trim strip is waterproof, comes in 8 foot pieces and is cut to fit the between the quarter round moulding and the bottom lip of the tub. The trim strip is very light and held in place only by the non-adhesive caulk. The top of the trim strip is sanded to round it over to eliminate sharp edges and blend it into the tub.
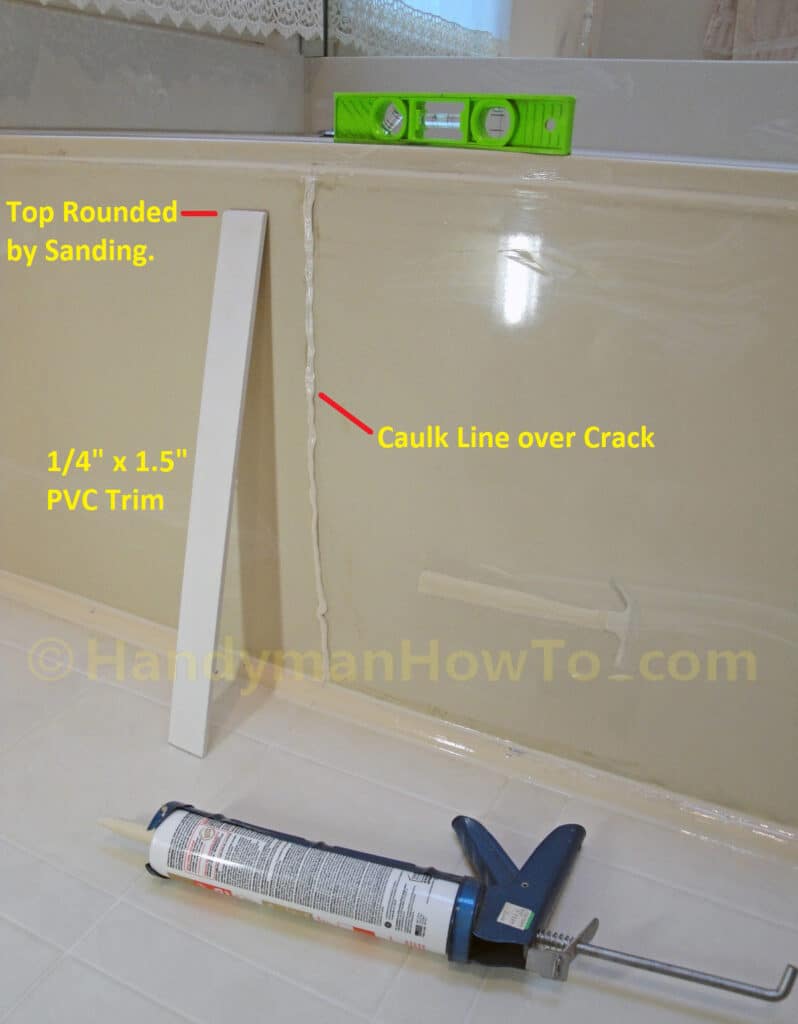
The PVC moulding is pressed onto the caulk line over the crack, then more caulk is applied to the sides of the trim strip. Here’s a photo of the completed job:
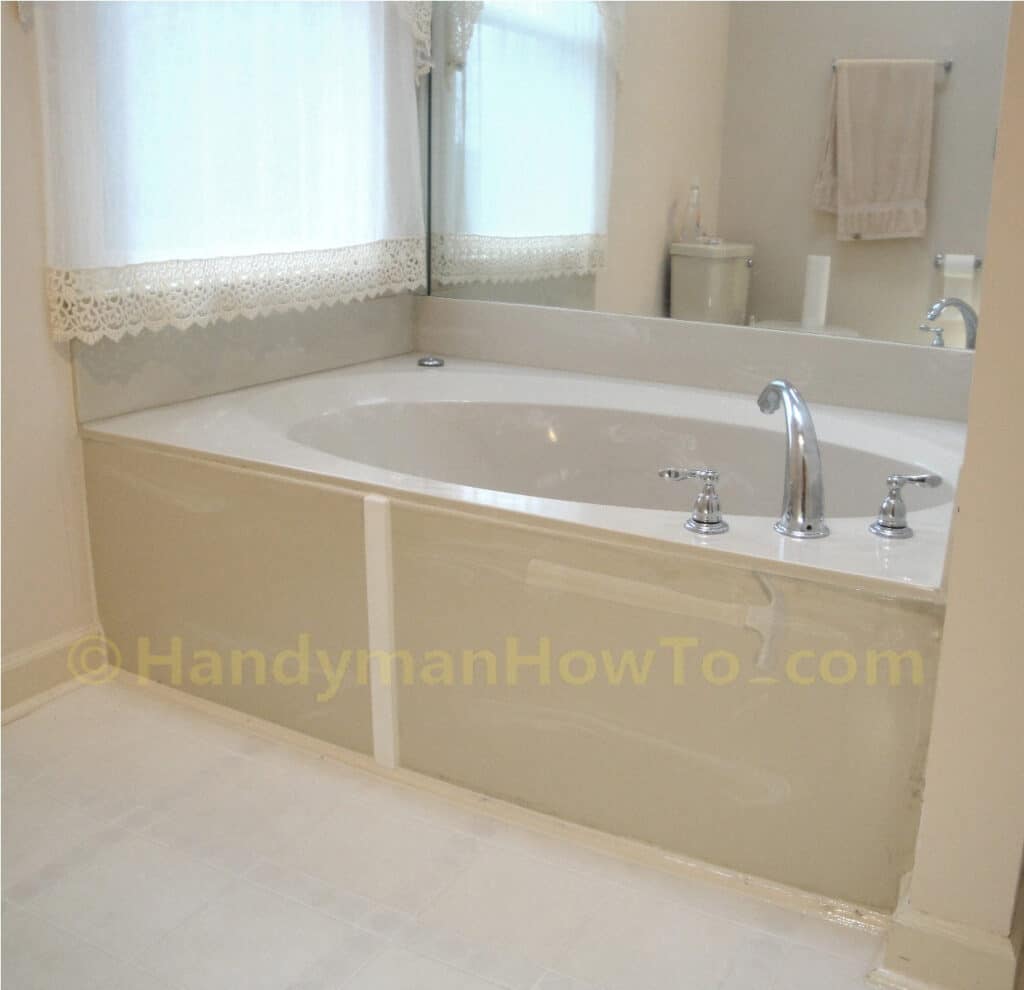
After painting the PVC moulding a matching almond color the broken marble panel repair won’t be noticeable.
The homeowners said they are very pleased with the repair job which cost only $65 in materials and about 3 hours of labor.
Take care,
Bob Jackson