This tutorial explains how to replace a shorted electrical outlet and repair the burnt and charred wire insulation.
Electrical Outlet Hissing Noise
The problem started when my son complained of hearing a hissing or sizzling noise from a wall outlet in his bedroom and temporarily losing power to some of the other outlets and lights. The circuit breaker wasn’t tripped and power would come back On by itself at the affected outlets and lights.
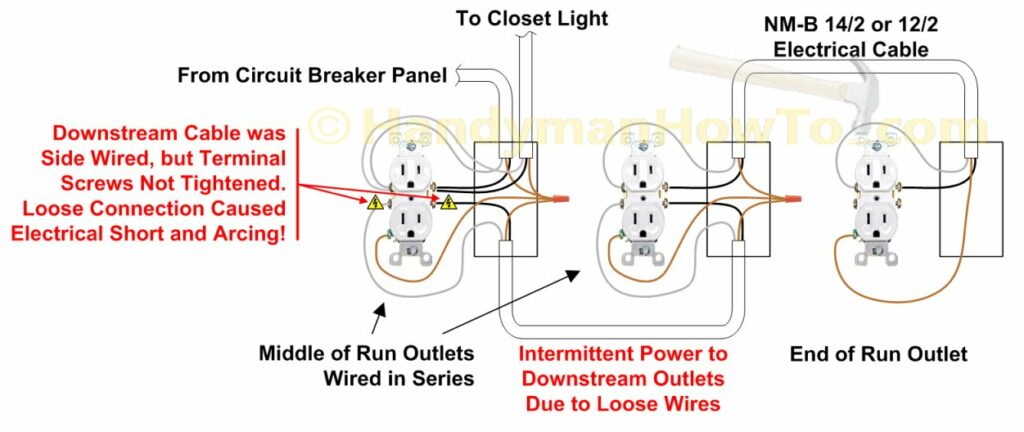
I asked my son to point out the outlet that was sometimes making the hissing noise. After shutting Off the electricity at the circuit breaker panel and verifying the electricity was Off with a voltage detector, I removed the outlet face plate and mounting screws. What I discovered was shocking! (Pun intended.) The outlet side terminal screws were not tightened on the NM-B 14/2 wires! The wires were just looped around the terminal screws making a loose connection that resulted in an arc short and heating that burned and charred the wire insulation. See the excellent “Short Circuit” and “Poor Connection” topics in the presentation by Dr. V. Babrauskas at 2001 International Fire & Materials Conference as posted on interFire.org.
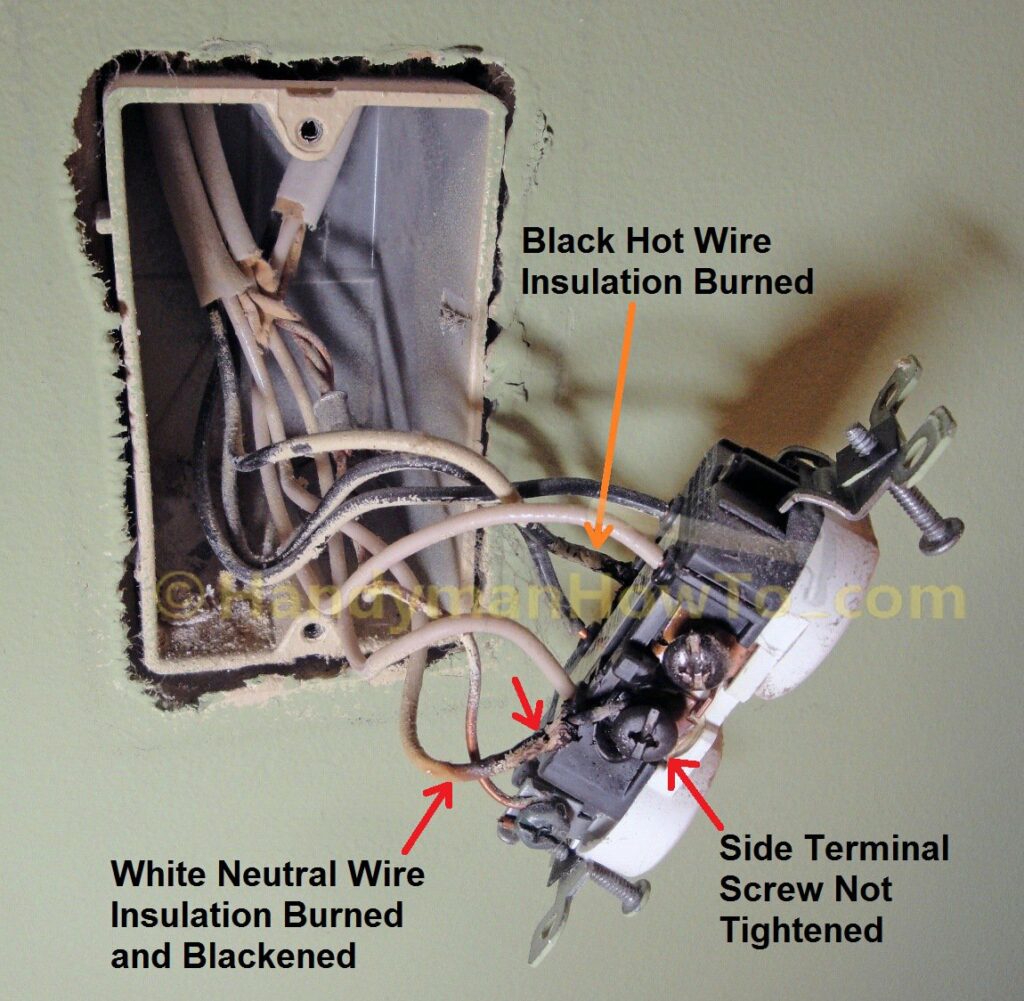
I could tell that the outlet is wiring is original from when the home was built by the metal crimp sleeve connectors on the ground wires and white primer spray painted on the wires after the drywall was installed. Why weren’t the side terminal screws properly tightened? My guess is the electrician got distracted during the job, or maybe it was quitting time that day, and forgot to tighten the terminal screws.
I’m lucky the electrical arc short didn’t cause a fire.
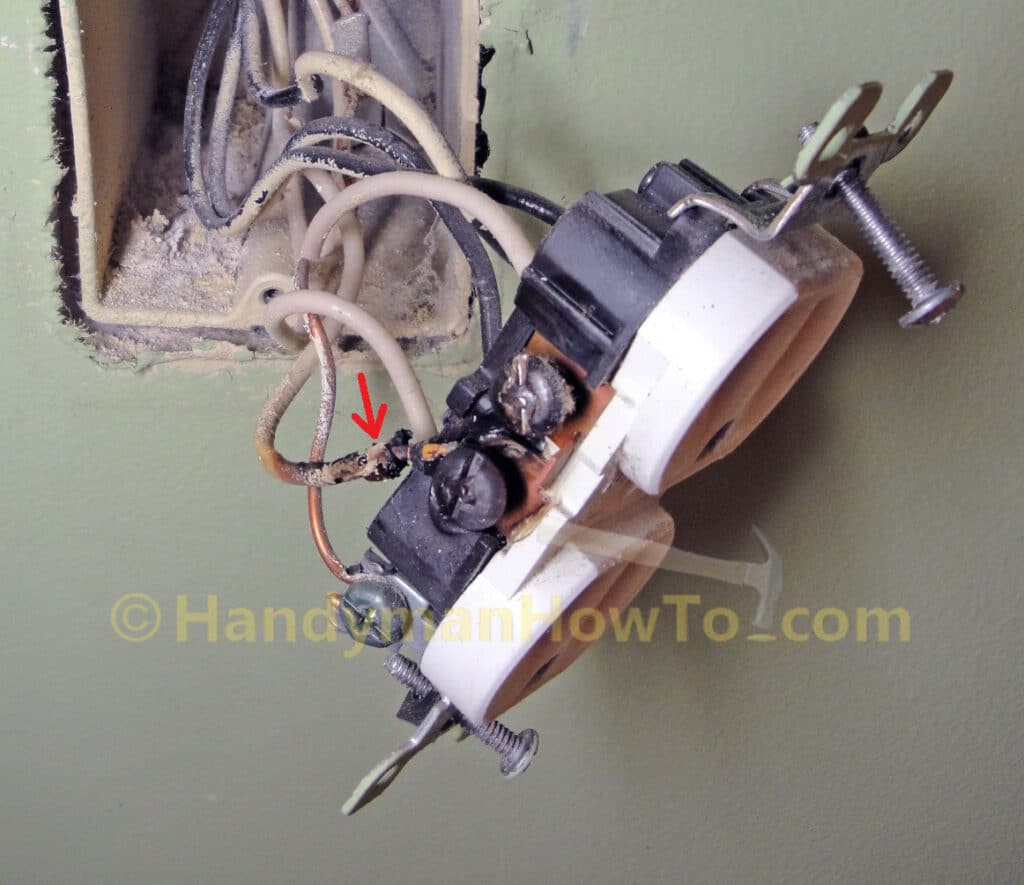
Here’s a closeup of the burned and charred insulation on the neutral (white) wire and blackened terminal screw – that screw should be silver colored like the other screw next to it:
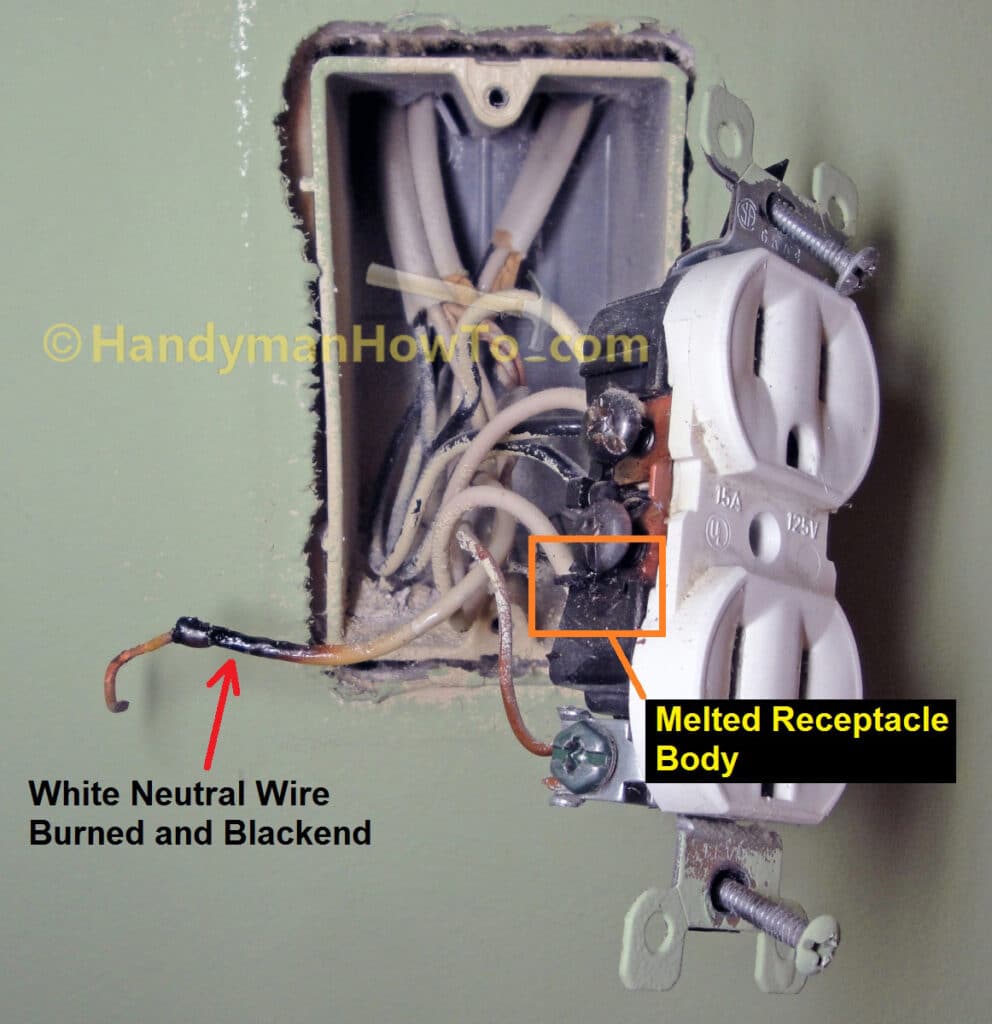
The plastic case of the outlet was melted where the wires touched the case:
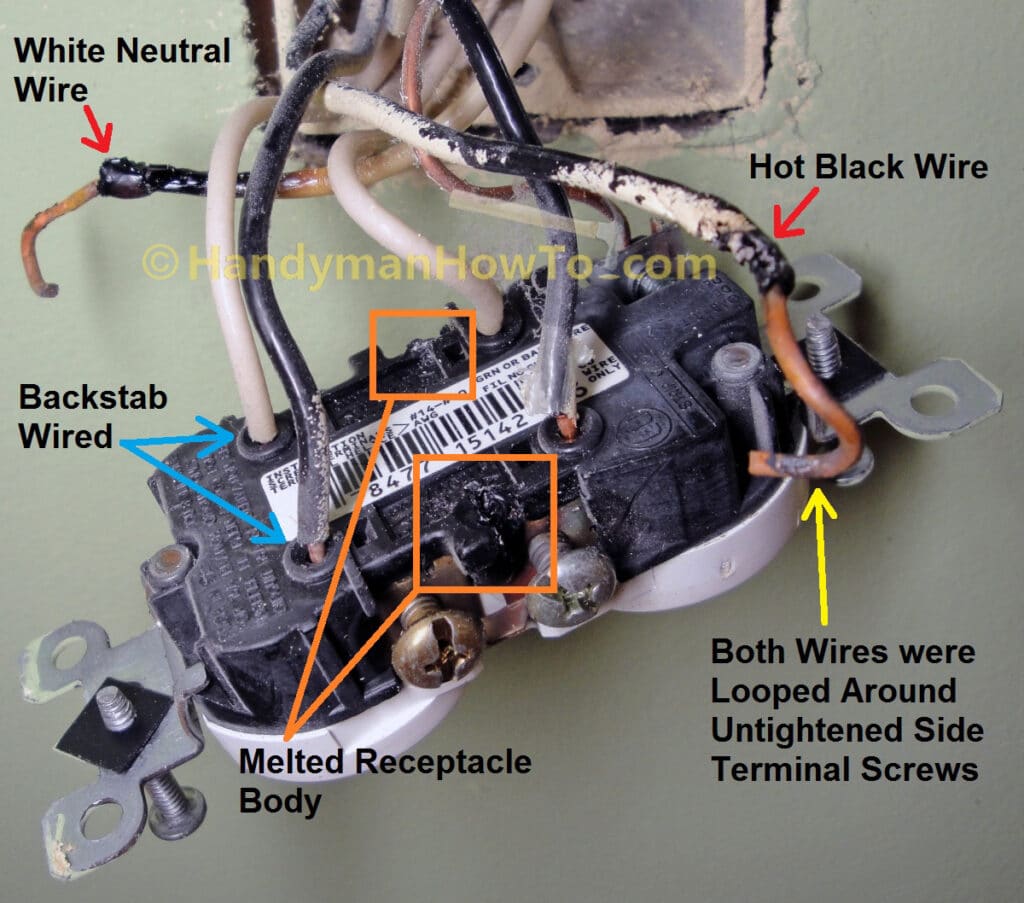
Both the neutral (white) and hot (black) wires were loose (a wiring fault), resulting in shorting and arcing that heated the wires and burned the insulation:
Other Wall Outlets Lose Power
Why did the power to the other outlets and lights temporarily go out and then come back on?
The reason for the intermittent power is because the outlets are wired in Series and the loose wires on this outlet are the source of electricity for those “downstream” outlets and lights (desk lamp and closet light). When the computer, Xbox, stereo, TV and lights on those downstream outlets were turned On, the electrical load of those devices caused the loose receptacle wires to heat up due to the poor (high electrical resistance) connection. The result was technically a “brown out” where the loose outlet wires couldn’t provide sufficient electricity to meet the power loads, so power was lost and the TV, desk lamp, etc. wouldn’t operate. Meanwhile the loose outlet wires would heat up like the wires in a toaster due to the loose/high resistance connection to the outlet with arcing and burned insulation. The arcing (electrical sparking) at the loose connection makes the hissing or sizzling noise.
How to Repair a Shorted Electrical Outlet
The following steps are required to repair the shorted wall outlet and burnt wire insulation:
- Repair the burned insulation on the copper wire conductors
- Replace the old wall outlet with a new electrical outlet
Because I’ve written a tutorial on how to replace an electrical outlet, the remainder of this project will focus on repairing the burned insulation on the individual wires (copper conductors) of the NM-B 14/2 cable. The burned insulation was repaired with Raychem Heat-Shrink Tubing which is rated for 600 volts and up to 275 °F (135 °C) operating temperature, which equals or exceeds the 600 volts and 194°F (90°C) limits of the NM-B 14/2 wire insulation. I also used Scotch 35 Vinyl Electrical Tape to code the repaired wires to avoid confusion for future electricians doing work on the outlet.
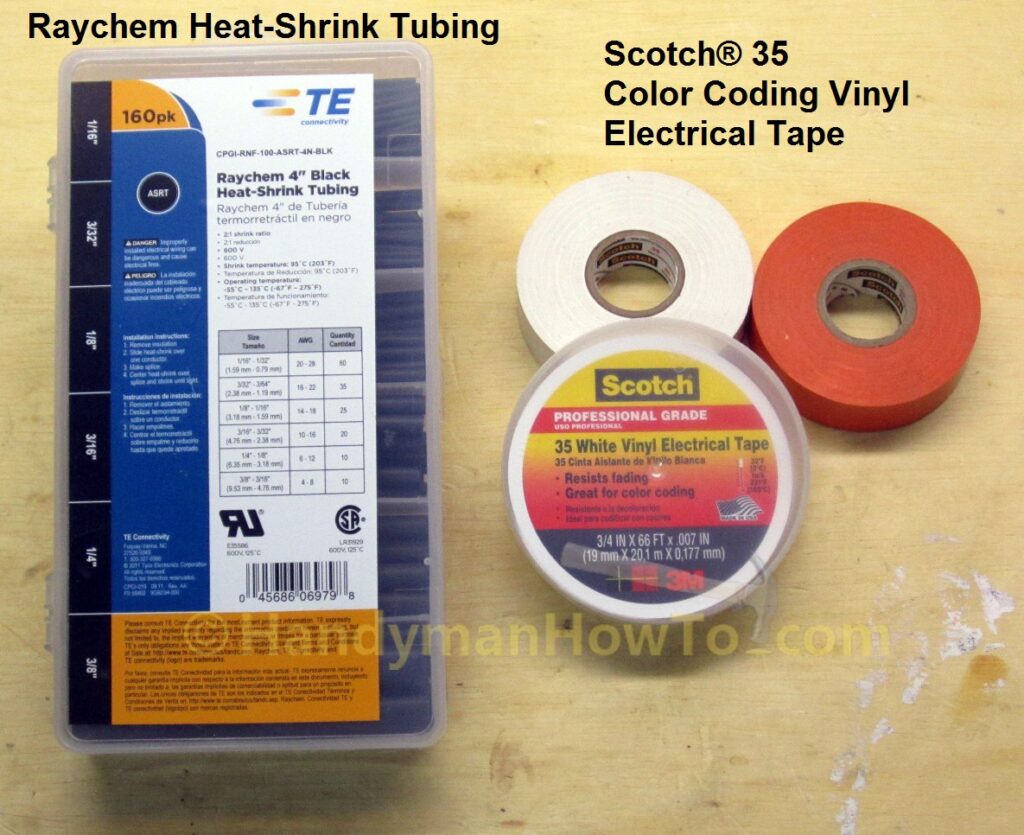
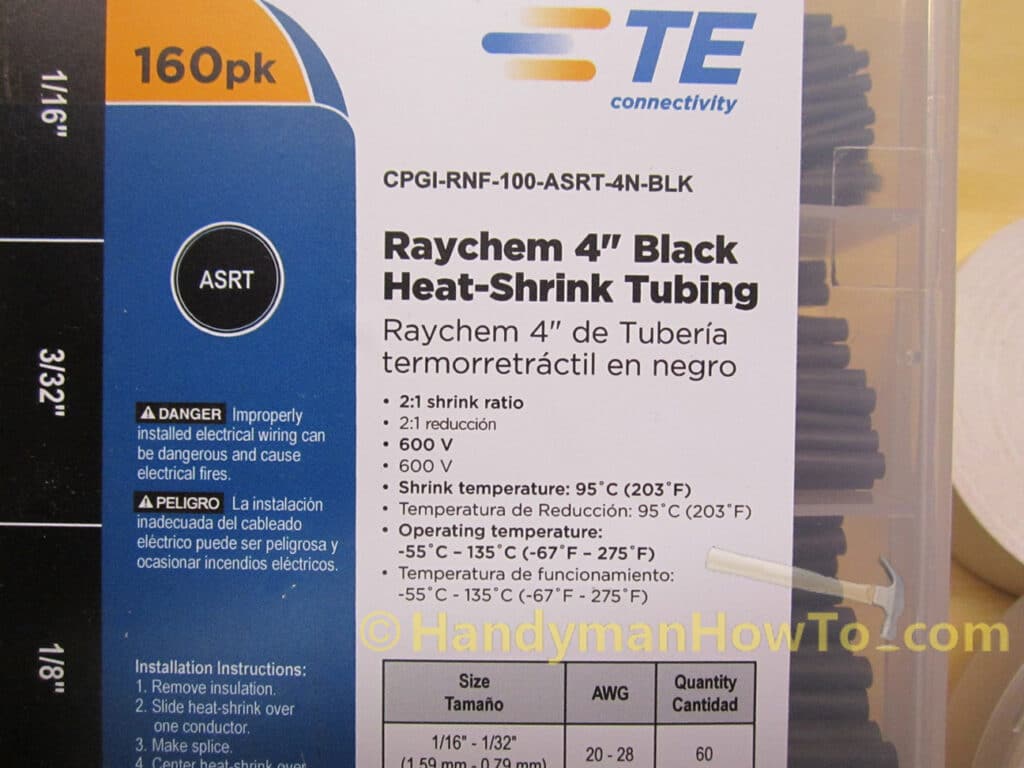
Closeup of the Raychem Heat-Shrink Tubing Kit, (here’s an excellent alternate at Amazon).
NM-B Wire Insulation Repair Options
There are several ways to repair the shorted outlet wires:
-
Replace the entire run of NM-B 14/2 cable with the burned insulation from this outlet to the next outlet in series.
This would require major work tearing open the drywall, removing cable staples, etc. I really didn’t want to go there nor is it necessary in this situation. - If the wires are long enough, cut the wires back beyond the burned insulation.
The National Electrical Code (NEC) 300.14 requires the wires extended a minimum of 3 inches outside the electrical box. If I cut the wires, I would be at or below the 3 inch minimum length requirement. I also don’t like shortening wires because they never get longer. - Cut back the burned wires and wire in a pigtail connection to lengthen the wire so it extends at least 3 inches past the outlet box.
This is possible and I would go with this option if the outlet box only had two (2) NM-B 14/2 cables, however it has three (3) NM-B 14/2 cables and the box is at it’s maximum wire fill allowance for an 18 cubic inch single gang outlet box. A pigtail wouldn’t increase the wire fill count per the NEC calculations, but I’d be cramming wire nuts and more wires in a too small box. Per the NEC wire fill calculations, the volume allowances for this outlet box are: 6 power conductors, 1 ground and 2 for the receptacle for a total of 9 volume allowances. For 14 gauge wire 2 cubic inches of box space are required per volume allowance. 9 volume allowances * 2 cubic inches/volume allowance equals 18 cubic inches; which equals the 18 cubic inch volume of the outlet box. -
Strip off the burned insulation and wrap the exposed copper conductor with electrical insulating tape.
Easy, quick and very inexpensive. This is probably what most electricians would do. -
Strip off the burned insulation and cover the exposed copper conductor with an appropriately rated heat-shrink tubing.
I liked this option the best and is how I made the repair. The extra effort and cost were minimal and it looks nicer compared to wrapping the wire with electrical tape.
Electrical Tape or Heat-Shrink Tubing?
There are recommended repair methods for the outer insulation jacket, but not for damaged conductor insulation in a terminating situation as I have with the shorted outlet wires. If this were damaged to the inner insulation or copper conductors in a cable span, the solution would be to splice in a new section of cable with two junction boxes.
To confirm if electrical tape or heat-shrinking tubing were acceptable conductor insulation repair methods, I called the Southwire Company, the manufacturer of Romex® NM-B cable, and explained my problem to a product support engineer. The engineer said that stripping off the burned insulation and wrapping the wire in electrical insulating tape would be an acceptable repair, but liked heat-shrink tubing better. Adhesive shrink wrap tubing would be best to prevent any possibility of the tubing slipping on the wire, however adhesive tubing in such a small diameter (1/16″ to 1/8″) probably wasn’t available. The minimum requirements are the heat-shrink tubing be rated for at least 600 volts, meet or exceed the NM-B cable operating temperature and recognized by Underwriter’s Laboratories (UL Standard 224, 600V/125˚C). The Raychem Heat-Shrink Tubing used in this repair meets all three requirements.
Shorted Electrical Outlet Repair
If you’re not comfortable working with electricity and electrical wiring, please hire a licensed electrician.
Recall that the electricity is shut off at the circuit breaker panel. Never work on live circuit to prevent shock, injury and/or death.
To begin the outlet repair:
- I disconnected and straightened all the wires from the old electrical outlet.
- Working with a helper at the circuit breaker panel while on the mobile phone, I asked my helper to turn on the electricity.
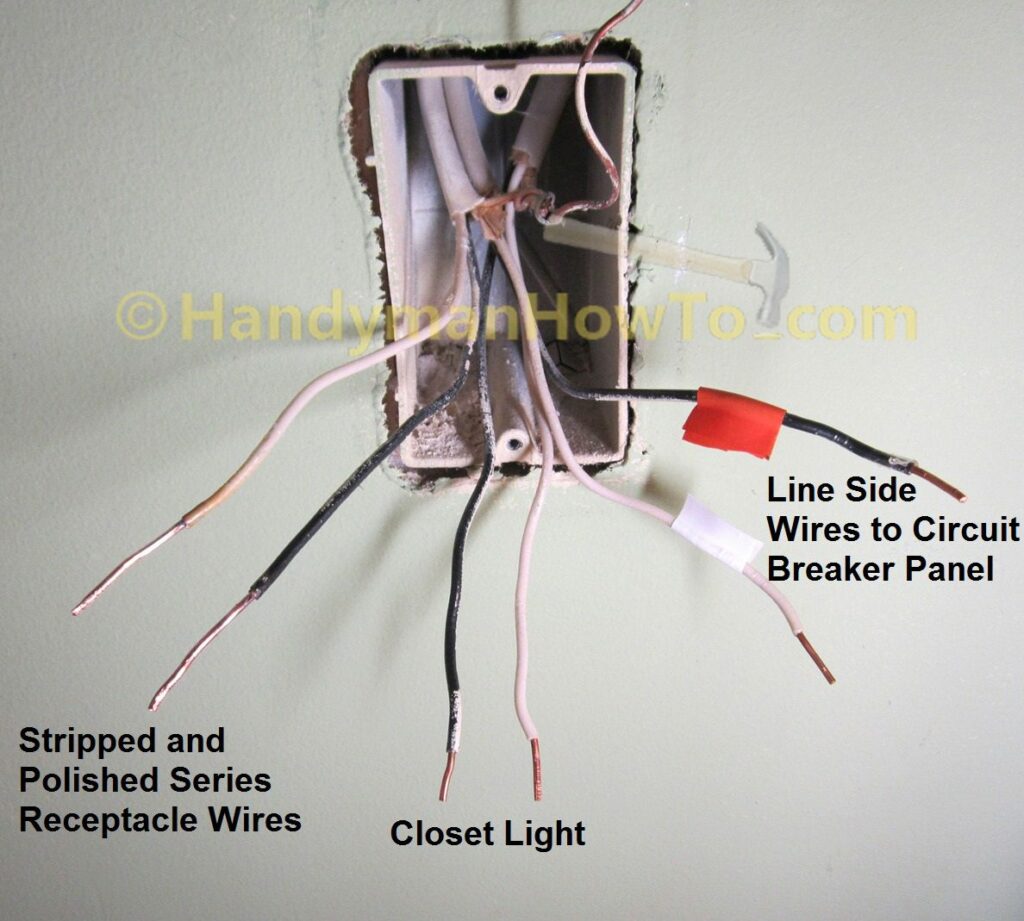
- Being extremely careful not to touch the live wires, I identified the line side wires (i.e. the wires that provide power to the outlet from the circuit breaker) with a non-contact voltage detector. I also verified there was no power on the other wires.
- I asked my helper to turn off the circuit breaker and verified the circuit was dead with the voltage detector.
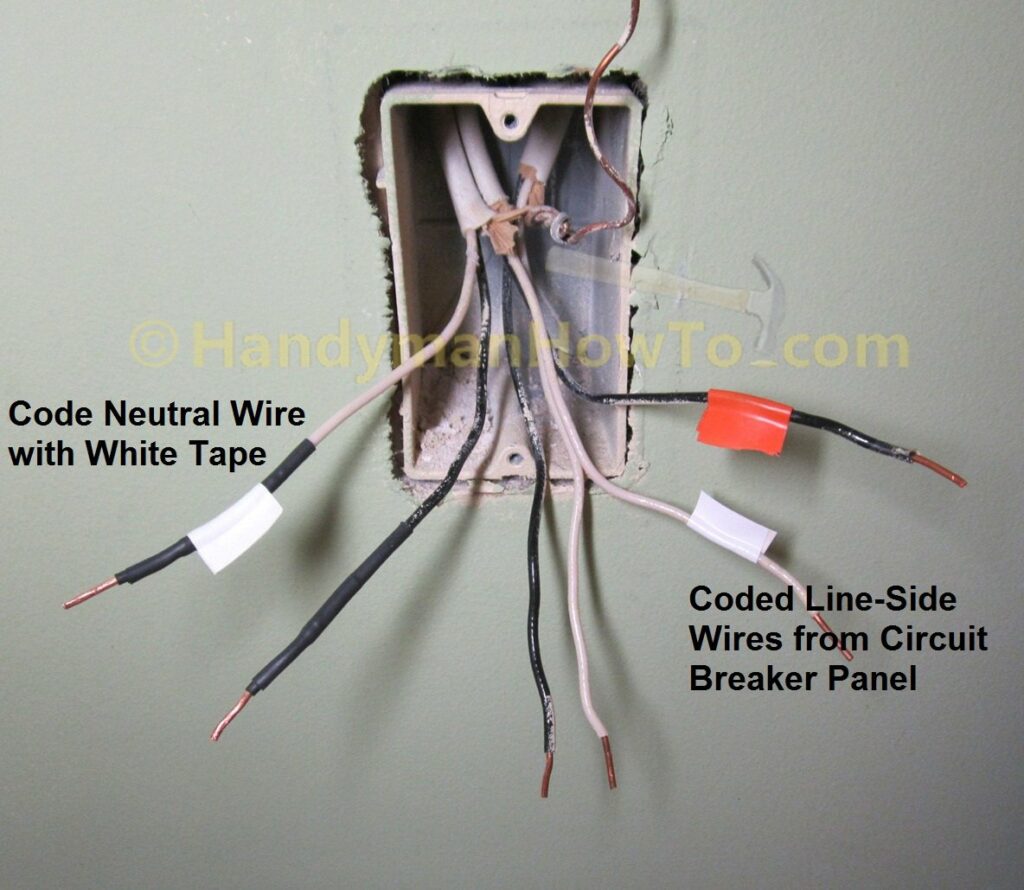
- I coded (tagged) the line side hot (black) and neutral (white) wires with red and white electrical tape as shown in this photo:
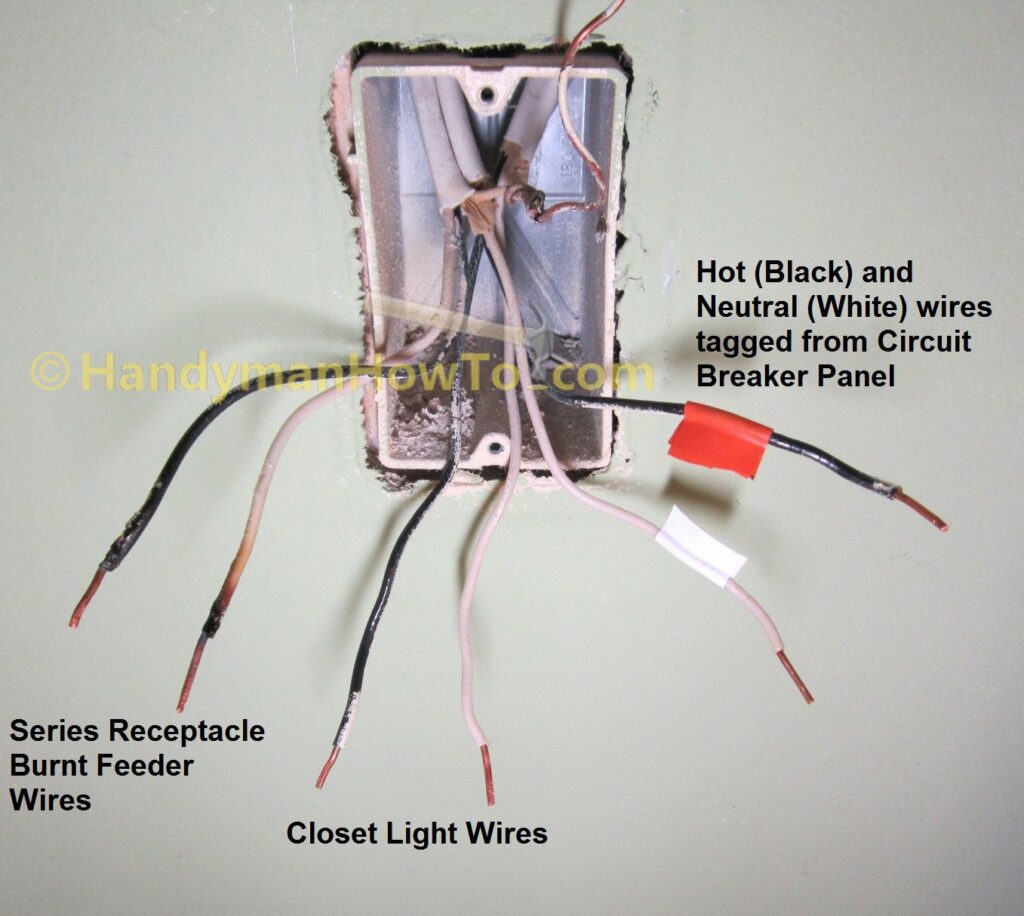
The damaged insulation on the 14 gauge copper wires must be stripped back to the undamaged insulation. The worst of the charred insulation has fallen off the wires as I handled and straightened the leads:
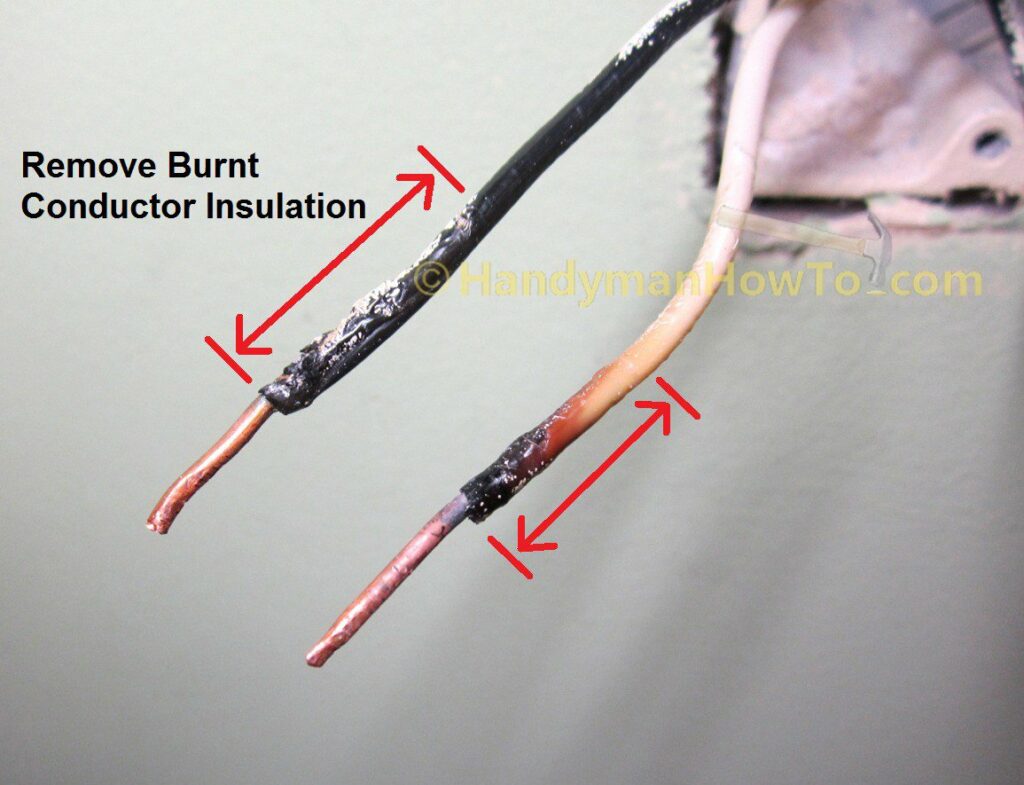
Here are the wires after stripping off the burnt and swollen insulation are shown in this next photo. This was necessary such that the 3/32″ diameter heat-shrink tubing would fit over the undamaged insulation.
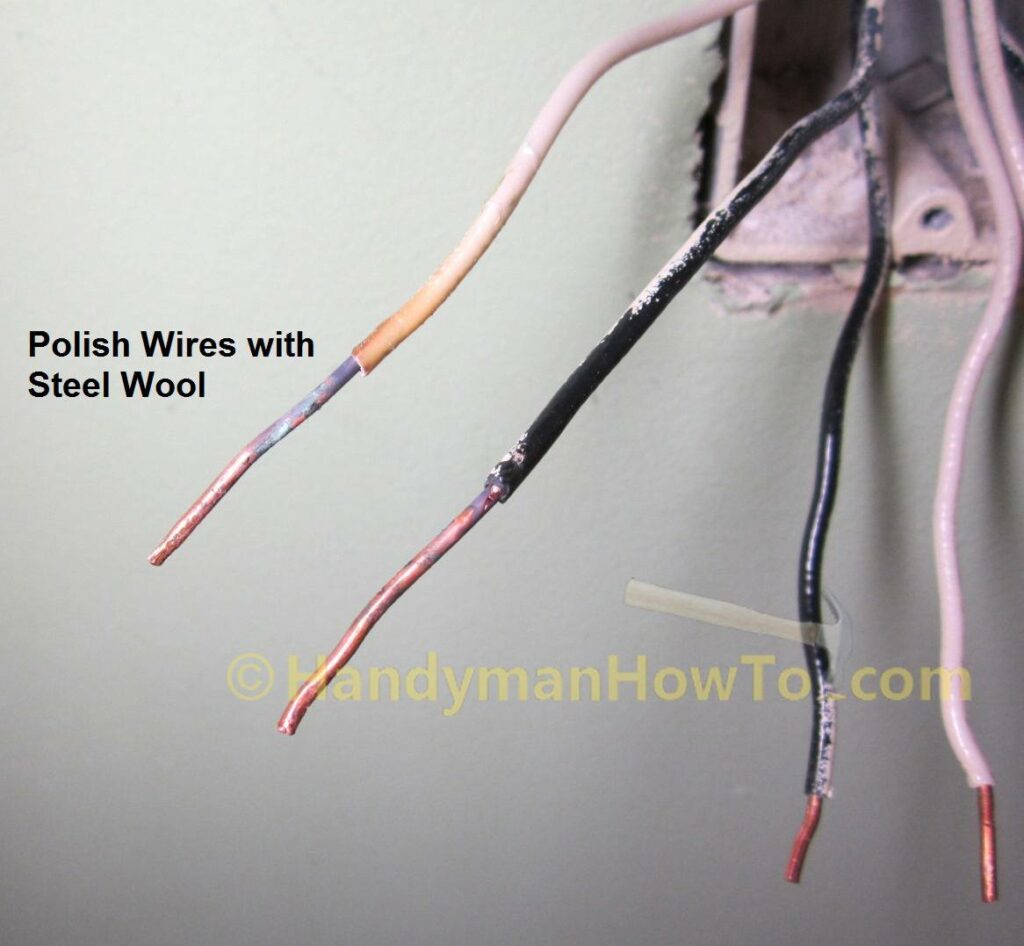
I next removed the tarnish and oxidation from the copper conductors with a bit of steel wool, mainly for appearances sake.
Heat Shrink Tubing Wire Insulation Repair
Before proceeding make certain the electricity is shut off the circuit breaker panel to prevent electrical shock, injury and/or death. If in doubt, hire a licensed electrician.
As previously described, the insulation on the NM-B 14/2 copper wires will be repaired with Raychem heat-shrink tubing rated for 600 volts and 275°F (135°C), Part #CPGI-RNF-100-ASRT-4N-BLK.
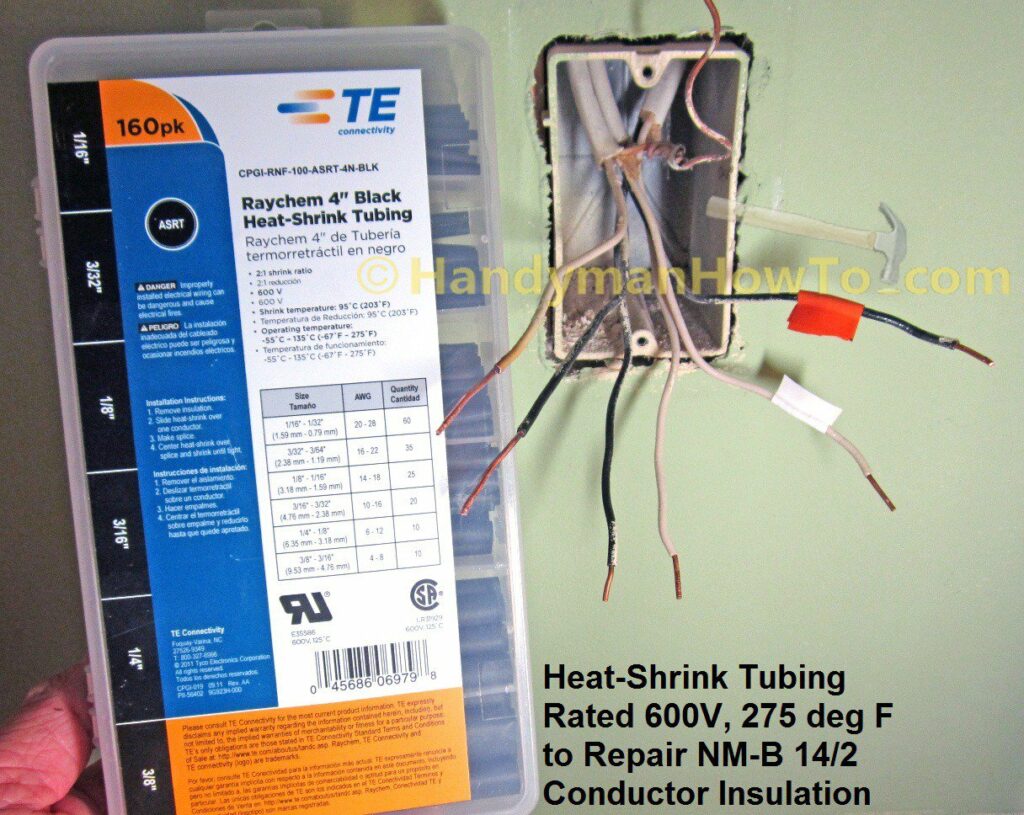
The NM-B 14/2 copper conductor wire insulation will be repaired with two pieces of heat-shrink tubing: 1) 3/32″ section against the wire and 2) 1/8″ section over the 3/32″ piece for a double layer of protection.
The larger piece of 1/8″ diameter tubing about 1-1/2″ in length is slipped over the 14 gauge wire first well away from the end so it’s not prematurely heated and shrunk. The smaller 3/32″ diameter tubing is next positioned over the wire according to the strip gauge on the back of the Leviton Heavy Duty Outlet Model 5252 to expose the correct amount of wire lead. The new outlet will be back wired using the screw-and-clamp method.
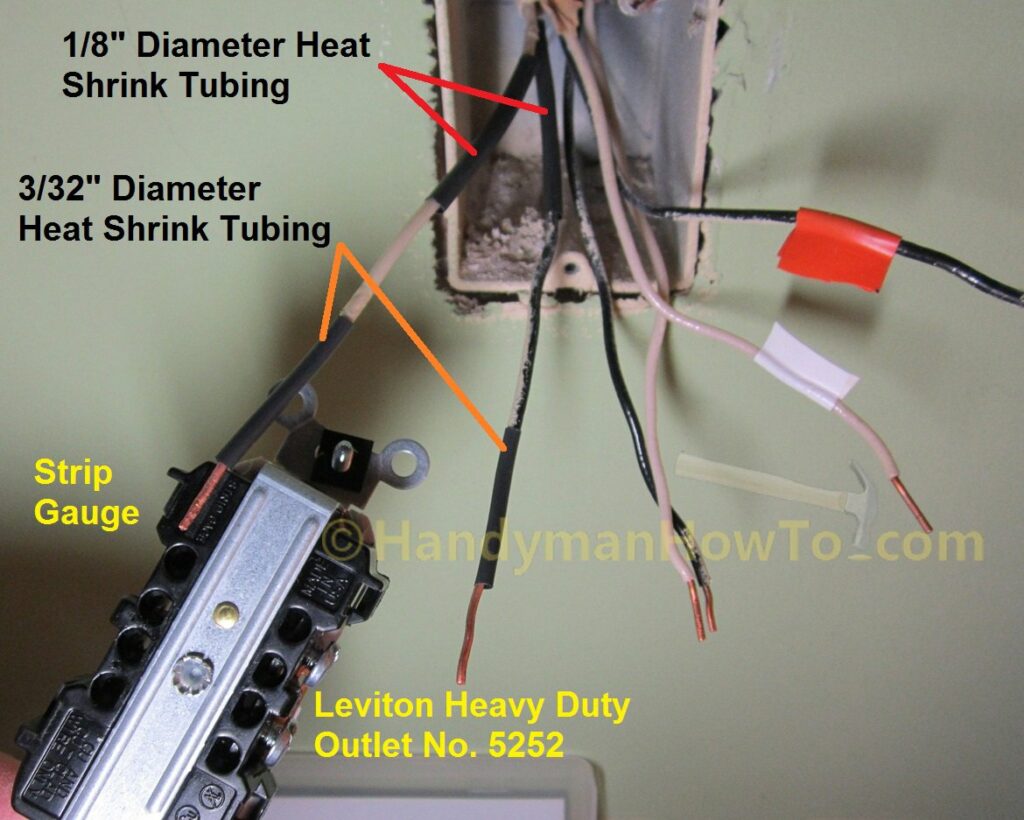
Heat-Shrink Tubing
I used a butane lighter to carefully shrink the 3/32″ tubing over the wire. Specialized heat-shrink butane torches or an electric heat gun may also be used, however a large heat gun is difficult to control due to the wide cone of hot air. The advantage of a butane torch lighter is the torch jet works in all positions, including upside down for even heating of the heat shrink tubing. Do not use an ordinary Bic butane lighter because it does a poor job of projecting the flame downward.
Work carefully while keeping the end of flame at about 1 inch away while applying heat to all sides of the tubing with a back-and-forth motion to avoid overheating which will cause the tubing to become brittle and crack. I held my other hand about 2 inches behind the wire to judge the amount of heat applied by the torch lighter. The Raychem tubing shrinks at 203°F. Practice heat shrinking first on a scrap piece of wire.
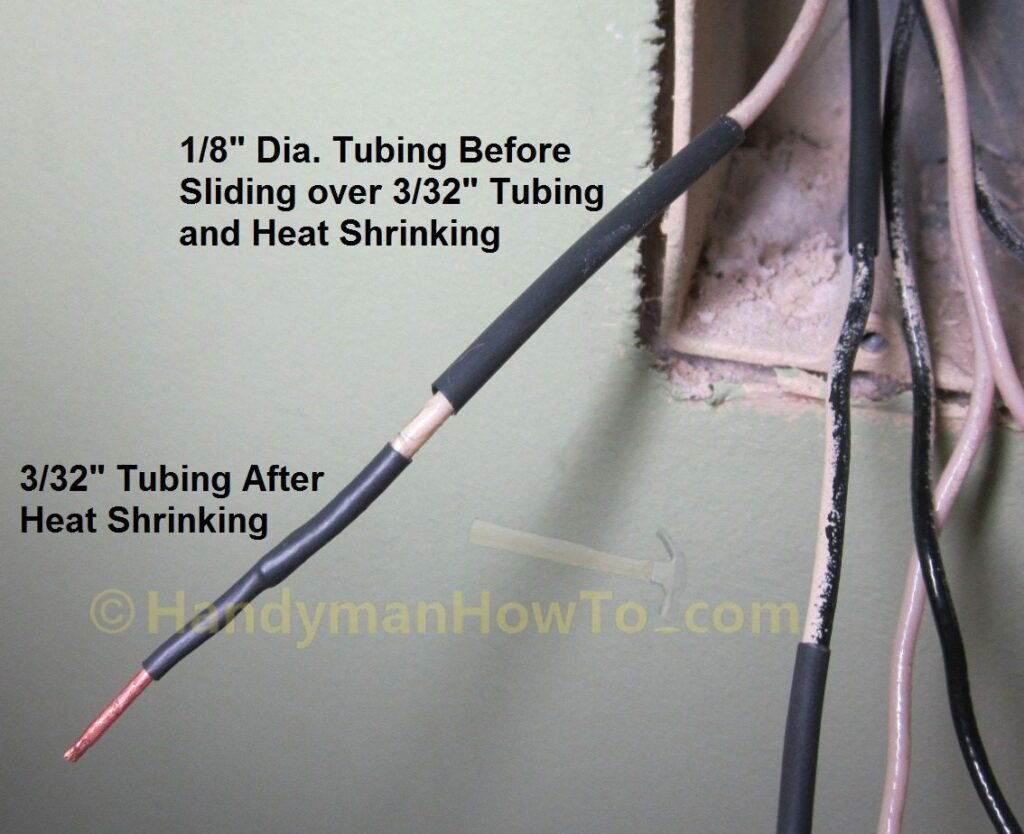
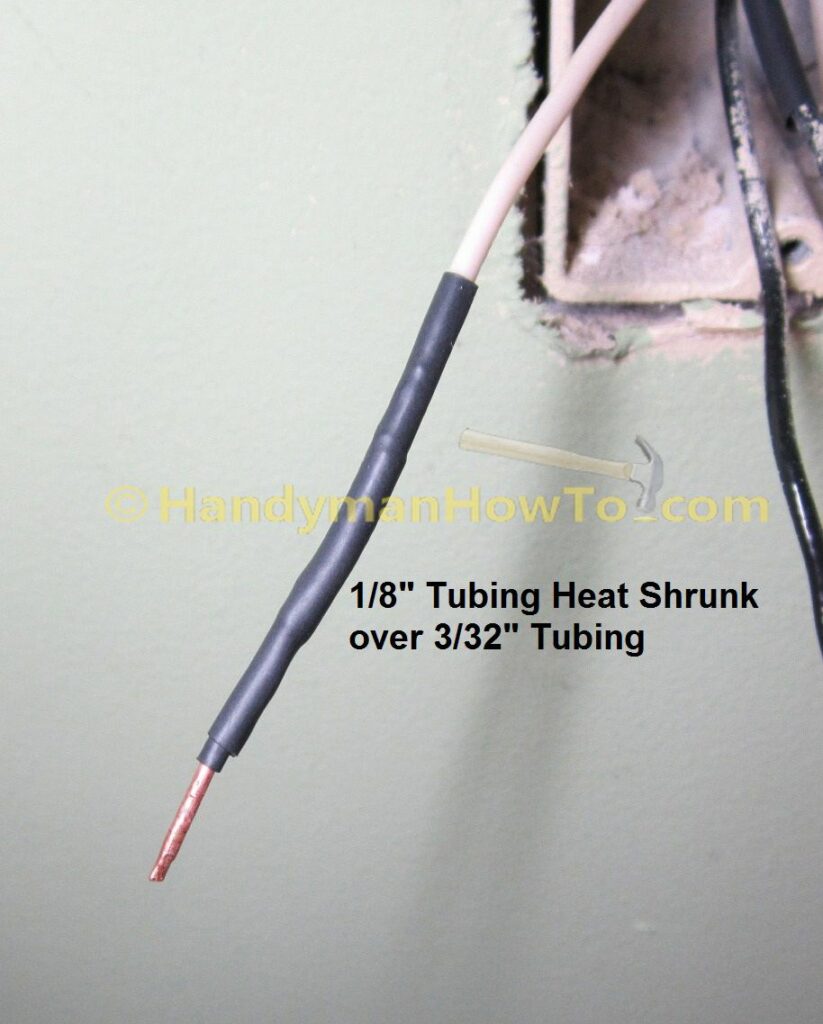
After the 3/32″ inner layer of tubing has been heat shrunk, slide the 1/8″ inch section of tubing into place and heat-shrink it with the butane torch lighter. Notice how the heat-shrink tubing squeezes tightly around the wire:
I coded the repaired white (neutral) wire with a piece of white electrical tape for anyone working on this outlet in the future to indicate it is still the neutral side of the circuit. Otherwise someone might think the black heat shrink tubing on the white neutral wire means it’s been re-purposed as a hot wire. The black (hot) wire insulation has also been repaired with heat-shrink tubing:
Back Wiring the New Wall Outlet
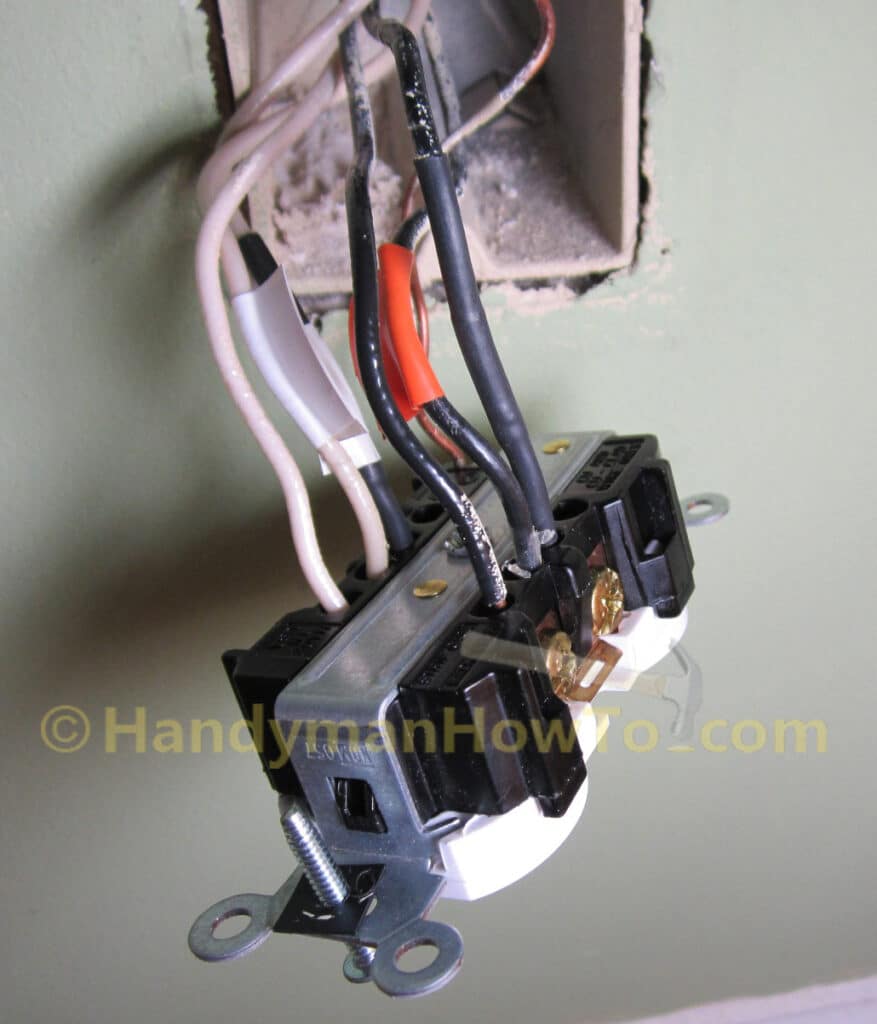
The new Leviton heavy-duty outlet model 5252 is back-wired using the screw-and-clamp system. Each pair of NM-B 14/2 wires for the same circuit are installed in matching positions. I installed the line-side wires from the circuit breaker panel in the middle position of the outlet for a minor degree of electrical balancing for the two feeder circuits on either side; this is just a personal preference.
Receptacle Testing
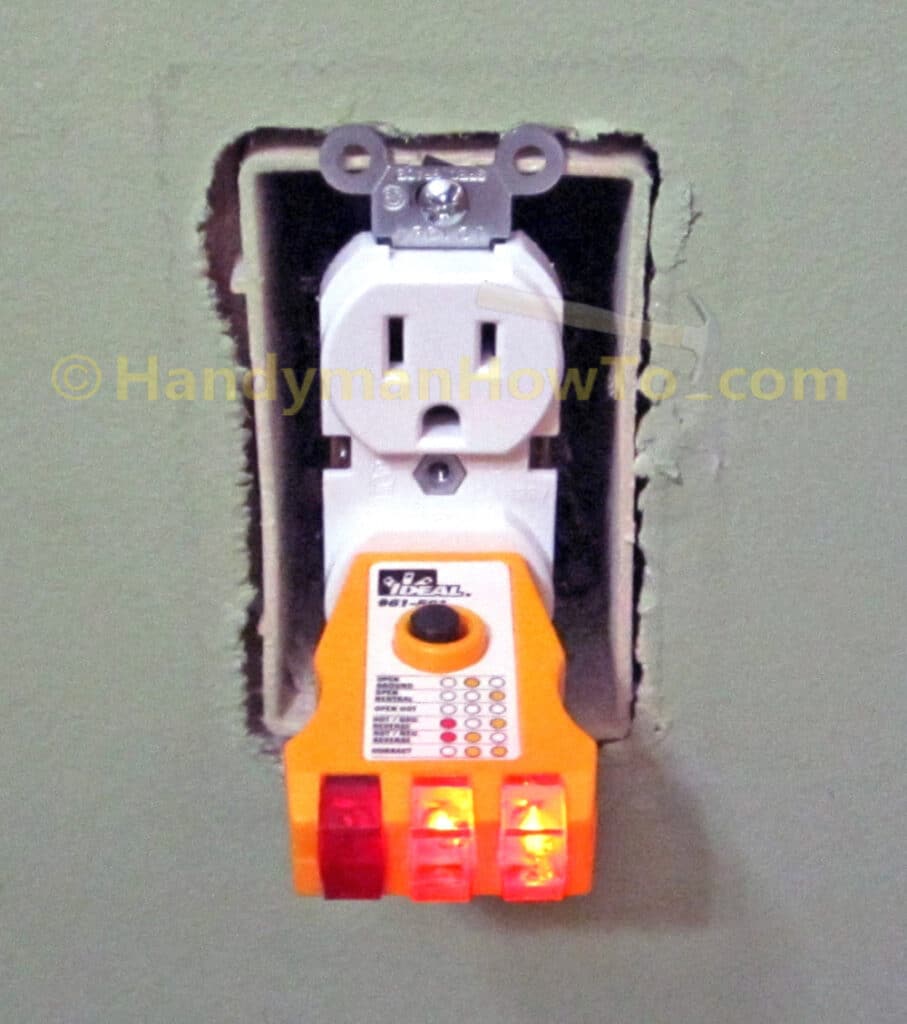
After checking the wires are securely back-wired to the outlet and the clamp screws are tight, the wires are carefully folded into the outlet box to avoid kinks. The new Leviton model 5252 outlet is fastened to the wall box by the two mounting screws, then power is turned On at the circuit breaker.
The outlet wiring is checked for correctness with a receptacle tester. The two orange lights indicates the outlet is wired correctly:
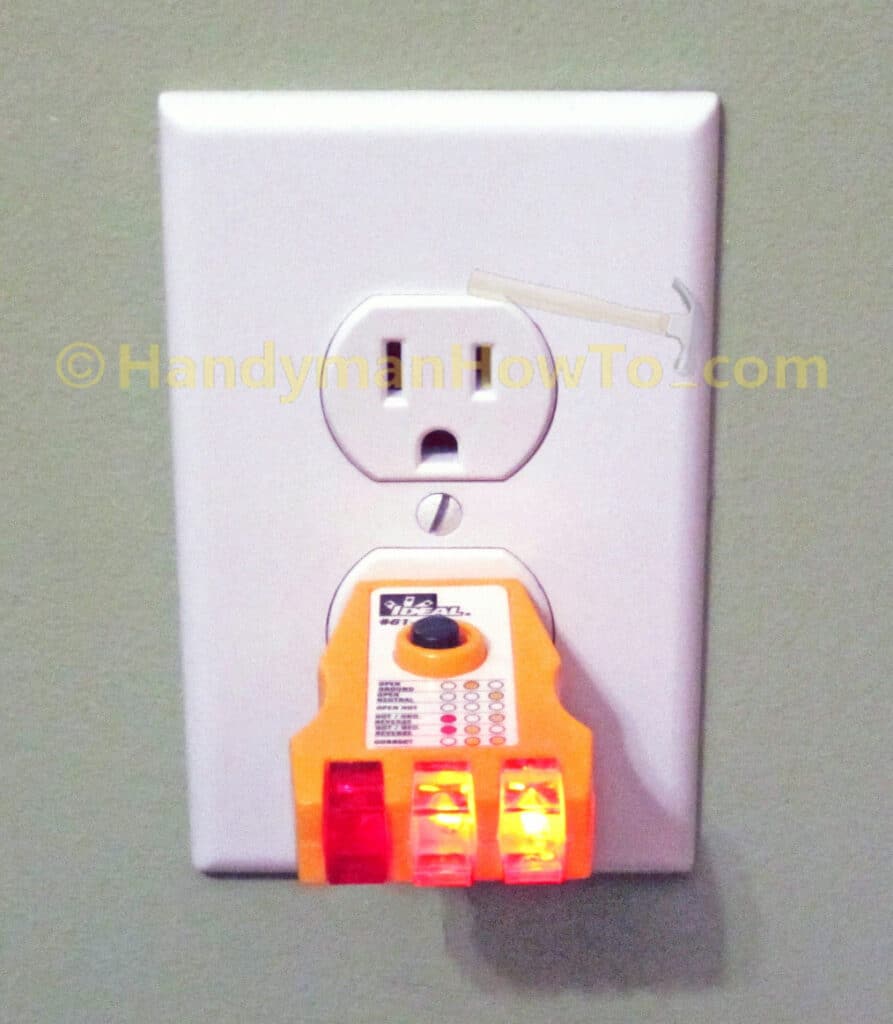
The cover plate is attached and the receptacle is checked again:
Arc Fault Circuit Breaker Upgrade
My home was built shortly before the National Electrical Code (NFPA 70) required Arc Fault Circuit Interrupters (AFCI) for circuits serving bedrooms and other locations. An AFCI breaker would have tripped when the loose outlet wires in my son’s room caused the arc short.
I purchased several Eaton 15 Amp Single Pole Combination Type FIRE-GUARD AFCI BR Type Breakers that matched my electrical panel (your panel will likely require a different breaker model) for about $38 each and replaced the standard breakers to reduce the future risk of arc shorts. Most homeowners will want to hire a licensed electrician for this advanced task which requires shutting off the power the entire home at the service entrance.
Thanks for reading,
Bob Jackson