Water damaged drywall ceiling repair options with step by step instructions for replacing the damaged section and finishing the drywall.
Water from the leaky shower drain dripped onto the basement drywall ceiling causing a fair amount of water damage. What appeared to be a simple stain on the finished ceiling is actually a hole on the unfinished side of the drywall.
Drywall Ceiling Water Damage Caused by Plumbing Leak
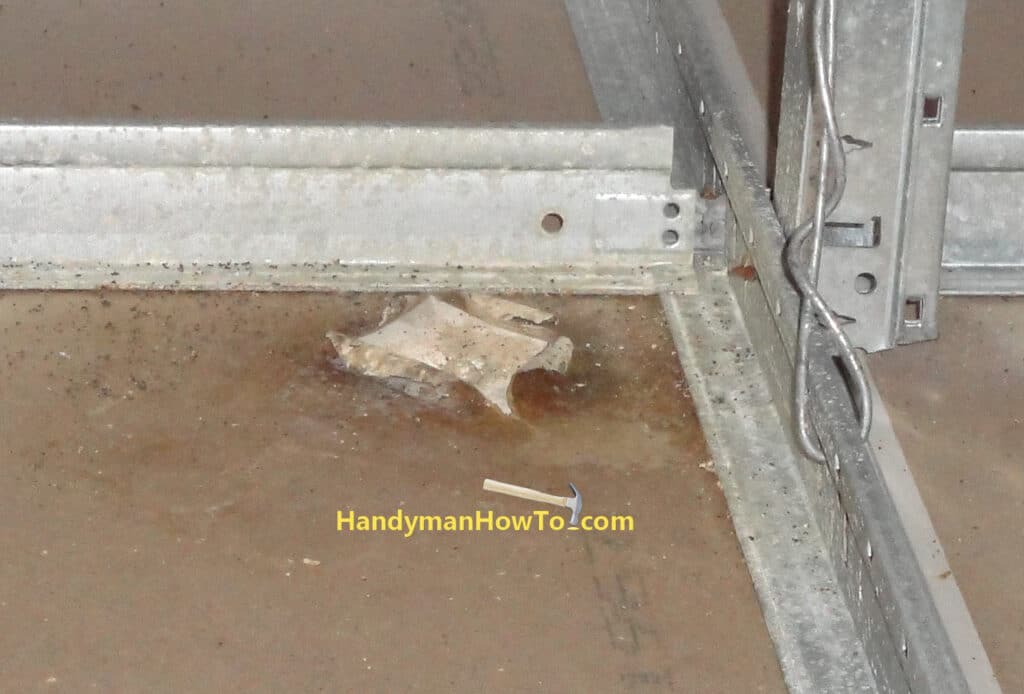
Water from the leaky shower drain dripped from the shower drain PVC pipe U-bend onto the suspended drywall basement ceiling. The leak caused the drywall paper backing to delaminate and eroded the gypsum drywall material leaving a crater:
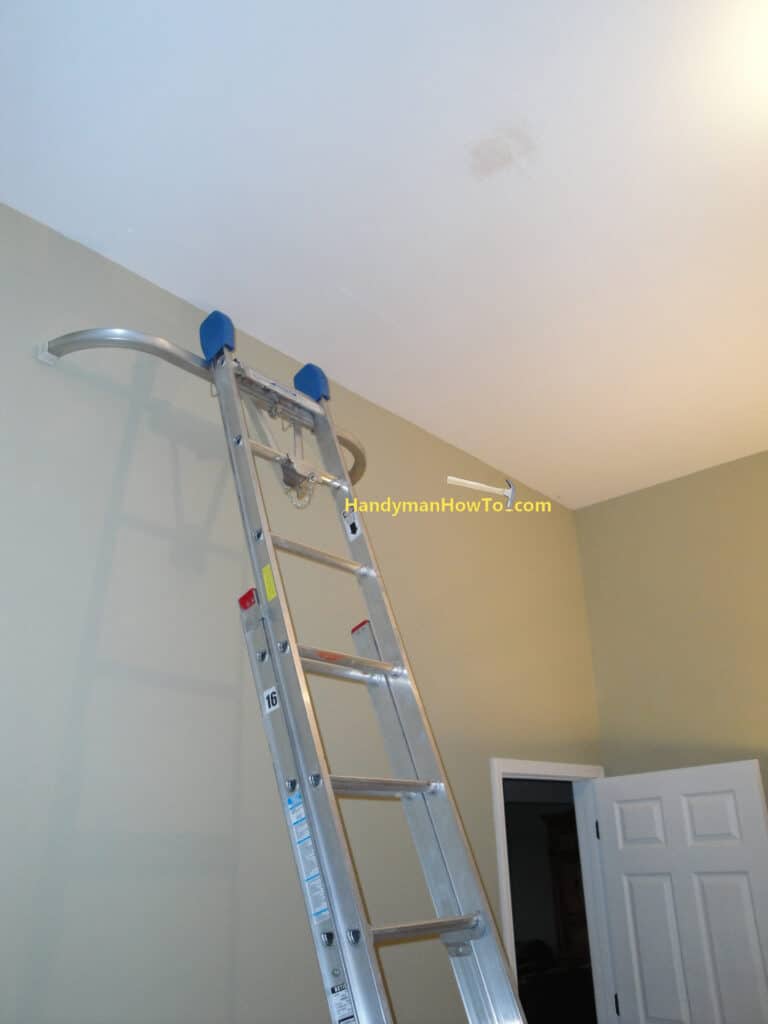
The basement ceiling is 14 feet high because the house sits on a hillside and has high basement walls. I used a 16 foot extension ladder with a ladder stabilizer to hold the ladder off the wall to better reach the water damaged drywall ceiling. The water stain doesn’t look that bad from this viewpoint, however upon closer inspection the drywall paper is delaminated with a sagging bubble in the center:
Drywall Ceiling Water Damage Repair Options
There are several methods to repair damaged drywall. The best option depends the extent of the damage (small or large area) and location (wall or ceiling).
Repair Option 1: Self-Adhesive Mesh Drywall Patch
Drywall patches consist of a thin metal mesh with a sticky backing. The metal mesh provides support for the drywall spackle. The patch is stuck over the hole, spackle, sand and paint. Self-adhesive metal patches work best on walls and small holes, but often sag when used on ceilings. I therefore chose not to use a metal repair patch.
Repair Option 2: Cut Out and Replace with New Drywall
The best way to repair the roughly 5″ by 5″ area of damaged drywall ceiling is to cut out the area and replace it with a new section of drywall by installing a wood reinforcement frame, tape the joints, apply joint compound, sand and paint. The most difficult part was working on the extension ladder to reach the high ceiling.
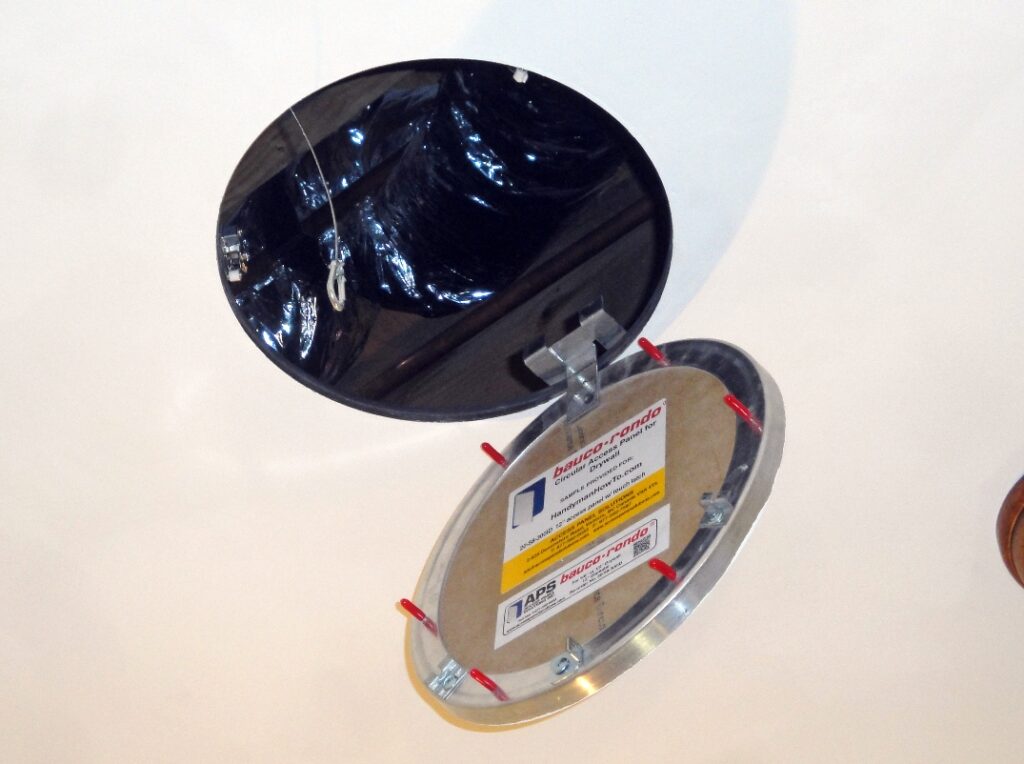
Repair Option 3: Install a Drywall Access Panel
The problem with Options 1 and 2 are if the leak were to happen again, you’ll be redoing the ceiling repairs. Depending on the nature of the leak, it may be necessary to cut an opening in the ceiling to fix the plumbing. In the 3 years since I made this repair, I’ve been introduced to the bauco drywall access panels. The bauco access panel solves both the repair and plumbing access problems. If I were to do this repair again, I’d use the bauco access panel.
How to Repair Drywall Ceiling Water Damage
Drywall Ceiling Repair Tools and Materials
You’ll save yourself a lot of time if you assemble the necessary tools and materials before starting the job. The items needed for this project are:
- Drywall Screw Setter – automatically sets the drywall screw the right depth every time. A 4-pack costs $5.
- Coarse Thread 1-1/4″ Drywall Screws
- Combination Square
- Pencil
- Utility Knife
- Cordless Drill/Driver
- Tape measure
- 12″ Drywall Taping Blade
- 6″ Drywall Taping Blade
- Drywall Jab Saw
- Drywall Sanding Sponge
- Roll of Self-Stick Fiberglass Drywall Tape
- Drywall Joint Compound
- Drywall Repair Panel
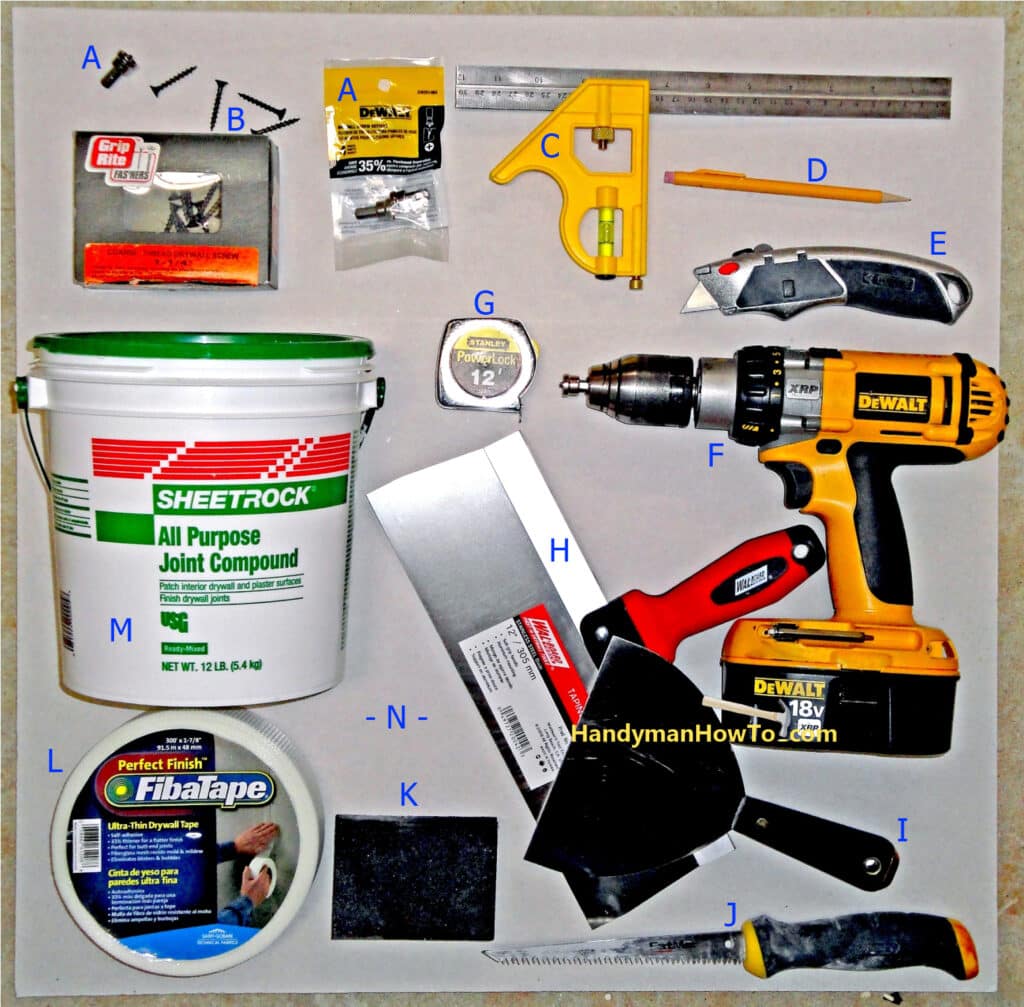
A large drop cloth is also needed to keep debris and dust off the floor.
Remove the Damaged Section of Drywall Ceiling
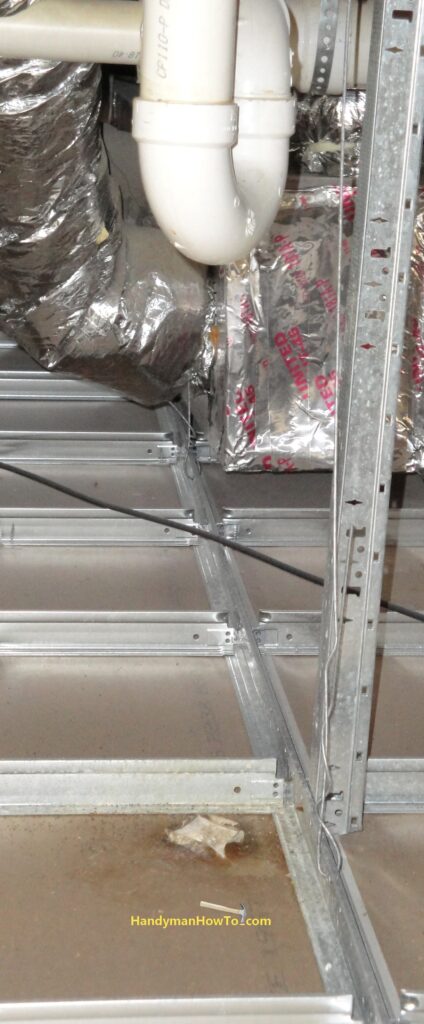
Before you cut out the damaged section of ceiling, know what’s on the other side of the drywall. Are there electrical wires, plumbing, gas lines, HVAC ducts, wood joists or metal support runners? I knew from looking into the ceiling crawlspace the center of the leak was close to the drywall suspended ceiling metal supports. If you can’t see what’s on the other side, cut a small inspection hole in the drywall with a utility knife and look inside with flashlight and small mirror.
I began the drywall repair by tapping drywall jab saw into the ceiling, knowing that I was inside the suspended drywall ceiling metal supports:
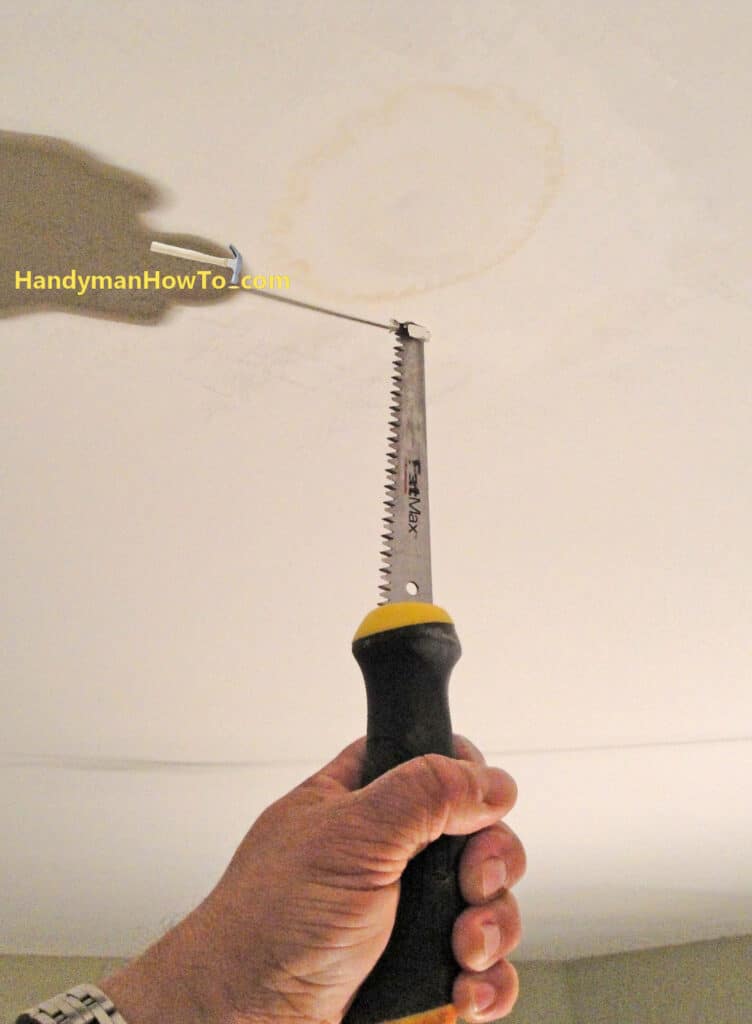
The cut is continued until I was well clear of the water damaged area. You might ask: “How do I know I’m making a straight cut?” because I’ve not marked cut lines on the ceiling with square. Right now it doesn’t matter – I’ll cut out the damaged area first and square up the hole later:
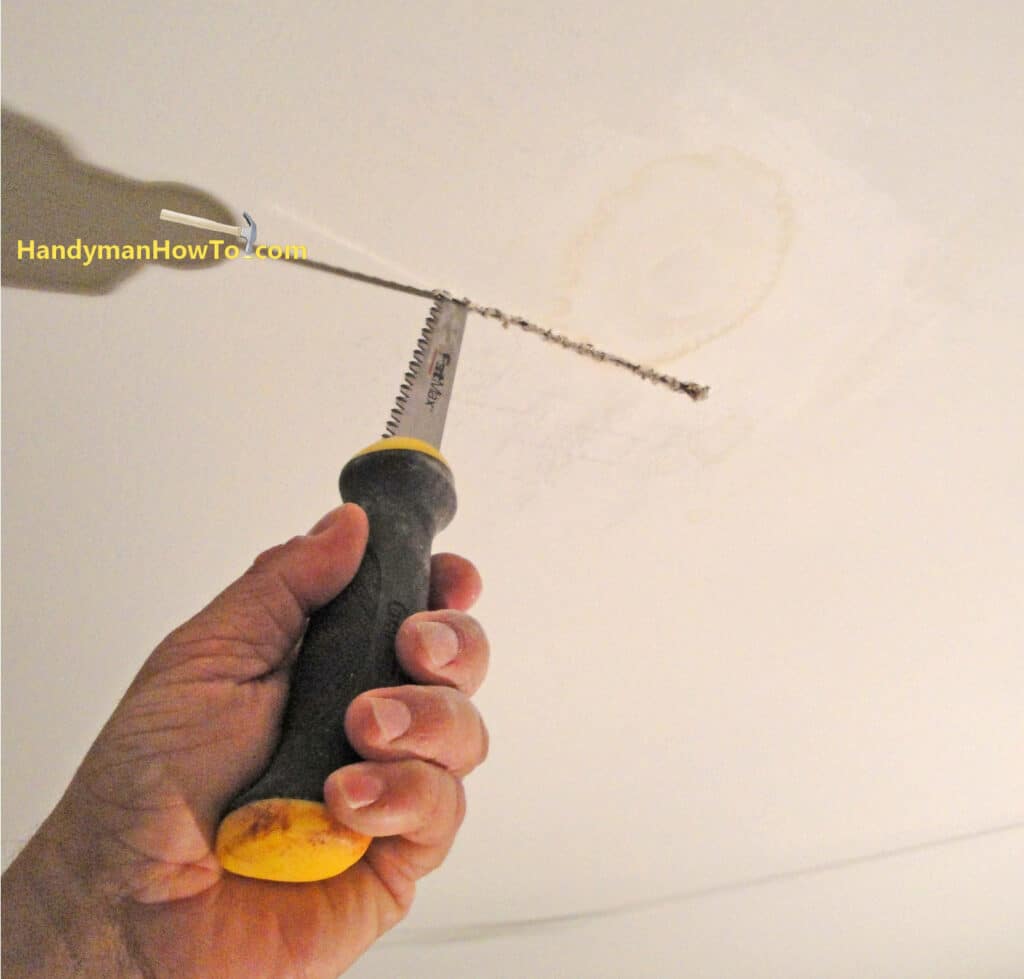
Knowing the leak was just inside the intersection of two suspended drywall ceiling metal supports, I made the second cut in the other direction:
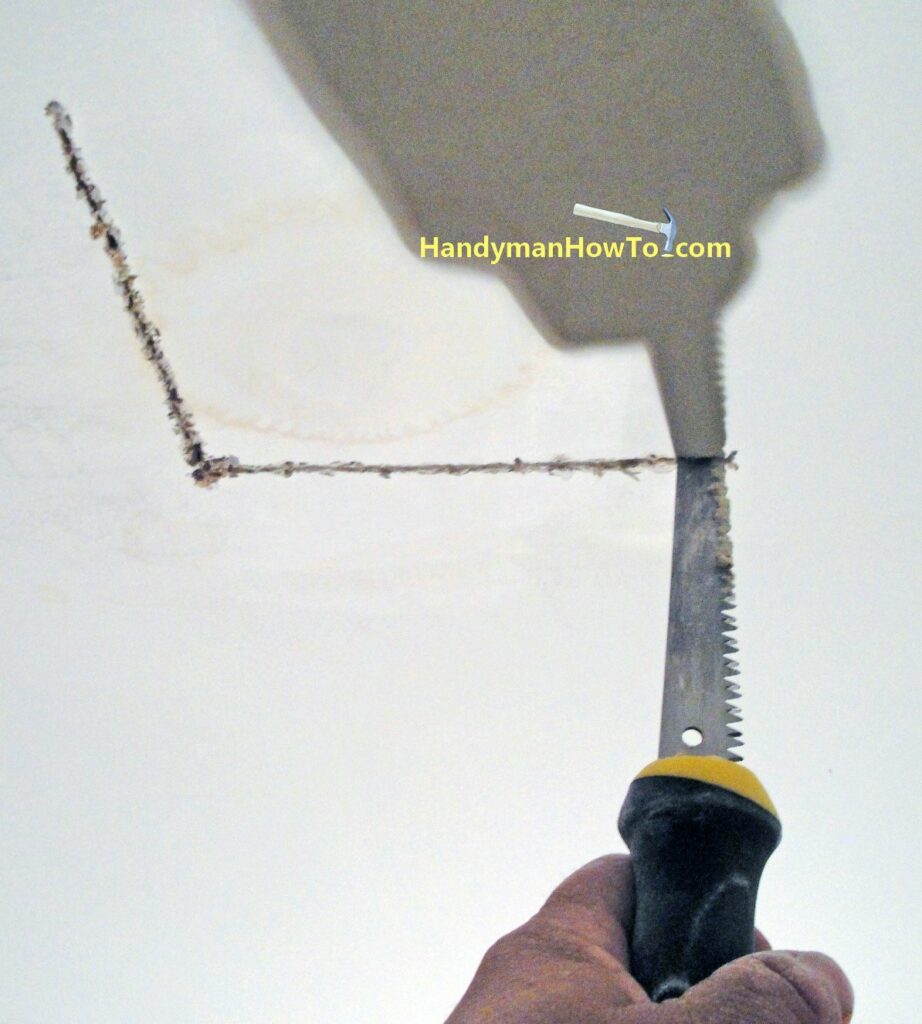
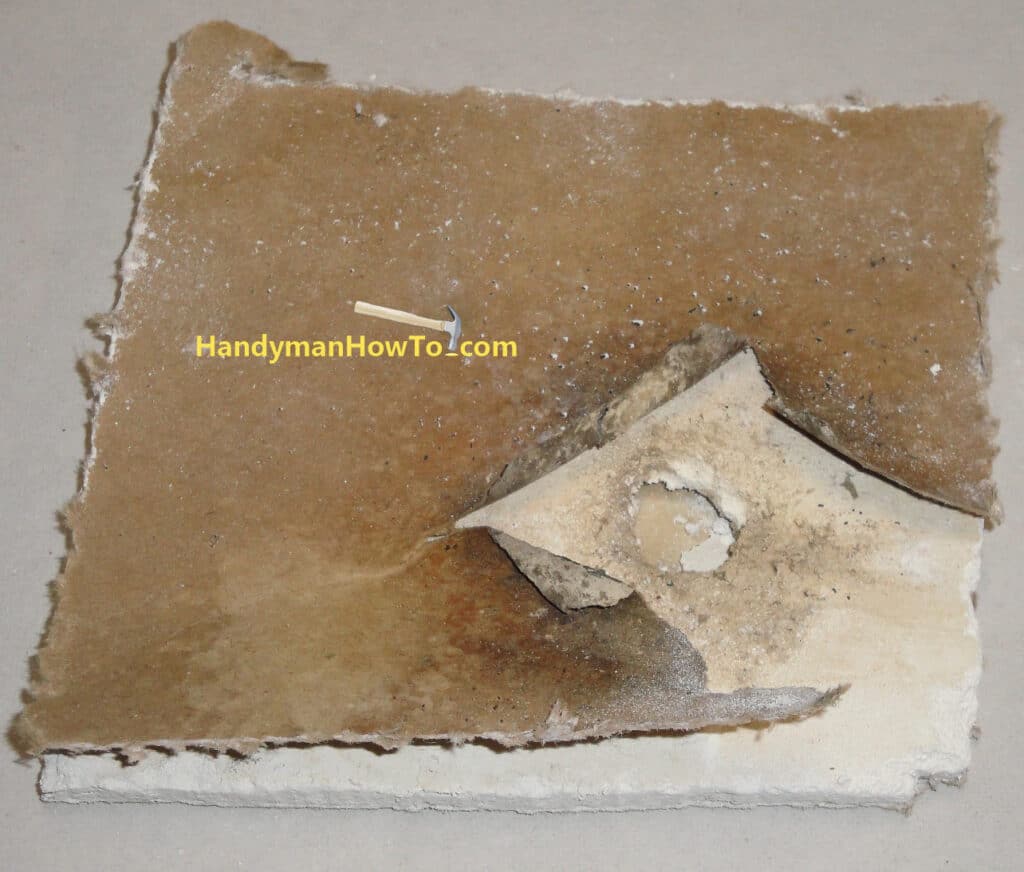
The water damaged drywall ceiling section cut out with the jab saw. Water from the leaky shower drain dripped and splashed creating the hole. The problem with slow plumbing leaks is it takes time before the damage become apparent:
This repair is continued in How to Repair Drywall Ceiling Water Damage – Part 2.
Hope this helps,
Bob Jackson