How to Repair Drywall Ceiling Water Damage – square up the ceiling hole and mount a wood brace for the repair panel. This repair is continued from How to Repair Drywall Ceiling Water Damage – Part 1.
Drywall Ceiling Repair Steps
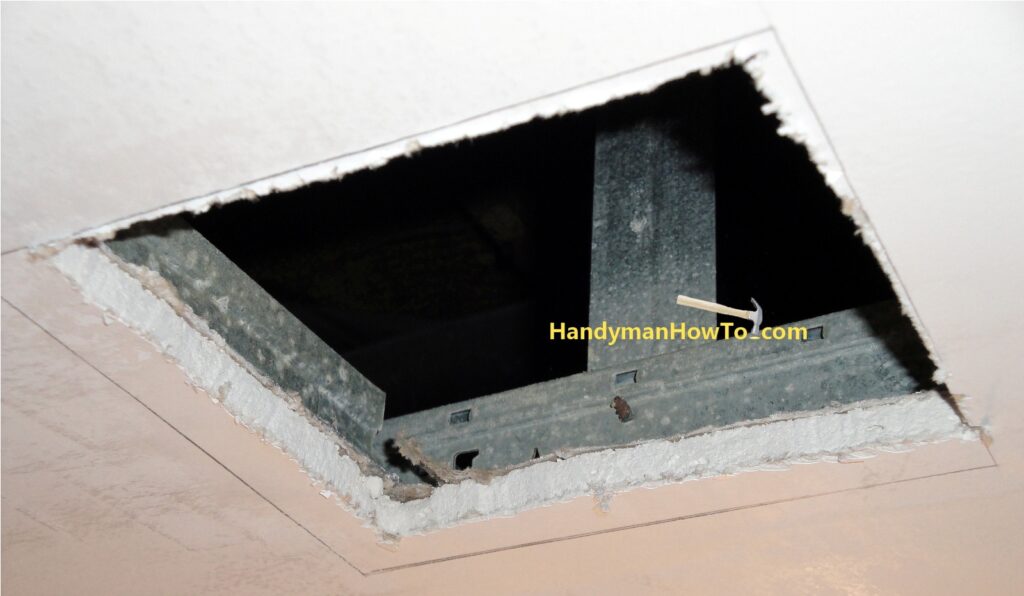
I’ve made the rough cut to remove the water damaged part of the drywall ceiling. Pencil lines are marked with a square to true up the repair hole. The pencil lines are marked to partly overlap the suspended drywall ceiling metal runners to provide a flange to mount the repair panel with drywall screws:
The drywall repair panel will be screwed into the bottom of the metal support runners. A utility knife is used to cut the drywall along the squared pencil lines to expose the edge of the runners. Score the drywall paper face then plunge in the blade making a seesaw motion with successive passes. Then make a long deep pass with the blade to complete the cut:
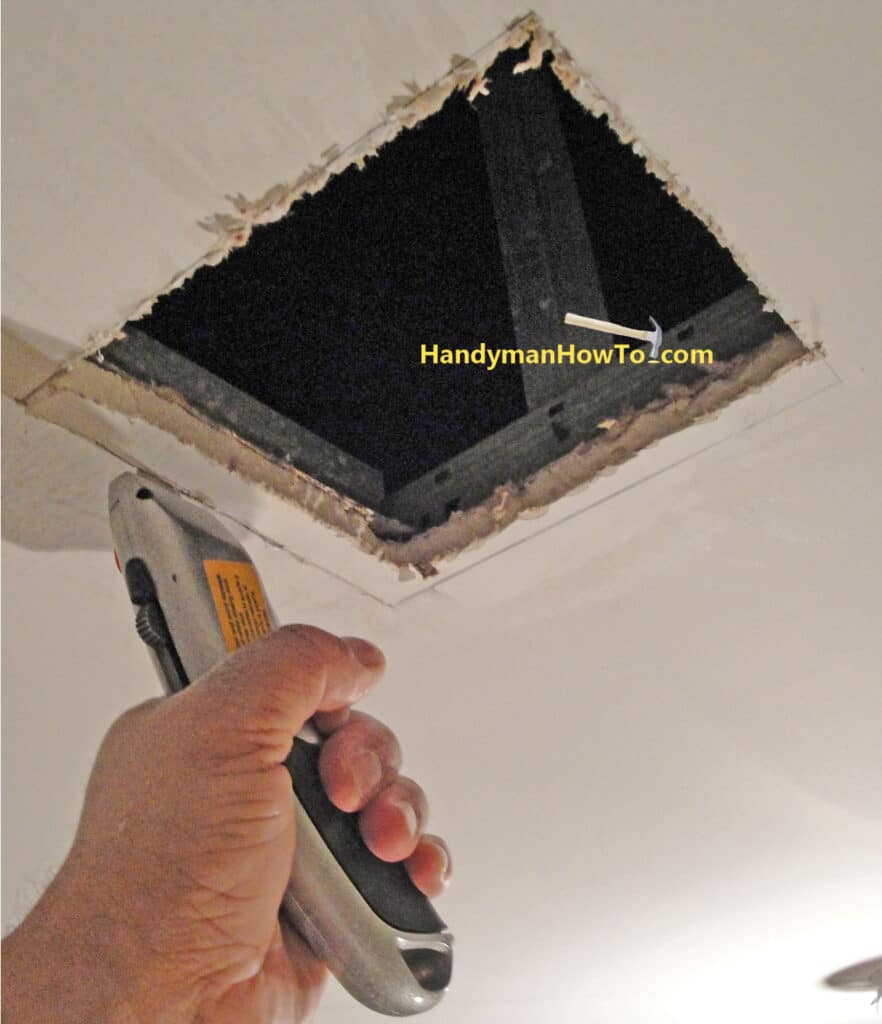
Cut along the other metal support runner:
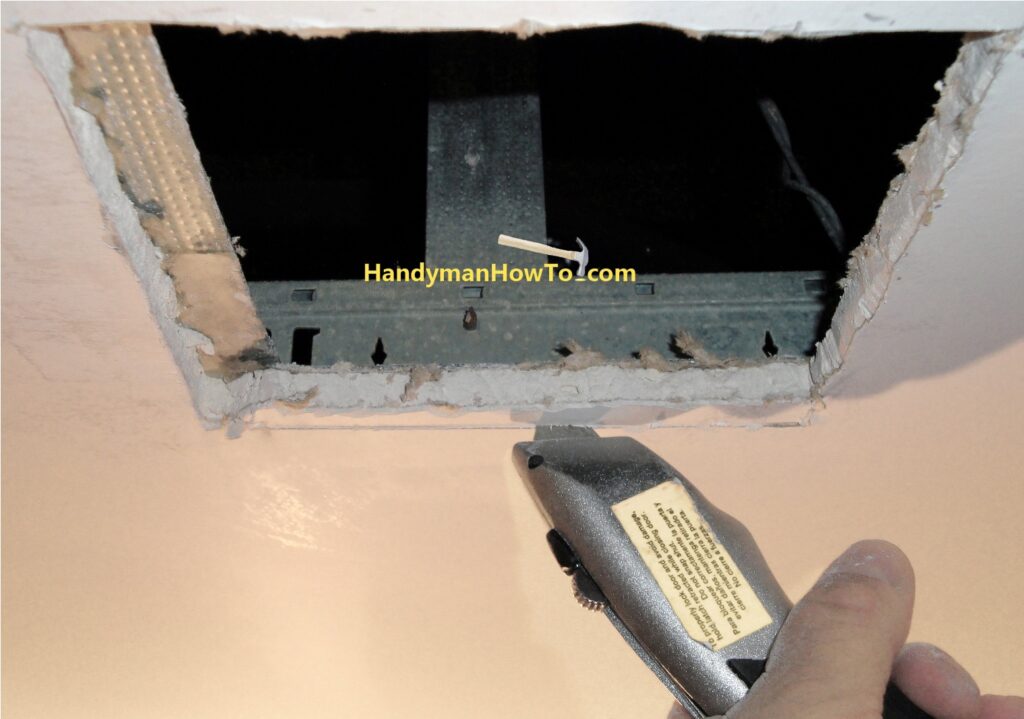
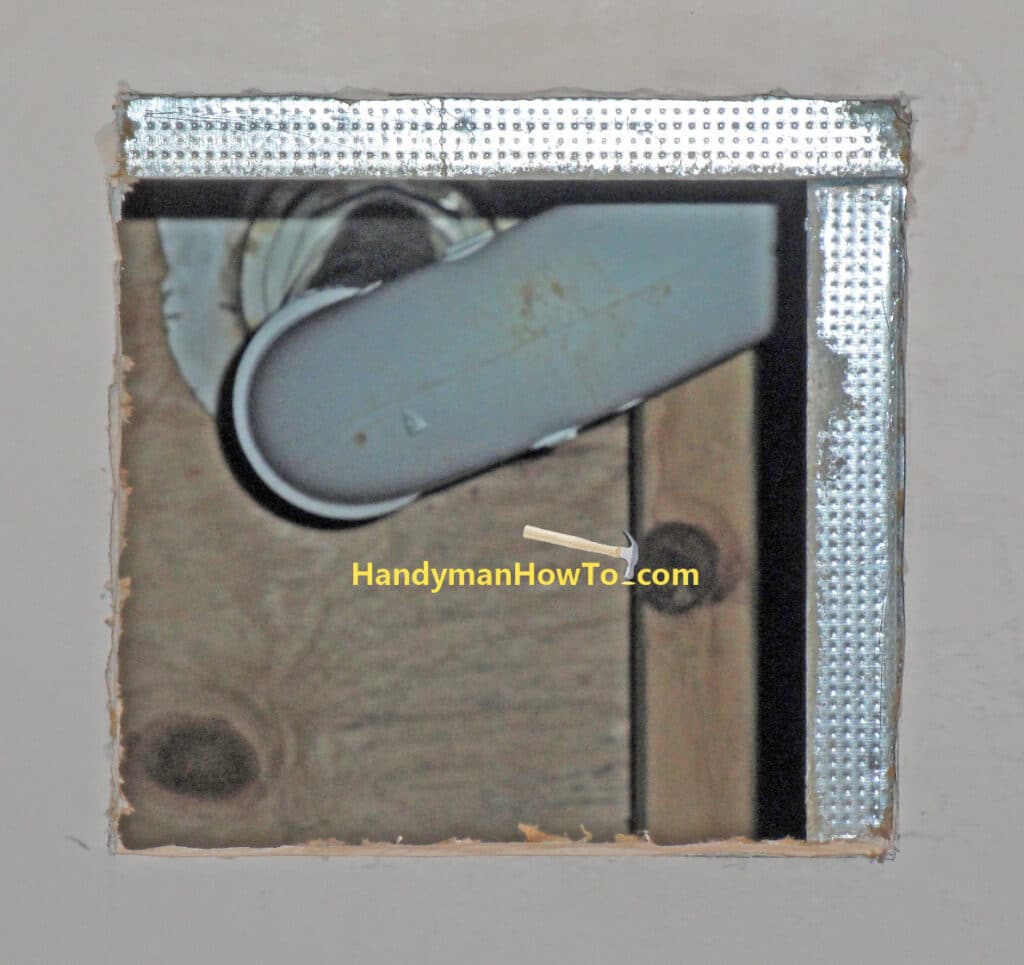
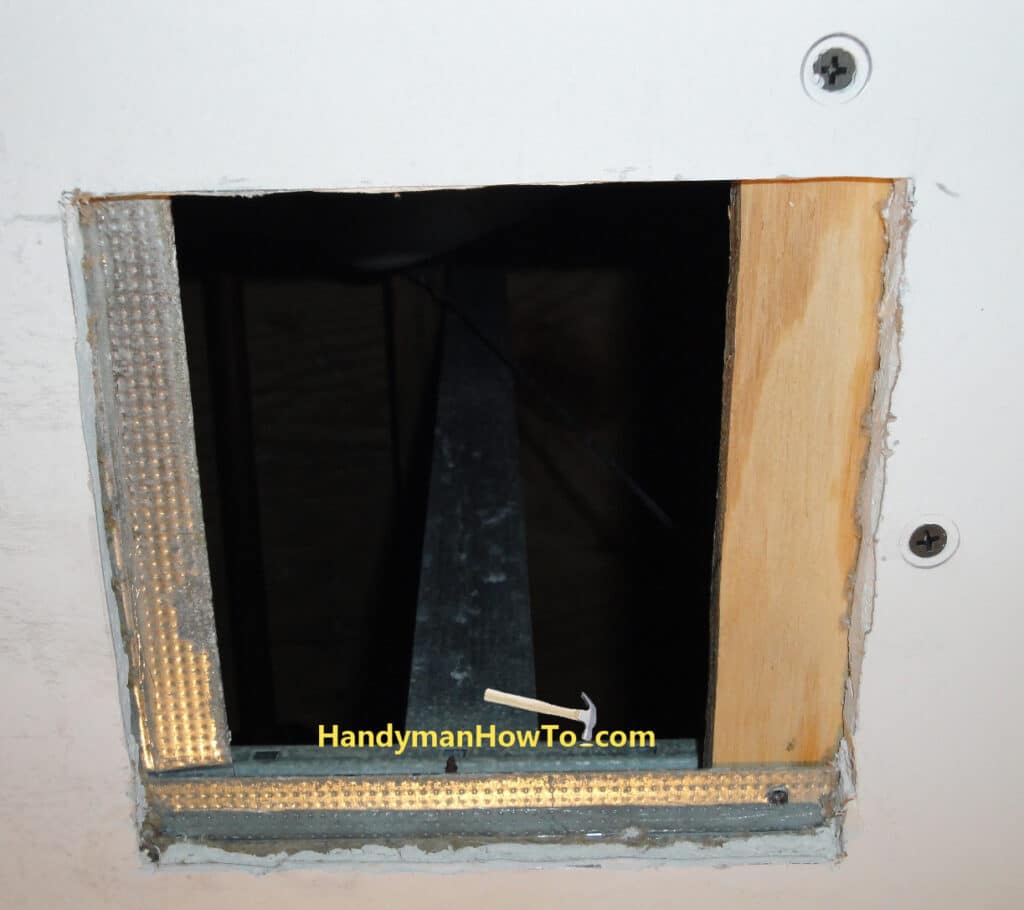
The water damaged drywall ceiling is cut away and the hole is squared exposing the two metal support runners:
Good view ceiling repair hole with the metal support runners, shower drain that leaked on the drywall ceiling and drain pipe U-bend:
Drywall Ceiling Repair Panel Bracing
A 9in x 4in x 1/2in plywood brace board is installed on the right side of the hole to provide a hard point to fasten the drywall repair panel with screws:
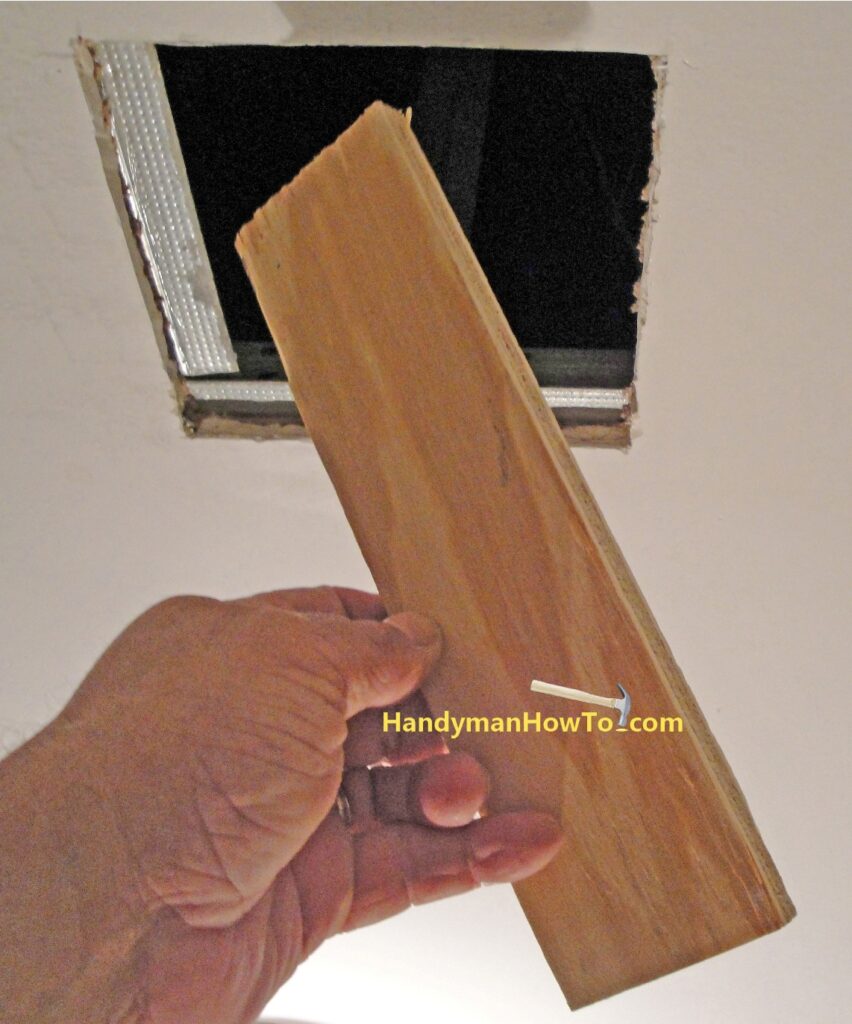
The plywood brace is attached to the ceiling using 1-1/4″ drywall screws and the drywall screw setter bit. I allowed for a generous ~2 inch overlap into the hole to attach the ceiling repair panel.
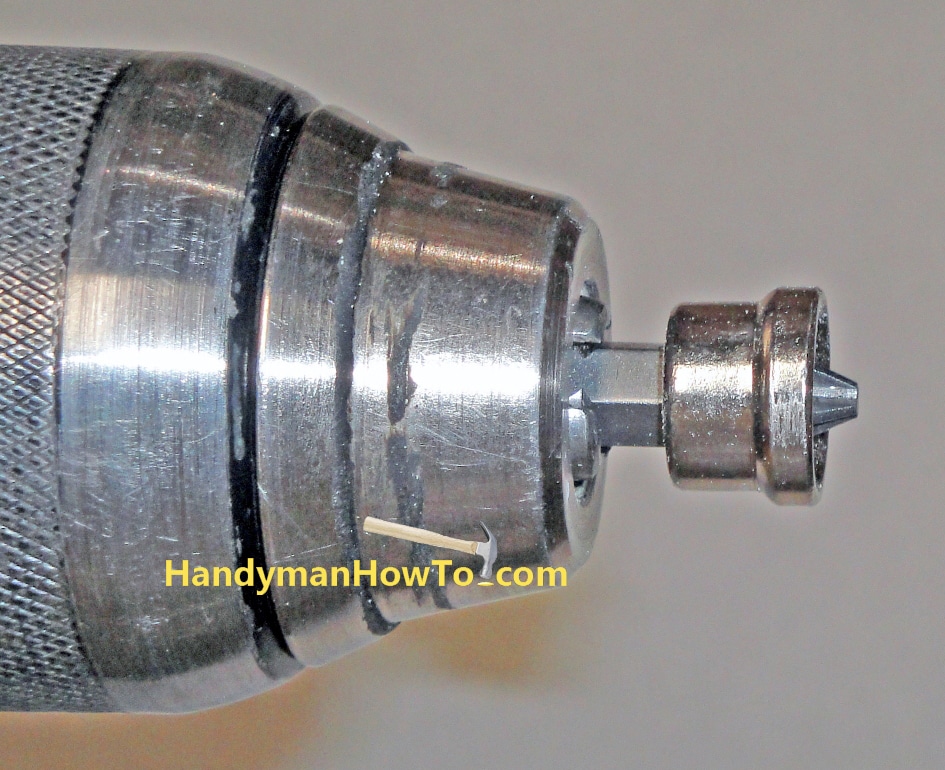
The drywall screw setter is a Philips driver set inside a collar. This automatically sets the drywall screw at the proper depth without tearing through the paper face of the drywall. The countersunk screw can then be covered with joint compound for a perfectly smooth finish.
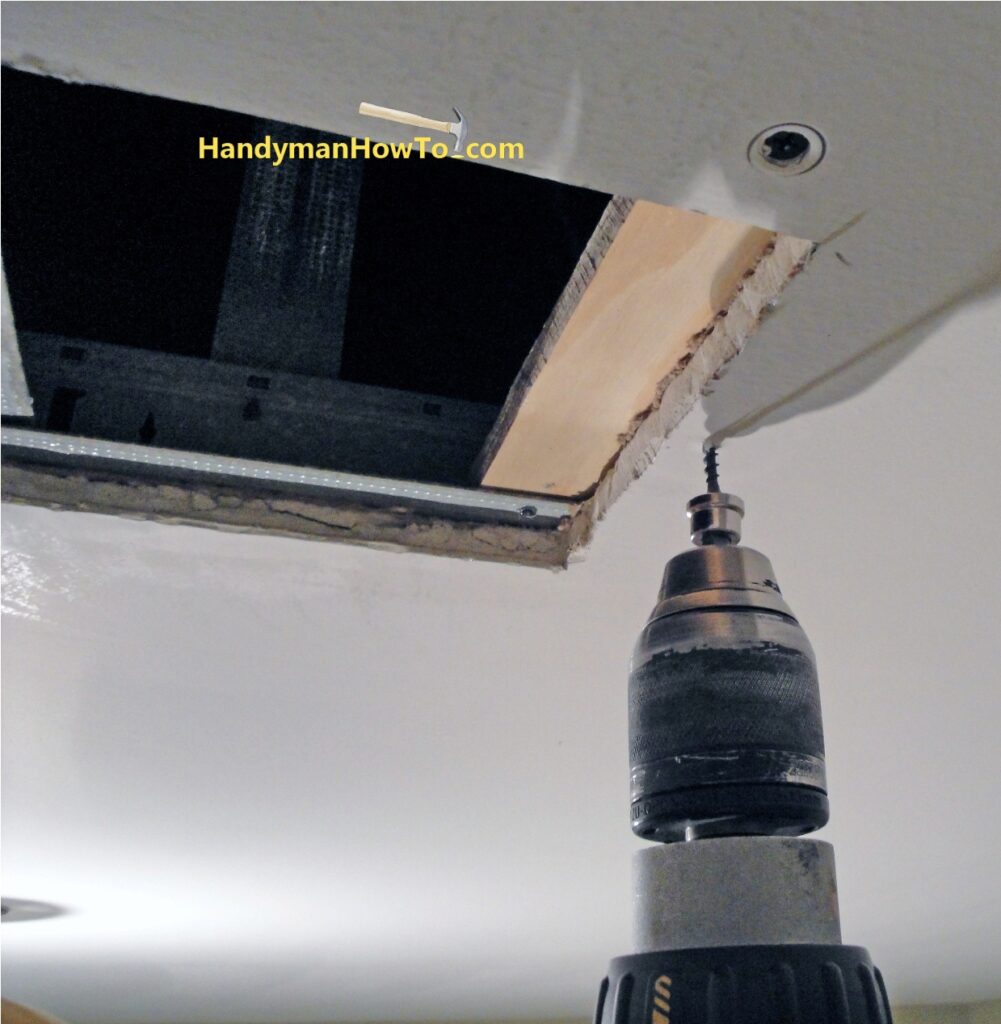
Plywood backer brace fastened with two screws. I started to set a 3rd screw in the metal runner and realized the screw head would protrude and prevent the repair panel to not sit flush with the ceiling. The two screws were plenty for the task:
SHEETROCK Brand Drywall Repair Clips
Home improvement and hardware stores sell SHEETROCK Brand Repair Clips – these are metal clips that are fit over the edges of the drywall hole to fasten a repair panel with screws. The SHEETROCK clips could be used in place of a wood brace and appear to be structurally sound, avoiding the sagging problem of the self-adhesive metal mesh patches.
This repair is continued in How to Repair Drywall Ceiling Water Damage – Part 3.
Take care,
Bob Jackson