This project is continued from How to Repair Rotted Soffit and Fascia – Part 4.
The mesh screen flip-up gutter covers weren’t doing the job, so I installed bullnose style metal gutter covers that slide under the shingles. These gutter covers cost about $1.35/foot and are available in 4ft and 10ft lengths from a local gutter supply company. Here I’ve got the main section installed and about to install covers on the outside corner. These things get almost too hot to touch on a sunny day!
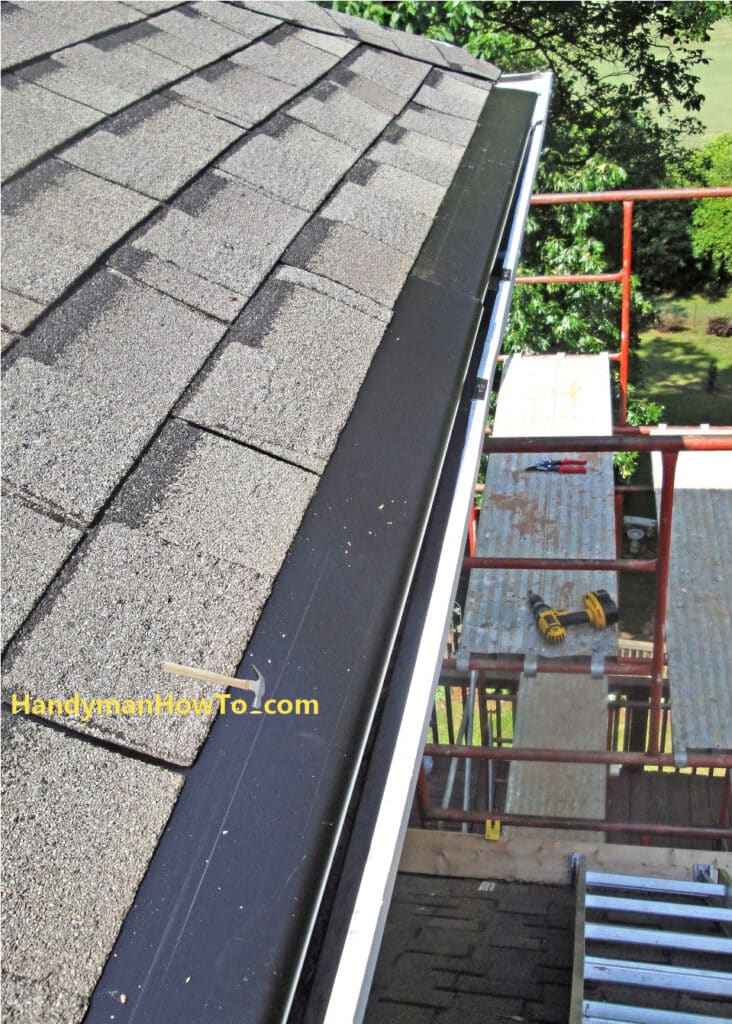
The gutter covers serve two purposes:
- To keep debris out of the gutter while avoiding trash build-up on the roof like those flip-up metal covers I had on before.
- To keep squirrels out of the attic. Recall the gap between the roof deck and fascia board I described in Part 1.
The gutter covers appear to be working well. What I’ve been able to observe so far is even heavy rain is wicked into the gutter and leaves go over the side. Fall and Spring will be the real test. See this article for a detailed DIY gutter cover project writeup. Ultimately, the 5 inch gutters and DIY gutter covers were replaced with new 6 inch gutters and MasterShield Gutter Covers.
Painting the Soffit and Fascia
I painted the gutter, fascia and soffit with Sherwin-Williams Duration Exterior Acrylic Latex paint. The Duration paint is thicker than standard paints, self-priming, low odor and dries quickly. You get maybe 4 or 5 brush strokes before it starts to thicken. The texture when dry is like a coat of plastic – impressive. I think the quality is right there with Benjamin-Moore MoorGlo® paint.
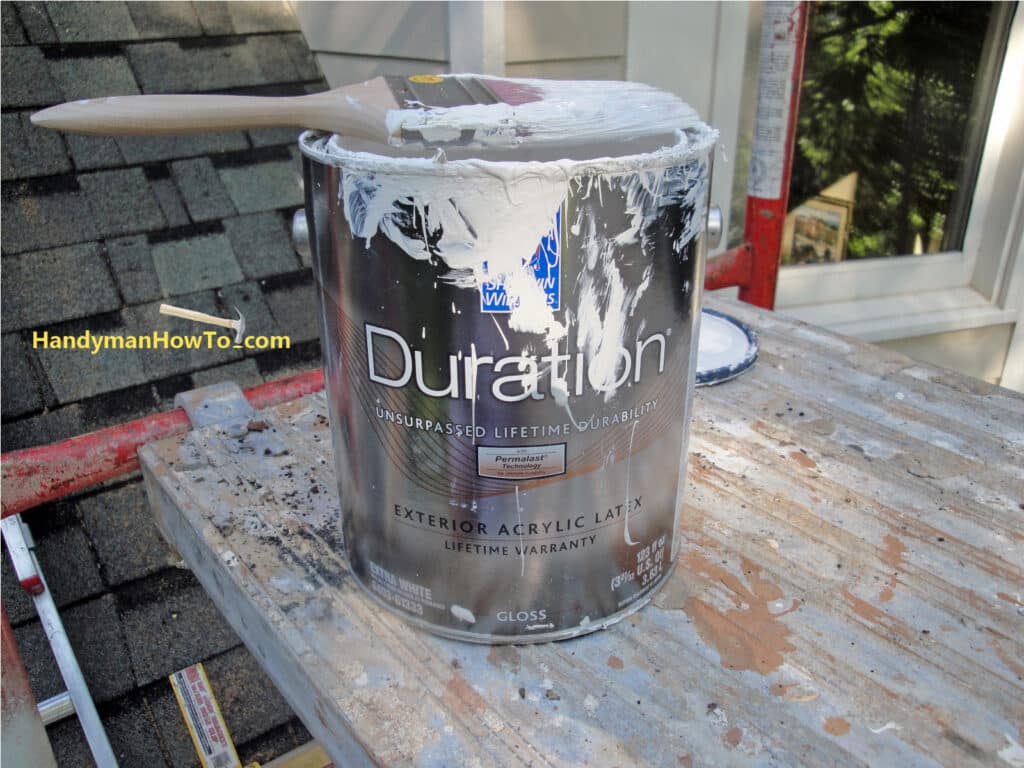
The Sherwin-Williams Duration paint is expensive – wait for a 25% off sale if you can. Visit your local Sherwin-Williams store and have them put your contact info. in their database (it’s free), you’ll receive e-mail coupons and sales notices.
The new soffit and fascia look great after painting. The last thing to do is install a soffit vent.
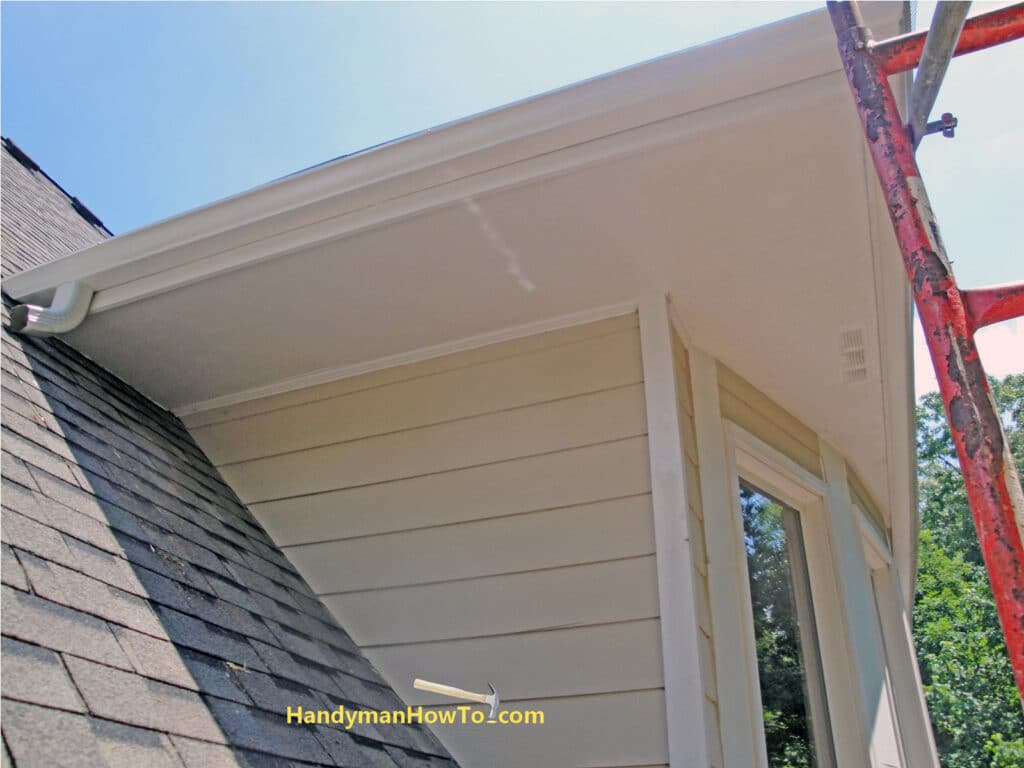
Another view of the finished job.
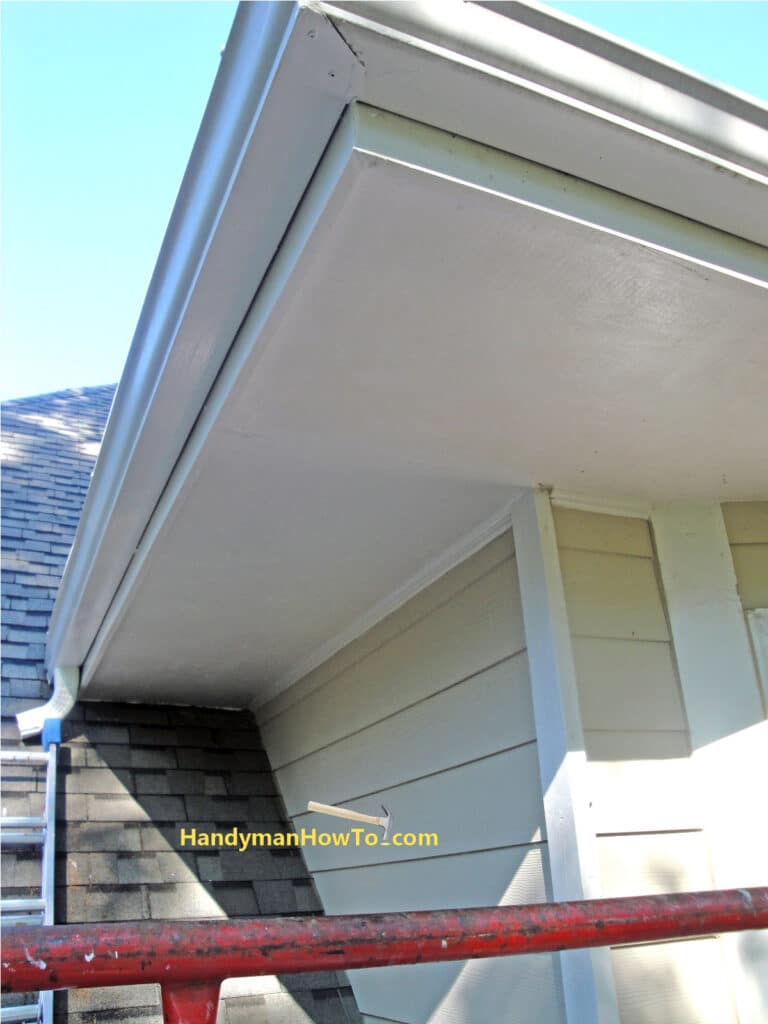
The soffit repair is done. Might as well do some more painting while I’ve got the scaffolding:
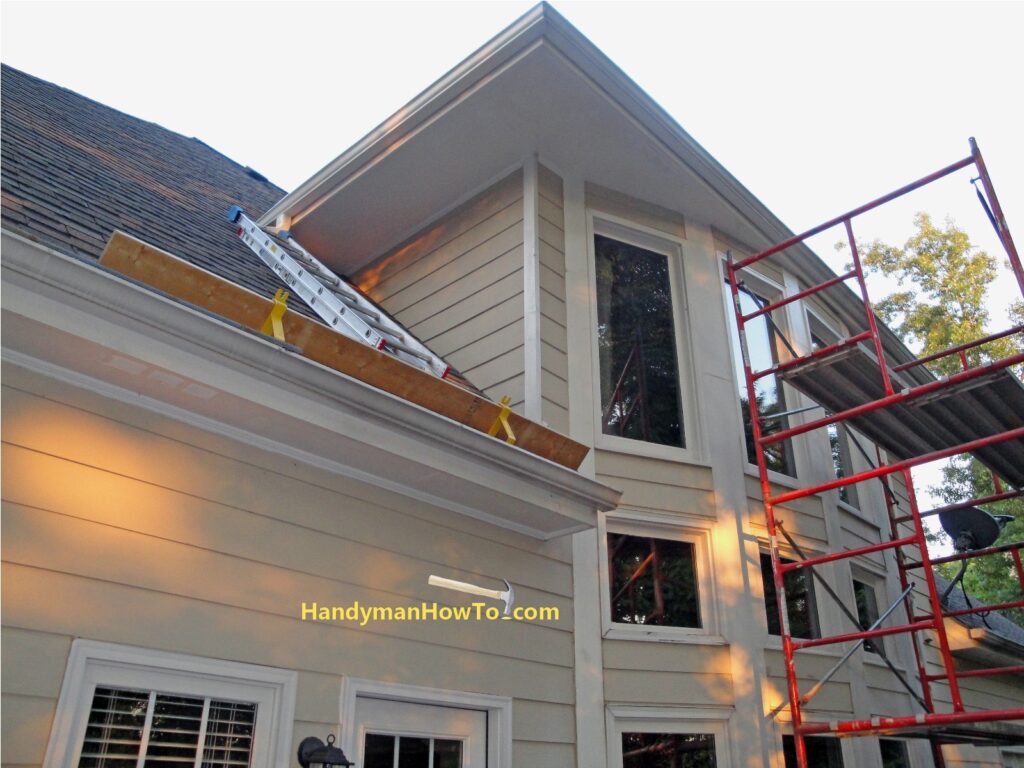
I took advantage of the scaffold to clean & re-slope the gutters, install new gutter covers and do some painting and caulking on the windows and trim.
The soffit and fascia repair required about 4 hours once all the tools, roof brackets, ladders and scaffold were in place. I did the work over two different evenings, stopping only because it got dark on me.
The materials cost were:
- $21.97 for a 3/8″ x 4′ x 8′ sheet of sanded plywood for the soffit
- $31.28 for an 18′ x 1′ x 8′ piece of TUF board for the fascia
- $92.00 to rent the scaffold for 7-days
- ~$30.00 for gutter sealant, gutter screws, caulk and misc. supplies
- $40.00 to rent a Home Depot trunk ($19.95 each trip) to pickup and return the scaffold
- ~$58.00 for a gallon of Sherwin-Williams Duration paint. I bought several gallons while it was on sale.
I already had a good stock of exterior wood screws and all the tools I needed.
How to Install New Soffit Vents
It’s important to replace the soffit vent for proper attic ventilation. I bought several Master Flow 16 in. x 4 in. Aluminum Under Eave Soffit Vents for about $2/each which matched the style and size of the other vents on the house. This photo was taken in response to a question I received long after the original repair job and I’ve since had the roof and gutters replaced. Another example of rotted soffit replacement is here.
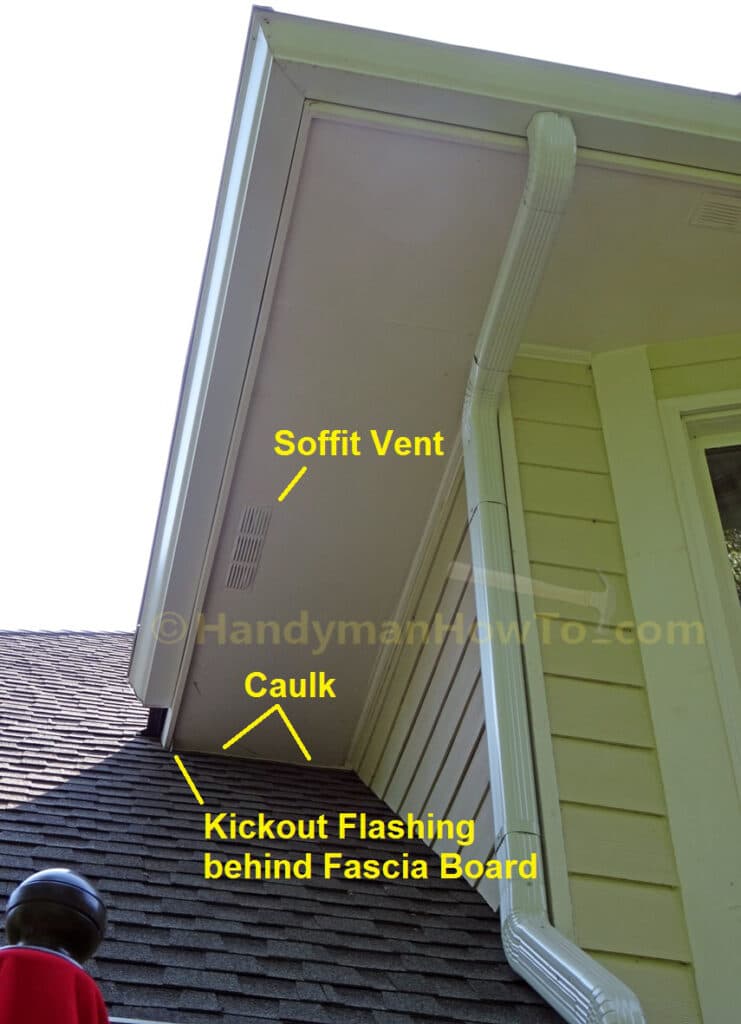
The home builder installed the minimum number of soffit vents required by the Building Code. Originally there was only one vent on the lower soffit (the 2nd vent from the left in the next photo). I installed three additional soffit vents for improved attic ventilation (here and elsewhere around the house). The new vents are apparent because I haven’t yet painted the vents to match the off-white house trim color. I used pan-head wood screws to mount the new soffit vents whereas the builder used nails to mount the original vents. Soffit vents should always be installed so the louvers face the wall to minimize the chance of wind-blown rain entering the vent.

The home builder cut crude diagonal mounting holes with a circular power saw that blocked a significant portion of the soffit vent. I can do a much better job by creating a simple card board mounting template and sawing a precision vent hole with my Rotozip spiral saw (but without the Rotozip edge guide attachment).
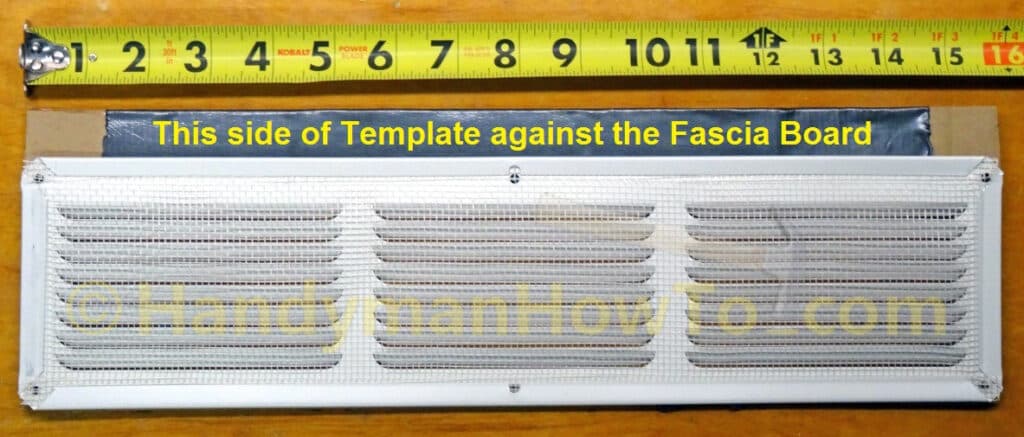
The Master Flow 16 in x 4 in soffit vent and cardboard mounting template is shown here:
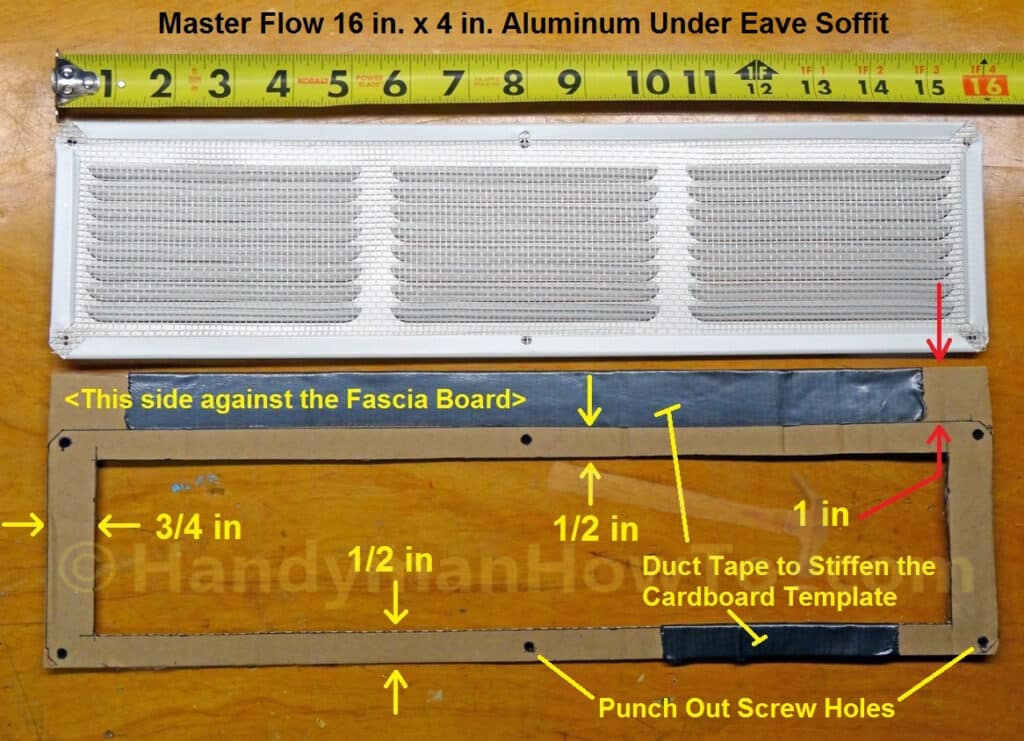
The 1 inch standoff from the edge of the fascia board (see the red arrows above) was chosen to match how my other soffit vents are mounted for appearances. Change this dimension to match your soffit vents. Aside: I added black duct tape to stiffen the template because the thin cardboard frame was a bit flimsy.
To make the template, I traced the outline of the soffit vent on a large piece of cardboard, added the fascia board standoff dimension (top side of template in the following photo) and punched out the screw holes with a sharp nail:
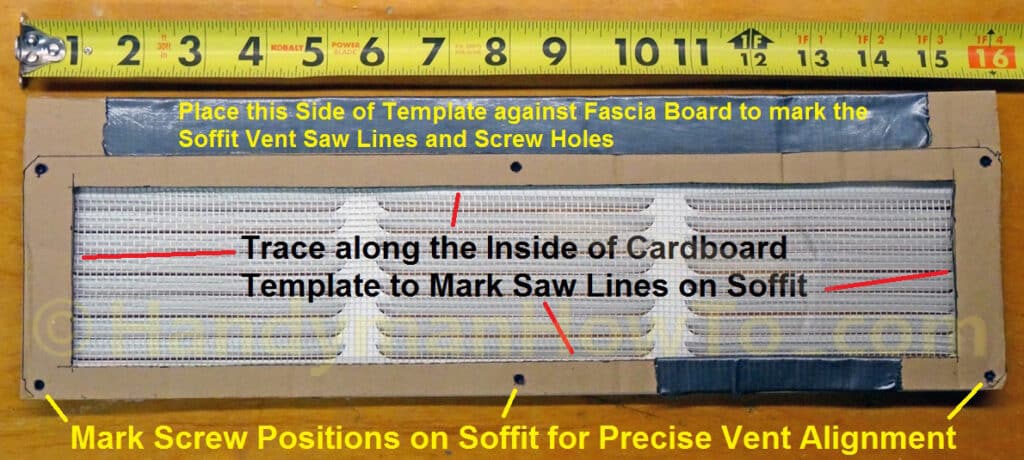
Imagine you are inside the attic looking down at the soffit. This is how the mounting template would appear and the soffit vent is mounted (although you’re tracing the saw lines while working outdoors). It’s important to mark the screw positions on the soffit after tracing the saw lines to precisely align the vent with the mounting hole:
The soffit vent installation steps are:
- All work is done outdoors.
- Wear safety glasses because saw dust will be raining down on you!
- Check for electrical wiring and other utilities inside the soffit.
- Measure where the new soffit vent should be located on the soffit.
- Hold the cardboard mounting template against the soffit and inside edge of the fascia board.
- Trace the saw lines for the vent opening inside the template. Also mark the six screw or nail holes on the soffit.
A felt tip pen does a great job. - Adjust the Rotozip spiral saw bit so the cut is about 1/8 inch deeper than the thickness of the soffit plywood.
Keeping the depth of the cut as shallow as possible avoids damage to the wood framing – rafters and lookouts.
I used the Rotozip jigsaw handle attachment that provides a flat stable base to hold the saw against the work surface. - Saw out the rectangular vent mounting hole along the lines traced with the template.
- Reach inside the soffit vent mounting hole and brush out as much saw dust as possible so it doesn’t get blown around and possibly clog the vent later.
- Mount the soffit with pan head wood screws by aligning the soffit vent with the holes marked using the template.
I prefer screws instead of nails for most jobs because screws hold more securely and are easier to install especially where it’s awkward to swing a hammer. My favorite are Simpson Strong-Tie SD8 #8 1-1/2 wood screws which are available at Home Depot. Another advantage of woods screws is I can quickly remove the soffit vent to pull wiring for a floodlight or security camera to be mounted nearby.
Hope this helps,
Bob Jackson