Bathroom ventilation fan wiring, connect the flexible air duct and mount the fan in the drywall ceiling.
This project is continued from How to Replace a Bathroom Exhaust Fan and Ductwork – Part 5.
How to Wire a Bathroom Ceiling Fan
Remember, the electricity was shutoff at the main circuit breaker panel to prevent electrical shock and/or death in the previous installment of this project.
I’ve temporarily suspended the Panasonic FV-11VQ5 bathroom vent fan from a general purpose steel wire wrapped around a pan head screw set high on the joist where it’ll be clear of the fan body so I can work with two hands to connect the electrical wiring and ductwork while on the step ladder.
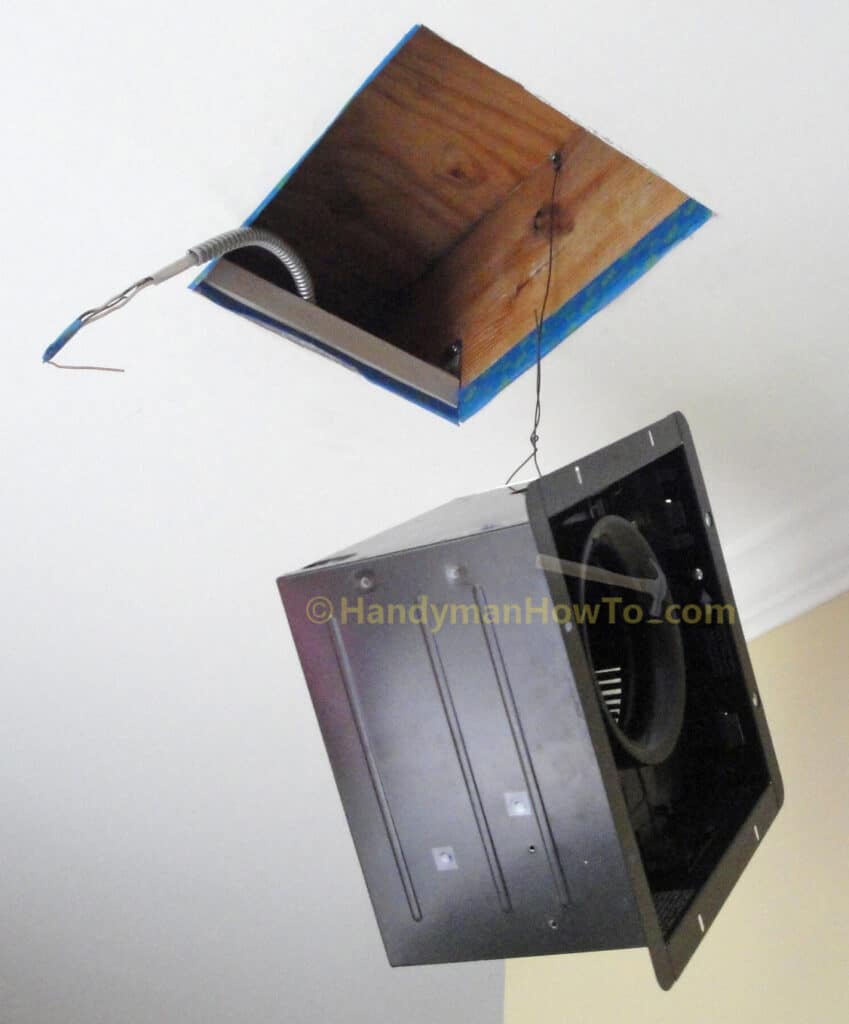
To connect the Panasonic FV-11VQ5 vent fan wiring:
- Remove either the top or side knock-out from the fan junction box with a flat head screw driver.
I removed the top knock-out because this will be the most direct path for the house wiring. - Remove the fan junction box screw and cover.
- Lift the spring tab on the Raco 1/2″ REDI-LOC Connector.
- Slip the NM-B 14/2 wires through the REDI-LOC connector.
- Twist/press REDI-LOC connector over the end of the aluminum flex cable.
- While holding the REDI-LOC connector on the flex cable, insert the wires into the fan junction through the knock-out hole.
- Hook the stationary metal tab of the REDI-LOC inside the fan junction box, then squeeze the REDI-LOC spring tab closed and push the tab into the fan junction box to secure it to the box.
A minute or two of study and practice to see how the REDI-LOC connector works and you’ll have it down.
Take a 2 inch piece of duct tape and reach into the ceiling and feel along the aluminum flex cable to the other end. The red plastic Milne No. 0 MM Bushing that was installed in Part 5 has most likely slipped out of the flex cable. Push the red MM bushing back into the flex cable so the sharp edges don’t chaff the NM-B 14/2 cable and secure it with that short piece of duct tape so it doesn’t slip out again.
The fan wires are pre-stripped stranded copper wire. Should your fan wires be broken or badly frayed, cut off the expose wire and strip 5/8 inch insulation from the end of the wire. Twist the ends of the stranded copper fan wires in a clock-wise direction to make a tight lead.
For each fan wire, hold the wire even with the same color NM-B 14/2 house wire and use wire nuts (not supplied with the fan) to connect the:
- Green fan wire to the bare copper ground wire.
- White fan wire to the white (neutral) house wire.
- Black fan wire to the black (hot) house wire.
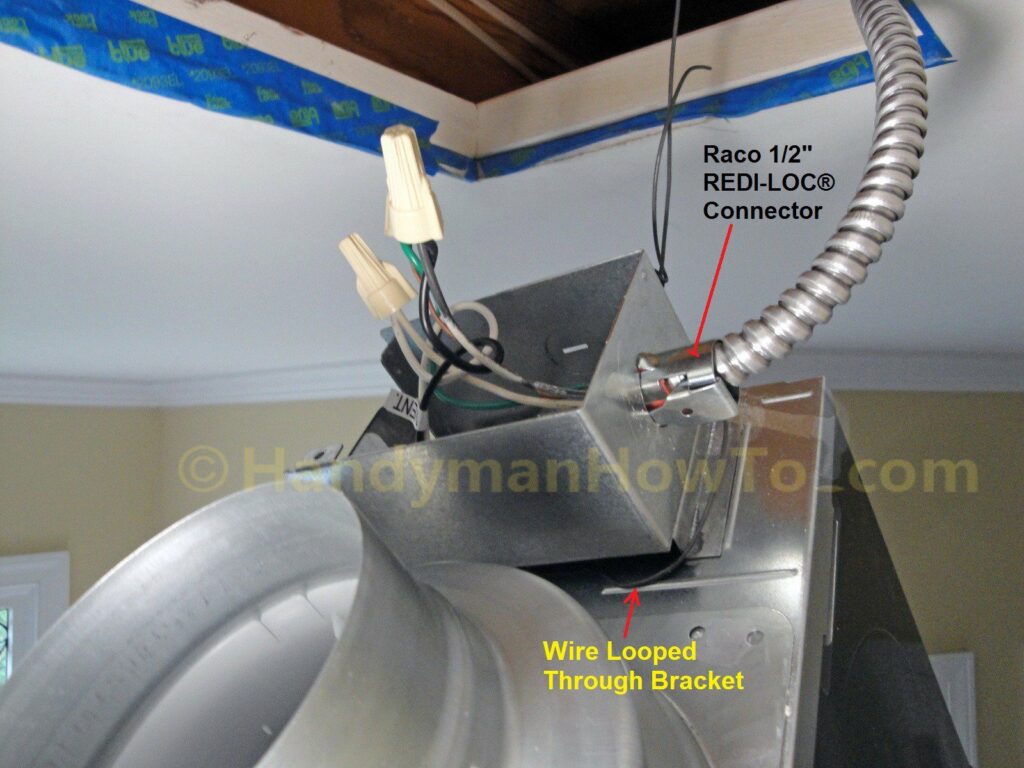
Here’s a closeup of the Panasonic vent fan wiring connections and REDI-LOC flex conduit connector:

Tuck in the fan wires then snap on the metal junction box cover and secure it the cover screw:
Bathroom Vent Fan: Flexible Duct Connection
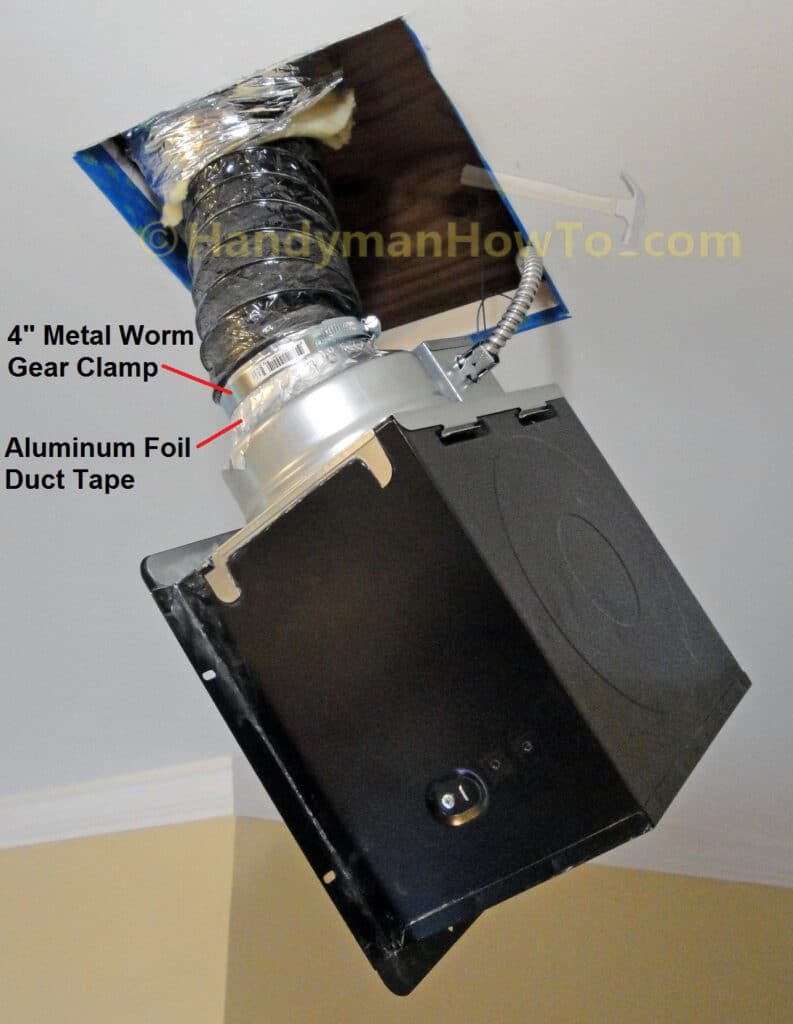
To attach the exhaust fan duct:
- Slip a 4 inch metal worm gear band clamp over the flexible vent duct.
- Slip the 4 inch flexible duct over the fan duct adapter.
- Wrap two layers metal foil HVAC tape over the vent duct to seal it to the fan duct adapter.
Do not use standard “duct tape” because it will not hold. - Slide the worm gear clamp over the duct and duct adapter, then tighten the clamp with a screw driver until it’s firmly snug.
Panasonic WhisperCeiling Ceiling Mount
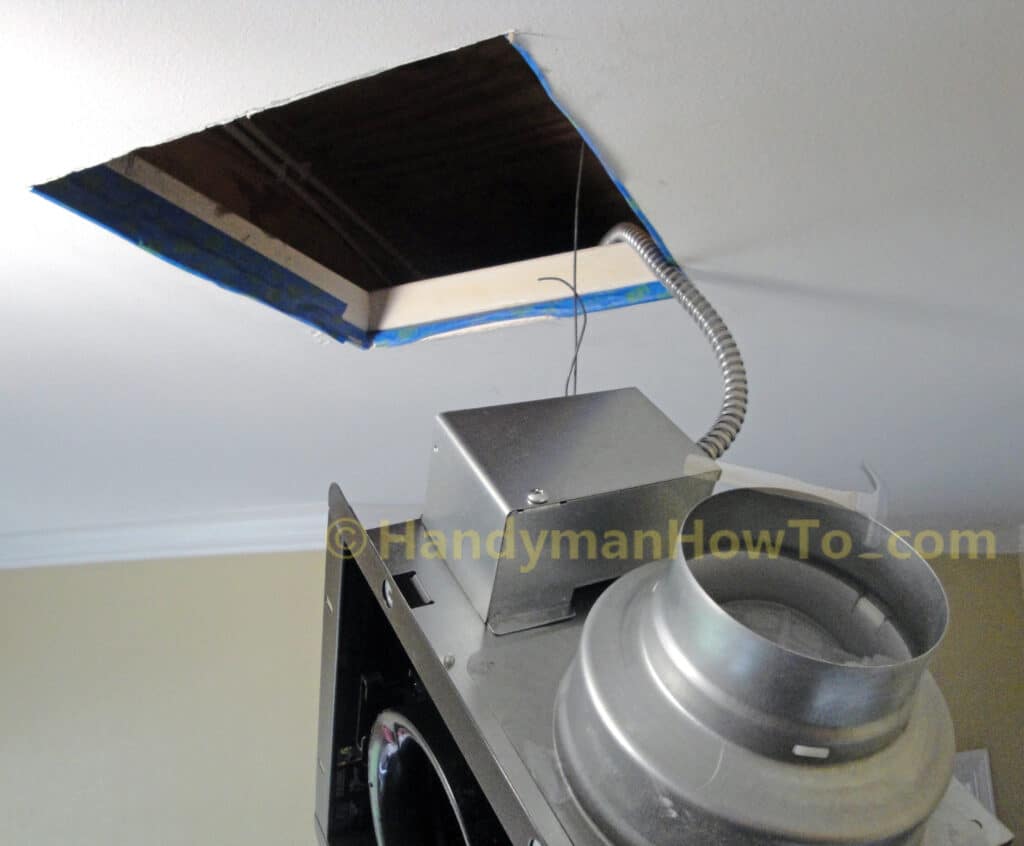
Remove the temporary suspension wire from the fan and remove the wood screw that was set in the ceiling joist, then slide the fan into the drywall ceiling mounting hole. I mounted the fan to the ceiling joist and 2×2 wood frame with four of the Simpson Strong-Tie SD8 #8 1-1/2 inch pan head wood screws as shown:
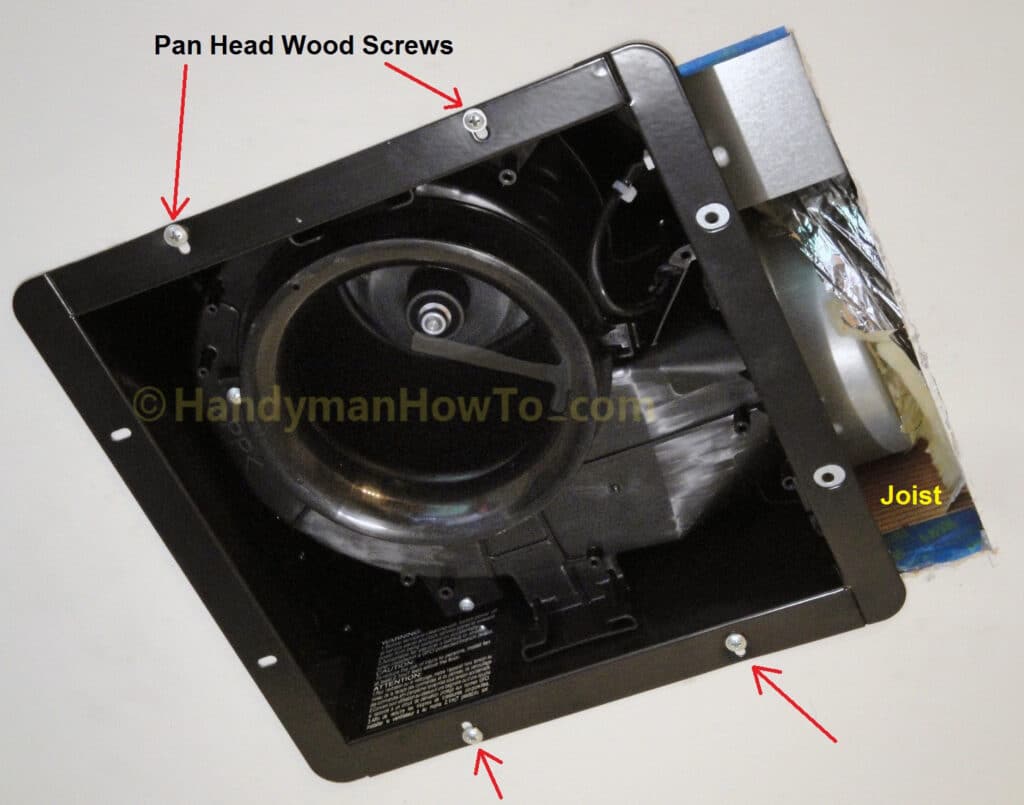
Notice how the metal flange is fastened against the drywall ceiling in an “old work” installation between the bathroom ceiling and 2nd floor that is not covered in the Panasonic WhisperCeiling installation instructions.
Bathroom Vent Fan: Interior Soffit Flexible Duct
The Panasonic WhisperCeiling exhaust fan basic installation is now complete and I’m eager to see how well it works with the flexible duct and that “pinch point” through the garage ceiling to the interior soffit.
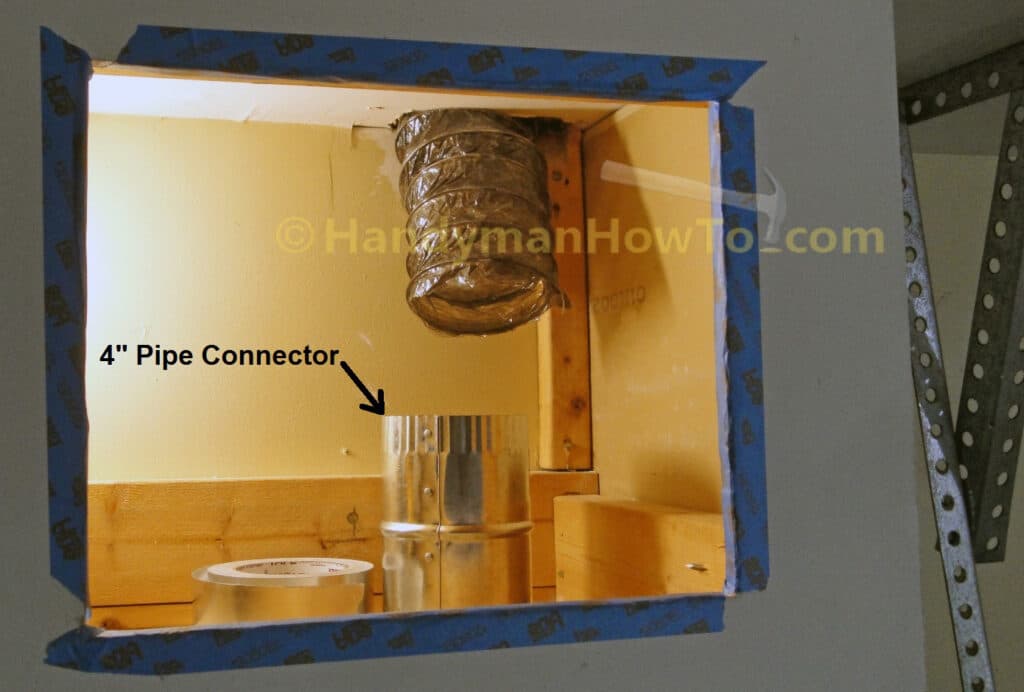
The flexible vent duct from the bathroom will be connected a second section of insulated flex duct (not shown) to the outdoors with a 4 inch galvanized pipe connector:
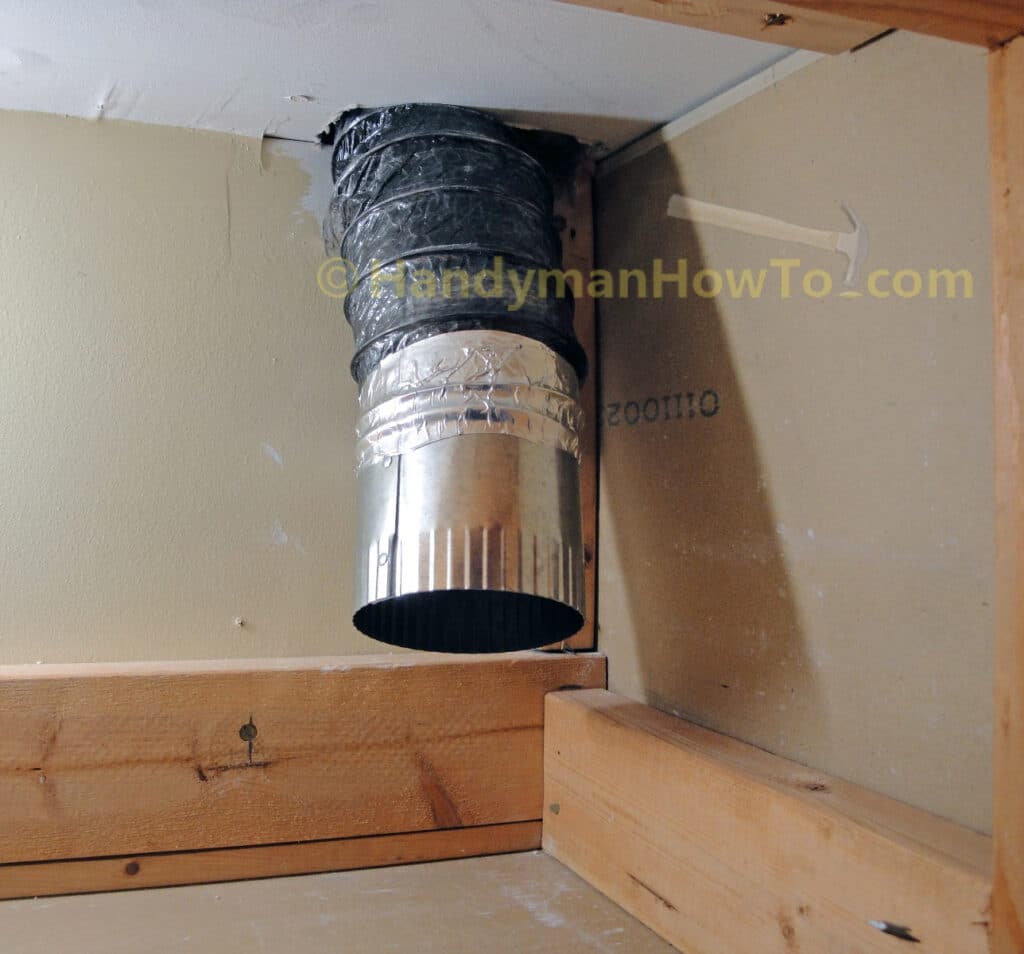
The flexible duct is slipped over the duct connector to the center rib:
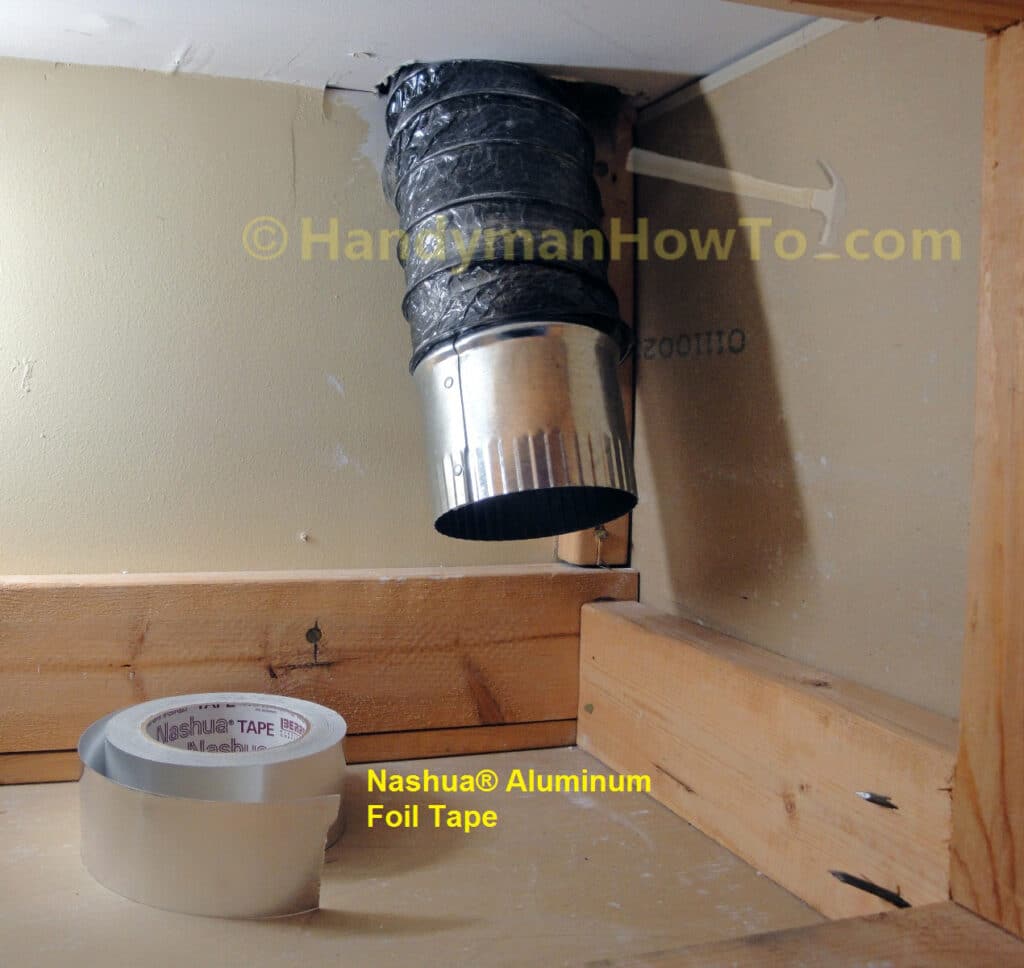
And sealed with two layers of HVAC metal foil tape:
Panasonic WhisperCeiling Fan Testing
The Panasonic WhisperCeiling FV-11VQ5 exhaust fan is installed in the bathroom ceiling and ready for testing. My main concern is if the air flow will be significantly reduced by that rectangular hole (pinch point) in the garage ceiling. Elbows, kinks and long duct runs of vent duct create friction and impede the airflow.
I turned on the electricity at the circuit breaker panel and switched on the fan inside the master bathroom. Wow! The fan was really quite! Especially compared to the old and very noisy bathroom fan.
Back in the garage I could feel a strong air flow blowing from flexible duct. This video of a strip of newspaper flapping demonstrates the fan is working quite well:
This project is continued in How to Replace a Bathroom Exhaust Fan and Ductwork – Part 7.
Hope this helps,
Bob Jackson