Build a simple and attractive wood frame to conceal the gap in the drywall ceiling opening for the “old work” bathroom ventilation fan installation.
This project is continued from How to Replace a Bathroom Exhaust Fan and Ductwork – Part 8.
Bathroom Vent Fan – Gap in the Drywall Ceiling
Back in Part 5 of this project, I discovered the Panasonic WhisperCeiling FV-11VQ5 (Editor’s Note: this is a discontinued model, here’s a modern version) exhaust fan would not fit through the 10-7/16 inch square mounting hole in the drywall ceiling due to the rather large duct adapter and electrical box. After lengthening the opening to 13 inches to mount the fan there was a ~2 inch gap in the drywall ceiling (right side of photo):
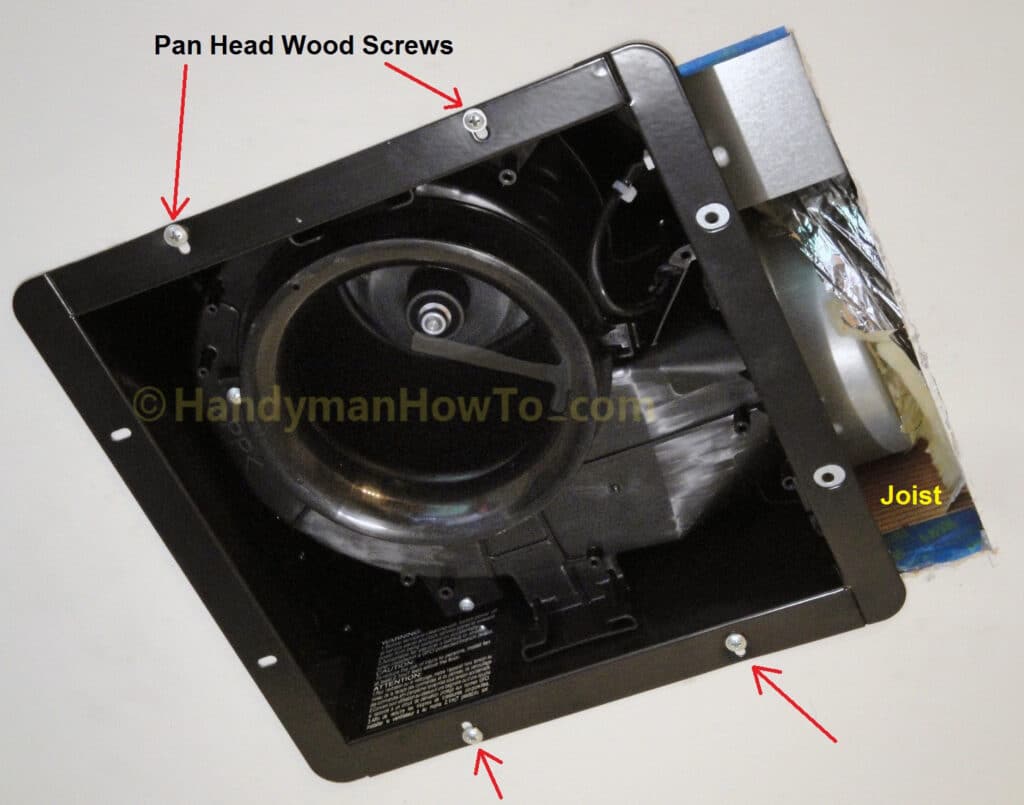
Recall that the Panasonic WhisperCeiling fan installation instructions assume that you either have attic access to install the fan from above the ceiling; or the fan is installed during home construction before the drywall is up. I was limited to an “old work” installation in the space between the 1st floor ceiling and 2nd floor.
I felt that any attempt to patch or repair the drywall ceiling would be futile since the ceiling patch would be both structurally weak and not look right.
My solution was to build a decorative wood trim frame (or moulding) to fit against the fan mounting flange to cover the gap in the drywall ceiling:
The bathroom vent fan moulding looks great if I do say so myself.
Project Update:
If you’re reading this article, I discovered it’s not necessary to saw a larger ceiling mounting hole and build the wood trim frame to conceal the larger opening as shown in the following steps.Please see updated project How to Install a Panasonic WhisperCeiling Bathroom Vent Fan for details.
Bathroom Vent Fan: Install Moulding to Conceal a Gap in the Drywall
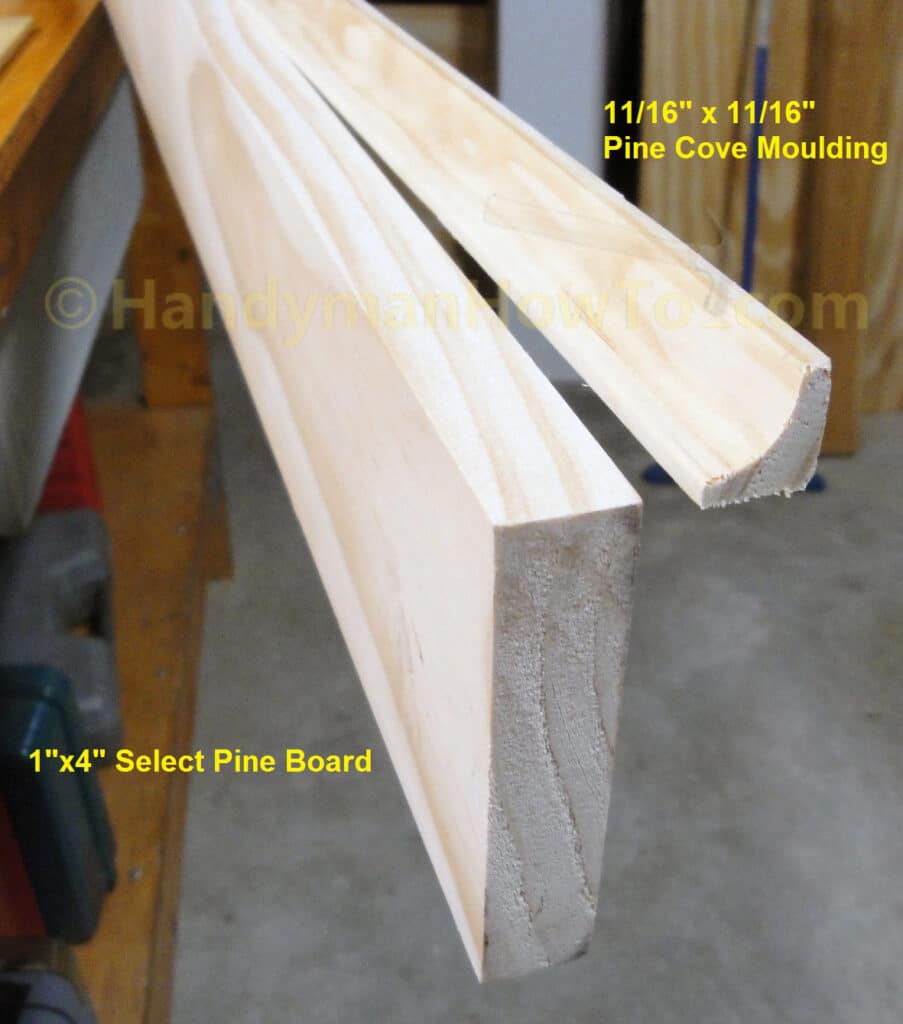
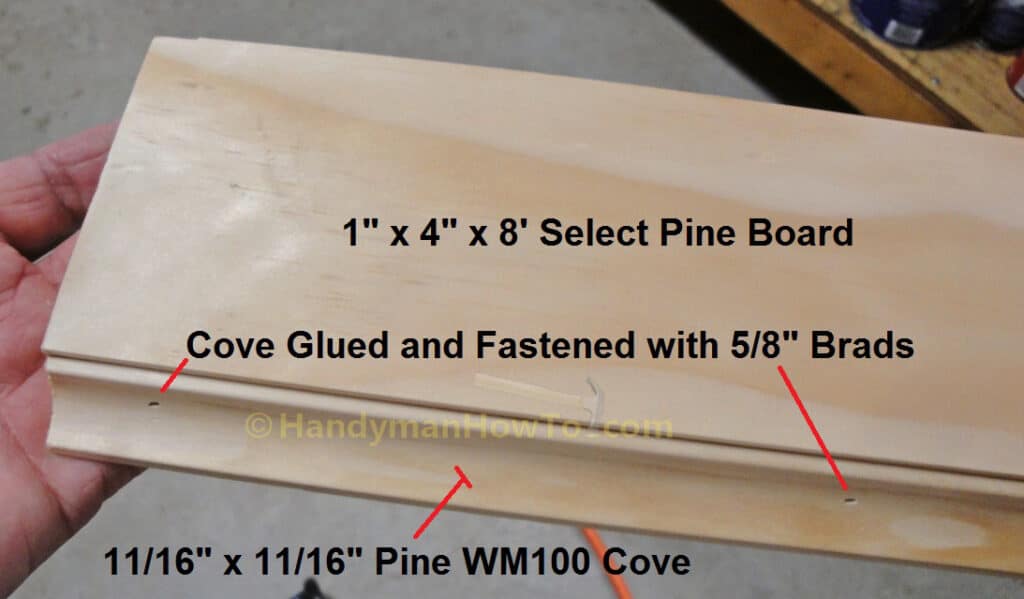
I purchased an 8 foot long 1×4 inch Select Pine Board and 11/16 x 11/16 inch Pine Cove Moulding at Home Depot to build the bathroom exhaust fan ceiling moulding.
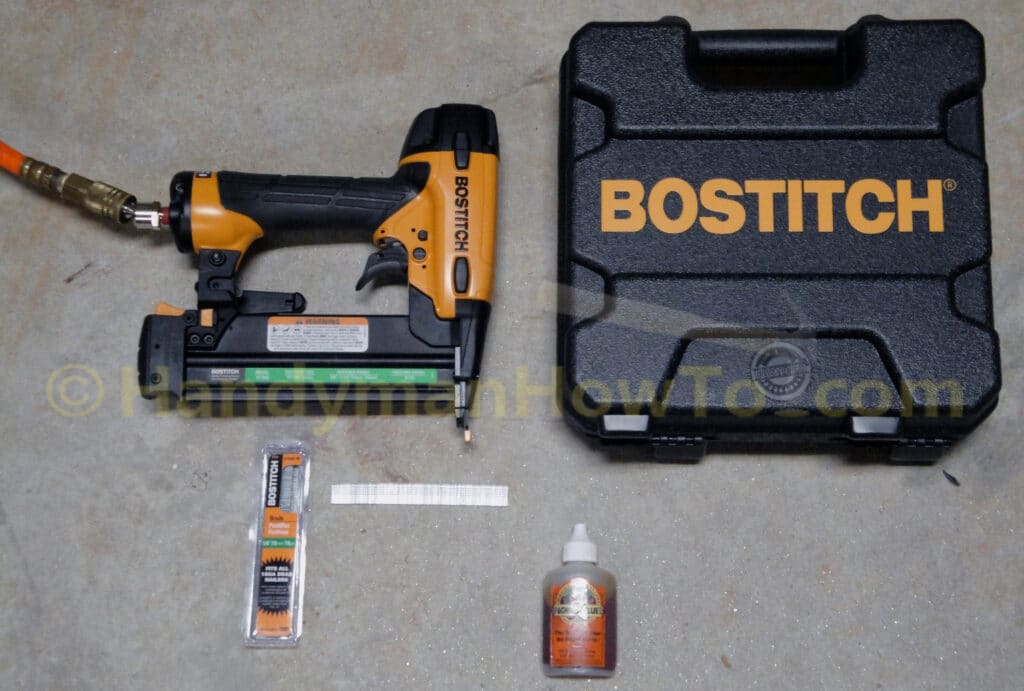
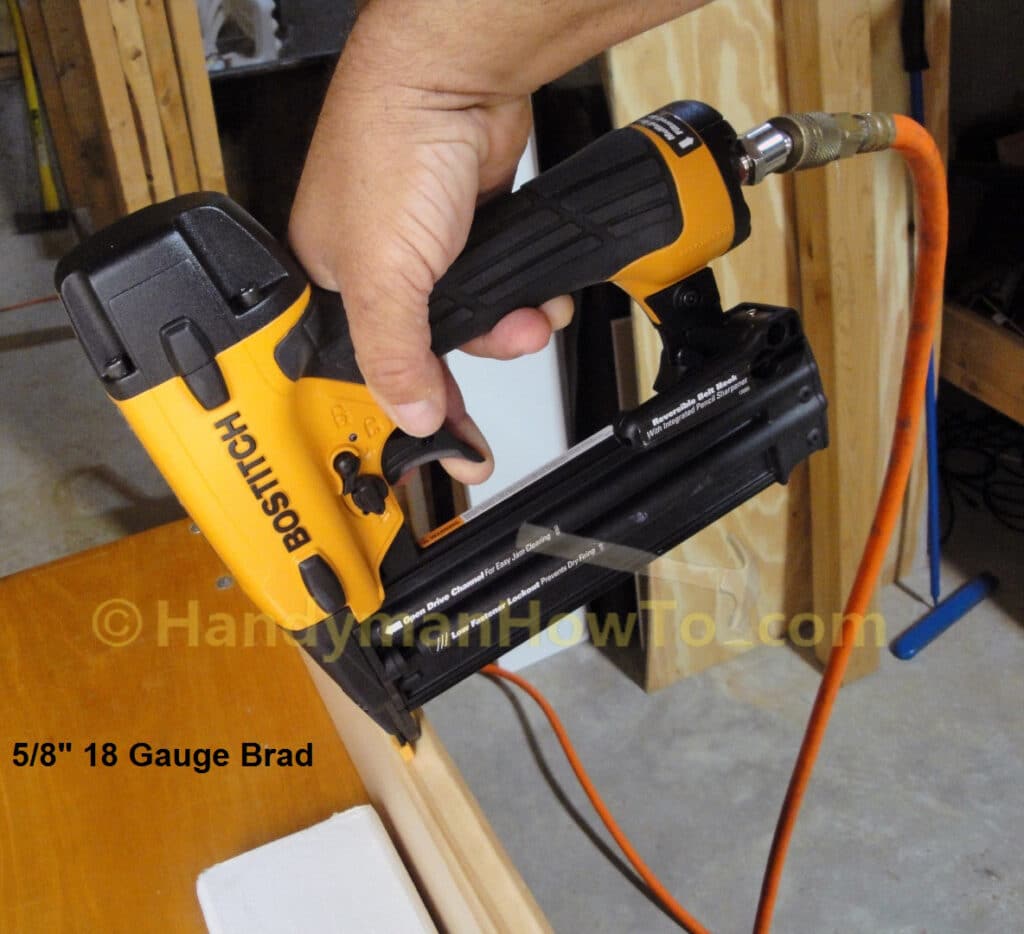
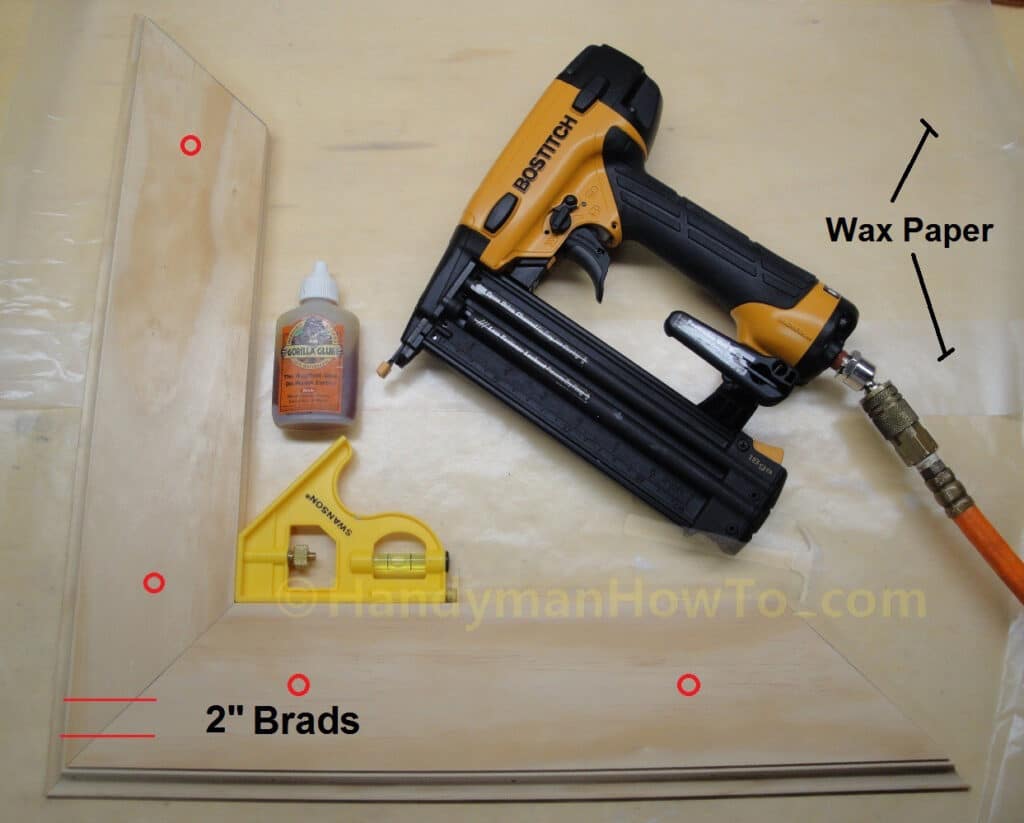
Gorilla Glue and my Stanley Bostitch BT1855K 18 gauge brad nailer with 5/8 inch, 1 inch and 2 inch brads are essential for building the wood frame trim moulding. The brad nailer runs on compressed air from my portable air compressor.
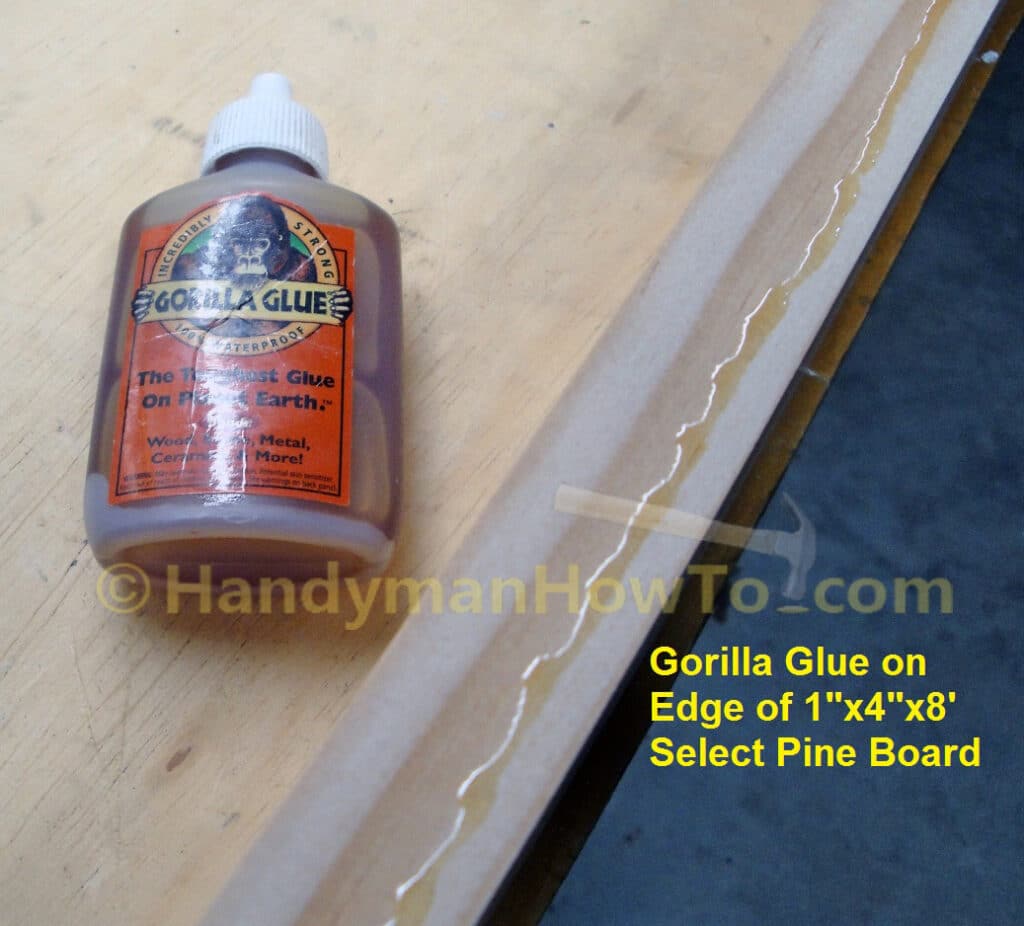
The 11/16 inch pine cove moulding will be both glued and brad nailed to the edge of the 1×4 inch pine board. I moistened the edge of the pine board with water and applied a bead of Gorilla Glue. Gorilla Glue is water activated.
The 11/16 x 11/16 inch pine cove moulding is fastened to the 1×4 pine board with 5/8 inch brad nails set approx 6 inches along the length of the board. Align the bottom of the cove flush with the pine board. The brad nails provide the clamping force for the Gorilla Glue while the glue provides most of the bonding strength. The 5/8 inch brads are short enough so as not to pierce through the back of the pine board. (Note: The brad nailer is angled too much off the vertical as I was taking this photo because I need three hands!).
The pine cove moulding softens the edge of the pine board for a decorative look:
The Gorilla Glue will foam and squeeze out along the seam between the cove and pine board over 10 to 20 minutes. This is good because the glue is filling in the voids for a solid bond. Wipe off the excess glue while it’s still uncured and soft. Wait about 45 minutes for the Gorilla Glue to finish the initial foaming stage before proceeding.
Mark and Saw the Trim Moulding
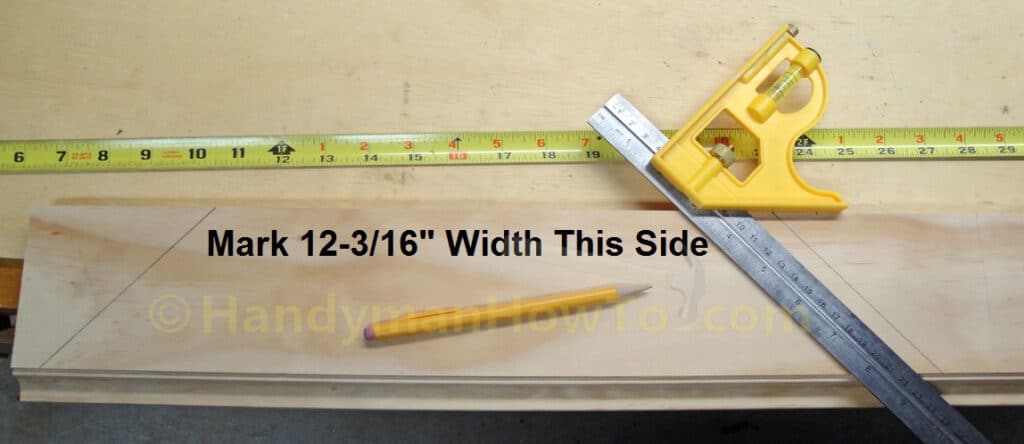
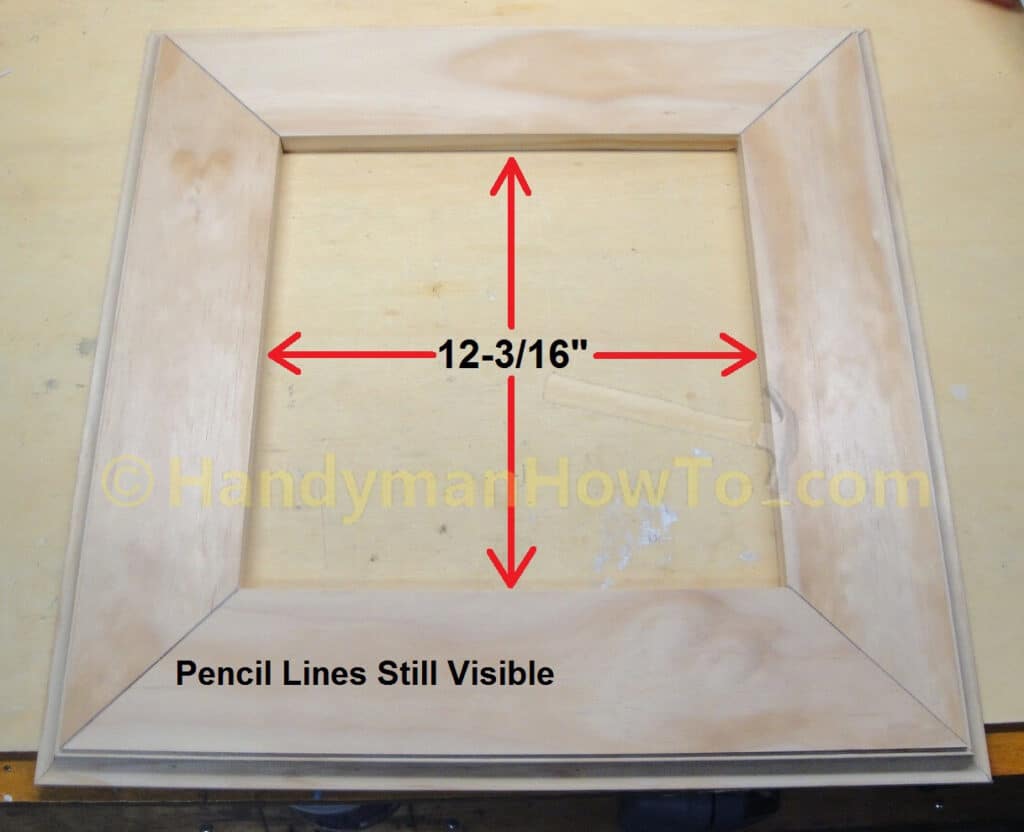
The bathroom exhaust fan trim moulding is basically a square frame (like a picture frame) that will fit against the mounting flange of the Panasonic bathroom fan model FV11-VQ5. To build the frame, I marked off 4 sections of moulding at a 45 degree angle with an interior side length of 12-3/16 inches. Recall that the Panasonic bath fan flange is 12-1/8 inches square, so my trim frame will be 1/16 inch larger.
I used the 45 degree side of my combination square to mark a 45 degree line on the left, then measured 12-3/16 inches to the right, flipped the square over and marked another 45 degree line as shown below. Take care that the wide side (bottom in the photo) of the 45 degree angle lines do not run off the end of the moulding or cross the next line.
Continue marking off sections of the wood trim frame along the board. Four sections are needed to build the decorative square frame.

Miter Saw 45 Degree Cross Cuts
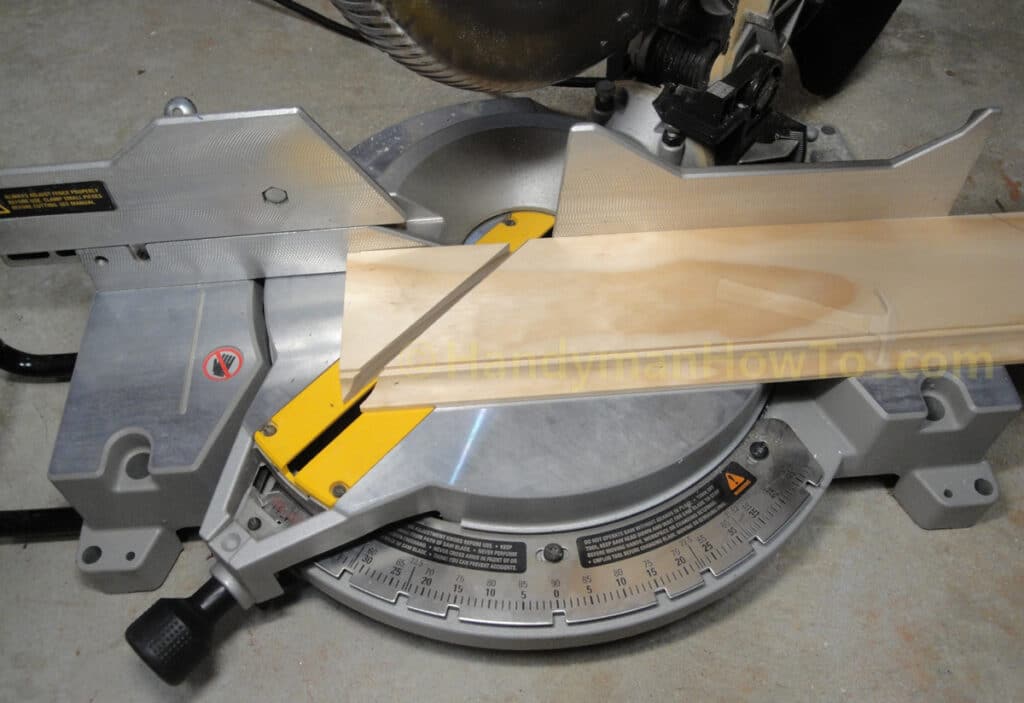
I used my Dewalt compound miter saw to make precise 45 degree angle cross cuts as marked on the trim moulding.
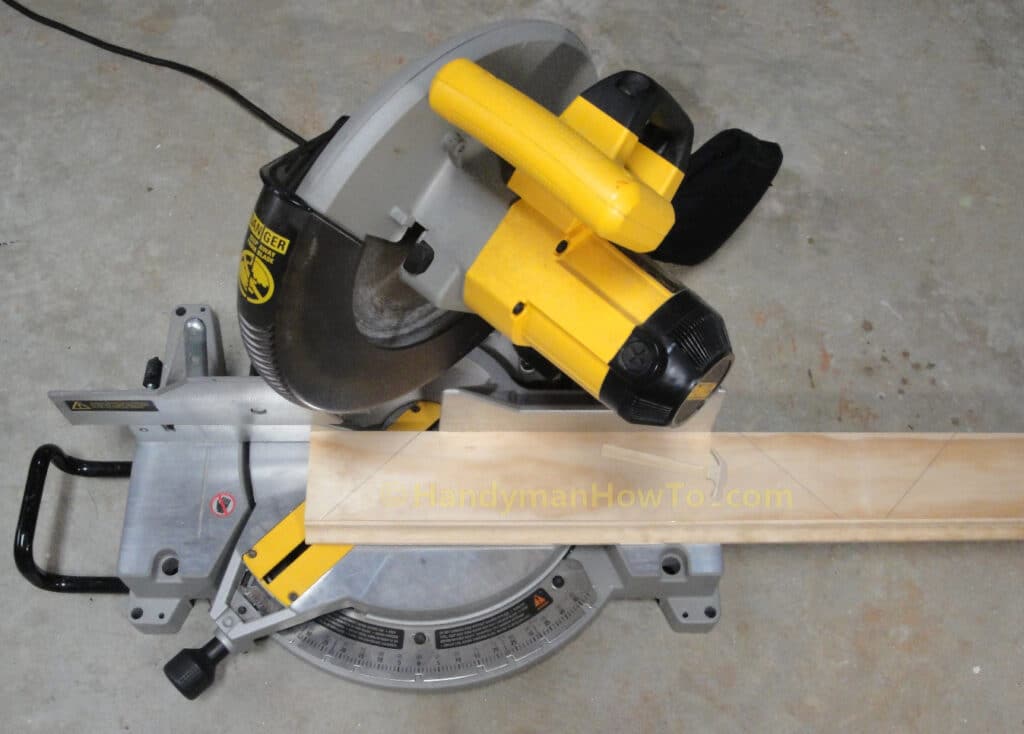
The miter saw cuts will be made against outside of the 45 degree angle pencil marks so I have sections of trim exactly 12-3/16 inches long. Hold the trim board firmly against the saw fence and lower the blade with the shutoff to adjust the board such that the blade is on the outside (long side) of the pencil line, then make the cut. If you cut on the line, the trim section will be shortened by the width of the saw blade (kerf) and the frame will be too small to fit the bathroom fan.

The bathroom vent fan ceiling moulding after the first miter saw cut:
Continue making the left side miter cuts along the board:
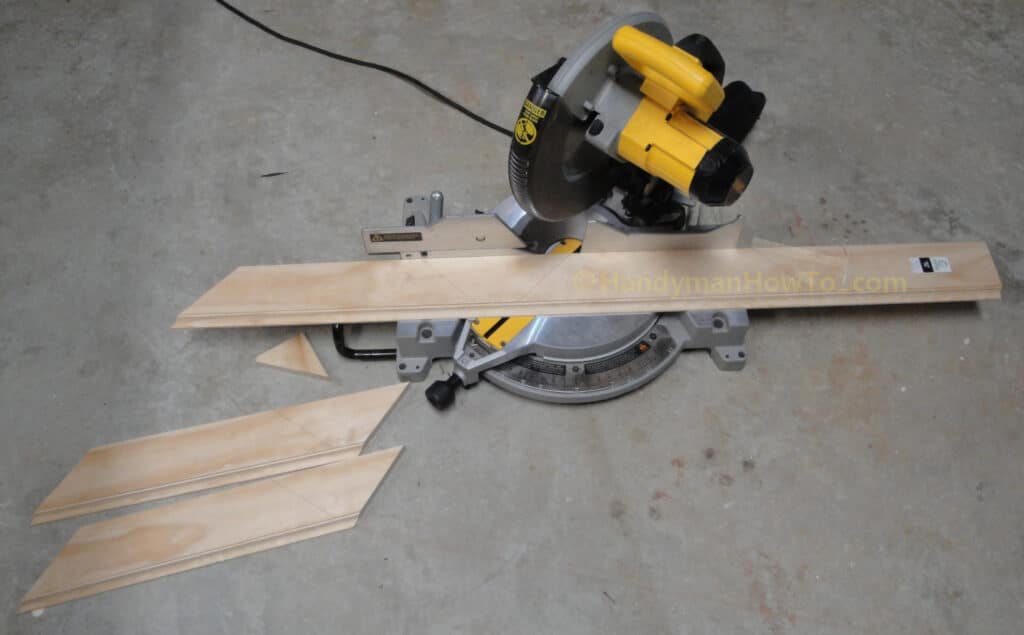
I set the saw to make the right side 45 degree miter cuts and sawed the other end of the trim boards:
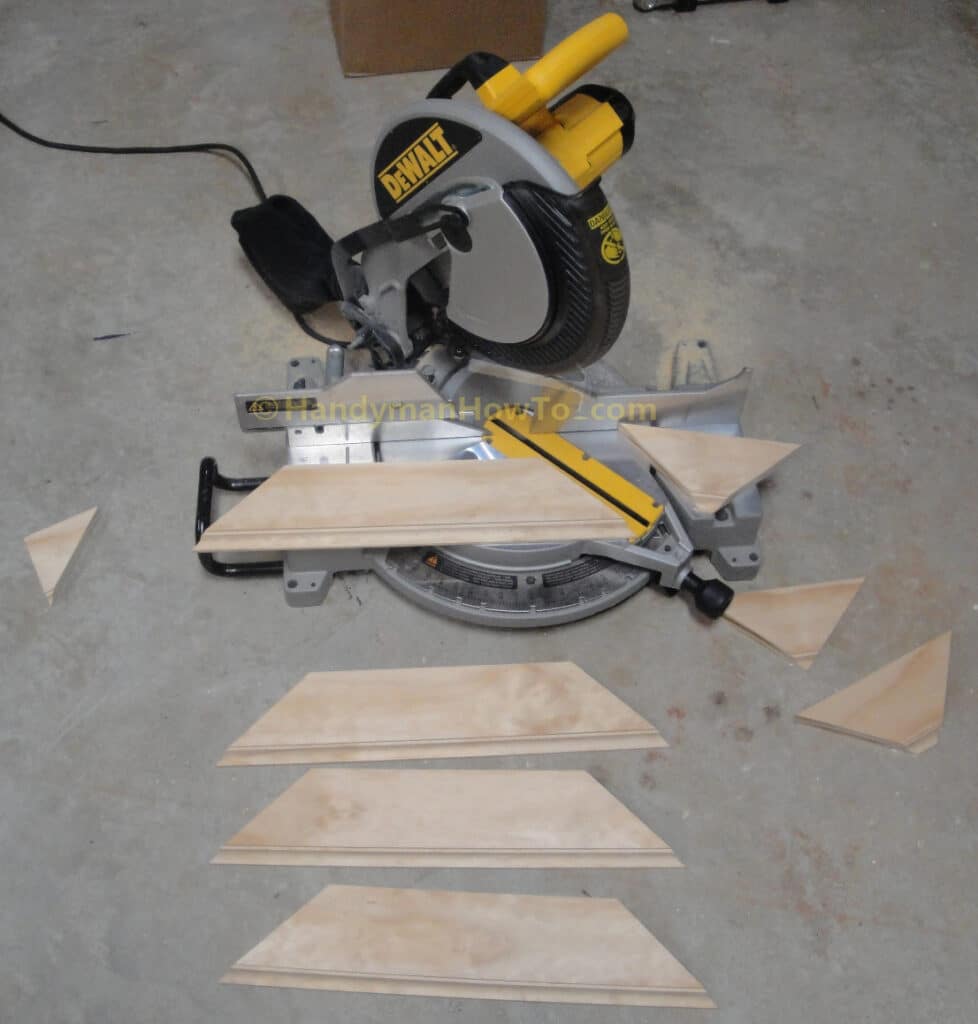
The four sections of wood trim moulding now fit together to make a square frame that is 12-3/16 inches square inside. The pieces are just sitting loosely on my workbench in this photo:
Glue and Brad Nail the Wood Frame
Because I didn’t want to buy a set of picture frame clamps (a.k.a. corner clamps) that I’d probably never use again or take the time to make an old fashioned set, I simply brad nailed the frame molding sections to my wood workbench.
To glue and nail the bathroom exhaust fan trim moulding frame:
- Lay a piece of very flat and smooth plywood on the wood workbench.
I used a section 3 ft. x 3 ft. section of 1/4 inch plywood I picked up at the home improvement store for small projects. I happened to have this item because it’s very light in color and provides a high contrast background for taking project photos compared to the darker lacquered top of my workbench. - Lay down a couple of sheets of wax paper so the Gorilla Glue doesn’t stick to the plywood bench top.
- Brad nail the bottom section of trim frame to the work bench using 1 inch brads at the locations indicated by the red circles. This anchors the frame section for gluing.
- Moisten the edge of the frame with water and apply a bead of Gorilla Glue.
- Set the left side section of wood frame against the bottom section, using the base of the combination square to square the two pieces.
- Squeeze the sections firmly together and set two brad nails through the left side section to hold it place.
- Load the brad nail with 2 inch brad nails, then set two nails in corner as indicated by the red lines to reinforce the corner joint. Be careful to hold the gun horizontal with the trim board so the nail doesn’t pierce the face or back of the board.
- Repeat for the 3rd and 4th sections of trim to complete the frame.
- Wipe off the excess Gorilla Glue as it foams and let the frame cure overnight.
The next day:
- Gently pry up the 3ft x 3ft section of plywood from the main work bench top leaving the wood frame in place.
- Pry the wood frame off the 3ft x 3ft x 1/4 inch section of plywood. The brad nails will easily pull out of the 1/4 inch plywood.
- Cut the brad nails off even with the back of the wood frame using flush wire cutters.
Shortcut:
If you’re not a perfectionist, just brad nail the frame sections to the bathroom ceiling as shown in Part 10 and caulk the corner gaps.
The back of the wood trim moulding after cutting off the brad nails:
I filled the counter sunk brad nail heads with wood filler before painting:

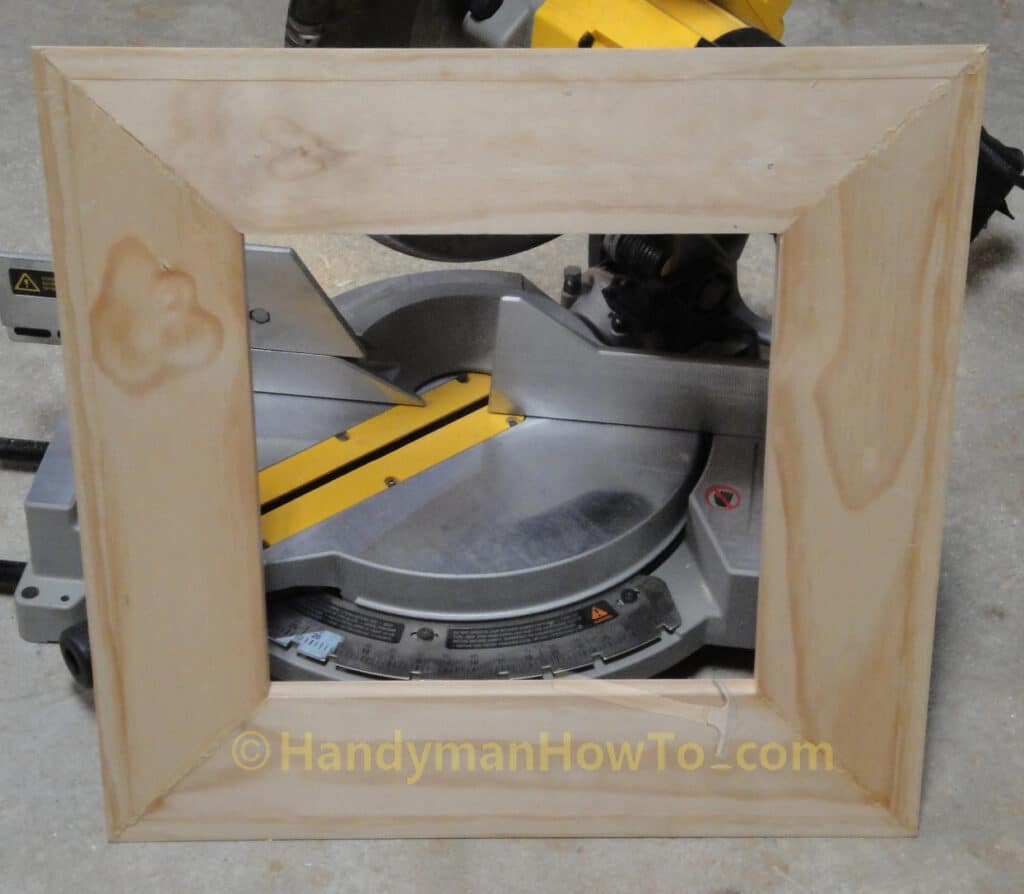
This is the completed wood trim moulding to fit around the Panasonic FV-11VQ5 bathroom fan to cover the gap in the drywall ceiling. I found the wood frame to be quite sturdy:

This project is concluded in How to Replace a Bathroom Exhaust Fan and Ductwork – Part 10.
Thanks for reading,
Bob Jackson