My 9 year old dishwasher wouldn’t drain completely after any wash/rinse cycle. It wasn’t worth the cost of a service call to repair and after performing some basic checks, I decided to replace it with a Frigidaire® Gallery dishwasher, model FGHD2433KF1.
In this article, i’ll share some steps on troubleshooting why a dishwasher won’t drain, and why i opted to get a new dishwasher instead.
Dishwasher Replacement Project Table of Contents
This article is part of a project series on replacing a dishwasher. The project phases are:
- Part 1 – Troubleshooting why the dishwasher won’t drain (this article).
- Check for clogs in the drain hose, sump and check valve.
- Discovered the old dishwasher is leaking on the floor.
- Decide the old dishwasher isn’t worth fixing.
- Part 2 – Disconnect and remove the old dishwasher.
- Disconnect the drain hose, water supply and electrical connections.
- Water was leaking on to the solenoid drain valve, causing it to go bad.
- Part 3 – Buy a Frigidaire Gallery Dishwasher.
- New Dishwasher overview.
- Consumer Reports, SquareTrade extended warranty, Mfg Installation Instructions
- Part 4 – Install a new Water Supply Line and Dishwasher Elbow
- Part 5 – How to install a Dishwasher under the counter (main guide).
Why Won’t My Dishwasher Drain?
Here are the most common reasons for standing water in a dishwasher:
- Blocked Drain Tube
- The Dishwasher Sump Inlet Cover and Sump Filter are blocked
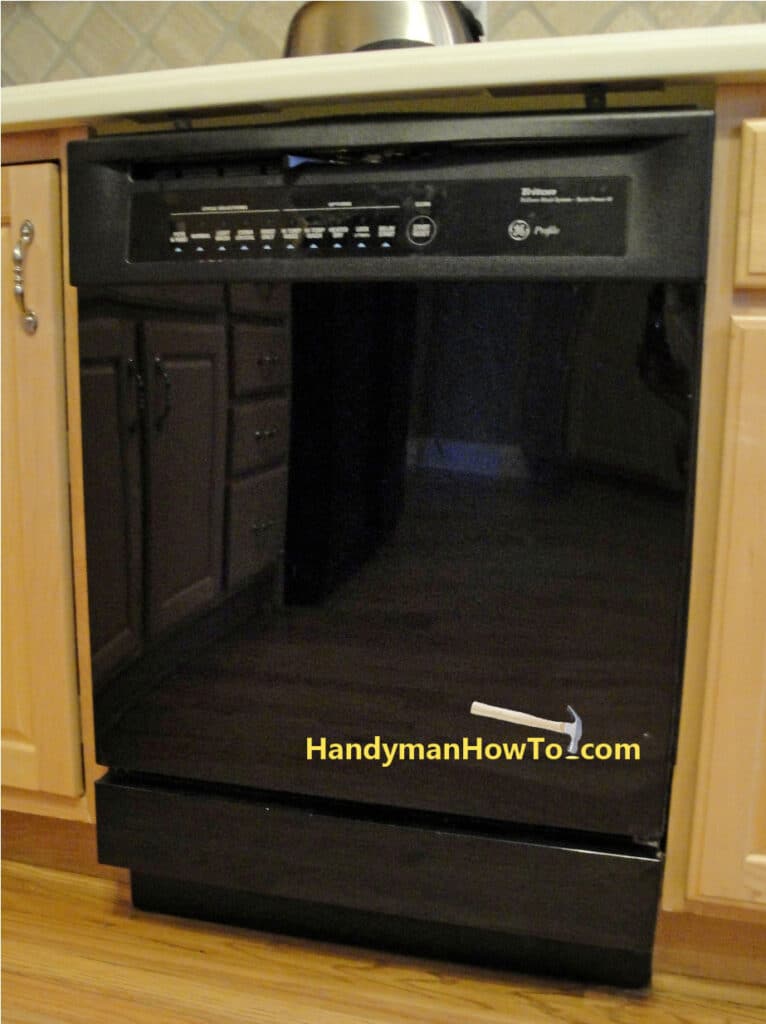
The GE Profile® Triton™ dishwasher had given many years of service, but wasn’t draining the water out of the tub. No matter the cycle – wash or rinse – about 2 inches of water remained in the tub.
See the Dishwasher Repair Frequently Asked Questions by Samurai Appliance Man and in particular the GE Dishwasher Drainology for excellent troubleshooting advice and replacement parts. I didn’t get past checking the sump entrance screen before finding more serious problems that motivated me to replace the dishwasher.
Check the Drain Tube and Pump
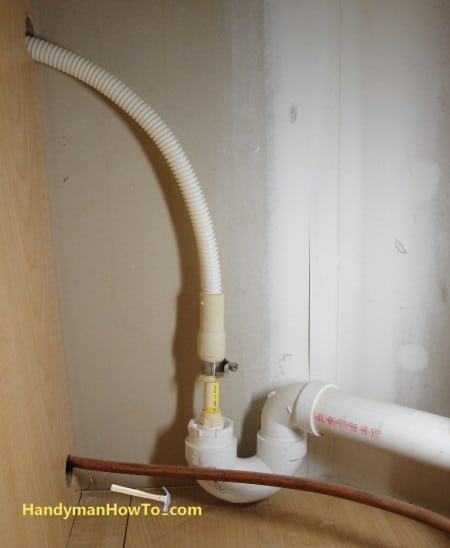
The dishwasher cleaned the dishes just fine and the standing water in the tub was clear, but it wouldn’t drain completely. Holding the drain tube where it connects under the sink, I could feel and hear warm water rushing through the flexible drain tube into PVC house plumbing, which led me to believe the pump was working OK.
Dishwasher drain hoses are commonly connected to a fitting on the side of the garbage disposal. The drain hose on my dishwasher connects to a P-trap under the sink because it sits a bit too far away to reach the garbage disposal.
Check the Dishwasher Sump Inlet Cover and Sump Filter
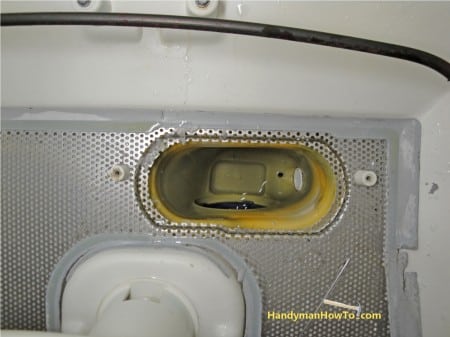
To check the sump filter and sump chamber, I sponged the water out of the tube and into a bucket. I removed maybe 2 gallons of water.

Two hex-head screws (red arrows) are loosened to remove the sump inlet cover. I also noticed the edges of gray filter gasket lining the tub bottom is cracked and breaking.
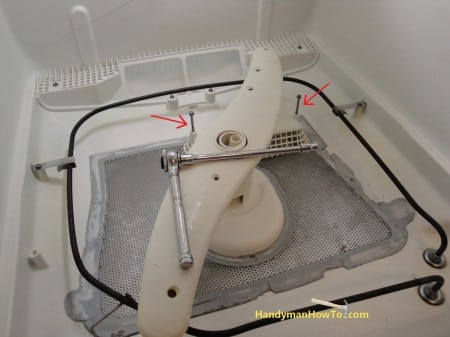
The sump filter is the white oval part in the center of this photo. No obvious clogs here.
The sump filter lifts out of the sump. The filter wasn’t clogged.
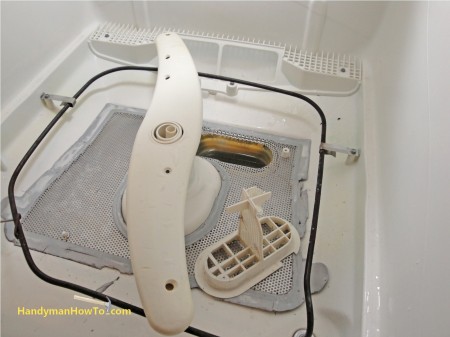
I used a turkey baster to suck the water out of the sump to get a good look at the sump inlet. I found a 4″ metal skewer lying in the bottom of the sump (lower right corner). Removing this item and running a wash cycle didn’t fix my problem.
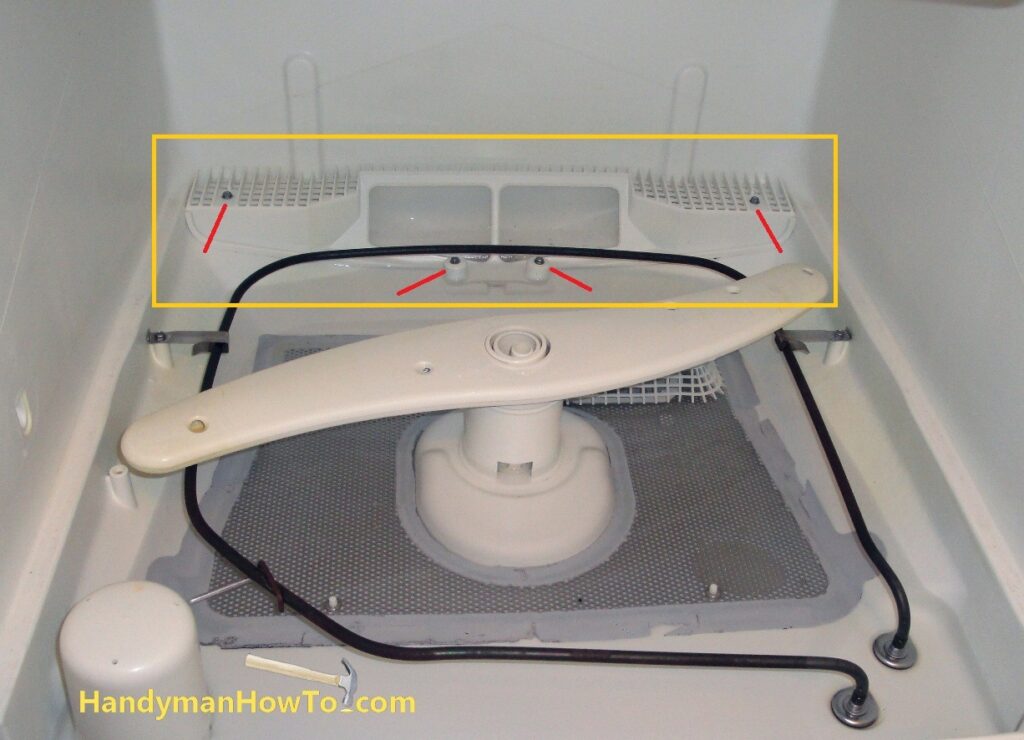
Dishwasher Rear Filter Check
Following the GE Triton XL Dishwasher Will Not Drain at Samurai Appliance Repair Man advice, I removed the four screws that fastened the filter rear filter frame (yellow square in the photo) and took out the check valve for inspection. The check valve appeared to be working fine.
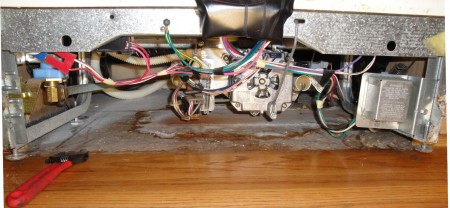
Dishwasher Bottom Inspection
Continuing the trouble inspection, I removed the toe-kick access panel on the front of the dishwasher. Wow! The dishwasher is leaking under the tub with splashes and corrosion on the some of the electrical connections and mechanical parts.
This made my decision to replace the dishwasher.
This project is continued in How to Replace a Dishwasher.
Take care,
Bob Jackson