The Waste King® Legend L-8000 garbage disposer has a plug in electrical cord, however my old disposal unit was the hardwired type connected to the house electrical cable. I therefore needed to install an electrical outlet under the sink to plug in the new Waste King disposer. Converting a hardwired electrical connection to an plug-in wall outlet is simple and inexpensive. I prefer a plug-in disposer because it’s easy to remove for maintenance and easier access to the sink plumbing.
This project is part of a series on replacing a garbage disposal:
- Part 1: Removing the old garbage disposal
- Part 2: Wiring the garbage disposal switch and outlet (this article)
- Part 3: Installing the new garbage disposal
Under Sink Electrical Outlet
I purchased a single steel outlet box and Leviton steel cover plate:
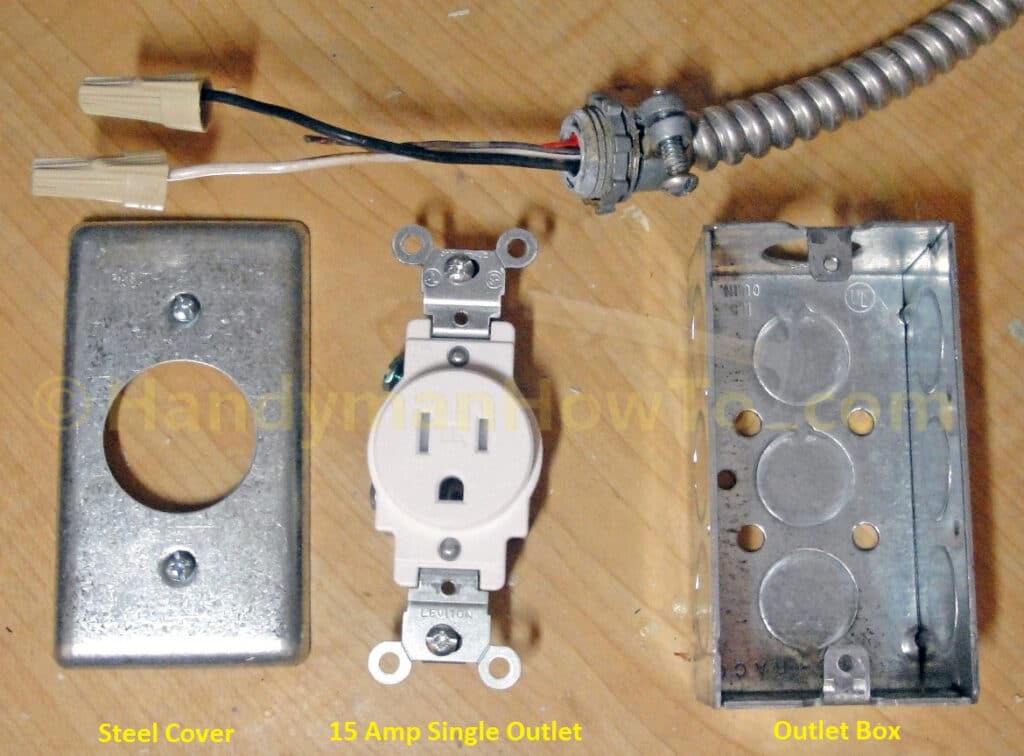
I bought a single outlet to prevent any other appliance from being plugged to prevent overloading the circuit.
Electrical Safety
For safety’s sake, let’s review where I am in this project:
- The garbage disposer is on a dedicated circuit from the main electrical service panel.
- The electricity has been shut off at the circuit breaker in the main panel.
- I verified there is no voltage on the house electrical wiring.
My garbage disposal is operated by an on/off switch located above the kitchen sink. Simply turning off the sink switch is not an adequate safety precaution.
Garbage Disposal Electrical Outlet Wiring
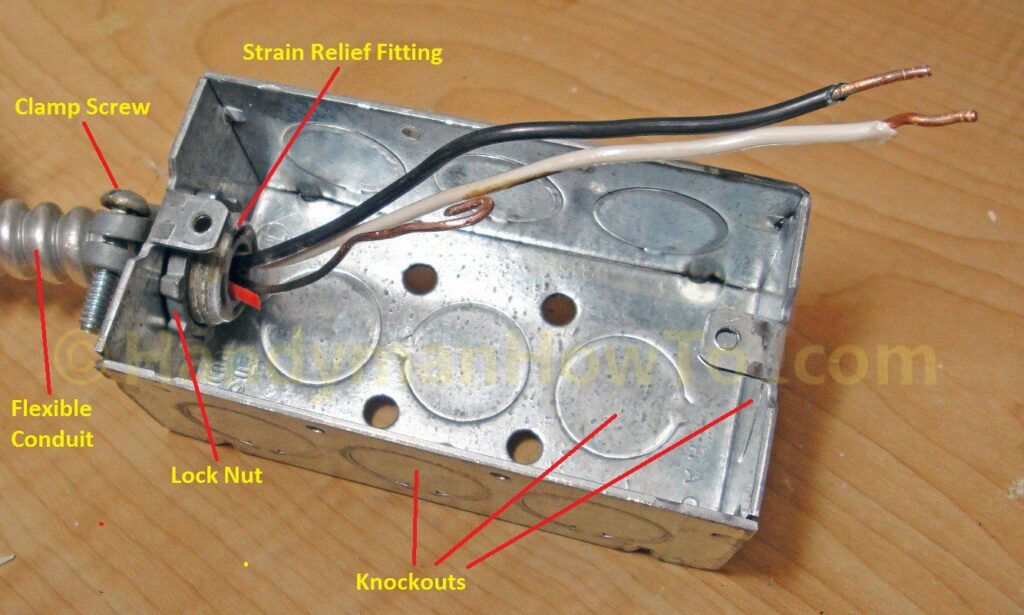
Since I already had the hardwired NM 12/2 electrical wire and flexible metallic conduit, installing the electrical outlet was easy.
- Remove a prepunched knock-out from the steel outlet box by bending it in with a screwdriver and working the disc back and forth until it breaks off at the tab. I chose the knockout at the box end as the most direct way to bring in the wires.
- Straighten the NM 12/2 electrical wires as shown in the photo below.
- Remove the lock nut from the strain relief fitting.
- Feed the wires and threaded end of the fitting through the knockout hole in the box.
- Slide the lock nut over the wires and screw the nut onto the fitting as shown.
- Tighten the lock nut by 1/4 turn – a flat screwdriver tip levered against a spur of the lock nut works well.
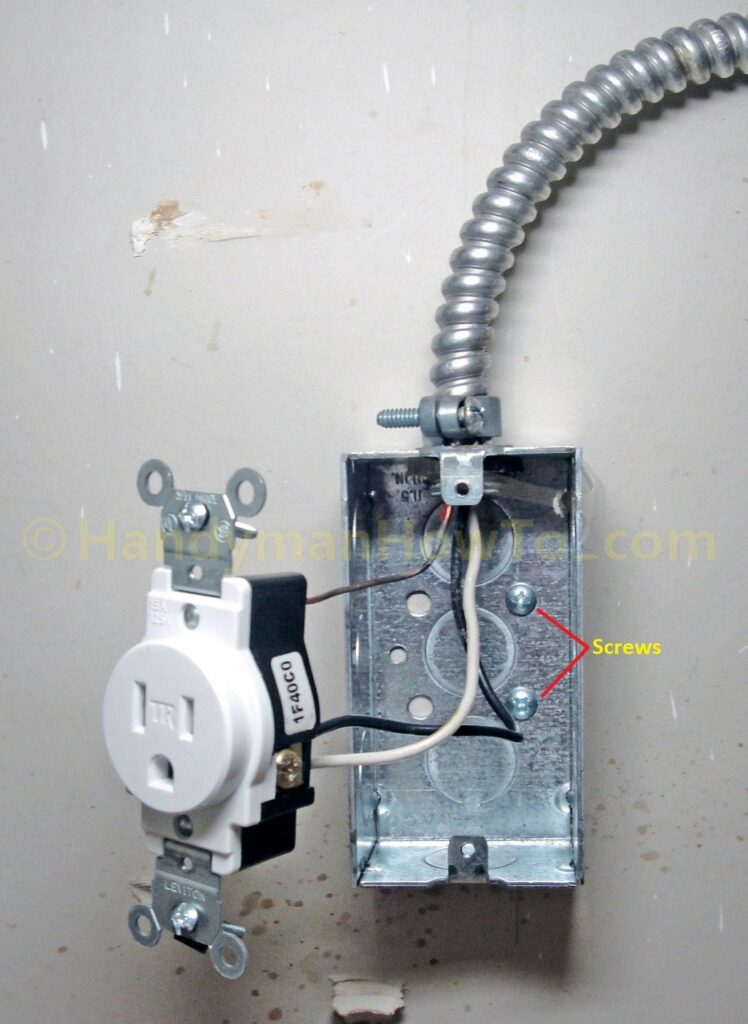
I purchased a Leviton single outlet rated for 15AMPs and 125VAC and backwired the outlet per the instructions printed on the package. I also scraped off the light coating of oxidation off the wire ends with a edge of the needle nose pliers to expose the shiny copper surface for a solid electrical connection before wiring the outlet. The three connections are: black wire (hot), white wire (neutral) and ground wire (bare).
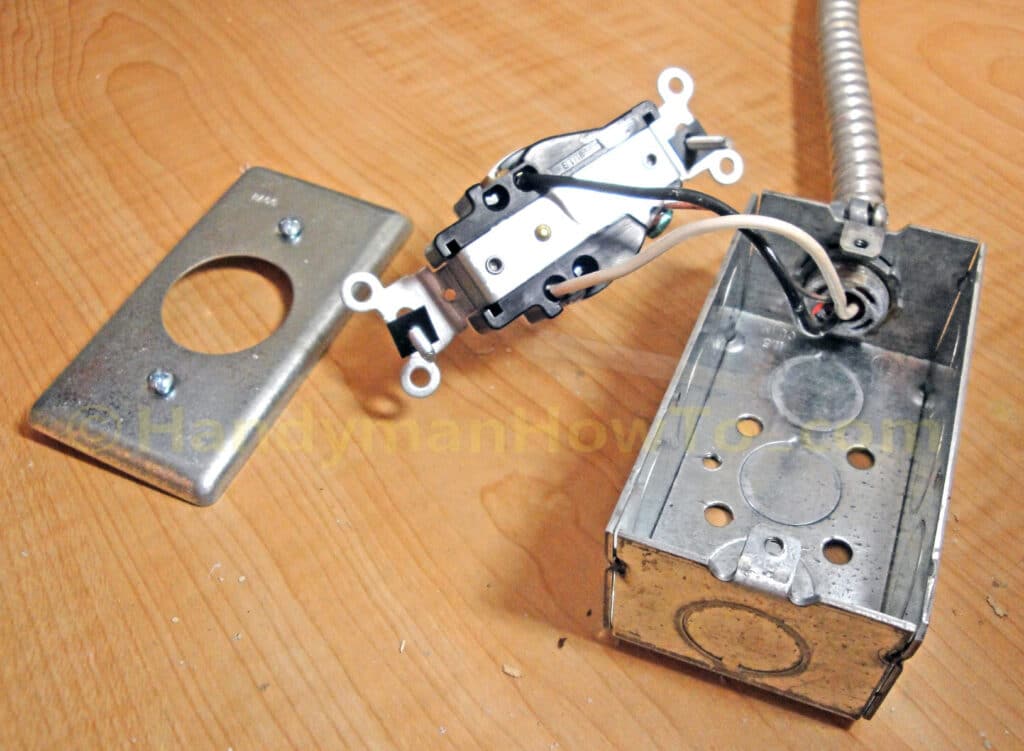
Another view of the pre-wired outlet.
Note that I wired the outlet before mounting it on the wall at the back of the sink cabinet. Doing it know meant I could sit in comfort on the kitchen floor with the outlet lying in my lap instead of lying down and straining to reach the back of the cabinet!
Mount the Garbage Disposer Outlet Box
- Locate a convenient spot on the back of the sink cabinet for the electrical out.
- Now verify the garbage disposal cord is long enough to easily reach that spot!
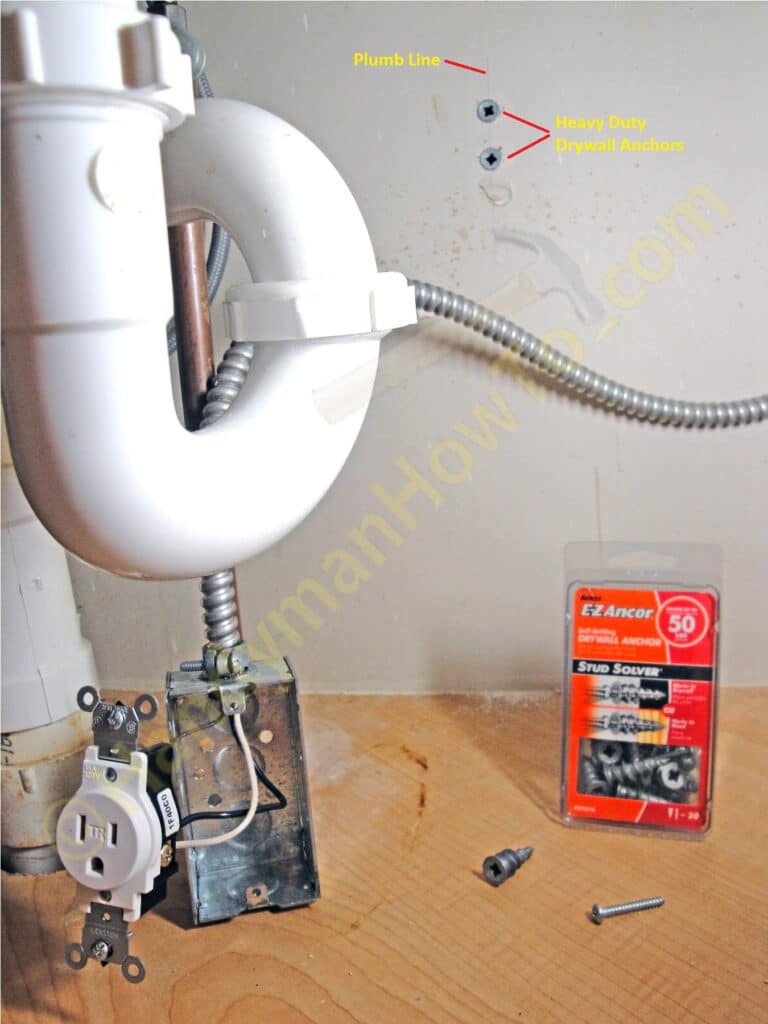
- Mark a plumb line (vertical line) on the back wall of the sink cabinet with a carpenter’s level.
- Hold the outlet against the wall over the plumb line.
- Move the outlet so you can see the plumb through two of the screw holes on the back of the box.
- Mark the center of the screw holes on the plumb line.
- Insert two drywall anchors. I really like these self-drilling heavy-duty metal EZ Anchors that hold up to 50lbs.
If you can locate a wood stud behind the drywall to drive in the screws, then you can omit the drywall anchors. It was a long reach lying on my side under the sink to reach the back of the cabinet, so I used the drywall anchors for convenience.
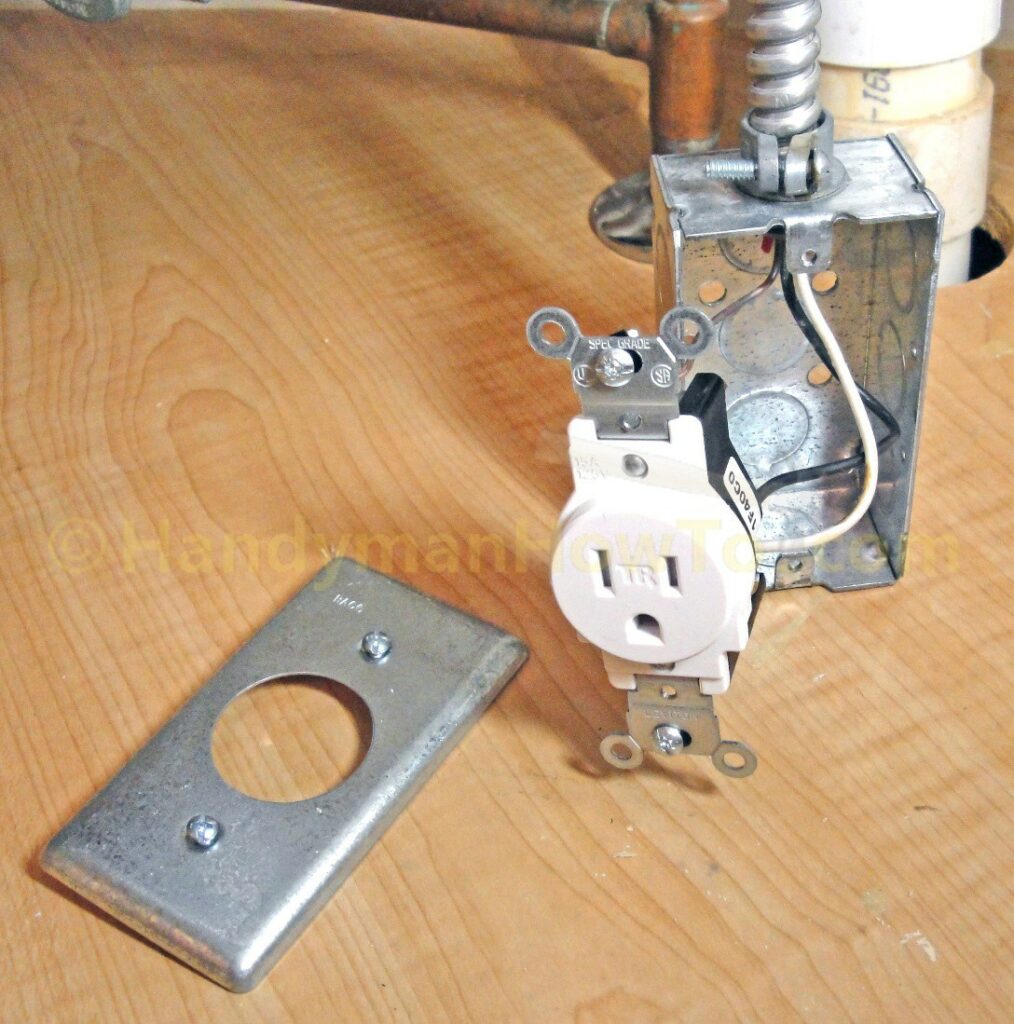
Fasten the box to the wall / drywall anchors with two screws as shown below. You can see why I pre-wired the outlet before mounting the electrical box as it would’ve been very difficult to do wire it while laying under the sink inside the cabinet.
Verify the Electrical Wiring Connections
I turned on the circuit breaker and flipped on the switch by the sink to power the new receptacle. I plugged in a 3-wire receptacle tester to check for improper wiring such as reversed wires and open connections. These are really easy to use, just plug it in an confirm the light pattern with the reference chart. The two yellow lights means it’s wired correctly.
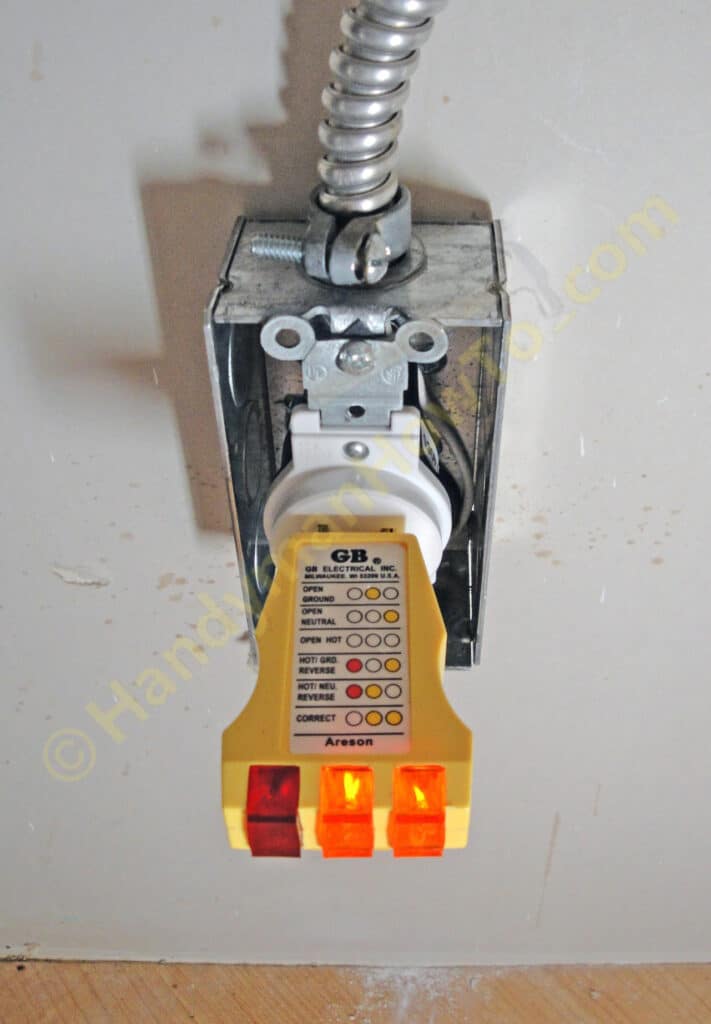
I flipped the garbage disposer switch by the sink to the off position and attached the steel cover plate to the outlet box. The new outlet is ready for service!
Garbage Disposer Electrical Outlet Installation Tips
Some tips when installing the garbage disposer electrical outlet:
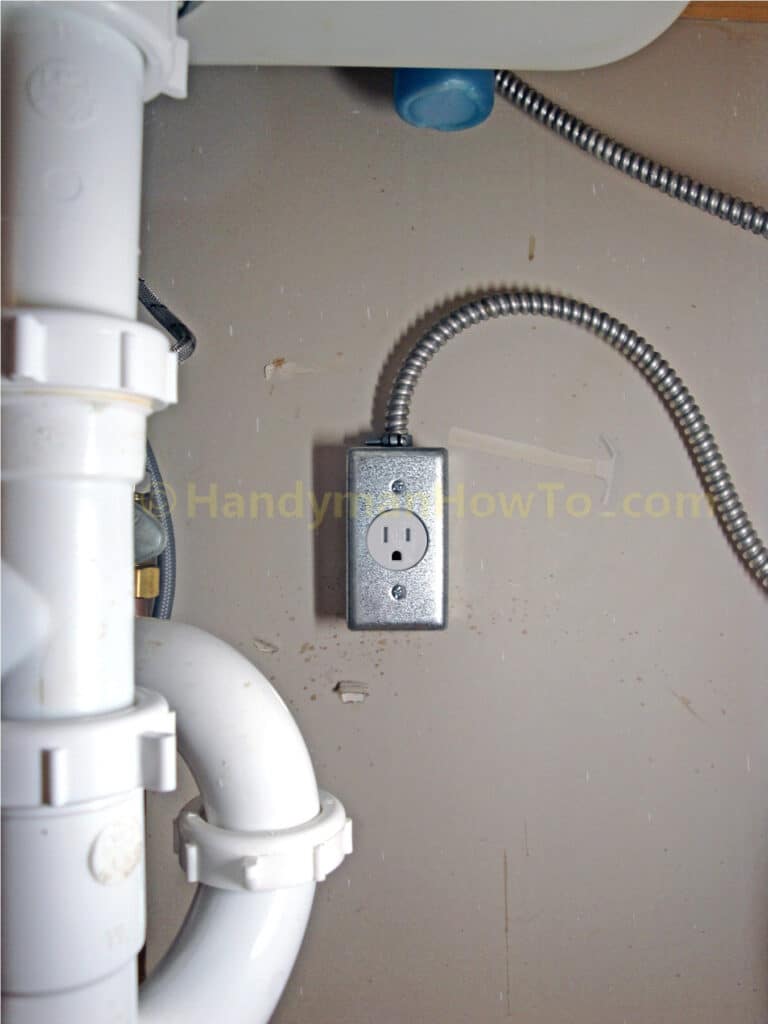
- Mount the outlet several inches higher than the bottom of the garbage disposer.
This so water can’t run along the power cord and into the receptacle if you have a leak. - Route the wiring into the top of the box as shown above.
Again, so leaking water can’t run along the flexible conduit into the box.
This project is concluded in part 3: Installing the new garbage disposal.
Take care,
Bob Jackson