How to Replace a Sewage Pump Check Valve – measure and fit the new silent check valve to the PVC sewage plumbing.
This project is continued from Part 4.
Having removed the old sewage check valve and installed a new PVC discharge pipe on the sewage pump, the new A.Y. McDonald 2068S silent check valve can be installed to eliminate the water hammer in the basement bathroom.
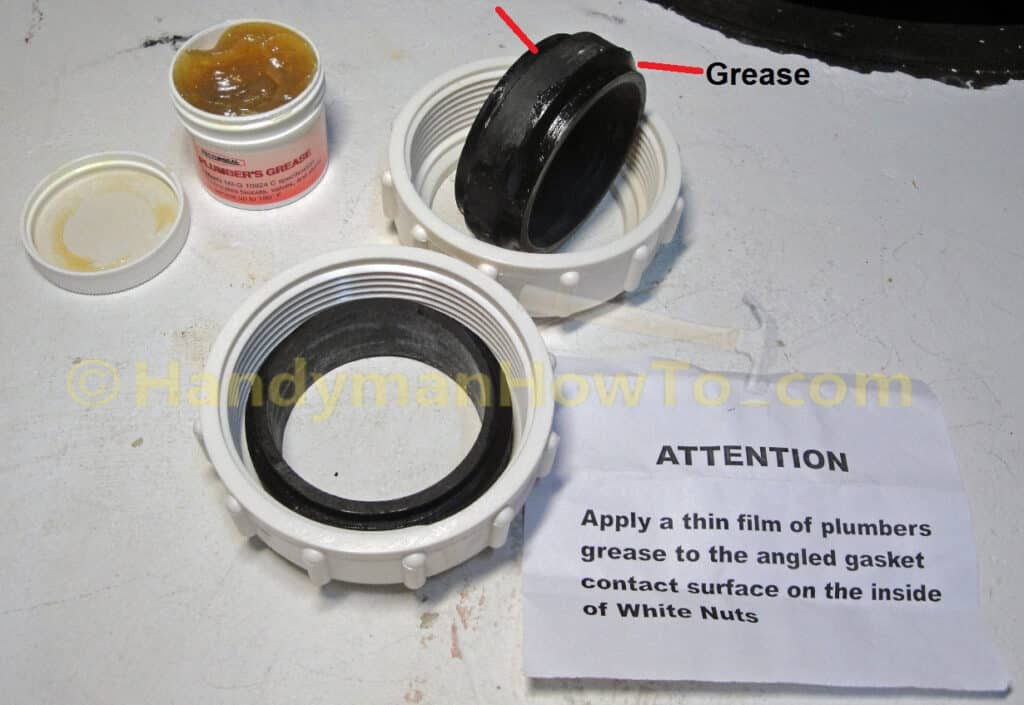
The A.Y. McDonald 2068S silent check valve uses compression fittings composed of a heavy rubber gasket and plastic nut. The instructions call for a light coating of Plumber’s Grease on the angled contact surface of the gaskets.
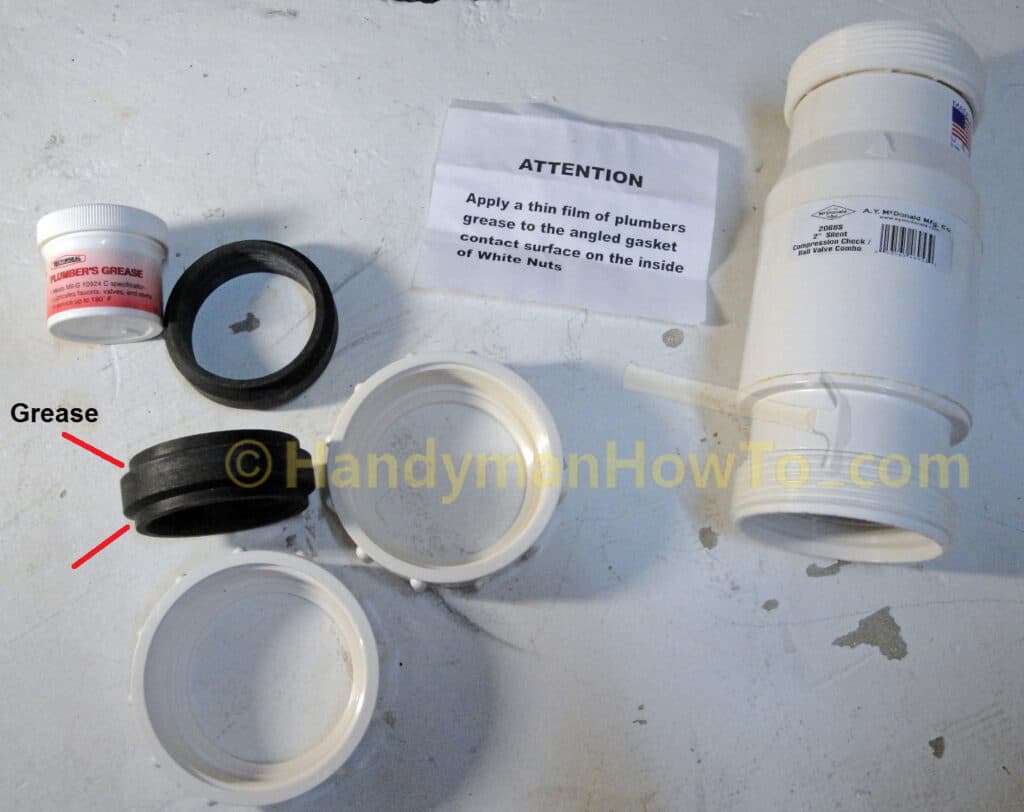
The Plumber’s Grease is smeared on the outside bearing surfaces of the rubber gaskets as shown. This is to prevent the gasket from sticking to the nut and check valve body over time.
A.Y. McDonald Silent Check Valve Installation
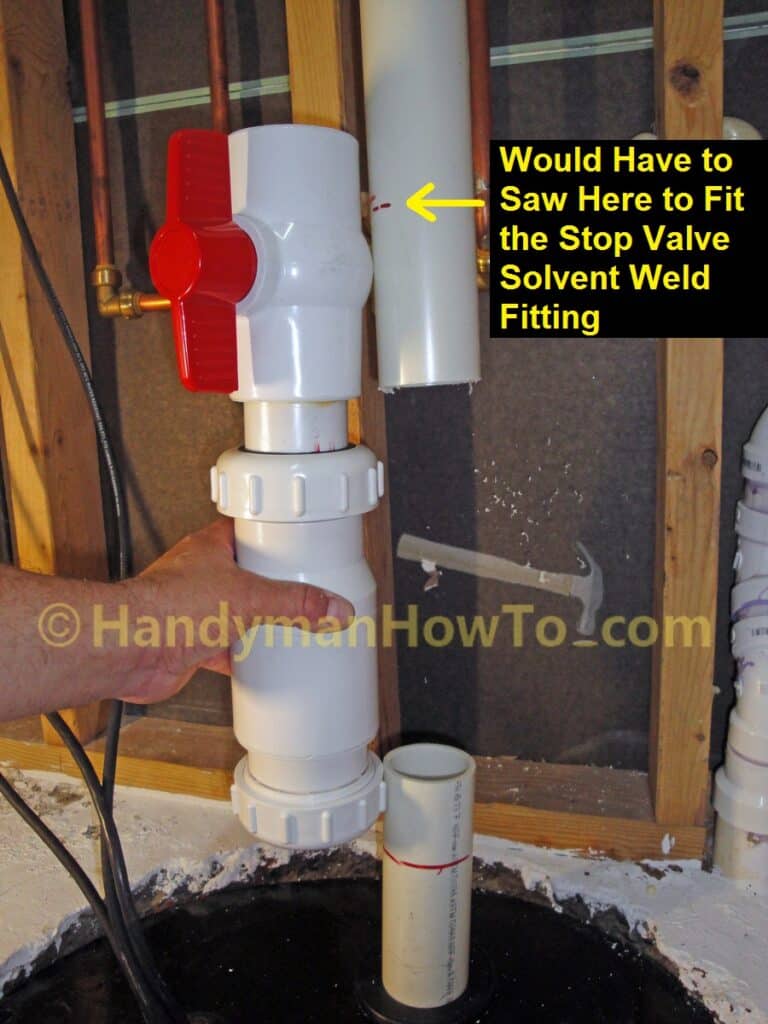
The new A.Y. McDonald 2068S check/ball valve combo is dry fitted to the PVC sewer pipe decide where to cut the PVC pipe. The red line on the lower discharge pipe shows the maximum depth the pipe will slide into the bottom compression fitting of the check valve. The compression fittings are designed with a generous margin to fit over the PVC pipe so it can be removed for maintenance.
The dashed red lines on the upper section of PVC pipe show where I would have to cut the pipe to make the solvent weld attachment to the ball valve.
Reflecting upon how this would work, I decided that I didn’t want a PVC solvent weld joint permanently attaching the ball valve to the sewer pipe. I therefore chose an American Valve, Inc. P200U-40 True Union Ball Valve purchased at Lowes. The advantages of the P200U-40 True Union Ball Valve are:
- It requires zero clearance to disassemble the PVC union joints to remove the check valve.
- I can easily remove the A.Y. McDonald check valve for maintenance by unscrewing only the bottom union nut on the ball valve, then loosen the check valve compression nuts and slide the silent check valve off the lower discharge pipe.
The revised installation with the A.Y. McDonald Silent Check Valve and American Valve P200U-40 Union Ball Valve is dry fitted as shown:

I did have to mark and saw off a couple of inches from the upper PVC sewer pipe to make room for the American Valve P200-U Ball Valve. I also need to measure and cut a short span of 2 inch diameter PVC pipe to join the silent check valve to the union ball valve as indicated in the above photos.
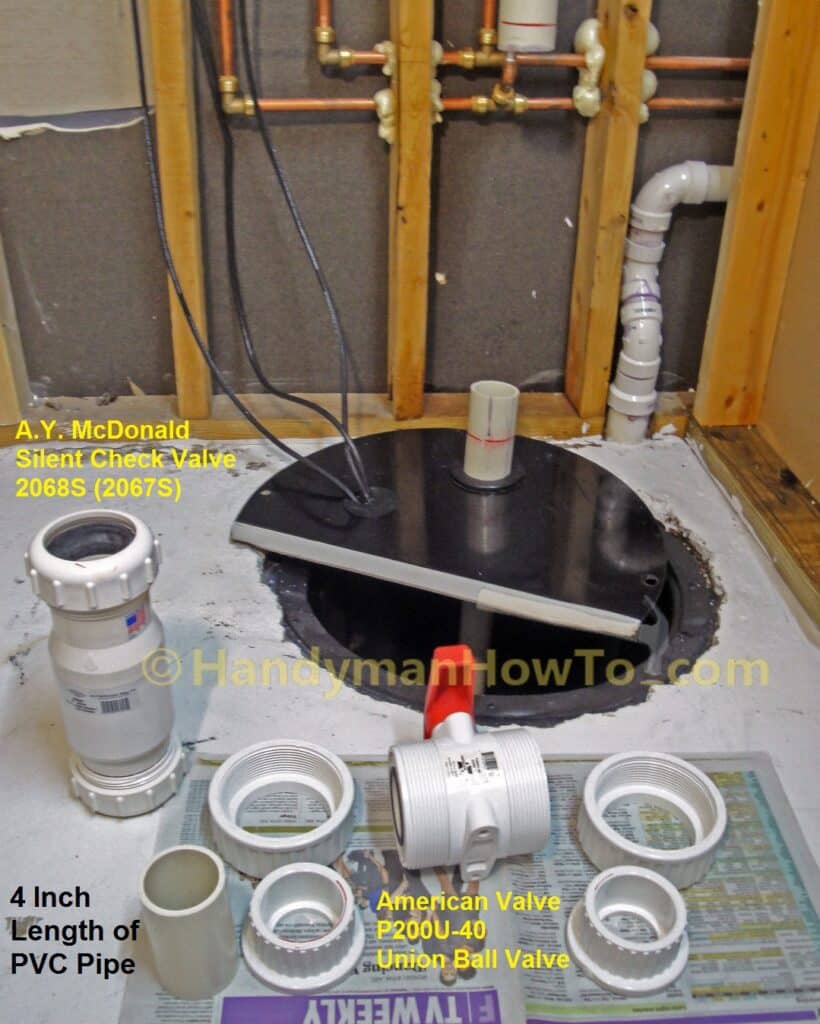
The silent check valve and disassembled ball valve with the 4 inch section of Schedule 40 PVC pipe to join the two valves are shown here, ready for installation on the basement bathroom sewer pipe:
The ball stop valve Union joints have solvent weld fittings for the 2 inch PVC sewage pipe attachments. The solvent weld fittings are cleaned with the PVC purple primer in preparation for gluing. A paper towel is placed over the PVC pipe running into the sewage basin to catch drips from the purple primer swabbed on the upper pipe end because the primer tends to soften the PVC and I didn’t want to contaminate the lower pipe where the check valve rubber gasket compression fitting will go.
This project is concluded in Part 6.
Take care,
Bob Jackson