How to Replace a Toilet Fill Valve: Mount the new Fluidmaster fill valve in the toilet tank. This project is continued from How to Replace a Toilet Fill Valve – Part 2.
Brasscraft Toilet Connector Hose
The Brasscraft Toilet Connector hose (left) comes preassembled with the cone washer. The Fluidmaster Fill Valve kit provides the shank washer and cone washer (right) as a single unit:
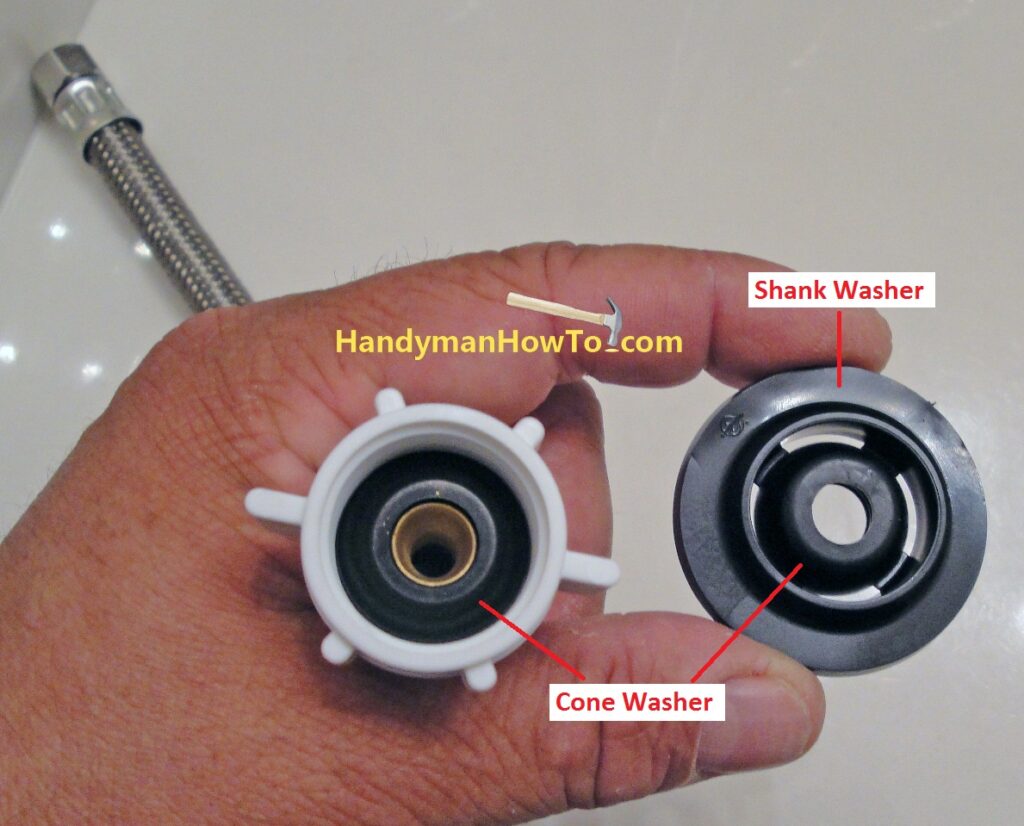
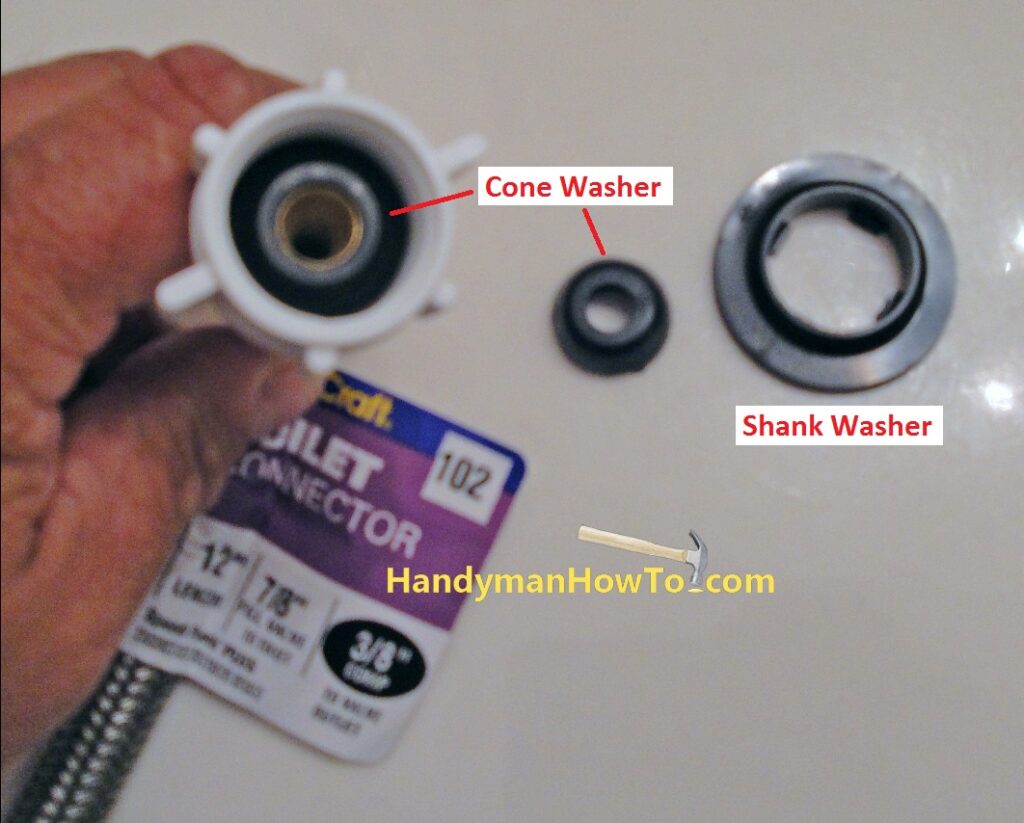
I don’t need the Fluidmaster cone washer but I do need the shank washer. Separate the cone washer from the center of the shank washer by either cutting the four tabs or carefully pulling apart at the tabs.
The cone washer is separated from the shank washer:
Install the Fluidmaster Whisper Fill Valve
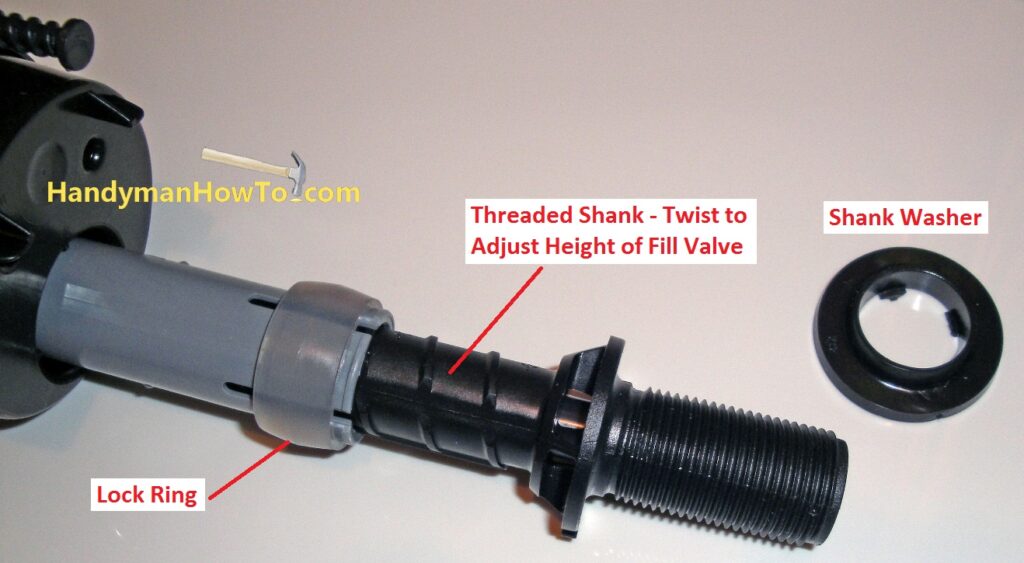
The height of the Fluidmaster Whisper Fill Valve is adjustable, just twist the threaded shank. I needed increase the height of the fill valve by about two inches as shown in the following photo.
Do not remove the lock ring. The lock ring holds the body of the fill valve on to the shank. Without the lock ring, the fill valve could pop off and you’ll have a fountain of water squirting out out of the toilet tank!
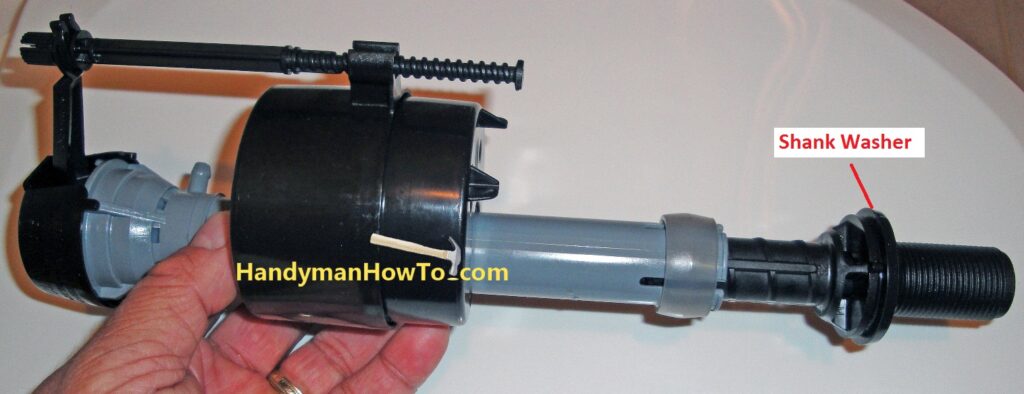
Slide the shank washer onto the threaded shank. The flat side goes against the valve and the beveled end faces away as shown to fit against the toilet tank. The purpose of the shank washer is to make a water tight seal against the bottom of the toilet tank.
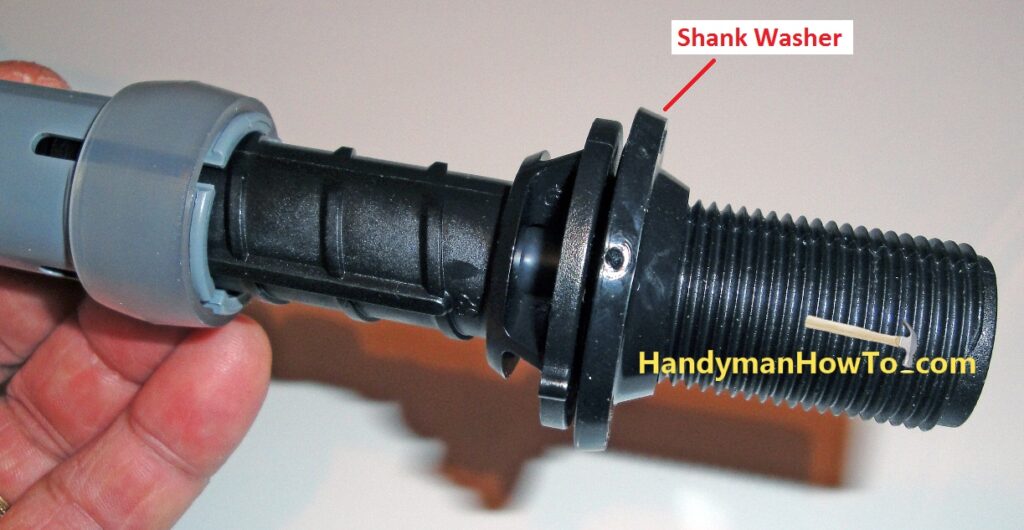
The new Fluidmaster Whisper Valve and shank washer ready to be installed in the toilet tank:
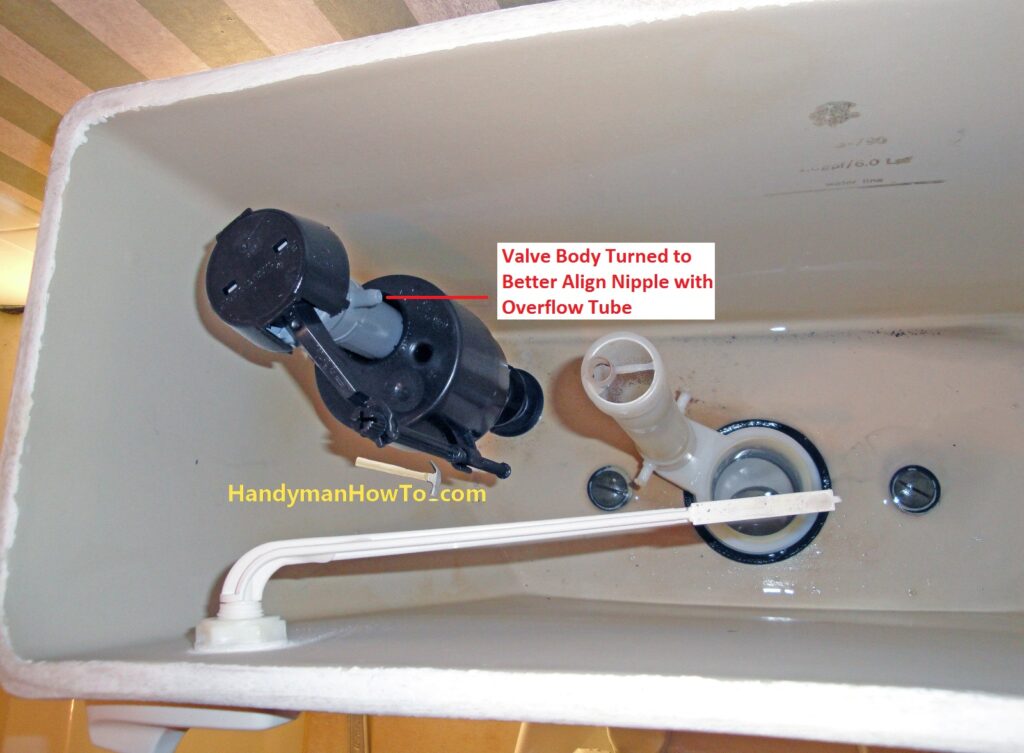
Place the fill valve inside the tank and orient the valve body so the outlet nipple for the overflow tube is oriented towards the center of tank. Make sure the fill valve is not touching sides of the tank or the flush arm.
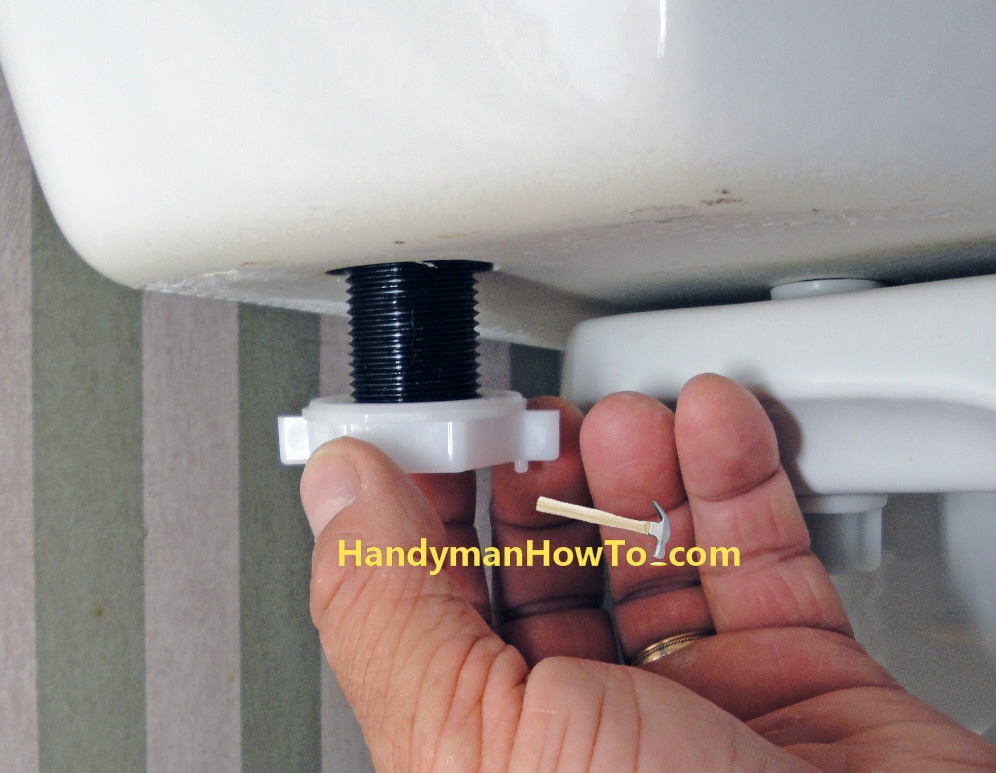
Reach inside the tank and hold the fill valve so it doesn’t turn and tighten the lock nut against the bottom of the tank. Notice that the Fluidmaster lock nut has generous “wings” to hand tighten. Hand tighten only – you only need to compress the shank washer for a watertight seal. If you over tighten the nut, you could crack the toilet tank.
This project is continued in How to Replace a Toilet Fill Valve – Part 4.
Take care,
Bob Jackson