How to Replace a Toilet Fill Valve: Reinstall the flapper valve and adjust the water level in the toilet tank. This project is continued from How to Replace a Toilet Fill Valve – Part 4.
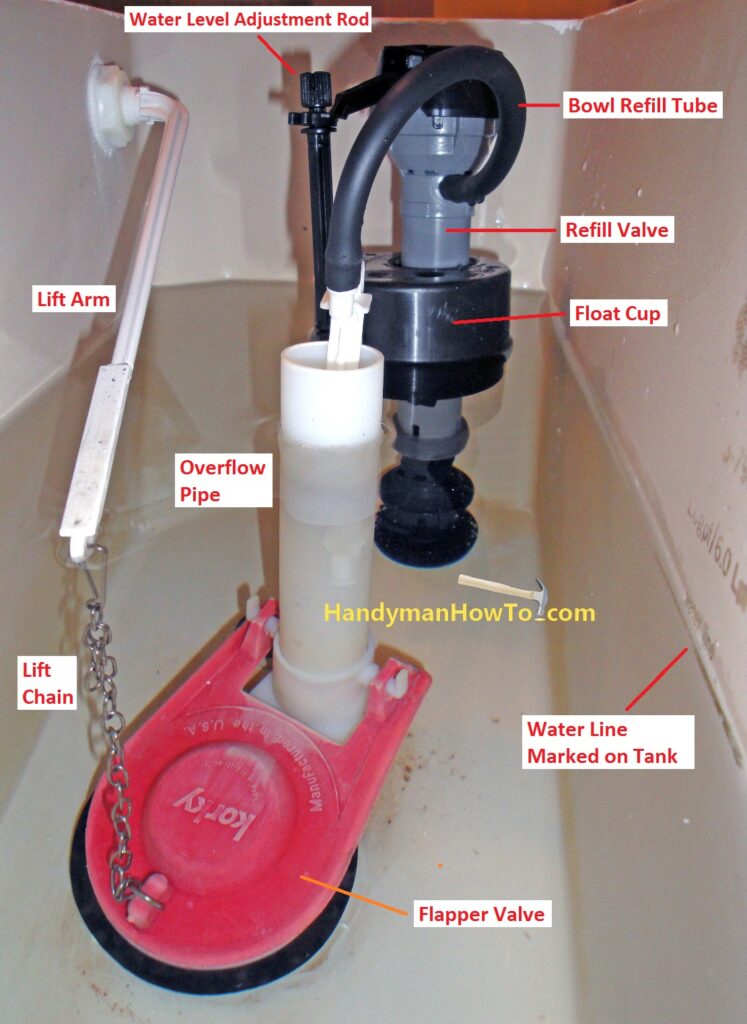
The Fluidmaster Fill Valve kit includes a new flapper (top item in the next photo). The Fluidmaster flapper valve includes an overflow tube mounting ring held by the spring steel U-shaped clip which doesn’t fit my toilet. This isn’t a problem because the overflow tube mount ring unsnaps from the flapper bracket arms. Because I’d recently replaced the Korky Toilet Flapper (bottom of photo) and it’s in very good condition, I choose to reinstall the Korky flapper valve and keep the Fluidmaster flapper as a spare. This way I won’t have to adjust the flapper valve chain length where it connects to the flush lever arm.
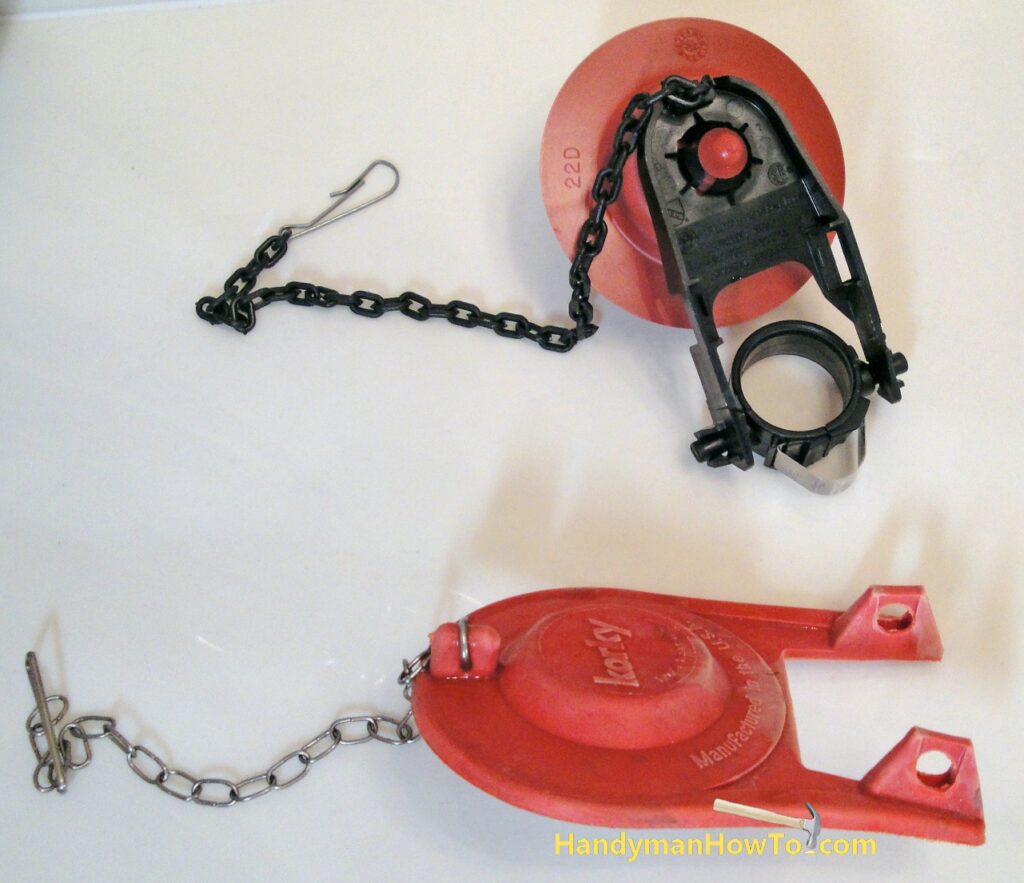
Install the flapper – either the old or new item – and reconnect the lift chain to the tank level. For details see How to Fix a Broken Toilet Flapper Valve and Lift Chain.
Toilet Fill Replacement: Pre-Flush Checks
Verify the flapper valve falls completely closed when the flush handle is released and the lift chain is slightly slack. Any tension in the lift chain can prevent the flapper valve from closing complete and cause a leak with high water bills.
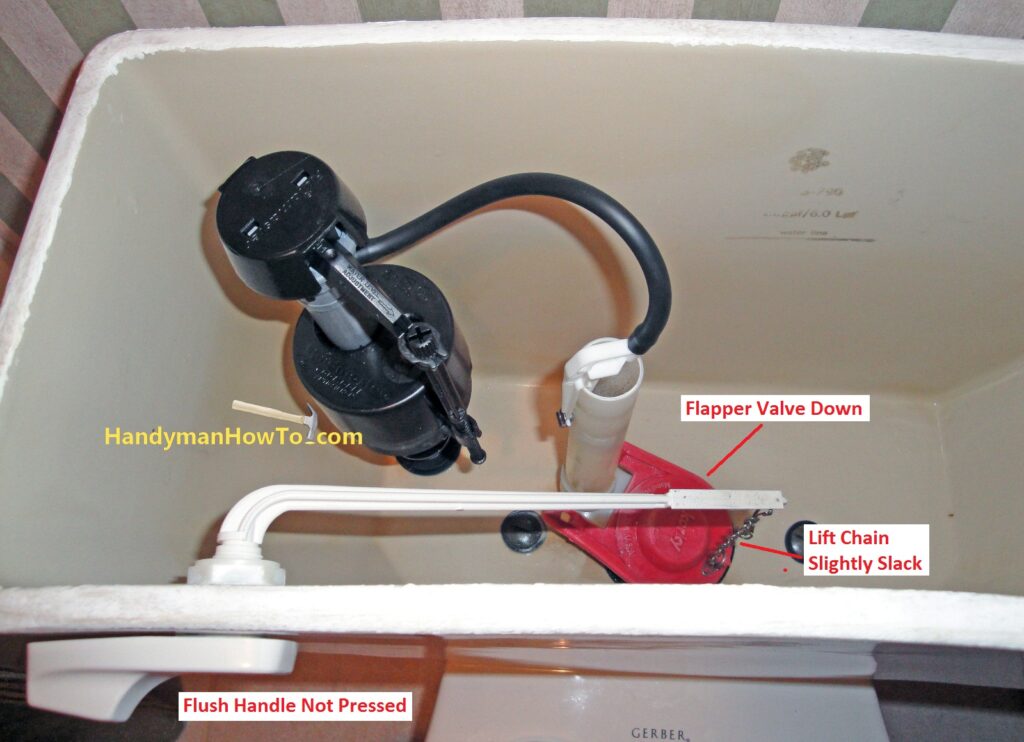
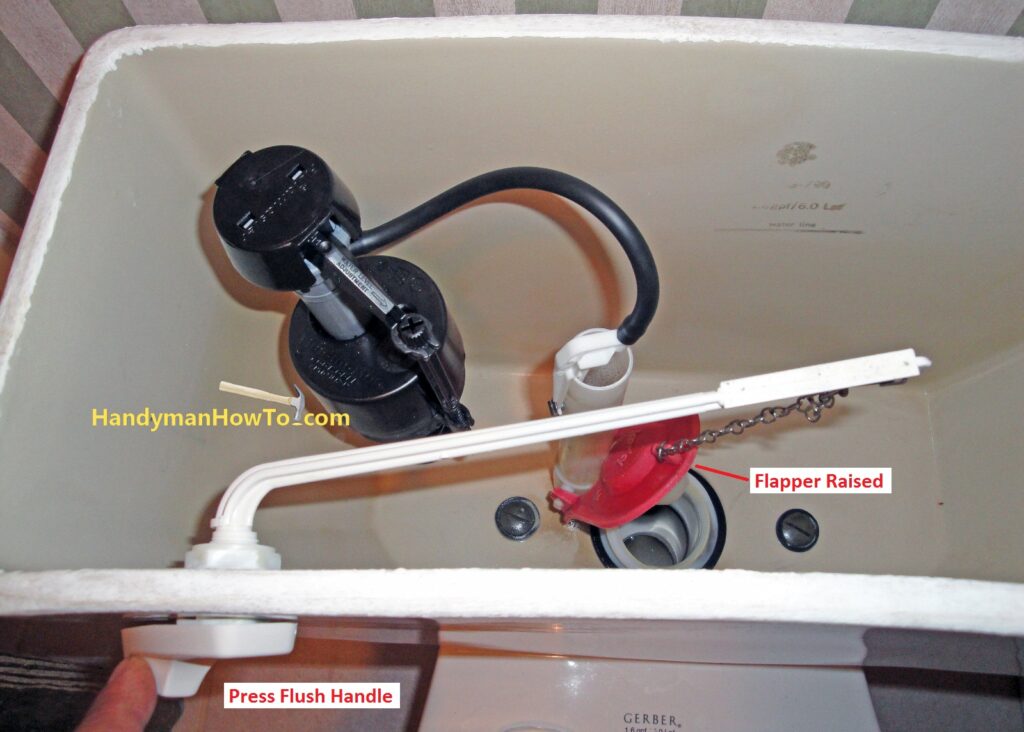
Press the flush handle a few times and see that everything works smoothly with the flapper raising and falling freely:
Adjust the Toilet Fill Valve Critical Level
The toilet water supply valve must still be shutoff before proceeding.
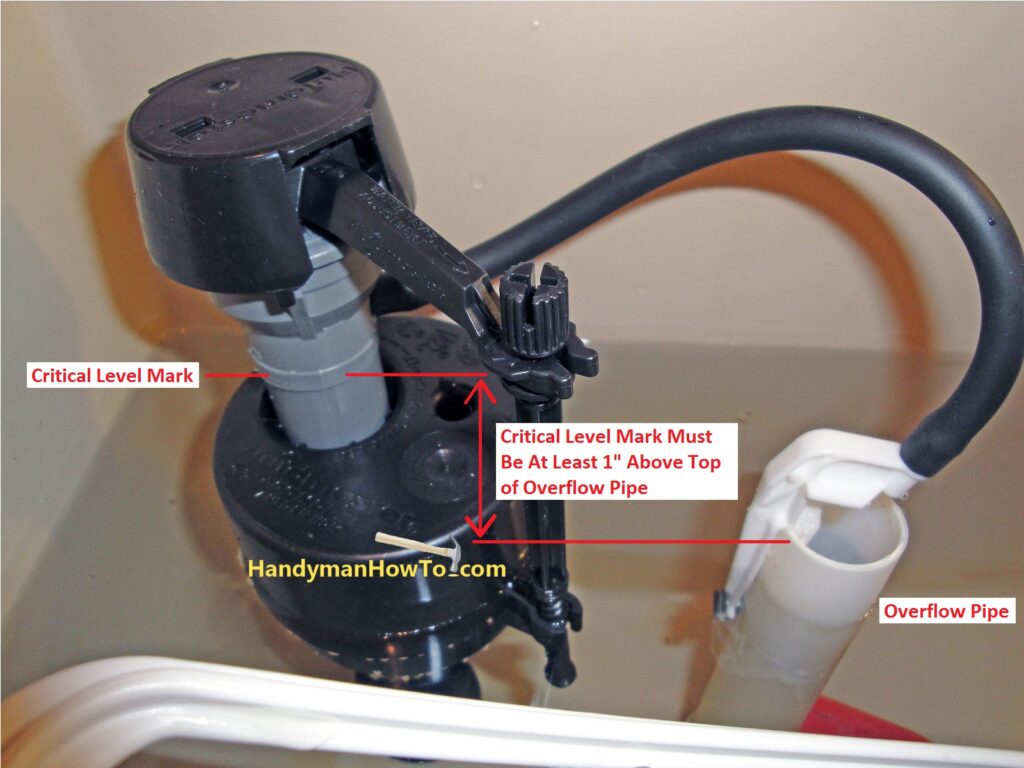
Verify the critical level mark on the toilet fill valve is a minimum of 1 inch above the top of the overflow tube to comply with Building Code requirements. If the critical level is too low, the valve height needs to be adjusted. The “official” way to adjust the height is uninstall the fill valve and turn the shank to lengthen the fill valve. “What?! But I just installed the darn thing! I’d have unscrew all the connections and remove the valve!” There is a simple shortcut:
- Verify the water supply valve is shut off.
- Lift the lock ring up the shank body.
- Grasp the gray valve body above the threaded shank – do not pull on the float cup or black valve cap.
- Pull the valve body to lengthen the valve height – you’ll hear/feel a couple of clicks.
- Slide the lock ring back down into place. Double check the lock ring is securely in its original place.
Remember – the lock ring is the only thing holding the valve body onto the shank and prevents the valve from popping off when the water supply is On.
Toilet Flush Test and Leak Check
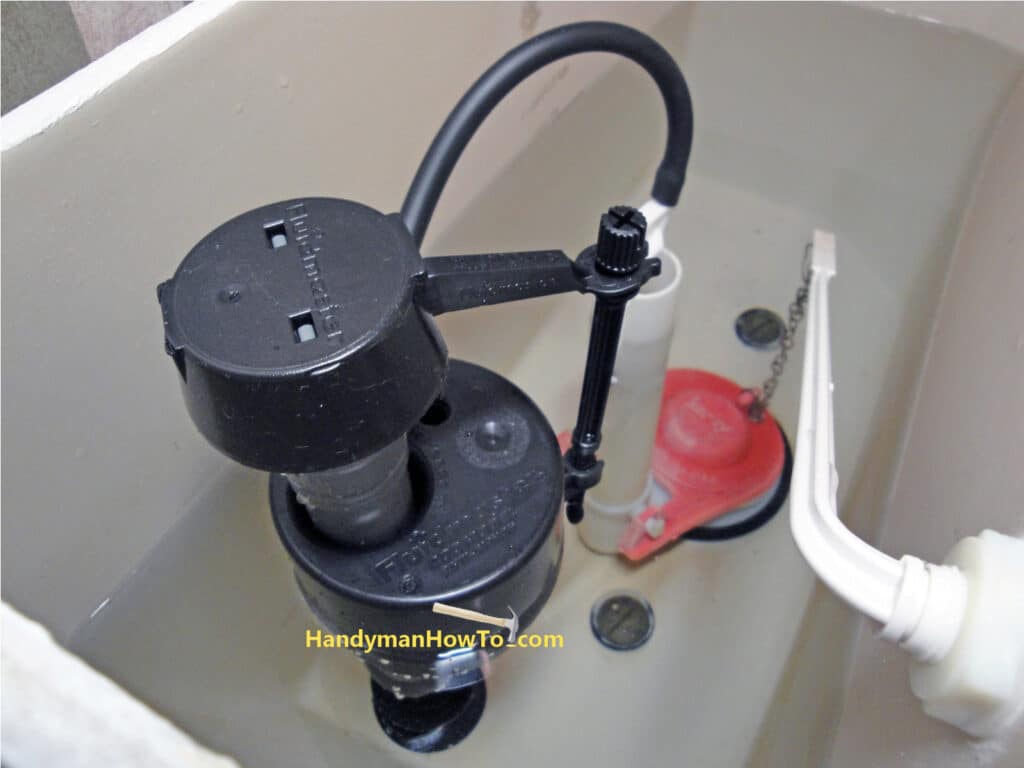
Turn on the water supply and check for leaks as the tank fills with water. Gently tighten any connections if you find a leak. The new toilet fill valve and water level in the toilet tank should look like this:
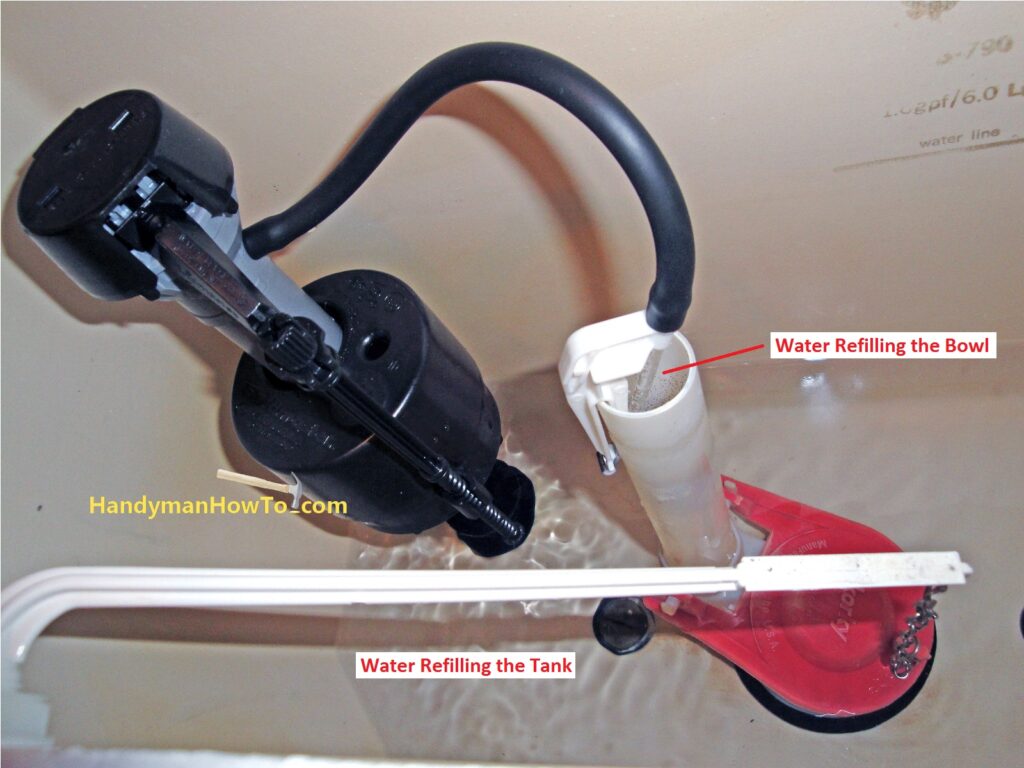
Flush the toilet to verify the cycle works correctly. Water exits the fill valve near the bottom of the toilet tank and the refill tube fills the bowl.
Adjust the Toilet Fill Valve Water Level
The water level line should be marked by the toilet manufacturer on the back of the tank. If not, the water level should be about 1 inch below the top of the overflow pipe.
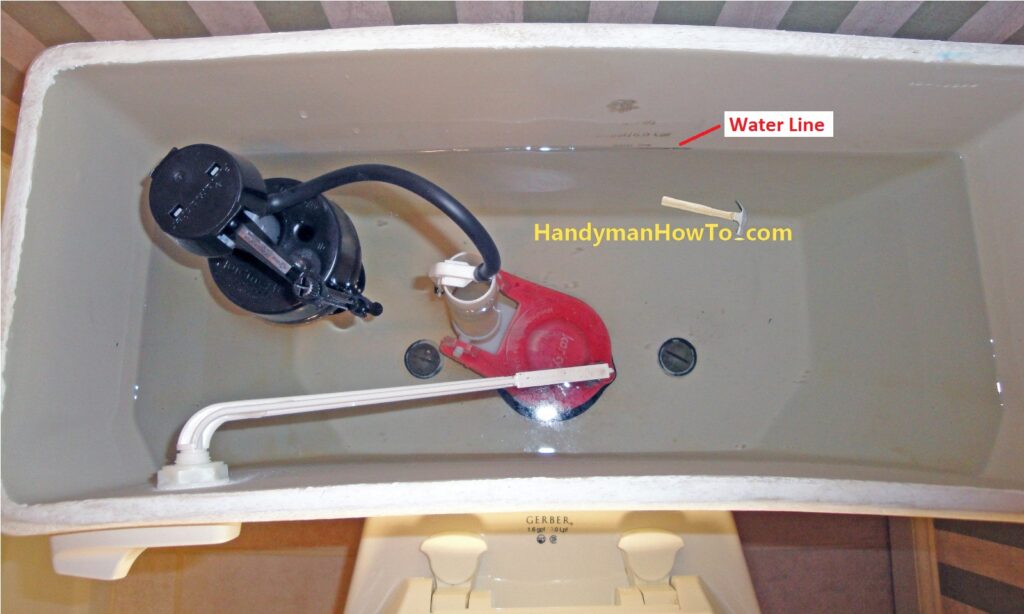
To raise or lower the water level in the toilet tank, turn the adjustment screw on the toilet fill valve. The screw and rod controls the distance between the valve arm and the float cup. Flush the toilet to verify the final water level.
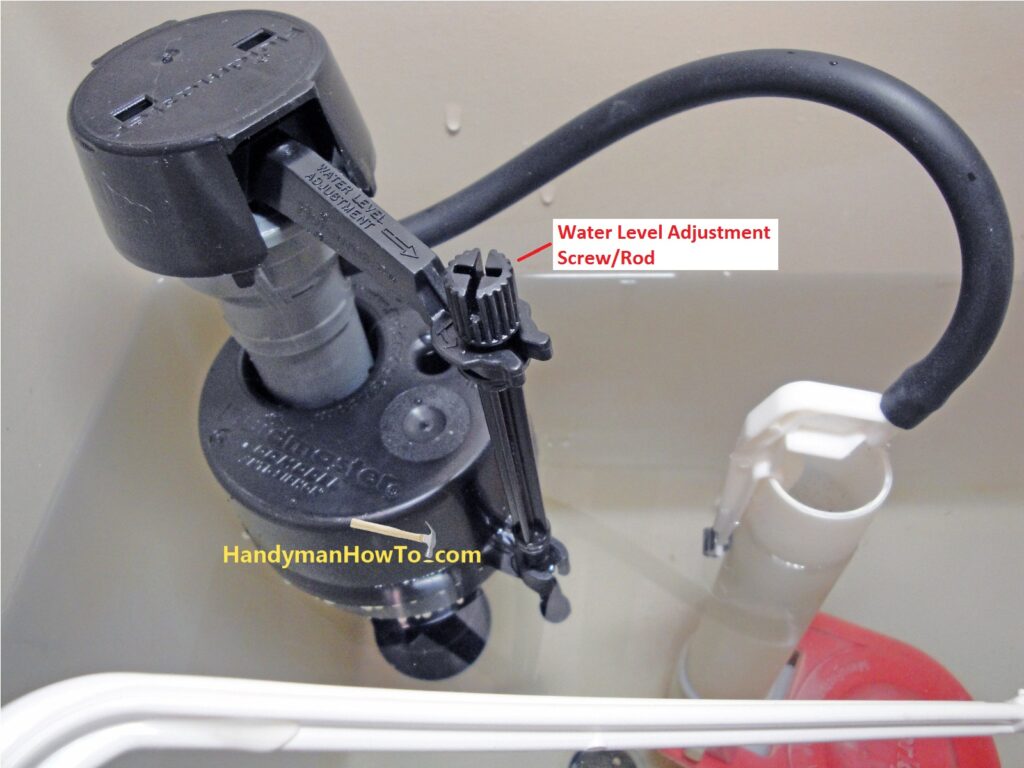
An alternate perspective of the finished job:
Check the connections again and after one hour to be certain there are no leaks. Tighten any leaking connections as needed. Toilet paper is an excellent leak detector because the slightest amount of water will show on the paper.
Take care,
Bob Jackson