How to Replace an Exterior Door – remove the old door jamb and frame then check the rough opening for square.
This project is continued from Part 1.
Remove the Exterior Door Frame
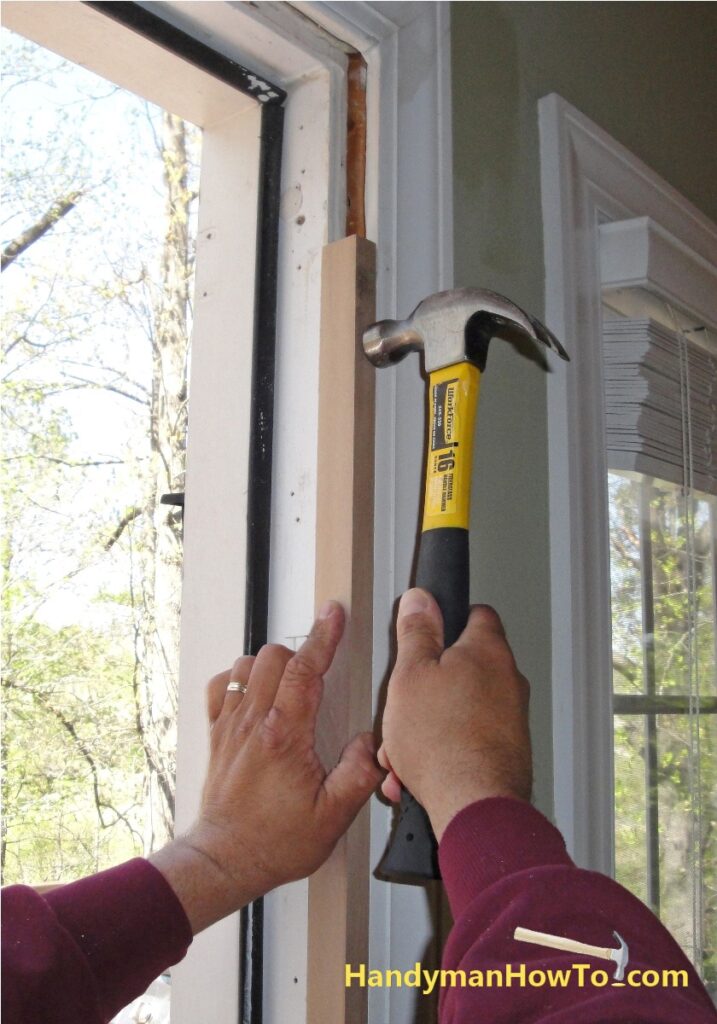
Having taken off the brick mould, I removed several screws that fastened the old door frame to the 2×4 jack studs in the wall. Next, I cut the caulk lines between the door frame and interior moulding. The door frame was tapped out with a hammer and wood block as shown here.
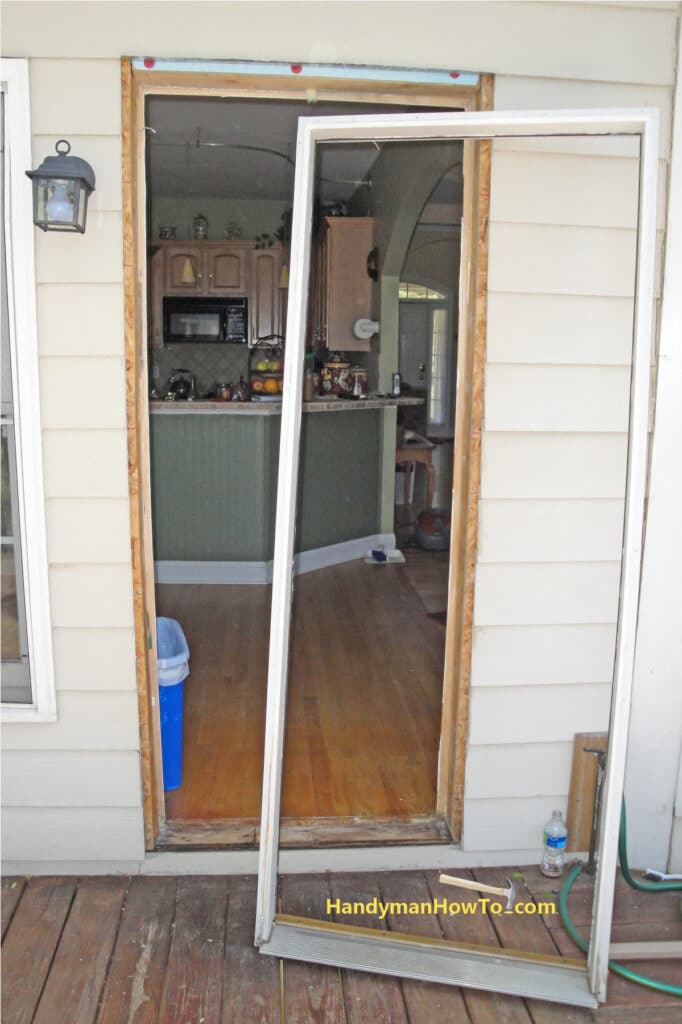
The door frame is almost out of the rough opening. I discovered the door sill was caught by a couple of wood staples from the oak plank floor that were driven in at an angle. I cut the staples and tipped the door all the way out without any problem. If your door was installed properly, there should be caulking under the sill and subfloor that may be holding the door. Use a putty knife or 5-in-1 painter’s tool to separate the caulk if the door won’t pull free.
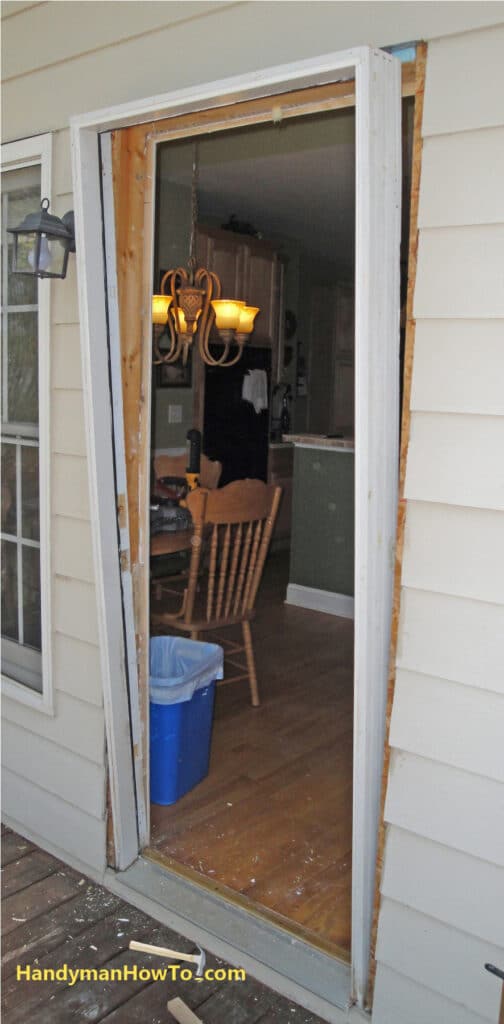
Here’s the old entry door frame and rough opening. The wood frame wall construction in my home is:
- HardiePlank cement board siding
- OSB sheathing
- 2×4 framing
- Sheetrock interior wall board
Blue Styrofoam™ insulating sheets are sometimes used in non-structural areas.
Old Door Installation Errors
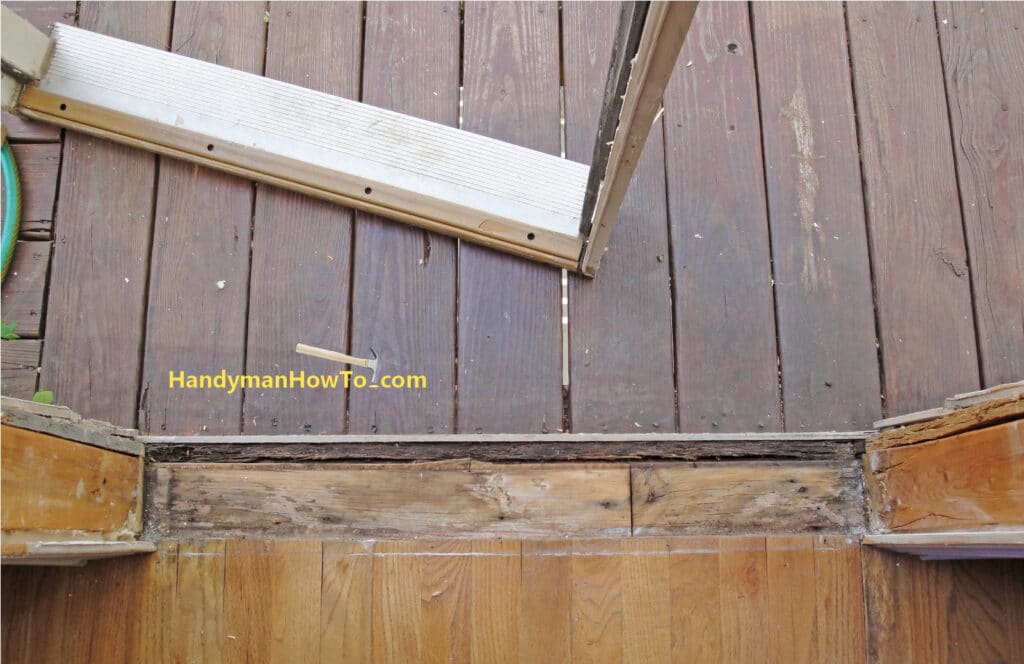
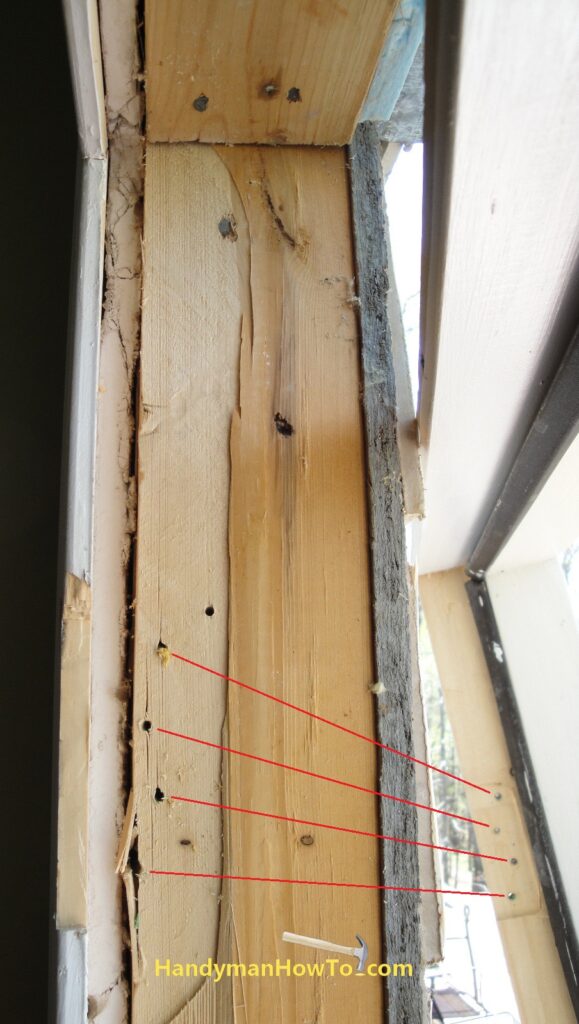
Close-up of the door bottom rough opening. As you can see, the home builder maintained his “contractor grade” attention to quality and workmanship. The various problems here are:
- NO CAULKING under the door sill. Water staining and swelling is evident in the OSB sheathing, 2×4 jack studs and the right corner oak flooring plank.
- The plywood subfloor (bottom of the rough opening) has a joint towards the right. The right subfloor panel is about 3/8″ higher than the left side. This alone will cause the door frame to be significantly out of square if not corrected.
Exterior Door Hinge Mounting Screws
The reason why Therma-Tru provides two extra long screws for the top hinge at the outer-most positions (1st and 3rd from top) is because long hinge screws at the inner-most positions (2nd and 4th) almost miss the 2×4 jack stud.
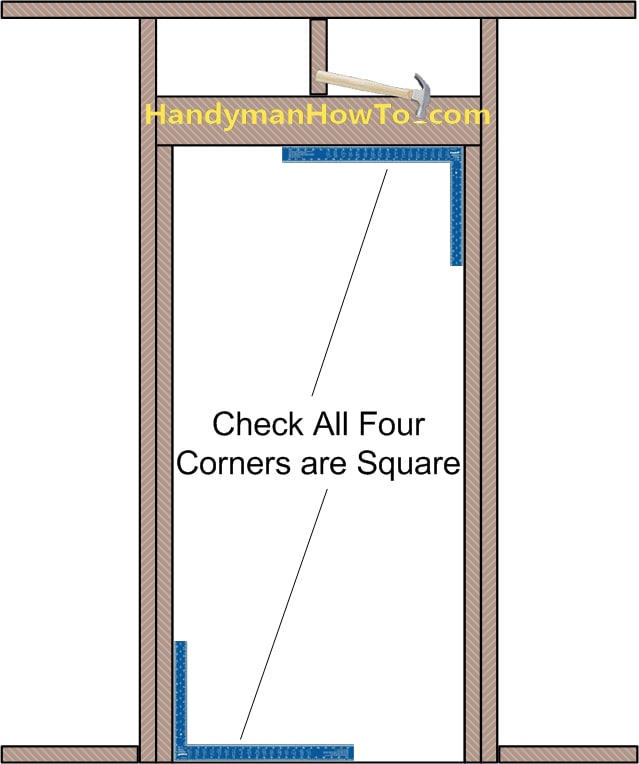
Check the Exterior Door Rough Opening
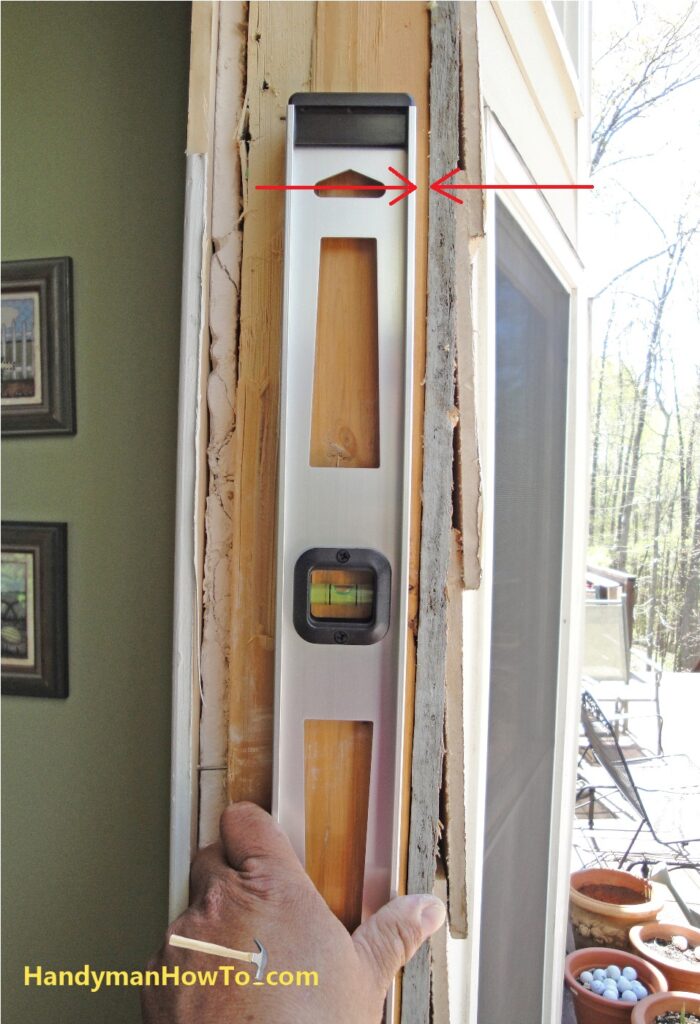
The exterior wall is slightly out of plumb with a 1/4″ outward lean as checked with a 5 foot long spirit level. This means that setting the new fully against the rough opening flush with the wall will also cause the door to lean and swing to the closed position if not held open. No big deal – the door frame will be plumbed independently of the wall.
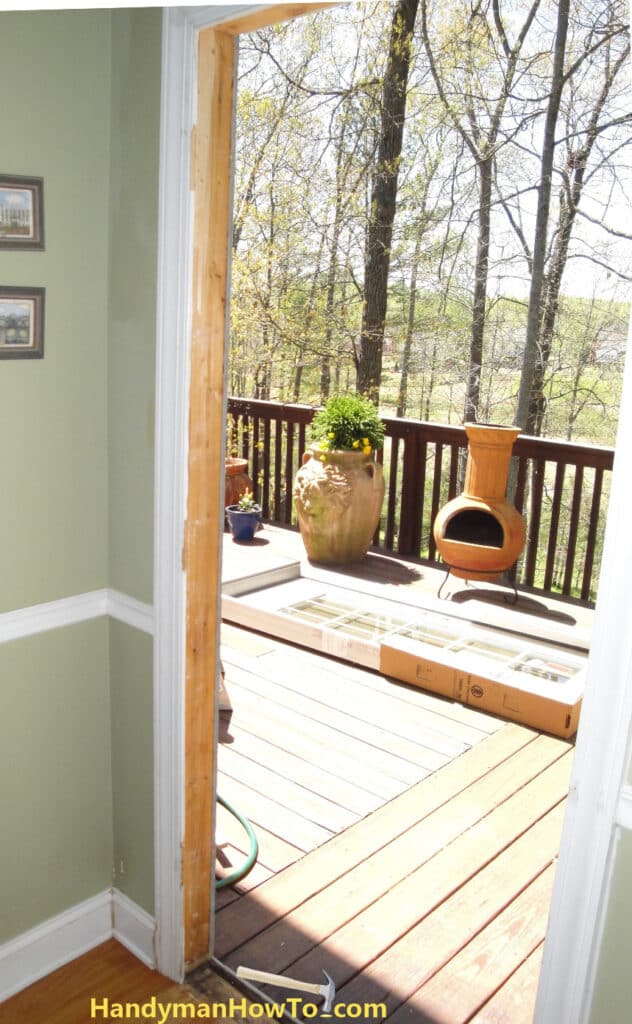
Almost ready to begin the new door installation. I pulled off the white interior door trim next by cutting the caulk lines between it and the drywall. The trim was fastened by finishing nails and easy to pull off by hand. The finishing nails were driven out from the back of the board because I’ll reuse the trim.
Therma-Tru’s web site has door installation instructions and videos. The videos are very well done and educational.
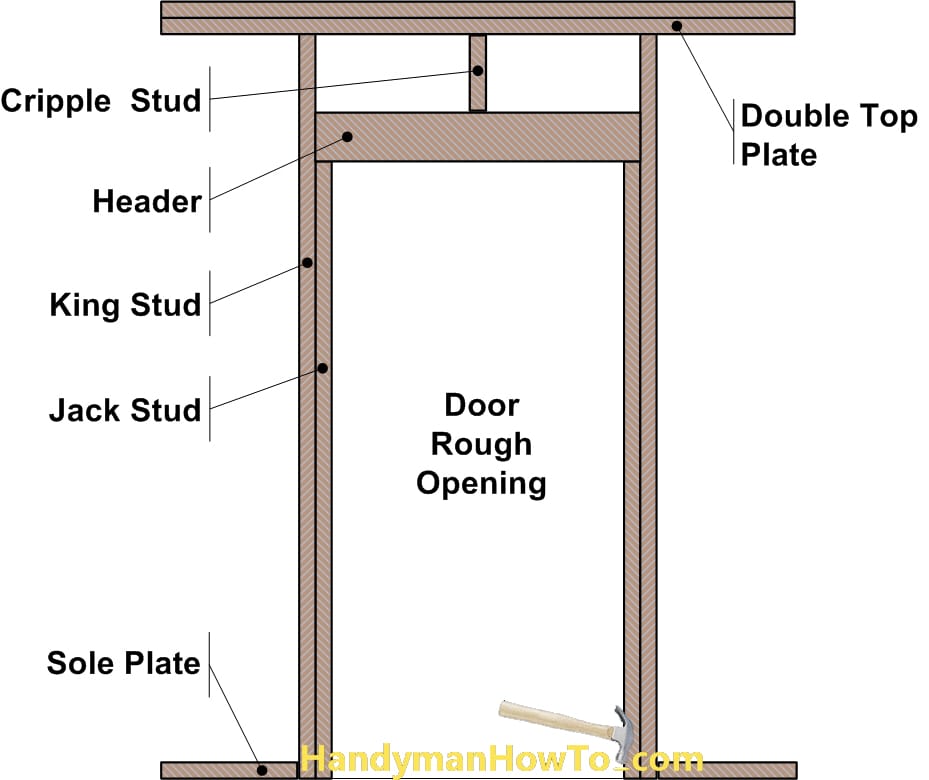
This diagram illustrates the various components of 2×4 exterior wall construction for a door rough opening. The door frame will set inside the rough opening and attaches to the jack studs with screws. The rough opening needs to be about 1/2″ larger than the door frame dimensions. Shims are used to adjust and support the door frame in the rough opening.
Verify all four corners are square. If the wood frame is not square, correct the problem now. This could mean planing or sanding down a high spot, or ripping a tapered board on table saw to be nailed inside the frame to fix a large gap – just take care the new door fits without binding. The lock-side of the subfloor on my house was 3/8″ higher than the left side, this was corrected by planing and sanding to level across the bottom. The bottom of the rough opening must be level or the door will sit crooked.
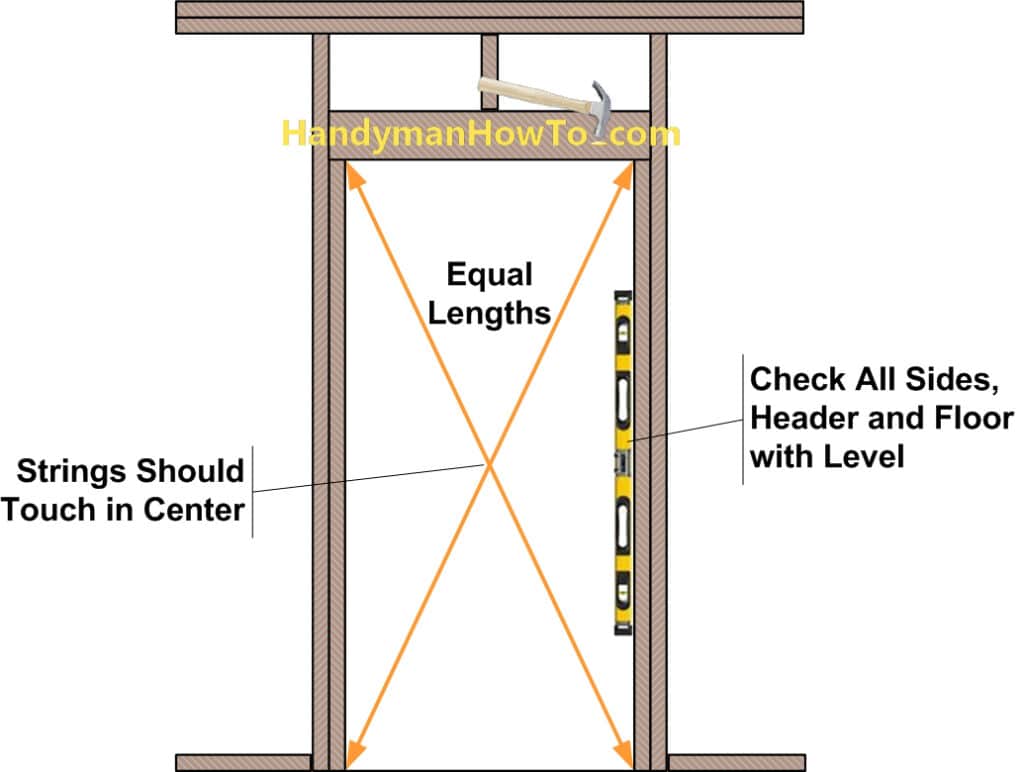
The string test checks if the rough opening is square as a whole and without twist. Attach two strings to the outside corners of the door frame. The strings should cross in the center – use a tape measure to confirm it’s centered in the frame – and lightly touch. If the strings don’t touch, the frame is twisted. If the crossing point is not centered, the frame is canted. Move the string to inside and recheck. Verify the frame is level – sides, top, bottom and inside/outside faces. I used a 5 foot long level but a 6 foot level is recommended.
My door frame was square but the wall tilted slightly outwards, about 1/4″ more at the top (see photo earlier in this article). There wasn’t really anything I could to do to correct the wall, so I made the adjustment by setting the bottom of the new door frame outward by 1/4″ so it was vertical and covered the gap between the lower door frame and interior trim with caulk. If you didn’t know where to look, it’s almost invisible.
This project is continued in Part 3.
Take care,
Bob Jackson