This project shows how to fish cable and wire a Cat6 RJ45 Ethernet jack for a home network. I’ve been upgrading my network and decided to switch from Cat5e to Cat6 cable for all new installs. Cat5e supports a maximum of 1 Gigabit/sec whereas Cat6 supports 10 Gigabits/sec speed and is future-proof for multi-Gigabit Internet speeds, growing LAN bandwidth demand and better resistance to interference. Cat6 cable is about 30% more expensive than Cat5e, or about $50 for a 1000 feet roll.
Cat6 versus Cat5e Cable
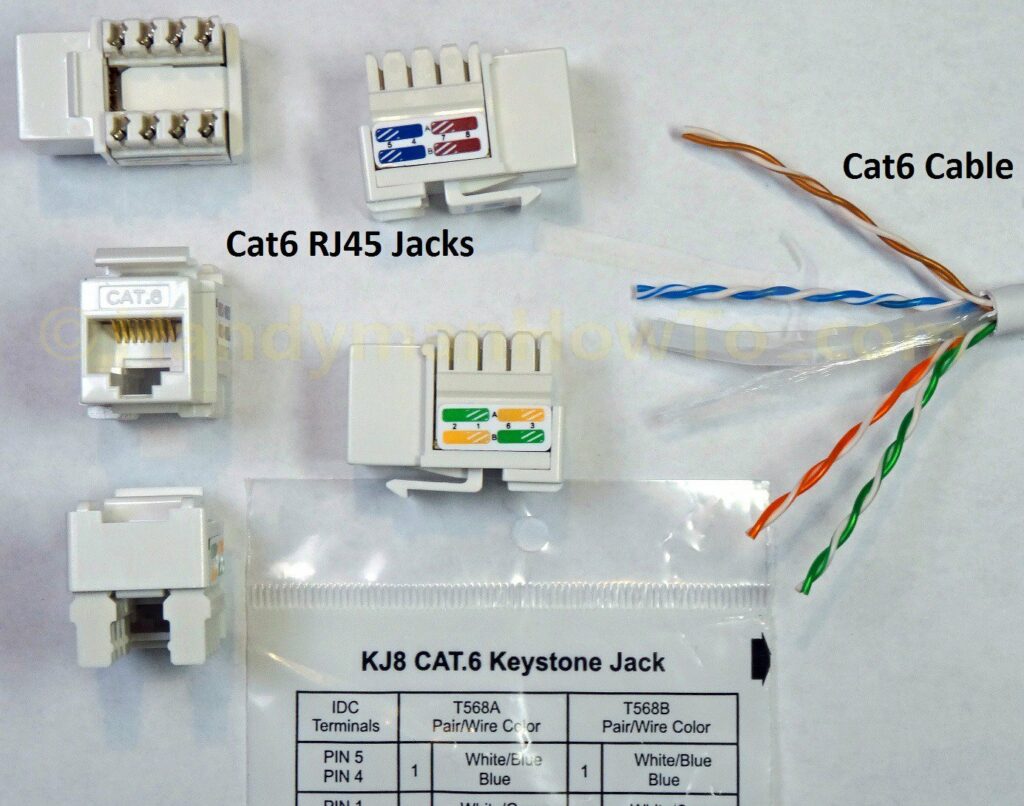
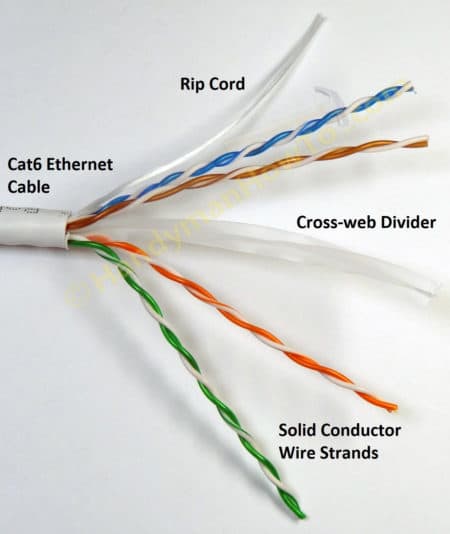
Cat6 cable is much thicker than Cat5e because Cat6 has heavier insulation, 23 AWG copper conductors and a cross-web divider between the twisted pairs of wires. Compare to Cat5e which uses thinner 24 AWG wires. Cat6 RJ45 Ethernet jacks are very similar to Cat5e jacks but are designed for the higher Cat6 performance specifications:
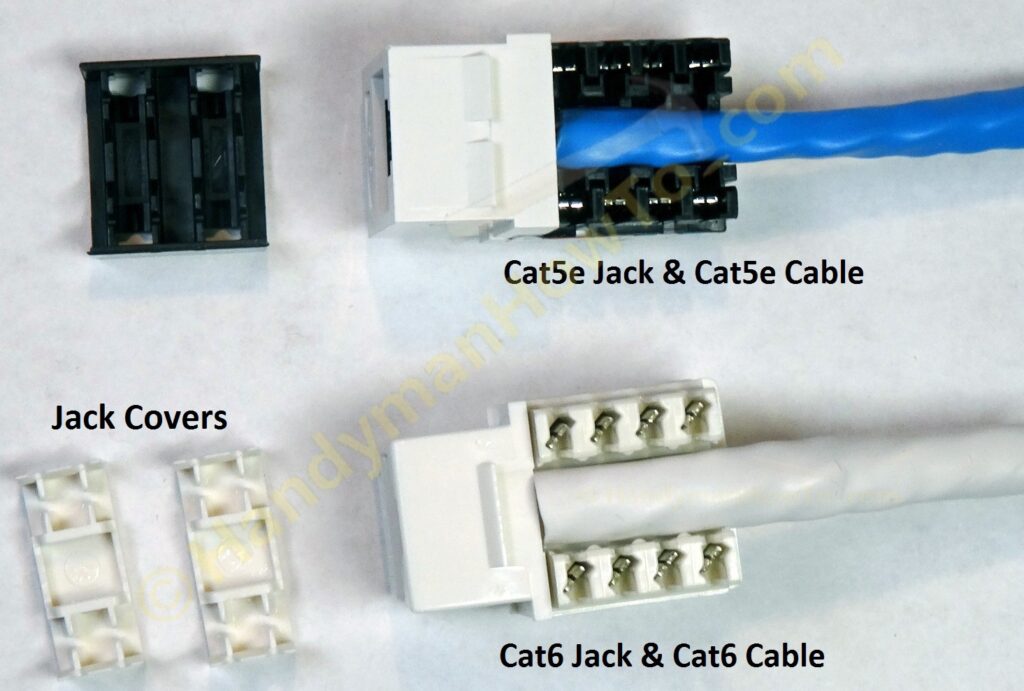
You can wire a Cat5e jack with Cat6 cable however it won’t attain the full Cat6 performance.
How to Wire a Cat6 RJ45 Ethernet Jack
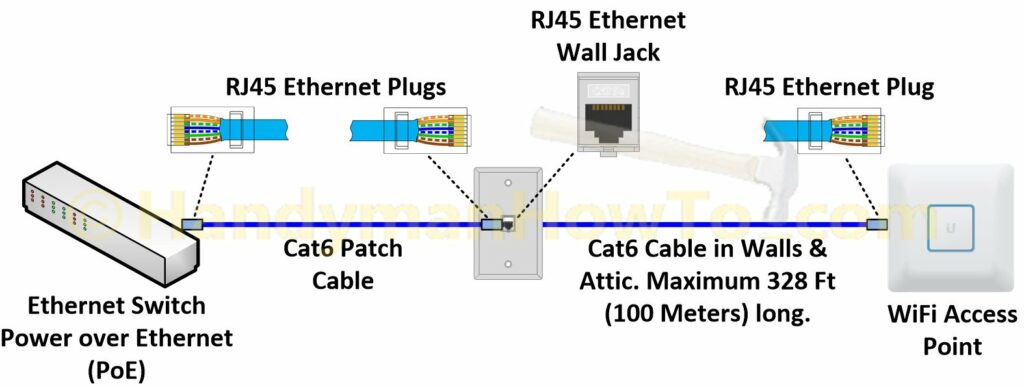
Today I’m pulling Cat6 cable and wiring a new Ethernet wall jack for a WiFi Access Point:
Cat6 Cable Tools and Materials
I used the following tools and materials:
- Cat6 Bulk Insulated Bare Copper Ethernet Cable, UTP, Solid, 550MHz, 23 AWG
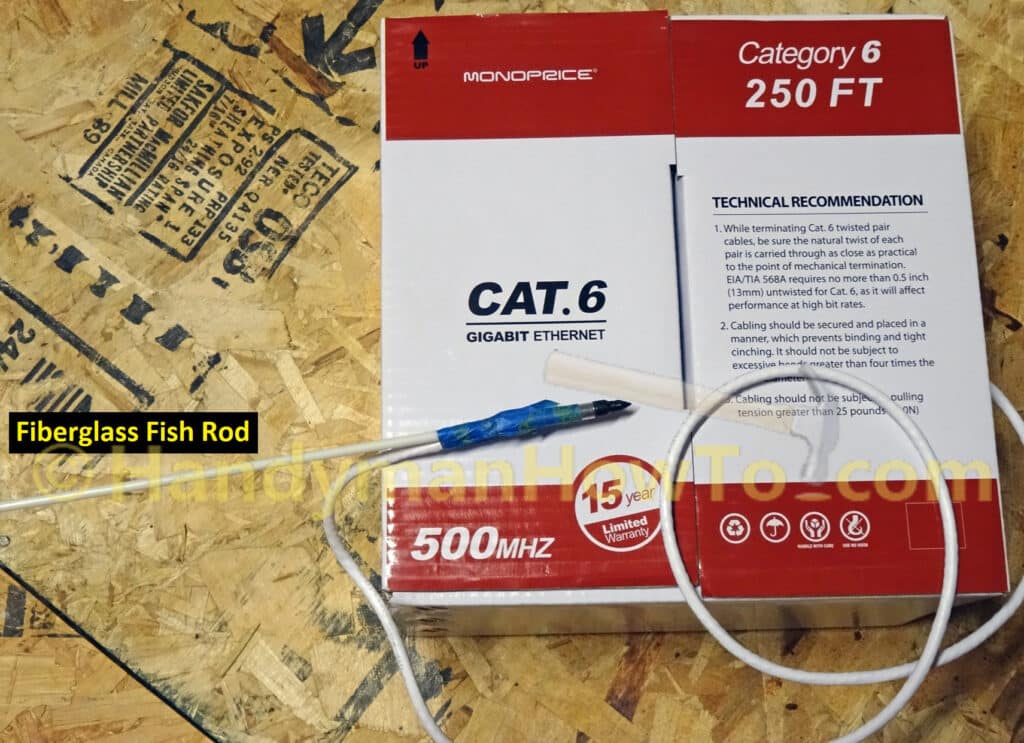
I bought a 250 feet box of Cat6 bulk cable for new installs after using up a 1,000 feet box of Cat5e in my home. If you plan to make a lot of Ethernet drops the 1,000 foot roll may be a better choice. - Fiberglass Fish Rod – at least 15 feet long. 30 feet is better if you need to pull cable two or more floors
- Cable Matters 10-Pack Cat6 RJ45 Punch-Down Keystone Jack in White
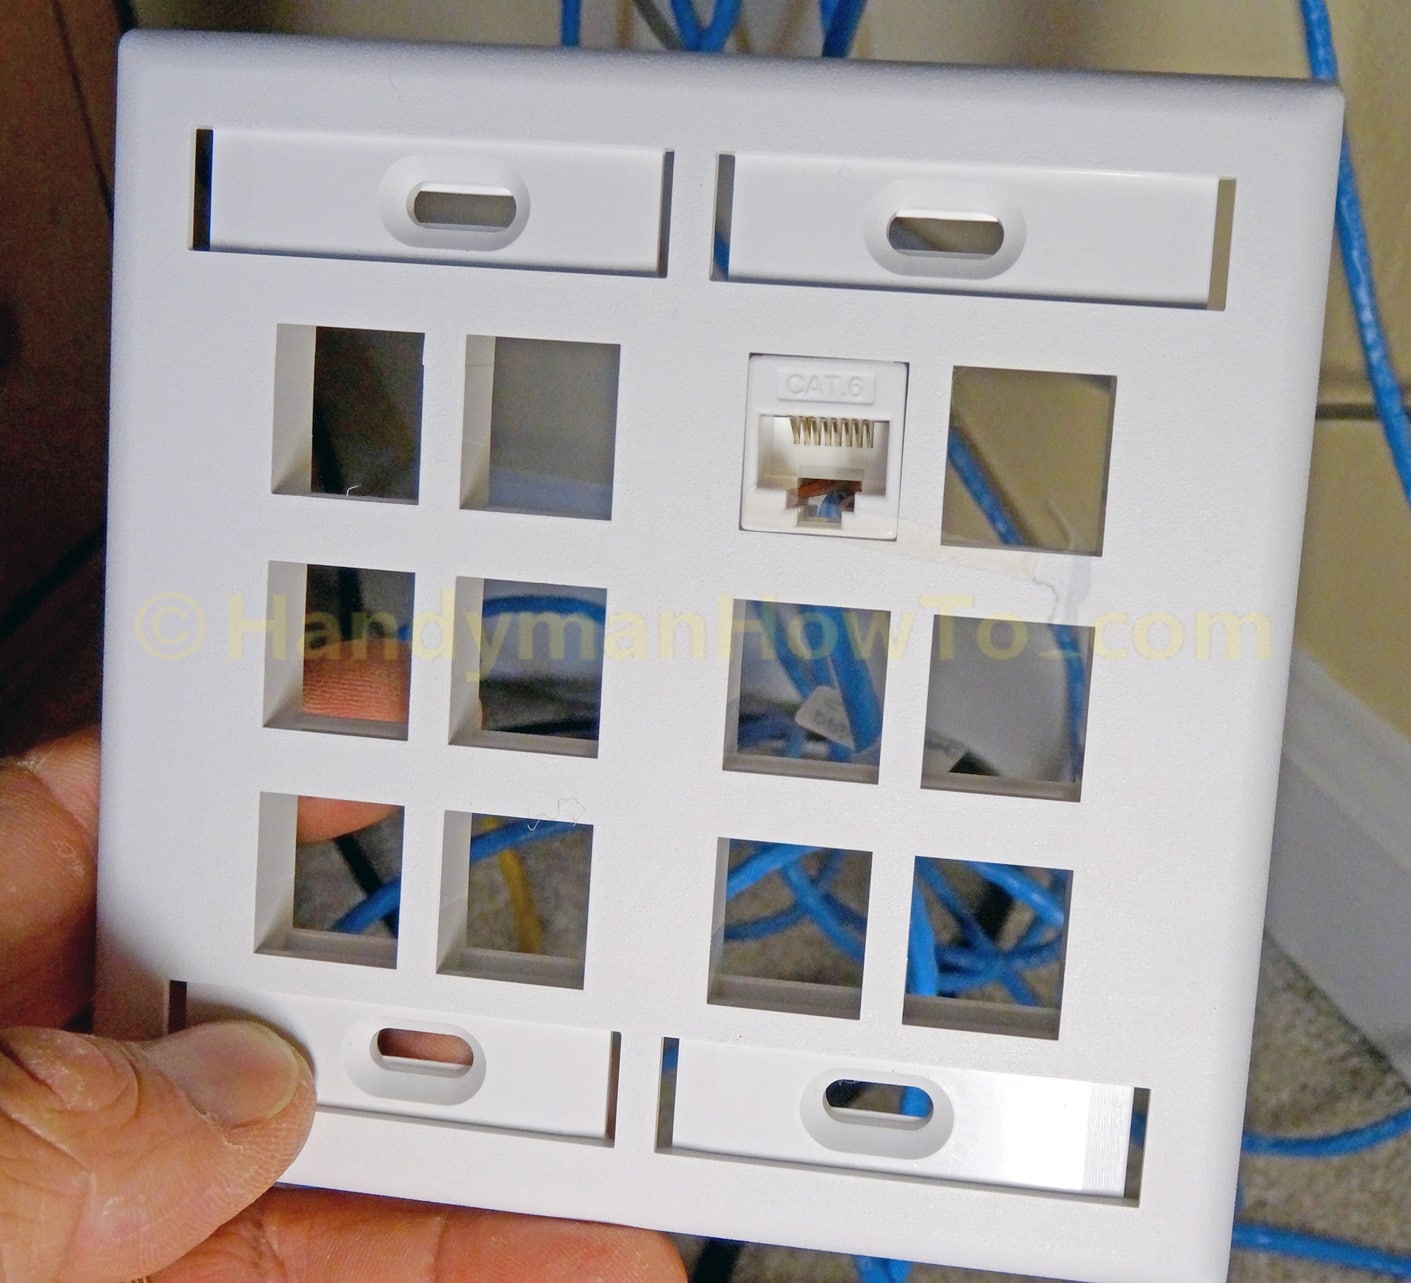
- RJ45 Wall Plate – if you don’t already have one installed
- RJ45 Jack Blank Wall Plate Insert – optional if you won’t be immediately using all jack positions in the wall plate
- Low Voltage Mounting Bracket – to mount the wall plate
- Punch Down Tool
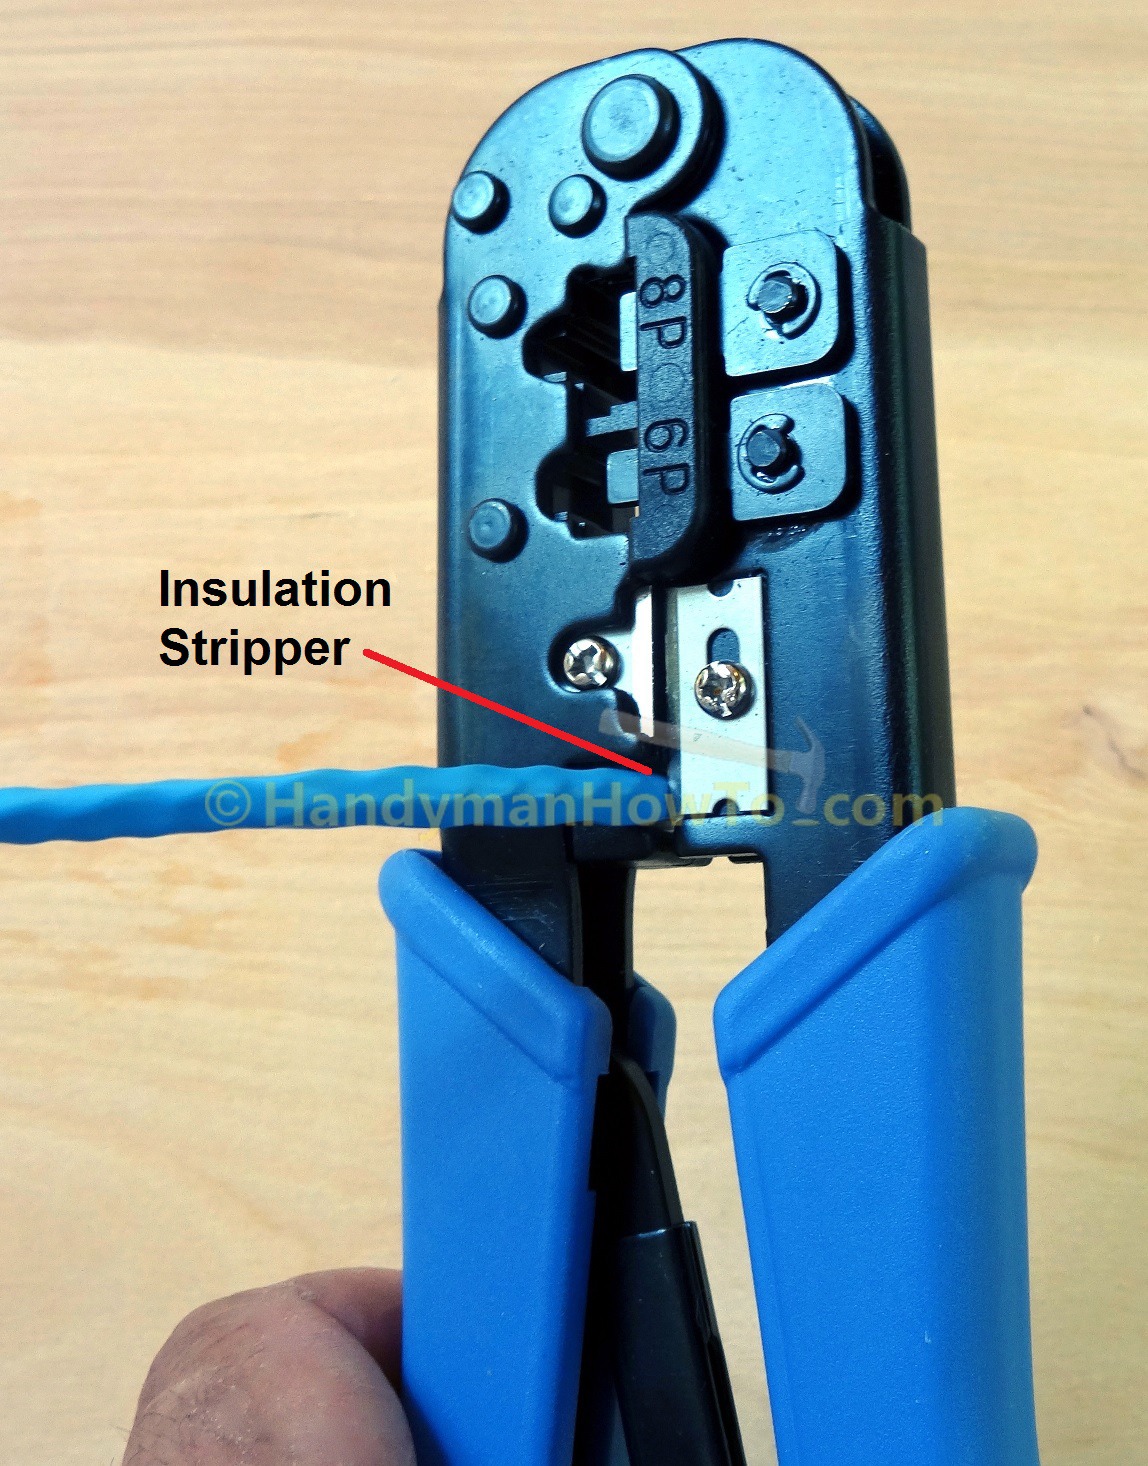
- RJ45 Crimp, Cut and Strip Tool
- Cat5e/Cat6 Cable Jacket Strip Tool – optional but easier and faster than the RJ45 crimp/cut/strip multi-tool.
- Diagonal wire cutters
I have a very basic punch down tool; better punch down tools will automatically cut off the extra wire omitting the need for diagonal wire cutters - Tape to secure the cable to the fish rod
- Philips head screw driver or cordless drill/drive to remove the RJ45 wall plate
Fishing Cat6 Cable
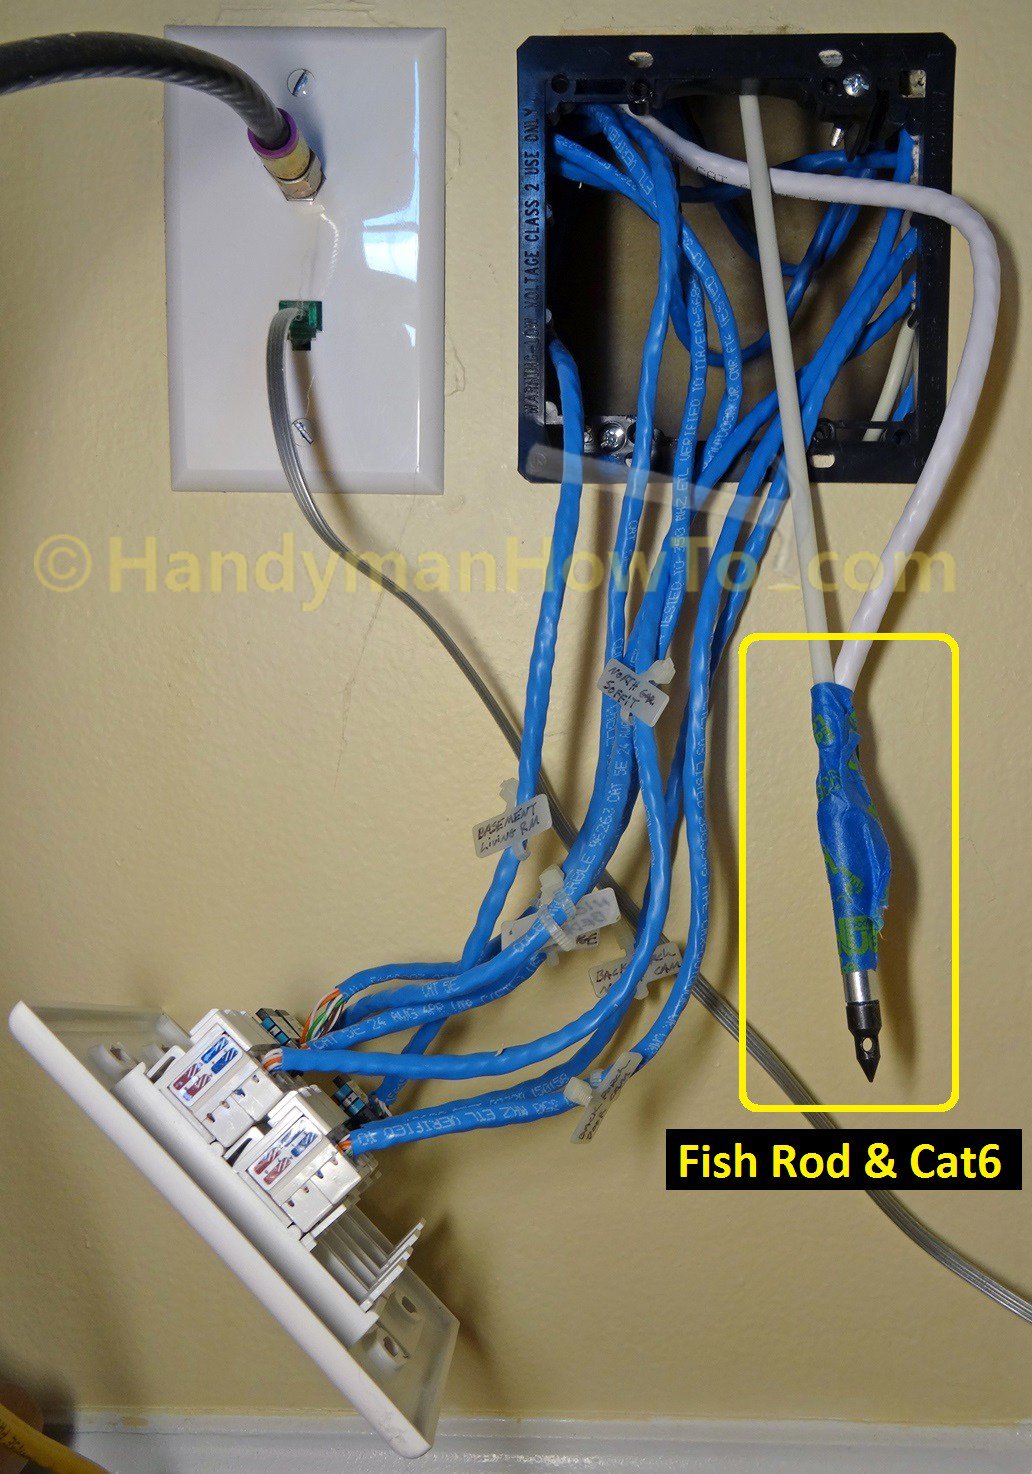
The 15 feet long fiberglass fish rod has three 5 foot sections that screw together. The fish rod is great for pulling NM-B 120 volt electrical and Ethernet cables through walls, above ceilings, along roof rafters and soffits to install floodlights, PoE security cameras and such. Working in the attic, I taped the end of the Cat6 cable to the fish rod:
And inserted the fish rod through a 3/4 inch diameter hole drilled in the 2×4 wall top plate past the blue Cat5e cables:

A second 5 feet long section of fish rod is screwed on as the cable is pushed down the wall cavity. The Cat6 cable is pulled from the box and held next to the fish rod as it’s fed into the wall:
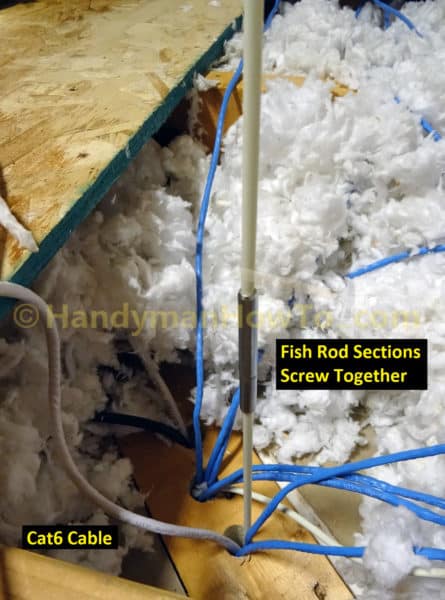
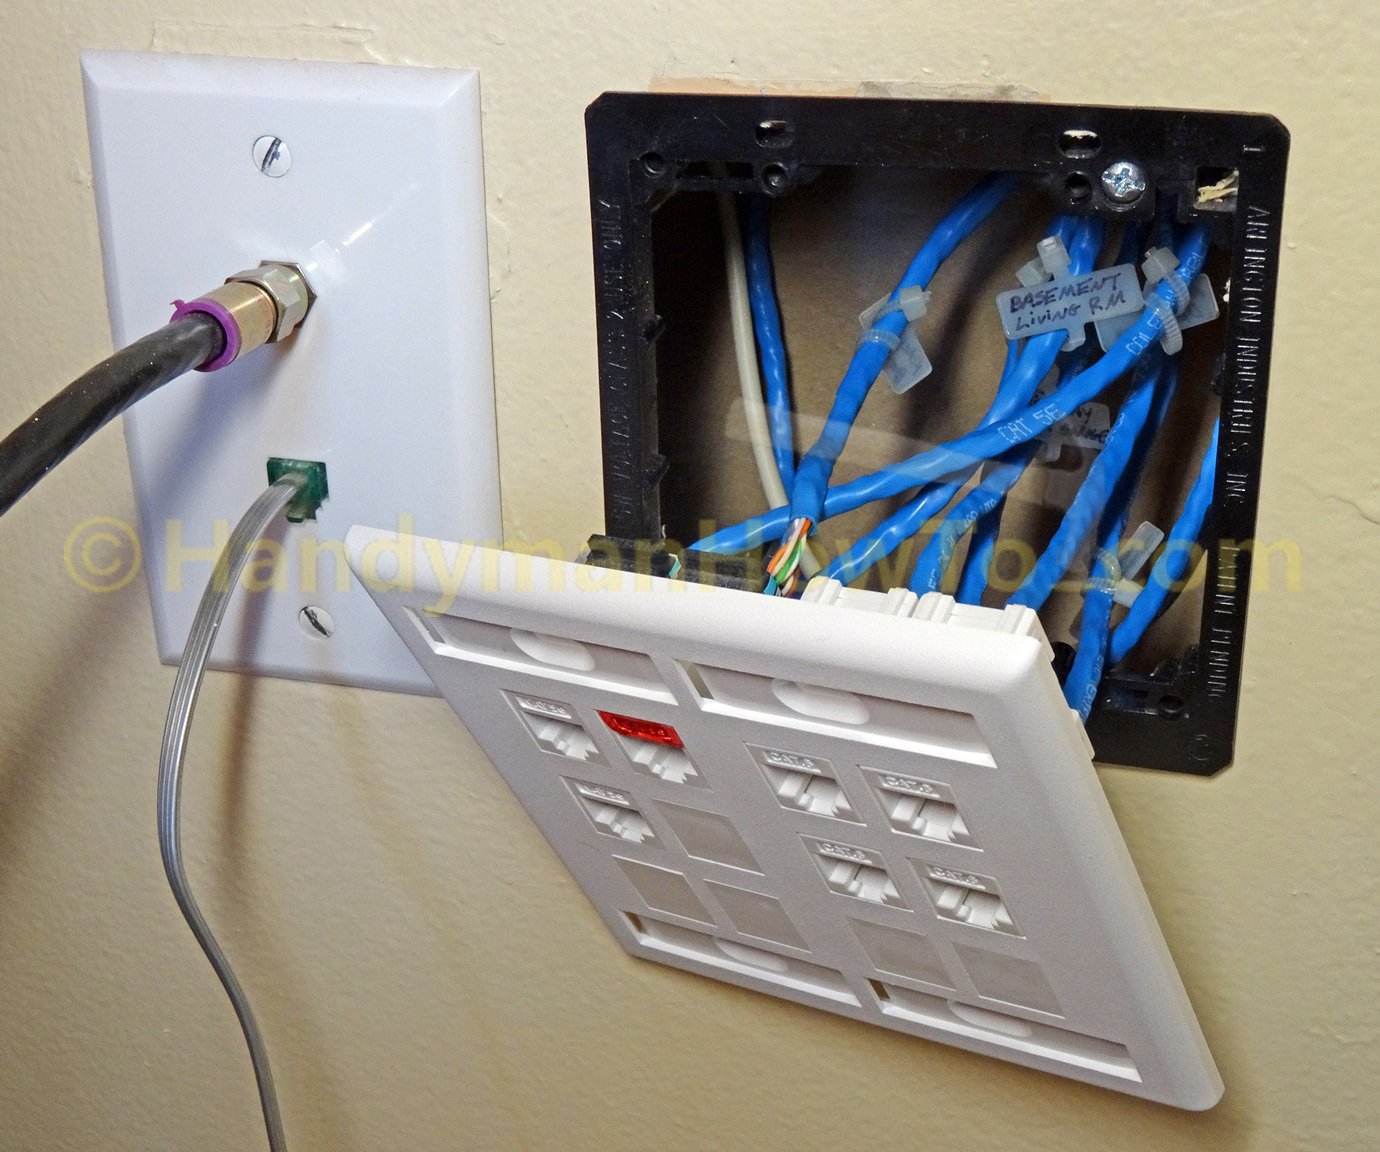
The fiberglass fish rod was easy to push past the other Cat5e cables without snagging. My helper reached inside the wall and guided the flexible fish rod and cable out of the low voltage wall bracket. Note the small zip-tie labels fastened to the blue Cat5e cables. Labels are critical for keeping track of where everything goes:
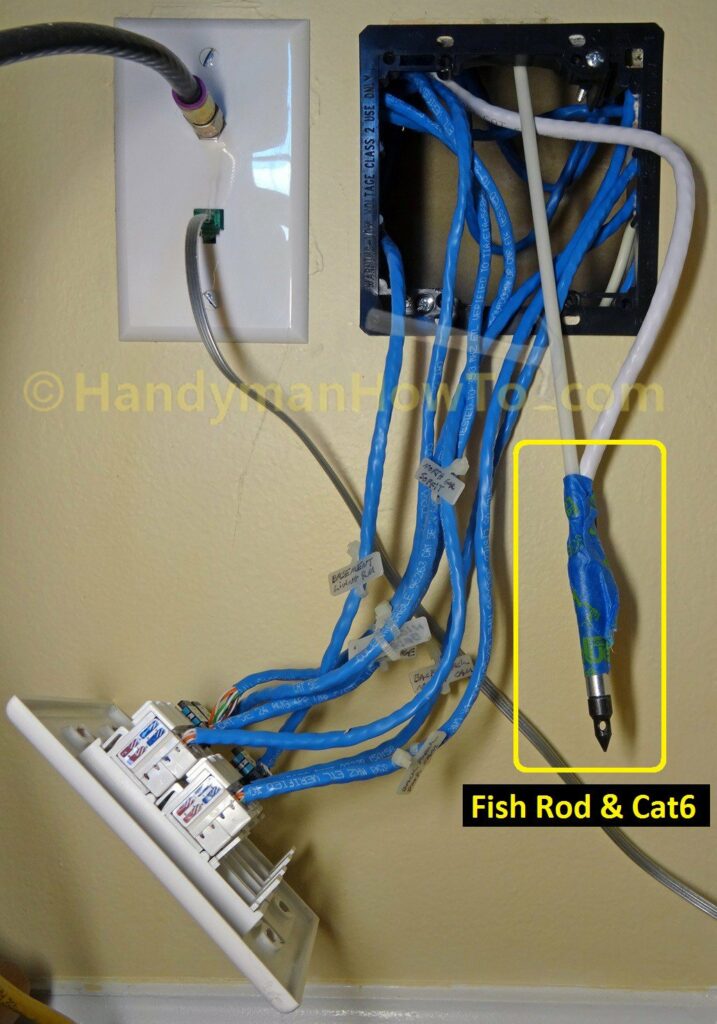
I pulled an extra 2 feet of Cat6 cable out the wall for several reasons: Easier access for wiring the Ethernet jack; in case I need to cut off the cable and rewire the jack; a short service loop to remove the Ethernet wall plate.
How to Wire a Cat6 Ethernet Jack
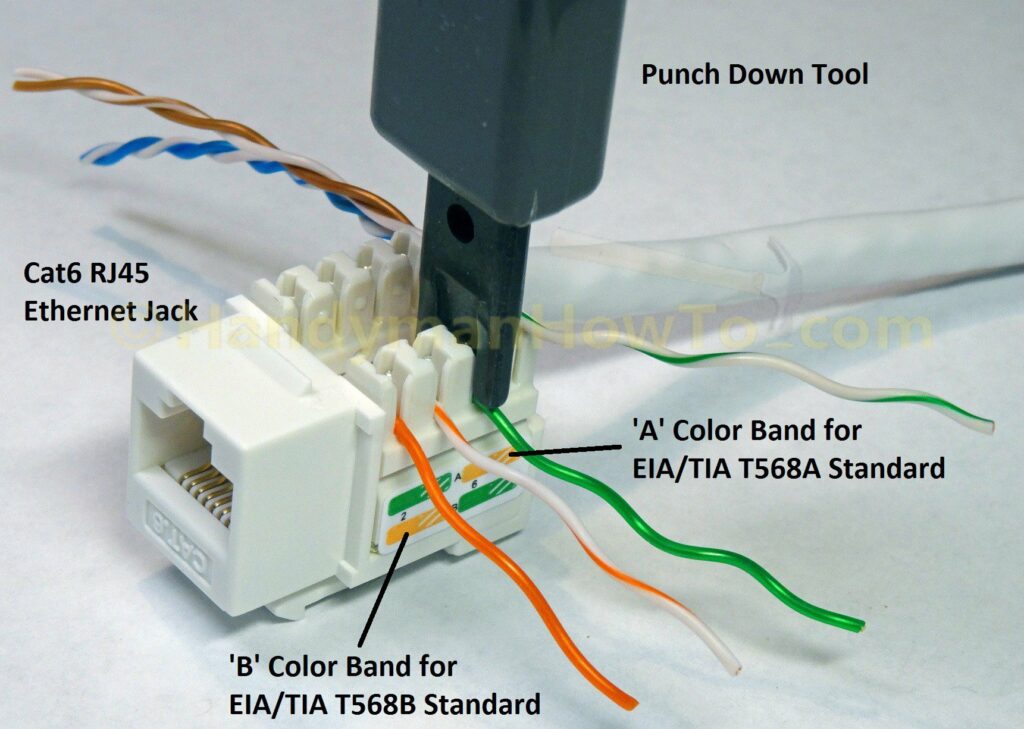
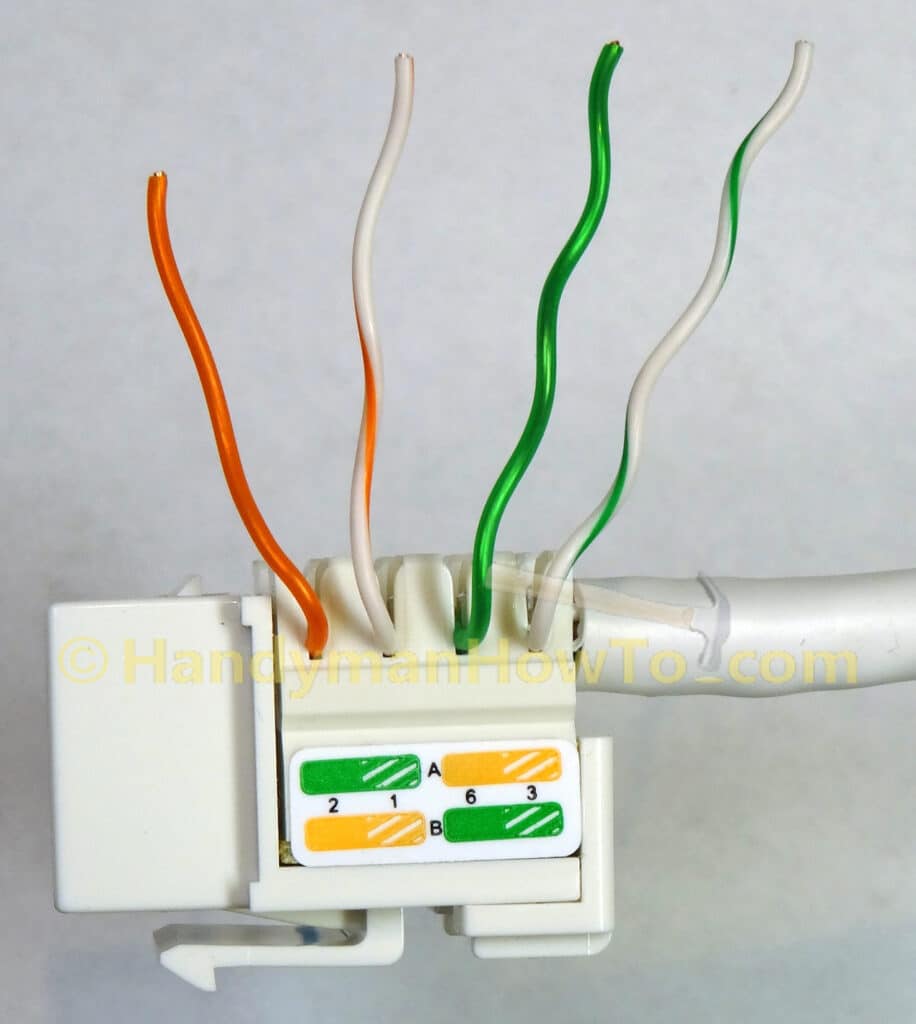
Wiring a Cat6 Ethernet jack almost the same as a wiring a Cat5e jack, however Cat6 rated RJ45 Ethernet jacks must be used with Cat6 cable to realize the full 10 Gigabit bandwidth capabilities. These Cat6 RJ45 jacks have color coded wiring labels for the T568A (upper band) and T568B (lower band) wiring standards and snap-on covers:
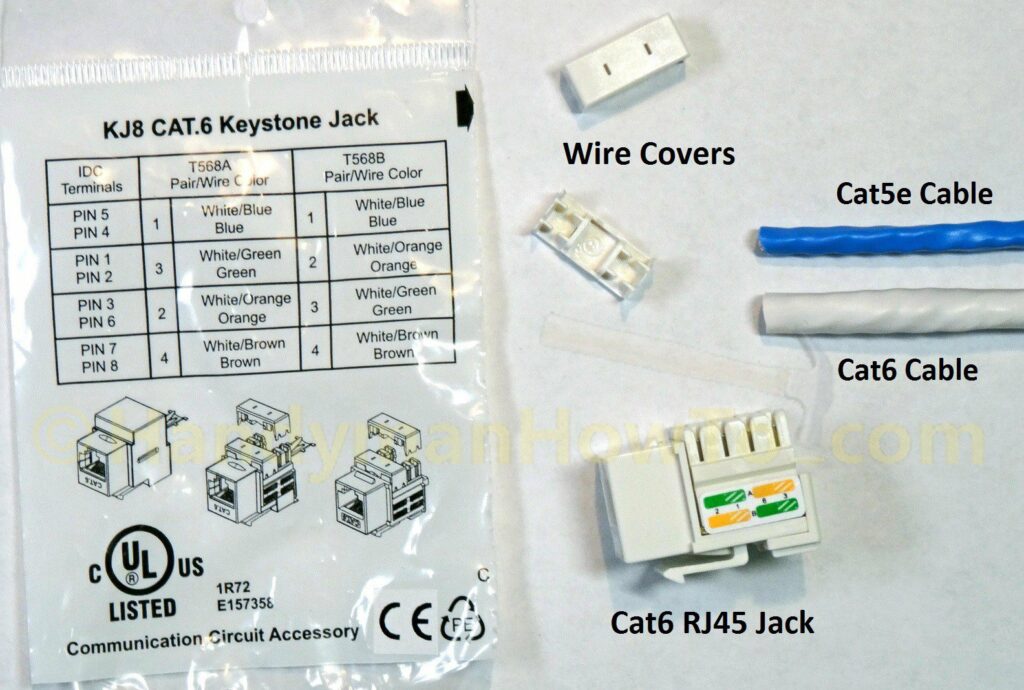
BTW – Cat6 and Cat5e jacks are both the same size and fit standard Ethernet wall plates.
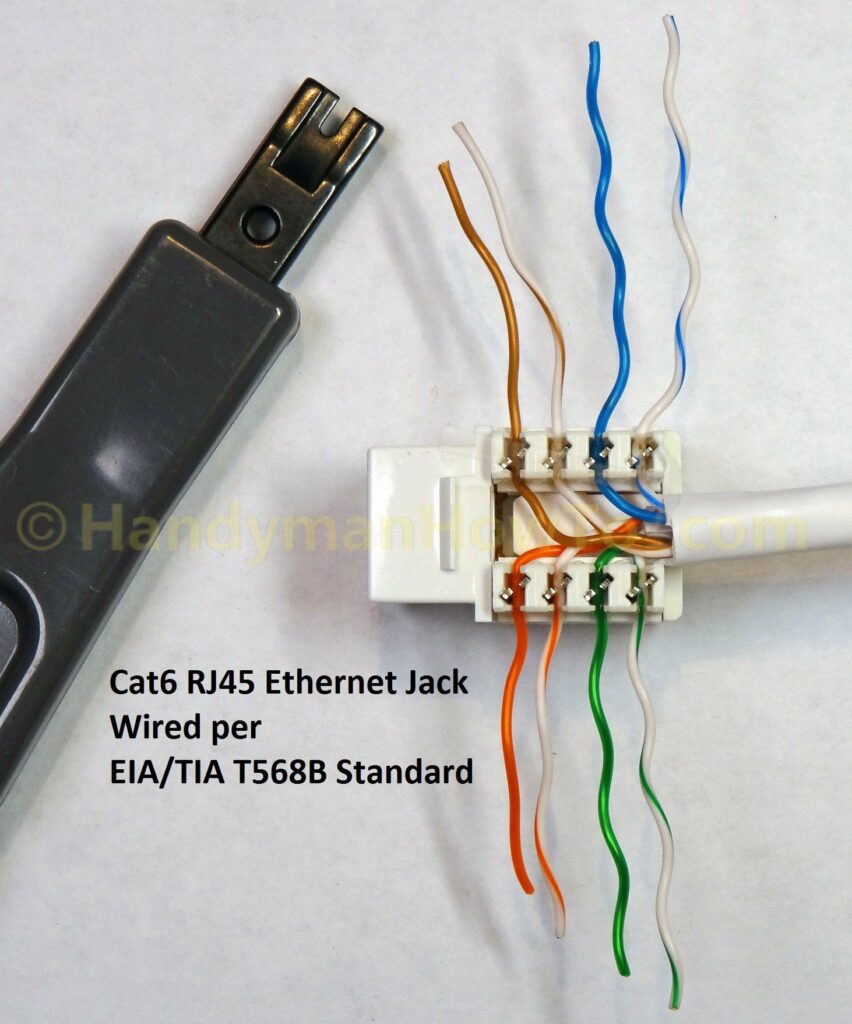
Another view of the Cat6 RJ45 jacks and Cat6 cable twisted pairs:
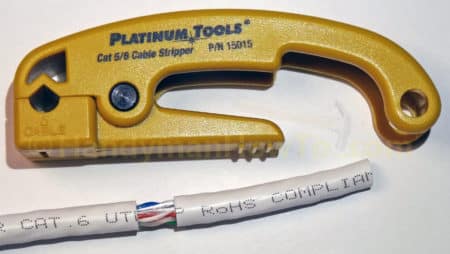
Remove the Outer Insulation Jacket
Score the outer insulation about 2 inches from the end with a cable stripper tool. The tool automatically adjusts for the different thicknesses of Cat5e and Cat6 cables. It’s fast and accurate, just spin the tool around the cable:
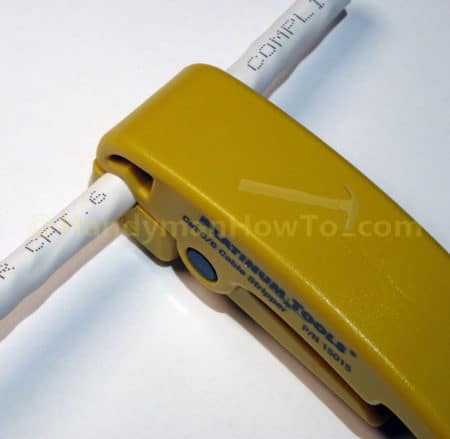
The Ethernet cable strip tool won’t nick the twisted pairs and does a perfect job:
You can also use jacket stripper blade & notch on an RJ45 crimp tool which is a bit awkward and requires more care to do it right. You only need to score the surface, do not cut all the way through the jacket to avoid nicking the inner twisted pairs.
Separate the twisted pairs and cut off the rip cord and cross-web divider (if present) with scissors:
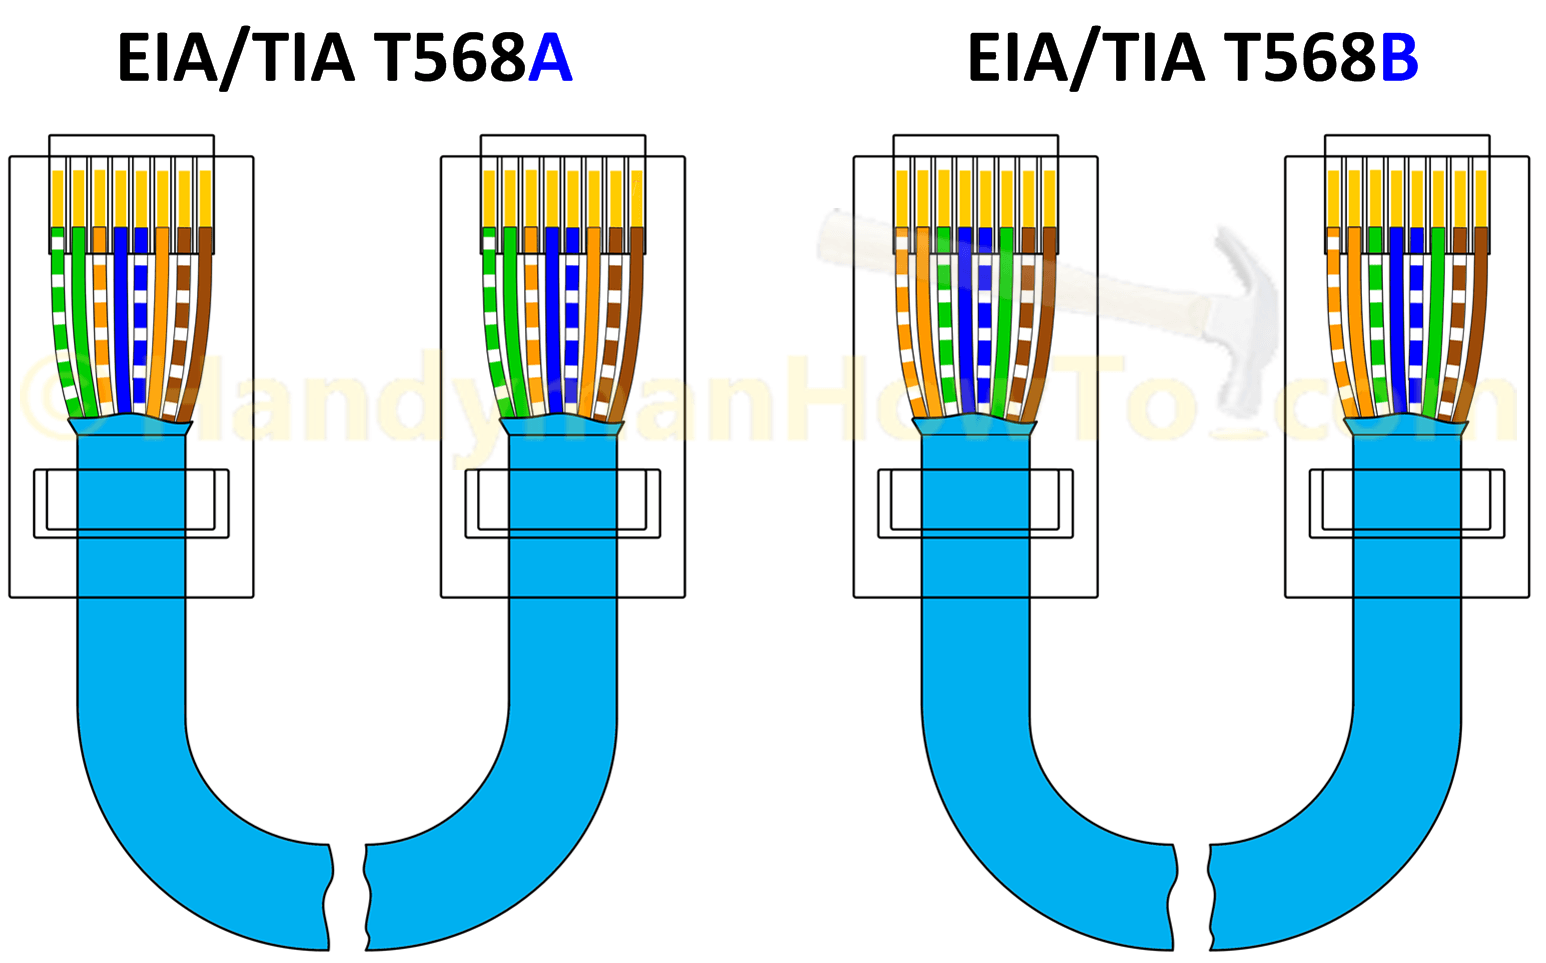
Decide which Ethernet wiring standard you will use, either EIA/TIA T568A or T568B. The differences are minor but it’s important to wire both ends of the cable the same way. I’ve wired all my jacks and plugs per the T568B standard. The upper color band on the side of the jack is for T568A and the lower band for T568B as denoted by the small ‘A’ and ‘B’, respectively.
Untwist each set of wires, match the wire to the label color, then punch it down on the pin:
The wired Cat6 RJ45 jack:
Snap on the wire covers:
And trim the wires with diagonal wire cutters:
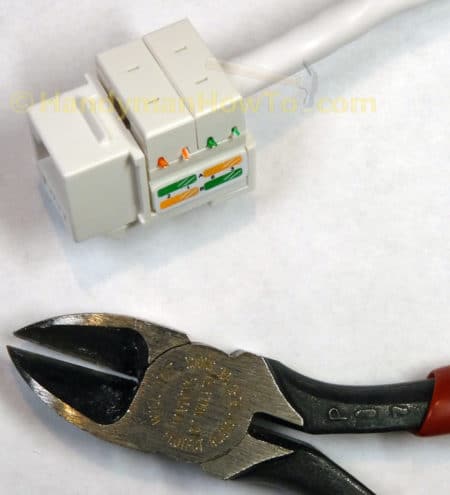
The jack is ready to be snapped into the Ethernet wall plate.
This project is continued in How to Wire a Cat6 RJ45 Ethernet Plug.
Best,
Bob Jackson